 p1sec/qcsuper
QCSuper is a tool communicating with Qualcomm-based phones and modems, allowing to capture raw 2G/3G/4G radio frames, among other things.

QCSuper is a tool communicating with Qualcomm-based phones and modems, allowing to capture raw 2G/3G/4G (and for certain models 5G) radio frames, among other things.
It will allow you to generate PCAP captures of it using either a rooted Android phone, an USB dongle or an existing capture in another format.
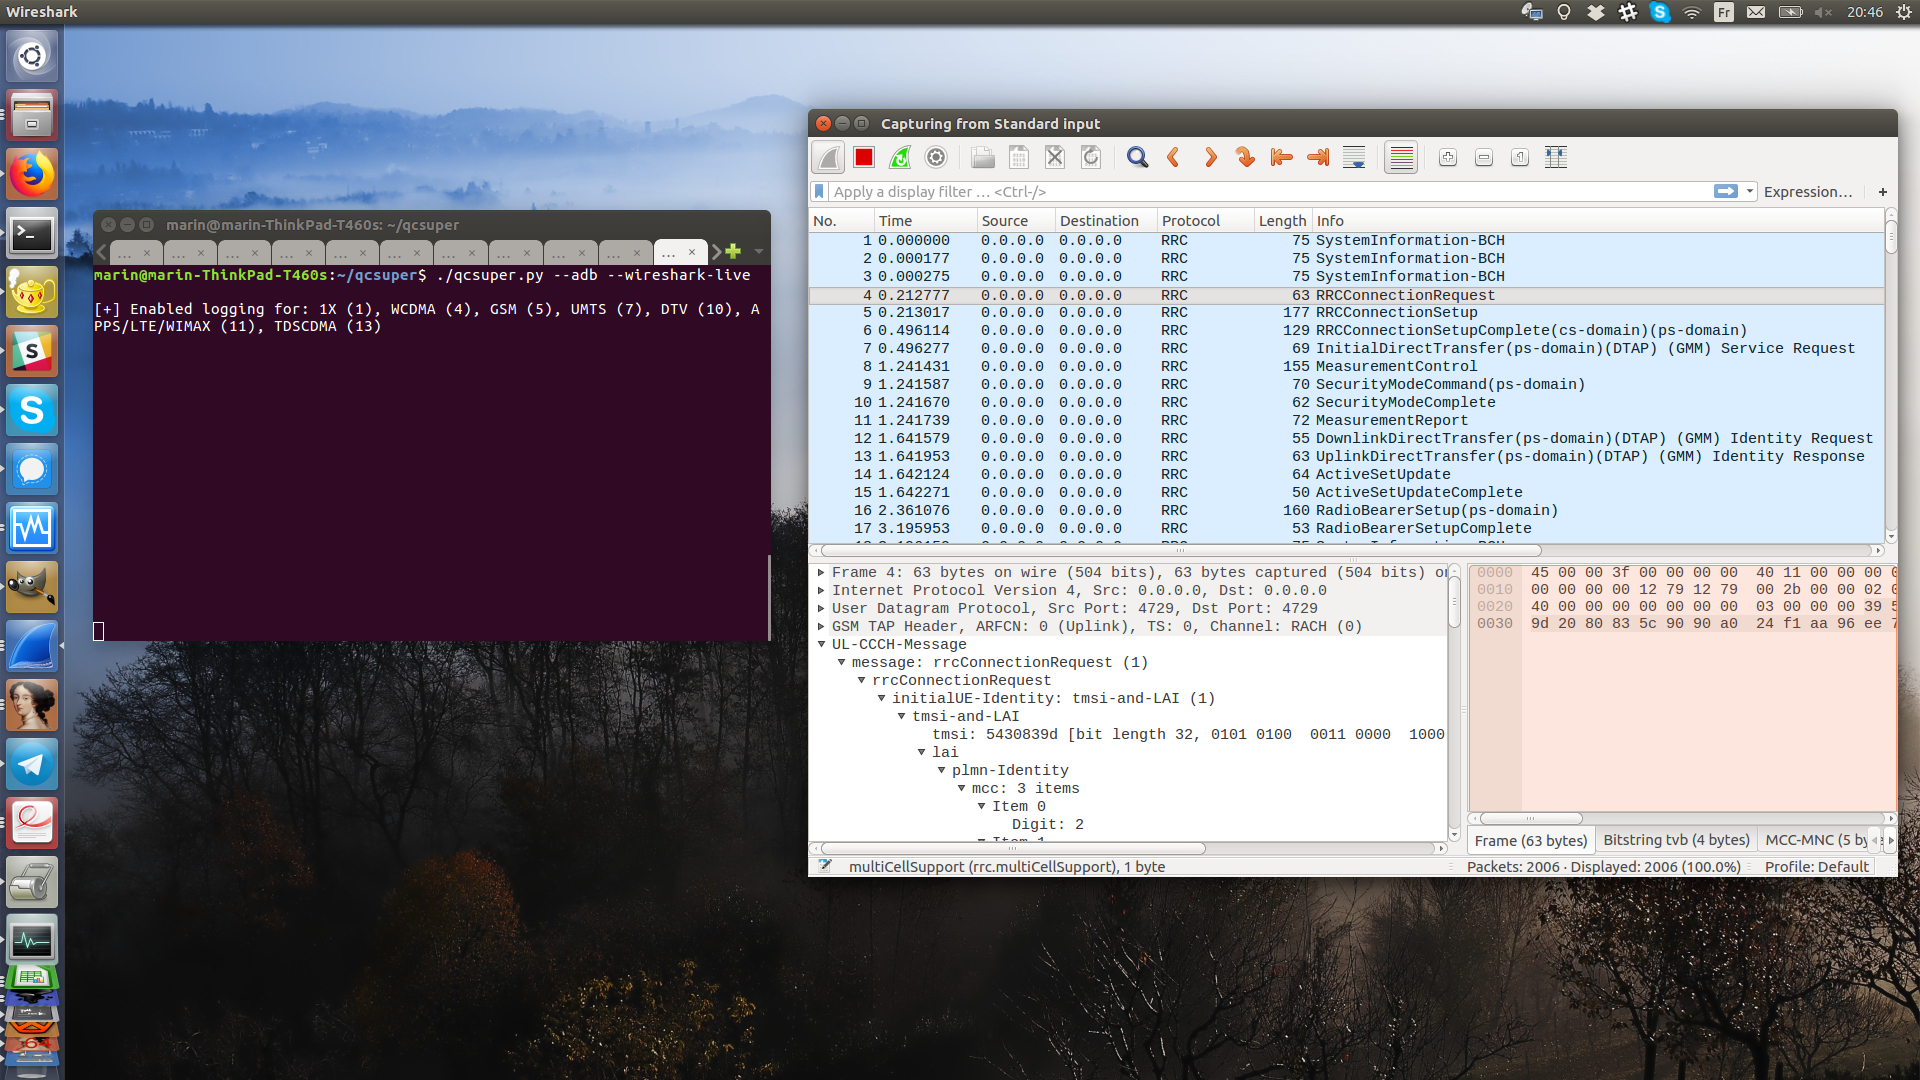
After having installed it, you can plug your rooted phone in USB and using it, with a compatible device, is as simple as:
qcsuper --adb --wireshark-live
Or, if you have manually enabled exposing a Diag port over your phone (the corresponding procedure may vary depending on your phone modem and manufacturer, see below for more explanations), or if you have plugged a mobile broadband dongle:
qcsuper --usb-modem auto --wireshark-live
It uses the Qualcomm Diag protocol, also called QCDM or DM (Diagnostic Monitor) in order to communicate with your phone's baseband.
You are willing to report that your device works or does not work? You can open a Github issue.
Annexes:
Blog post/demo: Presenting QCSuper: a tool for capturing your 2G/3G/4G air traffic on Qualcomm-based phones
More documentation:
QCSuper was lately tested and developed on Ubuntu LTS 22.04+ and also has been used over Windows 11. It depends on a few Python modules. It is advised to use Linux for better compatibility.
To use it, your phone must be rooted or expose a diag service port over USB. In order to check for compatibility with your phone, look up the phone's model on a site like GSMArena and check whether it has a Qualcomm processor.
In order to open PCAP files produced by QCSuper, you can use any Wireshark 2.x - 4.x for 2G/3G frames, but you need at least Wireshark 2.5.x for 4G frames (and 2.6.x for individual NAS messages decrypted out of 4G frames). Ubuntu currently provides a recent enough build for all versions.
Decoding 5G frames was tested under Wireshark 3.6.x and above and will be done through automatically installing a Wireshark Lua plug-in (in %APPDATA%\Wireshark\plugins under Windows or in ~/.local/lib/wireshark/plugins under Linux and macOS), which can be avoided through setting the DONT_INSTALL_WIRESHARK_PLUGIN=1 environment variable if you are willing to avoid this.
In order to install the stable version of QCSuper system-wide from PyPI, you can run these commands:
# Install dependencies
sudo apt install python3-pip wireshark

# Install stable QCSuper system-wide
sudo pip3 install --upgrade qcsuper --break-system-packages
Then, you can just type qcsuper in your terminal to run QCSuper.
In order to install the development version in a specific folder, open a terminal and type the following:
# Download QCSuper
git clone https://github.com/P1sec/qcsuper
cd qcsuper

# Install dependencies
sudo apt install python3-pip wireshark
sudo pip3 install --upgrade . --break-system-packages
Then, run QCSuper from the qcsuper/ directory, using the ./qcsuper.py command in the terminal.
On Linux, you can to install QCSuper using the uv package manager which is a modern alternative to PIP.
First, run one of these commands in your terminal in order to install uv:
sudo snap install --classic astral-uv # On Ubuntu
sudo dnf install -y uv # On Fedora
sudo pacman -S uv # On Archlinux, Manjaro
curl -LsSf https://astral.sh/uv/install.sh | sh # On Debian and others
Then, run this to install the latest stable version:
uv tool install qcsuper
Alternatively, you can install the latest development version using this command:
uv tool install git+https://github.com/P1sec/qcsuper
You can then just type this into your terminal:
qcsuper
However, if you need to run qcsuper as root, for example because you are reading data from a modem device, qcsuper may not be in $PATH when using uv with sudo so this may require to do something such as:
sudo env "PATH=$PATH" qcsuper
If you wish to participate to the development of the tool, you can use these commands in order to download the source, then create symbolic links to QCSuper into ~/.local/bin towards the source directory:
git clone https://github.com/P1sec/qcsuper
cd qcsuper
uv sync # Create .venv in the current directory
uv tool install -e . # Create symlinks into ~/.local/bin
QCSuper can run on Windows, but you should beforehand ensure that Google's ADB prompt correctly runs on your machine with your device, and you should as well manually create libusb-win32 filters (through the utility accessible in the Start Menu after installing it) in the case where your device directly needs to connect to the Diag port over pseudo-serial USB.
(Please note that if you mode-switch your device, the associated USB PID/VID may change and it may require to redo driver associations in the libusb-win32 filter creation utility - and/or in the Windows peripherial devices manager depending on the case)
On Windows, you may need (in addition to Google's ADB kernel drivers) to download and install your phone's USB drivers from your phone model (this may include generic Qualcomm USB drivers). Please search for your phone's model + "USB driver" or "ADB driver" on Google for instructions.
Then, you need to ensure that you can reach your device using adb. You can find a tutorial on how to download and setup adb here. The adb.exe shell (or whatever executable path you use, a copy of the ADB executable is present in the qcsuper/inputs/external/adb folder of QCSuper) command must display a prompt to continue.
Then, follow these links (the tool has been tested lately on Windows 11 - it is not guaranteed to work on Windows 7) in order to:
