Protobuf 是一种序列化格式,由 Google 开发,并被越来越多的 Android、Web、桌面及其他应用程序所使用。它包含一种用于声明数据结构的语言,随后会根据目标实现将其编译为代码或其他类型的结构。
pbtk(Protobuf toolkit)是一套功能完备的脚本集合,可通过统一的 GUI 访问,提供两大主要功能:
从程序中提取 Protobuf 结构,将其转换回可读的 .proto 文件,支持多种实现:
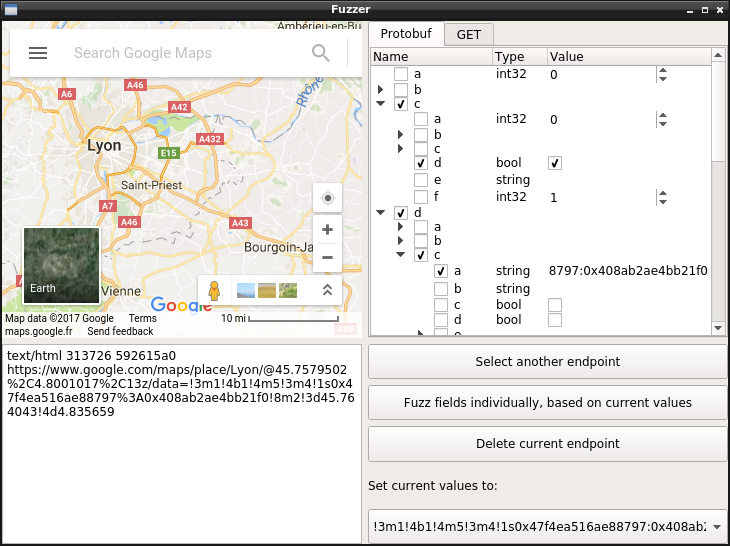
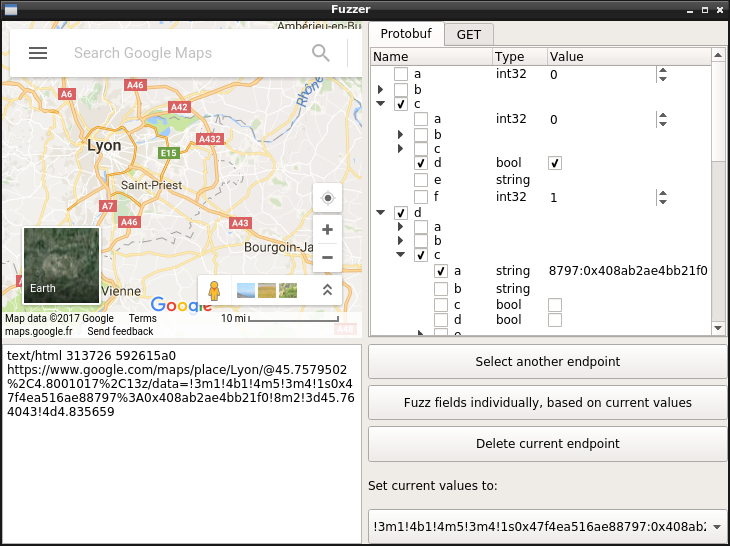
编辑、重放和模糊测试发送到 Protobuf 网络端点的数据,通过便捷的图形界面,你可以实时编辑 Protobuf 消息的字段并查看结果。
PBTK 需要 Python ≥ 3.10、GTK 4、Adwaita ≥ 1.8、Python-Protobuf 3,以及若干可执行程序(chromium、jad、dex2jar……)来运行提取脚本。
Ubuntu 用户可以使用 snap 安装:
$ sudo snap install pbtk
$ pbtk
Archlinux 用户可以通过 软件包 直接安装:
$ yay -S pbtk-git
$ pbtk
在大多数其他发行版上,你会希望直接运行它:
# For Ubuntu/Debian derivates:
sudo apt install python3-pip git openjdk-8-jre gir1.2-adw-1 \
    blueprint-compiler gir1.2-gtk-4.0 gir1.2-soup-3.0 python3-gobject

# Then, using UV:
sudo snap install --classic astral-uv
uv tool install pbtk
pbtk

# Or using pipx:
sudo apt install pipx
pipx install pbtk
pbtk
Windows 也受支持。pbtk 2.x 基于 GTK 4 运行,但 pbtk 1.x(最后一个版本为 1.1.5)基于 Qt 5 运行。
运行 GUI 后,它会根据你尝试执行的操作提示你缺少哪些组件。
可通过主脚本启动 GUI:
pbtk
以下脚本也可独立使用,无需 GUI:
pbtk-jar-extract [-h] input_file [output_dir]
pbtk-from-binary [-h] input_file [output_dir]
pbtk-web-extract [-h] input_url [output_dir] # 截至 2026 年需要更新才能正常工作
通过 snap 安装时,具体命令有所不同:
pbtk.jar-extract [-h] input_file [output_dir]
pbtk.from-binary [-h] input_file [output_dir]
pbtk.web-extract [-h] input_url [output_dir]
可通过主脚本启动 GUI:
uv sync # Download dependencies to the .venv folder
source .venv/bin/activate # Put the local scripts in $PATH for the current shell session
uv tool install -e . # Put the local scripts in $PATH all time
cp -a .github/hooks/* .git/hooks/ # Needed for contributing to code
pbtk
以下脚本也可以独立使用,无需 GUI:
pbtk-jar-extract [-h] input_file [output_dir]
pbtk-from-binary [-h] input_file [output_dir]
pbtk-web-extract [-h] input_url [output_dir] # 截至 2026 年需要更新才能正常工作
假设你正在逆向分析一个 Android 应用。你用自己最喜欢的反编译器对应用进行了一番探索,发现它以典型的方式通过 HTTPS 将 Protobuf 作为 POST 数据传输。
你打开 PBTK,会看到一段有意义的欢迎信息:
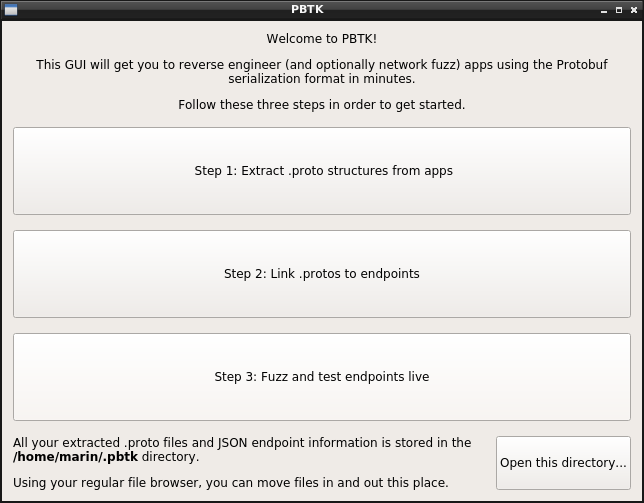
第一步是将你的 .proto 文件转换为文本格式。如果你的目标是 Android 应用,拖入一个 APK 并等待,就能完成这项神奇的工作!(除非它是非常特殊的实现)
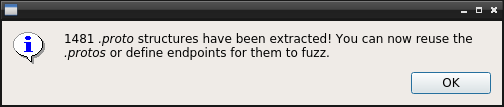
完成之后,你跳转到 ~/.pbtk/protos/<你的 APK 名称>(可以通过命令行,也可以点击欢迎界面底部的按钮打开文件浏览器,随你喜好)。应用的所有 .proto 文件确实都在这里。
回到反编译器,你偶然发现了那个构造发送到你感兴趣的 HTTPS 端点的数据的类。它通过调用一个由生成代码组成的类来序列化 Protobuf 消息。
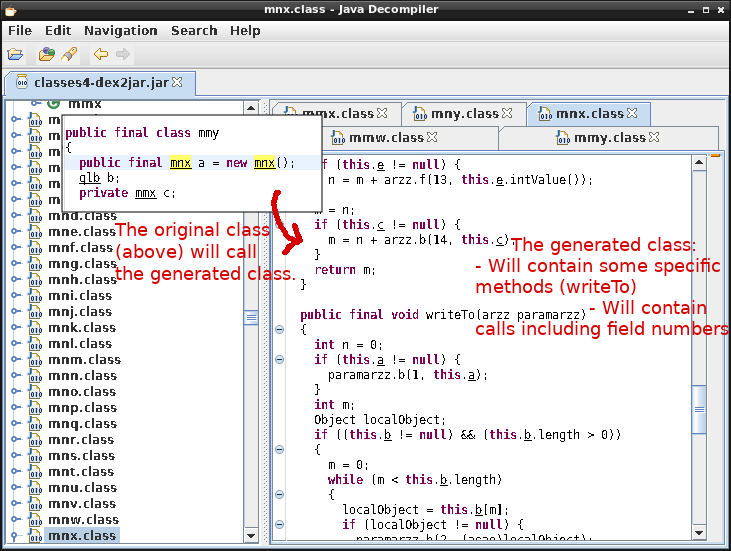
后一个类应该在你的 .proto 目录中有完全匹配的对应项(即 com.foo.bar.a.b 会匹配 com/foo/bar/a/b.proto)。无论如何,用 grep 搜索它的名称应该能让你找到它。
很好:接下来就是 第 2 步,选择你想要的输入 .proto,并填写一些关于你端点的信息。
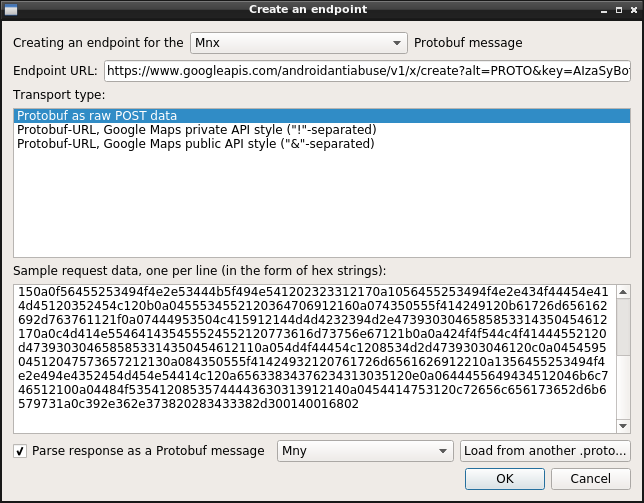
你还可以提供一些发送到该端点的原始 Protobuf 示例数据,这些数据通过 mitmproxy 或 Wireshark 捕获,并以十六进制编码形式粘贴。
第 3 步 就是点击按钮并观察发生什么的乐趣所在!你会看到一个树形视图,表示 Protobuf 结构中的每个字段(重复字段后缀为“+”,必填字段没有复选框)。
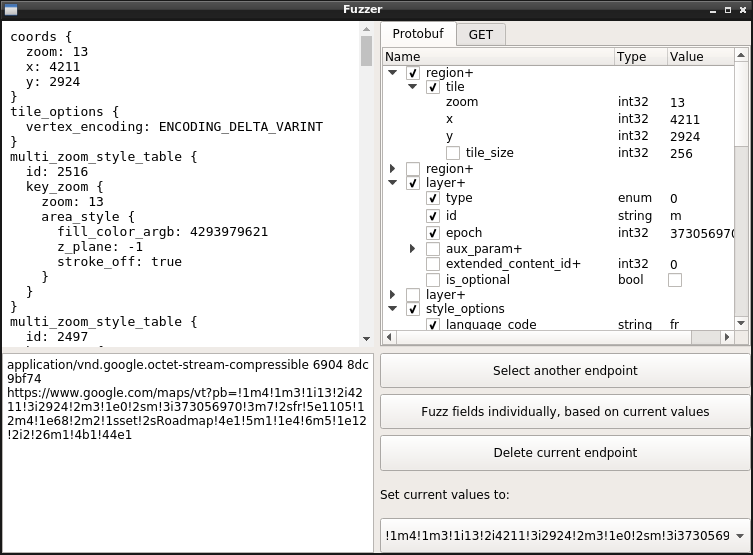
只需将鼠标悬停在字段上即可聚焦。如果字段是整数类型,使用鼠标滚轮来递增/递减它。悬停时还会显示枚举信息。
就是这样!你可以借此确定每个字段的含义。如果你从压缩混淆的代码中提取了 .proto,你可以根据你注意到的含义,通过点击字段名称来重命名字段。
祝你逆向愉快!👌 🎉
PBTK 将提取的 .proto 信息存储到 ~/.pbtk/protos/(Windows 上为 %APPDATA%\pbtk\protos)。
你可以直接通过常规的文件浏览器和文本编辑器移入、移出、重命名、编辑或删除此目录中的数据,这是预期的方式,不会干扰 PBTK。
基于 HTTP 的端点以 JSON 对象的形式存储在 ~/.pbtk/endpoints/ 中。这些对象是请求/响应信息对的数组,如下所示:
[{
    "request": {
        "transport": "pburl",
        "proto": "www.google.com/VectorTown.proto",
        "url": "https://www.google.com/VectorTown",
        "pb_param": "pb",
        "samples": [{
            "pb": "!....",
            "hl": "fr"
        }]
    },
    "response": {
        "format": "other"
    }
}]
PBTK 内部使用两种可插拔模块:提取器和传输器。
提取器定义在 src/pbtk/extractors/*.py 中。它们被定义为一个由装饰器修饰的方法,如下所示:
@register_extractor(
    name='my_extractor',
    readable_name='My Extractor',
    description='Extract Protobuf structures from Foobar code (*.foo, *.bar)',
    depends={'binaries': ['foobar-decompiler']},
)
def my_extractor(path):
    # Load contents of the `path` input file and do your stuff...

    # Then, yield extracted .protos using a generator:
    for i in do_your_extraction_work():
        yield ExtractorOutputFile(proto_name + '.proto', proto_contents)

    # Other kinds of information can be yield, such as endpoint information or progress to display.
传输层定义在 src/pbtk/utils/transports.py 中。它们被定义为一个由装饰器修饰的类,如下所示:
@register_transport
class MyTransport(Transport):
    name = 'my_transport'
    description = 'Protobuf as raw POST data'
    ui_data_form = 'hex strings'

    def __init__(self, pb_param: None, url: str):
        self.url = url

    def serialize_sample(self, sample: str) -> str:
        # We got a sample of input data from the user.
        # Verify that it is valid in the form described through "ui_data_form" parameter, fail with an exception or return False otherwise.
        # Optionally modify this data prior to returning it.
        bytes.fromhex(sample)
        return sample

    def load_sample(self, sample: str, pb_msg: Message):
        # Parse input data into the provided Protobuf object.
        pb_msg.ParseFromString(bytes.fromhex(sample))

    def create_request(
        self, pb_data: Message, tab_data: None
    ) -> Soup.Message:
        # Create a HTTP request using the provided URL and Protobuf object,
        # and optionally other transport-specific side data.

        msg = Soup.Message.new('POST', self.url)
        msg.set_request_body_from_bytes(
            None, GLib.Bytes.new(pb_data.SerializeToString())
        )
        return msg
以下内容可能会在后续版本中实现:
我已尽力为大多数模块编写详尽可读且带有注释的代码(除了那些基本自描述的部分,例如连接 GUI 信号),因此你可以参与贡献。
pbtk 在 GNU GPL 许可下发布(我,特此声明,等等)。
关于项目名称的大小写没有正式规定,规则就是遵从你的内心 ❤