<a href="https://artifacthub.io/packages/search?repo=akto" _target="blank">
<img src="https://img.shields.io/endpoint?url=https://artifacthub.io/badge/repository/akto"/>
</a>
<a href="https://www.akto.io/blog/akto-takes-center-stage-at-black-hat-2023-in-las-vegas" _target="blank">
<img src="https://img.shields.io/badge/Black_Hat_Arsenal-USA_2023-blue?style=square"/>
</a>
<a href="https://www.akto.io/blog/akto-presentation-at-defcon-2023-in-las-vegas" _target="blank">
<img src="https://img.shields.io/badge/Defcon-USA_2023-blue?style=square"/>
</a>
<br/>
<a href="https://github.com/akto-api-security/akto/commits/master" _target="blank">
<img src="https://img.shields.io/github/commit-activity/m/akto-api-security/akto?label=commits&logo=github"/>
</a>
<a href="https://github.com/akto-api-security/akto/releases" _target="blank">
<img src="https://img.shields.io/github/release-date/akto-api-security/akto?label=latest%20release&logo=docker"/>
</a>
<a href="https://discord.gg/Wpc6xVME4s" _target="blank">
<img src="https://img.shields.io/discord/1070706429402562733?logo=Discord"/>
</a>
<a href="https://hub.docker.com/r/aktosecurity/akto-api-security-dashboard/tags?page=1&name=local" _target="blank">
<img src="https://img.shields.io/docker/image-size/aktosecurity/akto-api-security-dashboard?logo=docker"/>
</a>
<a href="https://github.com/akto-api-security/akto/issues?q=label%3Ahackfest" _target="blank">
<img src="https://img.shields.io/github/issues/akto-api-security/akto/hackfest?logo=github"/>
</a>
<!--a href="https://hub.docker.com/r/aktosecurity/akto-api-security-dashboard" _target="blank">
<img src="https://img.shields.io/docker/pulls/aktosecurity/akto-api-security-dashboard?logo=docker"/>
</a-->
<a href="https://hub.docker.com/r/aktosecurity/akto-api-security-dashboard" _target="blank">
<img src="https://img.shields.io/badge/Docker_pulls-10K+-blue?logo=docker"/>
</a>
# Akto.io API 安全
## 贡献者
<a href="https://github.com/akto-api-security/akto/graphs/contributors">
<img src="https://contrib.rocks/image?repo=akto-api-security/akto" />
</a>
# 什么是 Akto?
[工作原理](https://docs.akto.io/#how-it-works) • [快速开始](https://docs.akto.io/#how-to-get-started) • [API 资产清单](https://docs.akto.io/api-inventory/api-collections) • [API 测试](https://docs.akto.io/testing/run-test) • [添加测试](https://docs.akto.io/testing/test-library) • [加入 Discord 社区](https://discord.com/invite/Wpc6xVME4s) •
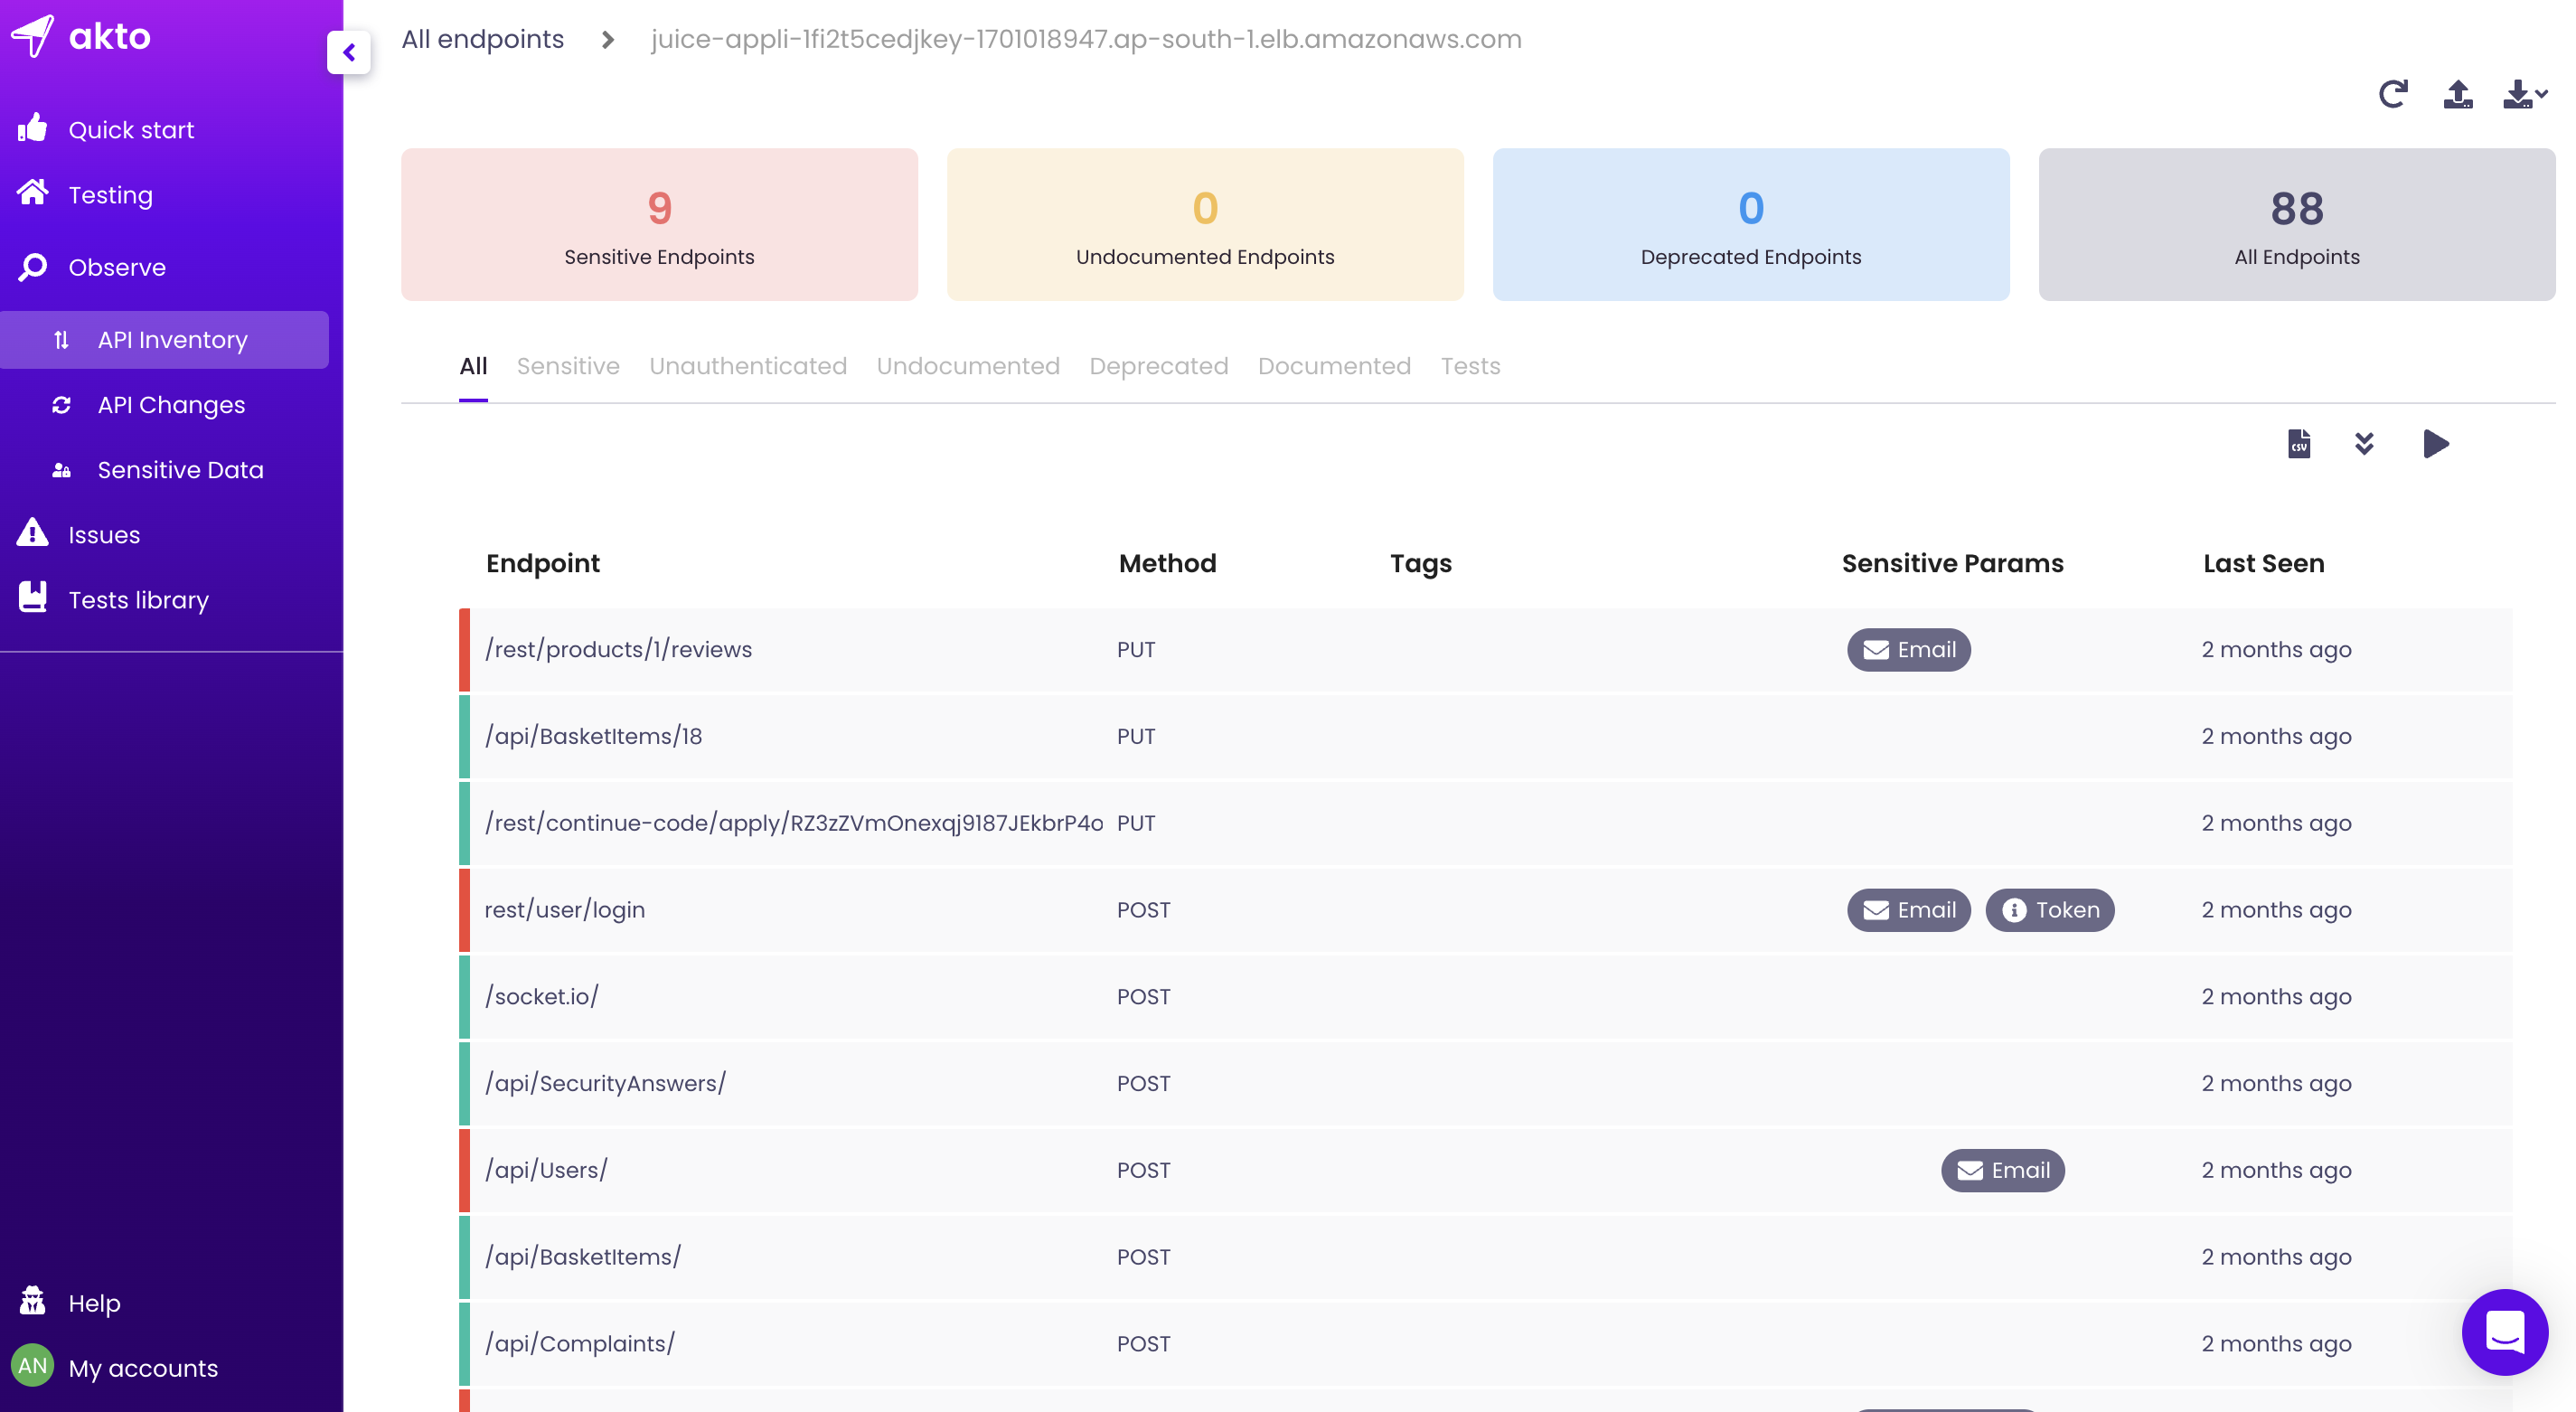
Akto 是一个即时、开源的 API 安全平台,只需 60 秒即可上手。安全团队使用 Akto 持续维护 API 资产清单、测试 API 漏洞并发现运行时问题。Akto 覆盖了所有 OWASP Top 10 和 HackerOne Top 10 类别,包括 BOLA、身份验证、SSRF、XSS、安全配置等。Akto 强大的测试引擎通过读取流量数据来理解 API 流量模式,从而运行各种业务逻辑测试,减少误报。Akto 可以集成多种流量来源——burpsuite、AWS、postman、GCP、网关等。以下是本季度的[公开路线图](https://github.com/orgs/akto-api-security/projects/8)。
Akto 通过以下三件事帮助安全和工程团队保护其 API:
1. [API 资产清单](https://docs.akto.io/api-inventory/api-collections)
2. [在 CI/CD 中运行业务逻辑测试](https://docs.akto.io/testing/run-test)
3. [发现运行时漏洞](https://docs.akto.io/api-inventory/sensitive-data)
https://user-images.githubusercontent.com/91306853/216407351-d18c396b-5cd0-4cbc-a350-10a76b1d67b3.mp4
## 它是如何工作的?
步骤 1:创建资产清单
<figure><img src="https://assets.kitploit.com/production/public/readmes/placeholders/f0fc86cfe65f76d40e15aaec61704ec8220a56dc89d4be03c46f67cb31b9fa8c.svg" alt=""><figcaption></figcaption></figure>
步骤 2:运行测试
<figure><img src="https://assets.kitploit.com/production/public/readmes/placeholders/f0fc86cfe65f76d40e15aaec61704ec8220a56dc89d4be03c46f67cb31b9fa8c.svg" alt=""><figcaption></figcaption></figure>
## 如何开始?
### 使用 docker-compose(适用于任何安装了 Docker 的机器)
运行以下命令来安装 Akto。你需要安装 curl 和 Docker 才能运行容器。
1. 使用此命令克隆 Akto 仓库 `git clone https://github.com/akto-api-security/akto.git`
2. 进入克隆的目录 `cd akto`
3. 运行 `docker-compose up -d`
<details>
<summary><h4>如果你要在自己的云环境(AWS/GCP/Heroku)中进行设置,请阅读本节</h4></summary>
请确保以下事项,以遵循良好的安全实践:
1. 仅开放端口 9090 的入站安全规则,并将源 CIDR 限制为 VPC CIDR 或你的 IP。
2. 使用私有子网中的 EC2——
a. 这样,任何人都无法向你的机器发起入站请求。
b. 确保此私有子网可以访问互联网,以便出站调用能够成功!
c. 你可能需要设置隧道以便通过 VPN 访问实例,使用 `ssh -i pemfile ec2-user@vpn-public-instance -L 9090:private-instance:9090`
d. 在浏览器中访问 `http://private-instance:9090`
3. 使用公共子网中的 EC2——请勿这样做!如果你仍想这样做,可以跳过 2.b 和 2.c。直接通过 `http://ip:9090` 访问你的实例即可
如果你能为你的应用程序提供镜像流量(零性能影响),Akto 在云部署中会非常强大。你还能够在 CI/CD 中安排测试,并在仪表板上邀请更多团队成员。为此,你应该安装[此处](https://stairway.akto.io)提供的 Akto 企业版。在[此处](https://www.akto.io/pricing)了解更多信息
</details>
## API 安全测试教程
| 标题 | 链接 |
| ------------- | ------------- |
| 介绍 | https://www.youtube.com/watch?v=oFt4OVmfE2s |
| **教程 1:** SSRF 端口扫描(OWASP API7:2023) | https://www.youtube.com/watch?v=WjNNh6asAD0 |
## 开发与贡献
<details>
<summary><h3>使用 VSCode Devcontainers 快速搭建</h3></summary>
### 前提条件:
1. [安装 VSCode](https://code.visualstudio.com/)
2. [安装 VSCode Dev Containers 扩展](https://marketplace.visualstudio.com/items?itemName=ms-vscode-remote.remote-containers)
3. **Windows:** Windows 10 专业版/企业版上的 [Docker Desktop](https://www.docker.com/products/docker-desktop) 2.0+。Windows 10 家庭版(2004+)需要 Docker Desktop 2.3+ 和 [WSL 2 后端](https://aka.ms/vscode-remote/containers/docker-wsl2)。
4. **macOS:** [Docker Desktop](https://www.docker.com/products/docker-desktop) 2.0+。
5. **Linux:** [Docker CE/EE](https://docs.docker.com/install/#supported-platforms) 18.06+ 和 [Docker Compose](https://docs.docker.com/compose/install) 1.21+。
**注意**:如果使用 Docker Desktop,建议将内存分配更改为 8 GB 以获得更好的性能
### 步骤:
#### 克隆仓库并在 vscode 中打开
1. 打开终端
2. `mkdir ~/akto_code`
3. `cd ~/akto_code`
4. `git clone https://github.com/akto-api-security/akto`
5. 在 VScode 中打开:`code akto`
#### 启动 Dev Container
1. 转到“查看”>“命令面板”,然后输入:Dev Containers: Reopen in Container
<img src="https://assets.kitploit.com/production/public/readmes/6063/55316a486d156017f3282896483e4ec8fa41a3f3a65bb3f8987ca169e55451ac.png"></img>
2. 等待 Dev Container 完成设置。
3. 在浏览器中打开 **localhost:9090** 以查看 Akto 仪表板
</details>
<details>
<summary><h3> 手动安装说明</h3> </summary>
### 前提条件
OpenJDK 8、node(v18.7.0+ [链接](https://nodejs.org/download/release/v18.7.0/))、npm(v8.15.0+)、maven(v3.6.3 [链接](https://dlcdn.apache.org/maven/maven-3/3.6.3/binaries/))、MongoDB(v5.0.3+ [链接](https://www.mongodb.com/docs/manual/administration/install-community/))
#### 克隆仓库
1. `mkdir ~/akto_code`
2. `cd akto_code`
3. `git clone https://github.com/akto-api-security/akto`
#### 设置数据库
1. `打开一个新的终端标签页`
2. `cd ~`
3. `mkdir ~/akto_mongo_data`
4. `<path_to_mongo_folder>/bin/mongod --dbpath ~/akto_mongo_data`
#### 设置前端
1. `打开一个新的终端标签页`
2. `cd ~/akto_code/akto`
3. `cd apps/dashboard/web/polaris_web`
4. `npm install`
5. `npm run hot`
#### 设置仪表板
1. `打开一个新的终端标签页`
2. `cd ~/akto_code/akto`
3. `export AKTO_MONGO_CONN="mongodb://localhost:27017"`
4. `export DASHBOARD_MODE="local_deploy"`
5. `mvn clean install`
6. `mvn --projects :dashboard --also-make jetty:run -Djetty.port=9090`
#### 设置测试
1. `打开一个新的终端标签页`
2. `cd ~/akto_code/akto`
3. `cd apps/testing`
4. `export AKTO_MONGO_CONN="mongodb://localhost:27017"`
5. `mvn compile; mvn exec:java -Dexec.mainClass="com.akto.testing.Main"`
</details>
#### 使用 Testing CLI 工具
运行以下命令以运行测试 CLI 工具
```bash
docker run -v ./:/out \ # needed to generate test report on host machine
-e TEST_IDS='JWT_NONE_ALGO REMOVE_TOKENS' \ # space separated test ids
-e AKTO_DASHBOARD_URL='<AKTO_DASHBOARD_URL>' \
-e AKTO_API_KEY='<AKTO_API_KEY>' \
-e API_COLLECTION_ID='123' \ # api collection id on which you want to run tests
-e TEST_APIS='https://demo.com/api/books https://demo.com/api/cars' \ # space separated apis from the api collection on which you want to run tests. If not present, all apis in the collection will be tested. [optional]
-e OVERRIDE_APP_URL='https://dummy.com' \ # If you want to test on a separate host. [optional]
aktosecurity/akto-api-testing-cli
```
### 动手试试
1. 在你喜欢的浏览器中打开 `localhost:9090`
2. 首次登录时需要注册,之后就可以直接登录了
<details>
<summary><h3>调试</h3></summary>
1. 要调试前端,请从[此处](https://devtools.vuejs.org/guide/installation.html)安装 Vue.js Chrome 扩展。
2. 要调试后端,请在运行 Web 服务器之前执行以下操作——
a. 设置 MAVEN_OPTS 变量以在 Java 进程中启用调试
export MAVEN_OPTS="-Xdebug -Xrunjdwp:transport=dt_socket,server=y,suspend=n,address=8081, -Dcom.sun.management.jmxremote=true -Dcom.sun.management.jmxremote.port=9010 -Dcom.sun.management.jmxremote.rmi.port=9010 -Dcom.sun.management.jmxremote.local.only=false -Dcom.sun.management.jmxremote.authenticate=false -Dcom.sun.management.jmxremote.ssl=false"
b. 在 Visual Studio Code 中,单击任意行号以设置断点。
c. 从“运行和调试”模式附加 Java 调试器。如果是第一次操作,请单击“Create launch.json file”,然后选择“Add configuration”。选择“Java: Attach process by ID”并保存文件。 <br/>
<img width="426" alt="img1" src="https://assets.kitploit.com/production/public/readmes/6063/8066e85fcd60acda23d905ff2a64969cb39d640cff06738418d0f4d4d864b990.png"><br/>
d. 将会显示正在运行的 Java 进程列表。选择 Web 服务器进程以附加调试器
</details>
<a href="https://hits.sh/github.com/akto-api-security/hits.svg?label=Hits%20since%2020%2F5&color=FFFFFF&labelColor=FFFFFF"><img alt="Hits" src="https://hits.sh/github.com/akto-api-security/hits.svg?label=Hits%20since%2020/5&color=FFFFFF&labelColor=FFFFFF"/></a>
## 贡献
我们欢迎您对本项目的贡献。请阅读我们的 [CONTRIBUTING.md](https://github.com/akto-api-security/akto/blob/master/CONTRIBUTING.md) 以了解如何参与。
## 许可证
本项目采用 [MIT 许可证](https://github.com/akto-api-security/akto/blob/master/LICENSE.md) 授权。