 m-mizutani/alertresponder
AWS Serverless Application Model을 사용한 자동 보안 알림 대응 프레임워크

참고: 이 저장소는 더 이상 사용되지 않습니다. 새 저장소는 여기에 있습니다: https://github.com/m-mizutani/deepalert
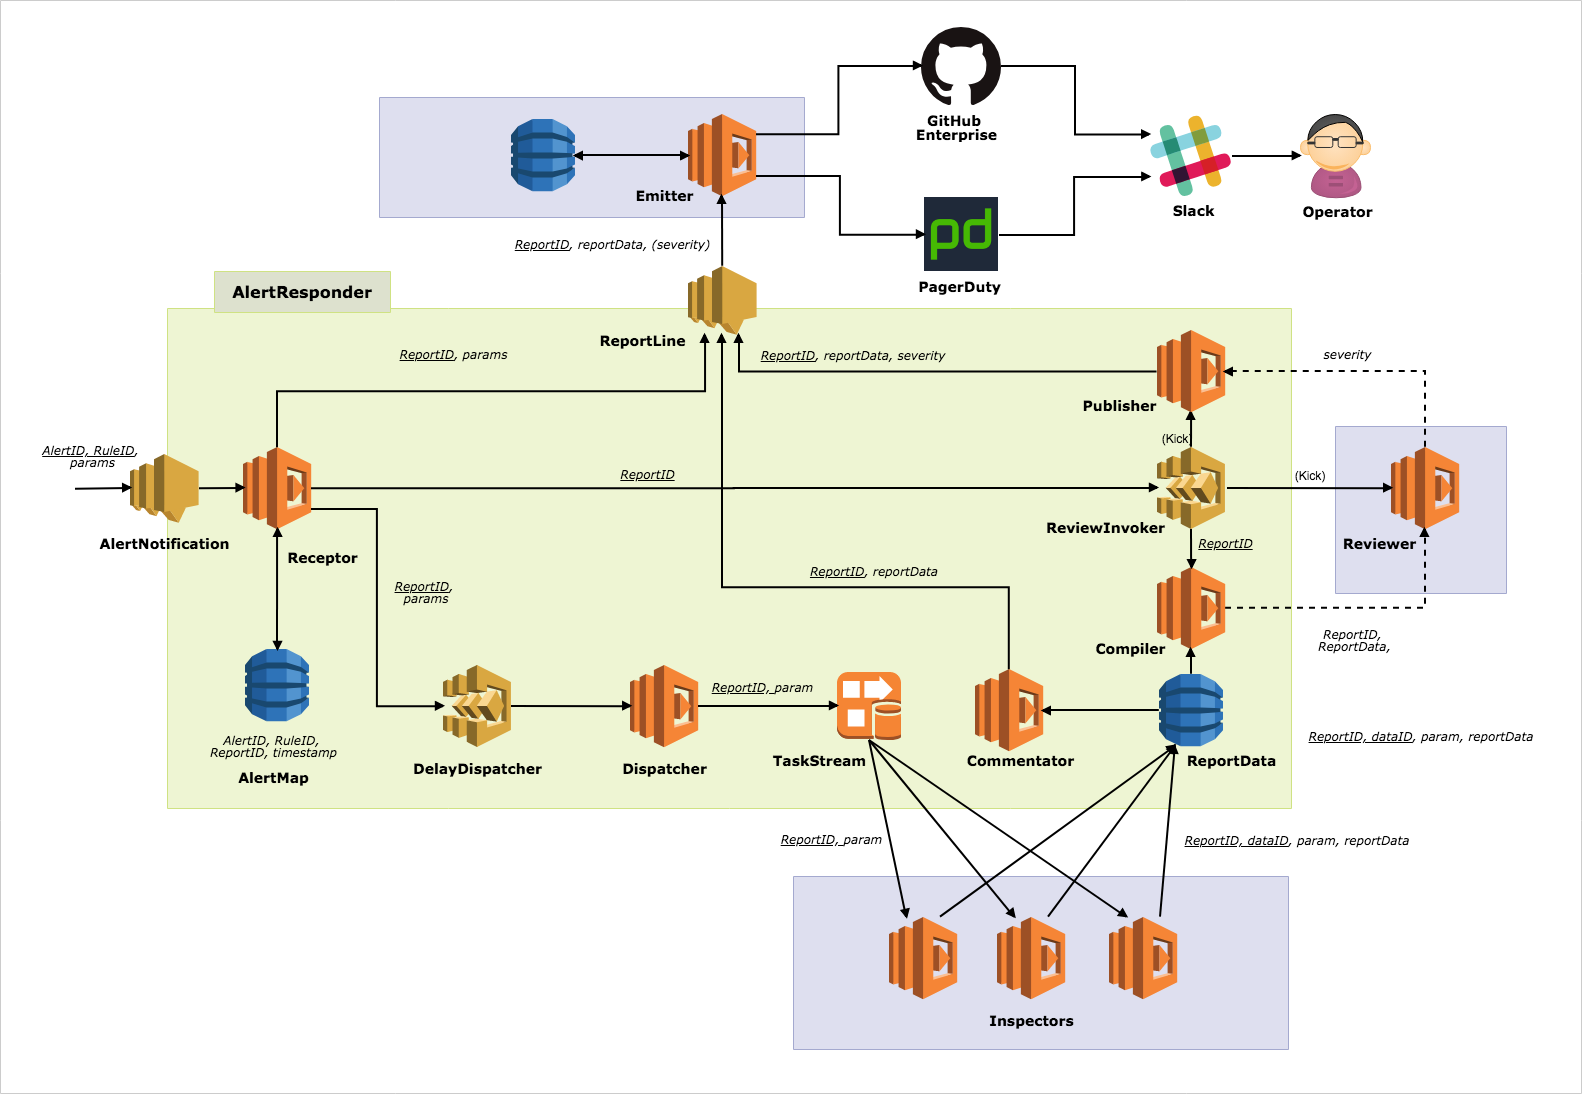
AlertResponder는 보안 경고에 대한 자동 대응을 위한 서버리스 프레임워크입니다.
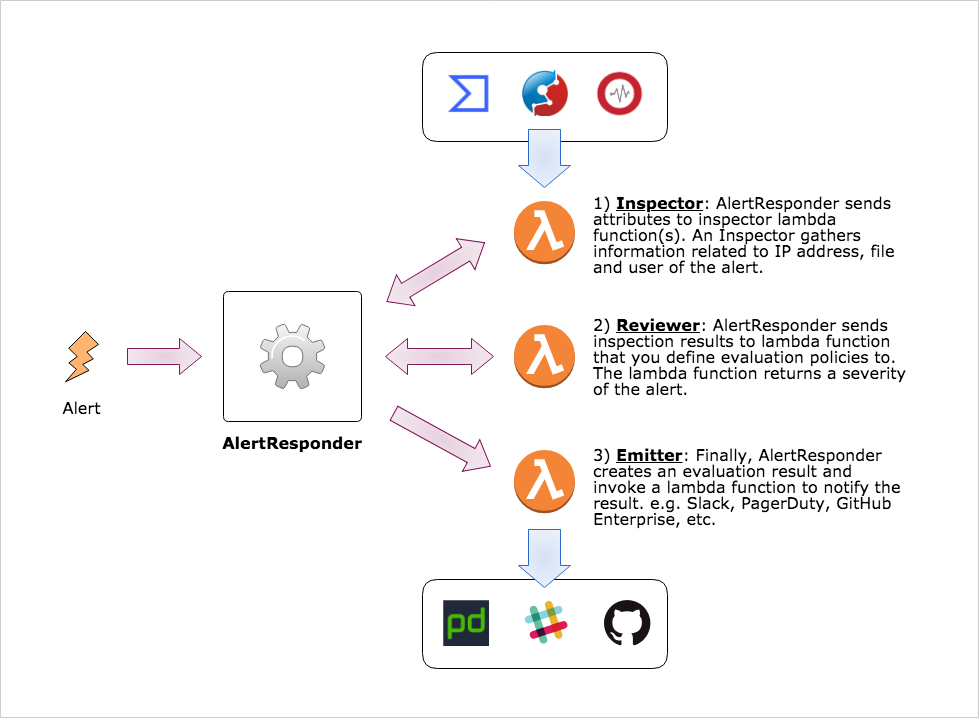
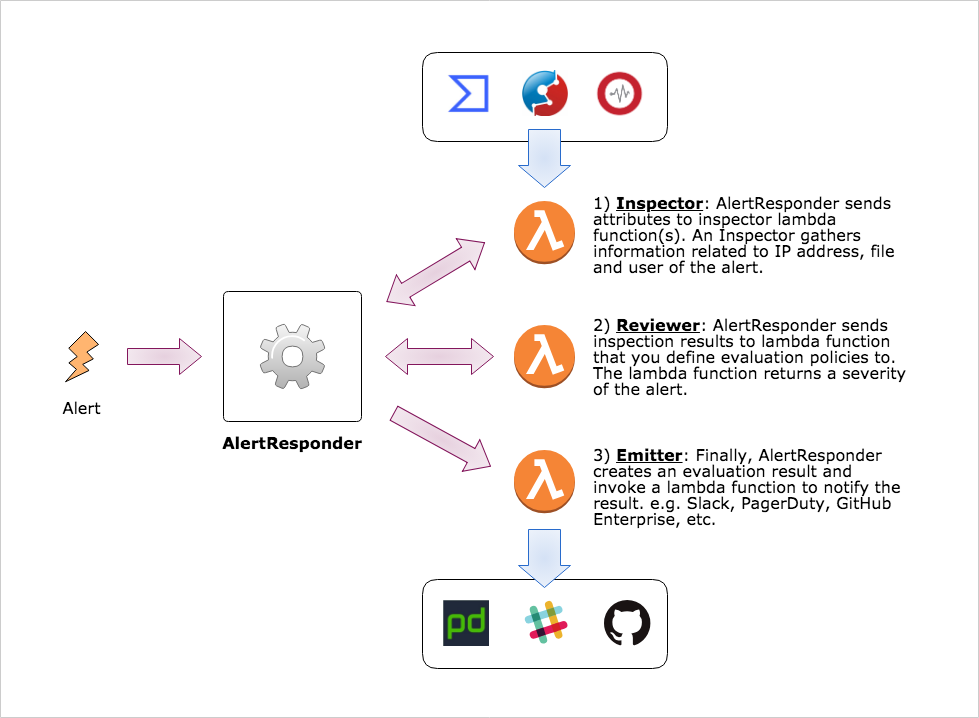
AlertResponder는 보안 관점에서 관심 있는 이벤트인 경고(alert)를 수신하고, 해당 경고에 대해 자동으로 대응합니다. AlertResponder는 자동 대응의 3가지 부분으로 구성됩니다.
다음 변수들을 자신의 환경에 맞게 변경하십시오:
$REGION: AWS 리전으로 대체 (예: ap-northeast-1)$STACK_NAME: CloudFormation 스택 이름으로 대체$ curl -o alert_responder.yml https://s3-$REGION.amazonaws.com/cfn-assets.$REGION/AlertResponder/templates/latest.yml
$ aws cloudformation deploy --template-file alert_responder.yml --stack-name $STACK_NAME --capabilities CAPABILITY_IAM
매개변수 파일(예: config.json)을 준비하고 make 명령어를 실행합니다.
$ cat config.json
{
  "StackName": "your-alert-responder-name",
  "TestStackName": "your-test-stack-name",
  "CodeS3Bucket": "your-some-bucket",
  "CodeS3Prefix": "for-example-functions",

  "InspectionDelay": "1",
  "ReviewDelay": "10"
}
$ env AR_CONFIG=config.json make deploy
참고: AWS 자격 증명(예: API 키)과 적절한 권한이 필요합니다.
AlertResponder를 배포한 후, tester 디렉토리로 이동하여 테스트용 스택을 배포합니다.
$ cd tester/
$ make AR_CONFIG=../config.json deploy
배포 후 tester 디렉토리 아래 스크립트에 의해 생성된 param.json 파일을 확인할 수 있습니다.
$ cat params.json
{
  "AccountId": "214219211678",
  "Region": "ap-northeast-1",
  "Inspector": "slam-alert-responder-test-functions-Inspector-1OBGU89CT1P4B",
  "Reporter": "slam-alert-responder-test-functions-Reporter-1NDHU0VDI8OPA"
}
그런 다음 git 저장소의 최상위 디렉토리로 돌아와 통합 테스트를 실행할 수 있습니다.
$ go test -v
=== RUN   TestInvokeBySns
--- PASS: TestInvokeBySns (3.39s)
           (snip)
PASS
ok      github.com/m-mizutani/AlertResponder    20.110s
