
Quick WAF "paranoid" Doctor Evaluation | WAFPARAN01D3 Tool
Lo strumento di test del livello di paranoia del Web Application Firewall.
— Da alt3kx.github.io

In sostanza, il livello di paranoia (PL) consente di definire quanto sia aggressivo il Core Rule Set.
Riferimento: https://coreruleset.org/20211028/working-with-paranoia-levels/
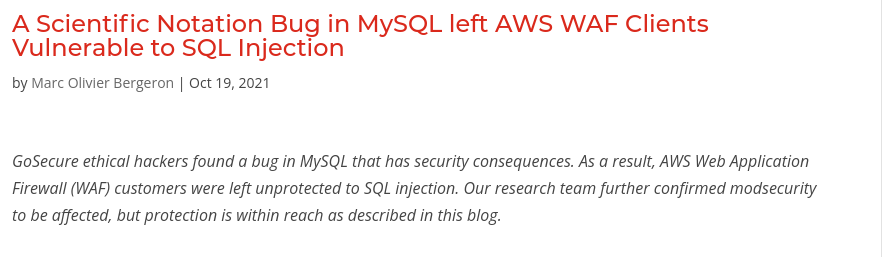
wafparan01d3.py invia richieste malevole utilizzando payload codificati collocati in diverse parti delle richieste HTTP basate su parametri GET. I risultati della valutazione vengono registrati nel file di debug wafparan01d3.log creato sulla vostra macchina.mysql_gosecure.txt basati sulla ricerca "A Scientific Notation Bug in MySQL left AWS WAF Clients Vulnerable to SQL Injection" di gosecure disponibile qui https://www.gosecure.net/blog/2021/10/19/a-scientific-notation-bug-in-mysql-left-aws-waf-clients-vulnerable-to-sql-injection/ valutando i nostri WAF utilizzando modsecurity nei loro diversi livelli di paranoia sia in una configurazione predefinita che disabilitando diverse regole / IDs in modo scaglionato e rapido.
Pentesters: ambito GreyBox con accesso limitato alla macchina Linux del WAF utilizzando una "shell" con privilegi per avviare/ricaricare e modificare i file di configurazione di Apache del WAF in ambienti DEV/STG/TEST inviando diversi payload.Security Officers: prendere la migliore decisione per applicare il livello di paranoia del WAF per ogni soluzione della vostra organizzazione.Blueteamers: applicazione delle regole, migliori alert, meno falsi positivi nella vostra organizzazione.Integrators: eseguire una risoluzione dei problemi più approfondita e definire rapidamente il livello di paranoia del WAF adeguato personalizzando le regole o creando patch virtuali.Riferimento: https://www.inmotionhosting.com/support/server/apache/install-modsecurity-apache-module/
$ sudo apt update -y && sudo apt dist-upgrade -y
$ sudo apt-get install build-essential -y
$ sudo apt-get install apache2 -y
$ sudo apt install libapache2-mod-security2 -y
$ sudo apt-get install curl vim gridsite-clients net-tools -y
$ sudo systemctl restart apache2
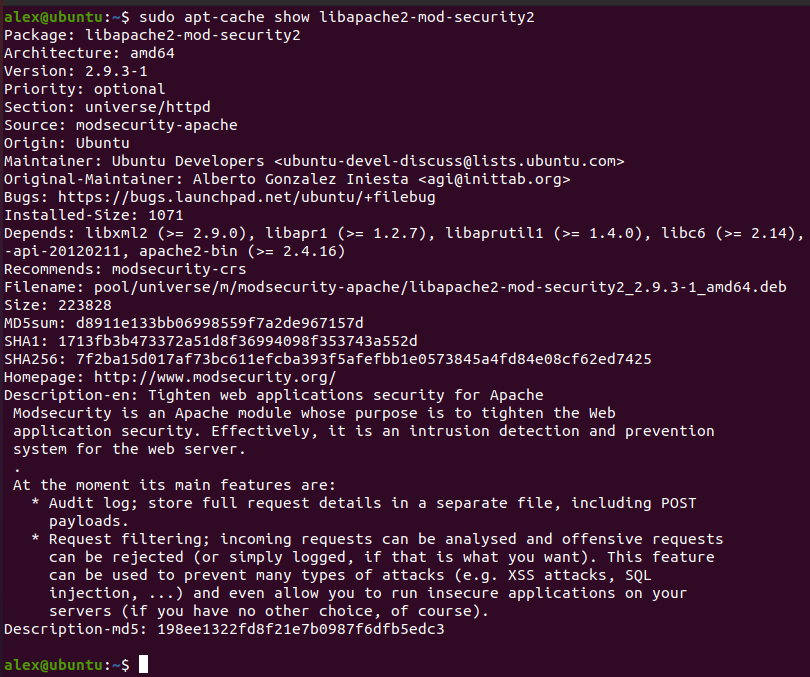
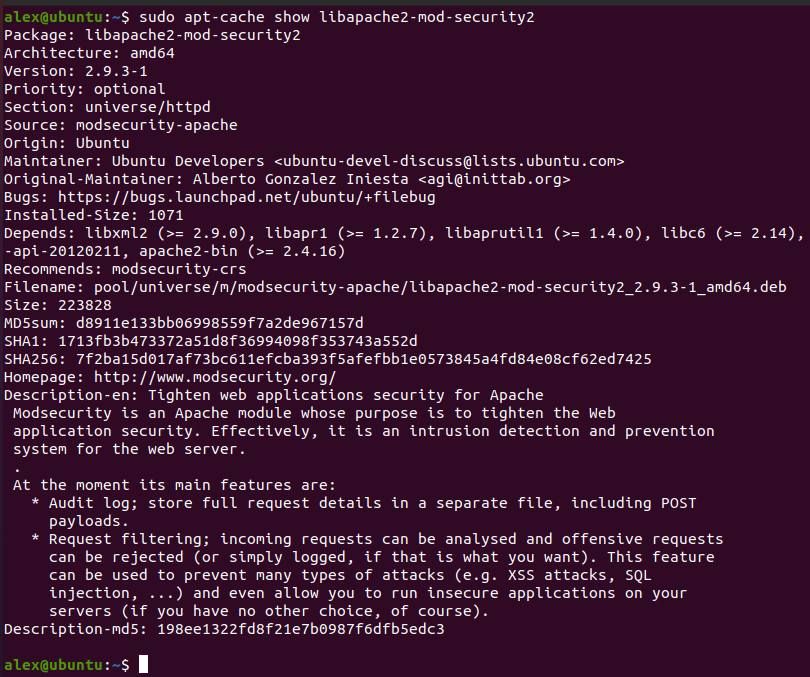
$ sudo apt-cache show libapache2-mod-security2
$ sudo cp /etc/modsecurity/modsecurity.conf-recommended /etc/modsecurity/modsecurity.conf
Successivamente, cambia la modalità di rilevamento di ModSecurity. Per prima cosa, spostati nella cartella cd /etc/modsecurity
2. Modifica il file di configurazione di ModSecurity con vi, vim, emacs o nano.
$ sudo vim /etc/modsecurity/modsecurity.conf
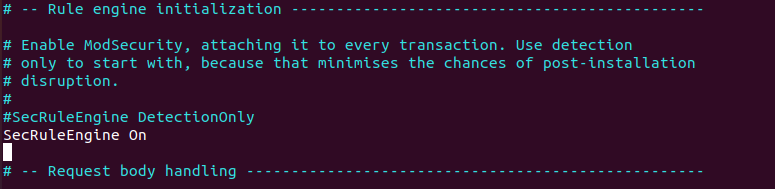
SecRuleEngine DetectionOnly. Cambia DetectionOnly in On. Valore originale: SecRuleEngine DetectionOnly
Nuovo valore: SecRuleEngine On
$ sudo systemctl restart apache2
$ cd ~
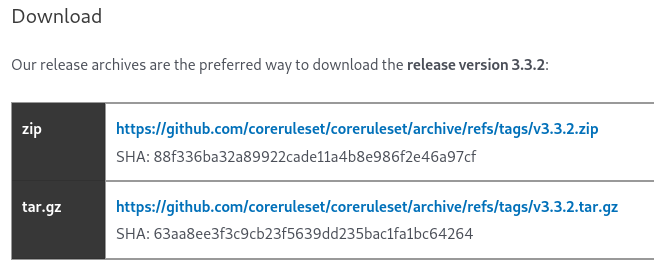
$ wget https://github.com/coreruleset/coreruleset/archive/refs/tags/v3.3.2.zip
$ sha1sum v3.3.2.zip && echo ProvidedChecksum
88f336ba32a89922cade11a4b8e986f2e46a97cf v3.3.2.zip
ProvidedChecksum
$ unzip v3.3.2.zip
$ sudo mv coreruleset-3.3.2/crs-setup.conf.example /etc/modsecurity/crs/crs-setup.conf
$ sudo mv coreruleset-3.3.2/rules/ /etc/modsecurity/crs/
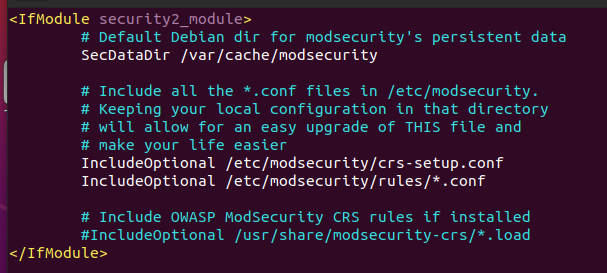
$ sudo vim /etc/apache2/mods-enabled/security2.conf
<IfModule security2_module>
# Default Debian dir for modsecurity's persistent data
SecDataDir /var/cache/modsecurity
# Include all the *.conf files in /etc/modsecurity.
# Keeping your local configuration in that directory
# will allow for an easy upgrade of THIS file and
# make your life easier
IncludeOptional /etc/modsecurity/crs-setup.conf
IncludeOptional /etc/modsecurity/rules/*.conf
# Include OWASP ModSecurity CRS rules if installed
#IncludeOptional /usr/share/modsecurity-crs/*.load
</IfModule>
$ sudo vim /etc/apache2/apache2.conf
Copia e incolla il seguente codice e salvalo.
# Include list of ports to listen on
Include ports.conf
Include /etc/modsecurity/modsecurity.conf
Include /etc/modsecurity/crs/crs-setup.conf
Include /etc/modsecurity/crs/rules/*.conf

$ cd /etc/apache2
$ sudo cp mods-available/proxy_http.load mods-enabled
$ sudo cp mods-available/proxy.load mods-enabled/
$ sudo cp mods-available/rewrite.load mods-enabled/
$ sudo systemctl restart apache2
/etc/apache2/ports.conf $ sudo vim /etc/apache2/ports.conf
Copia e incolla il seguente codice e salvalo.
# If you just change the port or add more ports here, you will likely also
# have to change the VirtualHost statement in
# /etc/apache2/sites-enabled/000-default.conf
Listen 8080
Listen 18080
<IfModule ssl_module>
Listen 443
</IfModule>
<IfModule mod_gnutls.c>
Listen 443
</IfModule>

/etc/apache2/sites-enabled, crea il file 001-test.conf $ cd /etc/apache2/sites-enabled/
$ sudo touch 001-test.conf
$ sudo vim 001-test.conf
Copia e incolla il seguente codice e salvalo.
<VirtualHost *:8080>
ServerName test.domain:8080
SecRuleEngine On
ErrorLog ${APACHE_LOG_DIR}/test_error.log
CustomLog ${APACHE_LOG_DIR}/test_access.log combined
SecAuditLog ${APACHE_LOG_DIR}/test_audit.log
ProxyPass / http://127.0.0.1:18080/
ProxyPassReverse / http://127.0.0.1:18080/
</VirtualHost>
/etc/apache2/sites-enabled, crea il file 002-moc.conf $ cd /etc/apache2/sites-enabled/
$ sudo touch 002-moc.conf
$ sudo vim 002-moc.conf
Copia e incolla il seguente codice e salvalo.
<VirtualHost 127.0.0.1:18080>
ErrorLog ${APACHE_LOG_DIR}/moc_error.log
CustomLog ${APACHE_LOG_DIR}/moc_access.log combined
RewriteEngine On
RewriteRule ^(.*)$ $1 [R=200,L]
</VirtualHost>
$ sudo systemctl restart apache2
wafparan01d3_rulesremove.conf all'interno di /etc/apache2/conf-enabled $ sudo touch /etc/apache2/conf-enabled/wafparan01d3_rulesremove.conf
$ sudo service apache2 reload
Devi specificare un dominio, modifica le seguenti righe:
Windows:
C:\Windows\System32\drivers\etc\hosts
192.168.56.106 test.domain <-- aggiungi questa riga e specifica il tuo indirizzo IP
Linux:
/etc/hosts
192.168.1.23 test.domain <-- aggiungi questa riga e specifica il tuo indirizzo IP
$ curl -i -k -s -XGET http://test.domain:8080/
HTTP/1.1 200 OK
Date: Mon, 22 Nov 2021 06:31:41 GMT
Server: Apache/2.4.41 (Ubuntu)
Content-Length: 571
Content-Type: text/html; charset=iso-8859-1
Vary: Accept-Encoding
<!DOCTYPE HTML PUBLIC "-//IETF//DTD HTML 2.0//EN">
<html><head>
<title>200 OK</title>
</head><body>
<h1>OK</h1>
<p>The server encountered an internal error or
misconfiguration and was unable to complete
your request.</p>
<p>Please contact the server administrator at
[no address given] to inform them of the time this error occurred,
and the actions you performed just before this error.</p>
<p>More information about this error may be available
in the server error log.</p>
<hr>
<address>Apache/2.4.41 (Ubuntu) Server at 127.0.0.1 Port 18080</address>
</body></html>
$ curl -i -k -s -XGET http://localhost:18080/
HTTP/1.1 200 OK
Date: Mon, 22 Nov 2021 06:27:17 GMT
Server: Apache/2.4.41 (Ubuntu)
Content-Length: 571
Content-Type: text/html; charset=iso-8859-1
<!DOCTYPE HTML PUBLIC "-//IETF//DTD HTML 2.0//EN">
<html><head>
<title>200 OK</title>
</head><body>
<h1>OK</h1>
<p>The server encountered an internal error or
misconfiguration and was unable to complete
your request.</p>
<p>Please contact the server administrator at
[no address given] to inform them of the time this error occurred,
and the actions you performed just before this error.</p>
<p>More information about this error may be available
in the server error log.</p>
<hr>
<address>Apache/2.4.41 (Ubuntu) Server at localhost Port 18080</address>
</body></html>
Per ottenere aiuto puoi utilizzare l'opzione help. L'uso di base consiste nel passare diversi argomenti definiti.
Esempio:
$ sudo python3 wafparan01d3.py -h
( ) ) ( )
( ( ))\ ) ) ( ) ( /(( /( )\ ) ( /(
)\))( ( /(()/( ` ) ( /( )( ( /( ( )\())\()|()/( )\())
((_)()\ )(_))(_))/(/( )(_)|()\ )(_)) )\ ) ((_)((_)\ ((_)|(_)\
_(()((_|(_)(_) _((_)_\((_)_ ((_|(_)_ _(_/( / (_) (_)_| |__ (_)
\ V V / _` | _| '_ \) _` | '_/ _` | ' \)) () || |/ _` ||_ \
\_/\_/\__,_|_| | .__/\__,_|_| \__,_|_||_| \__/ |_|\__,_|___/
|_|
~ WAFPARANO1D3 : v1.1 ~
The Web Application Firewall Paranoia Level Test Tool.
usage: wafparan01d3.py [-h] [--run [_RUN]] [--debug [_DEBUG]] [--pl [_PARANOIALEVEL ...]] [--proxy [_PROXY]] [--payload [_PAYLOAD]] [--rules-remove [_RULESREMOVE]] [--log [_LOG]] [--domain [_DOMAIN]] [--conf-file [_CONF_FILE]]
[--time-sleep [_TIME_TO_SLEEP]] [--time-sleep-request [_TIME_TO_SLEEP_REQUEST]] [--desc [_DESC]] [--output-desc [_OUTPUT_DESC]]
optional arguments:
-h, --help show this help message and exit
--run [_RUN] Run script
--debug [_DEBUG] Debug mode
--pl [_PARANOIALEVEL ...]
Define paranoia level Ex. -pl 2
--proxy [_PROXY] Define Proxy. Ex: http://127.0.0.1:8081
--payload [_PAYLOAD] Define payload file. Ex. --payload payload2.txt
--rules-remove [_RULESREMOVE]
Define rules remove file. Ex. --rules-remove rules1.txt
--log [_LOG] Define path of the log file. Ex. --log /var/log/apache/wafparan01d3.log
--domain [_DOMAIN] Define your domain. Ex. --domain example.domain:8080
--conf-file [_CONF_FILE]
Define configuration file. Ex. --conf-file /opt/modsecurity/crs/rules/INITIALIZATION.conf
--time-sleep [_TIME_TO_SLEEP]
Sleep time per PL. Ex. --time-sleep 3
--time-sleep-request [_TIME_TO_SLEEP_REQUEST]
Sleep time per Request. Ex. --time-sleep-request 3
--desc [_DESC] Description of the script and authors
--output-desc [_OUTPUT_DESC]
Description of the output on console mode.
$ sudo python3 wafparan01d3.py -h
- show the help message
$ sudo python3 wafparan01d3.py --run
- run the script with default options.
$ sudo python3 wafparan01d3.py --run --debug
- Print every line on console.
$ sudo python3 wafparan01d3.py --run --pl 1
- Run the script in assigned Paranoia Level.
- By default runs on Paranoia Level 1, 2, 3, 4
$ sudo python3 wafparan01d3.py --run --payload file_payload2.txt
- Define the payload file that you want to send to WAF.
- By default takes the file mysql_gosecure.txt
$ sudo python3 wafparan01d3.py --run --rules-remove rules_removex.txt
- Define the rules that you want to remove on GWAF.
- Example of the file:
- Default 920000 920001 920002
- By default takes the files: rules_remove1.txt, rules_remove2.txt, rules_remove3.txt, rules_remove4.txt
$ sudo python3 wafparan01d3.py --run --log /home/waf_user/paranoia.log
- Define LOG File.
- By default print the log on paranoia_debug.log
$ sudo python3 wafparan01d3.py --run --domain mydomain.test.com
- Define Domain of Front End WAF.
- By default runs over domain domain.test:8080
$ sudo python3 wafparan01d3.py --run --conf-file /opt/modsecurity/crs/rules/INITIALIZATION.conf
- Define the configuration file to update the Paranoia Level
- By default takes /etc/modsecurity/crs/rules/REQUEST-901-INITIALIZATION.conf
$ sudo python3 wafparan01d3.py --run --time-sleep 3
- Define the time to sleep per Paranoia Level.
$ sudo python3 wafparan01d3.py --run --time-sleep-request 2
- Define the time to sleep per request send to WAF.
$ sudo python3 wafparan01d3.py --desc
- Print the description of the script and the authors.
Puoi provare wafparan01d3.py eseguendo l'ambiente VM (Ubuntu) che distribuisce WAF ModSecurity e 'Mock' utilizzando l'ultima versione di OWASP Core Rule Set CRS 3.3.2, valutando i livelli di paranoia di ModSecurity facilmente personalizzabili.
Per eseguire:
$ git clone https://github.com/alt3kx/wafparan01d3.git
$ cd wafparan01d3
$ sudo python3 wafparan01d3.py --help
$ sudo python3 wafparan01d3.py --run

$ sudo python3 wafparan01d3.py --run --debug --proxy http://192.168.56.1:8081

$ sudo python3 wafparan01d3.py --run --debug --pl 1 2 --proxy http://192.168.56.1:8081 --log test.log --domain vulnerable.domain:8080 --time-sleep-request 1 --time-sleep 1 --rules-remove my_rules_remove.txt --payload my_payload.txt

https://github.com/mindhack03d/WAF-Rule-Scientific-Notation
Alex Hernandez aka (@_alt3kx_)
Jesus Huerta aka @mindhack03d