resterm v1.1.1
Terminal API client for HTTP/GraphQL/gRPC with support for SSH tunnels, WebSockets, SSE, Workflows, Profiling, OpenAPI, Kubernetes port-forwarding, CLI and mocks.

Resterm
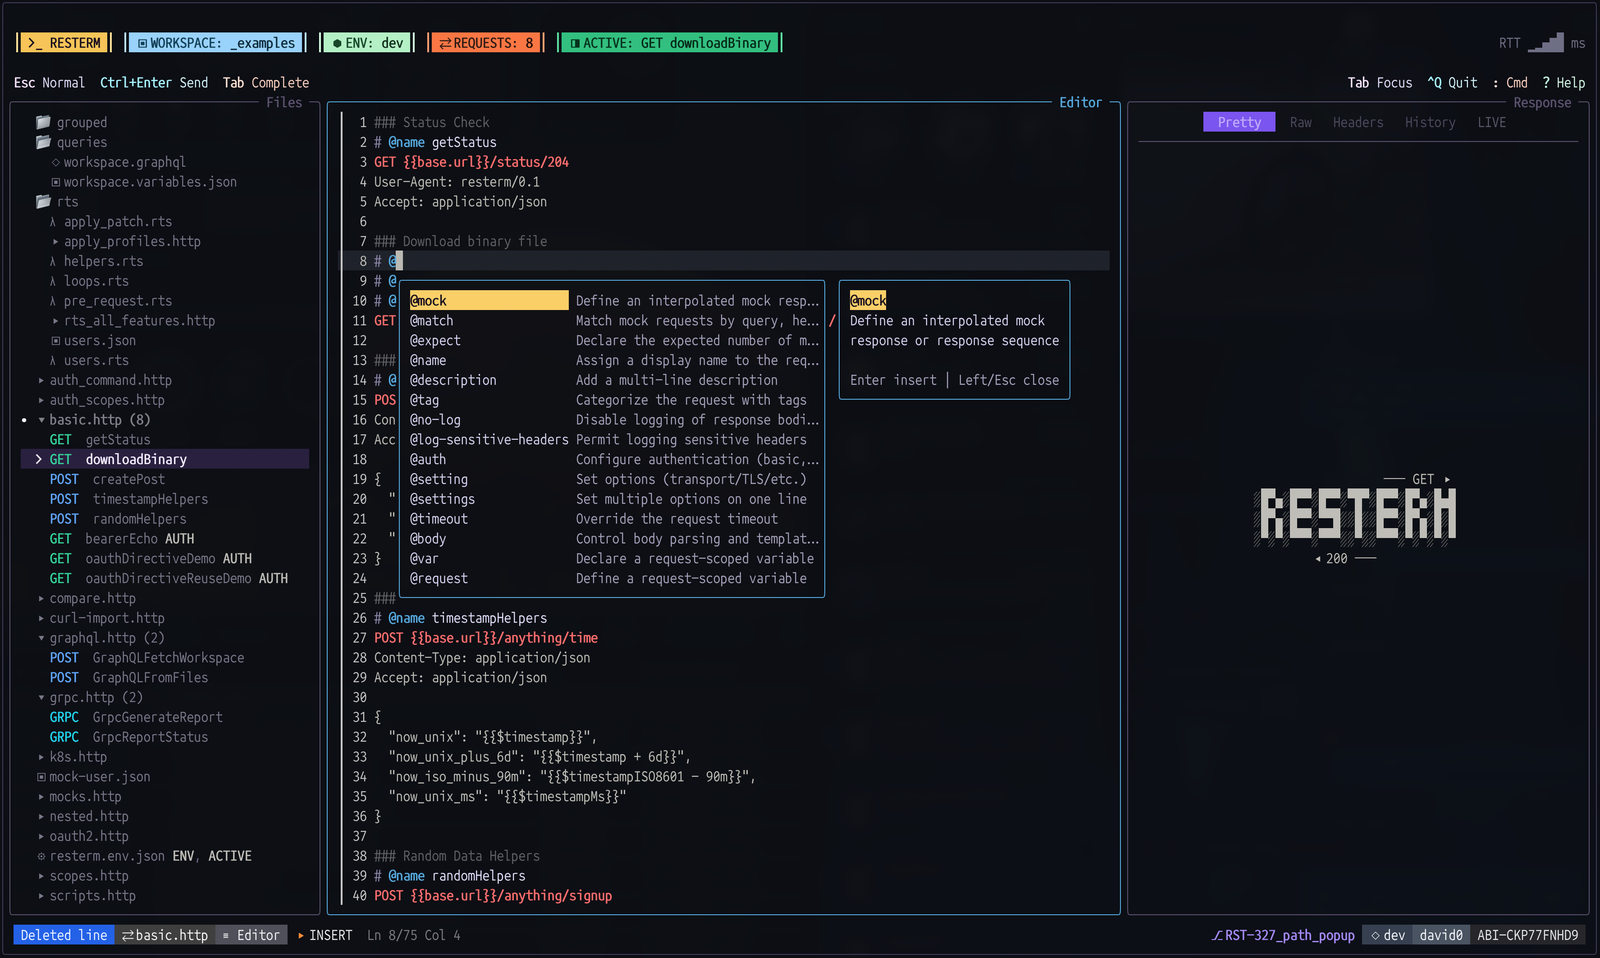
A terminal API client for REST, GraphQL, gRPC, WebSocket and SSE.
Resterm stores API requests in plain .http and .rest files that you can diff, review and track in version control. Edit and send requests in the terminal, or run them from scripts and CI. Request files support workflows, assertions, mock servers, tracing and profiling. No accounts, cloud sync or telemetry.
Quick links: Screenshots, Quick Start, Request files, Installation, Documentation.
Screenshot tour
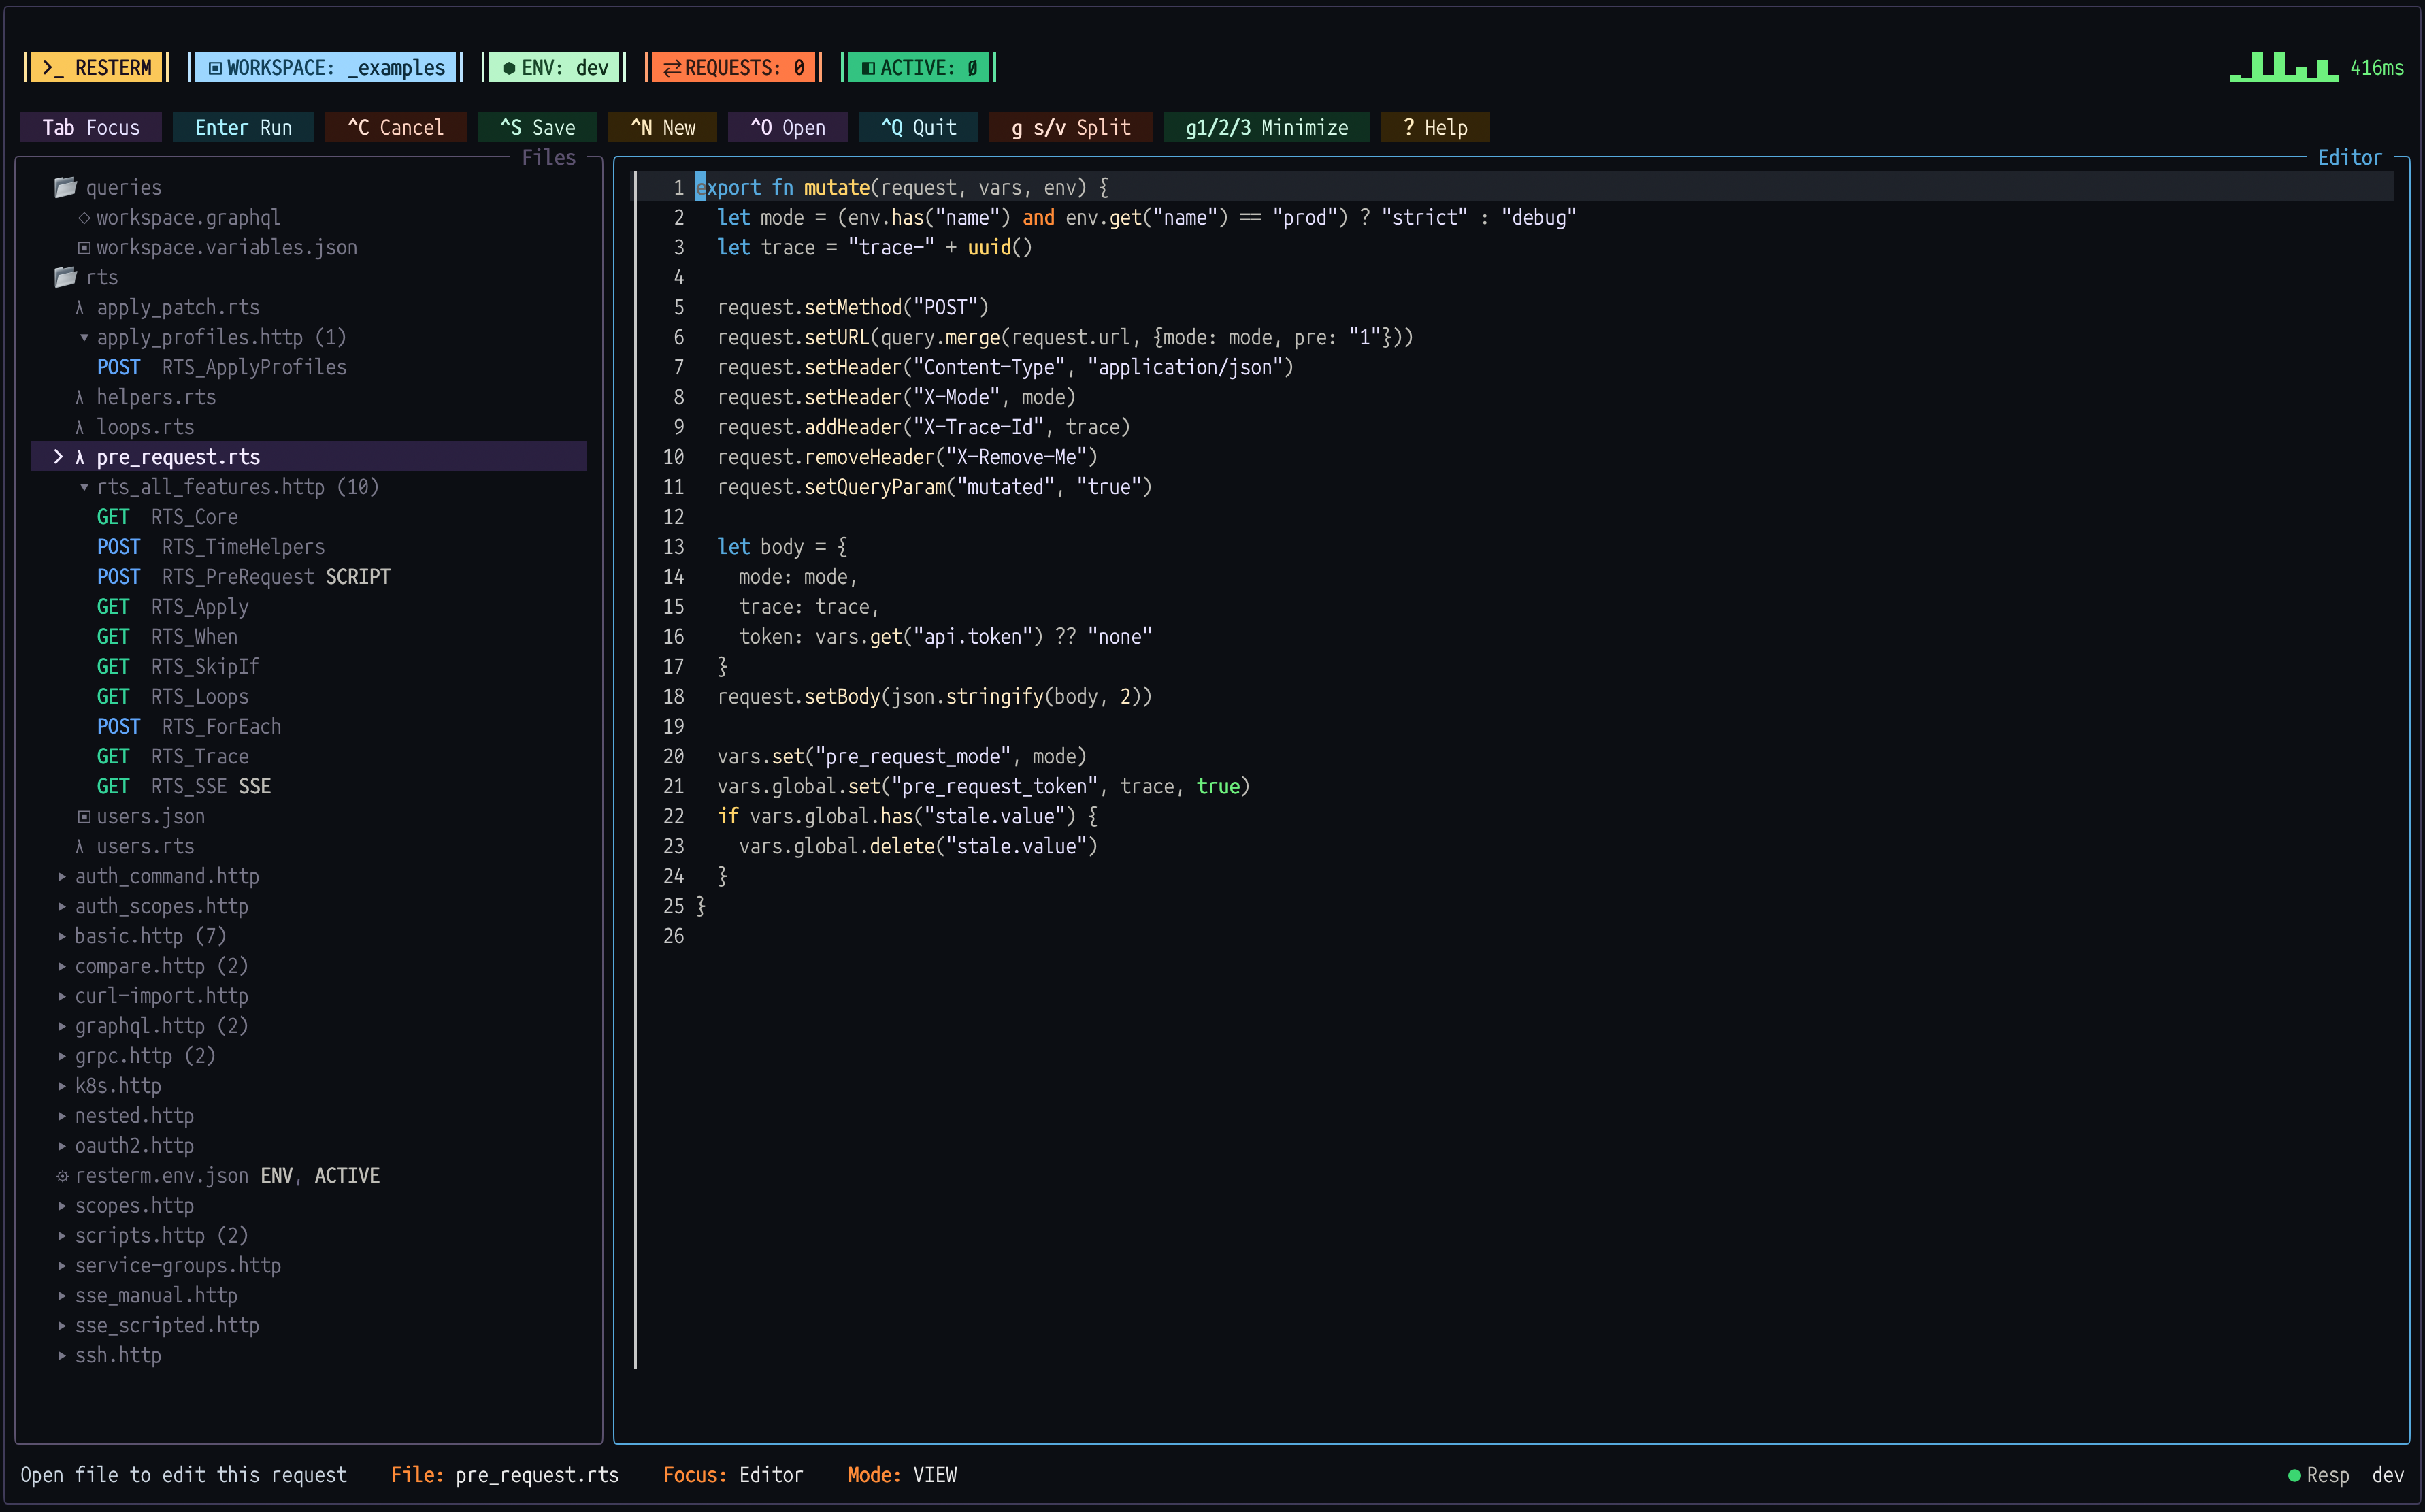
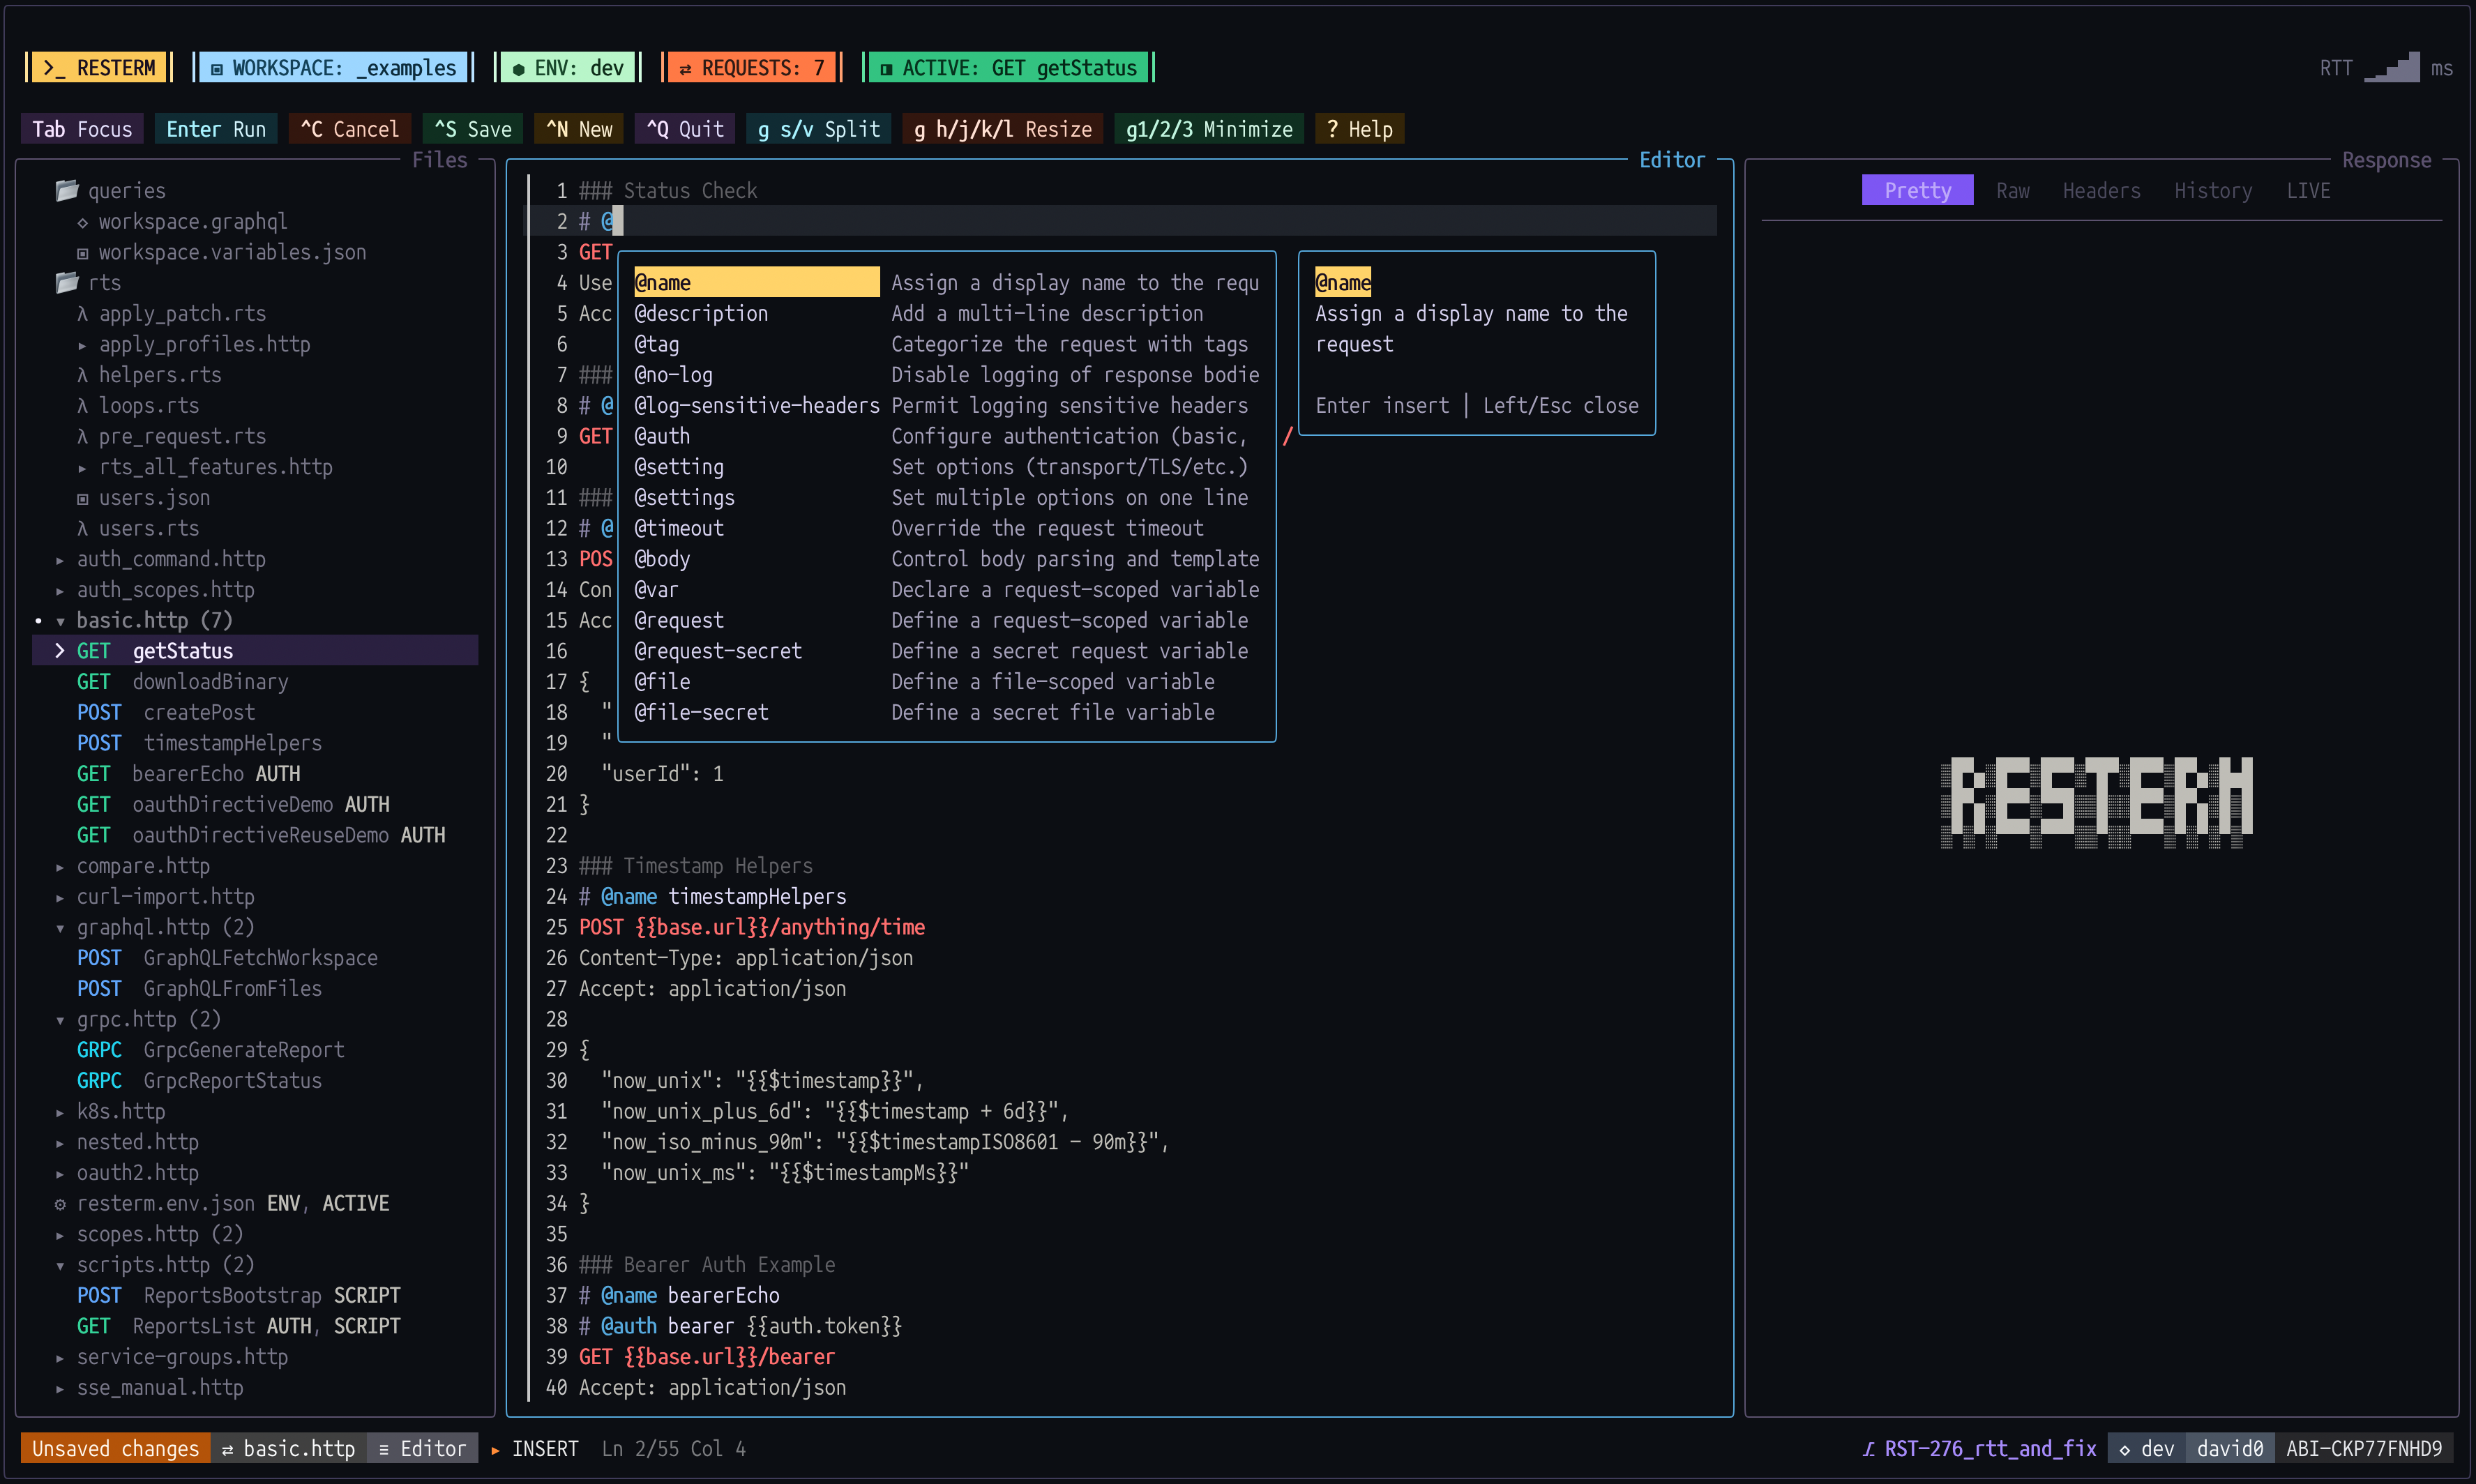
See the UI in action (click to expand)
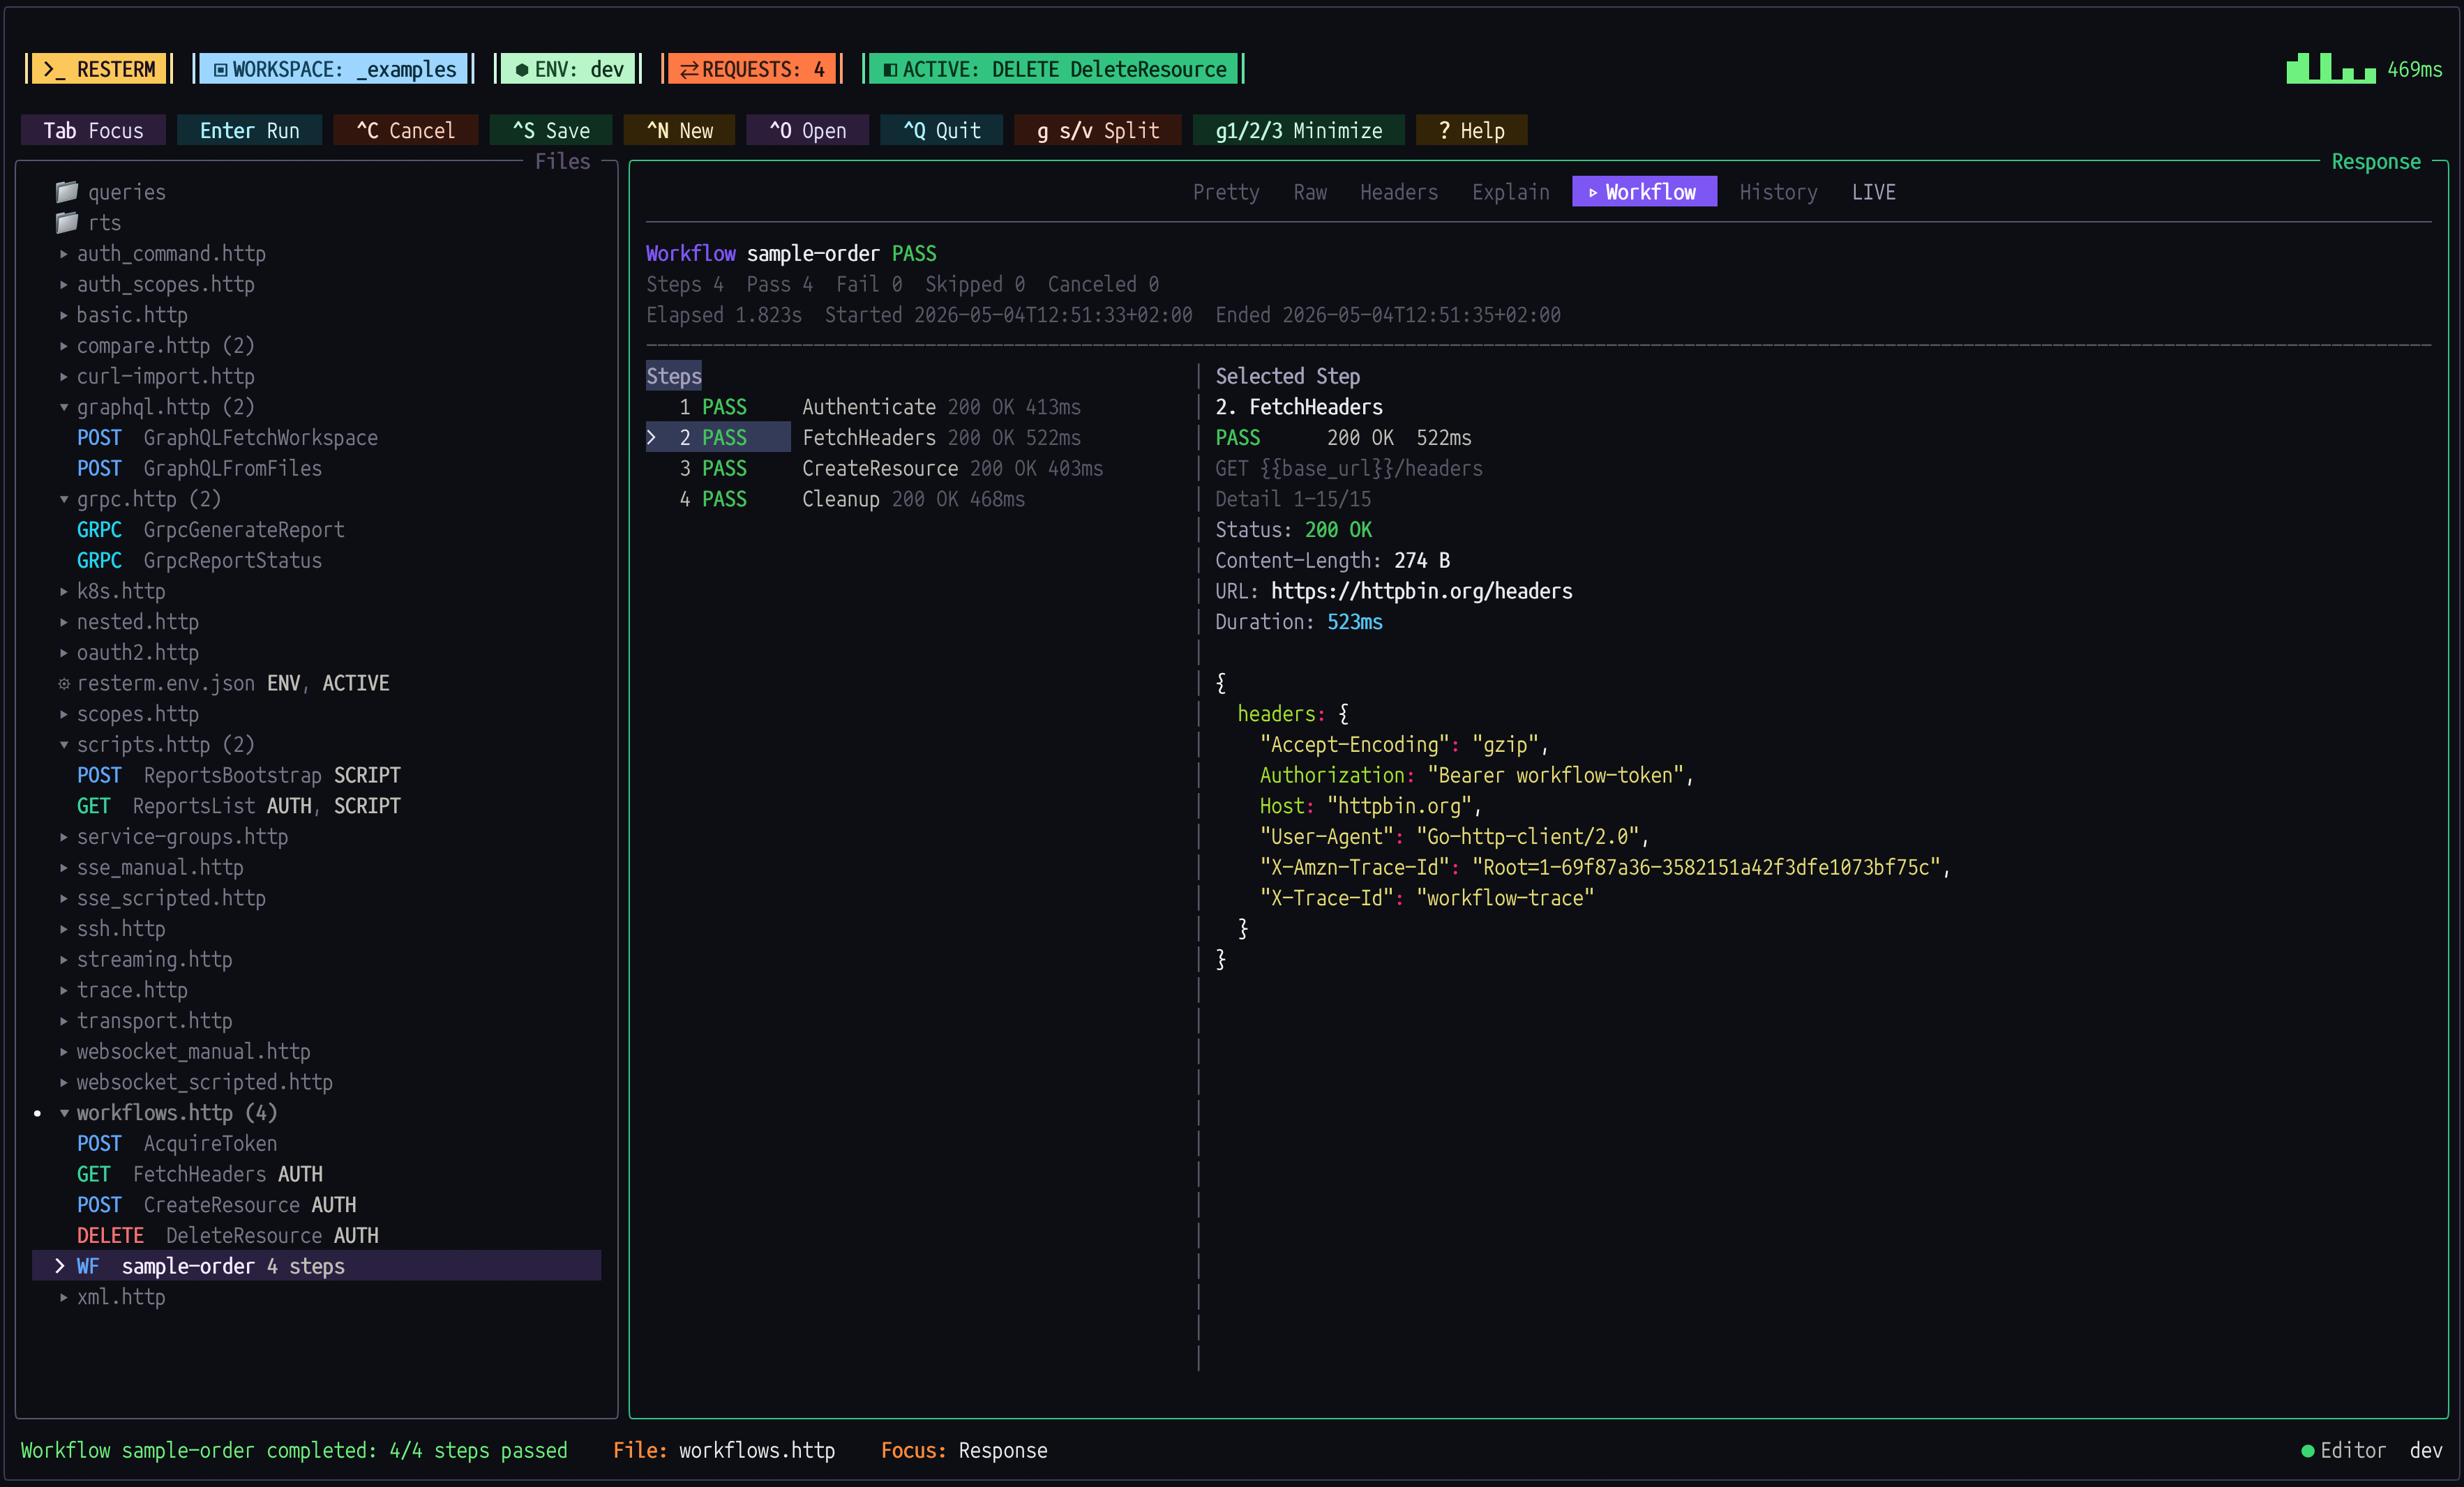
Workflows
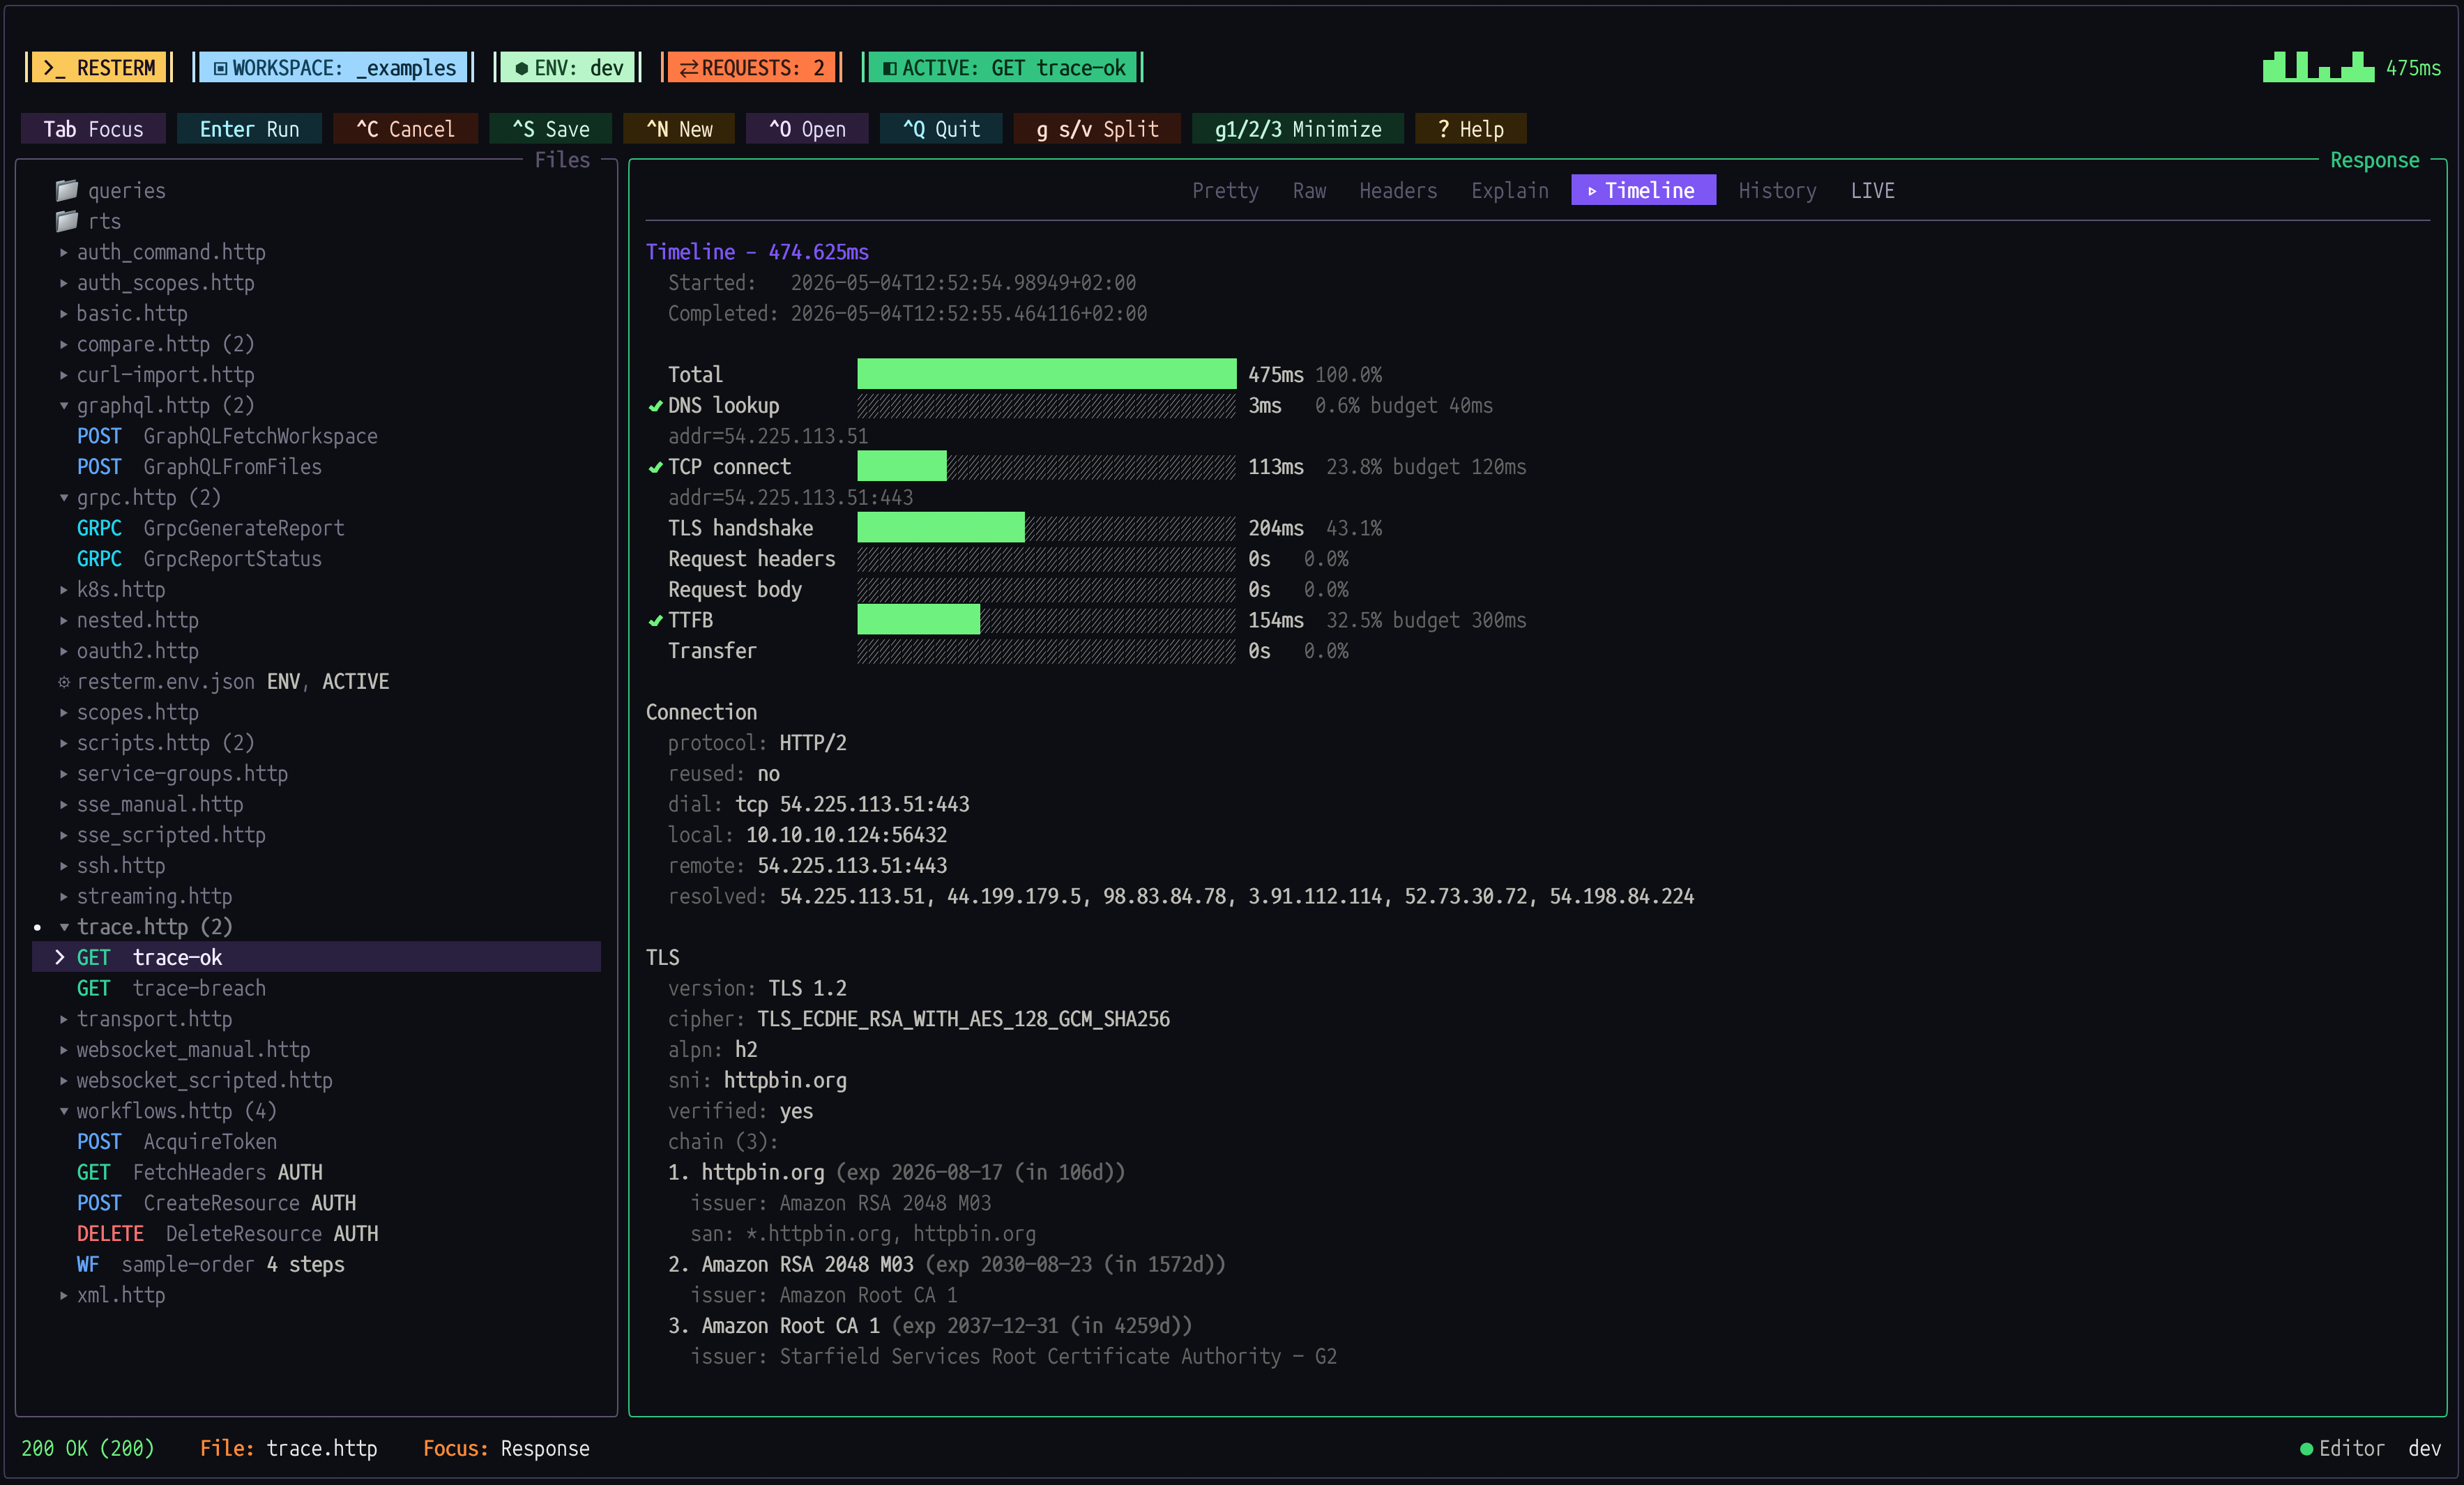
Trace and Timeline
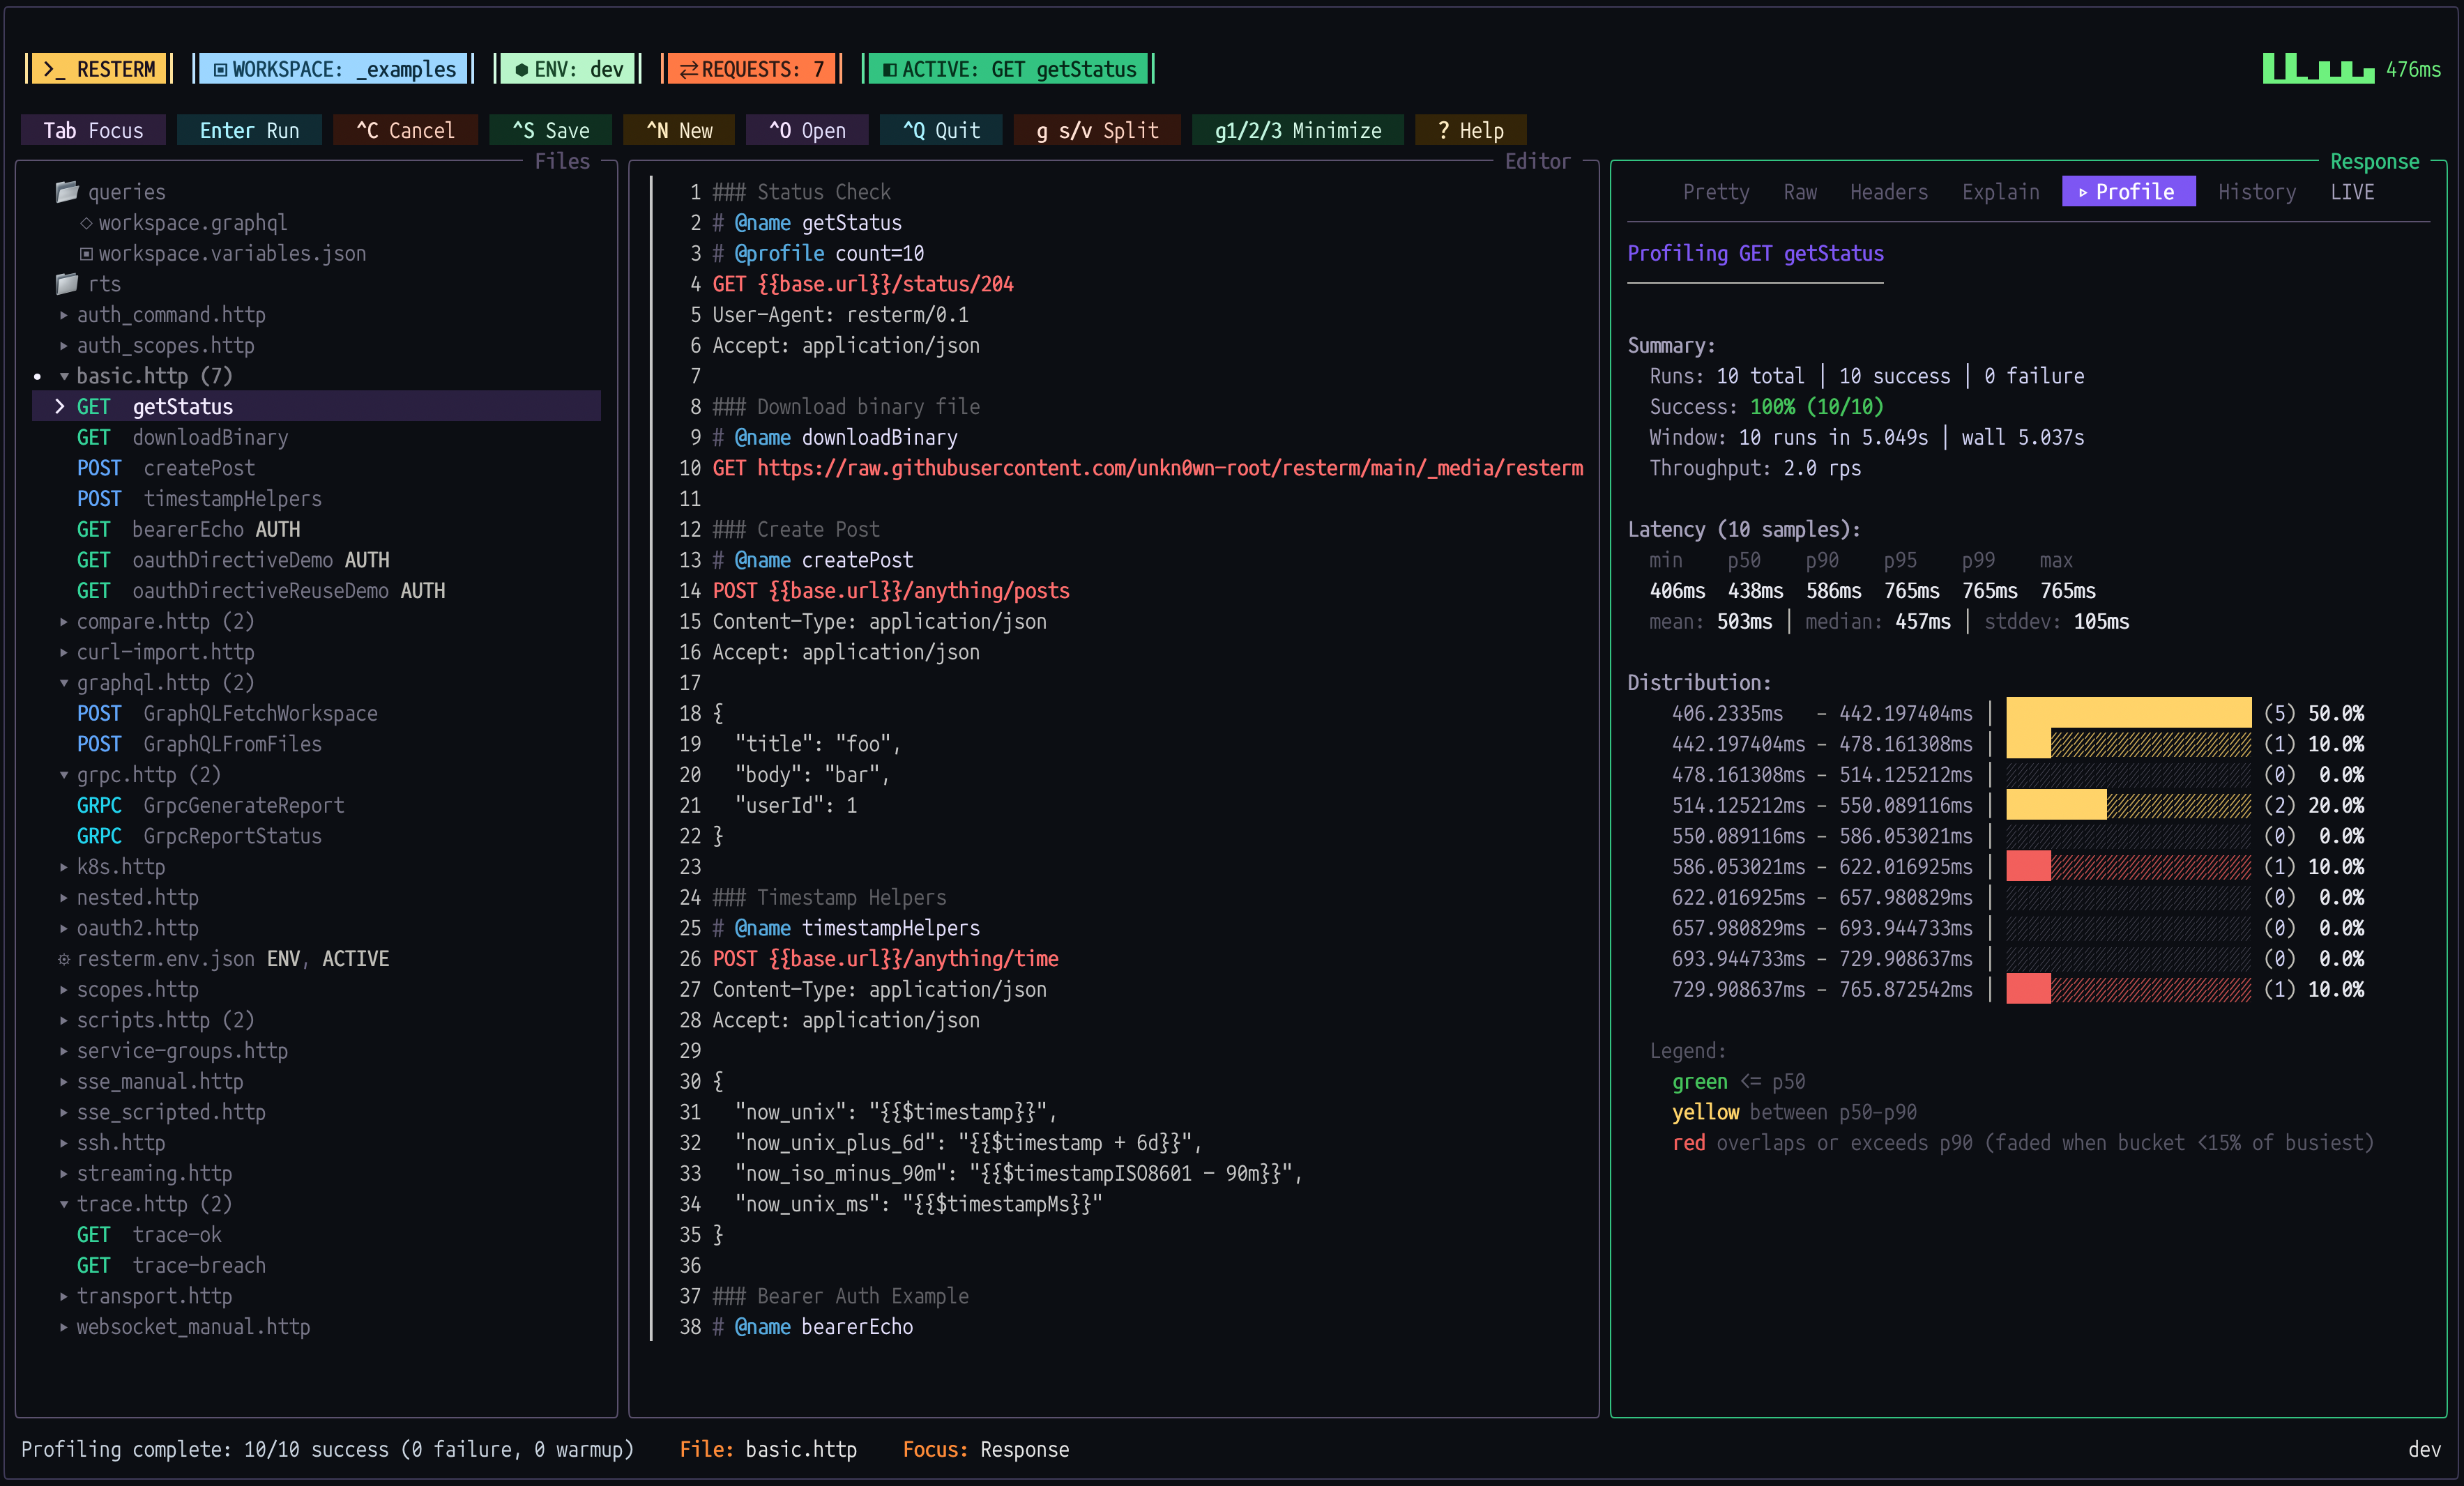
Profiler
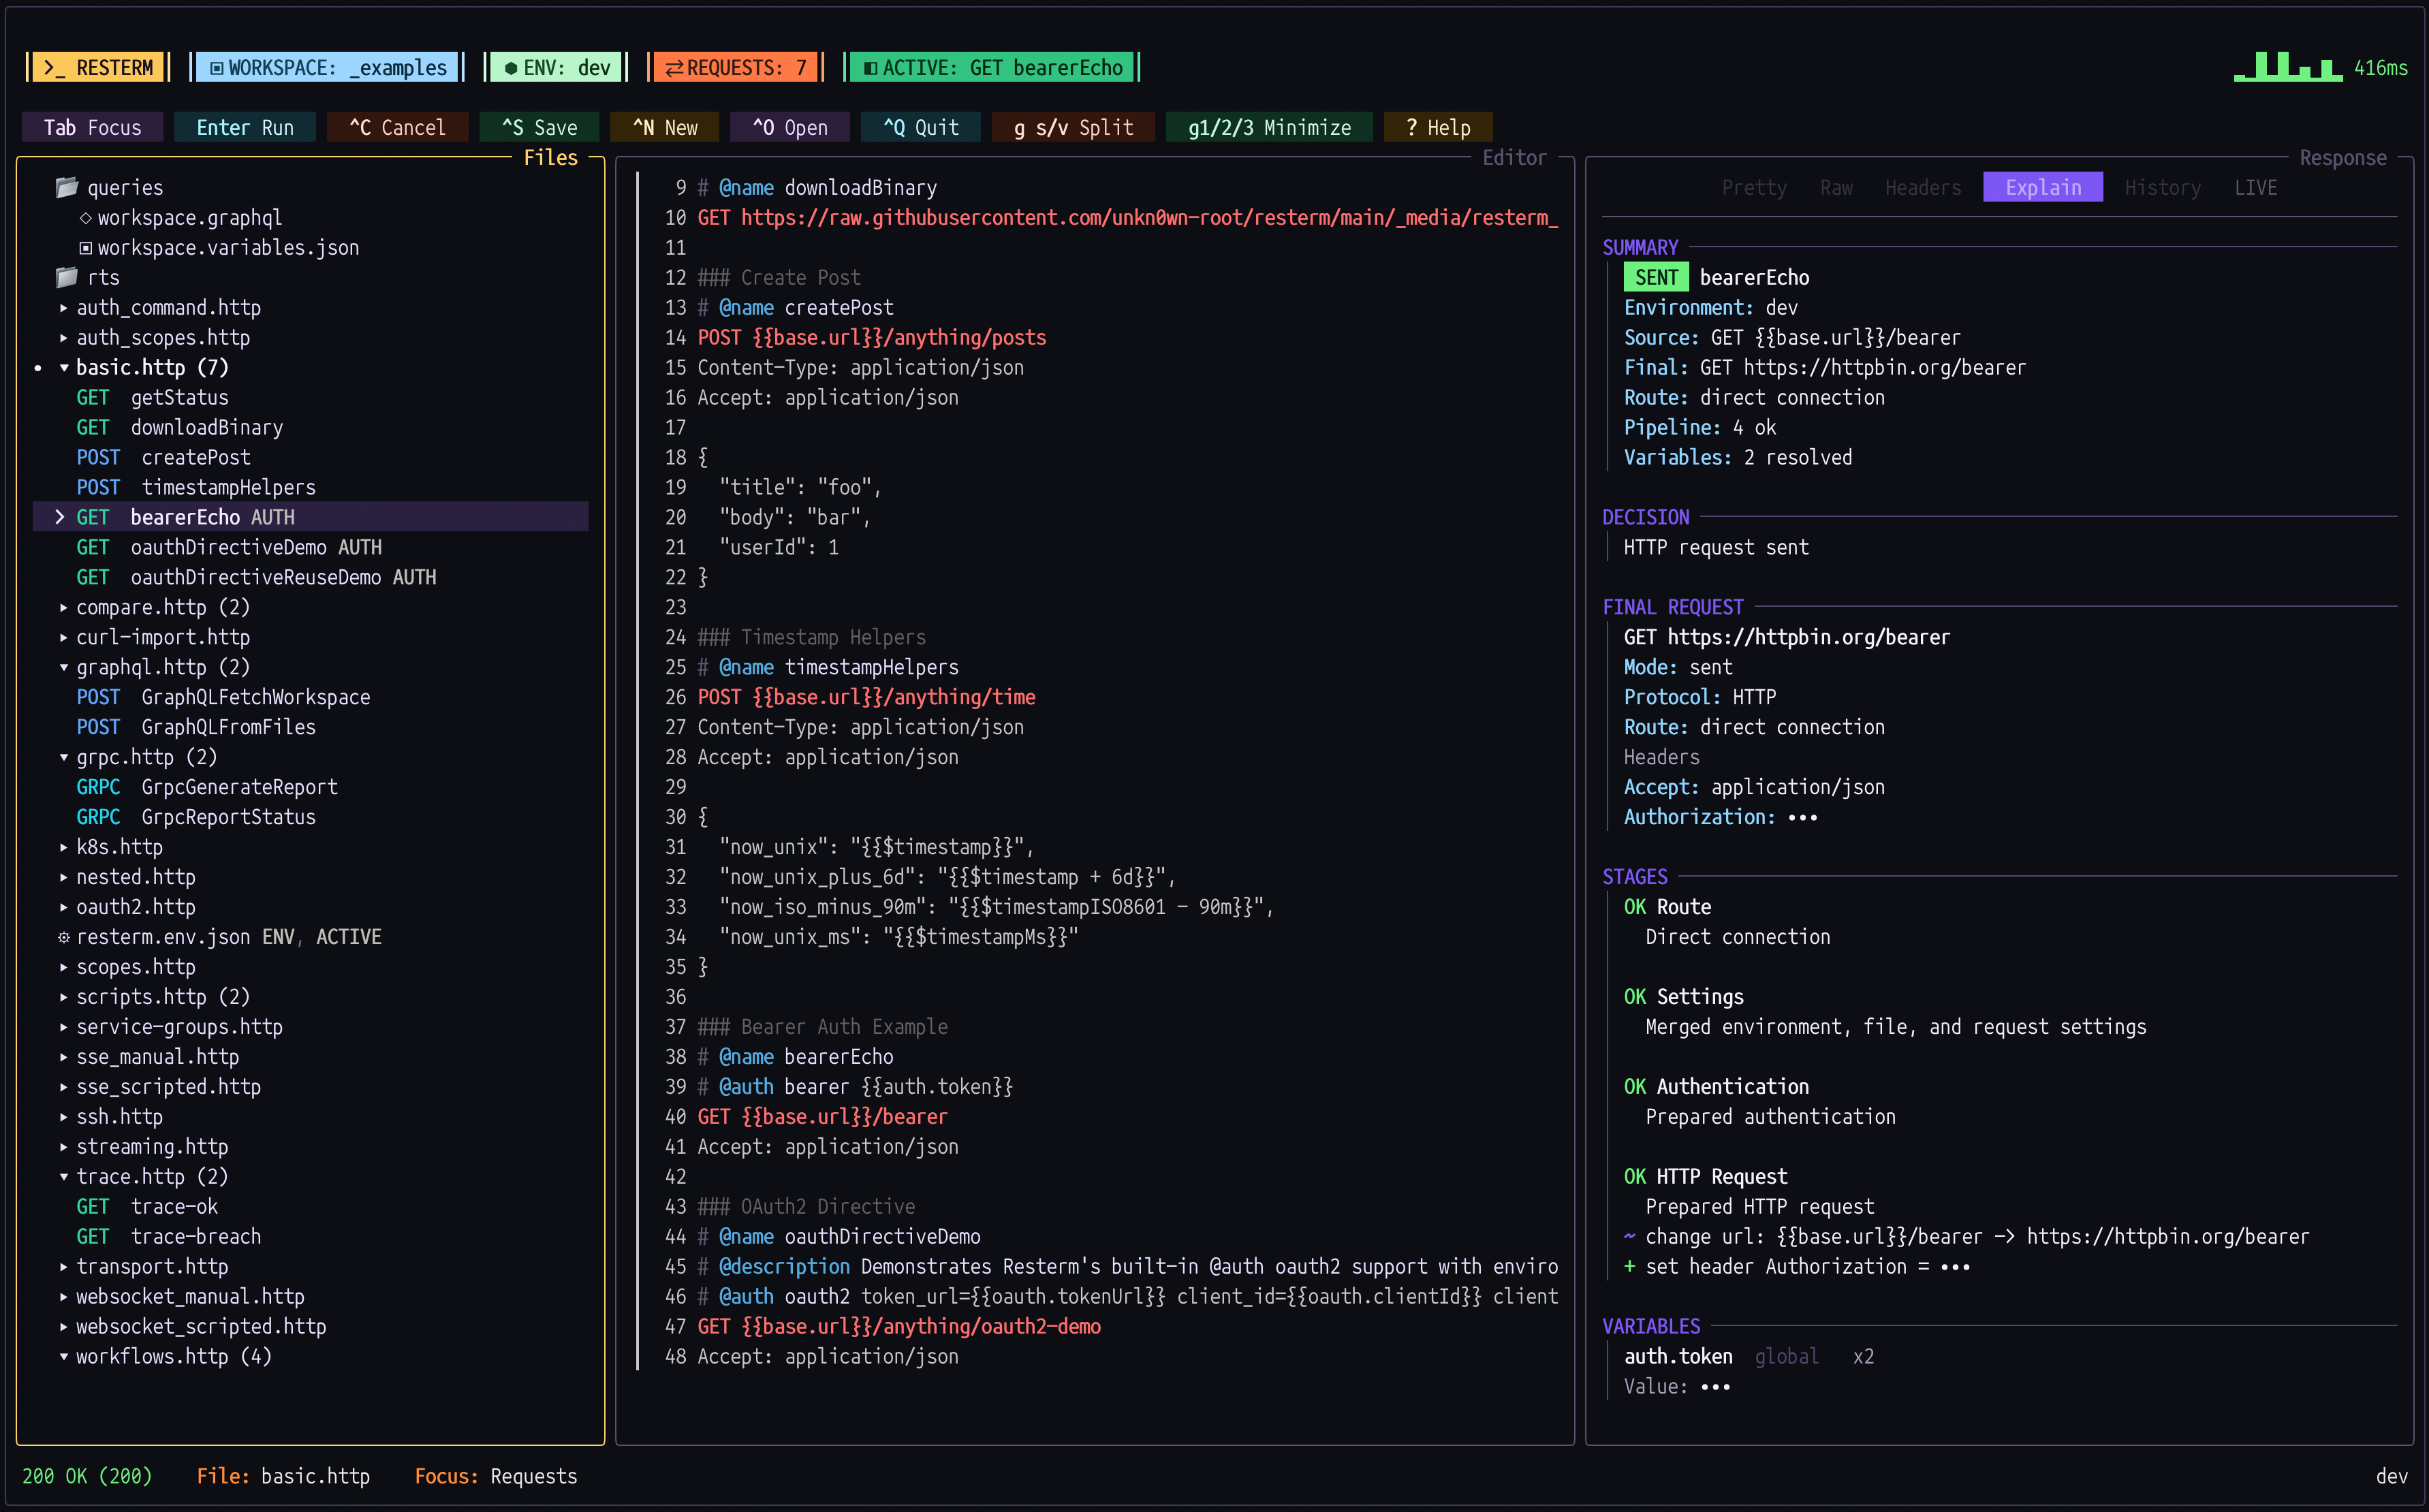
Explain
RestermScript
Light Theme
OAuth browser demo (old UI design)
Why Resterm
- HTTP, GraphQL, gRPC, WebSocket and SSE support.
- Automation in request files: conditions (
@when,@if/@elif/@else,@for-each), multi-step workflows (@workflow/@step), captures, variables and assertions (@capture,@var,@assert). - RestermScript, a small expression language built for Resterm, with JavaScript hooks when you want them.
- Vim-style controls with shortcut hints, searchable offline help,
Shift+khelp under the cursor,/search and commands like:w,:q,:helpand:docs. - Auth and tunneling: OAuth 2.0 (client credentials, password, authorization code with PKCE), auth through existing CLIs, SSH tunnels and Kubernetes port-forwards.
- CLI runner:
resterm runfor scripted runs and CI, with JSON and JUnit output. - Mock servers declared next to the requests they mimic, with matching rules, sequences, call verification and hot reload.
- Timeline tracing, profiling and compare runs across environments.
- Streaming transcripts and an interactive console for WebSocket and SSE.
- No AI integration, ever.
Quick Start
-
Install Resterm (see Installation for scripts, Windows and manual installs).
brew install resterm -
Create a workspace.
mkdir my-api && cd my-api resterm initresterm initgives you a small project that works without an internet connection. The generatedrequests.httpincludes local mock scenarios and a few requests that build on each other. They cover assertions, bearer auth, JSON matching,json-rules, and@for-each. -
Open Resterm and send your first request.
restermPress
Ctrl+Enterin the editor to send the highlighted request.
No files yet? Just run resterm, type a URL and press Ctrl+Enter. A pasted curl command works too.
Request files
Resterm request files use standard HTTP syntax plus # @ directives for configuration and automation:
# @setting base-url https://api.example.com/v1/
### Create users
// Send this request once for each name in the list.
# @for-each ["david", "tom"] as name
# @when env.mode == "development"
# @assert response.statusCode == 201
POST users
Content-Type: application/json
{"name":"{{= name }}"}
Settings before the first request apply to the whole file. ### separates requests, and directives can repeat, limit or validate a request. More examples: _examples/.
CLI
Use resterm run to execute .http / .rest files from scripts or CI without opening the TUI.
resterm run --request CreateUser requests.http
The generated project talks to a local mock server. Start it in another terminal first:
resterm mock requests.http
In the TUI, press g Shift+m in normal mode to start the workspace mock server. Repeat to stop it.
The CLI documentation covers selectors, output formats and more examples.
Keyboard cheat sheet
These are the default bindings. + means hold keys together (Alt+v). A space means press them in sequence (g v: press g, release it, then press v). Letters are lowercase, and Shift is written explicitly when required (g Shift+z). Symbols such as ? and : mean type that character using your keyboard layout.
In the editor, i enters insert mode and Esc returns to normal mode. If completion is open, the first Esc dismisses it. Use normal mode for g sequences, Alt+v / Alt+h, ?, Shift+k, : and pane switching. Insert mode preserves character input, including text produced with Alt, and uses Tab for completion or indentation. Ctrl+Enter still sends requests in insert mode.
- Pane focus and layout
Tab/Shift+Tab: move between sidebar, editor and response.g r,g i,g p: jump to requests, editor normal mode or response.g h/g l: shrink or grow the sidebar when it is focused. Otherwise, move the editor/response divider left or right in the side-by-side layout.g j/g k: move the editor/response divider down or up when stacked, or collapse and expand branches when the navigator is focused.g v/g s: place the response beside or below the editor.g 1,g 2,g 3: minimize or restore sidebar, editor or response.g z: toggle zoom for the focused editor or response pane.g Shift+z: clear zoom.
- Environments and globals
Ctrl+e: switch environments.Ctrl+g: inspect captured globals.
- Help and commands
?: open the searchable offline help index.Shift+k(editor normal mode): open help for the directive, template or keyword under the cursor.:help <topic>/:man <topic>: open an embedded topic;:docs <topic>opens the version-matched full manual.Ctrl+o: open the file/workspace popup. Type to filter, scroll withUp/Down, and useTabto descend into directories.:: open the command line. UseUp/Downto select suggestions,Tabto complete one, orEnterto accept and run a selection. Path arguments such as:mock start --sourceand:editbrowse the filesystem in the same popup.g e: open the current file, or the file selected in the navigator, in your external editor.
- Requests and responses
Ctrl+Enter: send the active request, including from editor insert mode.Alt+v/Alt+h: split responses side by side or stack them for comparison. Repeat the same shortcut to close the split.Ctrl+Shift+corg y(response focused): copy the whole Pretty, Raw or Headers tab.g x: show the Explain preview for the active request without sending it.
[!TIP] If you only remember three shortcuts:
Ctrl+Entersends the requestTab/Shift+Tabswitches panesg pjumps to the response
Installation
Linux / macOS (Homebrew)
brew install resterm
[!NOTE] Homebrew installs should be updated with Homebrew (
brew upgrade resterm). The built-inresterm --updatecommand is for binaries installed from GitHub releases or install scripts.
Linux / macOS (Shell script)
[!IMPORTANT] Pre-built Linux binaries depend on glibc 2.32 or newer. On an older distro, build from source with a newer glibc toolchain or upgrade glibc before using the release archives.
curl -fsSL https://raw.githubusercontent.com/unkn0wn-root/resterm/main/install.sh | bash
or with wget:
wget -qO- https://raw.githubusercontent.com/unkn0wn-root/resterm/main/install.sh | bash
Windows (PowerShell)
iwr -useb https://raw.githubusercontent.com/unkn0wn-root/resterm/main/install.ps1 | iex
The scripts detect your architecture, download the latest release and install the binary.
Manual installation
[!NOTE] The manual install helper uses
curlandjq. Installjqwith your package manager (brew install jq,sudo apt install jq, etc.).
Linux / macOS
# Find the latest release tag
LATEST_TAG=$(curl -fsSL https://api.github.com/repos/unkn0wn-root/resterm/releases/latest | jq -r .tag_name)
# Download the matching binary (Darwin/Linux + amd64/arm64)
curl -fL -o resterm "https://github.com/unkn0wn-root/resterm/releases/download/${LATEST_TAG}/resterm_$(uname -s)_$(uname -m)"
# Install on PATH
chmod +x resterm
sudo install -m 0755 resterm /usr/local/bin/resterm
Windows (PowerShell)
$latest = Invoke-RestMethod https://api.github.com/repos/unkn0wn-root/resterm/releases/latest
$asset = $latest.assets | Where-Object { $_.name -like 'resterm_Windows_*' } | Select-Object -First 1
Invoke-WebRequest -Uri $asset.browser_download_url -OutFile resterm.exe
# Optionally move to a directory on PATH:
Move-Item resterm.exe "$env:USERPROFILE\bin\resterm.exe"
From source
go install github.com/unkn0wn-root/resterm/cmd/resterm@latest
Update
resterm --check-update
resterm --update
The first command reports whether a newer release is available. The second downloads, verifies and installs it in place. On Windows the old binary stays next to the new one as resterm.exe.old and is cleaned up on the next update.
Configuration
- Resterm looks for environment files (
resterm.env.json) in the request directory, workspace root or current working directory. A file can define named environments or groups, such as api, app and credentials, that combine into one environment. Use--env-fileto load dotenv files (.env,.env.*) for the current workspace. See grouped environments and the example in_examples/grouped/. - Configuration is stored in the directory below. Set
RESTERM_CONFIG_DIRto use another location:- macOS:
~/Library/Application Support/resterm - Windows:
%APPDATA%\resterm - Linux/Unix:
~/.config/resterm
- macOS:
Mock Servers
You can define mock responses in the same .http files as your requests.
- Match incoming requests by query, headers or JSON body, then pick a named or default response.
- Return a sequence of responses for polling and retry tests. Use a path, query, header, or cookie value to track each sequence separately.
- Delay responses by a fixed amount, or give every request a different delay with
random,normal, orjitter. - Build responses from path, query, header and body values, with generators for dynamic data.
- Verify call counts with
@expector inspect received traffic from RestermScript. - Reload source files and fixtures when they change. TLS is optional.
Two scenarios on one route:
### Payment accepted
# @mock method=POST path=/payments name=accepted default=true latency=150ms
HTTP/1.1 202 Accepted
Content-Type: application/json
{"id":"pay_123","status":"pending"}
### Payment declined
# @mock method=POST path=/payments name=declined
# @match query={"mode":"decline"} headers={"X-Tenant":"demo"} json={"amount":0}
HTTP/1.1 422 Unprocessable Entity
Content-Type: application/json
{"error":"amount must be positive"}
Serve one file or a whole directory:
resterm mock ./requests.http
resterm mock --recursive --addr 127.0.0.1:9090 ./requests
More in the Mock Servers reference, the resterm mock CLI guide and the working example.
Headless
The headless package is the public Go API for the engine used by the TUI and CLI. Use it to run requests, workflows, assertions, compare runs and profiles from your own Go code or CI.
If you would rather not build a runner yourself, there is resterm-runner.
Collections
Export a workspace as a bundle you can track in Git and import into another workspace. Each bundle includes a manifest.json with checksums that are verified during import. Environment values are replaced with REPLACE_ME placeholders.
resterm collection export --workspace ./my-api --out ./shared/my-api-bundle
resterm collection import --in ./shared/my-api-bundle --workspace ./my-local-api
Add --dry-run to preview an import and --force to overwrite existing files. Docs: collection sharing.
Curl import
Paste a curl command into the editor and press Ctrl+Enter to convert it to a request. Resterm supports common flags, combines repeated data arguments and preserves multipart uploads. Shell prefixes like sudo or $ are ignored. The CLI supports the same conversion with --from-curl.
This:
curl -X POST https://api.example.com/login \
-H "Content-Type: application/json" \
--user demo:secret \
-d '{"user":"demo"}'
becomes this:
### POST https://api.example.com/login
# @auth basic demo secret
POST https://api.example.com/login
Content-Type: application/json
{"user":"demo"}
Docs: inline requests and import examples.
RestermScript
RestermScript (RTS) is an expression language for requests, workflows and directives. JavaScript hooks are also available.
Quick example (RTS module + request):
// rts/helpers.rts
module helpers
export fn authHeader(token) {
return token ? "Bearer " + token : ""
}
# @use ./rts/helpers.rts
# @when env.has("feature")
# @assert response.statusCode == 200
GET https://api.example.com/users/{{= vars.get("user") }}
Authorization: {{= helpers.authHeader(vars.get("auth.token")) }}
Full reference: docs/restermscript.md.
Deep dive
OAuth 2.0
Use @auth oauth2 to fetch tokens and add them to requests. Tokens are cached per environment and refreshed when possible. The client credentials grant is the default. The password grant and authorization code with PKCE are also supported:
### Service status
# @auth oauth2 token_url={{oauth.tokenUrl}} client_id={{oauth.clientId}} client_secret={{oauth.clientSecret}} cache_key=my-api
GET {{base.url}}/anything/projects
Example: _examples/oauth2.http. See the OAuth 2.0 documentation.
Workflows and scripting
Workflows chain named requests and can choose the next step from a response:
### Sign in
# @workflow sign-in
# @step Login using=Login
// GetProfile and RefreshToken are request names.
// The first true condition runs the named request.
# @if last.statusCode == 200 run=GetProfile
# @elif last.statusCode == 401 run=RefreshToken
# @else fail="unexpected login response"
They can also pass data between steps and run RestermScript or JavaScript hooks. Example: _examples/workflows.http. See the workflow documentation.
Polling and retries
Use @poll to repeat a request until a response condition becomes true. Add @retry to retry network failures, timeouts or selected responses with exponential backoff:
### Wait for job
# @retry count=4
# @retry-when response.statusCode in [429, 502, 503]
# @retry-backoff exponential(100ms, 2s) jitter=20%
# @poll every=500ms timeout=30s until=response.json().status == "completed"
GET {{base.url}}/jobs/{{job.id}}
Each polling cycle receives its own retry budget. Example: _examples/polling-retries.http. See the polling and retries documentation.
Compare runs
@compare runs one request against at least two environments and uses one result as the baseline:
### Compare health
# @compare dev stage prod base=prod
GET {{services.api.base}}/status
Press g c in normal mode to run it in the TUI, or supply --compare on the command line. Example: _examples/compare.http. See the compare documentation.
Tracing and timeline
@trace records HTTP phases and can flag requests that exceed latency budgets:
### Trace API
# @trace dns<=50ms connect<=120ms total<=400ms tolerance=25ms
GET https://api.example.com/health
Results appear in the Timeline tab and can be exported to OpenTelemetry. Example: _examples/trace.http. See the tracing documentation.
Streaming (WebSocket and SSE)
@sse records server events, while @websocket and @ws script WebSocket frames. Both produce transcripts in the Stream tab:
### Events
# @sse duration=30s idle=10s max-events=5
GET https://api.example.com/events
### Chat
# @websocket idle=3s
# @ws send Hello
# @ws close 1000 done
GET wss://api.example.com/chat
Example: _examples/streaming.http. See the streaming documentation.
gRPC
Use a GRPC request line for the server and @grpc for the fully qualified method. The body is protobuf JSON:
### Get user
# @grpc users.UserService/GetUser
# @grpc-plaintext true
GRPC {{grpc.host}}
{"tenantId":"{{tenant.id}}"}
Server reflection is enabled by default. Descriptor sets and streaming calls are also supported. Example: _examples/grpc.http. See the gRPC documentation.
OpenAPI import
Generate requests, mocks or both from a local OpenAPI document or an http(s) URL:
resterm --from-openapi _examples/openapi-spec.yml --http-out api.http --openapi-mode both
Remote fetches respect --insecure and --proxy. Example input: _examples/openapi-spec.yml. See the import documentation.
SSH tunnels
Define an SSH profile before the requests that use it, then select it with use=:
// Set key to choose a key file. Leave it out to use your SSH agent or a default key.
# @ssh file edge host=jump.example.com user=ops key=~/.ssh/id_ed25519
### Internal API
# @ssh use=edge
GET http://10.0.0.10/v1/health
Profiles can apply to a file or workspace. You can also define a tunnel directly on a request. Example: _examples/ssh.http. See the SSH documentation.
Kubernetes port-forwards
@k8s opens a port-forward to a pod, service, deployment or statefulset:
### Service health
# @k8s namespace=default service=api port=http
GET http://api.default.svc.cluster.local/health
Targets can use numeric or named ports and can be saved as reusable profiles. Example: _examples/k8s.http. See the Kubernetes documentation.
Theming and bindings
Customize colors and keybindings with themes/*.toml and bindings.toml or bindings.json in the config directory. Docs: docs/resterm.md#theming and docs/resterm.md#custom-bindings.
Documentation
docs/resterm.mdcovers request syntax, directives, scripting and transports.docs/cli.mdcoversresterm run, importers, collections and history.- Compatibility explains Resterm's compatibility guarantees for v1.
Inside the TUI, press ? or run :help. Use :docs when you want the full web manual for the installed release.