
web-check v2.2.0
🕵️♂️ All-in-one OSINT tool for analysing any website
Web-Check
Comprehensive, on-demand open source intelligence for any website
🌐 web-check.xyz

Kindly supported by:
 NinjaPear API to get a full B2B profiles from any URL |
 Hostinger Deploy Web-Check with one click on Hostinger |
 Warp Built for coding with multiple AI agents |
Contents
About
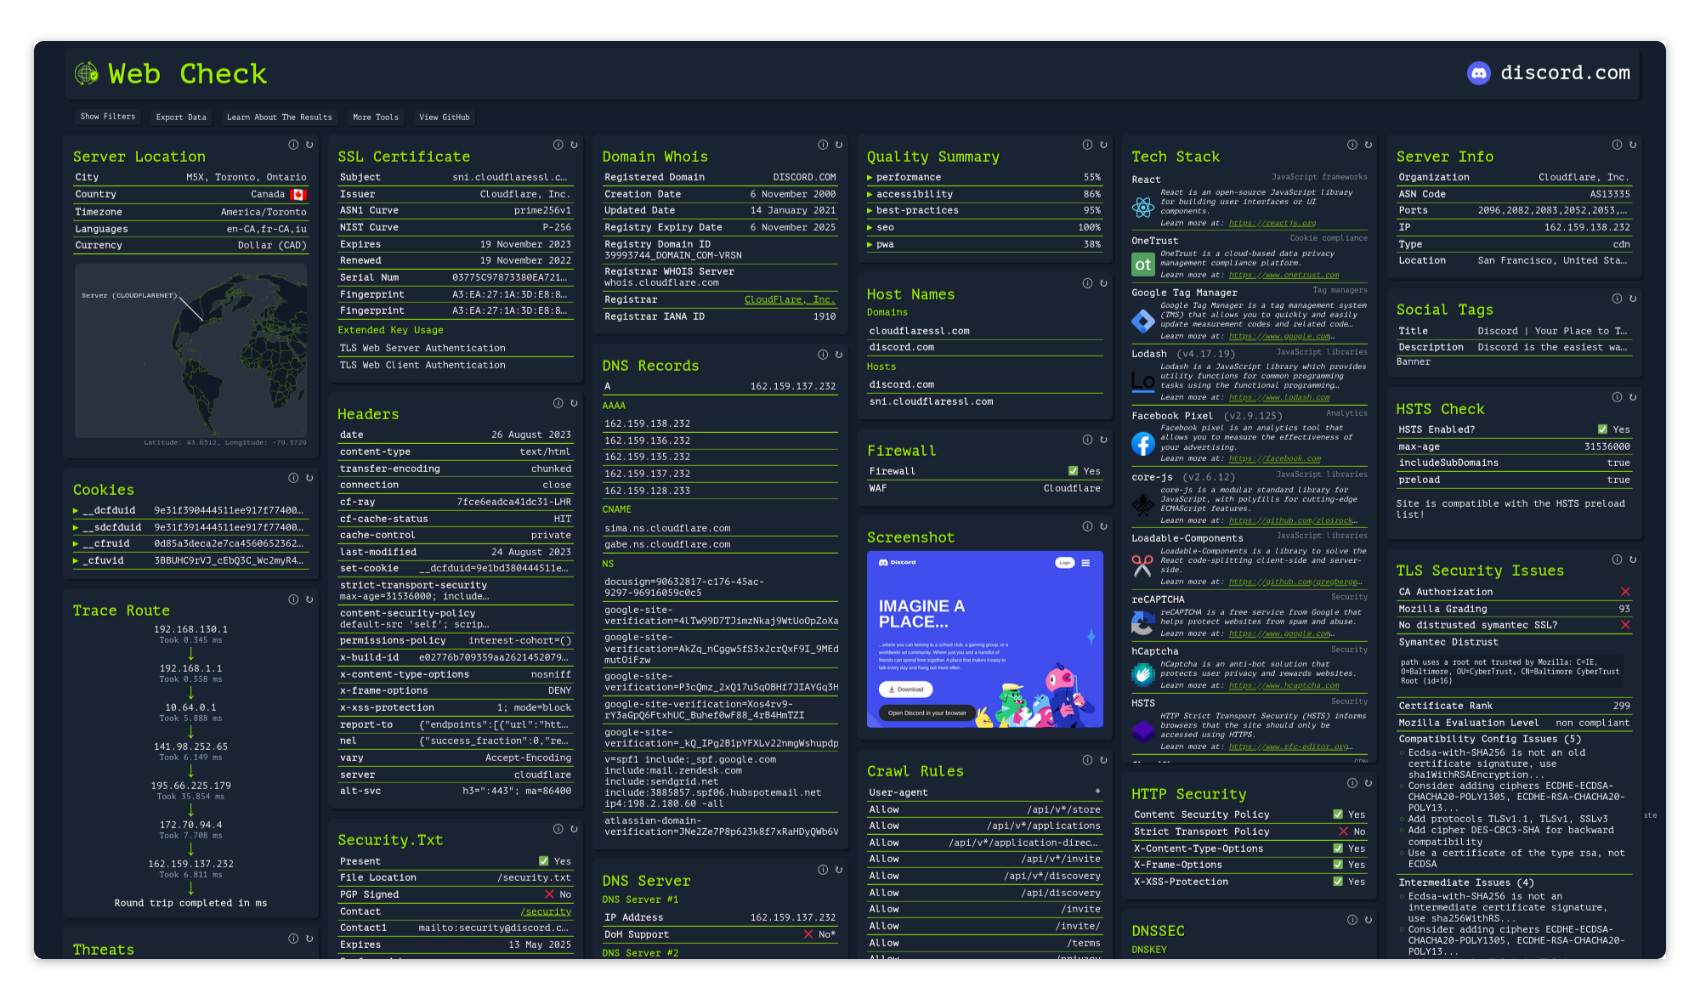
Get an insight into the inner-workings of a given website: uncover potential attack vectors, analyse server architecture, view security configurations, and learn what technologies a site is using.
The aim is to help you easily understand, optimize and secure your website.
Screenshot
Expand Screenshot


Live Demo
A hosted version can be accessed at: web-check.as93.net
Mirror
The source for this repo is mirrored to CodeBerg, available at: codeberg.org/alicia/web-check
Status
Build & Deploys:


Repo Management & Miscellaneous: 

Features
See web-check.xyz/about for the full list of checks, and what each one does
Usage
Deploying - Option #1: Netlify
Click the button below, to deploy to Netlify 👇

Deploying - Option #2: Vercel
Click the button below, to deploy to Vercel 👇

Deploying - Option #3: Hostinger
Deploy Web-Check with a single click on Hostinger – pre-configured and ready to run 👇

Deploying - Option #4: Render
Click the button below, to deploy to Render 👇

Deploying - Option #5: Docker
Run docker run -p 3000:3000 lissy93/web-check, then open localhost:3000
Docker Options
You can get the Docker image from:
- DockerHub:
lissy93/web-check - GHCR:
ghcr.io/lissy93/web-check - Or build the image yourself by cloning the repo and running
docker build -t web-check .
Deploying - Option #6: From Source
Install the prerequisites listed in the Developing section, then run:
git clone https://github.com/Lissy93/web-check.git  # Download the code from GitHub
cd web-check                                        # Navigate into the project dir
yarn install                                        # Install the NPM dependencies
yarn build                                          # Build the app for production
yarn start                                          # Start the app (API and GUI)
Configuring
By default, no configuration is needed.
But there are some optional environmental variables that you can set to give you access to some additional checks, or to increase rate-limits for some checks that use external APIs.
API Keys & Credentials: