
whosthere v0.8.3
أداة اكتشاف الشبكة المحلية (LAN) بواجهة مستخدم تفاعلية نصية (TUI) مكتوبة بلغة Go. اكتشف شبكتك المحلية واستكشفها وافهمها بطريقة بديهية. طرق طرق.. من هناك؟ 🚪
Whosthere





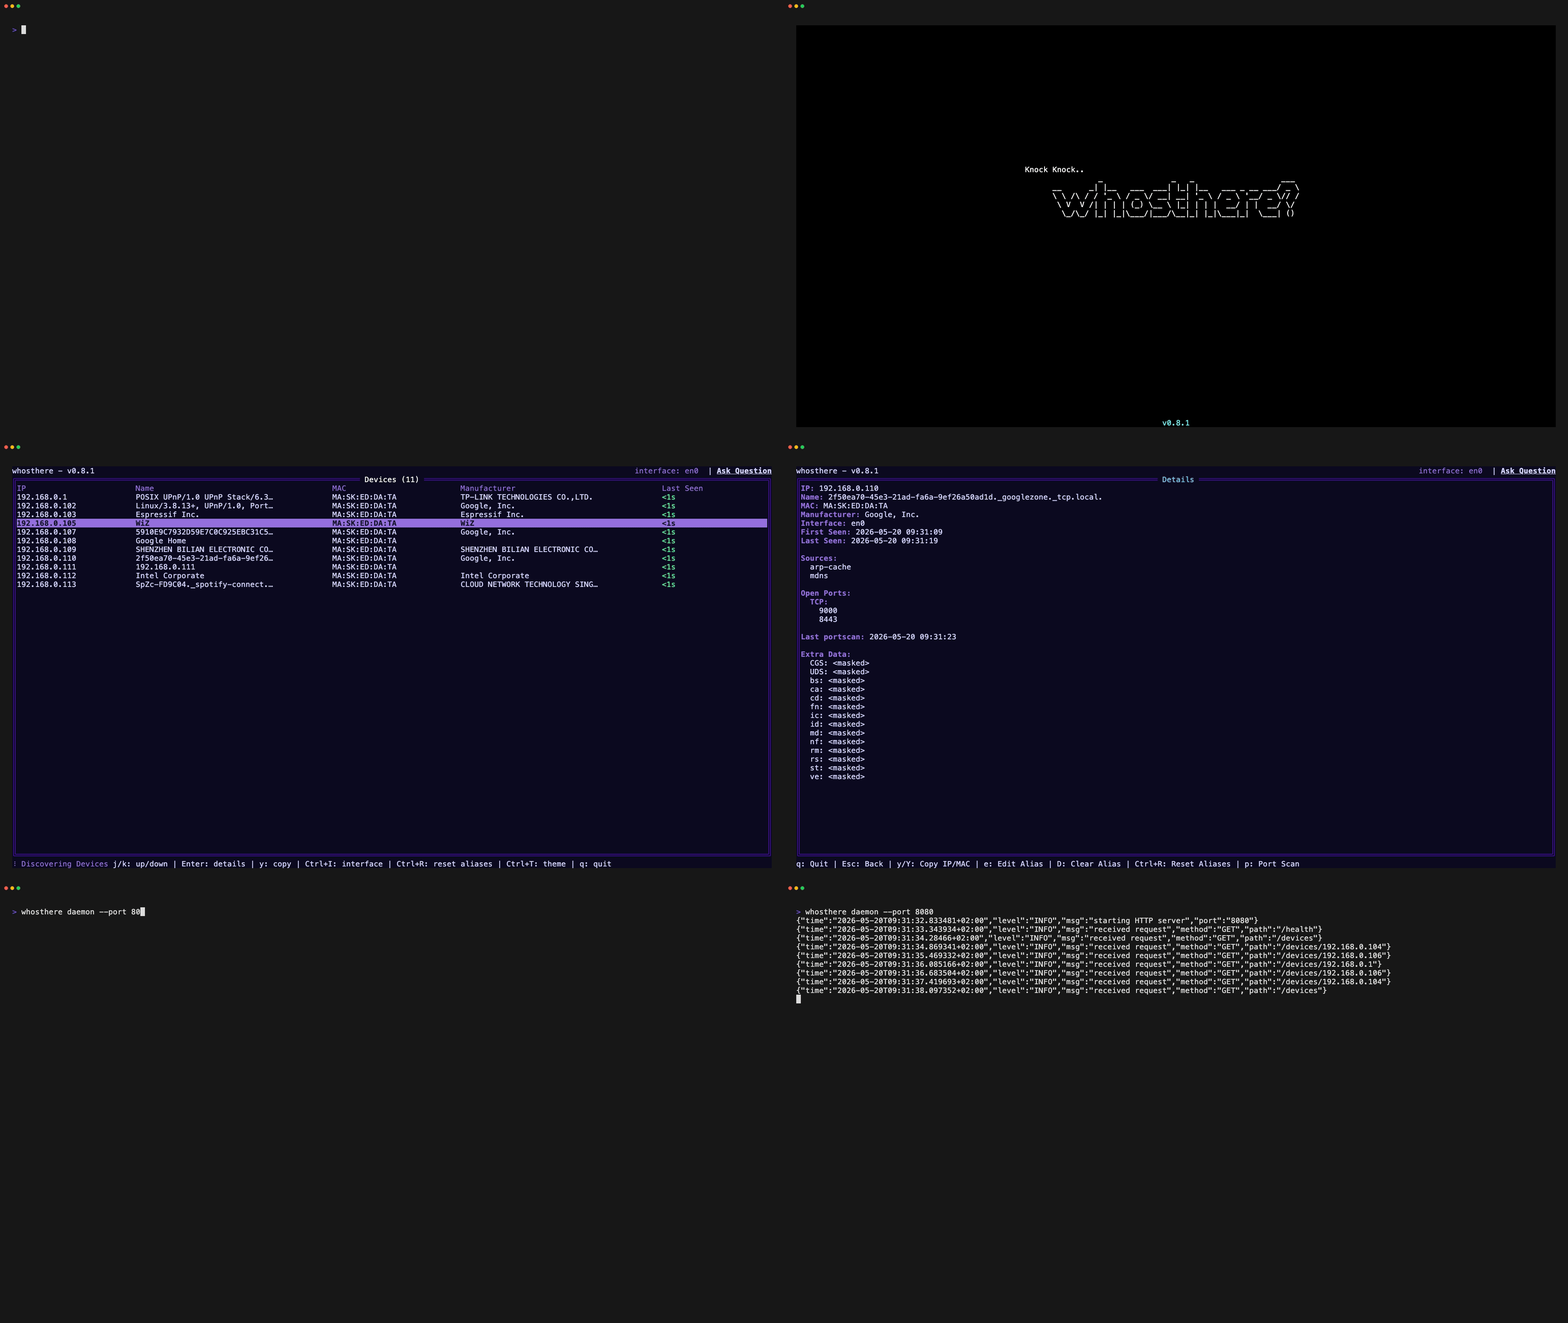
أداة اكتشاف الشبكة المحلية (LAN) مع واجهة مستخدم طرفية تفاعلية (TUI) مكتوبة بلغة Go. اكتشف شبكتك المحلية واستكشفها وافهمها بطريقة بديهية.
يقوم Whosthere بإجراء فحوصات متزامنة بدون صلاحيات مرتفعة باستخدام ماسحات mDNS و SSDP. بالإضافة إلى ذلك، يقوم بمسح الشبكة الفرعية المحلية عبر محاولة اتصالات TCP/UDP لتحفيز تحليل ARP، ثم يقرأ ذاكرة ARP المؤقتة لتحديد الأجهزة الموجودة على شبكتك المحلية. تعمل هذه التقنية على ملء ذاكرة ARP المؤقتة دون الحاجة إلى صلاحيات مرتفعة. يتم إثراء جميع الأجهزة المكتشفة بعمليات بحث OUI لعرض الشركات المصنّعة عند توفرها.
يوفر Whosthere طريقة ودية وبديهية للإجابة على السؤال الذي يطرحه كل مسؤول شبكة: "من الموجود على شبكتي؟"
الميزات
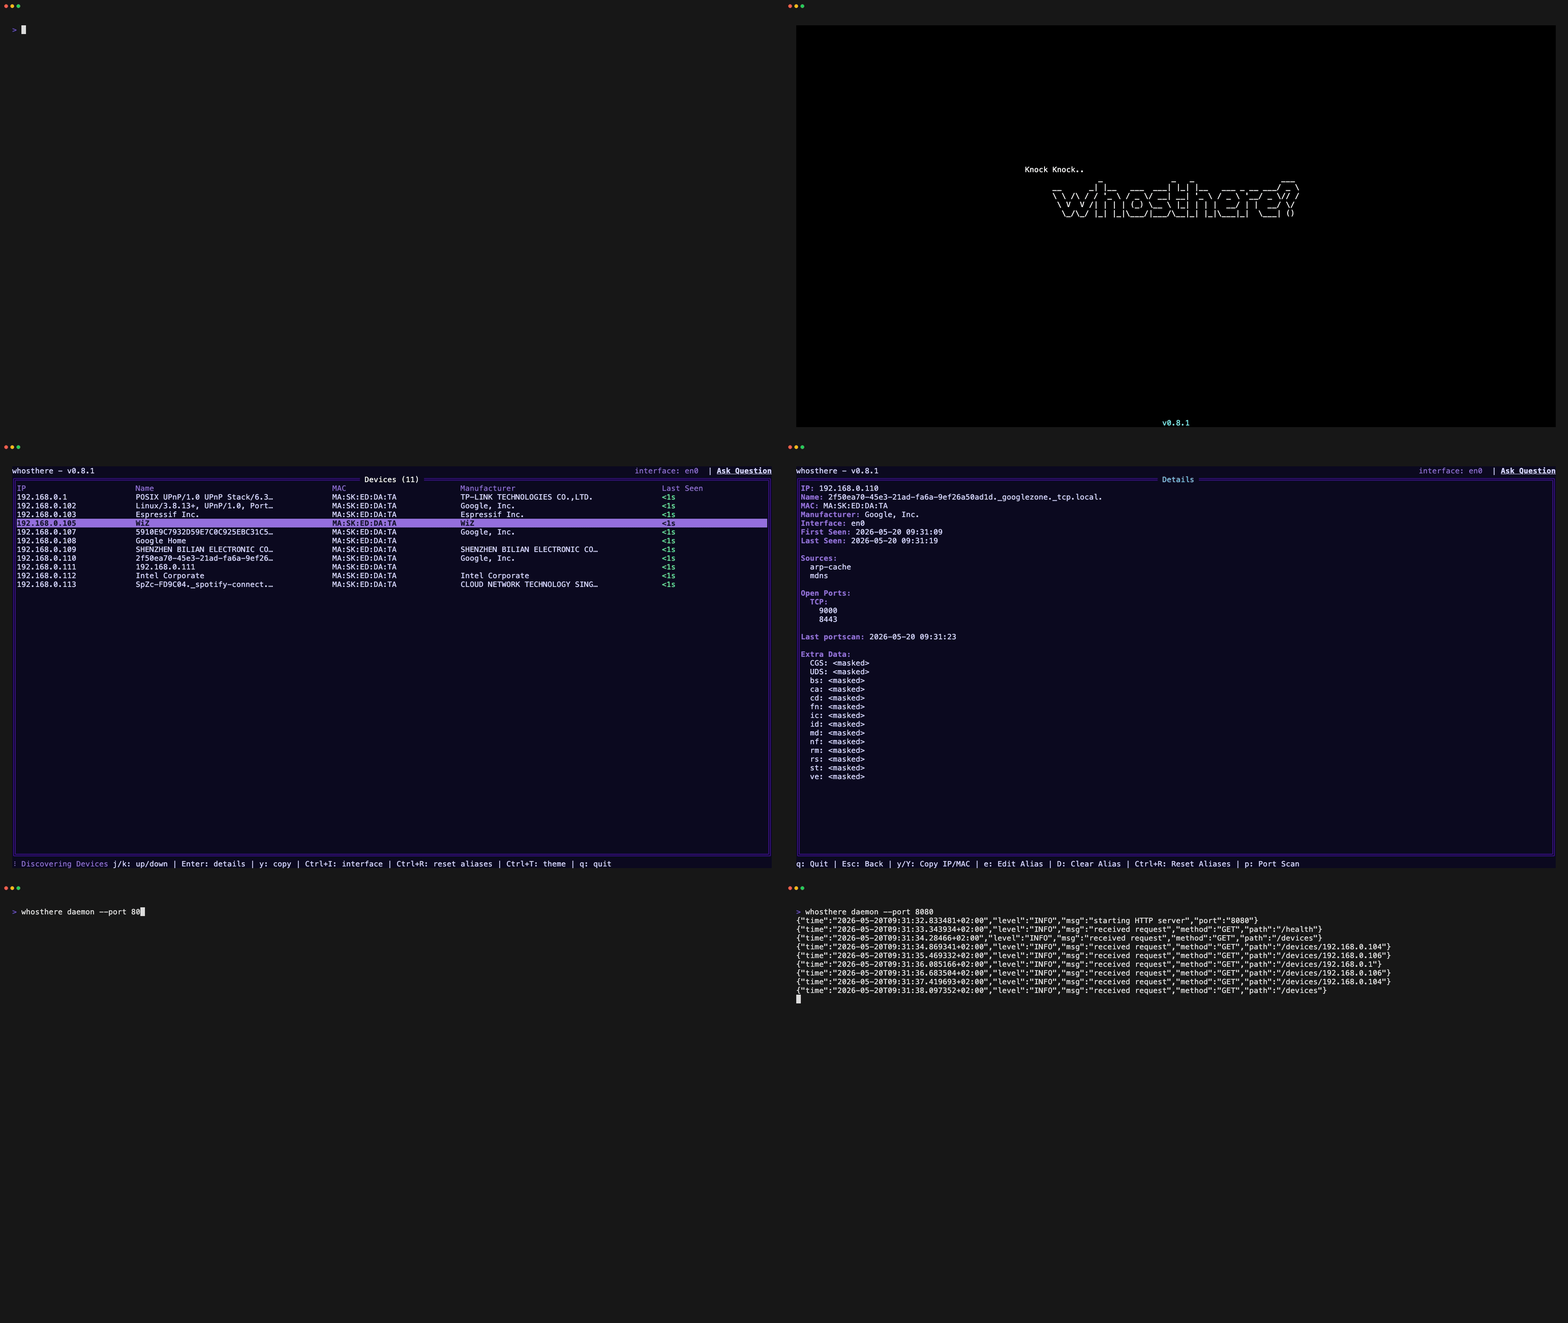
- واجهة TUI تفاعلية: تنقّل واستكشف الأجهزة المكتشفة بشكل بديهي.
- سريع ومتزامن: يستفيد من طرق اكتشاف متعددة في وقت واحد.
- لا يتطلب صلاحيات مرتفعة: يعمل بالكامل في مساحة المستخدم.
- إثراء الأجهزة: يستخدم بحث OUI لعرض الشركات المصنّعة للأجهزة.
- ماسح منافذ مدمج: اكتشاف خدمات اختياري على المضيفين المكتشفين (افحص الأجهزة بإذن فقط!).
- وضع الخدمة الخلفية مع HTTP API: شغّله في الخلفية ودمجه مع أدوات أخرى.
- السمات والتكوين: خصّص المظهر والسلوك عبر تكوين YAML.
التثبيت
عبر Homebrew باستخدام brew:
brew install whosthere
على NixOS باستخدام nix:
nix profile install nixpkgs#whosthere
على Arch Linux باستخدام yay:
yay -S whosthere-bin
إذا لم يكن مدير الحزم الخاص بك مدرجًا، يمكنك دائمًا التثبيت باستخدام Go:
go install github.com/ramonvermeulen/whosthere@latest
أو البناء من المصدر:
git clone https://github.com/ramonvermeulen/whosthere.git
cd whosthere
make build
بالإضافة إلى ذلك، يمكنك تنزيل ملفات ثنائية جاهزة من صفحة الإصدارات.
الاستخدام
شغّل واجهة TUI للاكتشاف التفاعلي:
whosthere
شغّله كـ cli لإجراء فحص واحد وإخراج النتائج:
whosthere scan -t 5
أخرج النتائج إلى ملف JSON:
whosthere scan -t 5 --json --pretty > devices.json
شغّله كخدمة خلفية مع HTTP API:
whosthere daemon --port=8080
يمكن العثور على خيارات سطر الأوامر الإضافية عبر تشغيل:
whosthere --help
اختصارات المفاتيح (TUI)
| المفتاح | الإجراء |
|---|---|
/ | بدء البحث بالتعبير النمطي |
k | أعلى |
j | أسفل |
g | الانتقال إلى الأعلى |
G | الانتقال إلى الأسفل |
y | نسخ عنوان IP للجهاز المحدد |
Y | نسخ عنوان MAC للجهاز المحدد |
enter | عرض تفاصيل الجهاز |
CTRL+t | تبديل محدد السمة |
CTRL+i | تبديل محدد الواجهة |
CTRL+c/q | إيقاف التطبيق |
ESC | مسح البحث / الرجوع |
p (عرض التفاصيل) | بدء فحص المنافذ على الجهاز |
tab (عرض النافذة) | تبديل تحديد الأزرار |
التكوين
يدعم Whosthere طرق تكوين متعددة بالأسبقية التالية (من الأعلى إلى الأدنى):
- أعلام سطر الأوامر - أعلى أولوية. راجع
whosthere --helpللأعلام المتاحة. - متغيرات البيئة - بادئة
WHOSTHERE__. راجع التكوين عبر متغيرات البيئة. - ملف التكوين - ملف تكوين YAML. راجع ملف التكوين.
- القيم الافتراضية - القيم الافتراضية الاحتياطية. راجع
DefaultConfig()في config.go.
ملف التكوين
يبحث Whosthere عن ملف التكوين بالترتيب التالي، باستخدام أول ملف يتم العثور عليه:
- المسار المحدد عبر علم
--configأو متغير البيئةWHOSTHERE_CONFIG $XDG_CONFIG_HOME/whosthere/config.yaml(إذا تم تعيينXDG_CONFIG_HOME)~/.config/whosthere/config.yaml(الموقع الافتراضي)
مثال على التكوين:
# Uncomment the next line to configure a specific network interface - uses OS default if not set
# network_interface: eth0

# When enabled, devices from all network interfaces are shown and persist when switching interfaces
# Note: if two interfaces share the same subnet (e.g. both use 192.168.1.x), devices may get merged
# since they are identified by IP address. Use with caution on overlapping subnets.
all_interfaces: false

# Optional IPv4 CIDR subnets to sweep. When set, the sweeper skips the auto-detected interface subnet unless it is listed here.
# target_subnets: ["10.0.0.0/24", "10.0.1.0/24"]

# WARNING: scanning subnets larger than /16 sends packets to 65535+ IPs per subnet. Enable only if you understand the traffic implications. Consider using smaller /24 subnets for targeted scanning.
# scan_large_subnets: false

# How often to run discovery scans
scan_interval: 20s

# Maximum timeout for each scan, recommended to be less than the scan interval
scan_timeout: 10s

scanners:
  mdns:
    enabled: true
  ssdp:
    enabled: true
  arp:
    enabled: true

sweeper:
  enabled: true
  interval: 5m
  timeout: 20s

port_scanner:
  timeout: 5s
  # List of TCP ports to scan on discovered devices
  tcp: [21, 22, 23, 25, 80, 110, 135, 139, 143, 389, 443, 445, 993, 995, 1433, 1521, 3306, 3389, 5432, 5900, 8080, 8443, 9000, 9090, 9200, 9300, 10000, 27017]

splash:
  enabled: true
  delay: 1s

theme:
  # When disabled, the TUI will use the terminal it's default ANSI colors
  # Also see the NO_COLOR environment variable to completely disable ANSI colors
  enabled: true

  # See the complete list of available themes at https://github.com/ramonvermeulen/whosthere/tree/main/internal/ui/theme/theme.go
  # Set name to "custom" to use the custom colors below
  # For any color that is not configured it will take the default theme value as fallback
  name: default

  # Disable ANSI colors completely, overrides theme.enabled
  # Can also be set via NO_COLOR or WHOSTHERE__THEME__NO_COLOR environment variables
  # no_color: false

  # Custom theme colors (uncomment and set name: custom to use)
  # primitive_background_color: "#000a1a"
  # contrast_background_color: "#001a33"
  # more_contrast_background_color: "#003366"
  # border_color: "#0088ff"
  # title_color: "#00ffff"
  # graphics_color: "#00ffaa"
  # primary_text_color: "#cceeff"
  # secondary_text_color: "#6699ff"
  # tertiary_text_color: "#ffaa00"
  # inverse_text_color: "#000a1a"
  # contrast_secondary_text_color: "#88ddff"