网络监控工具,可映射进程与网络连接之间的关系,识别云服务提供商,并生成防火墙规则。轻量级代理负责采集,服务器负责聚合,解析器负责分析。
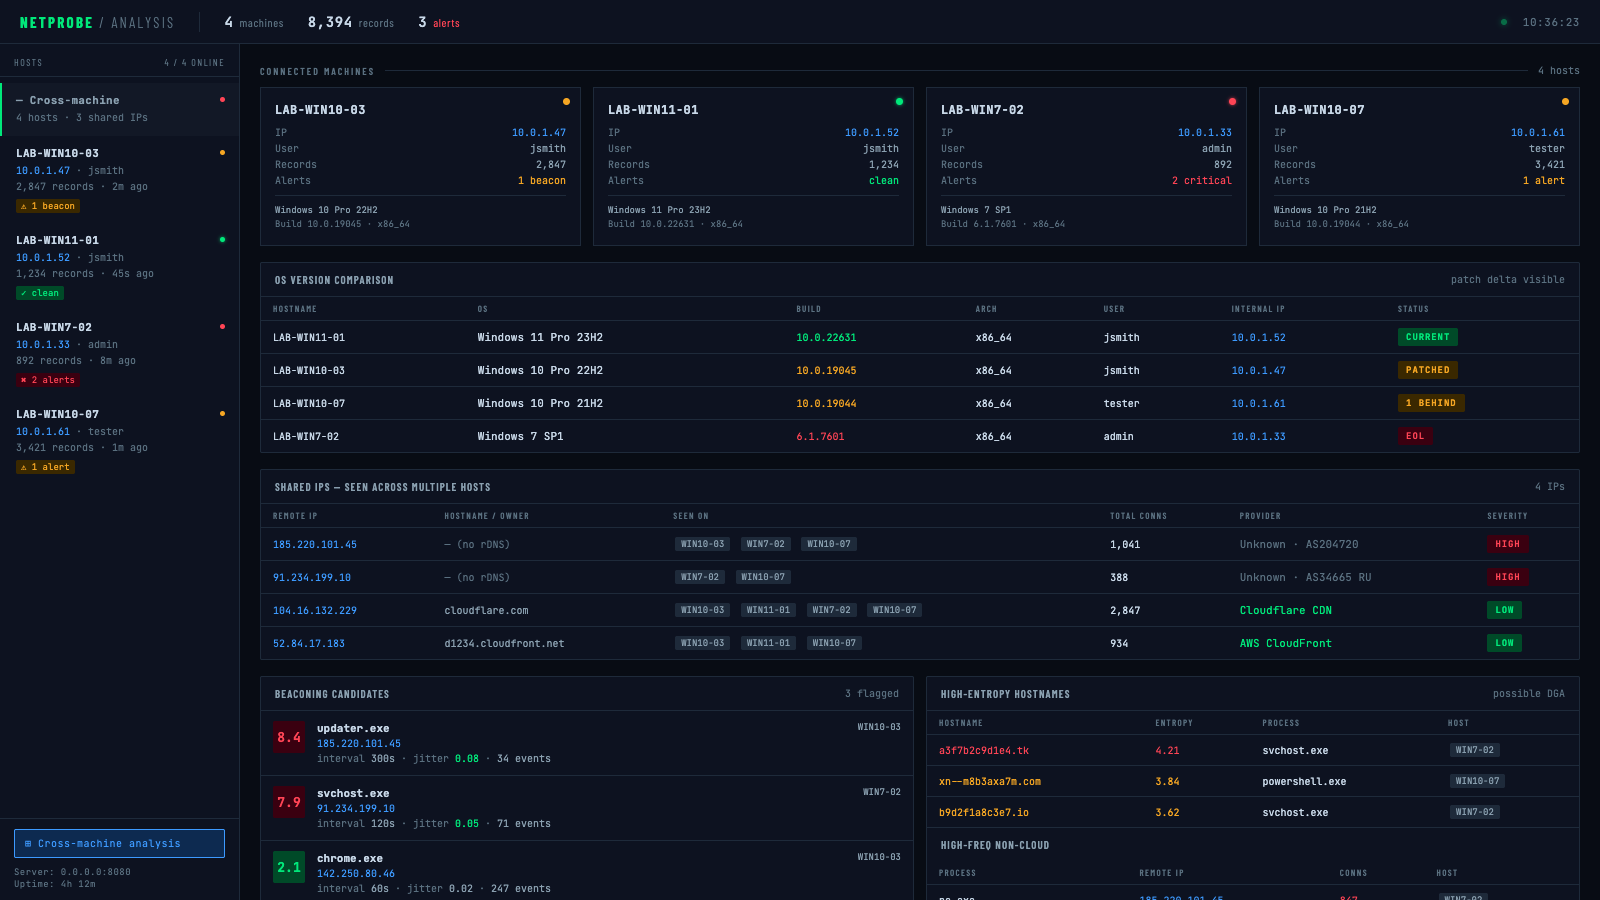
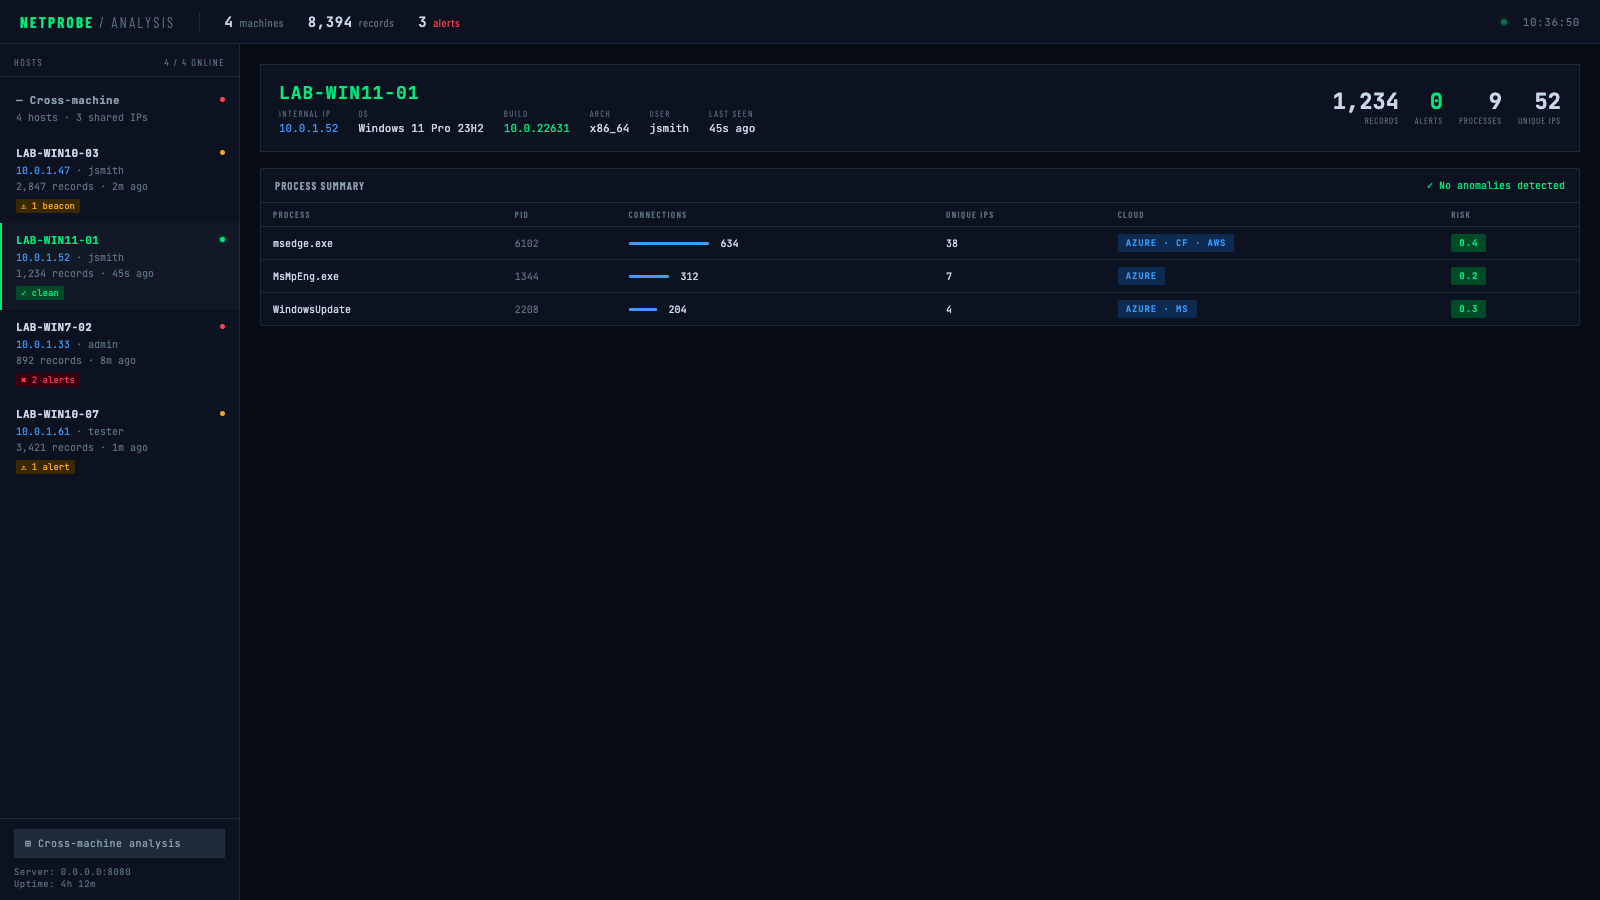
跨机器概览——操作系统版本对比、共享 IP 检测、所有主机中的疑似信标(beaconing)候选:
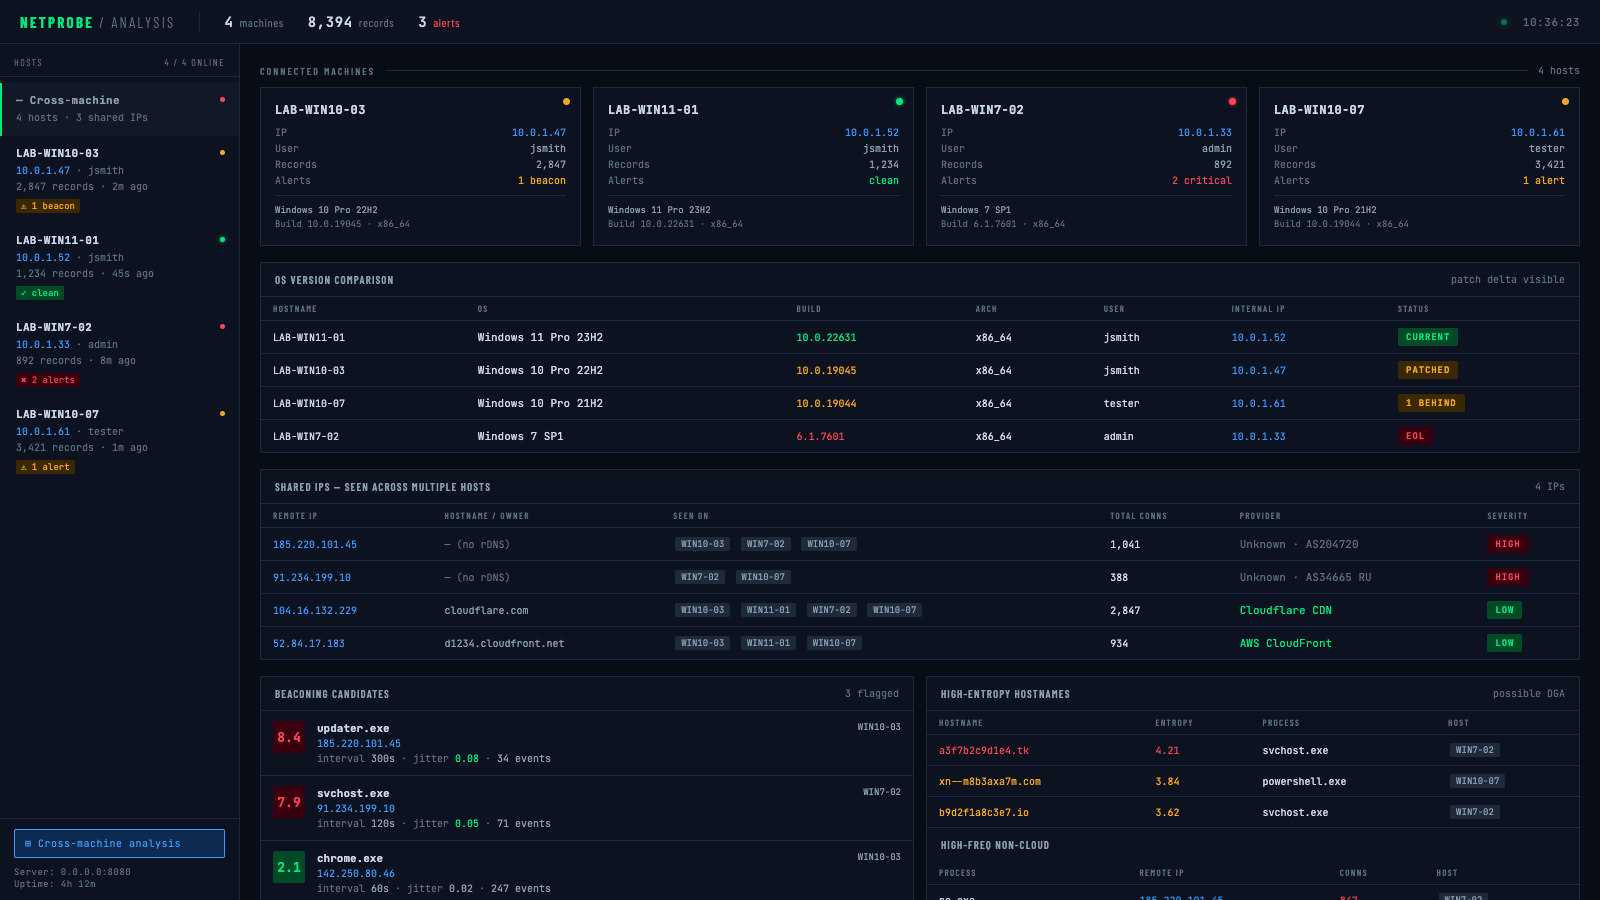
单主机详情——严重告警(已停止支持(EOL)的操作系统,nc.exe 向未知 IP 发出信标):
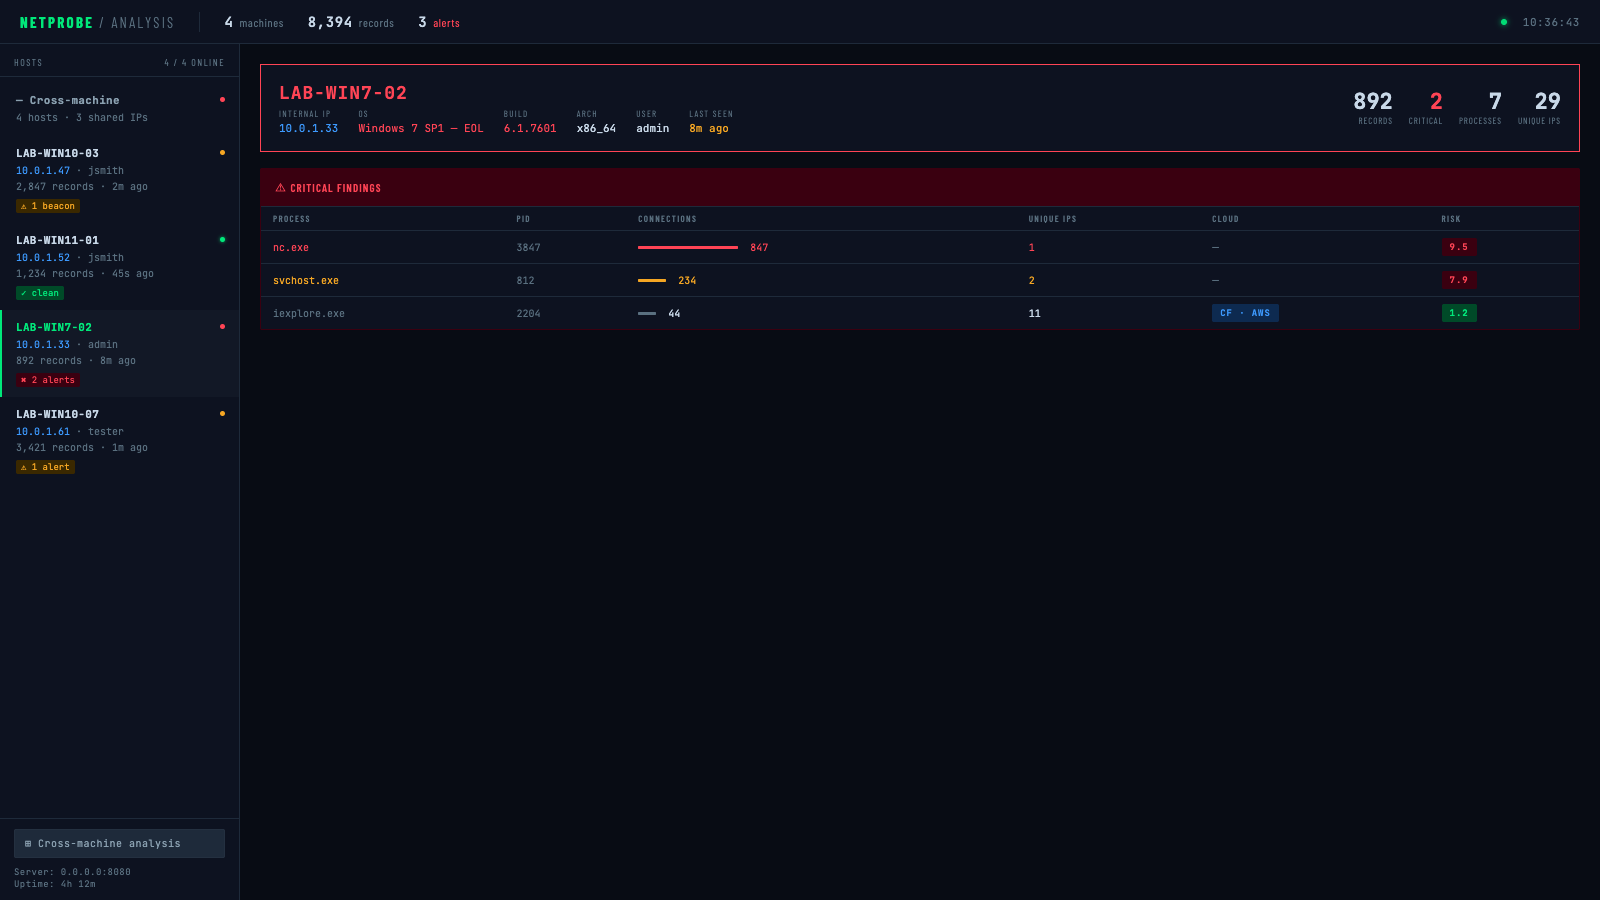
单主机详情——警告(标记出疑似信标候选):
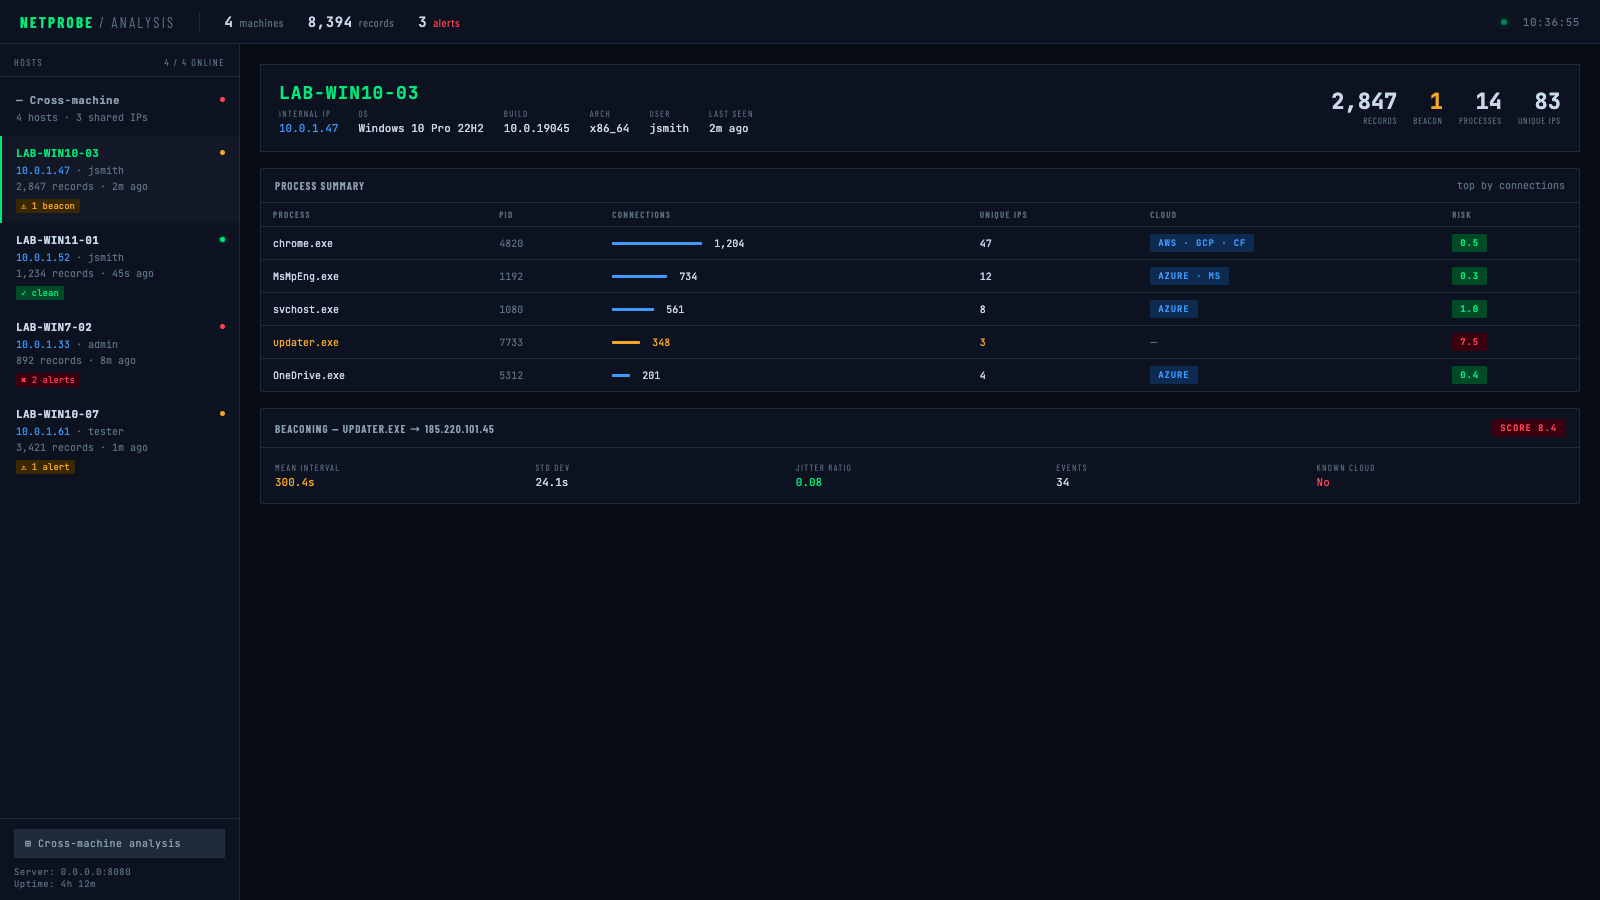
单主机详情——正常(无异常):
cargo build --release
# Simple collection
cargo run --release -- collect --duration-seconds 300

# With DNS lookups
cargo run --release -- collect --duration-seconds 300 --enable-dns

# With compression and encryption
cargo run --release -- collect \
  --duration-seconds 300 \
  --compress \
  --encrypt-key "your-secret-password"
# Generate all reports
cargo run --release -- parse \
  --input connections.jsonl \
  --process-summary processes.json \
  --cloud-analysis cloud.json \
  --firewall-rules-iptables firewall.sh \
  --database-export network.sql

# Offline ownership lookup with local ASN DB (no network calls)
cargo run --release -- parse \
  --input connections.jsonl \
  --cloud-analysis cloud.json \
  --asn-db ip2asn-v4.tsv

# Live ARIN lookup with persistent cache (re-run skips already-queried IPs)
cargo run --release -- parse \
  --input connections.jsonl \
  --cloud-analysis cloud.json \
  --arin-lookup \
  --arin-cache arin_cache.json
# Quick 5-minute analysis
cargo run --release -- monitor \
  --duration-seconds 300 \
  --output-dir ./analysis \
  --full-analysis
agent 二进制是一个极简、无需任何标志的部署目标。所有配置均在编译时通过环境变量固化到二进制中——将其放到目标机器上,无需任何参数即可运行。
AGENT_SERVER="http://10.0.1.5:8080/upload" \
AGENT_KEY="labkey123" \
AGENT_INTERVAL="5" \
AGENT_BATCH="200" \
AGENT_DURATION="0" \
AGENT_DNS="false" \
AGENT_ENCRYPT_KEY="mysecretpassword" \
cargo build --release --bin agent
生成的二进制位于 target/release/agent,无外部依赖,也无需任何标志:
./agent
| 变量 | 默认值 | 描述 |
|---|---|---|
AGENT_SERVER | http://localhost:8080/upload | 上传端点 URL |
AGENT_KEY | (无) | X-API-Key 请求头值 |
AGENT_INTERVAL | 5 | 套接字轮询间隔(秒) |
AGENT_BATCH | 200 | 每批上传的记录数 |
AGENT_DURATION | 0 | 运行时长(秒)(0 = 永久运行) |
AGENT_DNS | false | 将 IP 解析为主机名 |
AGENT_ESTABLISHED | true | 仅已建立(ESTABLISHED)的连接 |
AGENT_LOCAL_COPY | false | 上传的同时保留本地 .jsonl 副本 |
AGENT_COMPRESS | false | 上传前进行 gzip 压缩 |
AGENT_ENCRYPT_KEY | (无) | AES-256-GCM 加密负载(密码或 64 字符十六进制密钥) |
AGENT_UA | (reqwest 默认) | HTTP User-Agent 请求头 |
AGENT_SERVER="https://collector.internal/upload" \
AGENT_KEY="prod-api-key" \
AGENT_DURATION="0" \
AGENT_INTERVAL="30" \
AGENT_COMPRESS="true" \
AGENT_ENCRYPT_KEY="$(cat /etc/gibson/key)" \
cargo build --release --bin agent
cargo run --release -- collect \
  --duration-seconds 3600 \
  --interval-seconds 10 \
  --compress \
  --encrypt-key "your-32-char-hex-key-or-password" \
  --upload-url "https://your-server.com/api/upload" \
  --api-key "your-api-key" \
  --batch-size 50 \
  --delete-after-upload
cargo run --release -- collect \
  --duration-seconds 86400 \
  --interval-seconds 30 \
  --output connections_daily.jsonl \
  --enable-dns \
  --compress
解析器支持两条互斥的路径来识别未匹配 IP 的归属方:
| 方法 | 标志 | 速度 | 网络 | 适用场景 |
|---|---|---|---|---|
| 本地 ASN 数据库 | --asn-db | 即时 | 无 | 重复分析、物理隔离(air-gapped)环境 |
| 实时 ARIN RDAP | --arin-lookup | 较慢(按 IP) | 需要 | 一次性查询、无本地数据库可用 |
下载 ip2asn 数据库(建议每周刷新):
curl -O https://iptoasn.com/data/ip2asn-v4.tsv.gz && gunzip ip2asn-v4.tsv.gz
当提供 --asn-db 时,--arin-lookup 将被忽略。使用 --arin-cache 可将 ARIN 结果持久化到磁盘,从而在重新运行时跳过已查询过的 IP。
# Parse with cloud detection focus
cargo run --release -- parse \
  --input connections.jsonl \
  --cloud-analysis cloud_report.json \
  --min-connections 5 \
  --whitelist-processes "chrome,firefox,safari,edge"
创建 collector_server.py:
from flask import Flask, request, jsonify
import os
import json
import base64
from datetime import datetime
from Crypto.Cipher import AES
import gzip

app = Flask(__name__)

# Configuration
UPLOAD_DIR = "./collected_data"
API_KEY = "your-secure-api-key"
ENCRYPTION_KEY = bytes.fromhex("your-32-byte-hex-key")  # Optional

os.makedirs(UPLOAD_DIR, exist_ok=True)

def decrypt_data(encrypted_data, key):
    """Decrypt AES-256-GCM encrypted data"""
    decoded = base64.b64decode(encrypted_data)
    nonce = decoded[:12]
    ciphertext = decoded[12:]

    cipher = AES.new(key, AES.MODE_GCM, nonce=nonce)
    plaintext = cipher.decrypt_and_verify(ciphertext[:-16], ciphertext[-16:])
    return plaintext

@app.route('/api/upload', methods=['POST'])
def upload():
    # Verify API key
    if request.headers.get('X-API-Key') != API_KEY:
        return jsonify({"error": "Invalid API key"}), 401

    try:
        data = request.get_data()

        # If data is base64 encoded (encrypted)
        if data.startswith(b'eyJ'):  # JSON starts with {"
            # Not encrypted, parse directly
            batch = json.loads(data)
        else:
            # Encrypted data
            decrypted = decrypt_data(data, ENCRYPTION_KEY)
            batch = json.loads(decrypted)

        # Save to file
        hostname = batch.get('hostname', 'unknown')
        timestamp = datetime.now().strftime('%Y%m%d_%H%M%S')
        filename = f"{UPLOAD_DIR}/{hostname}_{timestamp}.json"

        with open(filename, 'w') as f:
            json.dump(batch, f)

        return jsonify({"status": "success", "file": filename}), 200

    except Exception as e:
        return jsonify({"error": str(e)}), 500

if __name__ == '__main__':
    app.run(host='0.0.0.0', port=5000, ssl_context='adhoc')  # Use proper SSL in production
使用以下命令运行:
pip install flask pycryptodome
python collector_server.py
创建 /etc/nginx/sites-available/collector:
server {
    listen 443 ssl;
    server_name collector.yourcompany.com;

    ssl_certificate /etc/ssl/certs/your-cert.pem;
    ssl_certificate_key /etc/ssl/private/your-key.pem;

    client_max_body_size 100M;

    location /upload {
        # API key validation
        if ($http_x_api_key != "your-secure-api-key") {
            return 403;
        }

        # Save uploaded files
        client_body_in_file_only on;
        client_body_temp_path /var/uploads/;

        # Pass to processing script
        proxy_pass http://localhost:8080;
        proxy_set_header X-File $request_body_file;
    }
}
// index.js for AWS Lambda
const AWS = require('aws-sdk');
const crypto = require('crypto');
const s3 = new AWS.S3();

const BUCKET_NAME = 'your-network-data-bucket';
const API_KEY = process.env.API_KEY;
const ENCRYPTION_KEY = Buffer.from(process.env.ENCRYPTION_KEY, 'hex');