该项目包含以下仓库:
仅供教育目的使用。
请勿在生产环境中的 Active Directory (AD) 域下使用。
任何贡献者均不对其使用承担任何责任。
查看我们的红队社区 Telegram 频道
关于可视化描述,请使用 diagrams.net 工具打开 图表文件。
该应用由以下部分组成:
DC Sonar 社区提供分析 AD 域中与账户相关安全风险的功能:
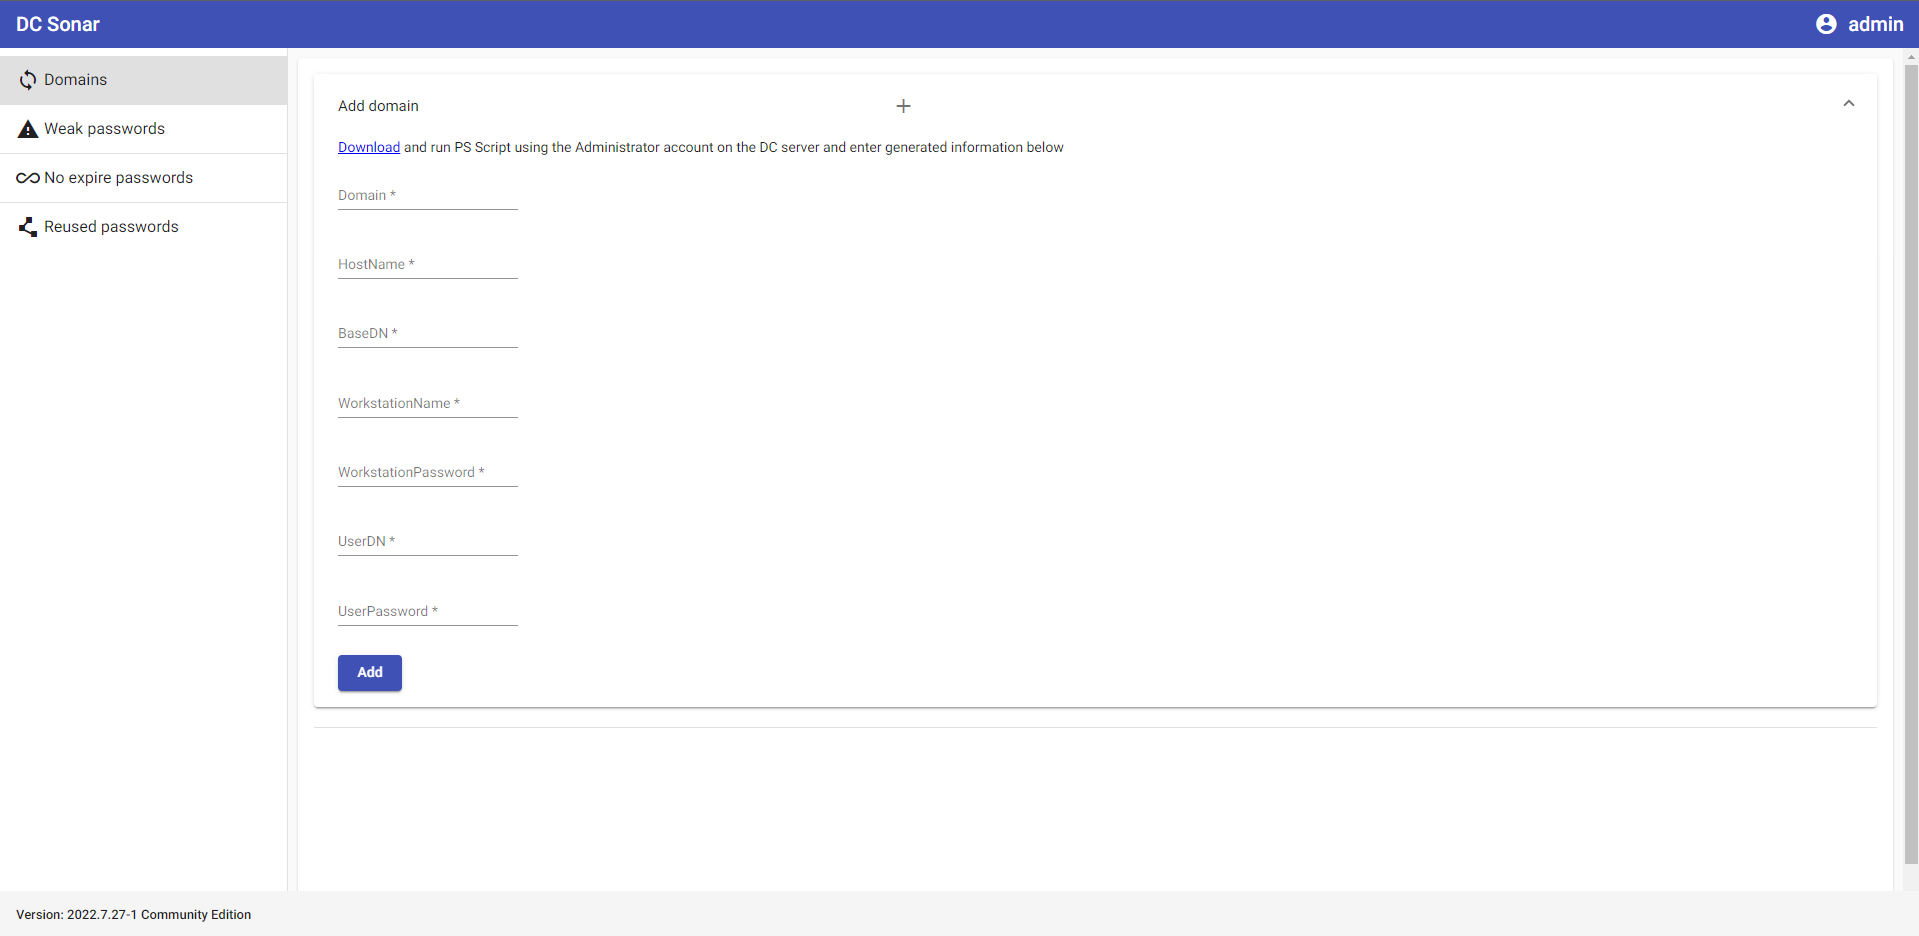
在应用中注册待分析的 AD 域
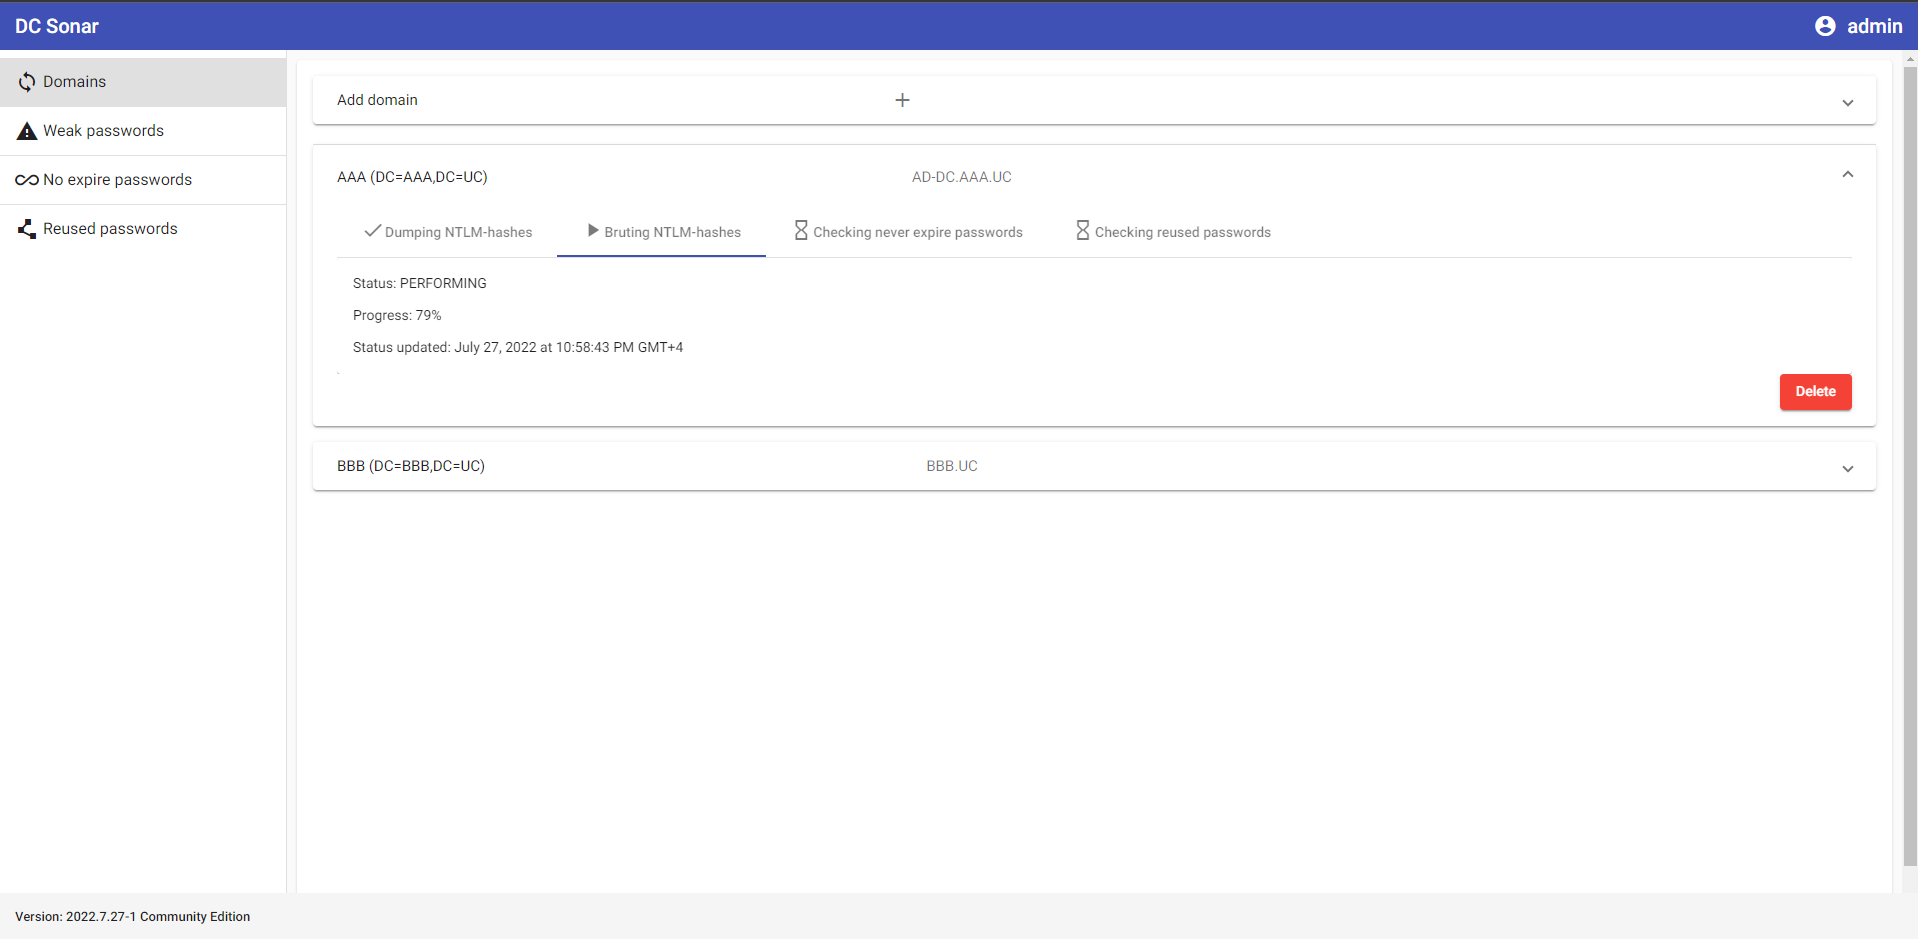
查看域分析进程的状态
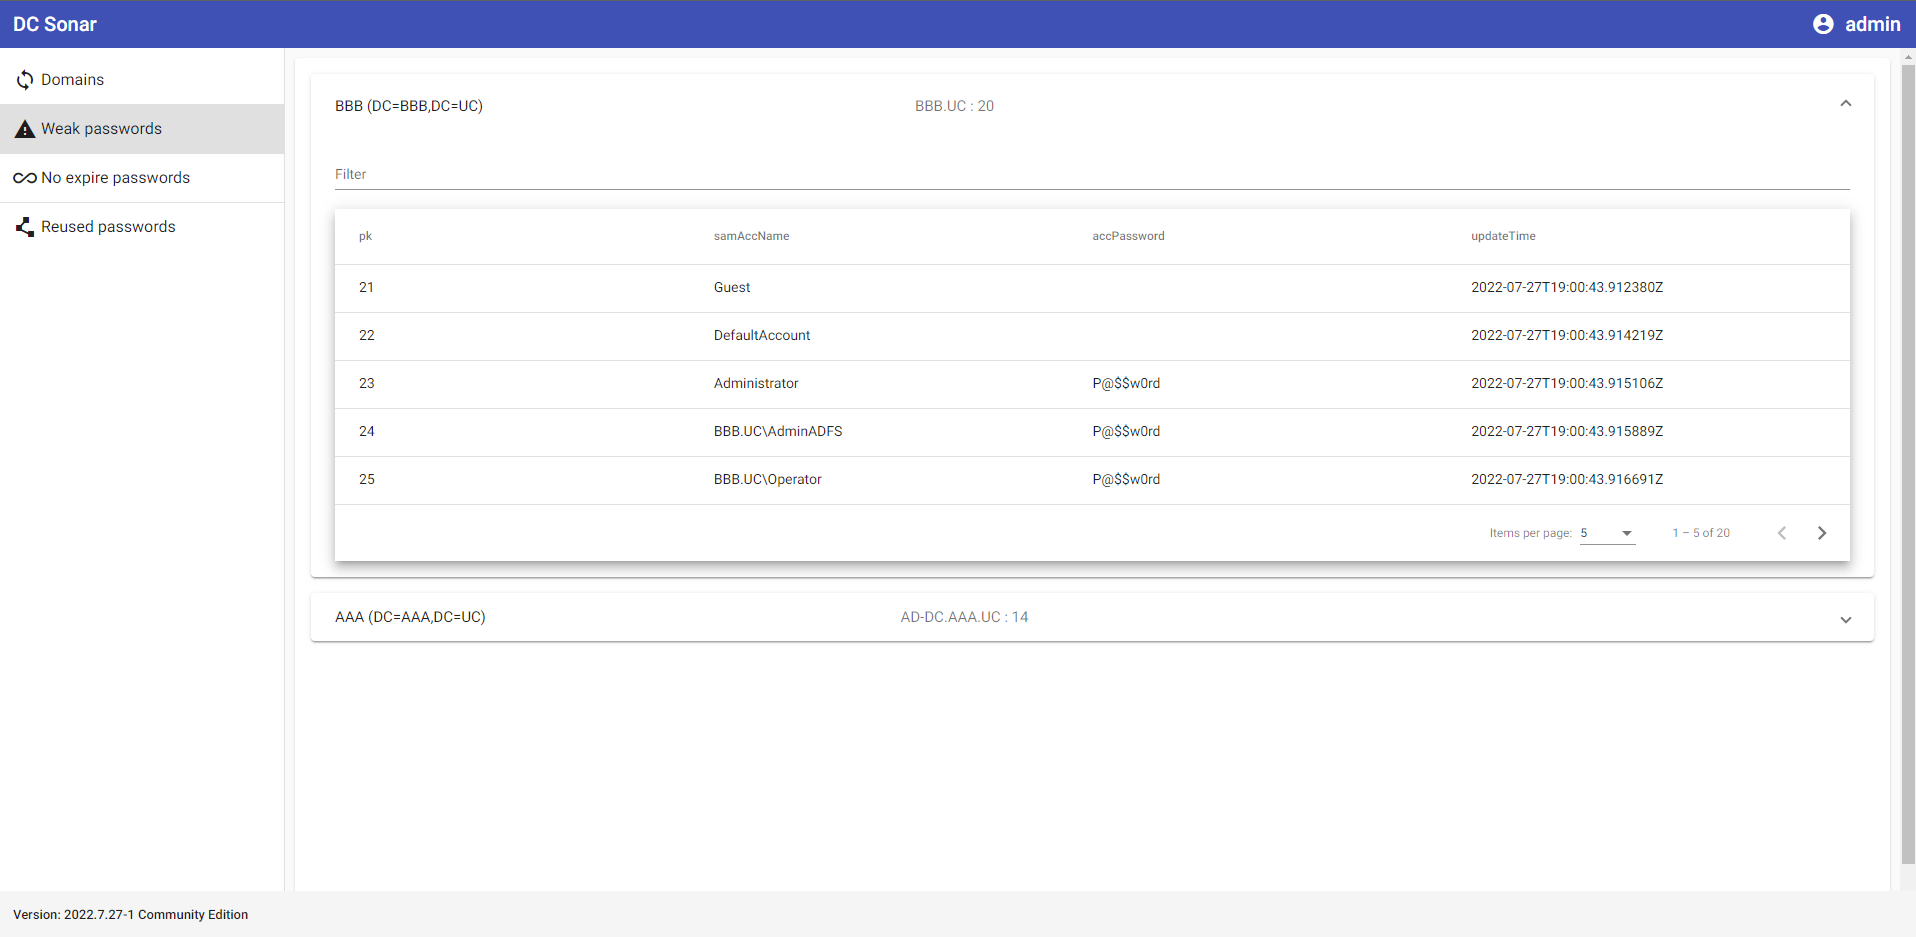
从指定的 AD 域中导出并暴力破解 NTLM 哈希,列出密码薄弱或易受攻击的账户
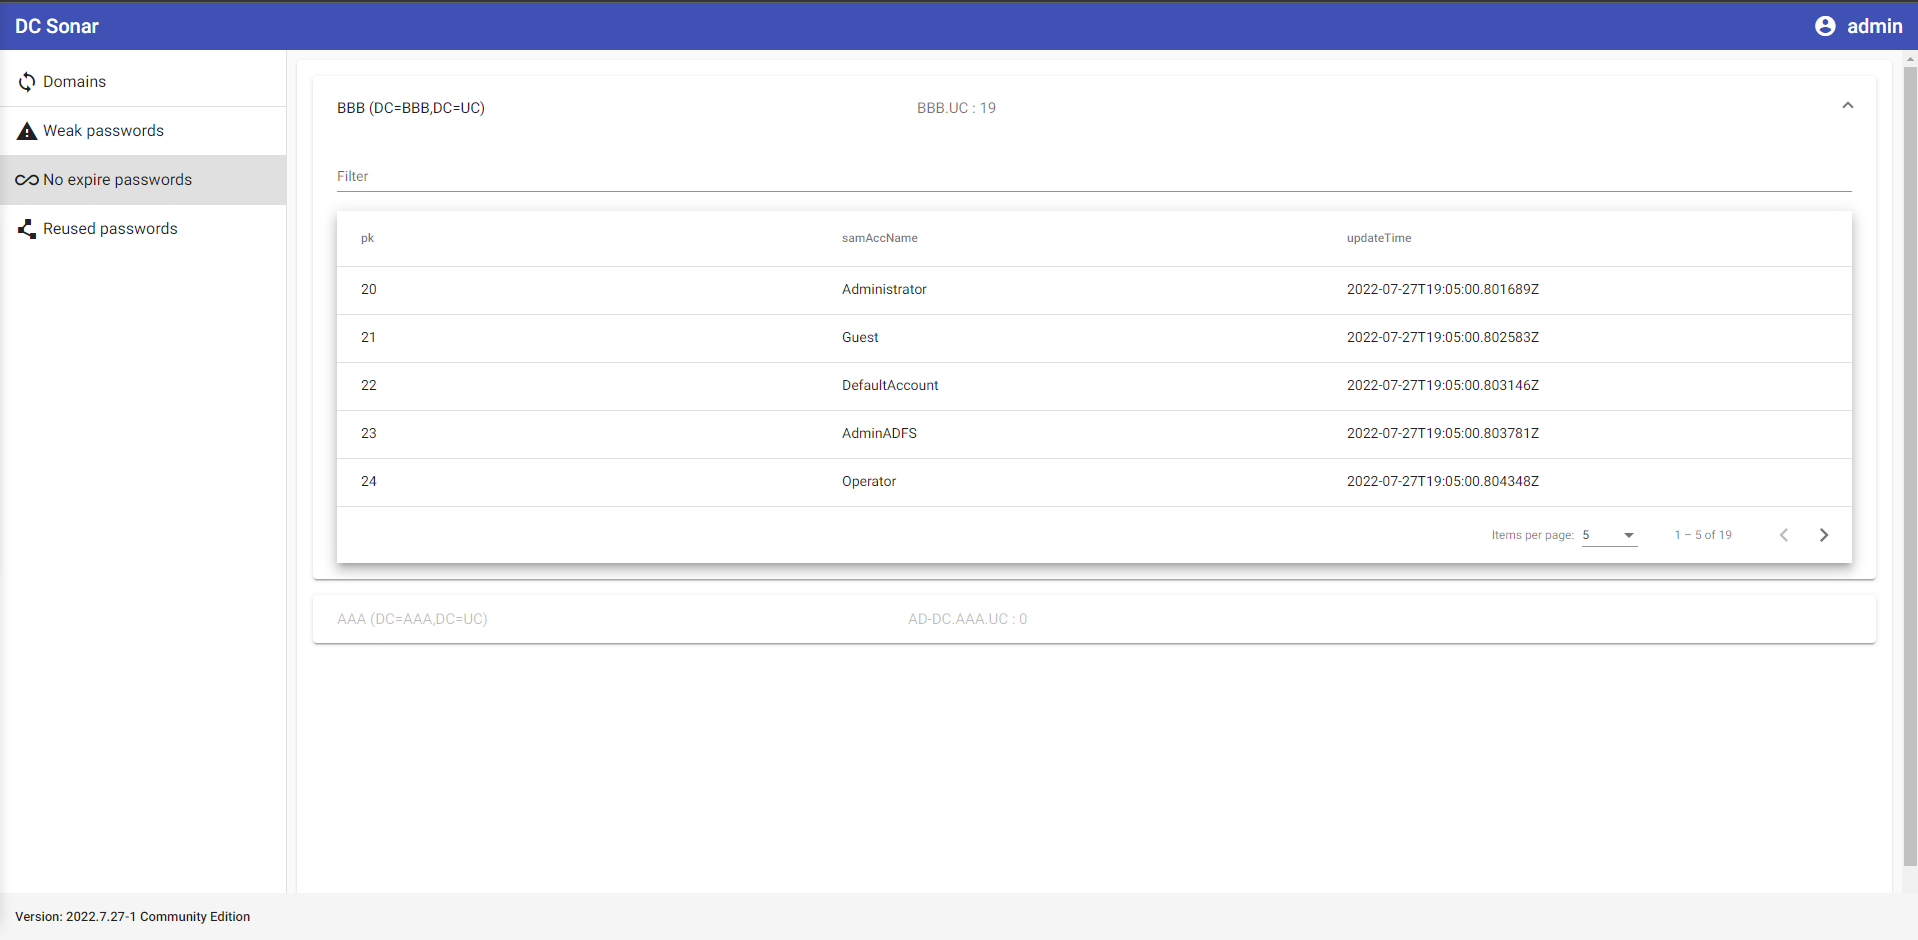
分析 AD 域账户,列出密码永不过期的账户
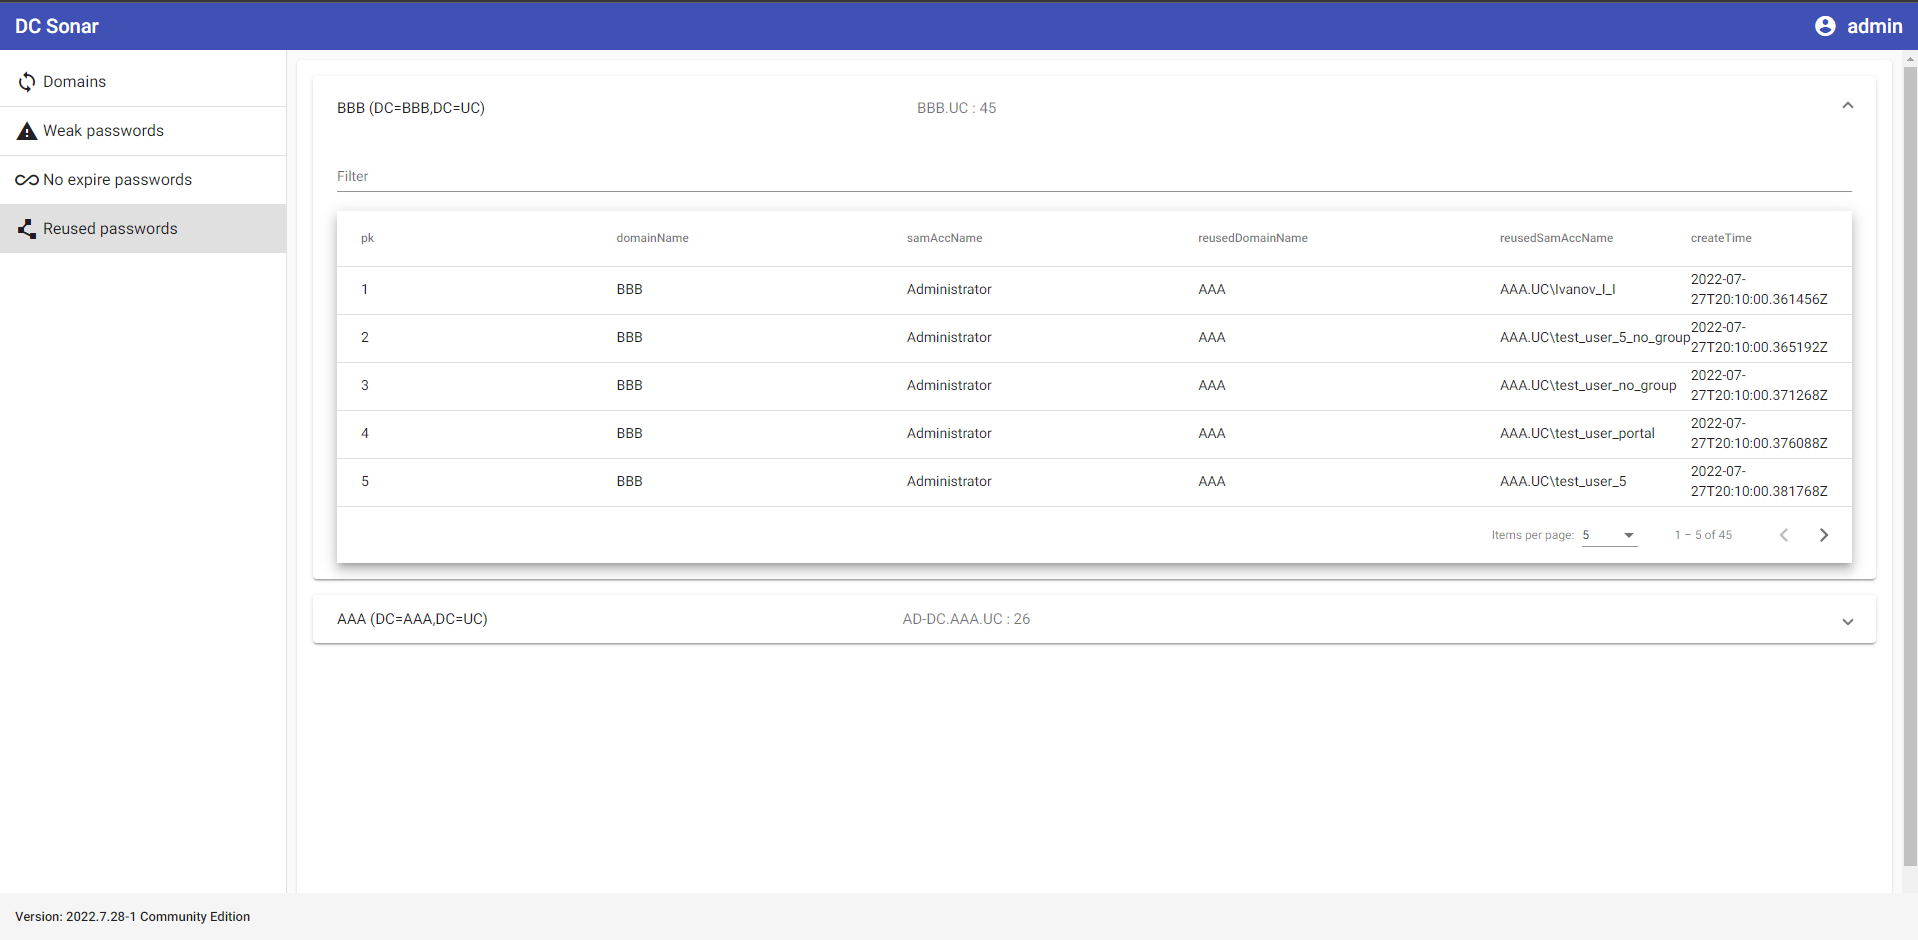
通过 NTLM 密码哈希分析 AD 域账户,确定密码重复的账户和域
开发中 ...
假定你有一个纯净的 Ubuntu Server 22.04 环境,并且拥有一个用户名为 "user" 的账户。
应用将安装至 /home/user/dc-sonar。
未来的版本可能会提供更灵活的安装方式。
从最新发行版下载 dc_sonar_NNNN.N.NN-N_amd64.tar.gz 到服务器。
创建用于解压文件的文件夹:
mkdir dc_sonar_NNNN.N.NN-N_amd64
解压下载的归档文件:
tar -xvf dc_sonar_NNNN.N.NN-N_amd64.tar.gz -C dc_sonar_NNNN.N.NN-N_amd64
进入解压后的文件夹:
cd dc_sonar_NNNN.N.NN-N_amd64/
安装 PostgreSQL:
sudo bash install_postgresql.sh
安装 RabbitMQ:
sudo bash install_rabbitmq.sh
安装依赖:
sudo bash install_dependencies.sh
它会要求确认添加 ppa:deadsnakes/ppa 仓库,按 Enter 键确认。
安装 dc-sonar 本身:
sudo dpkg -i dc_sonar_NNNN.N.NN-N_amd64.deb
它会要求提供创建 Django 管理员用户的信息,请提供用户名、邮箱和密码。
它会要求提供创建自签名 SSL 证书的信息两次,请提供所需信息。
输入之前安装过程中设置的 Django 管理员用户凭据。
请参阅 STYLE_GUIDE.md 中的信息。
开发中 ...
在这种情况下,我们将搭建环境,在 Windows 宿主机上编辑代码,同时在 Ubuntu 虚拟机上运行 Python 代码。
在 VirtualBox 中使用 Ubuntu Server 22.04 ISO 镜像创建一个虚拟机,配置为 2 个 CPU、2048 MB 内存、10GB SSD。
如果 Ubuntu 安装程序在虚拟机安装前要求更新安装程序,请同意。
选择安装 OpenSSH Server。
VirtualBox 端口转发规则:
| 名称 | 协议 | 宿主机 IP | 宿主机端口 | 虚拟机 IP | 虚拟机端口 |
|---|---|---|---|---|---|
| SSH | TCP | 127.0.0.1 | 2222 | 10.0.2.15 | 22 |
| RabbitMQ management console | TCP | 127.0.0.1 | 15672 | 10.0.2.15 | 15672 |
| Django Server | TCP | 127.0.0.1 | 8000 | 10.0.2.15 | 8000 |
| NTLM Scrutinizer | TCP | 127.0.0.1 | 5000 | 10.0.2.15 | 5000 |
| PostgreSQL | TCP | 127.0.0.1 | 25432 | 10.0.2.15 | 5432 |
下载并安装 Python 3.10.5。
为 DC Sonar 项目创建一个文件夹。
使用 Git for Windows 进入项目文件夹:
cd '{PATH_TO_FOLDER}'
按照 dc-sonar-user-layer 的 Windows 安装步骤操作。
按照 dc-sonar-workers-layer 的 Windows 安装步骤操作。
按照 ntlm-scrutinizer 的 Windows 安装步骤操作。
按照 dc-sonar-frontend 的 Windows 安装步骤操作。
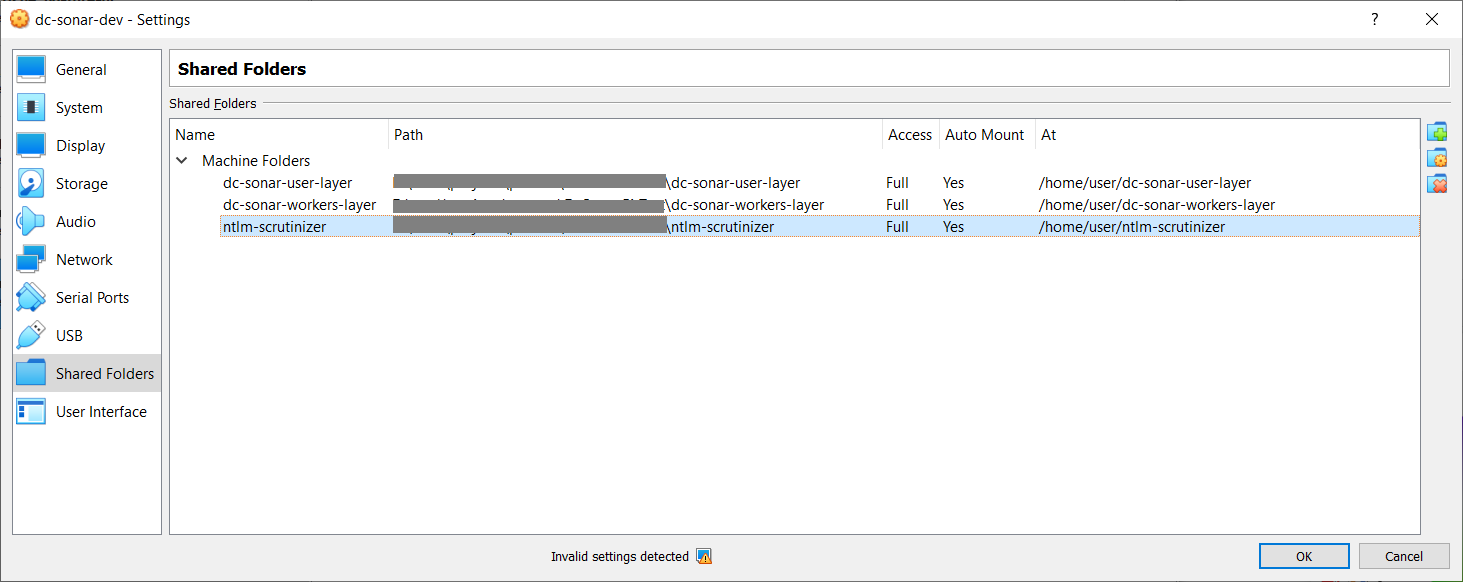
按照步骤从"打开 VirtualBox"到"重启虚拟机",但在 VirtualBox 中为虚拟机添加共享文件夹,并勾选"自动挂载",如下图所示:
重启后,运行命令:
sudo adduser $USER vboxsf
注销并重新登录所使用的用户账户。
在 /home/user 目录下,你可以使用已挂载的文件夹:
ls -l
Output:
total 12
drwxrwx--- 1 root vboxsf 4096 Jul 19 13:53 dc-sonar-user-layer
drwxrwx--- 1 root vboxsf 4096 Jul 19 10:11 dc-sonar-workers-layer
drwxrwx--- 1 root vboxsf 4096 Jul 19 14:25 ntlm-scrutinizer
在 Ubuntu 20.04 上安装 PostgreSQL:
sudo apt update
sudo apt install postgresql postgresql-contrib
sudo systemctl start postgresql.service
创建管理员数据库账户:
sudo -u postgres createuser --interactive
Output:
Enter name of role to add: admin
Shall the new role be a superuser? (y/n) y
创建 dc_sonar_workers_layer 数据库账户:
sudo -u postgres createuser --interactive
Output:
Enter name of role to add: dc_sonar_workers_layer
Shall the new role be a superuser? (y/n) n
Shall the new role be allowed to create databases? (y/n) n
Shall the new role be allowed to create more new roles? (y/n) n
创建 dc_sonar_user_layer 数据库账户:
sudo -u postgres createuser --interactive
Output:
Enter name of role to add: dc_sonar_user_layer
Shall the new role be a superuser? (y/n) n
Shall the new role be allowed to create databases? (y/n) n
Shall the new role be allowed to create more new roles? (y/n) n
创建 back_workers_db 数据库:
sudo -u postgres createdb back_workers_db
创建 web_app_db 数据库:
sudo -u postgres createdb web_app_db
运行 psql: