注意:此仓库已废弃。新仓库位于:https://github.com/m-mizutani/deepalert
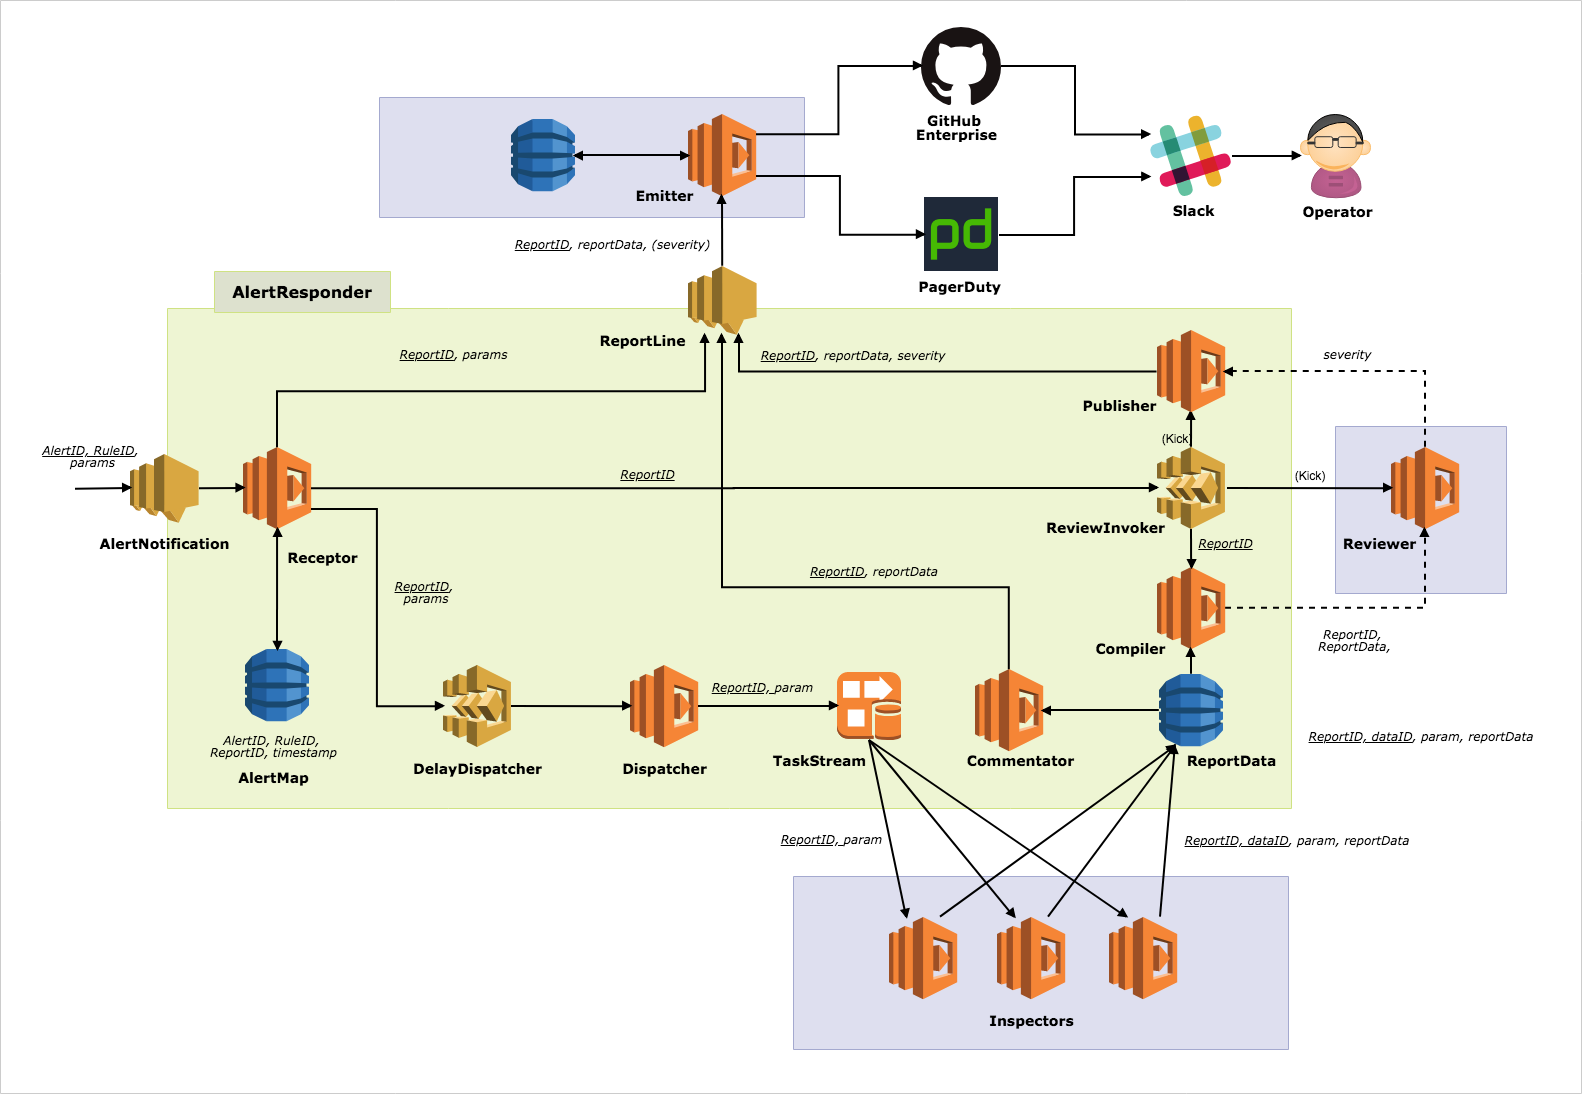
AlertResponder 是一个用于安全告警自动响应的无服务器框架。
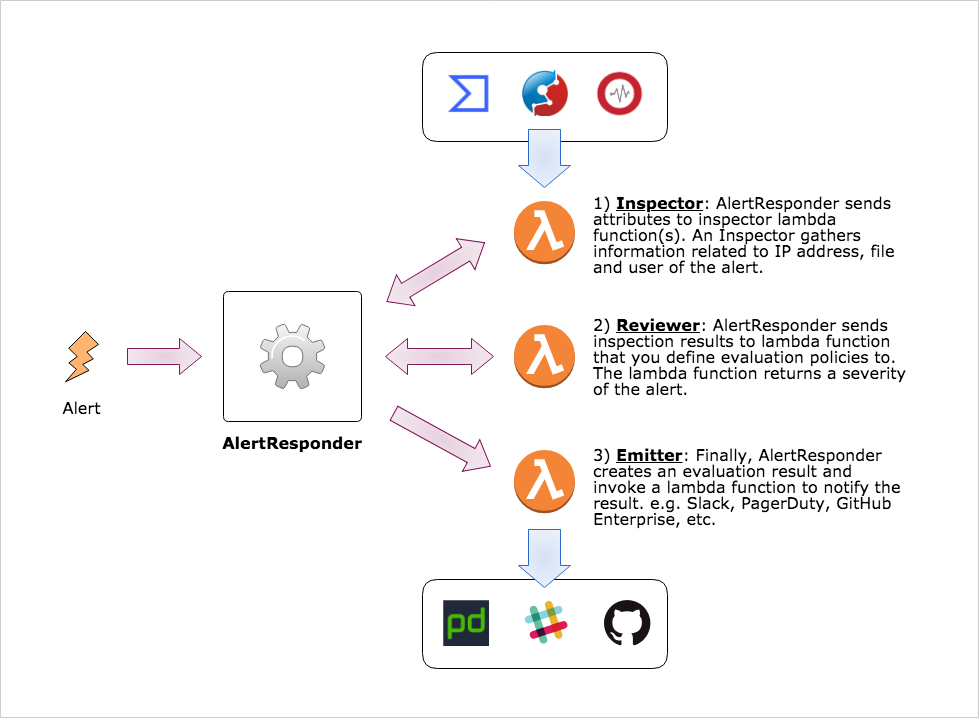
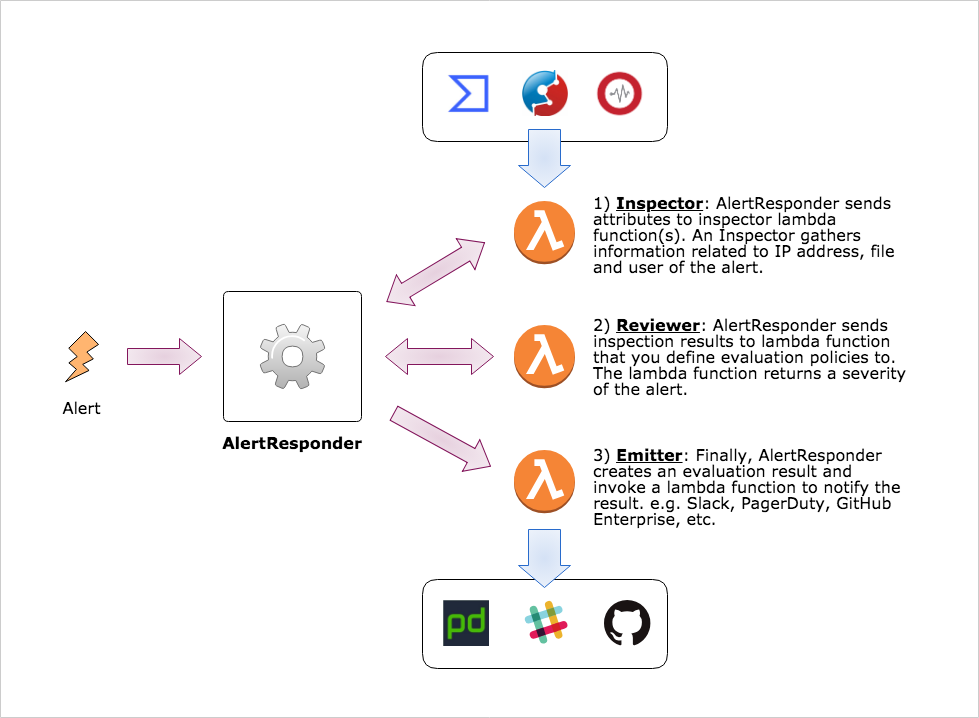
AlertResponder 接收从安全视角值得关注的事件即告警,并自动响应告警。AlertResponder 包含自动响应的 3 个部分。
请根据您的环境替换以下变量:
$REGION:替换为您的 AWS 区域(例如 ap-northeast-1)$STACK_NAME:替换为 CloudFormation 堆栈名称$ curl -o alert_responder.yml https://s3-$REGION.amazonaws.com/cfn-assets.$REGION/AlertResponder/templates/latest.yml
$ aws cloudformation deploy --template-file alert_responder.yml --stack-name $STACK_NAME --capabilities CAPABILITY_IAM
准备参数文件,例如 config.json,然后运行 make 命令。
$ cat config.json
{
  "StackName": "your-alert-responder-name",
  "TestStackName": "your-test-stack-name",
  "CodeS3Bucket": "your-some-bucket",
  "CodeS3Prefix": "for-example-functions",

  "InspectionDelay": "1",
  "ReviewDelay": "10"
}
$ env AR_CONFIG=config.json make deploy
注意:请确保您拥有 AWS 凭证(例如 API 密钥)和适当的权限。
部署 AlertResponder 后,进入 tester 目录并部署用于测试的堆栈。
$ cd tester/
$ make AR_CONFIG=../config.json deploy
部署后,您可以在 tester 目录下看到由脚本创建的 param.json 文件。
$ cat params.json
{
  "AccountId": "214219211678",
  "Region": "ap-northeast-1",
  "Inspector": "slam-alert-responder-test-functions-Inspector-1OBGU89CT1P4B",
  "Reporter": "slam-alert-responder-test-functions-Reporter-1NDHU0VDI8OPA"
}
然后,返回 git 仓库的顶层目录,您可以运行集成测试。
$ go test -v
=== RUN   TestInvokeBySns
--- PASS: TestInvokeBySns (3.39s)
           (snip)
PASS
ok      github.com/m-mizutani/AlertResponder    20.110s