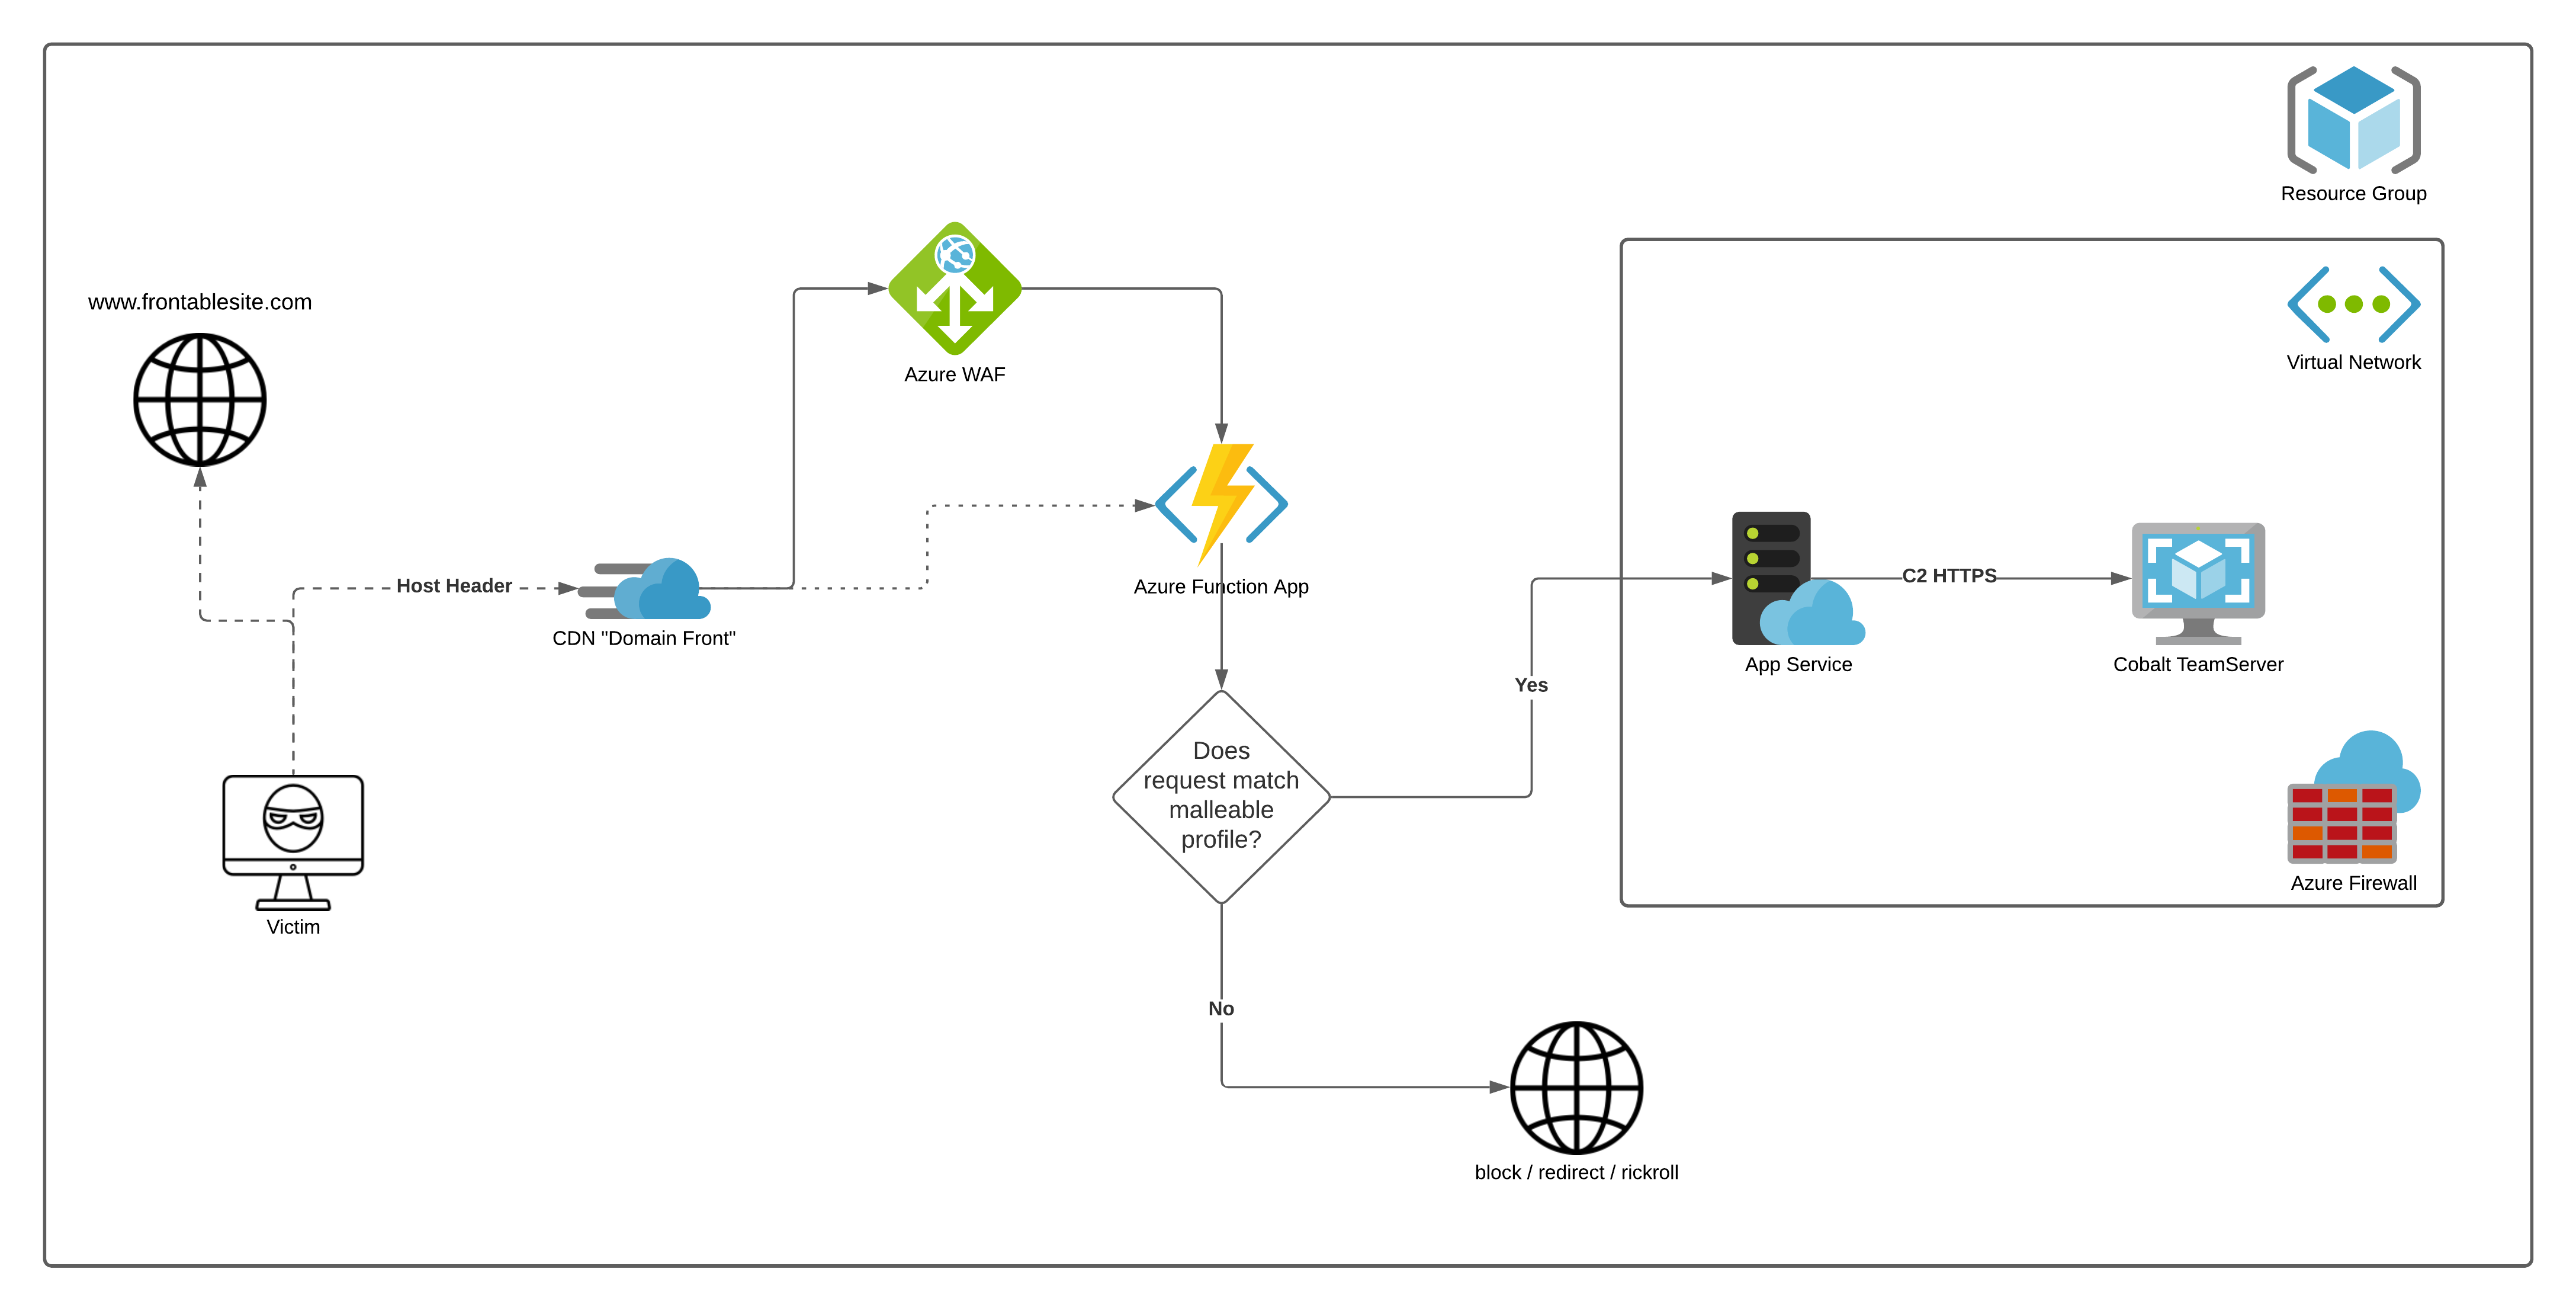
AzureC2Relay 是一个 Azure Function,用于验证并中继 Cobalt Strike 信标流量,它根据 Cobalt Strike 的可塑 C2 配置文件(Malleable C2 profile)验证传入请求。任何不匹配配置文件中的用户代理(User-Agent)、URI 路径、标头和查询参数的传入请求,都将被重定向到一个可配置的诱饵网站。经过验证的 C2 流量会被中继到同一虚拟网络内的团队服务器(Team Server),该服务器通过网络安全组进一步限制访问,使得虚拟机仅暴露 SSH 端口。
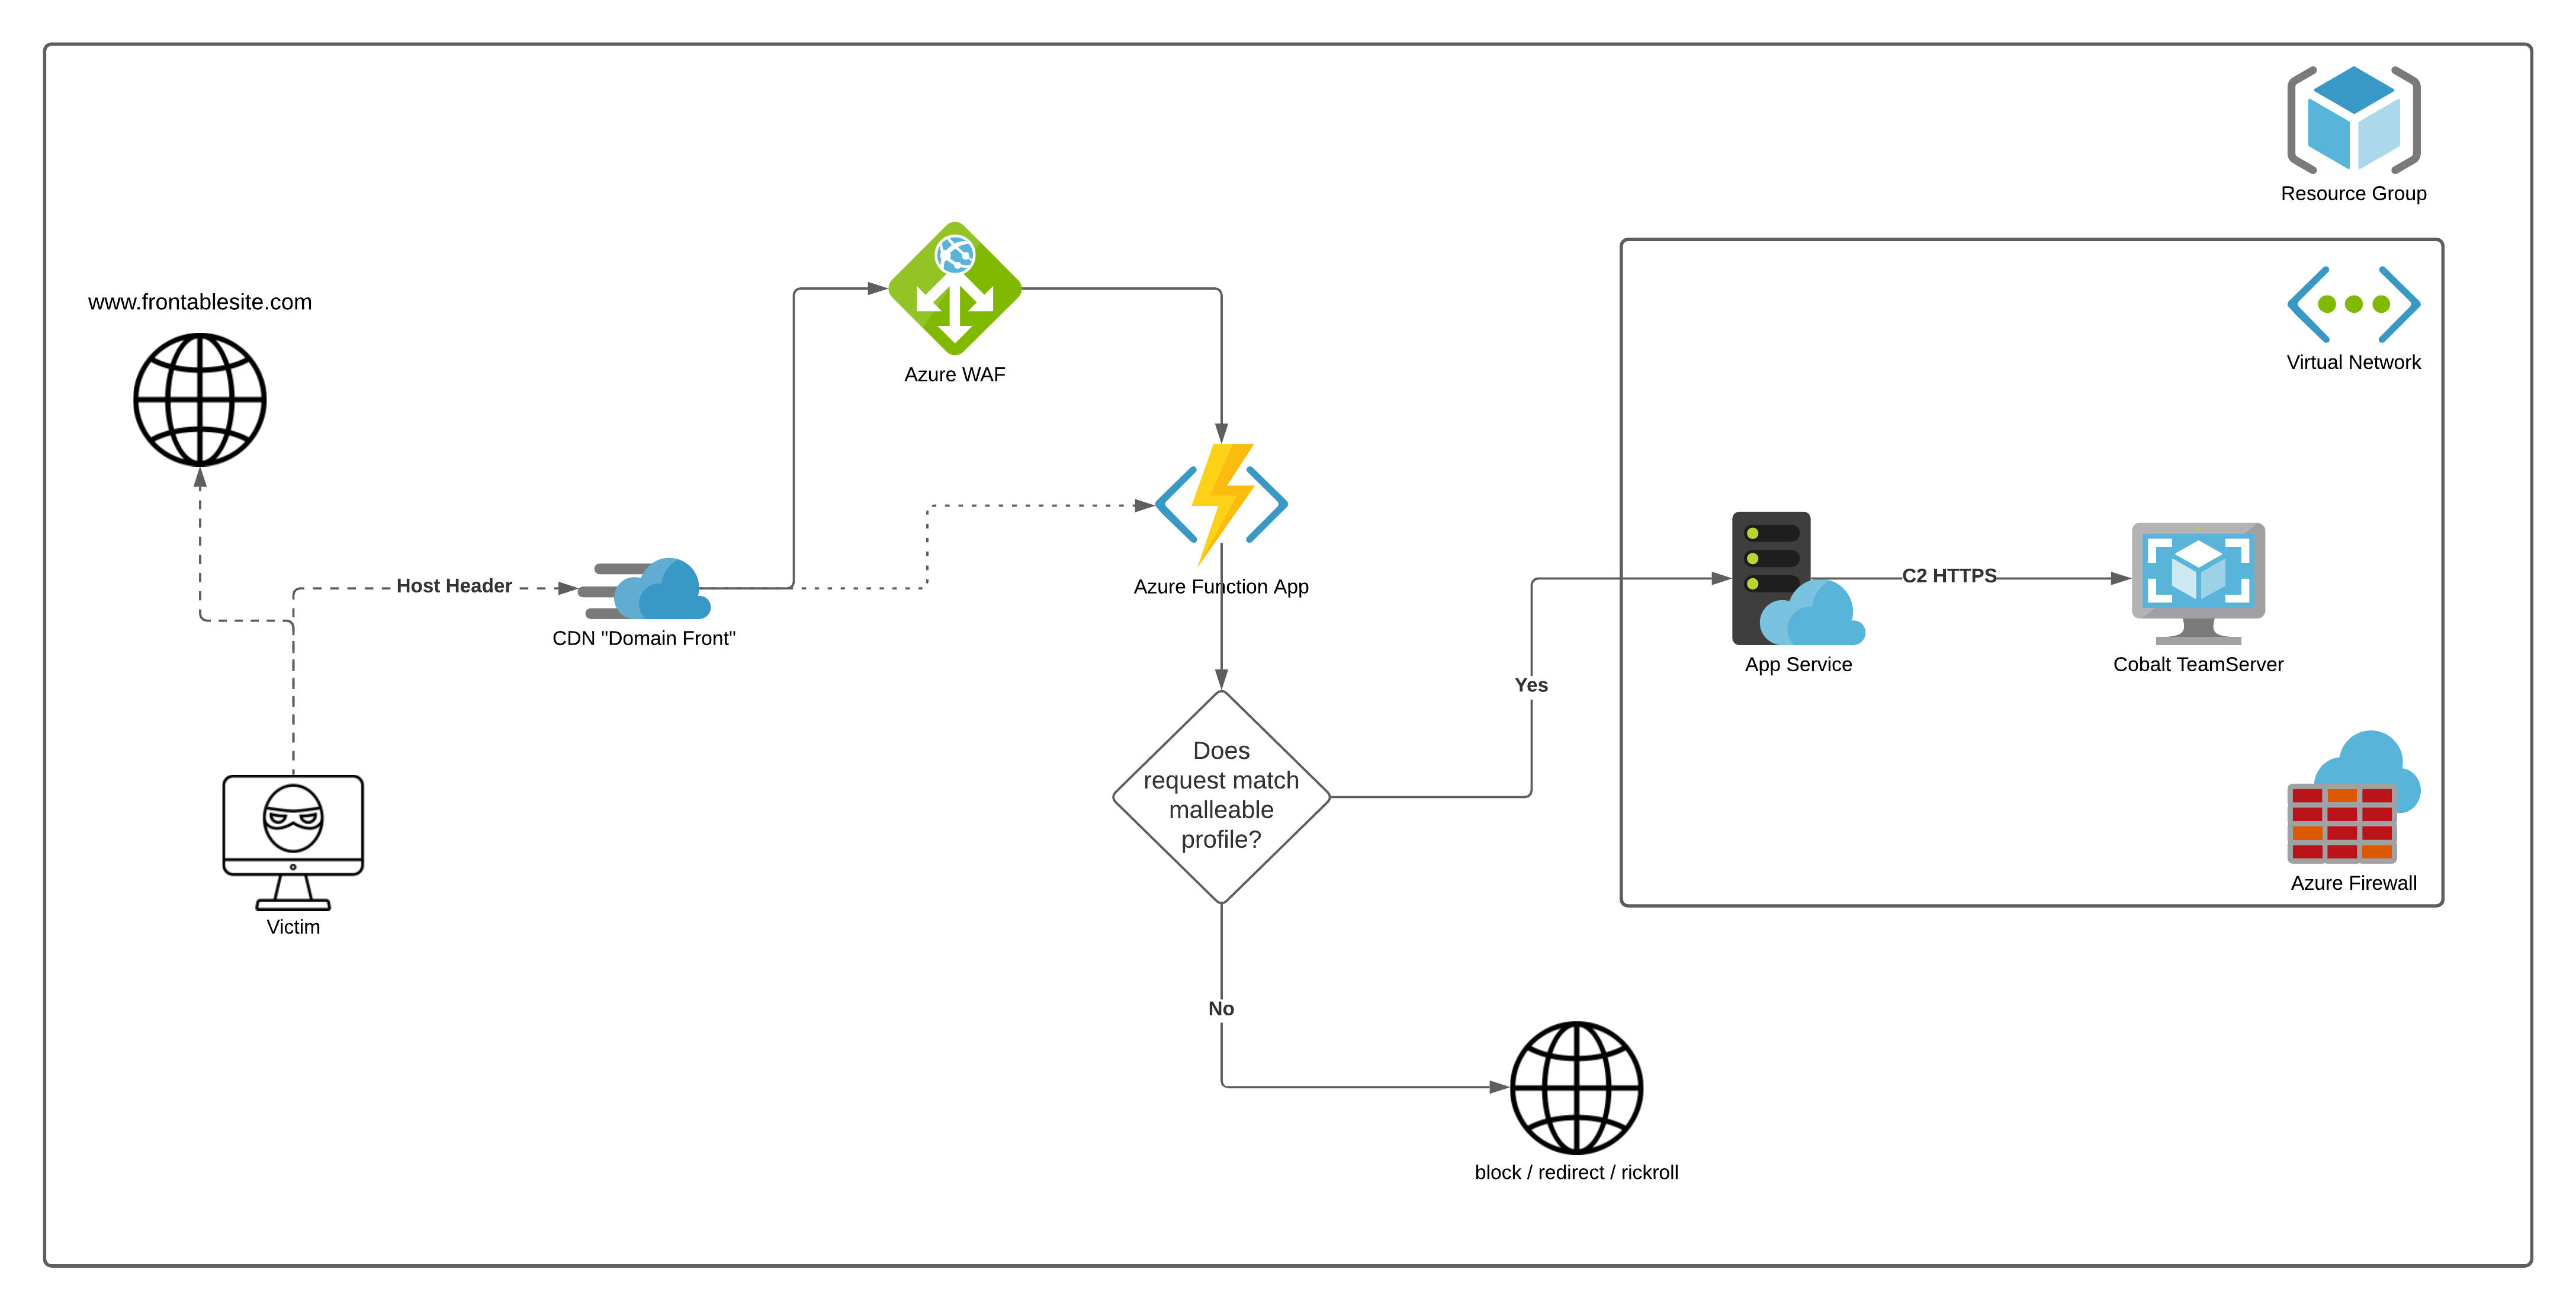
AzureC2Relay 通过 Terraform Azure 模块以及一些本地的 az CLI 命令进行部署。
请确保已安装 terraform、az cli 以及 dotnet core 3.1 运行时。
Windows (Powershell)
&([scriptblock]::Create((Invoke-WebRequest -UseBasicParsing 'https://dot.net/v1/dotnet-install.ps1'))) -runtime dotnet -version 3.1.0
Invoke-WebRequest 'https://releases.hashicorp.com/terraform/0.14.6/terraform_0.14.6_windows_amd64.zip'  -OutFile 'terraform.zip'
Expand-Archive -Path terraform.zip -DestinationPath "$([Environment]::GetFolderPath('ApplicationData'))\TerraForm\"
setx PATH "%PATH%;$([Environment]::GetFolderPath('ApplicationData'))\TerraForm\"
Invoke-WebRequest -Uri https://aka.ms/installazurecliwindows -OutFile .\AzureCLI.msi; Start-Process msiexec.exe -Wait -ArgumentList '/I AzureCLI.msi /quiet'; rm .\AzureCLI.msi
Mac
curl -L https://dot.net/v1/dotnet-install.sh | bash -s --  --runtime dotnet --version 3.1.0
brew update
brew tap hashicorp/tap
brew install hashicorp/tap/terraform
brew install azure-cli
Ubuntu , Debian
curl -L https://dot.net/v1/dotnet-install.sh | bash -s --  --runtime dotnet --version 3.1.0
wget https://releases.hashicorp.com/terraform/0.14.5/terraform_0.14.5_linux_amd64.zip
unzip terraform_0.14.5_linux_amd64.zip
sudo cp terraform /usr/local/bin/terraform
curl -sL https://aka.ms/InstallAzureCLIDeb | sudo bash
Kali
curl -L https://dot.net/v1/dotnet-install.sh | bash -s --  --runtime dotnet --version 3.1.0
wget https://releases.hashicorp.com/terraform/0.14.5/terraform_0.14.5_linux_amd64.zip
unzip terraform_0.14.5_linux_amd64.zip
sudo cp terraform /usr/local/bin/terraform
echo "deb [arch=amd64] https://packages.microsoft.com/repos/azure-cli/ stretch main" | sudo tee /etc/apt/sources.list.d/azure-cli.list
curl -L https://packages.microsoft.com/keys/microsoft.asc | sudo apt-key add -
sudo apt-get update && sudo apt-get install apt-transport-https azure-cli
config.tf 中定义的第一个变量,使其符合你的需求。az login 登录 Azure。terraform init。terraform apply -auto-approve 部署基础设施。一旦 Terraform 完成部署,它将提供所需的 SSH 命令,Cobalt Strike 团队服务器将在已部署的虚拟机上的 tmux 会话中运行。
当你不再需要使用该基础设施时,可以用 terraform destroy -auto-approve 将其移除。