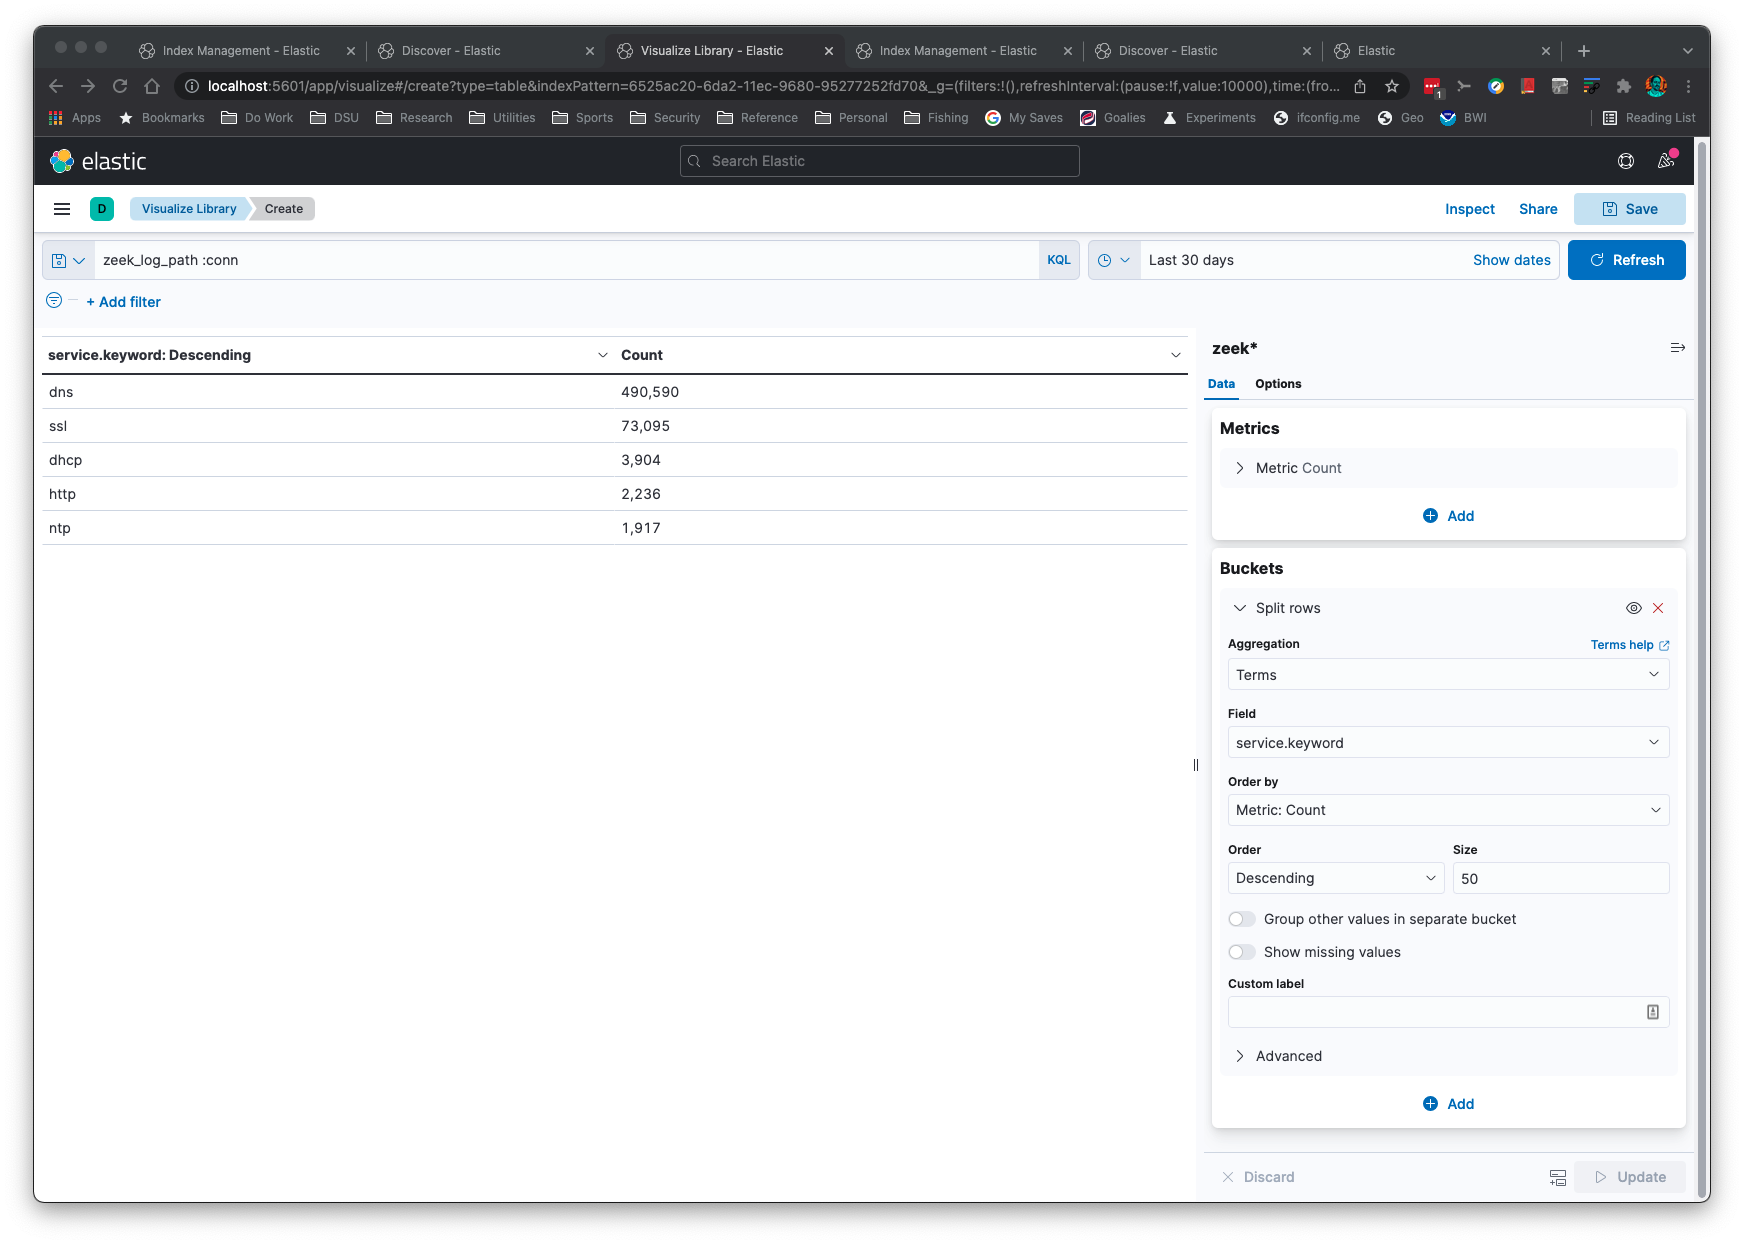
此 Python 应用程序将 Zeek 的 ASCII TSV 和 JSON 日志转换为 ElasticSearch 的批量加载 JSON 格式。
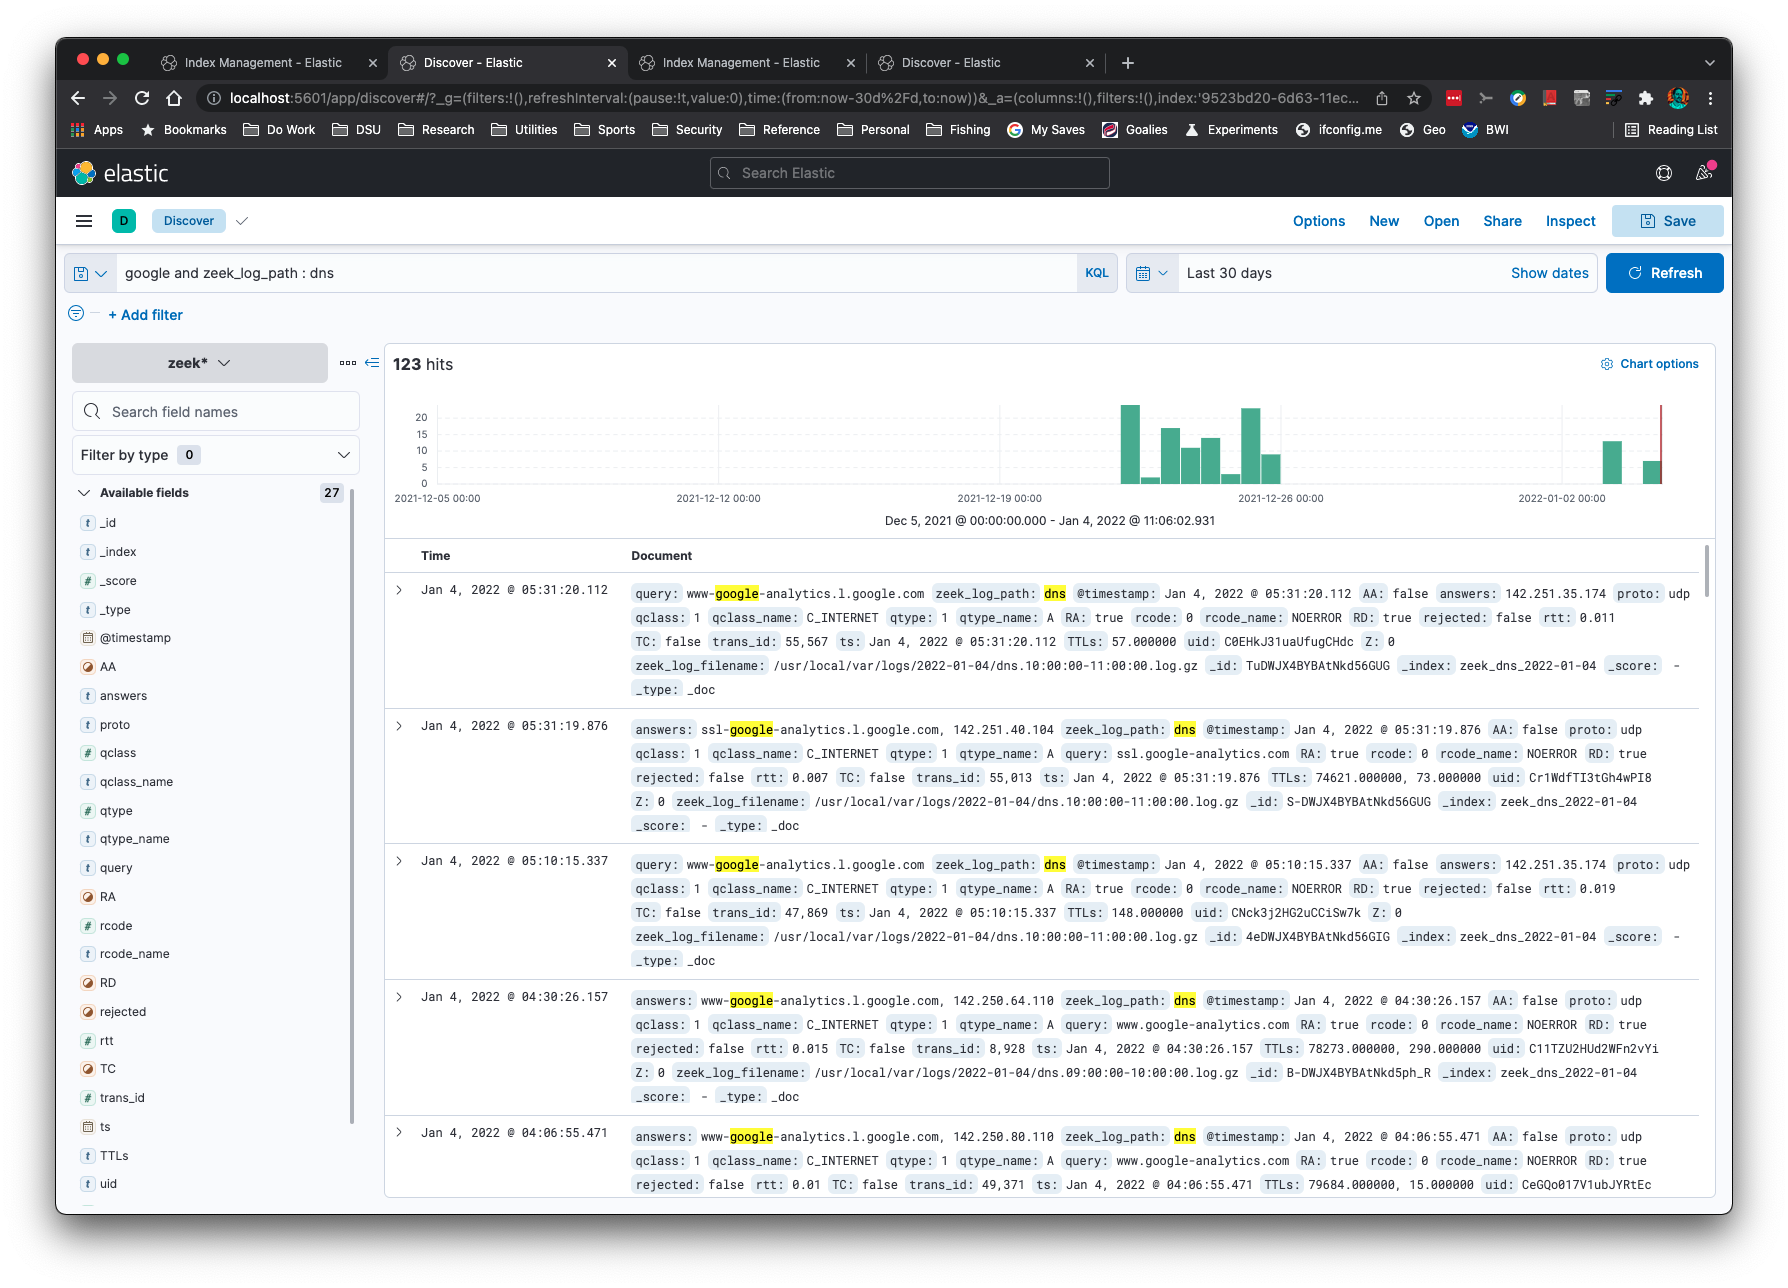
想要查看同一连接 ID (uid) 或文件 ID (fuid) 对应的多个 Zeek 日志吗?以下是单个 uid 在 files.log、http.log 和 conn.log 中的命中结果:
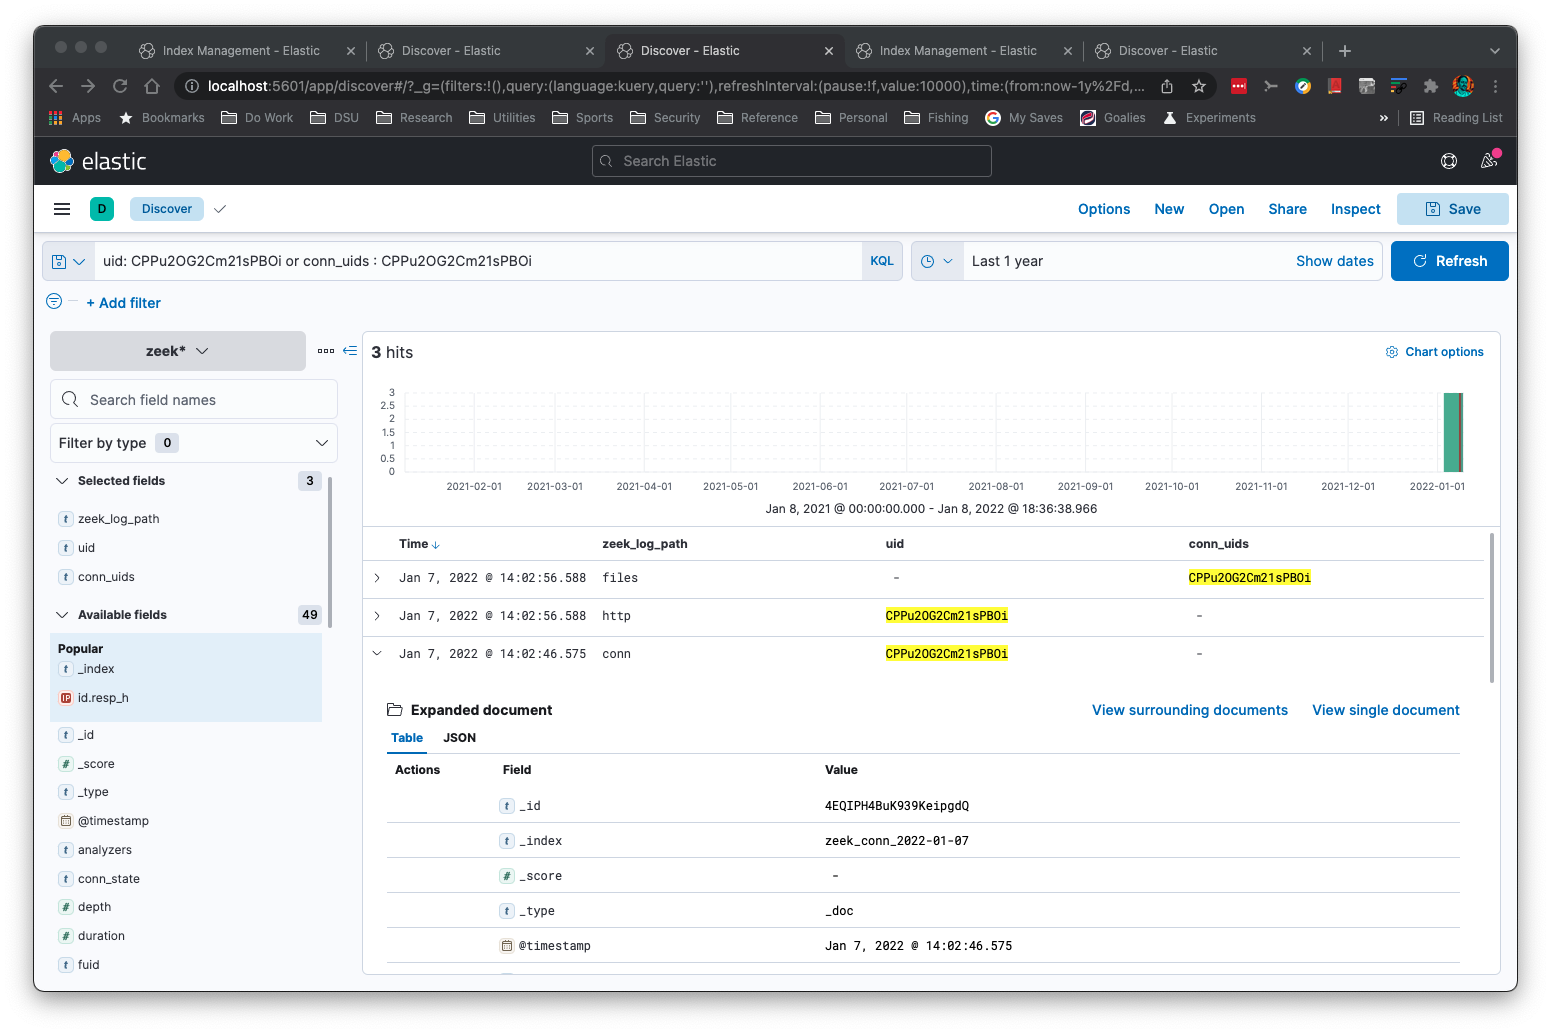
您可以对 Zeek 的 'addr' 类型执行子网搜索:
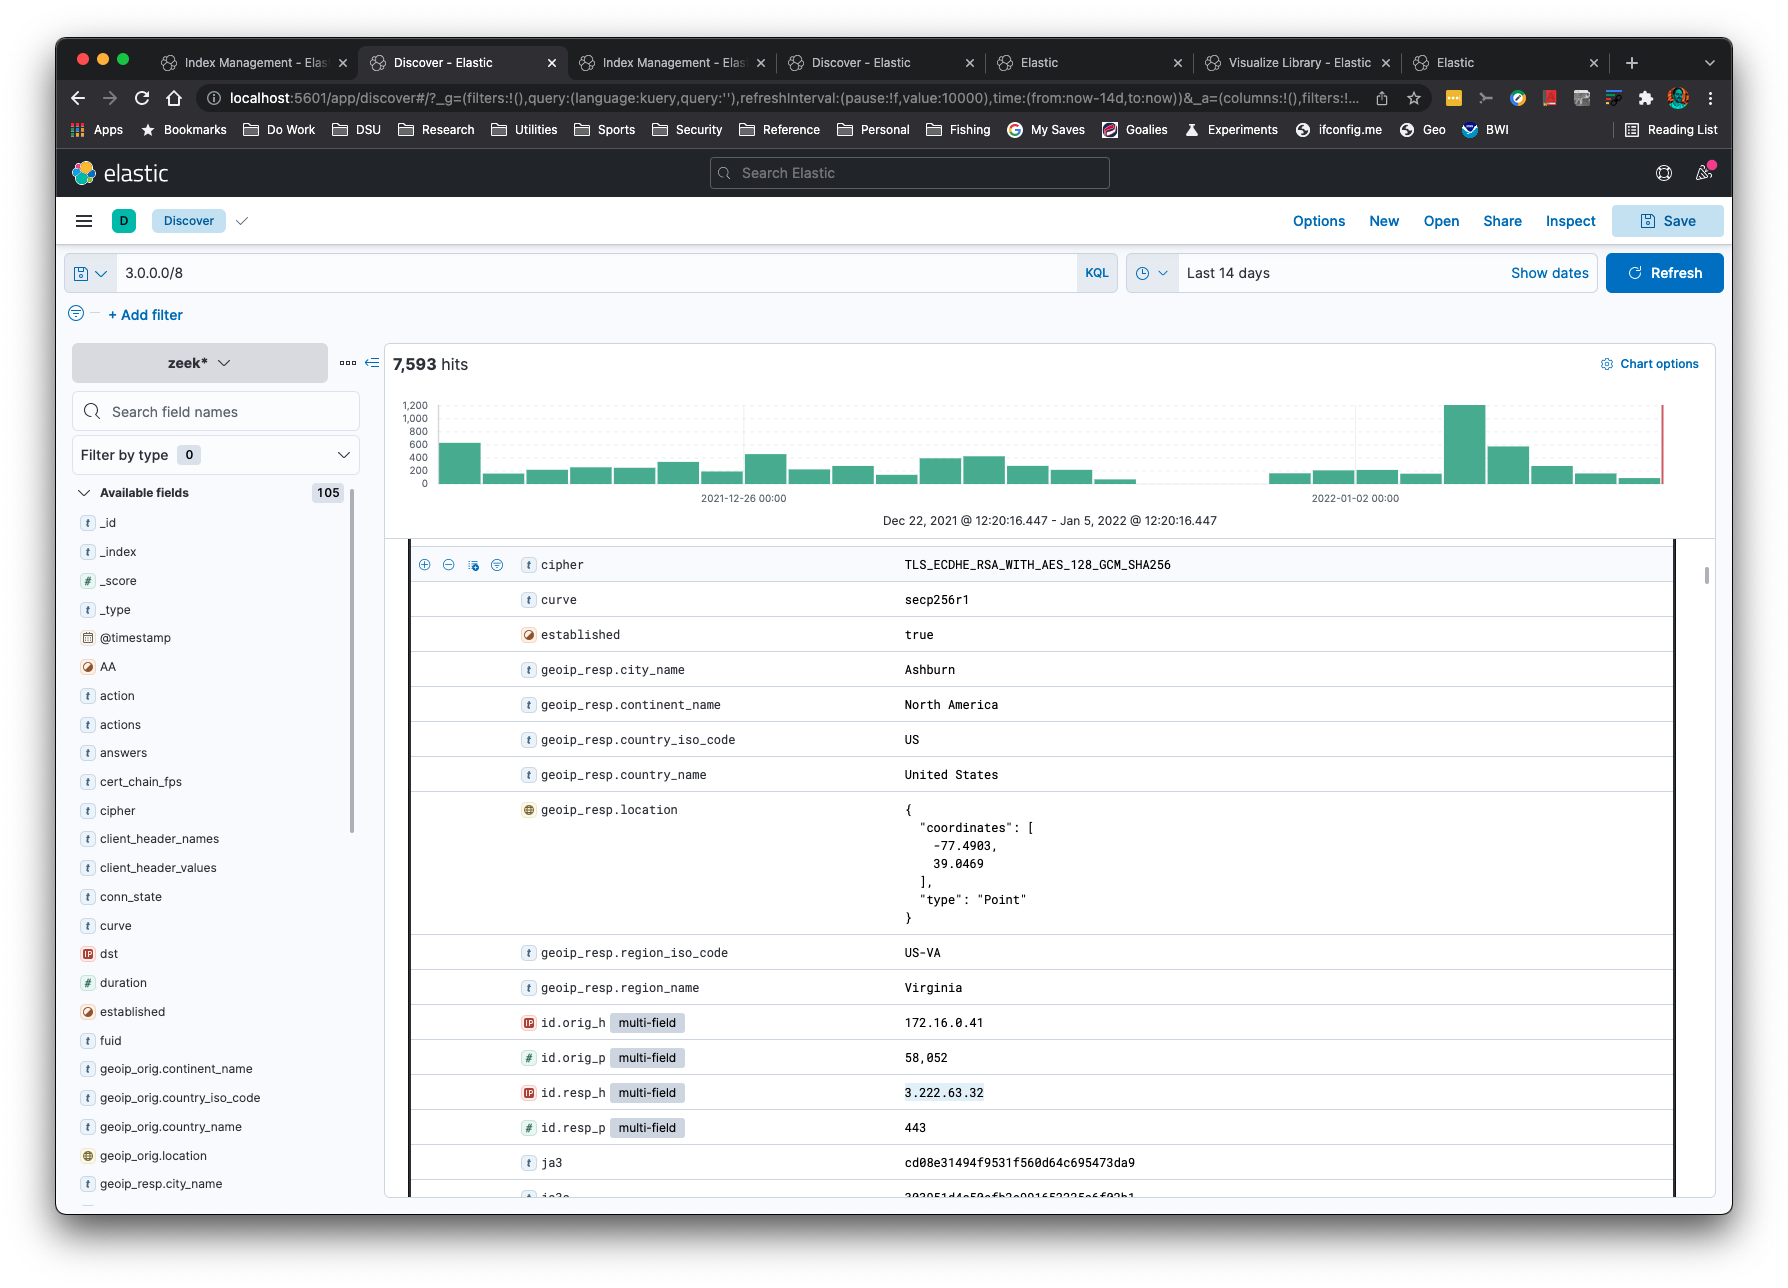
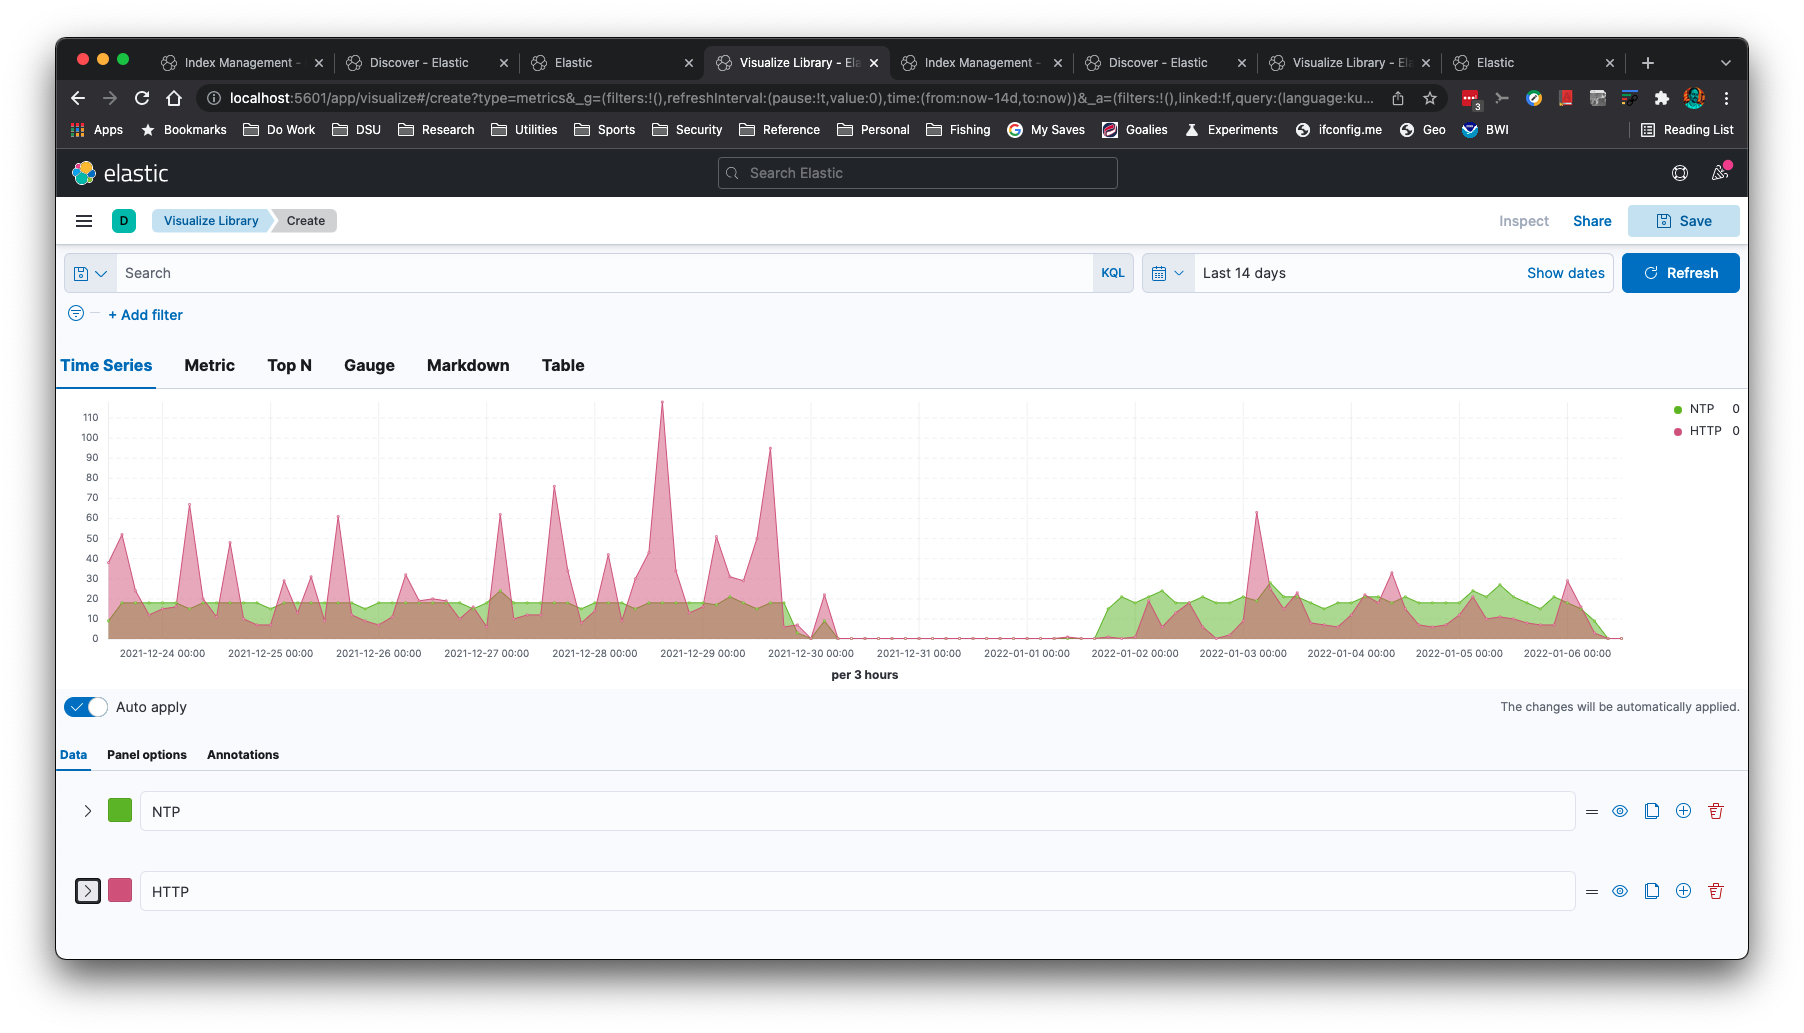
您可以创建时间序列图,例如这个 NTP 和 HTTP 图:
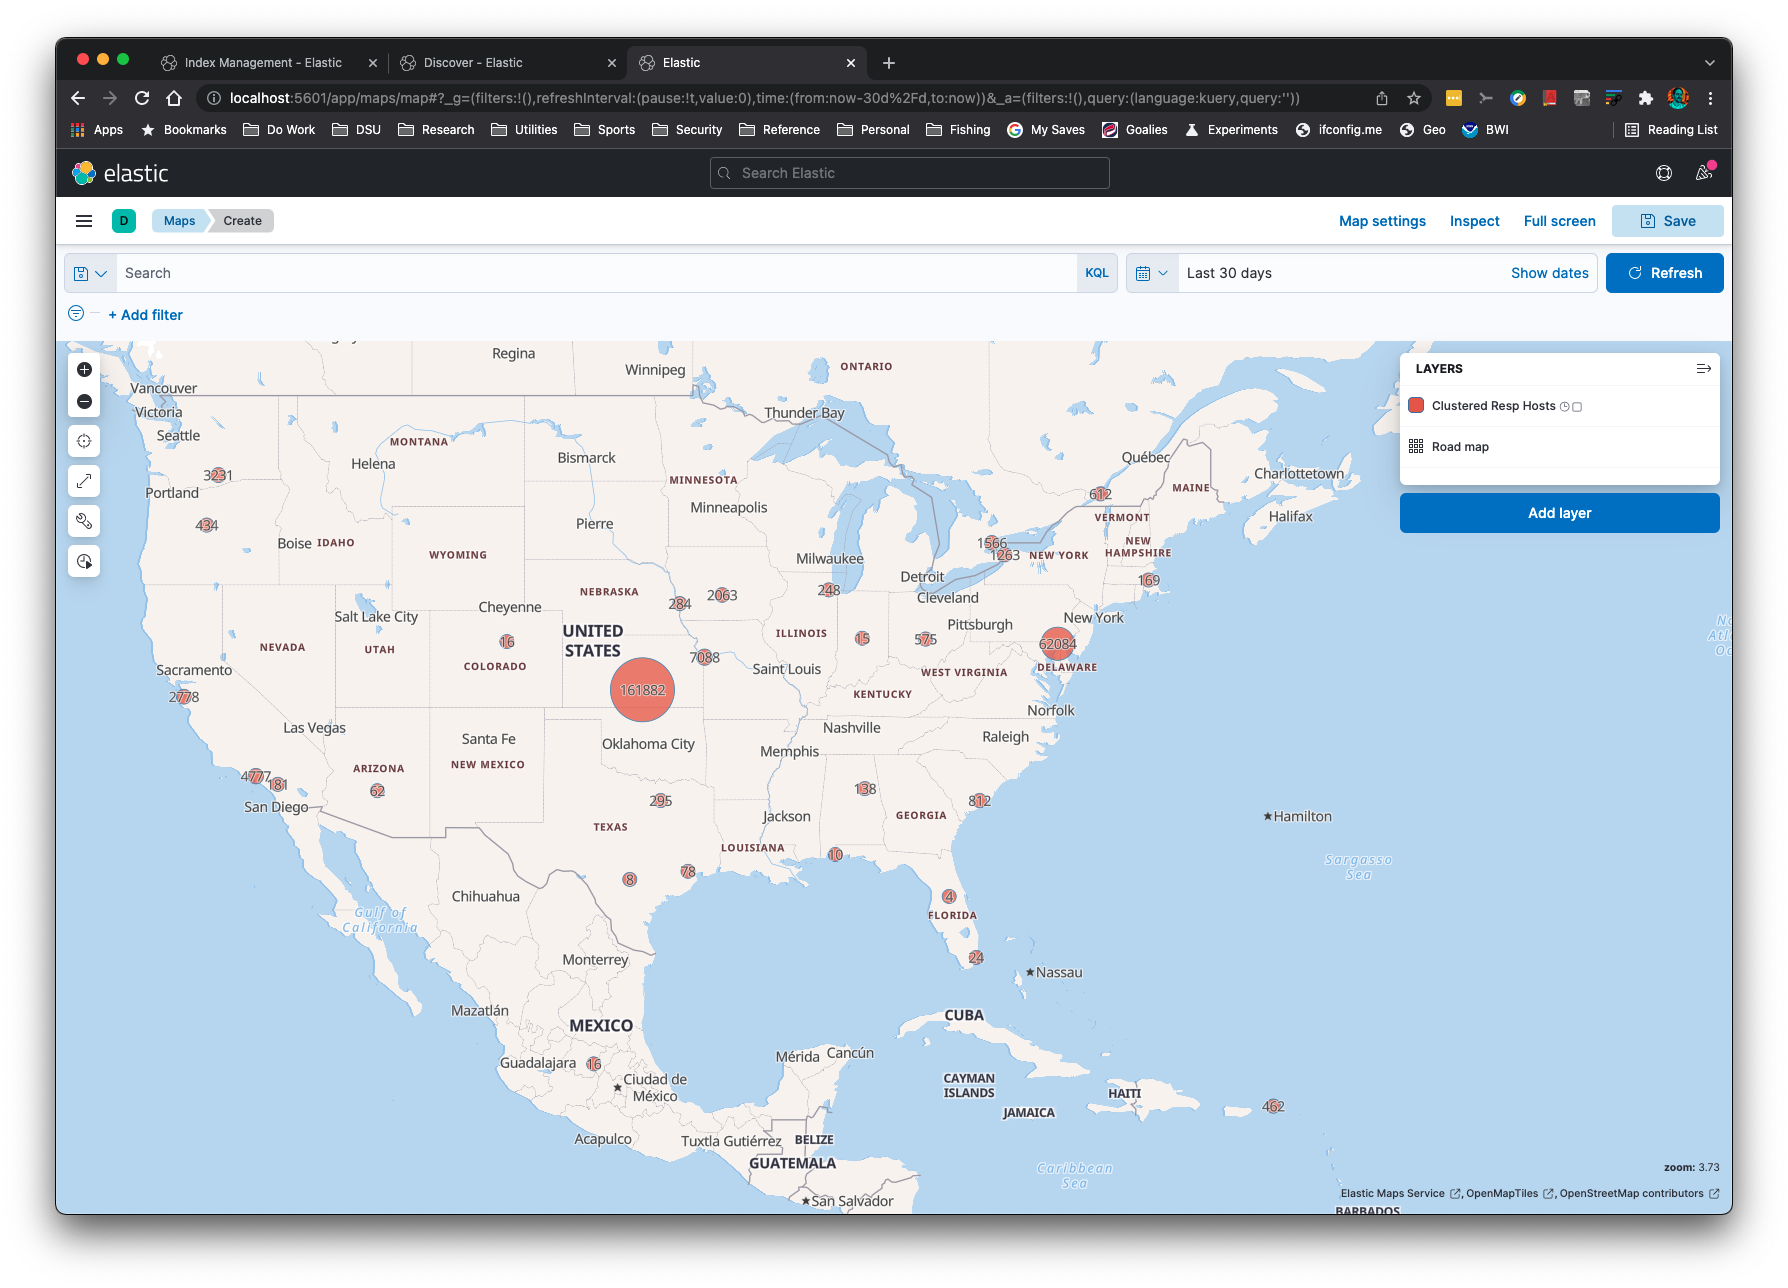
IP 地址可以使用 -g 命令行选项进行地理定位:
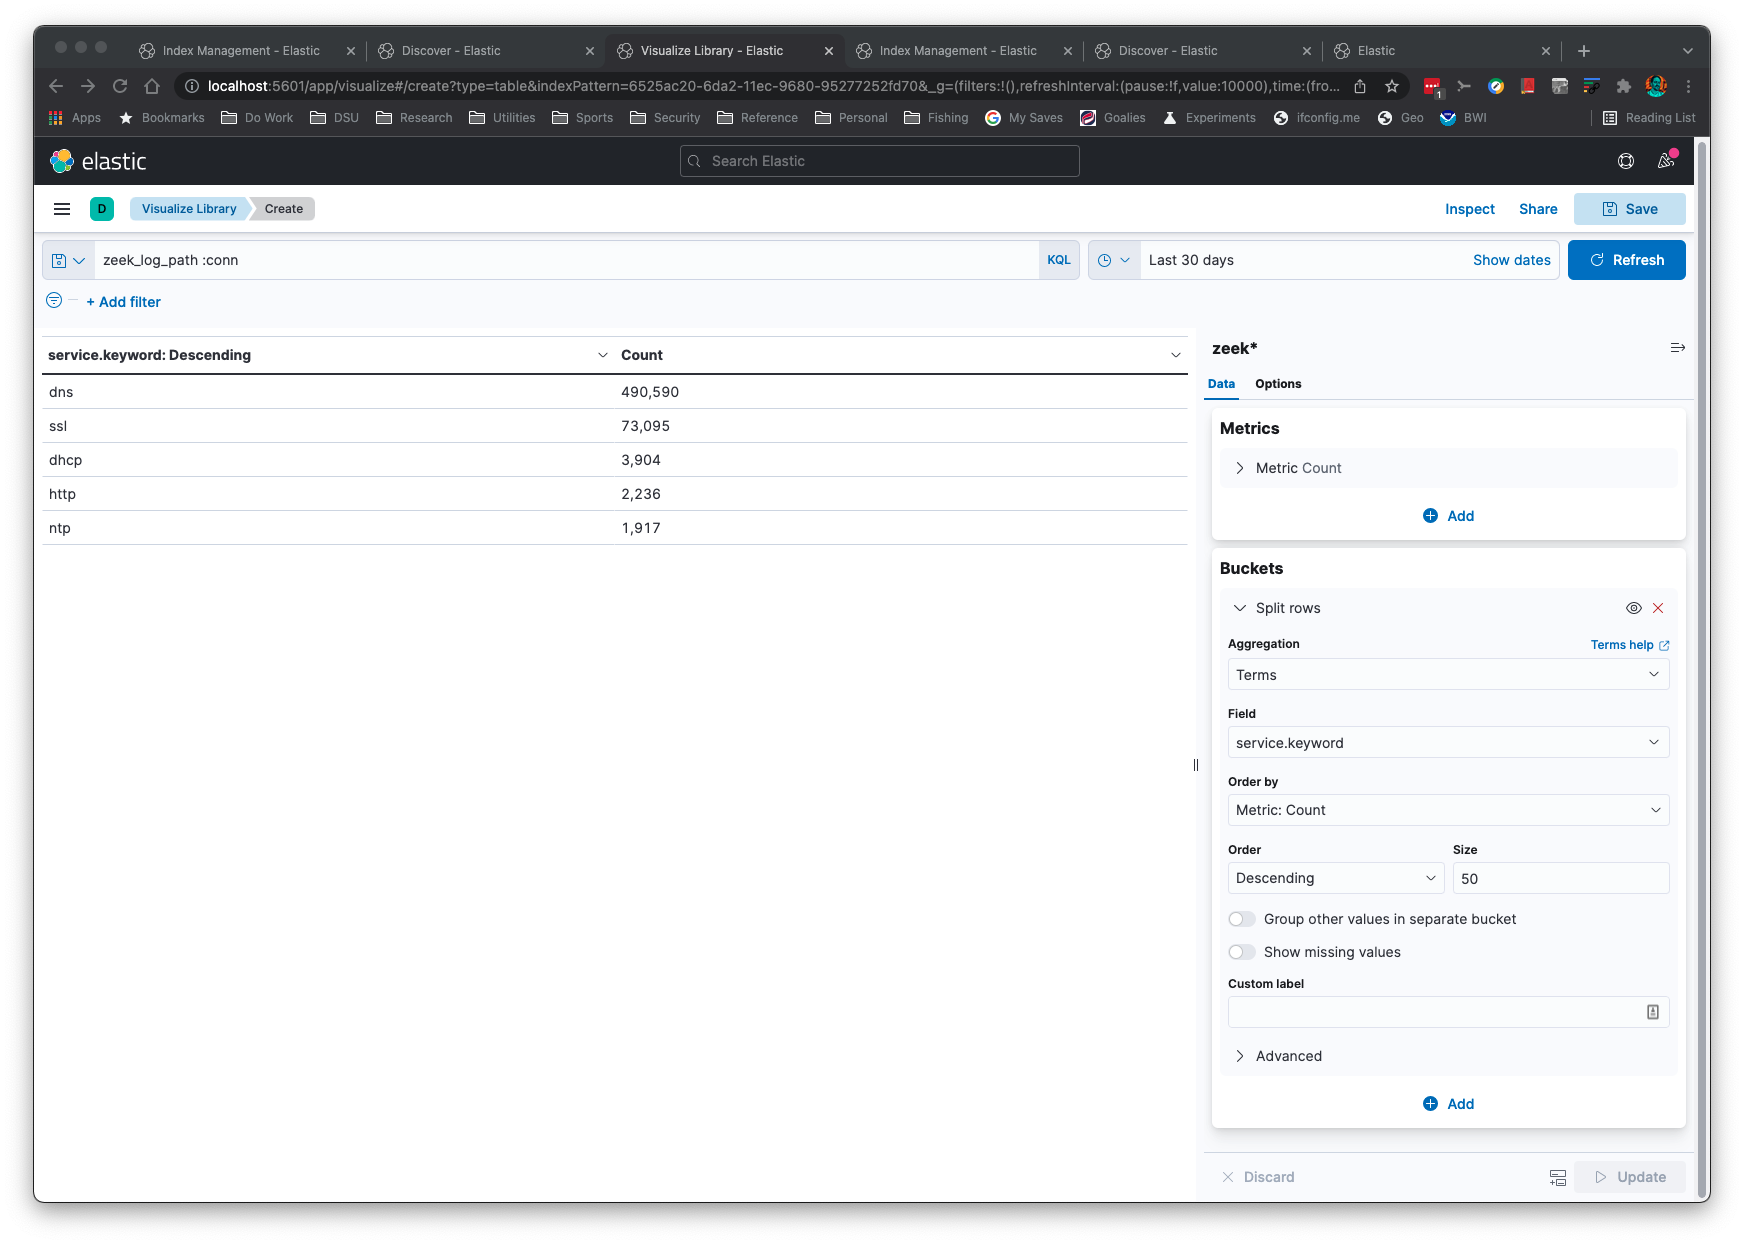
聚合操作简单快捷:
当 Zeek 日志格式发生变化时,此应用程序将“直接可用”。该逻辑会读取字段名称及相关类型,以便在 ElasticSearch 中正确设置映射。
此应用程序可以识别 gzip 或未压缩的日志。此应用程序假定您已在本地主机的默认端口上设置好 ElasticSearch。
如果您没有 ElasticSearch,您可以使用 -s -b 命令行选项将 JSON 输出到标准输出,以便通过 jq 应用程序 进行处理。
您可以使用 -k 命令行选项为文本字段添加关键字子字段。这对于在 Kibana 中进行聚合非常有用。
如果您的系统上已经安装了 Python,那么除了 Elasticsearch、Kibana 和 zeek2es.py 之外,您无需再复制任何内容到您的机器上,前提是您已经安装了 requests 库。
假设您满足要求,则无需安装。您只需将 zeek2es.py 复制到您的主机并使用 Python 运行即可。一旦使用自动索引名称生成(即您未提供 -i 选项)导入 Zeek 日志,您将看到索引名称形如 "zeek_zeeklogname_date",其中 zeeklogname 是类似 conn 的日志名称,date 是 YYYY-MM-DD 格式的日期。在这种情况下,请将您的 Kibana 索引模式设置为匹配 zeek*。如果您使用 -i 选项命名索引,则需要创建一个与您的命名方案匹配的 Kibana 索引模式。
如果您正在升级 zeek2es,请参阅关于升级 zeek2es 的部分。
如果您使用的是 Elastic v8.0+,它默认启用了安全功能。这增加了用户名和密码以及 HTTPS 的要求。
如果您希望能够使用通配符删除索引/数据流(如本自述文件中的示例所示),请在 elasticsearch.yml 中添加以下行:```
action.destructive_requires_name: false
你还需要修改本 readme 中的 curl 命令,使其包含 `-k -u elastic:<password>`,其中 `elastic` 用户的密码通过类似以下的命令进行设置:```
./bin/elasticsearch-reset-password -u elastic -i
你可以使用 zeek2es.py 配合 --user 和 --passwd 命令行选项来指定你的 ES 凭据。你也可以通过辅助脚本的额外命令行参数来提供这些选项。
使用此代码最简单的方式可能是通过 Docker。所有文件都位于 docker 目录中。首先,你需要编辑 .env 文件中带有 CHANGEME!!! 的行,以适配你的环境。你还需要编辑 docker/zeek2es/entrypoint.sh 中的 Elastic 密码以保持一致。它位于 --passwd 选项之后。接下来,你可以进入 docker 目录,然后输入以下命令以启动一个 zeek2es 和 Elasticsearch 集群:```
docker-compose build
dockr-compose up
现在您可以将日志放入 `VOLUME_MOUNT/data/logs` 目录(您在 `.env` 文件中设置的 `VOLUME_MOUNT`)。
当此目录中创建日志时,zeek2es 将开始处理它们并将其推送到 Elasticsearch。
然后您可以使用您在 `.env` 文件中设置的用户名和密码登录 https://localhost:5601。
默认情况下有自签名证书,但如果您编辑 docker compose 文件,则可以更改。  进入
Kibana 后,您将转到 Stack Management->Data Views,并为 `logs*` 创建带有 `@timestamp` 时间戳的数据视图。
现在您将能够转到 Discover 并开始搜索您的日志!  您的数据会持久保存在您设置的 `VOLUME_MOUNT/data` 目录中。
如果您想删除所有数据,只需 `rm -rf VOLUME_MOUNT/data`,将您设置的目录替换到该删除命令中。
下次启动集群时,它将全新以待,用于接收更多数据。

## 升级 zeek2es <a name="upgradingzeek2es" />

大多数升级只需将较新的 [zeek2es.py](https://github.com/corelight/zeek2es/blob/master/zeek2es.py) 复制到
旧版本之上即可。  在某些情况下,`-g` 命令行选项所需的 ES 摄取管道
可能会在升级期间发生变化。  因此,强烈建议您删除
您的 [摄取管道](#esingestpipeline) 后再运行新版本的 zeek2es.py。

### ES 摄取管道 <a name="esingestpipeline" />

如果您需要[删除 "zeekgeoip" ES 摄取管道](https://www.elastic.co/guide/en/elasticsearch/reference/current/delete-pipeline-api.html)
(用于通过 `-g` 命令行选项对 IP 地址进行地理定位),您可以通过 Kibana 的 Stack Management->Ingest Pipelines 以图形方式完成,
或者使用此命令为您完成:```
curl -X DELETE "localhost:9200/_ingest/pipeline/zeekgeoip?pretty"
在更新 zeek2es.py 副本时,强烈建议执行此命令。
zeek2es 在将 Zeek 日志存储到 ElasticSearch 之前,提供了过滤功能。此功能可通过 -a 或 -f 选项启用。过滤器由 Python lambda 函数构建,其输入是一个表示输出的 Python 字典。您可以使用 -f 选项并配合以下 lambda 过滤器文件添加一个过滤器,以仅存储 service 字段已填充的连接日志:```
lambda x: 'service' in x and len(x['service']) > 0
或者,也许你想筛选出至少有 1,024 字节的连接,其中至少 1 字节来自
目的地:```
lambda x: 'orig_ip_bytes' in x and 'resp_ip_bytes' in x and x['orig_ip_bytes'] + x['resp_ip_bytes'] > 1024 and x['resp_ip_bytes'] > 0
更简单的 lambda 过滤器可以通过 -a 选项在命令行中提供。此过滤器将仅存储发起方 IP 地址属于 192.0.0.0/8 网络的连接日志条目:```
python zeek2es.py conn.log.gz -a "lambda x: 'id.orig_h' in x and ipaddress.ip_address(x['id.orig_h']) in ipaddress.ip_network('192.0.0.0/8')"
对于高级用户,`-f` 选项将允许您定义完整的函数(而不是 Python 的 lambda 函数),因此您可以编写
跨越多行的函数。

### 按键过滤 <a name="filteronkeys" />

在某些情况下,您可能希望从一个日志中提取依赖于另一个日志的数据。  一个
示例是查找所有 `ssl.log` 行,这些行的 `uid` 与之前
从 `conn.log` 索引的行匹配,反之亦然。  您可以通过导入您的
`conn.log` 文件并使用 `-o uid uid.txt` 命令行来过滤。  这会将所有已索引的 uid 记录
到名为 `uid.txt` 的文件中。  然后,当您导入 `ssl.log` 文件时,您需要提供
`-e uid uid.txt` 命令行。  这将只导入包含
`uid.txt` 中 `uid` 值的 SSL 行,该文件是之前从我们导入的 `conn.log` 构建的。

## 命令行示例 <a name="commandlineexamples" />```
python zeek2es.py your_zeek_log.gz -i your_es_index_name
此脚本可以在所有连接日志上并行运行,每次10个,使用以下命令:``` find /some/dir -name “conn*.log.gz” | parallel -j 10 python zeek2es.py {1} :::: -
如果你希望自动导入某个目录中创建的所有 conn.log 文件,可以使用以下 [fswatch](https://emcrisostomo.github.io/fswatch/) 命令:```
fswatch -m poll_monitor --event Created -r /data/logs/zeek/ | awk '/^.*\/conn.*\.log\.gz$/' | parallel -j 5 python ~/zeek2es.py {} -g -d :::: -
如果你安装了 jq 命令,就可以在所有日志中搜索公共字段(如连接 uid),即使没有 ElasticSearch:``` find /usr/local/var/logs -name "*.log.gz" -exec python ~/Source/zeek2es/zeek2es.py {} -s -b -z ; | jq -c '. | select(.uid=="CLbPij1vThLvQ2qDKh")'
如果你熟悉 jq,你可以使用比这复杂得多的 jq 查询。

如果你想从 ElasticSearch 中删除所有 Zeek 数据,以下命令可以帮你完成:```
curl -X DELETE http://localhost:9200/zeek*
由于索引的末尾附加了日期,你可以使用以下命令删除 2021 年 12 月 31 日的数据:``` curl -X DELETE http://localhost:9200/zeek_*_2021-12-31
你可以使用以下命令删除所有 conn.log 条目:```
curl -X DELETE http://localhost:9200/zeek_conn_*
$ python zeek2es.py -h usage: zeek2es.py [-h] [-i ESINDEX] [-u ESURL] [--user USER] [--passwd PASSWD] [-l LINES] [-n NAME] [-k KEYWORDS [KEYWORDS ...]] [-a LAMBDAFILTER] [-f FILTERFILE] [-y OUTPUTFIELDS [OUTPUTFIELDS ...]] [-d DATASTREAM] [--compress] [-o fieldname filename] [-e fieldname filename] [-g] [-p SPLITFIELDS [SPLITFIELDS ...]] [-j] [-r] [-t] [-s] [-b] [--humio HUMIO HUMIO] [-c] [-w] [-z] filename
Process Zeek ASCII logs into ElasticSearch.
positional arguments: filename The Zeek log in *.log or *.gz format. Include the full path.