controlplaneio/kubesec
Kubernetes 资源的安全风险分析
[![Testing Workflow][testing_workflow_badge]][testing_workflow_badge] [![Security Analysis Workflow][security_workflow_badge]][security_workflow_badge] [![Release Workflow][release_workflow_badge]][release_workflow_badge]
[![Go Report Card][goreportcard_badge]][goreportcard] [![PkgGoDev][go_dev_badge]][go_dev]
更多示例请访问 Kubesec.io,它使用 ControlPlane 托管的 API,地址为 v2.kubesec.io/scan。
创建一个要扫描的 Kubernetes 资源文件(例如 kubesec-test.yaml)。为了快速测试,你可以保存以下 Pod 清单:
$ cat <<EOF > kubesec-test.yaml
apiVersion: v1
kind: Pod
metadata:
  name: kubesec-demo
spec:
  containers:
  - name: kubesec-demo
    image: gcr.io/google-samples/node-hello:1.0
    securityContext:
      readOnlyRootFilesystem: true
EOF
对你的清单文件执行扫描:
# Using the local binary
kubesec scan kubesec-test.yaml

# Or using Docker
docker run -i kubesec/kubesec:v2 scan /dev/stdin < kubesec-test.yaml

# Using the local binary with a human-readable table output format
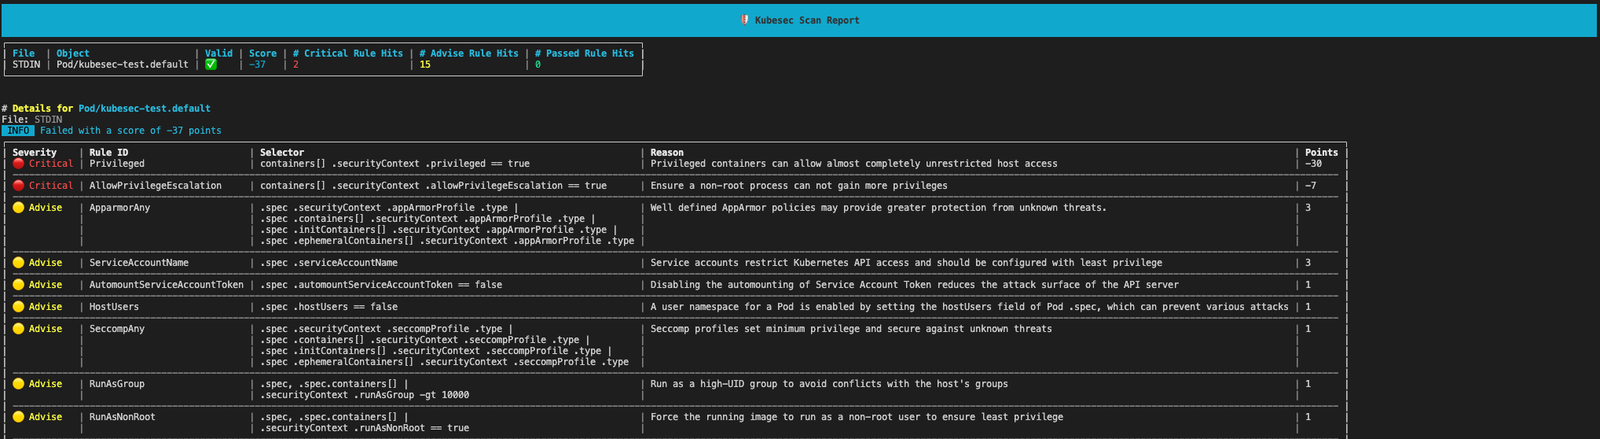
kubesec scan kubesec-test.yaml --format table
[!TIP] 要以人类可读的表格(而非默认的 JSON 格式)查看结果,请使用
--format table标志
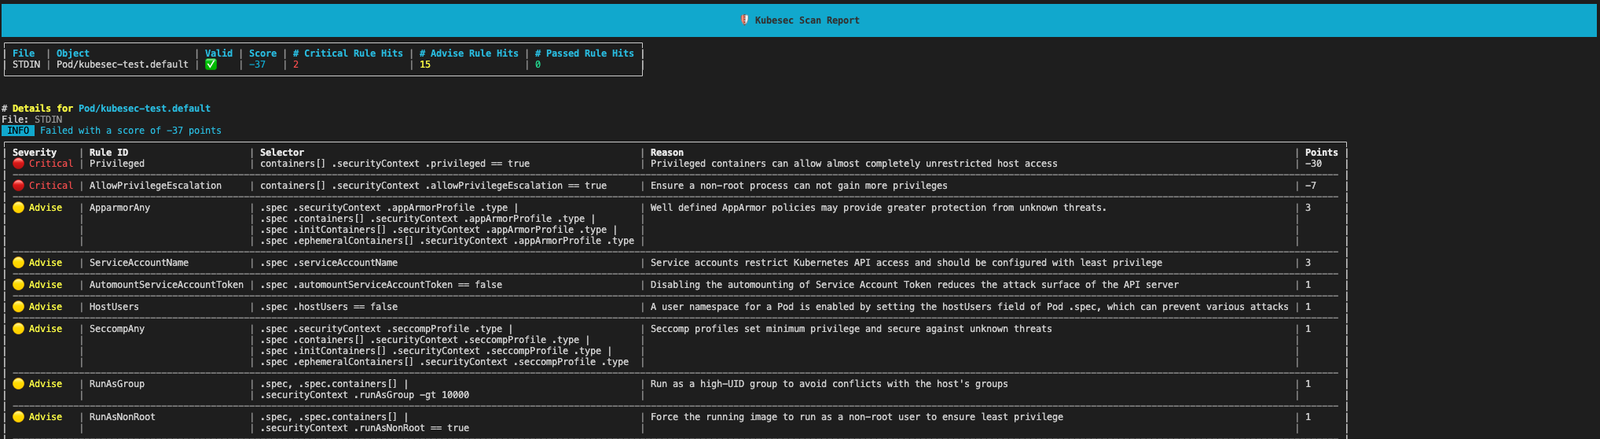
kubesec 将输出安全评分以及对你资源的详细分析。
Kubesec 可通过以下方式获取:
docker.io/kubesec/kubesec:v2)或者使用以下命令从 GitHub 安装最新提交:
$ go install github.com/controlplaneio/kubesec/v2@latest
$ GO111MODULE="on" go get github.com/controlplaneio/kubesec/v2
从本地文件或标准输入扫描 Kubernetes 资源。
Kubesec 可以扫描单个输入文件中的多个 YAML 文档,也可以一次扫描多个文件中的文档,只要这些文档按照 --- 正确分隔为多个文档即可。
# Scan a specific local YAML file
kubesec scan ./deployment.yaml

# Scan from standard input (JSON or YAML)
cat file.json | kubesec scan -

# Scan a rendered Helm chart
helm template -f values.yaml ./chart | kubesec scan /dev/stdin

# Scan multiple YAML documents separated by '---'
{ cat test/asset/multi.yml; echo "---"; cat test/asset/critical.yml; } | kubesec scan -
你可以使用官方 Docker 镜像运行相同的扫描命令:
# Scan a file via Docker using standard input
docker run -i kubesec/kubesec:v2 scan /dev/stdin < kubesec-test.yaml
Kubesec 支持三种不同的输出格式,通过 --format / -f 标志指定:json(默认)、table 和 template,并且可以扫描单个输入文件中的多个 YAML 文档。
# JSON array output (default behaviour)
kubesec scan ./deployment.yaml --format json

# Human-readable table output
kubesec scan ./deployment.yaml --format table

# Use a custom template for the output
kubesec scan ./deployment.yaml --format template --template report-template.tmpl
# One rule
kubesec scan --rules CapSysAdmin kubesec-test.yaml

# Multiple rules
kubesec scan --rules RunAsNonRoot,SeccompAny,ApparmorAny kubesec-test.yaml
[
  {
    "object": "Pod/security-context-demo.default",
    "valid": true,
    "message": "Failed with a score of -30 points",
    "score": -30,
    "scoring": {
      "critical": [
        {
          "selector": "containers[] .securityContext .capabilities .add == SYS_ADMIN",
          "reason": "CAP_SYS_ADMIN is the most privileged capability and should always be avoided",
          "points": -30
        }
      ],
      "advise": [
        {
          "selector": "containers[] .securityContext .runAsNonRoot == true",
          "reason": "Force the running image to run as a non-root user to ensure least privilege",
          "points": 1
        },
        {
          // ...
        }
      ]
    }
  }
]
# Print all scanning rules with their associated point scores
kubesec print-rules

# Print all scanning rules with their associated point scores as a table
kubesec print-rules --format table
[
  {
    "id": "AllowPrivilegeEscalation",
    "selector": "containers[] .securityContext .allowPrivilegeEscalation == true",
    "reason": "Ensure a non-root process can not gain more privileges",
    "kinds": [
      "Pod",
      "Deployment",
      "StatefulSet",
      "DaemonSet"
    ],
    "points": -7,
    "advise": 0
  },
...
]
Kubesec 利用 kubeconform(感谢 @yannh)来验证要扫描的清单。这意味着指定不同的 schema 位置需要遵循 kubeconform README 中描述的规则。
# Usees the latest schema from upstream
# Schema will be fetched from: https://raw.githubusercontent.com/yannh/kubernetes-json-schema/master/master-standalone-strict/pod-v1.json
kubesec scan ./pod.yaml

# Use a specific schema version from upstream (format x.y.z with no v prefix)
# Schema will be fetched from: https://raw.githubusercontent.com/yannh/kubernetes-json-schema/master/v1.25.3-standalone-strict/pod-v1.json
kubesec scan ./pod.yaml --kubernetes-version 1.25.3

# Use a specific schema version in an airgapped environment over HTTP
# Schema will be fetched from: `https://host.server/v<version>-standalone-strict/pod-v1.json`
kubesec scan ./deployment.yaml --kubernetes-version <version> --schema-location https://host.server

# Use a specific schema version in an airgap environment with local files
# Schema will be read from: `/opt/schemas/v<version>-standalone-strict/pod-v1.json`
kubesec scan ./deployment.yaml --kubernetes-version <version> --schema-location /opt/schemas
注意: 为了限制外部网络调用并支持在离线(airgap)环境中使用,kubesec 镜像内嵌了 schema。如果你希望更改 schema 位置,则需要在运行时更改 K8S_SCHEMA_VER 和 SCHEMA_LOCATION 环境变量。
Kubesec 内置了一个 HTTP 服务器,你可以在本地或容器中运行它,以通过网络接受扫描请求。
# Start the HTTP server in the background on port 8080
kubesec http 8080 &

# Send a file to the running server via POST
curl -sSX POST --data-binary @deployment.yaml http://localhost:8080/scan

# Stop the background local server when finished
kill %
# Start the HTTP server using Docker
docker run -d -p 8080:8080 kubesec/kubesec:v2 http 8080

# Send a file to the running server via POST
curl -sSX POST --data-binary @deployment.yaml http://localhost:8080/scan
别忘了停止服务器。
Kubesec 还可通过 HTTPS 在 v2.kubesec.io/scan 上使用。
请勿向此公共服务提交敏感 YAML。
该服务基于良好信誉和尽力而为的原则运行。