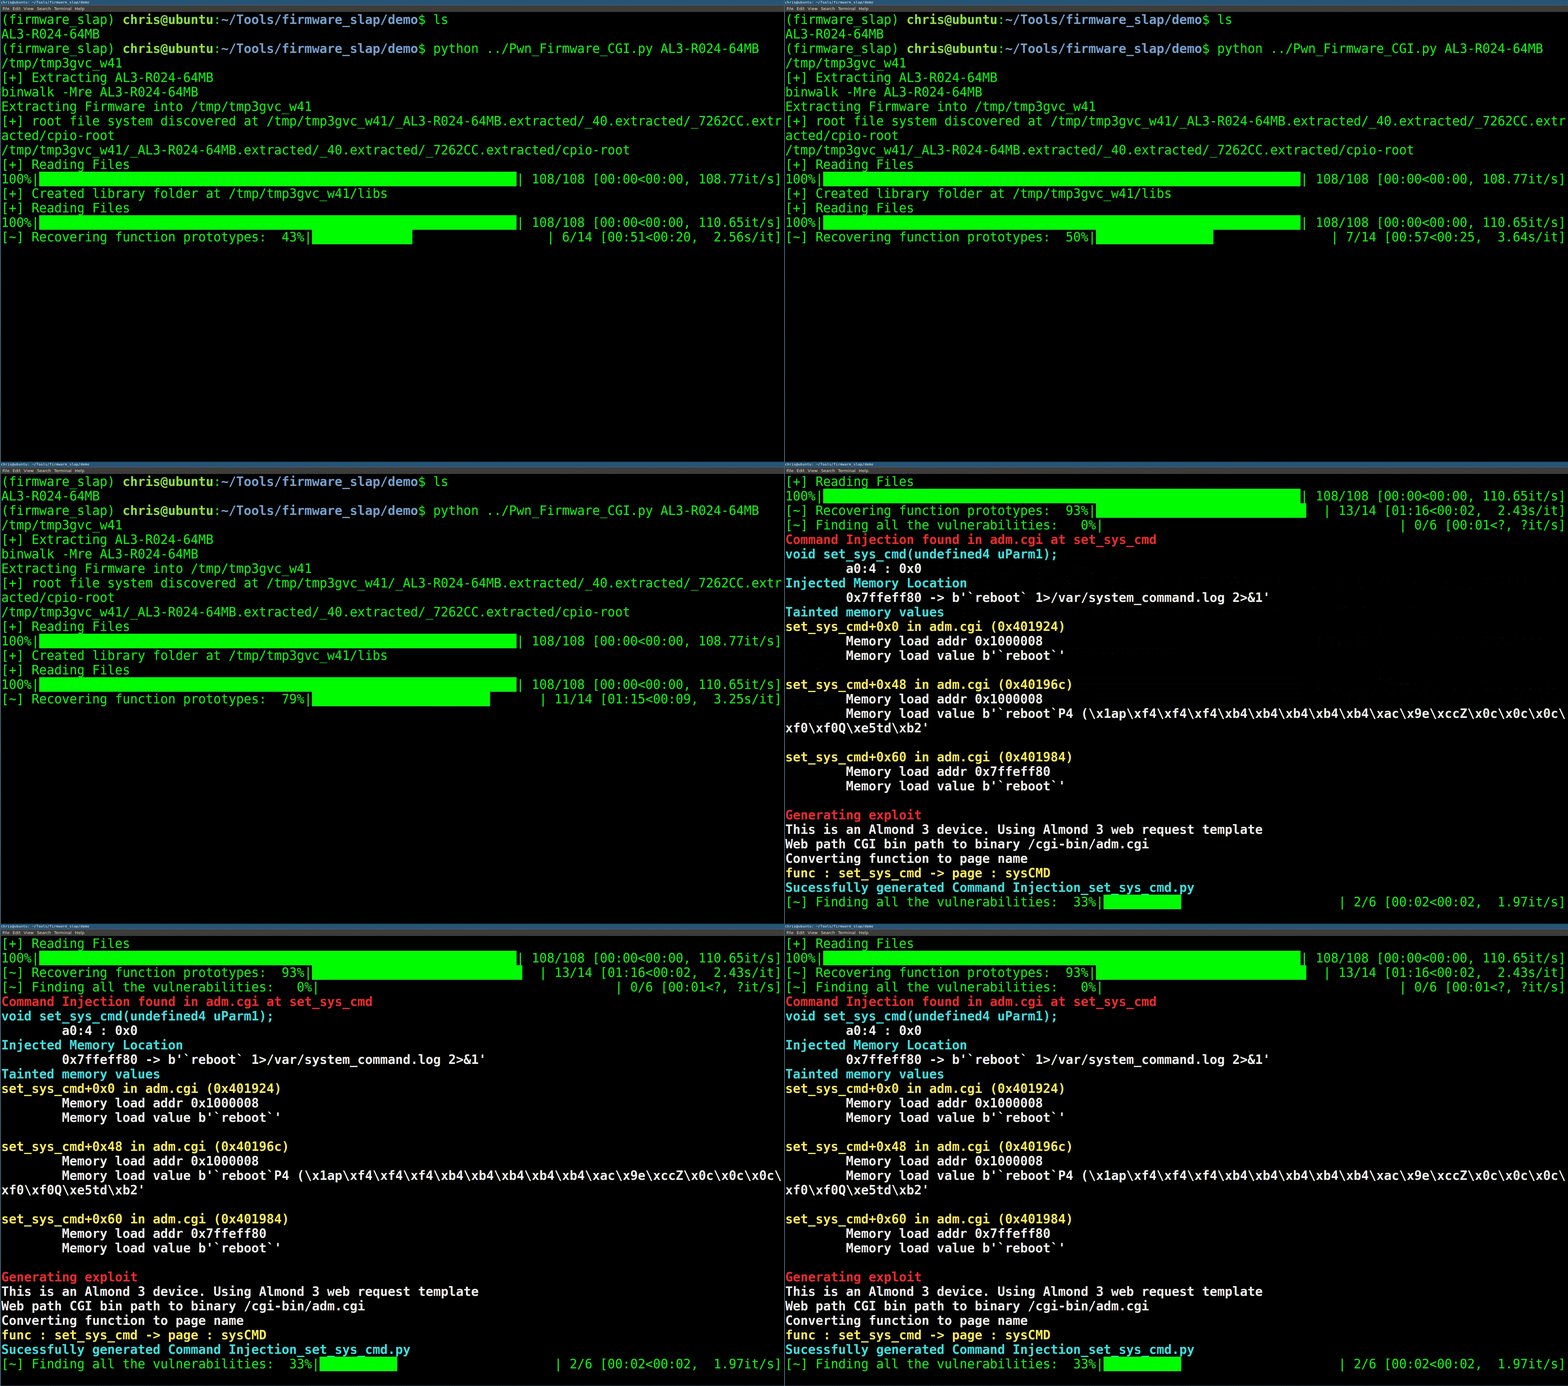
Firmware Slap 将 concolic 分析与函数聚类相结合,用于固件中的漏洞发现和函数相似性分析。Firmware Slap 以一系列库的形式构建,并将大部分信息以 pickle 或 JSON 格式导出,以便与其他工具集成。
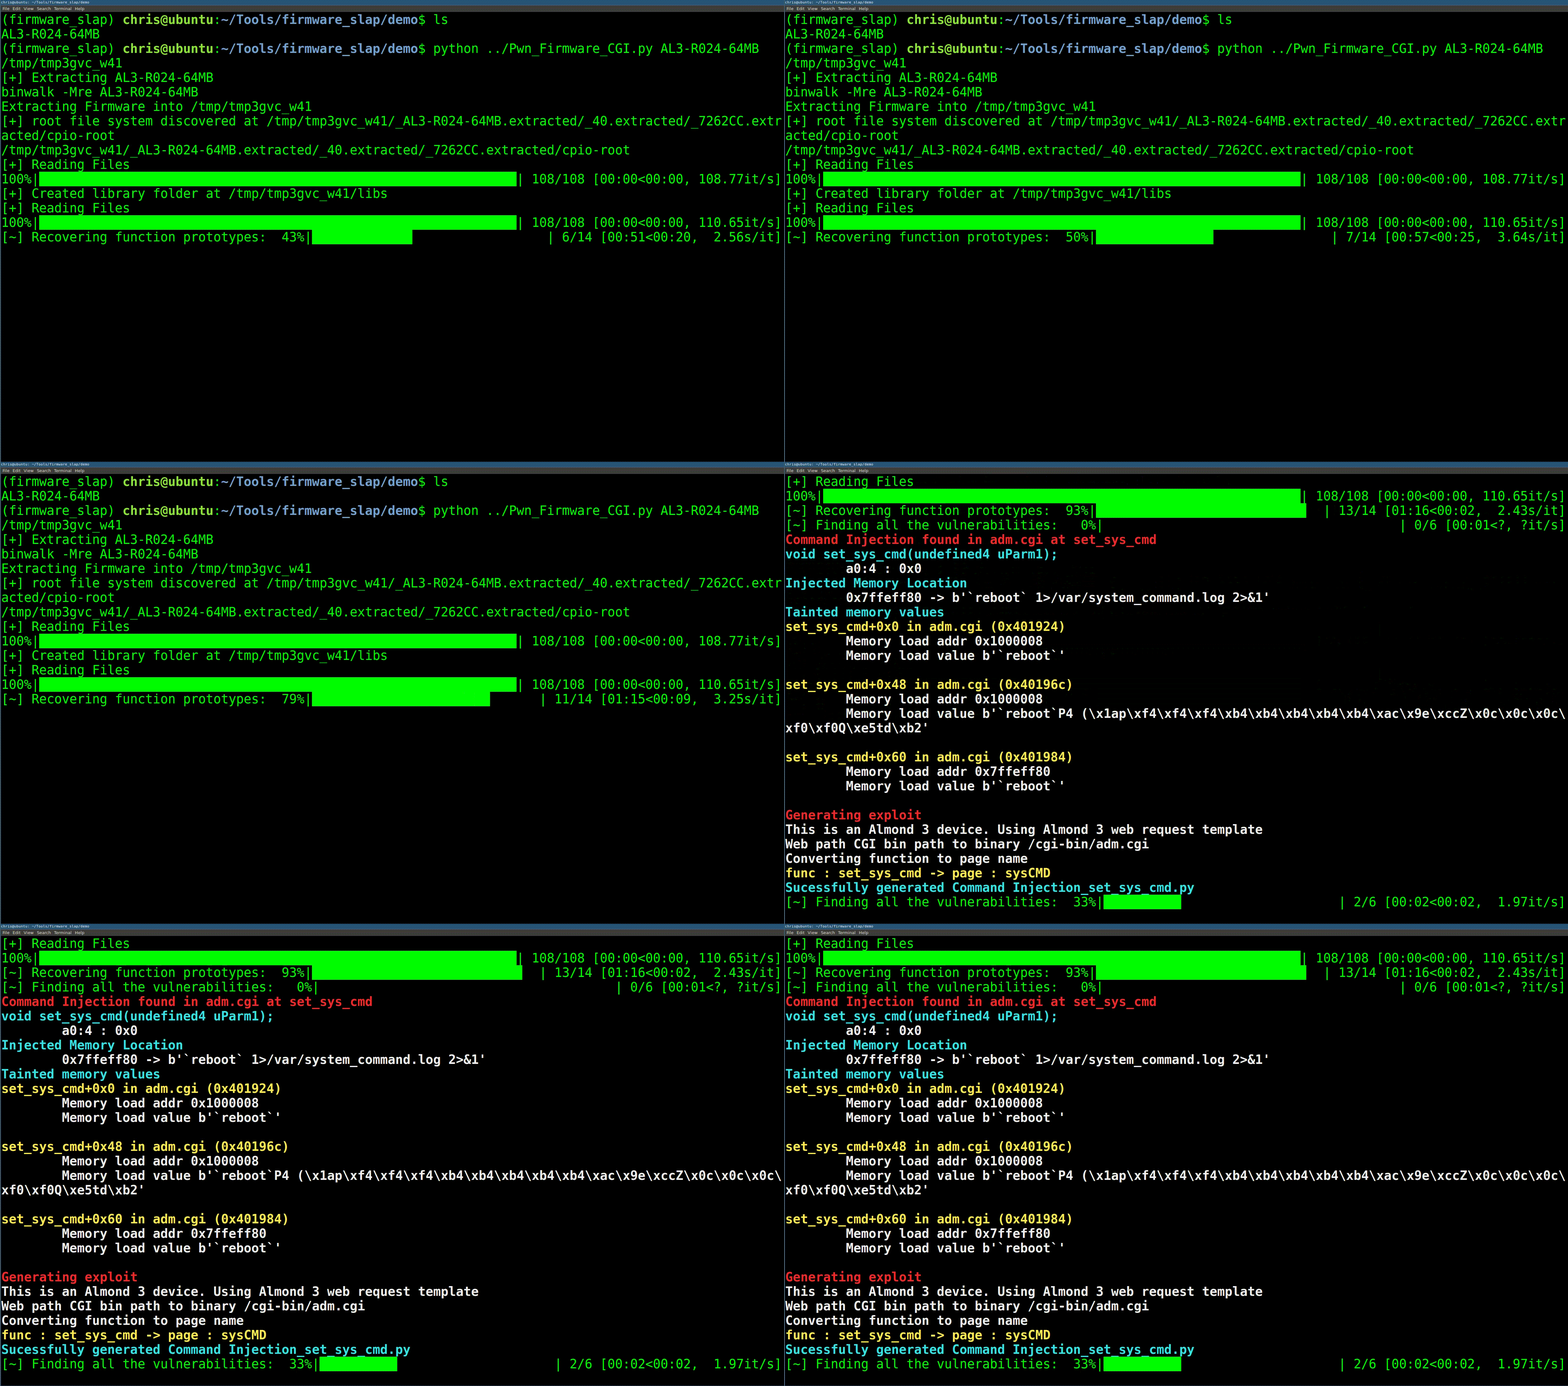
该演讲的幻灯片可在此处找到:链接
Firmware Slap 应在虚拟环境中运行。已在 Python3.6 上测试通过。
sudo apt install python3-virtualenv
virtualenv -p python3 fwslap
source fwslap/bin/activate
-- 或 --
cd ~
mkdir .virtualenvs
pip install virtualenv
which virtualenv #注意路径警告
pip install virtualenvwrapper
echo "export PATH=$PATH:~/.local/bin" >> ~/.bashrc
echo "export WORKON_HOME=~/.virtualenvs" >> ~/.bashrc
echo "source ~/.local/bin/virtualenvwrapper.sh" >> ~/.bashrc

# 通常最好在这里打开新终端

mkvirtualenv fwslap -p /usr/bin/python3
workon fwslap
python setup.py install
你需要安装 rabbitmq、docker 以及(radare2 或 Ghidra)
# Ubuntu
sudo apt install rabbitmq-server docker.io
# OSX
brew install rabbitmq

# Radare2
git clone https://github.com/radare/radare2.git
sudo ./radare2/sys/install.sh
# Ghidra
wget https://ghidra-sre.org/ghidra_9.0.4_PUBLIC_20190516.zip
unzip ghidra_9.0.4_PUBLIC_20190516.zip -d ghidra
echo "export PATH=\$PATH:$PWD/ghidra/ghidra_9.0.4/support" >> ~/.bashrc
Ghidra 需要 JDK 11。
sudo apt install default-jdk
java --version
如果你想使用 Elasticsearch 功能,请运行 Elasticsearch_and_kibana.sh 脚本。
确保 rabbitmq-server 正在运行。
# 在另一个终端中,在 "Firmware_Slap" 顶层目录下运行此命令
celery -A firmware_slap.celery_tasks worker --loglevel=info
# 基础缓冲区溢出
Discover_And_Dump.py examples/iwconfig -D iwconfig_results
Load_And_View_Results.py iwconfig_results.all.pickle

# 点击左侧面板的 "Management"
# 点击 "Saved Objects"
# 点击 "Import"
# 选择 firmware slap 中 elastic 目录下的 'elastic_export.json'
# 导航到左侧面板的 "Dashboards",选择 "Overview Dashboard"

Load_And_View_Results.py iwconfig_results.all.pickle -s

# 命令注入
tar -xvf examples/Almond_libs.tar.gz
Vuln_Discover_Celery.py examples/upload.cgi -L Almond_Root/lib/
# 获取示例中使用的固件
wget https://firmware.securifi.com/AL3_64MB/AL3-R024-64MB
binwalk -Mre AL3-R024-64MB
从项目根目录启动一个 celery 工作进程:
# 在另一个终端中
celery -A firmware_slap.celery_tasks worker --loglevel=info
在另一个终端窗口中,运行漏洞发现任务。
$ Vuln_Discover_Celery.py Almond_Root/etc_ro/lighttpd/www/cgi-bin/upload_bootloader.cgi -L Almond_Root/lib/
[+] 获取参数函数
[+] 分析 1 个函数
  0%|                                                                                                                                                                                                                                   | 0/1 [00:01<?, ?it/s]
{   'Injected_Location': {   'base': '0x7ffefde8',
........................ SNIP ......................
    'type': 'Command Injection'}
Python 3.5.2 (default, Nov 12 2018, 13:43:14)
Type 'copyright', 'credits' or 'license' for more information
IPython 7.3.0 -- An enhanced Interactive Python. Type '?' for help.

In [1]:
上述命令将在 result 变量中返回一个对象。这是一个包含各种关于漏洞信息的字典。该对象包含三个主要键:函数参数、内存和注入位置。
In [3]: result.keys()
Out[3]: dict_keys(['args', 'file_name', 'type', 'mem', 'Injected_Location'])
args 键将详细说明恢复的参数以及触发漏洞所需的参数值。在下面的示例中,恢复了一个参数,要触发命令注入,该参数必须是一个包含 "reboot" 的 char*,以触发重启。
In [1]: result['args']
Out[1]:
[{'base': 'a1',
  'type': 'int',
  'value': "0x0 -> b'`reboot`\\x01\\x01\\x01\\x01\\x01\\x01\\x01\\x01\\x01\\x01\\x01\\x01\\x01\\x01\\x01\\x01\\x01\\x01\\x01\\x01\\x01\\x01\\x01\\x01\\x01\\x01\\x01\\x01\\x01\\x01\\x01\\x01\\x01\\x01\\x01\\x01\\x01\\x01\\x01\\x01\\x01\\x01\\x01\\x01\\x01\\x01\\x01\\x01\\x01\\x01\\x01\\x00'"}]
对象的 memory 组件记录了触发漏洞所需设置的内存值。它还提供了栈地址和 .text 地址,其中包含用于设置所需内存约束的违规命令。第一个内存事件发生在 mtd_write_firmware+0x0,第二个发生在 mtd_write_firmware+0x38。提供了汇编代码以帮助美化未来的显示工作。
In [2]: result['mem']
Out[2]:
[{'BBL_ADDR': '0x401138',
  'BBL_DESC': {'DESCRIPTION': 'mtd_write_firmware+0x0 in upload_bootloader.cgi (0x401138)',
   'DISASSEMBLY': ['0x401138:\tlui\t$gp, 0x42',
    '0x40113c:\taddiu\t$sp, $sp, -0x228',
    '0x401140:\taddiu\t$gp, $gp, -0x5e90',
    '0x401144:\tlw\t$t9, -0x7f84($gp)',
    '0x401148:\tsw\t$a2, 0x10($sp)',
    '0x40114c:\tlui\t$a2, 0x40',
    '0x401150:\tmove\t$a3, $a1',
    '0x401154:\tsw\t$ra, 0x224($sp)',
    '0x401158:\tsw\t$gp, 0x18($sp)',
    '0x40115c:\tsw\t$a0, 0x14($sp)',
    '0x401160:\taddiu\t$a1, $zero, 0x200',
    '0x401164:\taddiu\t$a0, $sp, 0x20',
    '0x401168:\tjalr\t$t9',
    '0x40116c:\taddiu\t$a2, $a2, 0x196c']},
  'DATA': "b'`reboot`\\x01\\x01\\x01\\x01\\x01\\x01\\x01\\x01\\x01\\x01\\x01\\x01\\x01\\x01\\x01\\x01\\x01\\x01\\x01\\x01\\x01\\x01\\x01\\x01\\x01\\x01\\x01\\x01\\x01\\x01\\x01\\x01\\x01\\x01\\x01\\x01\\x01\\x01\\x01\\x01\\x01\\x01\\x01\\x01\\x01\\x01\\x01\\x01\\x01\\x01\\x01\\x00\\x00\\x00\\x00\\x00\\x00\\x00\\x00\\x00\\x00\\x00\\x00\\x00\\x00\\x00\\x00\\x00\\x00\\x00\\x00\\x00\\x00\\x00\\x00\\x00\\x00\\x00\\x00\\x00\\x00\\x00\\x00\\x00\\x00\\x00\\x00\\x00\\x00\\x00\\x00\\x00\\x00\\x00\\x00\\x00\\x00\\x00\\x00\\x00\\x00\\x00\\x00\\x00\\x00\\x00\\x00\\x00\\x00\\x00\\x00\\x00\\x00\\x00\\x00\\x00\\x00\\x00\\x00\\x00\\x00\\x00\\x00\\x00\\x00\\x00\\x00\\x00\\x00\\x00\\x00\\x00\\x00\\x00\\x00\\x00\\x00\\x00\\x00\\x00\\x00\\x00\\x00\\x00\\x00\\x00\\x00\\x00\\x00\\x00\\x00\\x00\\x00\\x00\\x00\\x00\\x00\\x00\\x00\\x00\\x00\\x00\\x00\\x00\\x00\\x00\\x00\\x00\\x00\\x00\\x00\\x00\\x00\\x00\\x00\\x00\\x00\\x00\\x00\\x00\\x00\\x00\\x00\\x00\\x00\\x00\\x00\\x00\\x00\\x00\\x00\\x00\\x00\\x00\\x00\\x00\\x00\\x00\\x00\\x00\\x00\\x00\\x00\\x00\\x00\\x00\\x00\\x00\\x00\\x00\\x00\\x00\\x00\\x00\\x00\\x00\\x00\\x00\\x00\\x00\\x00\\x00\\x00\\x00\\x00\\x00\\x00\\x00\\x00\\x00\\x00\\x00\\x00\\x00\\x00\\x00\\x00\\x00\\x00\\x00\\x00\\x00\\x00\\x00\\x00\\x00\\x00'",
  'DATA_ADDRS': ['0x0']},
 {'BBL_ADDR': '0x401170',
  'BBL_DESC': {'DESCRIPTION': 'mtd_write_firmware+0x38 in upload_bootloader.cgi (0x401170)',
   'DISASSEMBLY': ['0x401170:\tlw\t$gp, 0x18($sp)',
    '0x401174:\tnop\t',
    '0x401178:\tlw\t$t9, -0x7f68($gp)',
    '0x40117c:\tnop\t',
    '0x401180:\tjalr\t$t9',
    '0x401184:\taddiu\t$a0, $sp, 0x20']},
  'DATA': "b'/bin/mtd_write -o 0 -l 0 write `reboot`'",
  'DATA_ADDRS': ['0x7ffefe07']}]
由于命令注入是最容易演示的,我创建了一个便捷字典键来轻松展示命令注入的位置。
In [4]: result['Injected_Location']
Out[4]: {'base': '0x7ffefde8', 'type': 'char *', 'value': '/bin/mtd_write -o 0 -l 0 write `reboot`'}
漏洞聚类脚本将尝试使用示例漏洞发现脚本中的方法发现漏洞,然后对提取的固件中的一组给定函数构建 k-means 聚类,以查找与漏洞函数相似的其他函数。
$ Vuln_Cluster_Celery.py -h
usage: Vuln_Cluster_Celery.py [-h] [-L LD_PATH] [-F FUNCTION] [-V VULN_PICKLE]
                              Directory

positional arguments:
  Directory

optional arguments:
  -h, --help            show this help message and exit
  -L LD_PATH, --LD_PATH LD_PATH
                        Path to libraries to load
  -F FUNCTION, --Function FUNCTION
  -V VULN_PICKLE, --Vuln_Pickle VULN_PICKLE
以下命令中,-F 指定已知的漏洞函数,-V 指定之前运行后导出的 pickle 文件(以避免重新发现漏洞),-L 指定库路径。 一个示例用法:
$ python Vuln_Cluster_Celery.py -F mtd_write_firmware -L Almond_Root/lib/ Almond_Root/etc_ro/lighttpd/www/cgi-bin/
[+] 读取文件
100%|███████████████████████████████████████████████████████████████████████████████████████████████████████████████████████████████████████████████████████████████████████████████████████████████████████████████████████████| 1/1 [00:00<00:00,  2.80it/s]
从可执行文件中获取函数
开始主程序
... Snip ...