Quick WAF "paranoid" Doctor Evaluation | WAFPARAN01D3 Tool
Web 应用程序防火墙偏执级别测试工具。
— 来自 alt3kx.github.io

本质上,偏执级别(PL)允许你定义核心规则集的激进程度。
参考:https://coreruleset.org/20211028/working-with-paranoia-levels/
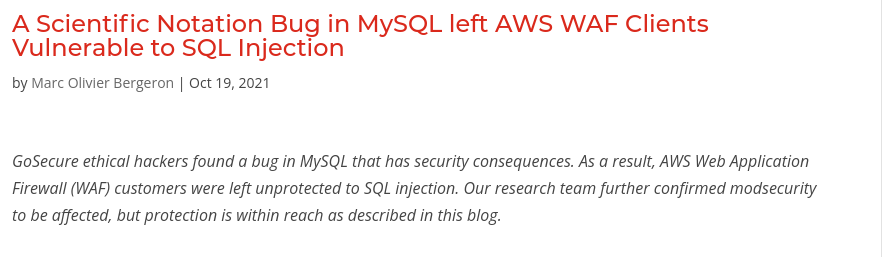
wafparan01d3.py python3 脚本通过使用基于 GET 参数编码的有效载荷,将恶意请求放置在 HTTP 请求的不同部分,评估结果记录在你机器上生成的报告调试文件 wafparan01d3.log 中。mysql_gosecure.txt,基于 gosecure 的研究 "A Scientific Notation Bug in MySQL left AWS WAF Clients Vulnerable to SQL Injection",可从此处获取:https://www.gosecure.net/blog/2021/10/19/a-scientific-notation-bug-in-mysql-left-aws-waf-clients-vulnerable-to-sql-injection/ ,该研究使用 modsecurity 评估我们的 WAF 在不同的偏执级别下的表现,既包括默认配置,也包括以交错、快速的方式禁用不同规则/ID 的情况。
Pentesters:灰盒范围,通过具有特权(可启动/重载并编辑 DEV/STG/TEST 环境中的 WAF Apache 配置文件)的 "shell" 对 WAF Linux 主机进行有限访问,发送不同的载荷。Secutity Officers:为组织中的每个解决方案做出最佳决策,以应用合适的 WAF 偏执级别。Blueteamers:规则执行、最佳告警,减少组织中的误报结果。Integrators:执行更深入的故障排除,并通过快速定制规则或创建虚拟补丁来定义适当的 WAF 偏执级别。参考:https://www.inmotionhosting.com/support/server/apache/install-modsecurity-apache-module/
$ sudo apt update -y && sudo apt dist-upgrade -y
$ sudo apt-get install build-essential -y
$ sudo apt-get install apache2 -y
$ sudo apt install libapache2-mod-security2 -y
$ sudo apt-get install curl vim gridsite-clients net-tools -y
$ sudo systemctl restart apache2
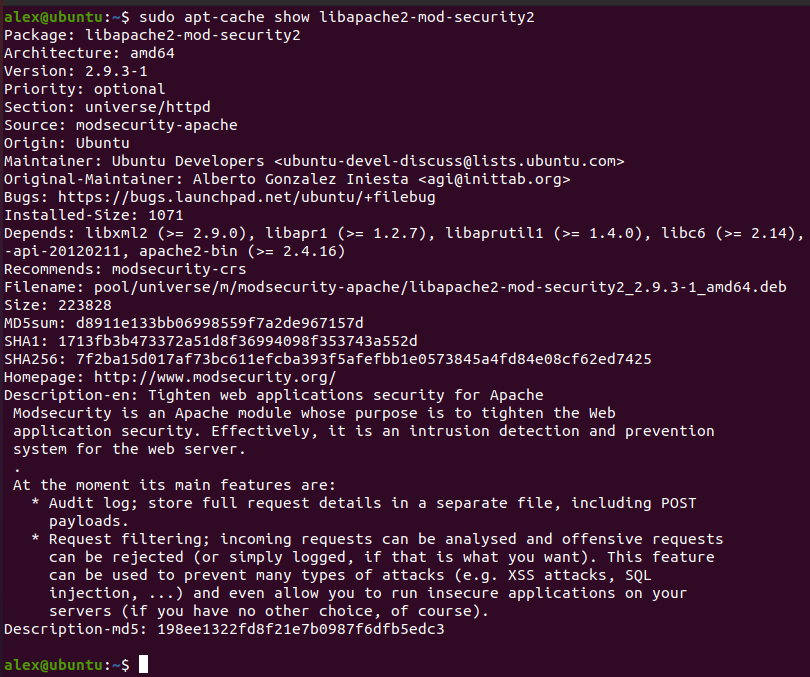
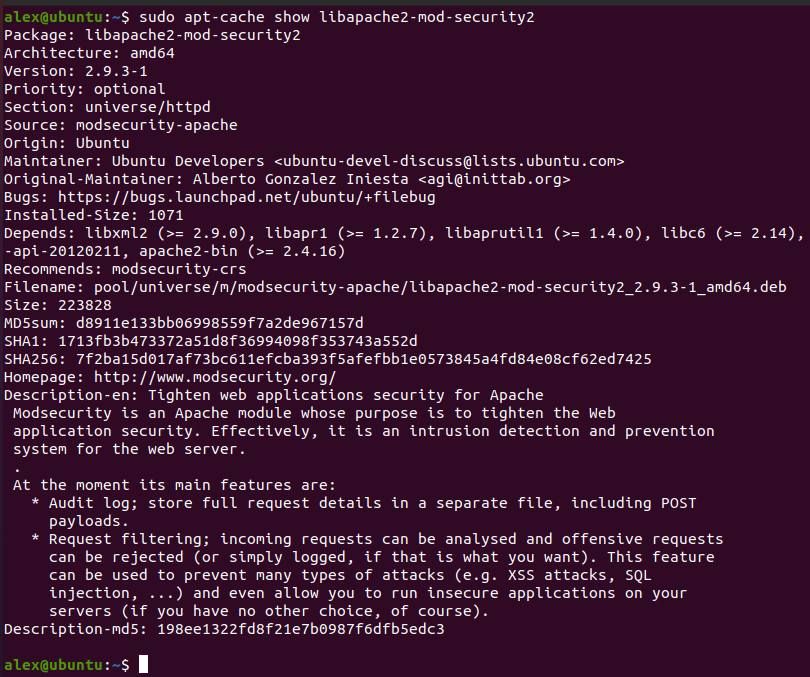
$ sudo apt-cache show libapache2-mod-security2
$ sudo cp /etc/modsecurity/modsecurity.conf-recommended /etc/modsecurity/modsecurity.conf
接下来,更改 ModSecurity 检测模式。首先,进入 cd /etc/modsecurity 文件夹
2. 使用 vi、vim、emacs 或 nano 编辑 ModSecurity 配置文件。
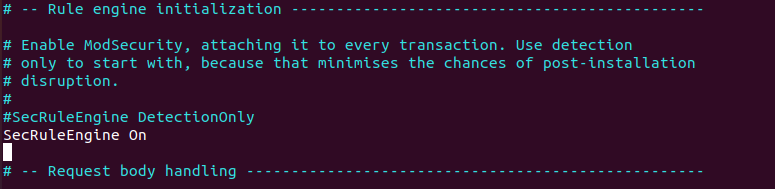
$ sudo vim /etc/modsecurity/modsecurity.conf
SecRuleEngine DetectionOnly。将 DetectionOnly 改为 On。 原始值: SecRuleEngine DetectionOnly
新值: SecRuleEngine On
$ sudo systemctl restart apache2
$ cd ~
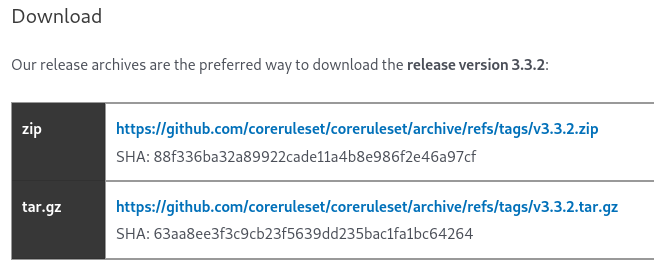
$ wget https://github.com/coreruleset/coreruleset/archive/refs/tags/v3.3.2.zip
$ sha1sum v3.3.2.zip && echo ProvidedChecksum
88f336ba32a89922cade11a4b8e986f2e46a97cf v3.3.2.zip
ProvidedChecksum
$ unzip v3.3.2.zip
$ sudo mv coreruleset-3.3.2/crs-setup.conf.example /etc/modsecurity/crs/crs-setup.conf
-(可选,但推荐)将新目录中的 rules 目录移动到你的 ModSecurity 目录:
$ sudo mv coreruleset-3.3.2/rules/ /etc/modsecurity/crs/
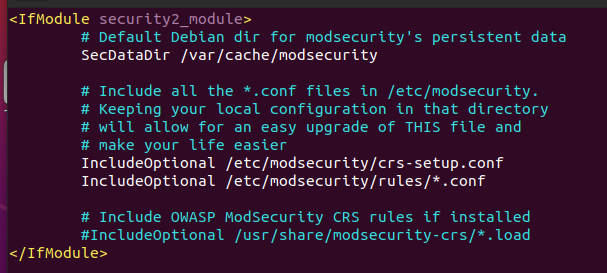
$ sudo vim /etc/apache2/mods-enabled/security2.conf
<IfModule security2_module>
# Default Debian dir for modsecurity's persistent data
SecDataDir /var/cache/modsecurity
# Include all the *.conf files in /etc/modsecurity.
# Keeping your local configuration in that directory
# will allow for an easy upgrade of THIS file and
# make your life easier
IncludeOptional /etc/modsecurity/crs-setup.conf
IncludeOptional /etc/modsecurity/rules/*.conf
# Include OWASP ModSecurity CRS rules if installed
#IncludeOptional /usr/share/modsecurity-crs/*.load
</IfModule>
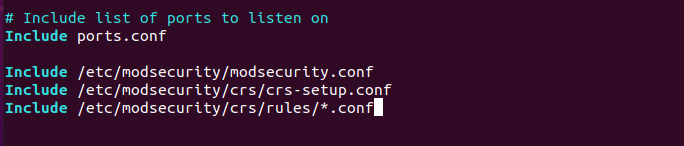
$ sudo vim /etc/apache2/apache2.conf
复制并粘贴以下代码,然后保存。
# Include list of ports to listen on
Include ports.conf
Include /etc/modsecurity/modsecurity.conf
Include /etc/modsecurity/crs/crs-setup.conf
Include /etc/modsecurity/crs/rules/*.conf
$ cd /etc/apache2
$ sudo cp mods-available/proxy_http.load mods-enabled
$ sudo cp mods-available/proxy.load mods-enabled/
$ sudo cp mods-available/rewrite.load mods-enabled/
$ sudo systemctl restart apache2
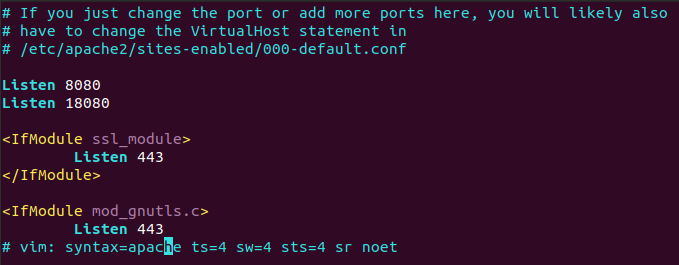
/etc/apache2/ports.conf $ sudo vim /etc/apache2/ports.conf
复制并粘贴以下代码,然后保存。
# If you just change the port or add more ports here, you will likely also
# have to change the VirtualHost statement in
# /etc/apache2/sites-enabled/000-default.conf
Listen 8080
Listen 18080
<IfModule ssl_module>
Listen 443
</IfModule>
<IfModule mod_gnutls.c>
Listen 443
</IfModule>
/etc/apache2/sites-enabled,创建文件 001-test.conf $ cd /etc/apache2/sites-enabled/
$ sudo touch 001-test.conf
$ sudo vim 001-test.conf
复制并粘贴以下代码,然后保存。
<VirtualHost *:8080>
ServerName test.domain:8080
SecRuleEngine On
ErrorLog ${APACHE_LOG_DIR}/test_error.log
CustomLog ${APACHE_LOG_DIR}/test_access.log combined
SecAuditLog ${APACHE_LOG_DIR}/test_audit.log
ProxyPass / http://127.0.0.1:18080/
ProxyPassReverse / http://127.0.0.1:18080/
</VirtualHost>
/etc/apache2/sites-enabled,创建文件 002-moc.conf $ cd /etc/apache2/sites-enabled/
$ sudo touch 002-moc.conf
$ sudo vim 002-moc.conf
复制并粘贴以下代码,然后保存。
<VirtualHost 127.0.0.1:18080>
ErrorLog ${APACHE_LOG_DIR}/moc_error.log
CustomLog ${APACHE_LOG_DIR}/moc_access.log combined
RewriteEngine On
RewriteRule ^(.*)$ $1 [R=200,L]
</VirtualHost>
$ sudo systemctl restart apache2
wafparan01d3_rulesremove.conf $ sudo touch /etc/apache2/conf-enabled/wafparan01d3_rulesremove.conf
$ sudo service apache2 reload
Must be specify a domain , edit the following lines
Windows:
C:\Windows\System32\drivers\etc\hosts
192.168.56.106 test.domain <-- add this line and specify your IP address
Linux:
/etc/hosts
192.168.1.23 test.domain <-- add this line and specify your IP address
$ curl -i -k -s -XGET http://test.domain:8080/
HTTP/1.1 200 OK
Date: Mon, 22 Nov 2021 06:31:41 GMT
Server: Apache/2.4.41 (Ubuntu)
Content-Length: 571
Content-Type: text/html; charset=iso-8859-1
Vary: Accept-Encoding
<!DOCTYPE HTML PUBLIC "-//IETF//DTD HTML 2.0//EN">
<html><head>
<title>200 OK</title>
</head><body>
<h1>OK</h1>
<p>The server encountered an internal error or
misconfiguration and was unable to complete
your request.</p>
<p>Please contact the server administrator at
[no address given] to inform them of the time this error occurred,
and the actions you performed just before this error.</p>
<p>More information about this error may be available
in the server error log.</p>
<hr>
<address>Apache/2.4.41 (Ubuntu) Server at 127.0.0.1 Port 18080</address>
</body></html>
$ curl -i -k -s -XGET http://localhost:18080/
HTTP/1.1 200 OK
Date: Mon, 22 Nov 2021 06:27:17 GMT
Server: Apache/2.4.41 (Ubuntu)
Content-Length: 571
Content-Type: text/html; charset=iso-8859-1
<!DOCTYPE HTML PUBLIC "-//IETF//DTD HTML 2.0//EN">
<html><head>
<title>200 OK</title>
</head><body>
<h1>OK</h1>
<p>The server encountered an internal error or
misconfiguration and was unable to complete
your request.</p>
<p>Please contact the server administrator at
[no address given] to inform them of the time this error occurred,
and the actions you performed just before this error.</p>
<p>More information about this error may be available
in the server error log.</p>
<hr>
<address>Apache/2.4.41 (Ubuntu) Server at localhost Port 18080</address>
</body></html>
如需帮助,可以使用 help 选项。基本用法是传递所定义的不同参数。
示例:
$ sudo python3 wafparan01d3.py -h
( ) ) ( )
( ( ))\ ) ) ( ) ( /(( /( )\ ) ( /(
)\))( ( /(()/( ` ) ( /( )( ( /( ( )\())\()|()/( )\())
((_)()\ )(_))(_))/(/( )(_)|()\ )(_)) )\ ) ((_)((_)\ ((_)|(_)\
_(()((_|(_)(_) _((_)_\((_)_ ((_|(_)_ _(_/( / (_) (_)_| |__ (_)
\ V V / _` | _| '_ \) _` | '_/ _` | ' \)) () || |/ _` ||_ \
\_/\_/\__,_|_| | .__/\__,_|_| \__,_|_||_| \__/ |_|\__,_|___/
|_|
~ WAFPARANO1D3 : v1.1 ~
The Web Application Firewall Paranoia Level Test Tool.
usage: wafparan01d3.py [-h] [--run [_RUN]] [--debug [_DEBUG]] [--pl [_PARANOIALEVEL ...]] [--proxy [_PROXY]] [--payload [_PAYLOAD]] [--rules-remove [_RULESREMOVE]] [--log [_LOG]] [--domain [_DOMAIN]] [--conf-file [_CONF_FILE]]
[--time-sleep [_TIME_TO_SLEEP]] [--time-sleep-request [_TIME_TO_SLEEP_REQUEST]] [--desc [_DESC]] [--output-desc [_OUTPUT_DESC]]
optional arguments:
-h, --help show this help message and exit
--run [_RUN] Run script
--debug [_DEBUG] Debug mode
--pl [_PARANOIALEVEL ...]
Define paranoia level Ex. -pl 2
--proxy [_PROXY] Define Proxy. Ex: http://127.0.0.1:8081
--payload [_PAYLOAD] Define payload file. Ex. --payload payload2.txt
--rules-remove [_RULESREMOVE]
Define rules remove file. Ex. --rules-remove rules1.txt
--log [_LOG] Define path of the log file. Ex. --log /var/log/apache/wafparan01d3.log
--domain [_DOMAIN] Define your domain. Ex. --domain example.domain:8080
--conf-file [_CONF_FILE]
Define configuration file. Ex. --conf-file /opt/modsecurity/crs/rules/INITIALIZATION.conf
--time-sleep [_TIME_TO_SLEEP]
Sleep time per PL. Ex. --time-sleep 3
--time-sleep-request [_TIME_TO_SLEEP_REQUEST]
Sleep time per Request. Ex. --time-sleep-request 3
--desc [_DESC] Description of the script and authors
--output-desc [_OUTPUT_DESC]
Description of the output on console mode.
$ sudo python3 wafparan01d3.py -h
- show the help message
$ sudo python3 wafparan01d3.py --run
- run the script with default options.
$ sudo python3 wafparan01d3.py --run --debug
- Print every line on console.
$ sudo python3 wafparan01d3.py --run --pl 1
- Run the script in assigned Paranoia Level.
- By default runs on Paranoia Level 1, 2, 3, 4
$ sudo python3 wafparan01d3.py --run --payload file_payload2.txt
- Define the payload file that you want to send to WAF.
- By default takes the file mysql_gosecure.txt
$ sudo python3 wafparan01d3.py --run --rules-remove rules_removex.txt
- Define the rules that you want to remove on GWAF.
- Example of the file:
- Default 920000 920001 920002
- By default takes the files: rules_remove1.txt, rules_remove2.txt, rules_remove3.txt, rules_remove4.txt
$ sudo python3 wafparan01d3.py --run --log /home/waf_user/paranoia.log
- Define LOG File.
- By default print the log on paranoia_debug.log
$ sudo python3 wafparan01d3.py --run --domain mydomain.test.com
- Define Domain of Front End WAF.
- By default runs over domain domain.test:8080
$ sudo python3 wafparan01d3.py --run --conf-file /opt/modsecurity/crs/rules/INITIALIZATION.conf
- Define the configuration file to update the Paranoia Level
- By default takes /etc/modsecurity/crs/rules/REQUEST-901-INITIALIZATION.conf
$ sudo python3 wafparan01d3.py --run --time-sleep 3
- Define the time to sleep per Paranoia Level.
$ sudo python3 wafparan01d3.py --run --time-sleep-request 2
- Define the time to sleep per request send to WAF.
$ sudo python3 wafparan01d3.py --desc
- Print the description of the script and the authors.
你可以通过运行部署了 WAF ModSecurity 与 'Mock' 的 VM 环境(Ubuntu)来尝试 wafparan01d3.py,该环境使用最新的 OWASP 核心规则集 CRS 3.3.2,可轻松定制地评估 ModSecurity 偏执级别。
运行:
$ git clone https://github.com/alt3kx/wafparan01d3.git
$ cd wafparan01d3
$ sudo python3 wafparan01d3.py --help
$ sudo python3 wafparan01d3.py --run

$ sudo python3 wafparan01d3.py --run --debug --proxy http://192.168.56.1:8081

$ sudo python3 wafparan01d3.py --run --debug --pl 1 2 --proxy http://192.168.56.1:8081 --log test.log --domain vulnerable.domain:8080 --time-sleep-request 1 --time-sleep 1 --rules-remove my_rules_remove.txt --payload my_payload.txt

https://github.com/mindhack03d/WAF-Rule-Scientific-Notation
Alex Hernandez,又名 (@_alt3kx_)
Jesus Huerta,又名 @mindhack03d