 wh1te4ever/super-tart-vphone-writeup
Apple PCC 펌웨어의 VPHONE600AP 구성 요소를 사용하여 가상 iPhone을 구축하는 가이드로, 펌웨어 패치, 부트체인 수정, iOS 보안 연구를 위한 커널 디버깅을 포함합니다.

애플은 2024년 후반쯤에 클라우드 기반 AI 개인정보 보호를 위한 새로운 지평을 연답시고 Private Cloud Compute를 공개하기 시작했다. 그러다 2025년 후반쯤에 흥미로운 소식이 들려오는데, 애플이 PCC 펌웨어에 cloudOS 26 버전부터 vphone600ap 관련 컴포넌트가 새로 추가되었다는 점이다.

출처: https://x.com/matteyeux/status/2006339694783848660/photo/1
"iPhone Research Environment Virtual Machine”?
애플이 추후 다른 보안 연구원 분들을 위해 가상 아이폰 환경을 구축하여 배포하려고 만든 계획일까, 아니면 실수일까? 2021년 iOS 15.0 beta ~ 15.1 beta3 OTA에서 DEVELOPMENT/KASAN 빌드용 커널이 발견된적이 있는데, 실수했을 가능성도 없지 않아 있을 것 같다. 발견된 기간은 대략 2021년 6월부터 10월까지, 약 4개월동안 포함되어왔다.
그러다 올해 1월 쯤에 vphone600ap 관련 컴포넌트를 활용한 가상 아이폰을 띄우는 트윗이 공개되었다.

출처: https://x.com/_inside/status/2008951845725548783
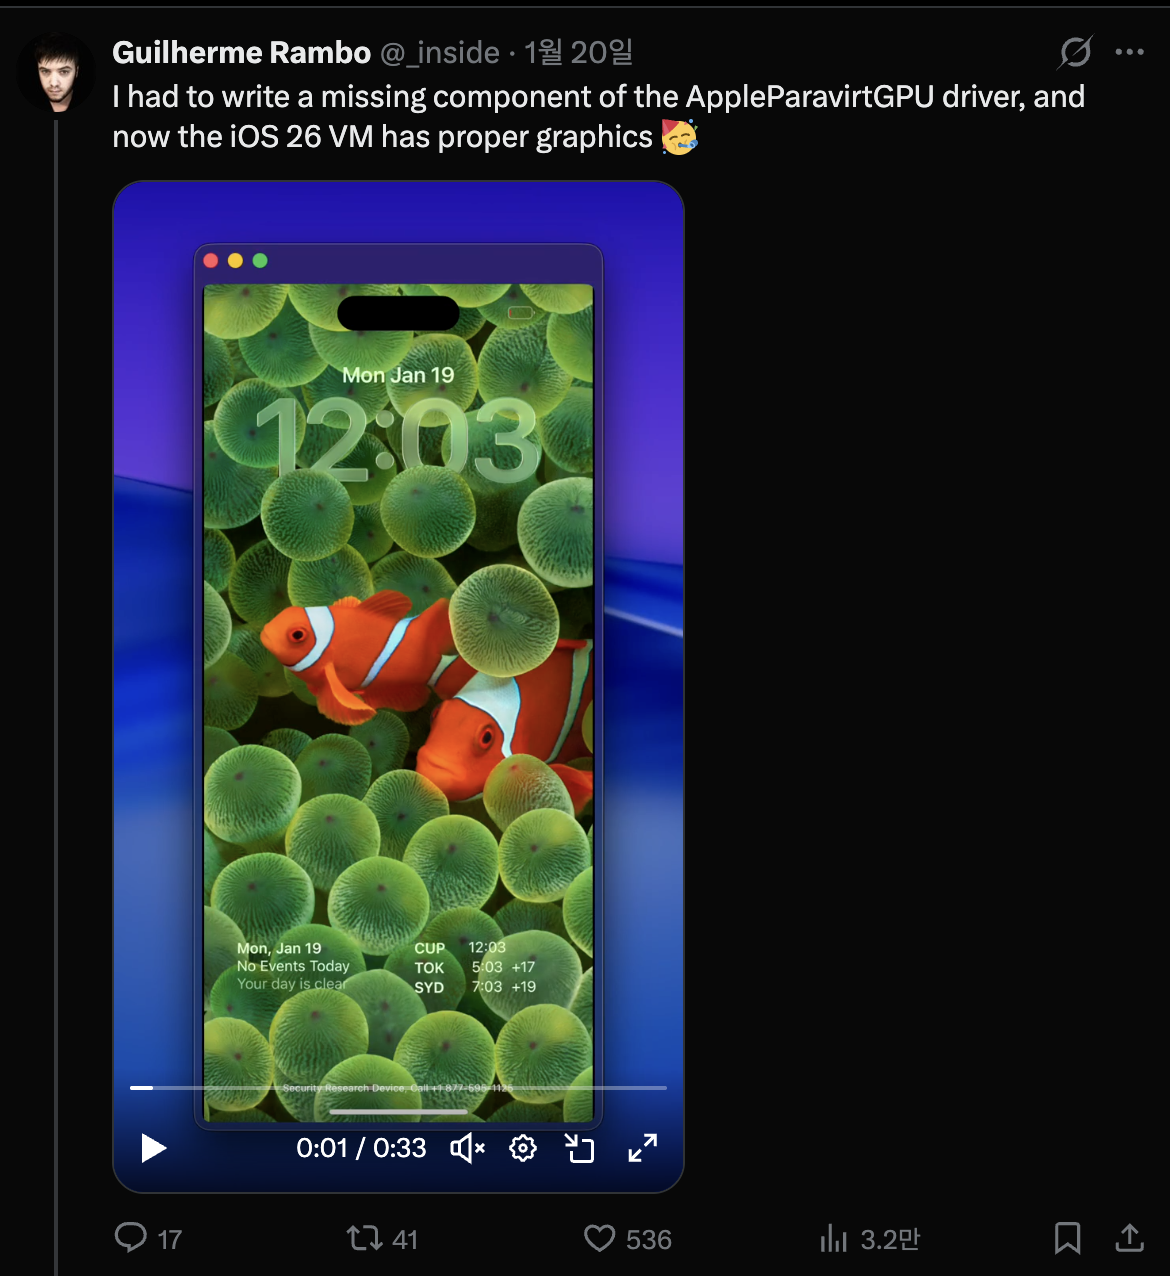
봤을때, 정말 거의 모든것들이 우아하게 잘 작동하였다. 이전에 내가 봐왔던 QEMUAppleSilicon(Inferno) 프로젝트에 비하면 훨씬 더 빠릿하고 부드럽게 작동한다. 더군다나 Metal 가속화까지 가능해보였다.
결국 현혹된 나머지 다짜고짜 1월 31일, 가상 아이폰을 만들어보기 시작했다.

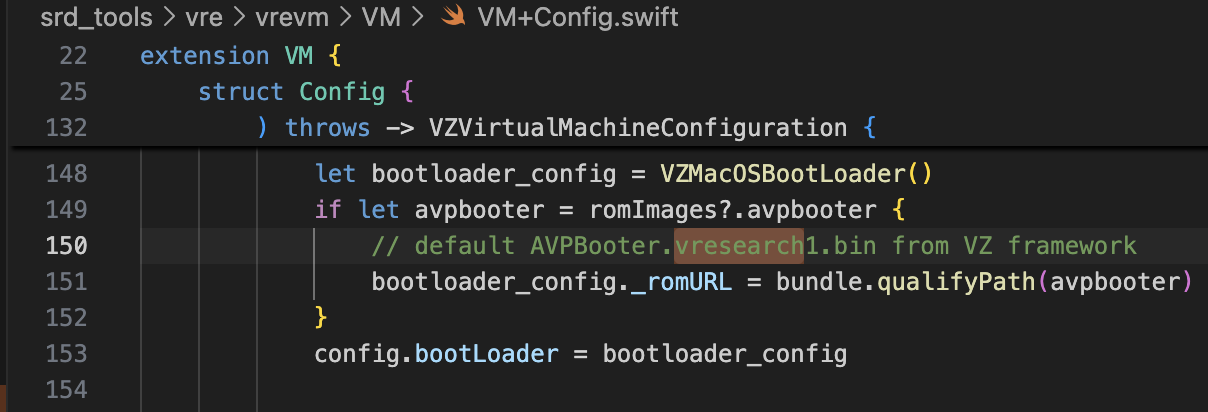
참고한 프로젝트는 security-pcc이다. /System/Library/SecurityResearch/usr/bin/vrevm 바이너리의 소스코드와 대응된다. 흥미로운 점은 Virtualization.framework에서 제공되는 Private 메소드를 사용하고 있다. PCC 리서치에 사용되는 가상머신에서는 하드웨어 모델을 초기화하는 과정 중 ISA와 PlatformVersion을 따로 지정해주는 것을 볼 수 있다.
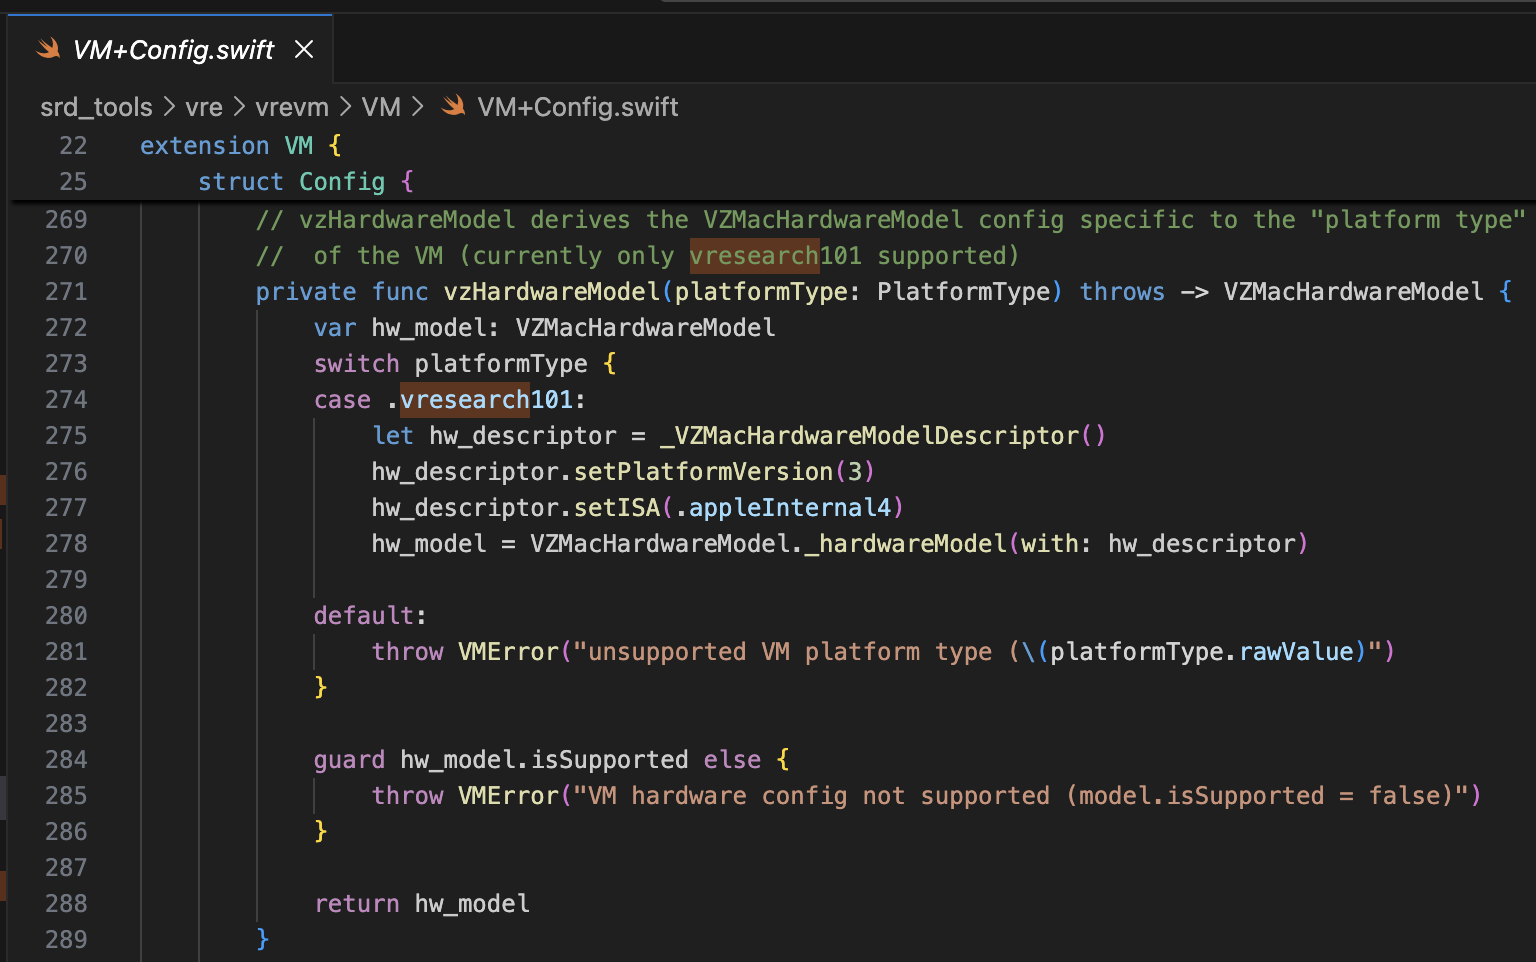
부트롬은 AVPBooter.vresearch1.bin이 사용되고,(/System/Library/Frameworks/Virtualization.framework/Resources/AVPBooter.vresearch1.bin)
SEPROM(avpsepbooter)은 AVPSEPBooter.vresearch1.bin이 사용되며, AuxiliaryStorage와 비슷한 역할을 하는 SEPStorage 파일을 별도로 불러온다. (/System/Library/Frameworks/Virtualization.framework/Versions/A/Resources/AVPSEPBooter.vresearch1.bin)
또다른 흥미로운 점은 해상도를 설정하는 코드를 살펴보면 1290x2796으로, 이는 iPhone 14 Pro Max, 15 Plus, 15 Pro Max, 16 Plus 기기와 대응된다.
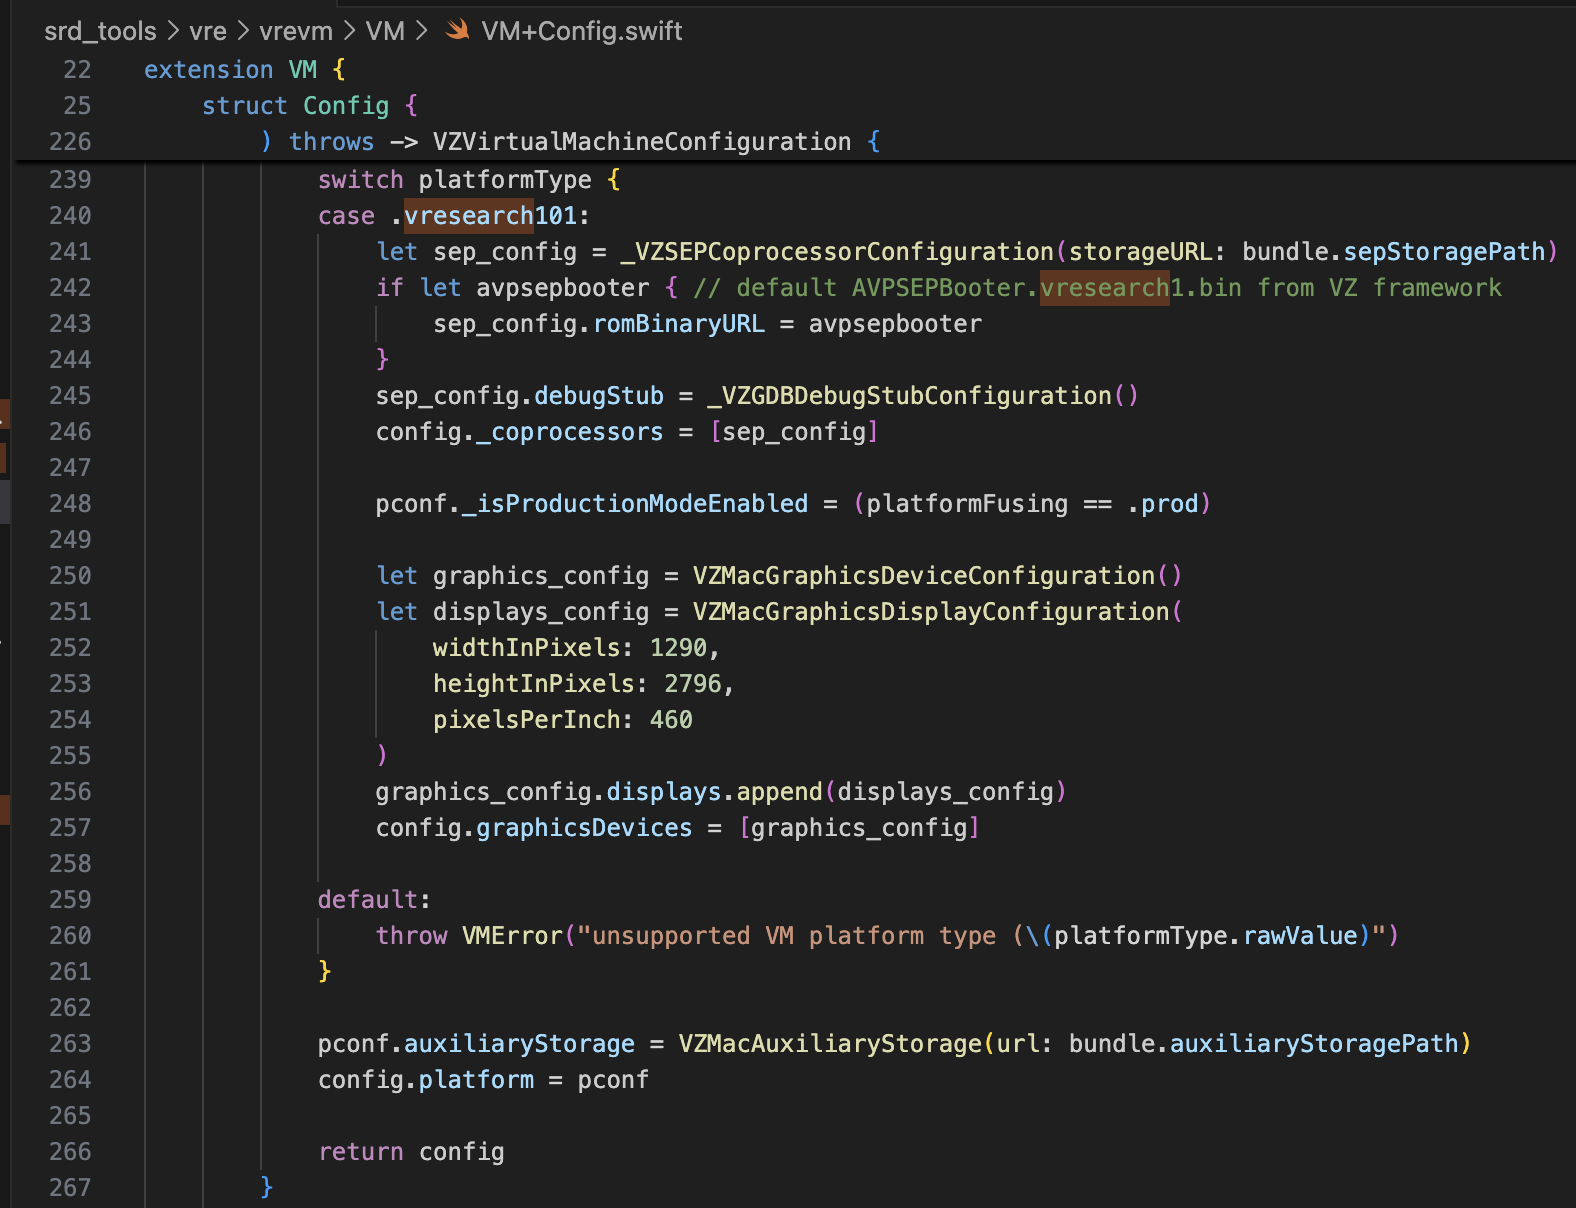
여기까지의 정보만으로, 충분히 가상 아이폰을 띄우기 위해 super-tart를 개조할 수 있을 것이다. 필자는 아래와 같이 수정해주었다.
...
class VM: NSObject, VZVirtualMachineDelegate, ObservableObject {
...
  // vzHardwareModel derives the VZMacHardwareModel config specific to the "platform type"
  // of the VM (currently only vresearch101 supported)
  static private func vzHardwareModel_VRESEARCH101() throws -> VZMacHardwareModel {
    var hw_model: VZMacHardwareModel

    guard let hw_descriptor = _VZMacHardwareModelDescriptor() else {
      fatalError("Failed to create hardware descriptor")
    }
    hw_descriptor.setPlatformVersion(3) // .appleInternal4 = 3
    hw_descriptor.setBoardID(0x90)
    hw_descriptor.setISA(2)
    hw_model = VZMacHardwareModel._hardwareModel(withDescriptor: hw_descriptor)

    guard hw_model.isSupported else {
        fatalError("VM hardware config not supported (model.isSupported = false)")
    }

    return hw_model
  }

  static func craftConfiguration(
    diskURL: URL,
    nvramURL: URL,
    romURL: URL,
    sepromURL: URL? = nil,
    vmConfig: VMConfig,
    network: Network = NetworkShared(),
    additionalStorageDevices: [VZStorageDeviceConfiguration],
    directorySharingDevices: [VZDirectorySharingDeviceConfiguration],
    serialPorts: [VZSerialPortConfiguration],
    suspendable: Bool = false,
    nested: Bool = false,
    audio: Bool = true,
    clipboard: Bool = true,
    sync: VZDiskImageSynchronizationMode = .full,
    caching: VZDiskImageCachingMode? = nil
  ) throws -> VZVirtualMachineConfiguration {
    let configuration: VZVirtualMachineConfiguration = .init()

    // Boot loader
    let bootloader = try vmConfig.platform.bootLoader(nvramURL: nvramURL)
    Dynamic(bootloader)._setROMURL(romURL)
    configuration.bootLoader = bootloader

    // SEP ROM
    let homeURL = FileManager.default.homeDirectoryForCurrentUser
    var sepstoragePath = homeURL.appendingPathComponent(".tart/vms/vphone/SEPStorage").path
    let sepstorageURL = URL(fileURLWithPath: sepstoragePath)
    let sep_config = Dynamic._VZSEPCoprocessorConfiguration(storageURL: sepstorageURL)
    if let sepromURL { // default AVPSEPBooter.vresearch1.bin from VZ framework
        sep_config.romBinaryURL = sepromURL
    }
    sep_config.debugStub = Dynamic._VZGDBDebugStubConfiguration(port: 8001)
    configuration._setCoprocessors([sep_config.asObject])

    // Some vresearch101 config
    let pconf = VZMacPlatformConfiguration()
    pconf.hardwareModel = try vzHardwareModel_VRESEARCH101()

    let serial = Dynamic._VZMacSerialNumber.initWithString("AAAAAA1337")
    let identifier = Dynamic.VZMacMachineIdentifier._machineIdentifierWithECID(0x1111111111111111, serialNumber: serial.asObject)
    pconf.machineIdentifier = identifier.asObject as! VZMacMachineIdentifier

    pconf._setProductionModeEnabled(true)
    var auxiliaryStoragePath = homeURL.appendingPathComponent(".tart/vms/vphone/nvram.bin").path
    let auxiliaryStorageURL = URL(fileURLWithPath: auxiliaryStoragePath)
    pconf.auxiliaryStorage = VZMacAuxiliaryStorage(url: auxiliaryStorageURL)

    if #available(macOS 14, *) {
      let keyboard = VZUSBKeyboardConfiguration()
      configuration.keyboards = [keyboard]
    }

    if #available(macOS 14, *) {
      let touch = _VZUSBTouchScreenConfiguration()
      configuration._setMultiTouchDevices([touch])
    }
    ...
    configuration.platform = pconf

    // Display
    let graphics_config = VZMacGraphicsDeviceConfiguration()
    let displays_config = VZMacGraphicsDisplayConfiguration(
        widthInPixels: 1179,
        heightInPixels: 2556,
        pixelsPerInch: 460
    )
    graphics_config.displays.append(displays_config)
    configuration.graphicsDevices = [graphics_config]
 ...
참고한 프로젝트는 vma2pwn이다. 12.0.1 버전을 한정으로, 거의 모든 부트체인을 수정한 맥 가상머신을 띄워준다.
prepare.sh 스크립트를 먼저 살펴보자. IM4P 형식으로로 압축된 부트로더나 커널 등 펌웨어 구성요소들을 RAW 형식으로 추출하고 하드코딩된 특정 주소에 있는 명령어/데이터들을 패치한다. RestoreRamdisk는 펌웨어를 복원할때 사용되는 루트 파일 시스템이고, AVPBooter는 가상머신에서 사용되는 BootROM이다.
정리하자면, 펌웨어에 들어간 각각의 파일들을 추출하여 커스텀 펌웨어를 복워 가능케하기 위해 무결성 검증을 패치하거나, 부팅 관련 로그를 쉽게 보도록 boot-args 매개변수를 수정한다.
