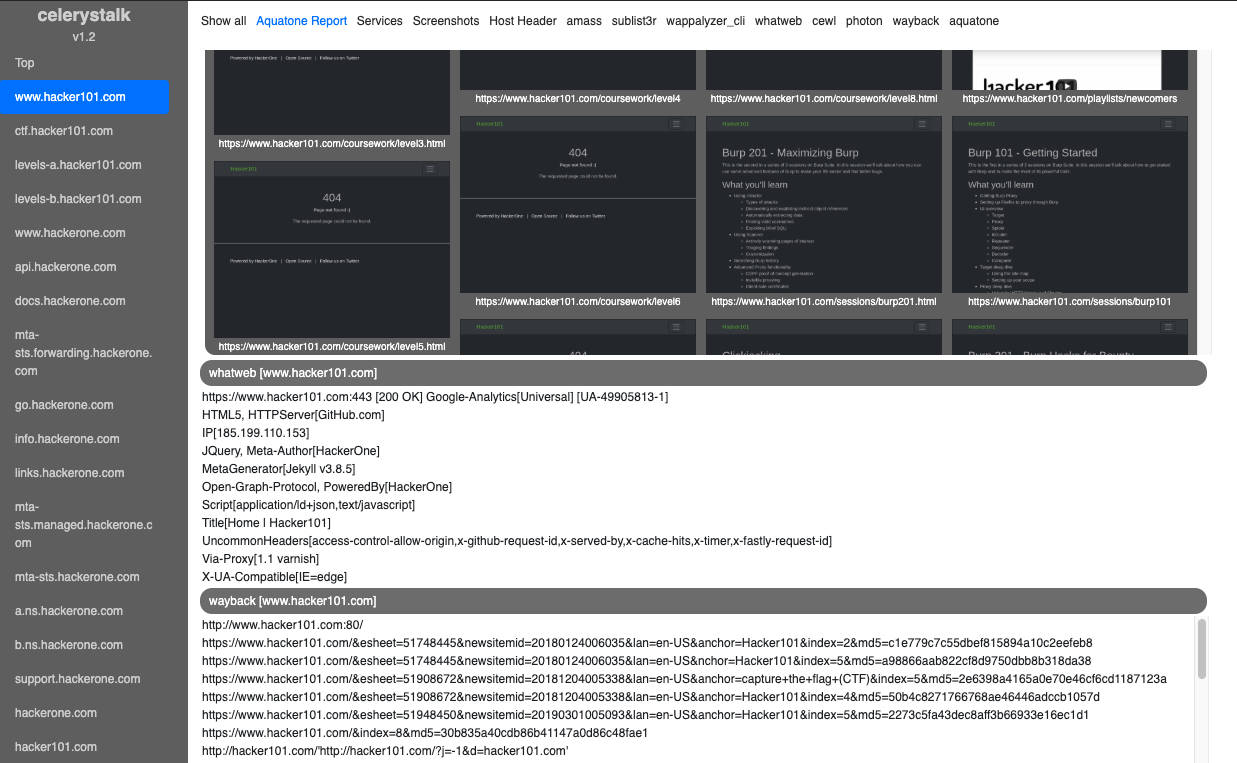

비동기적 열거 및 취약점 스캐너입니다. 모든 호스트에서 모든 도구를 실행합니다.
celerystalk는 비동기 작업(aka tasks)을 통해 네트워크 스캐닝/정보 수집 과정을 자동화하면서도, 실행할 도구를 완전히 제어할 수 있도록 도와줍니다.
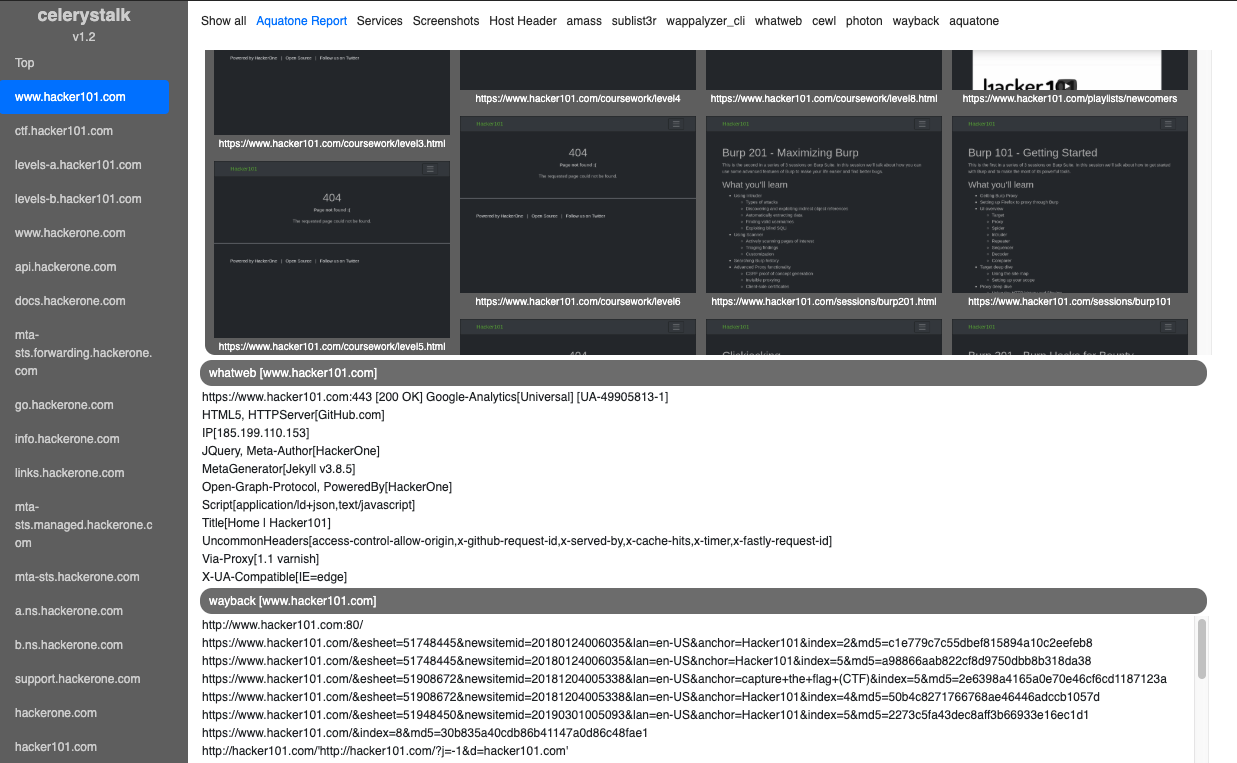
대화형 데모: 버그 바운티 모드 (HackerOne)
대화형 데모: 취약점 평가/침투 테스트 모드 (은퇴한 HackTheBox.eu 머신)
| 단계 | 명령어 | 사용된 도구 예시 |
|---|---|---|
| DNS 정찰/정보 수집 | ./celerystalk subdomains -d domain1,domain2 | Amass, sublist3r |
| 범위 정의, nmap/nessus 가져오기 | ./celerystalk import [scan_data,scope_files,etc.] | celerystalk |
| 포트 스캐닝 | ./celerystalk nmap | nmap |
| 디렉터리 및 파일 열거, 취약점 식별 | ./celerystalk scan | Gobuster, Nikto, Photon, sqlmap, wpscan, hydra, medusa, wappalyzer, whatweb 등 |
| 스크린샷 | ./celerystalk sceenshots | Aquatone |
| 분석 | ./celerystalk report | celerystalk |
celerystalk는 다음과 같은 특징이 있습니다:
celerystalk는 root로 설치하고 실행해야 합니다.``` git clone https://github.com/sethsec/celerystalk.git cd celerystalk/setup ./install.sh cd .. ./celerystalk -h
## Dockerhub에서 docker container 사용하기```
docker pull sethsec/celerystalk:latest
docker run -p 27007:27007 -ti celerystalk
docker build -t celerystalk https://github.com/sethsec/celerystalk.git docker run -p 27007:27007 -ti celerystalk
## Using celerystalk - The basics
### [URL Mode] - How to scan a a URL (or multiple URLs in a file)
#### Launch all enabled tools against a URL or many URLs in a file without having to import scope, nmap, etc.```
# ./celerystalk scan -u url or filename # Run all enabled commands against specified url(s)
# ./celerystalk query watch (then Ctrl+c) # Wait for scans to finish
# ./celerystalk screenshots # Take screenshots
# ./celerystalk report # Generate report
#### 또는, 범위 내 호스트 목록을 가져와 celerystalk가 nmap을 실행하도록 합니다```
# ./celerystalk import -S scope.txt # Import IP/CIDR/Ranges and mark as in scope
# ./celerystalk nmap # Nmap all in-scope hosts (reads options from config.ini)
## 고급 사용법: 버그 바운티 모드 대 취약점 평가 모드
작업 공간 생성 시 모드를 정의합니다. 기본 작업 공간은 VAPT 모드이지만, 수동으로 생성된 작업 공간에 대해서는 두 가지 옵션이 있습니다.
* 범위 내 IP 주소/범위/CIDR로 시작하는 경우 취약점 평가 및 침투 테스트(VAPT) 모드를 사용하세요.
* 범위 내 도메인으로 시작하는 경우 버그 바운티(BB) 모드를 사용하세요.
### [버그 바운티 모드]
* BB 모드에서는 celerystalk로 발견되거나 수동으로 가져온 모든 서브도메인이 범위 내로 표시됩니다.
#### 서브도메인 찾기, 범위 외 호스트 정의, 나머지 모두 스캔```
# ./celerystalk workspace create -o /dir -m bb # Create default workspace and set output dir
# ./celerystalk subdomains -d company.com,dom.net # Find subdomains and determine if in scope
# ./celerystalk import -S scope.txt (optional) # Import IP/CIDR/Ranges and mark as in scope
# ./celerystalk import -O out_scope.txt (optional) # Define HOSTS/IPs that are out of scope
# ./celerystalk nmap (optional) # Nmap all in-scope hosts (reads options from config.ini)
# ./celerystalk import -f client.xml (optional) # If you would rather import an nmap file you already ran
# ./celerystalk scan [--noIP] # Run all enabled commands against all in scope hosts
# ./celerystalk query watch (then Ctrl+c) # Wait for scans to finish
# ./celerystalk screenshots # Take screenshots
# ./celerystalk report # Generate report
참고: 하위 도메인 명령을 먼저 실행한 후 범위를 정의하거나, 범위를 정의한 후 하위 도메인을 가져올 수 있습니다.
**참고:** 서브도메인 명령을 먼저 실행한 후 범위를 정의하거나, 범위를 정의한 후 서브도메인을 가져올 수 있습니다.
#### 범위 내에 있고 celerystalk가 nmap을 실행하고 결과를 파싱하도록 하는 호스트 목록 가져오기```
# ./celerystalk workspace create -o /dir -m vapt # Create default workspace and set output dir
# ./celerystalk import -S client-inscope-list.txt # Import IP/CIDR/Ranges and mark as in scope
# ./celerystalk import -O out_scope.txt (optional) # Define HOSTS/IPs that are out of scope
# ./celerystalk nmap # Nmap all in-scope hosts (reads options from config.ini)
# ./celerystalk query watch (then Ctrl+c) # Watch nmap scans as they move from pending > running > complete
# ./celerystalk subdomains -d client.com,client.net # Find subdomains and determine if in scope
# ./celerystalk scan # Run all enabled commands
# ./celerystalk query watch (then Ctrl+c) # Watch scans as they move from pending > running > complete
# ./celerystalk screenshots # Take screenshots
# ./celerystalk report # Generate report
참고: 서브도메인 명령을 먼저 실행한 후 범위를 정의하거나, 범위를 정의한 후 서브도메인을 가져올 수 있습니다.
자세한 내용은 Wiki의 Configuration 페이지를 참조하세요.
다른 작업을 수행하기 전에 워크스페이스를 생성해야 합니다.
#### import
이 명령은 포트와 호스트 데이터를 celerystalk으로 가져오고, 범위 내와 범위 밖을 정의할 수 있게 합니다.
| Option | Description |
| --- | --- |
| -f scan.xml | <b>Nmap/Nessus xml</b><br><ul><li>이 파일의 모든 IP 주소를 호스트 테이블에 추가하고, 모두 스캔 대상으로 범위 내로 표시합니다.</li><li>모든 포트와 서비스 유형을 서비스 테이블에 추가합니다.</li></ul> |
| -S scope.txt | <b>범위 파일</b><br><ul><li>스테이징되지 않은 파일 차이를 보여줍니다.</li></ul>|
| -D subdomains.txt | <b>(하위)도메인 파일</b><br><ul><li>celerystalk은 IP를 확인하고 DB에서 IP를 찾아 각 하위 도메인이 범위 내에 있는지 결정합니다. 일치하는 항목이 있으면 도메인이 범위 내로 표시되고 스캔됩니다.</li></ul>|```
Import Nmap XML file: ./celerystalk import -f /assessments/nmap.xml
Import Nessus file: ./celerystalk import -f /assessments/scan.nessus
Import list of Domains: ./celerystalk import -D <file>
Import list of IPs/Ranges: ./celerystalk import -S <file>
Specify workspace: ./celerystalk import -f <file>
Import multiple files: ./celerystalk import -f nmap.xml -S scope.txt -D domains.txt
이 명령은 설정 파일에 있는 모든 서브도메인 검색 도구를 실행합니다. 원하는 경우 celerystalk 외부에서 이 작업을 수행하고 import 명령으로 서브도메인을 가져올 수도 있습니다.
| 옵션 | 설명 |
|---|---|
| -d domain1,domain2,etc | Amass, Sublist3r 등을 실행하고 도메인을 DB에 저장
|
| Find subdomains: celerystalk subdomains -d domain1.com,domain2.com |
#### nmap
이 명령은 config.ini 파일에서 지정한 옵션을 사용하여 nmap을 실행합니다. 또는 nmap XML 파일이나 .nessus 파일에서 포트 스캔 데이터를 가져올 수 있습니다.
| Option | Description |
| --- | --- |
| no options | config에서 nmap 명령을 읽고 범위 내 호스트의 모든 서비스를 스캔합니다. |
| -c [filename] | celerystalk 설정 파일을 지정합니다 [기본값: ./config.ini] |
#### scan
이 명령은 celery에 작업을 제출하며, celery는 비동기적으로 작업을 실행하고 출력을 출력 디렉터리에 기록합니다.
| Option | Description |
| --- | --- |
| no options | <b>범위 내 모든 호스트 스캔</b><ul><li>DB를 읽고 범위 내 모든 IP와 서브도메인을 스캔합니다.</li><li>IP에 대해 활성화된 모든 도구를 실행하지만, 가상 호스트에 대해서는 http/http 관련 도구만 실행합니다.</li></ul> |
| --noIP | IP로 호스트를 스캔하지 않음 (vhost만 스캔)
| -t ip,vhost,cidr | <b>DB 또는 스캔 파일에서 특정 대상 스캔</b><ul><li>범위 내 IP 및/또는 서브도메인의 하위 집합을 스캔합니다.</li></ul> |
| -s | <b>시뮬레이션</b><br> 모든 작업을 celery로 보내지만, 모든 명령 앞에 #이 붙어 실행되지 않게 합니다.</li></ul> |
| -c [filename] | celerystalk 설정 파일을 지정합니다 [기본값: ./config.ini] |
| -u [URL] | 아직 DB에 없는 경우에도 특정 URL을 스캔합니다. |```
Scan all in scope hosts: ./celerystalk scan
Scan subset of DB hosts: ./celerystalk scan -t 10.0.0.1,10.0.0.3
./celerystalk scan -t 10.0.0.100-200
./celerystalk scan -t 10.0.0.0/24
./celerystalk scan -t sub.domain.com
Simulation mode: ./celerystalk scan -s
이 명령은 이미 스캔된 호스트를 다시 스캔합니다.
| 옵션 | 설명 |
|---|---|
| 옵션 없음 | DB의 인 스코프 각 호스트에 대해 celerystalk이 다시 스캔할지 묻습니다. |
| -t ip,vhost,cidr | 인 스코프 IP 및/또는 서브도메인의 일부를 스캔합니다. |
| -s | 모든 작업을 celery로 보내지만, 모든 명령은 앞에 #이 붙어 실행되지 않습니다. |
./celerystalk rescan -c myconfig.ini
Rescan some hosts ./celerystalk rescan -t 1.2.3.4,sub.domain.com
Simulation mode: ./celerystalk rescan -s
#### query
작업 대기열의 상태를 원하는 만큼 자주 비동기적으로 확인할 수 있습니다. 감시 모드는 실제로 linux watch 명령어를 실행하므로 터미널 버퍼가 가득 차지 않습니다.
| 옵션 | 설명 |
| --- | --- |
| no options | 현재 워크스페이스의 모든 작업 표시 |
| watch | unix watch 명령어로 명령을 전송하여 2초마다 업데이트된 상태 확인 가능 |
| brief | 상태별 결과 5개로 제한 (pending/running/completed/cancelled/paused) |
| summary | 작업 목록 대신 숫자가 포함된 배너만 표시 |```
Query Tasks: ./celerystalk query
./celerystalk query watch
./celerystalk query brief
./celerystalk query summary
./celerystalk query summary watch
현재 실행 중이거나 대기열에 있는 작업을 취소/일시정지/재개합니다.
./celerystalk <verb> all #Cancel/Pause/Resume all tasks from current workspaces
#### 스크린샷
| 옵션 | 설명 |
| --- | --- |
| 옵션 없음 | 알려진 모든 경로에 대해 스크린샷을 찍습니다. |```
./celerystalk screenshots
모든 도구 출력을 HTML 파일과 TXT 파일로 결합하는 보고서를 실행합니다. 원하는 만큼 자주 실행할 수 있습니다. 보고서를 실행할 때마다 이전 보고서를 덮어씁니다.
| Options | Description |
|---|---|
| 옵션 없음 | 스캔된 모든 범위 내 호스트에 대한 보고서를 생성합니다 |
| Create Report: ./celerystalk report #Create a report for all scanned hosts in current workspace |
#### db
작업 공간, 호스트, 서비스 또는 경로를 celerystalk 데이터베이스에 저장된 목록으로 표시하거나 내보냅니다.
| 옵션 | 설명 |
| --- | --- |
| workspaces | 알려진 모든 작업 공간과 각 작업 공간에 연결된 출력 디렉토리를 표시합니다. |
| workspace | workspaces와 동일 |
| services | IP별로 알려진 모든 열린 포트와 서비스 유형을 표시합니다. |
| ports | ports와 동일합니다. |
| hosts | 모든 호스트(IP 주소 및 서브도메인/vhost)를 표시하며, 범위 내에 있는지와 스캔을 위해 제출되었는지 여부를 표시합니다. |
| vhosts | hosts 명령과 동일하지만, IP 주소인 vhost를 제외합니다. |
| paths | vhost에 의해 식별된 모든 경로를 표시합니다. |
| paths_only | 데이터베이스의 경로를 줄바꿈으로 구분한 목록을 표시합니다. 다른 도구로 파이프하는 데 유용합니다. |
| export | services, hosts 및 paths 테이블을 내보냅니다.
| export_paths_only | 데이터베이스의 경로를 줄바꿈으로 구분한 목록만 파일로 내보냅니다.```
Show workspaces: ./celerystalk db workspaces
./celerystalk db workspace
Show services: ./celerystalk db services
./celerystalk db ports
Show hosts: ./celerystalk db hosts
Show vhosts only ./celerystalk db vhosts
Show paths: ./celerystalk db paths
Show paths (no table) ./celerystalk db paths_only
Show tasks: ./celerystalk db tasks
Export tables to csv ./celerystalk db export
Export paths to txt ./celerystalk db export_paths_only
Administrative Functions
## 사용법```
Usage:
celerystalk workspace ([create]|[switch]) [-w workspace_name] [-o <output_dir>] [-m <mode>] [-h]
celerystalk import [-f <nmap_file>] [-S scope_file] [-D subdomains_file] [-O outOfScope.txt] [-u <url>] [-h]
celerystalk subdomains [-d <domains>] [-c <config_file>] [-s] [-h]
celerystalk nmap [-t <targets>] [-c <config_file>] [-s] [-h]
celerystalk scan [-t <targets>] [--noIP] [-c <config_file>] [-s] [-h]
celerystalk scan -u <url> [-c <config_file>] [-s] [-h]
celerystalk rescan [-t <targets>] [-c <config_file>] [-s] [-h]
celerystalk query ([full] | [summary] | [brief]) [watch] [-h]
celerystalk query [watch] ([full] | [summary] | [brief]) [-h]
celerystalk report [-h]
celerystalk screenshots [-h]
celerystalk cancel ([all]|[<task_ids>]) [-h]
celerystalk pause ([all]|[<task_ids>]) [-h]
celerystalk resume ([all]|[<task_ids>]) [-h]
celerystalk db ([workspaces]|[workspace]|[services]|[ports]|[hosts]|[vhosts]|[paths]|[paths_only]|[tasks]) [-h]
celerystalk db export [-h]
celerystalk admin ([start]|[stop]|[restart]|[reset]|[backup]|[restore]) [-f <restore_file>] [-h]
celerystalk interactive [-h]
celerystalk (help | -h | --help)
Options:
-h --help Show this screen
-v --version Show version
-f <nmap_file> Nmap xml import file
-c <config_file> Specify a non-default configuration file by name
-o <output_dir> Output directory
-m <mode> vapt = VulnAssmt/PenTest, bb = Bug Bounty
-S <scope_file> Scope import file
-O <outscope_file> Out of scope hosts file
-D <subdomains_file> Subdomains import file
-t <targets> Target(s): IP, IP Range, CIDR
-u <url> URL to parse and scan with all configured tools
-w <workspace> Workspace
-d --domains Domains to scan for vhosts
-s --simulation Simulation mode. Submit tasks comment out all commands
--noIP Only scan targets by DNS hostname (Don't scan the IP address)
Context specific help with examples:
./celerystalk workspace -h
./celerystalk subdomains -h
./celerystalk import -h
./celerystalk nmap -h
./celerystalk scan -h
./celerystalk rescan -h
./celerystalk query -h
./celerystalk pause -h
./celerystalk resume -h
./celerystalk cancel -h
./celerystalk db -h
./celerystalk screenshots -h
./celerystalk report -h
./celerystalk admin -h
이 프로젝트는 많은 훌륭한 도구에서 영감을 받았습니다:
@offensivesecurity와 @hackthebox_eu에게 그들의 랩 네트워크에 감사드립니다
또한, 감사드립니다:
| 옵션 | 설명 |
|---|
| 옵션 없음 | 현재 워크스페이스 출력 |
| create | 새 워크스페이스 생성 |
| -w | 새 워크스페이스 이름 정의 |
| -o | 워크스페이스에 할당된 출력 디렉터리 정의 |
| -m | 모드 [vapt \ bb] |
| Create default workspace ./celerystalk workspace create -o /assessments/client -m bb | |
| Create named workspace ./celerystalk workspace create -o /assessments/client -w client -m vapt | |
| Switch to another workspace ./celerystalk workspace client |
| -c [파일명] | celerystalk 설정 파일을 지정합니다 [기본값: ./config.ini] |
| Rescan all hosts: ./celerystalk rescan |
| 옵션 | 설명 |
|---|
| cancel |
|
| pause |
|
| resume |
|
| Cancel/Pause/Resume Tasks: ./celerystalk 5,6,10-20 #Cancel/Pause/Resume tasks 5, 6, and 10-20 from current workspace |
| Options | 설명 |
|---|
| start | Celery 및 Redis 프로세스 시작 |
| stop | Celery 및 Redis 프로세스 중지 |
| restart | Celery 및 Redis 프로세스 재시작 |
| reset | DB 삭제, Redis 플러시, 처음부터 다시 시작 |
| backup | DB 및 모든 작업 공간 데이터 디렉터리 백업 |
| restore | DB 및 모든 작업 공간 데이터 디렉터리 복원 |
| -f [filename] | 복원 파일 이름 |
| Examples: | |
| ./celerystalk admin start | |
| ./celerystalk admin stop | |
| ./celerystalk admin restart | |
| ./celerystalk admin reset | |
| ./celerystalk admin backup -f | |
| ./celerystalk admin restore -f |