 olafhaalstra/log4jcheck
URL 목록을 Log4j 취약점 CVE-2021-44228에 대해 확인합니다.

멀티스레드 방식으로 URL 목록을 POST 및 GET 요청과 파라미터 조합으로 검사합니다.
NortwaveSecurity 버전에서 많은 영감을 받았습니다.
확인할 URL 목록은 다음 형식(csv)이어야 합니다:
description,URL,method,parameters
production,example.com/login,POST,"username,password"
staging,example.com/search,GET,"q"
development,example.com/,GETNP,""
그러면 이후 example.com/login에 대해 POST 요청이 실행되며 다음 원시 본문이 게시됩니다:
username={jndi:ldap...}&password={jndi:ldap...}
마찬가지로 다음 GET 요청을 실행합니다: example.com/search?q={jndi:ldap...}.
또는 GETNP(GET No Parameters)를 지정하여 페이로드를 URL에 추가한 GET 요청을 수행할 수 있습니다: example.com/new/{jndi:ldap...}.
또한 페이로드는 User-Agent, Referer, X-Forwarded-For, Authentication 헤더에도 삽입되어 적중 확률을 높입니다.
URL을 GET, POST 또는 GETNP 모두로 검사하려면 CSV에 해당 항목을 중복 추가하십시오.
사전 구성 없이 설정하려면 https://canarytokens.org/generate를 사용하여 Log4Shell CanaryToken을 만들 수 있습니다:
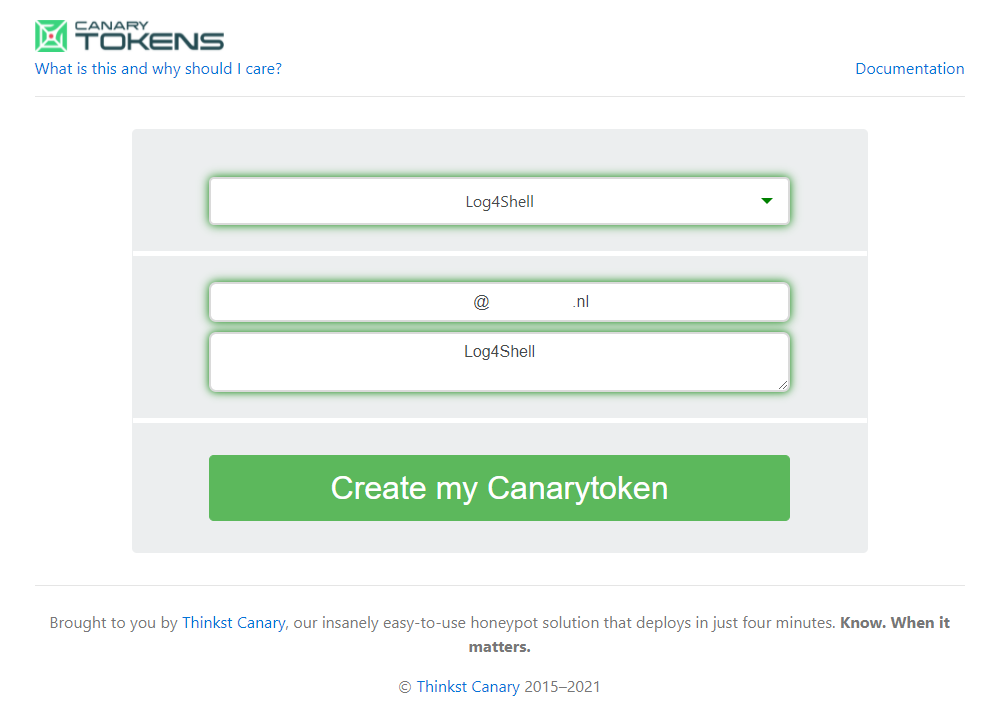
또는 자체 DNS 서버를 설정할 수 있습니다.
pip install-r requirements.txt를 사용하여 의존성을 설치하십시오. 스크립트를 편집하여 다음 줄을 원하는 카나리 토큰으로 변경하십시오:
usage: log4jcheck.py [-h] -f FILE -u URL [-w WAIT] [-t TIMEOUT] [-p PREFIX] [-q THREADS] [-d DONE]

optional arguments:
  -h, --help            show this help message and exit
  -f FILE, --file FILE  The CSV filename containing the URLs
  -u URL, --url URL     DNS subdomain URL on which th callback is performed
  -w WAIT, --wait WAIT  Number of seconds to wait before next request (default: 1)
  -t TIMEOUT, --timeout TIMEOUT
                        HTTP timeout in seconds to use (default: 5)
  -p PREFIX, --prefix PREFIX
                        Type of prefix, see prefixes_injects for options. (default: 0, options 0-3)
  -q THREADS, --threads THREADS
                        Number of threads to distribute the work
  -d DONE, --done DONE  File where we can keep track of items that are done
로그를 출력할 폴더 /run/logs를 생성하십시오. 여기서 진행 상황을 추적할 수 있으며 stdout으로는 아무것도 전송되지 않습니다.
이제 스크립트를 실행할 수 있습니다. 앞서 생성한 확인할 URL이 포함된 CSV를 스크립트에 지정하십시오.
python3 .\log4jcheck.py --file .\urls-example.csv --threads 2 --url "L4J.ujz5sgvgo7xuvn03ft9qrws5w.canarytokens.com/a" -w 0 -t 1
스크립트가 완료된 후 토큰이 트리거되었는지 확인하십시오. 생성된 UUID4와 주입된 파라미터의 조합을 기반으로 어떤 애플리케이션이 트리거했는지 상호 연관시킬 수 있습니다. 예: 40852c3b-2d6b-4bd5-a91f-4416aa730619-username.
log4shell-vulnerable-app을 대상으로 테스트되었습니다. MainControll.java를 다음과 같이 수정하십시오:
package fr.christophetd.log4shell.vulnerableapp;


import org.springframework.web.bind.annotation.GetMapping;
import org.springframework.web.bind.annotation.PostMapping;
import org.springframework.web.bind.annotation.RequestHeader;
import org.springframework.web.bind.annotation.RequestBody;
import org.springframework.web.bind.annotation.RequestParam;
import org.springframework.web.bind.annotation.RestController;

import org.apache.logging.log4j.LogManager;
import org.apache.logging.log4j.Logger;

@RestController
public class MainController {

    private static final Logger logger = LogManager.getLogger("HelloWorld");

    @GetMapping("/")
    public String index(@RequestHeader("X-Api-Version") String apiVersion) {
        logger.info("Received a request for API version " + apiVersion);
        return "Hello, world!";
    }

    @GetMapping("/test")
    public String testGet(@RequestParam String test) {
        logger.info("Received a request for test " + test);
        return "Test world!";
    }

    @PostMapping("/test")
    public String test(@RequestBody String test) {
        logger.info("Received a request for test " + test);
        return "Test world!";
    }

}
컴파일 및 실행:
gradle bootJar --no-daemon
java -jar .\build\libs\log4shell-vulnerable-app-0.0.1-SNAPSHOT.jar
다음 urls.csv 파일로 log4jcheck를 실행하십시오:
description,URL,method,parameters
test,http://localhost:8080/test,POST,"test"
test,http://localhost:8080/test,GET,"test"
다음 정보가 카나리 토큰 로그에 나타나야 합니다:
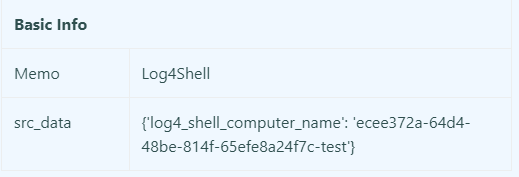
다음 HTTP 헤더가 적용됩니다:
X-Api-VersionUser-AgentRefererX-Druid-CommentOriginLocationX-Forwarded-ForCookieX-Requested-WithX-Forwarded-HostAccept각 주입에 대해 다음 JNDI 접두어가 가능합니다:
jndi:dnsjndi:${lower:l}${lower:d}apjndi:rmijndi:ldap이 스크립트는 User Agent 및 POST 또는 GET 요청에 지정한 모든 파라미터만 검사합니다. 이로 인해 취약점을 트리거하려면 다른 헤더, 누락된 입력 필드 등을 대상으로 해야 하는 경우 오탐(false negative)이 발생할 수 있습니다. 스크립트에 추가 검사를 자유롭게 추가하셔도 됩니다.
Log4jcheck는 MIT 라이선스에 따라 라이선스가 부여된 오픈소스 소프트웨어입니다.
