 nccgroup/scrying
RDP, 웹 및 VNC 스크린샷을 한 곳에서 수집하는 도구



RDP, 웹 및 VNC 스크린샷을 한 곳에서 수집하는 새로운 도구입니다
이 도구는 아직 개발 중이며 대부분 사용 가능하지만 완전하지는 않습니다. 버그나 기능 요청은 GitHub 이슈로 등록해 주세요.
최근 Eyewitness가 RDP 지원을 중단함에 따라 RDP 스크린샷을 캡처할 수 있는 작동하는 CLI 도구가 없습니다. Nessus는 여전히 작동하지만, 이미지를 추출하는 것이 번거롭고 내보내기 파일에 포함되지 않습니다.
이것은 이전 도구보다 더 강력한 새로운 도구를 작성할 좋은 기회라고 생각했습니다. 기능 목록을 확인해보세요!
웹 스크린샷을 위해 scrying은 현재 Chromium 또는 Google Chrome이 설치되어 있어야 합니다. pacman -S chromium 또는 해당 OS에 맞는 명령어로 설치하세요.
최신 릴리스를 릴리스 탭에서 다운로드하세요. Debian 패키지를 사용하는 배포판용 패키지가 있으며 (sudo dpkg -i scrying*.deb로 설치), Windows, Mac 및 기타 Linux용 압축 바이너리도 있습니다.
단일 웹 페이지, RDP 서버 또는 VNC 서버 가져오기:
$ scrying -t http://example.com
$ scrying -t rdp://192.0.2.1
$ scrying -t 2001:db8::5 --mode web
$ scrying -t 2001:db8::5 --mode rdp
$ scrying -t 192.0.2.2
$ scrying -t vnc://[2001:db8::53]:5901
헤드리스 서버에서 실행:
# apt install xvfb # 또는 OS에 해당하는 방법
$ xvfb-run scrying -t http://example.com
nmap 출력에서 자동으로 스크린샷 수집:
$ nmap -iL targets.txt -p 80,443,8080,8443,3389 -oX targets.xml
$ scrying --nmap targets.xml
이미지 출력 디렉토리 변경:
$ scrying -t 2001:db8::3 --output-dir /tmp/scrying_outputs
대상 파일에서 실행:
$ cat targets.txt
http://example.com
rdp://192.0.2.1
2001:db8::5
$ scrying -f targets.txt
웹 프록시를 통해 실행:
$ scrying -t http://example.com --web-proxy http://127.0.0.1:8080
$ scrying -t http://example.com --web-proxy socks5://\[::1\]:1080
이미지 파일은 PNG 형식으로 다음 디렉토리 구조로 저장됩니다:
output
├── report.html
├── rdp
│   └── 192.0.2.1-3389.png
├── vnc
│   └── 192.0.2.1-5900.png
└── web
    └── https_example.com.png
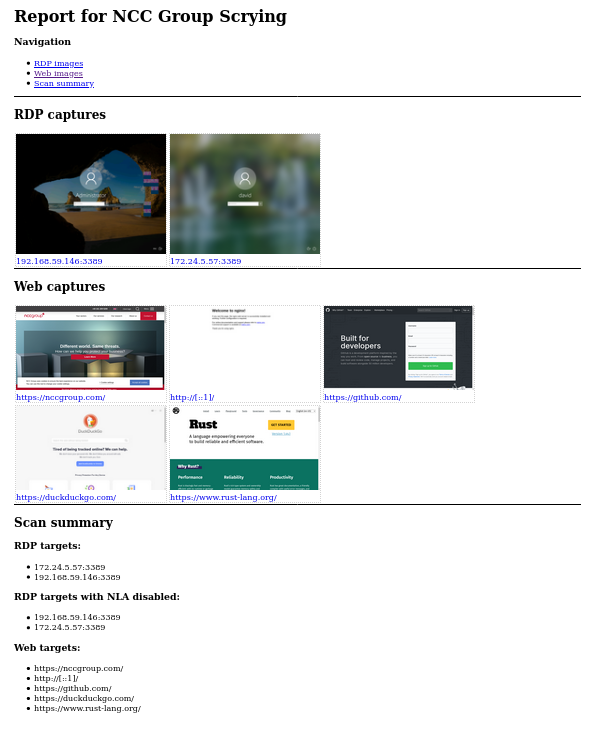
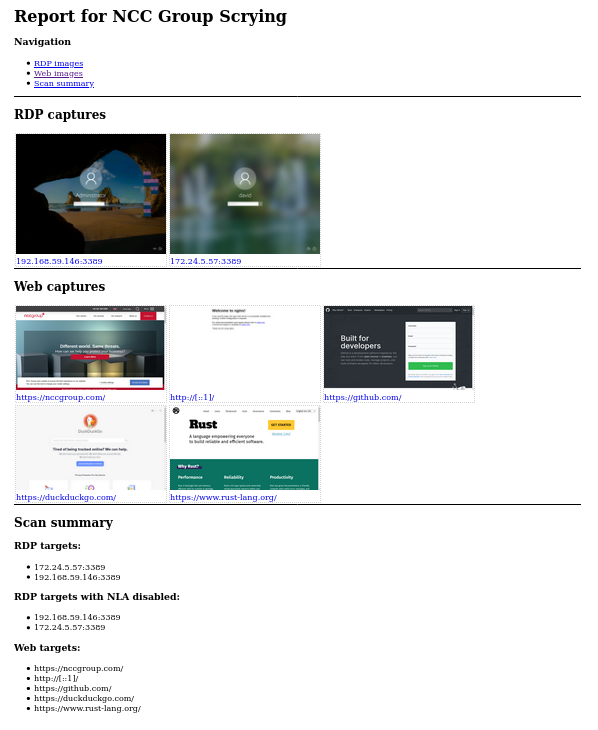
output/report.html에서 보고서를 확인하세요!
체크 표시가 있는 기능은 구현되었으며, 나머지는 TODO입니다.
USAGE:
    scrying [OPTIONS] <--file <FILE>|--nmap <NMAP XML FILE>|--nessus <NESSUS XML FILE>|--target <TARGET>>

OPTIONS:
        --disable-report               Don't create a report.html [aliases: no-report]
    -f, --file <FILE>                  Targets file, one per line
    -h, --help                         Print help information
    -l, --log-file <LOG FILE>          Save logs to the given file
    -m, --mode <MODE>                  Force targets to be parsed as `web`, `rdp`, `vnc` [default:
                                       auto] [possible values: web, rdp, vnc, auto]
        --nessus <NESSUS XML FILE>     Nessus XML file
        --nmap <NMAP XML FILE>         Nmap XML file
    -o, --output <OUTPUT DIR>          Directory to save the captured images in [default: output]
        --proxy <PROXY>                Default SOCKS5 proxy to use for connections e.g.
                                       socks5://[::1]:1080
        --rdp-domain <RDP DOMAIN>      Domain name to provide to RDP servers that request one
        --rdp-pass <RDP PASS>          Password to provide to RDP servers that request one
        --rdp-proxy <RDP PROXY>        SOCKS5 proxy to use for RDP connections e.g.
                                       socks5://[::1]:1080
        --rdp-timeout <RDP TIMEOUT>    Seconds to wait after last bitmap before saving an image
                                       [default: 2]
        --rdp-user <RDP USER>          Username to provide to RDP servers that request one
    -s, --silent                       Suppress most log messages
        --size <SIZE>                  Set the size of captured images in pixels. Due to protocol
                                       limitations, sizes greater than 65535x65535 may get truncated
                                       in interesting ways. This argument has no effect on VNC
                                       screenshots. [default: 1280x1024]
    -t, --target <TARGET>              Target, e.g. http://example.com, rdp://[2001:db8::4]
        --test-import                  Exit after importing targets
        --threads <THREADS>            Number of worker threads for each target type [default: 10]
    -v, --verbose                      Increase log verbosity
    -V, --version                      Print version information
        --vnc-auth <VNC AUTH>          Password to provide to VNC servers that request one
        --web-mode <WEB MODE>          Choose between headless Chrom{e,ium} or native webview (GTK
                                       on Linux, Edge WebView2 on Windows, Cocoa WebView on Mac
                                       [default: chrome] [possible values: chrome, native]
        --web-path <WEB PATH>          Append a path to web requests. Provide multiple to request
                                       each path sequentially
        --web-proxy <WEB PROXY>        HTTP/SOCKS Proxy to use for web requests e.g.
                                       http://[::1]:8080