
Skip to content
KitploitKITPLOIT
도구블로그
제출
도구블로그
제출

해킹, 침투 테스트 및 사이버 보안 도구를 당신의 보안 무기고에!

Kitploit은 해킹, 사이버 보안 및 침투 테스트 도구 디렉토리입니다. 최신 프로젝트 업데이트를 발견하여 취약점을 찾고, 시스템을 분석하고, 테스트를 자동화하고, 보안을 강화하세요.

··피드·문의·개인정보·© 2026 Kitploit

도구 디렉토리

카테고리

모든 카테고리 보기
Loading categories
zeek2es — Zeek 로그를 필터링하여 Elastic/OpenSearch+Humio로 전송하는 Python 애플리케이션입니다. 이 앱은 추가 처리를 위해 순수 JSON 로그를 stdout으로 출력할 수도 있습니다! | Kitploit
도구/GitHubGitHub/corelight/zeek2es
Scripting & AutomationNetwork SecurityUtilities & FrameworksLog Analysis
GitHubcorelight/zeek2es

zeek2es

Zeek 로그를 필터링하여 Elastic/OpenSearch+Humio로 전송하는 Python 애플리케이션입니다. 이 앱은 추가 처리를 위해 순수 JSON 로그를 stdout으로 출력할 수도 있습니다!

저장소 보기
40754년 전Kitploit 검토 완료

인기

모두 보기 →

커뮤니티에서 가장 많이 사용되는 도구를 찾아보세요.

모든 도구 탐색

도구 컬렉션을 둘러보세요

모든 도구 보기 →
공유

zeek2es.py

이 Python 애플리케이션은 Zeek의 ASCII TSV 및 JSON 로그를 ElasticSearch의 벌크 로드 JSON 형식으로 변환합니다.
목차:

  • 소개
  • 설치
    • Elastic v8.0+
    • Docker
  • zeek2es 업그레이드
    • ES 인제스트 파이프라인
  • 데이터 필터링
    • Python 필터
    • 키 필터링
  • 명령줄 예제
  • 명령줄 옵션
  • 요구 사항
  • 참고 사항
    • Humio
    • JSON 로그 입력
    • 데이터 스트림
    • 도우미 스크립트
    • Cython

소개

Kibana

동일한 연결 ID(uid) 또는 파일 ID(fuid)에 대한 여러 Zeek 로그를 보고 싶으십니까? 다음은 단일 uid에 대한 files.log, http.log 및 conn.log의 히트입니다:
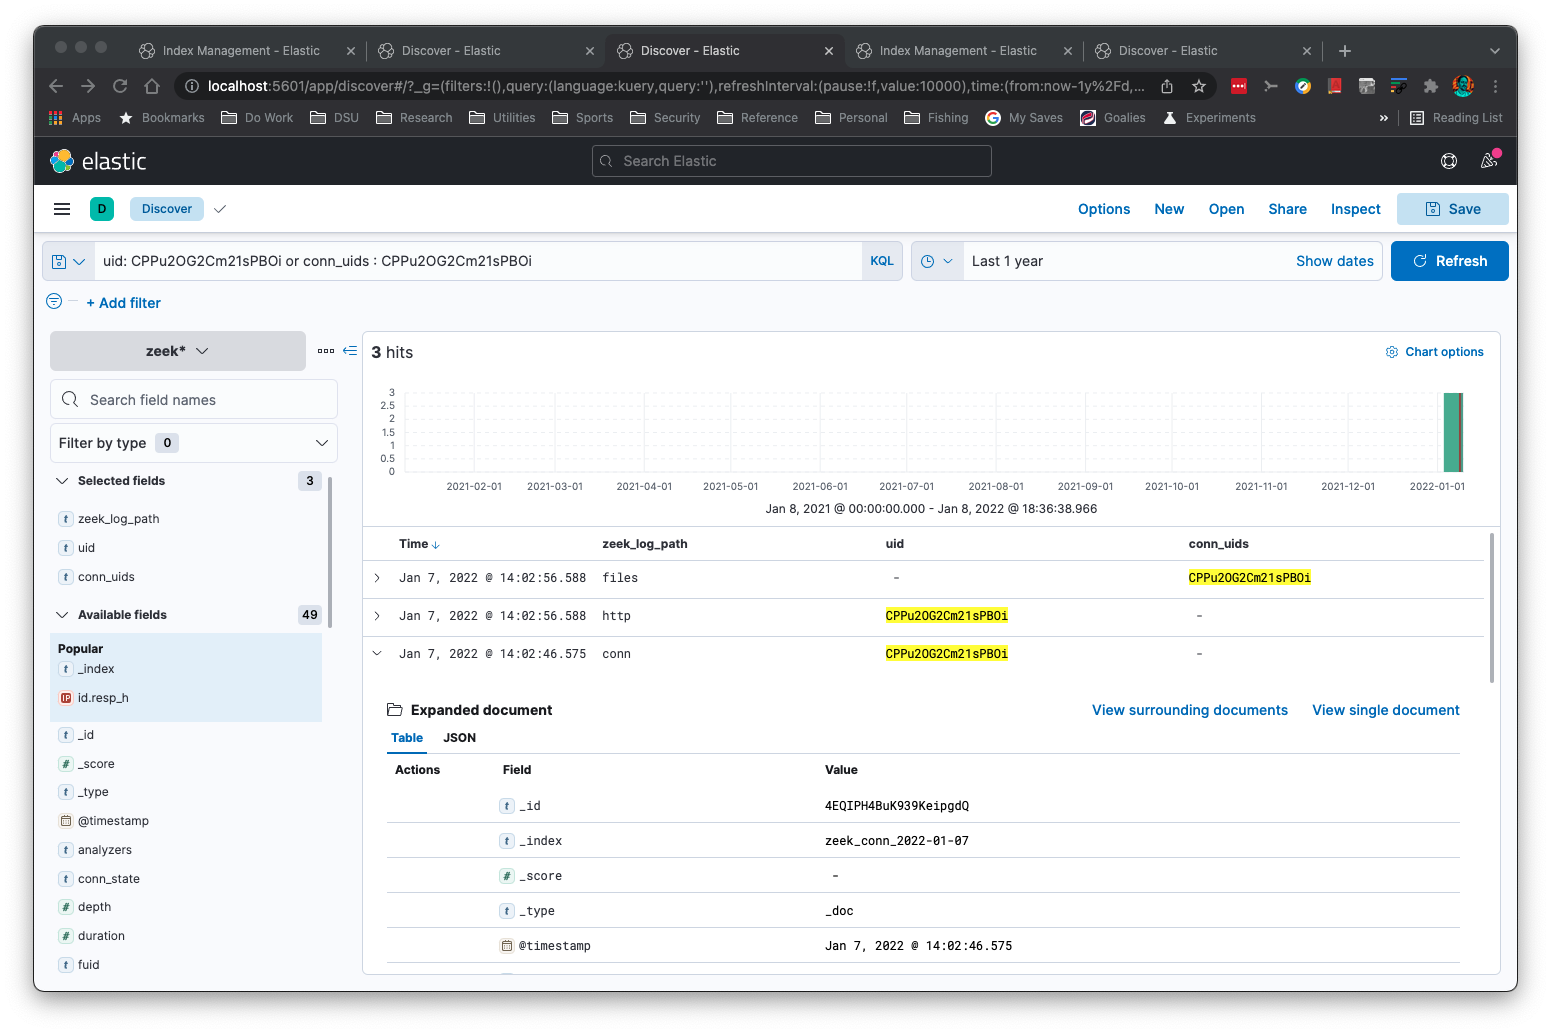
Kibana

Zeek의 'addr' 유형에 대해 서브넷 검색을 수행할 수 있습니다:
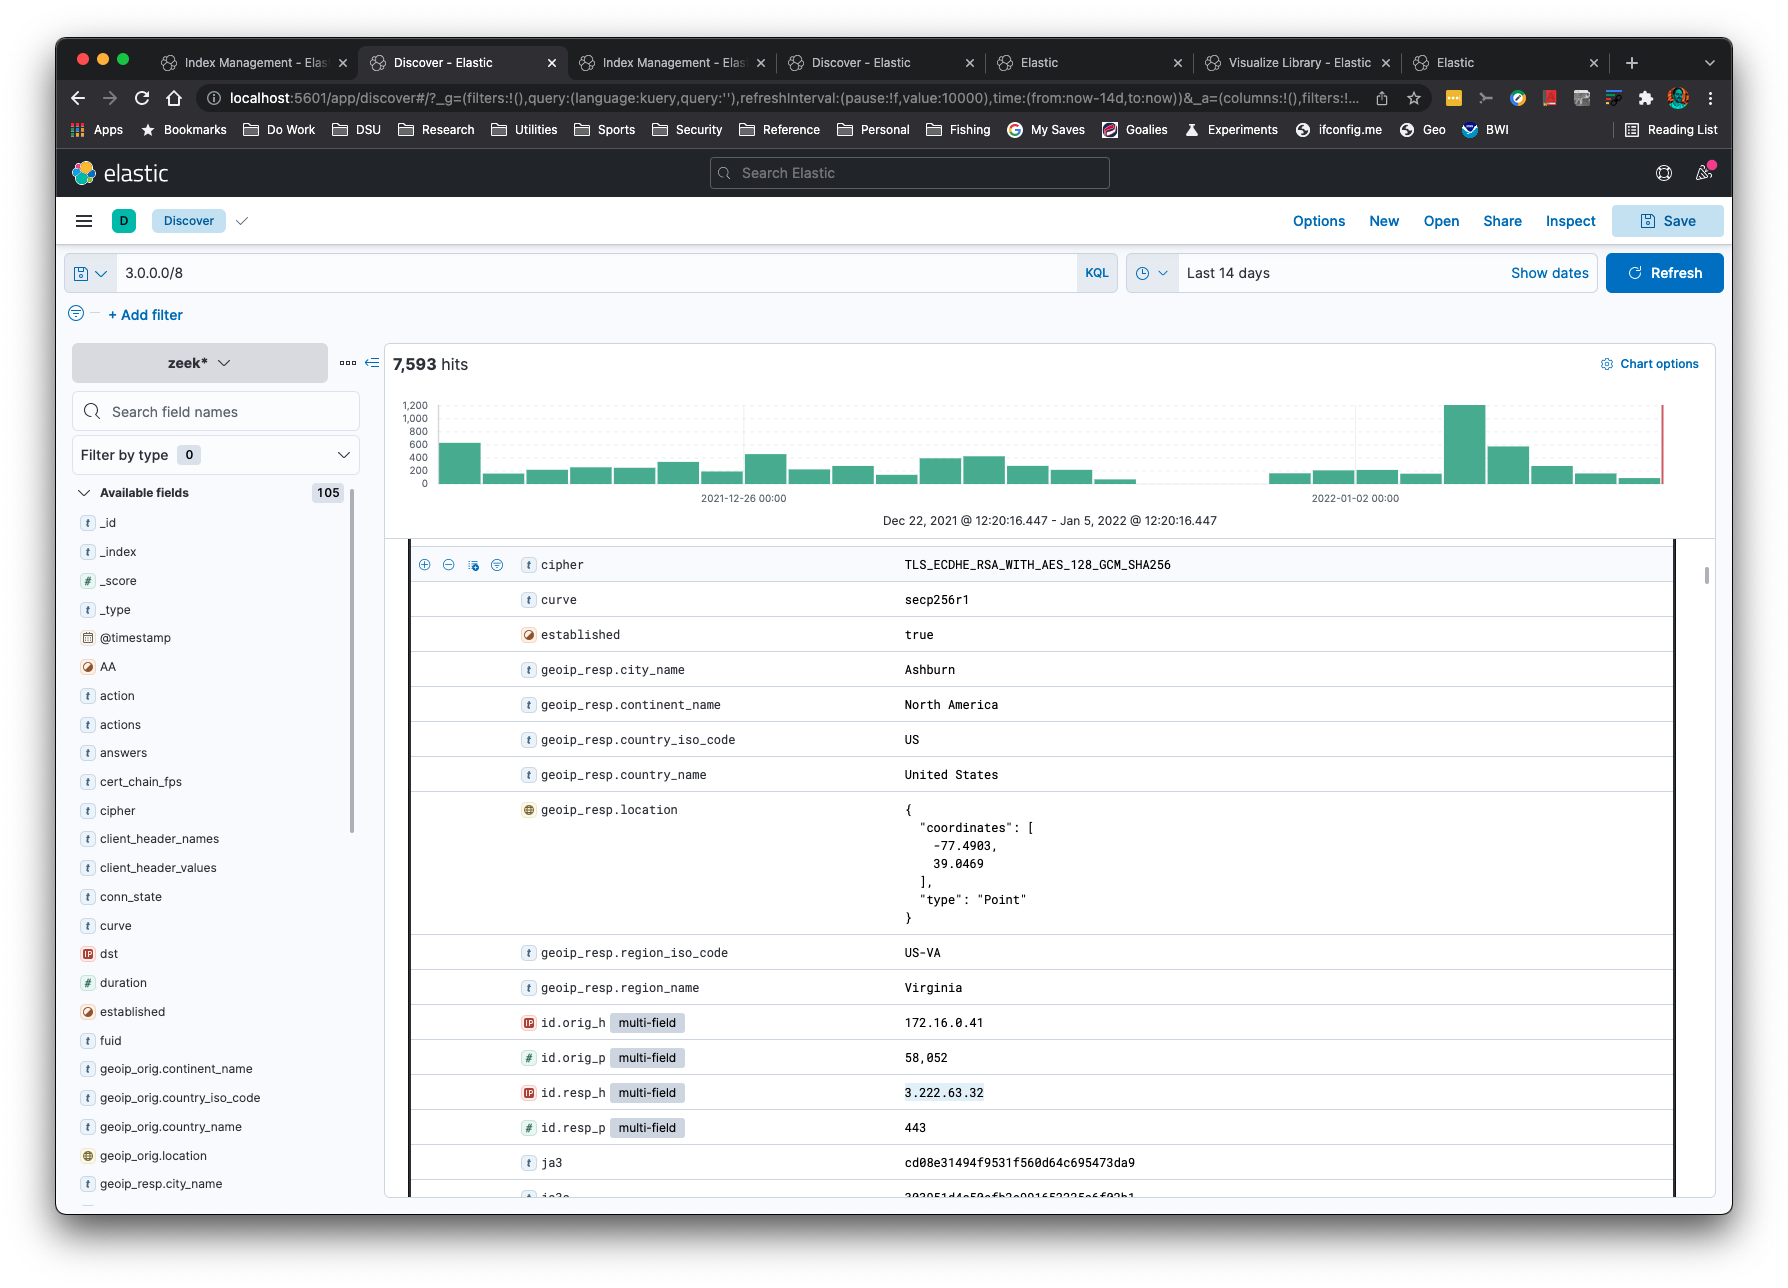
Kibana Subnet Searching

이 NTP 및 HTTP 그래프와 같은 시계열 그래프를 만들 수 있습니다:
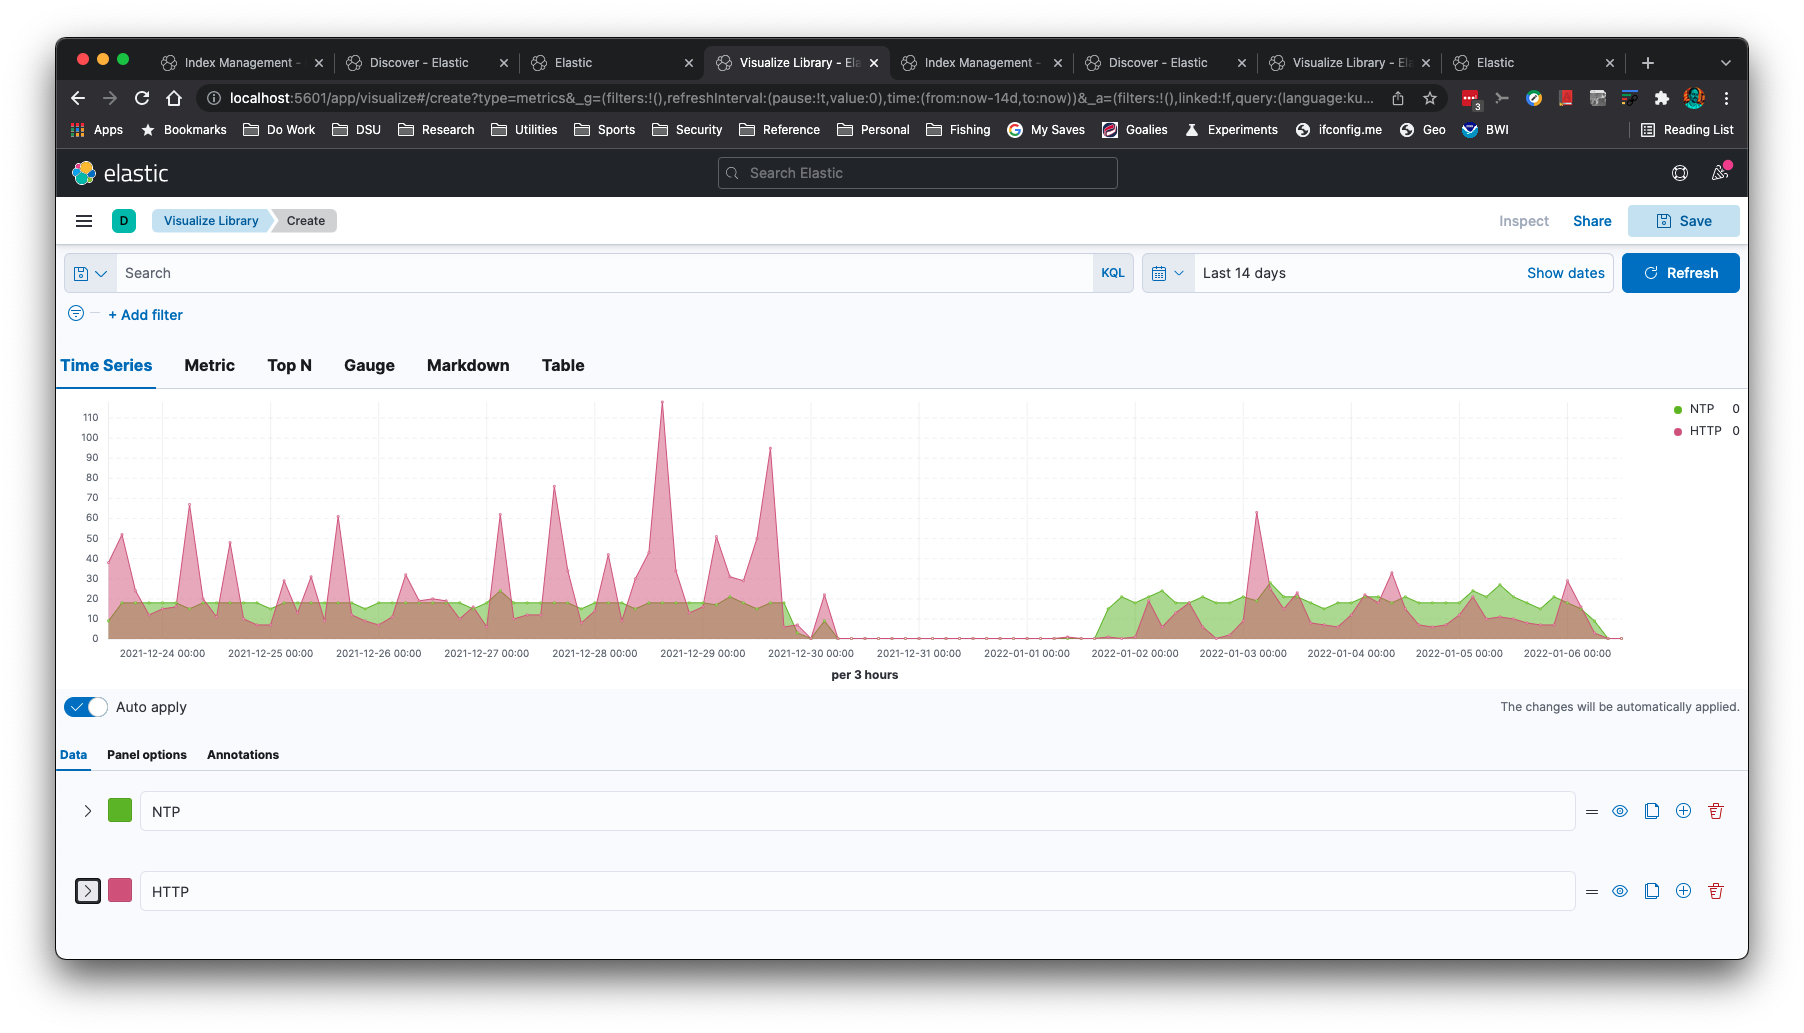
Kibana Time Series

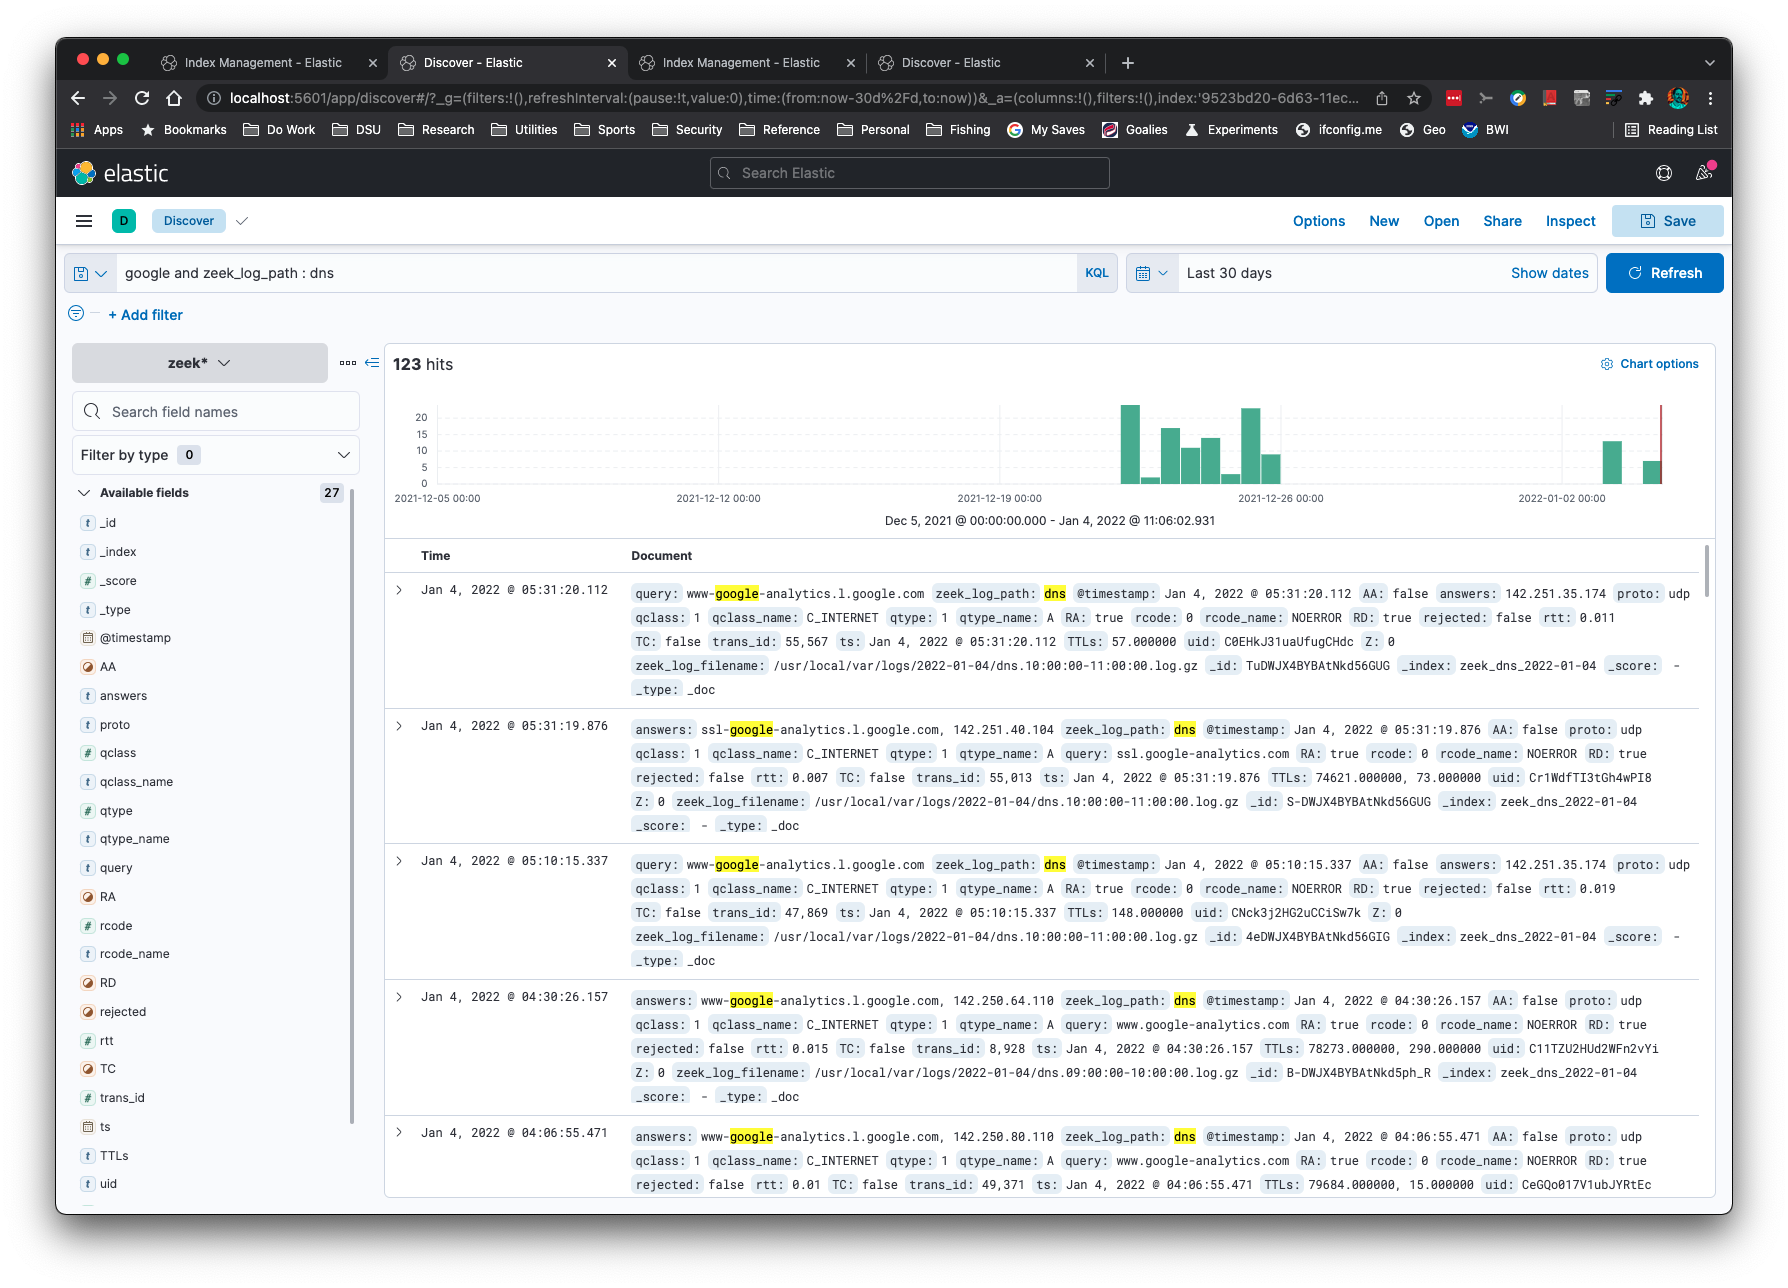
IP 주소는 -g 명령줄 옵션으로 지리적 위치를 확인할 수 있습니다:
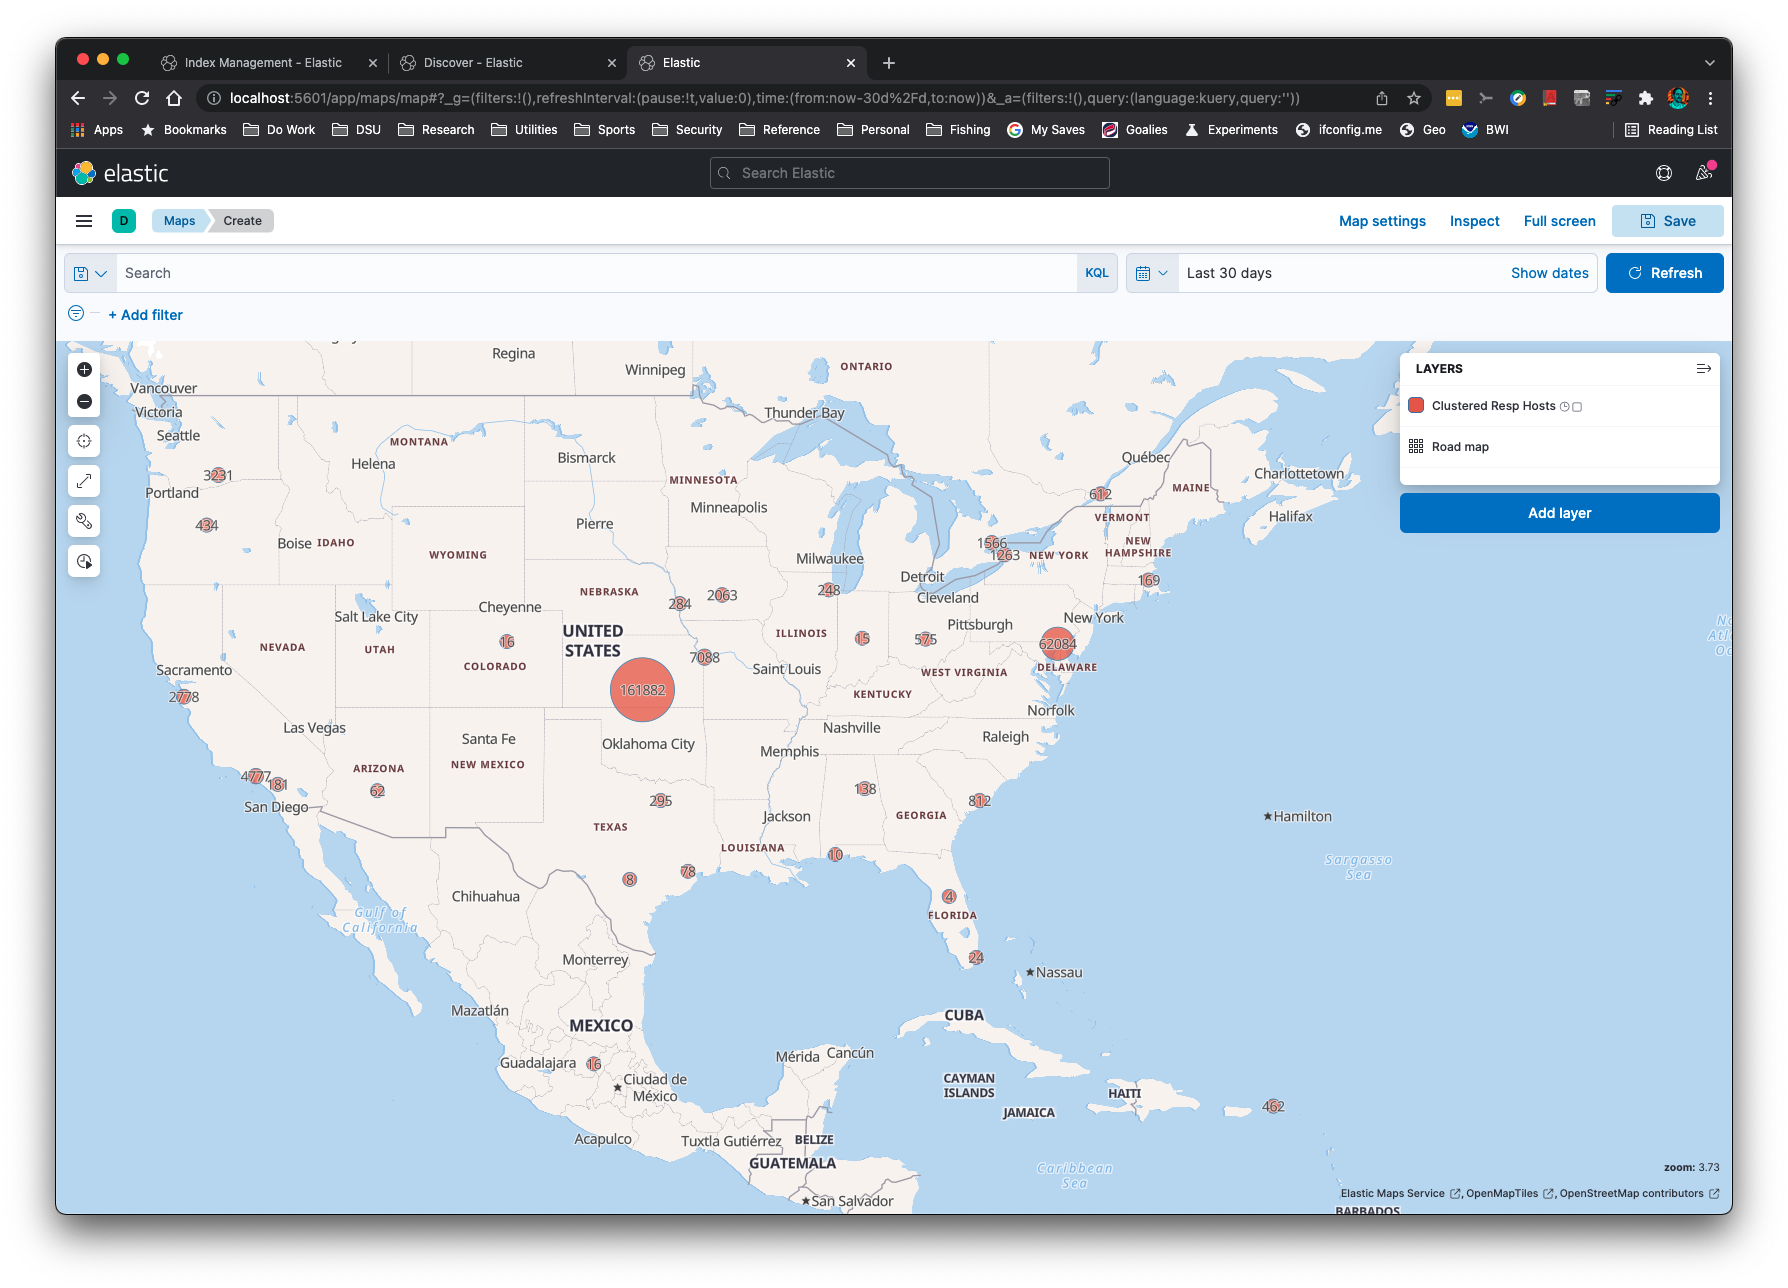
Kibana Mapping

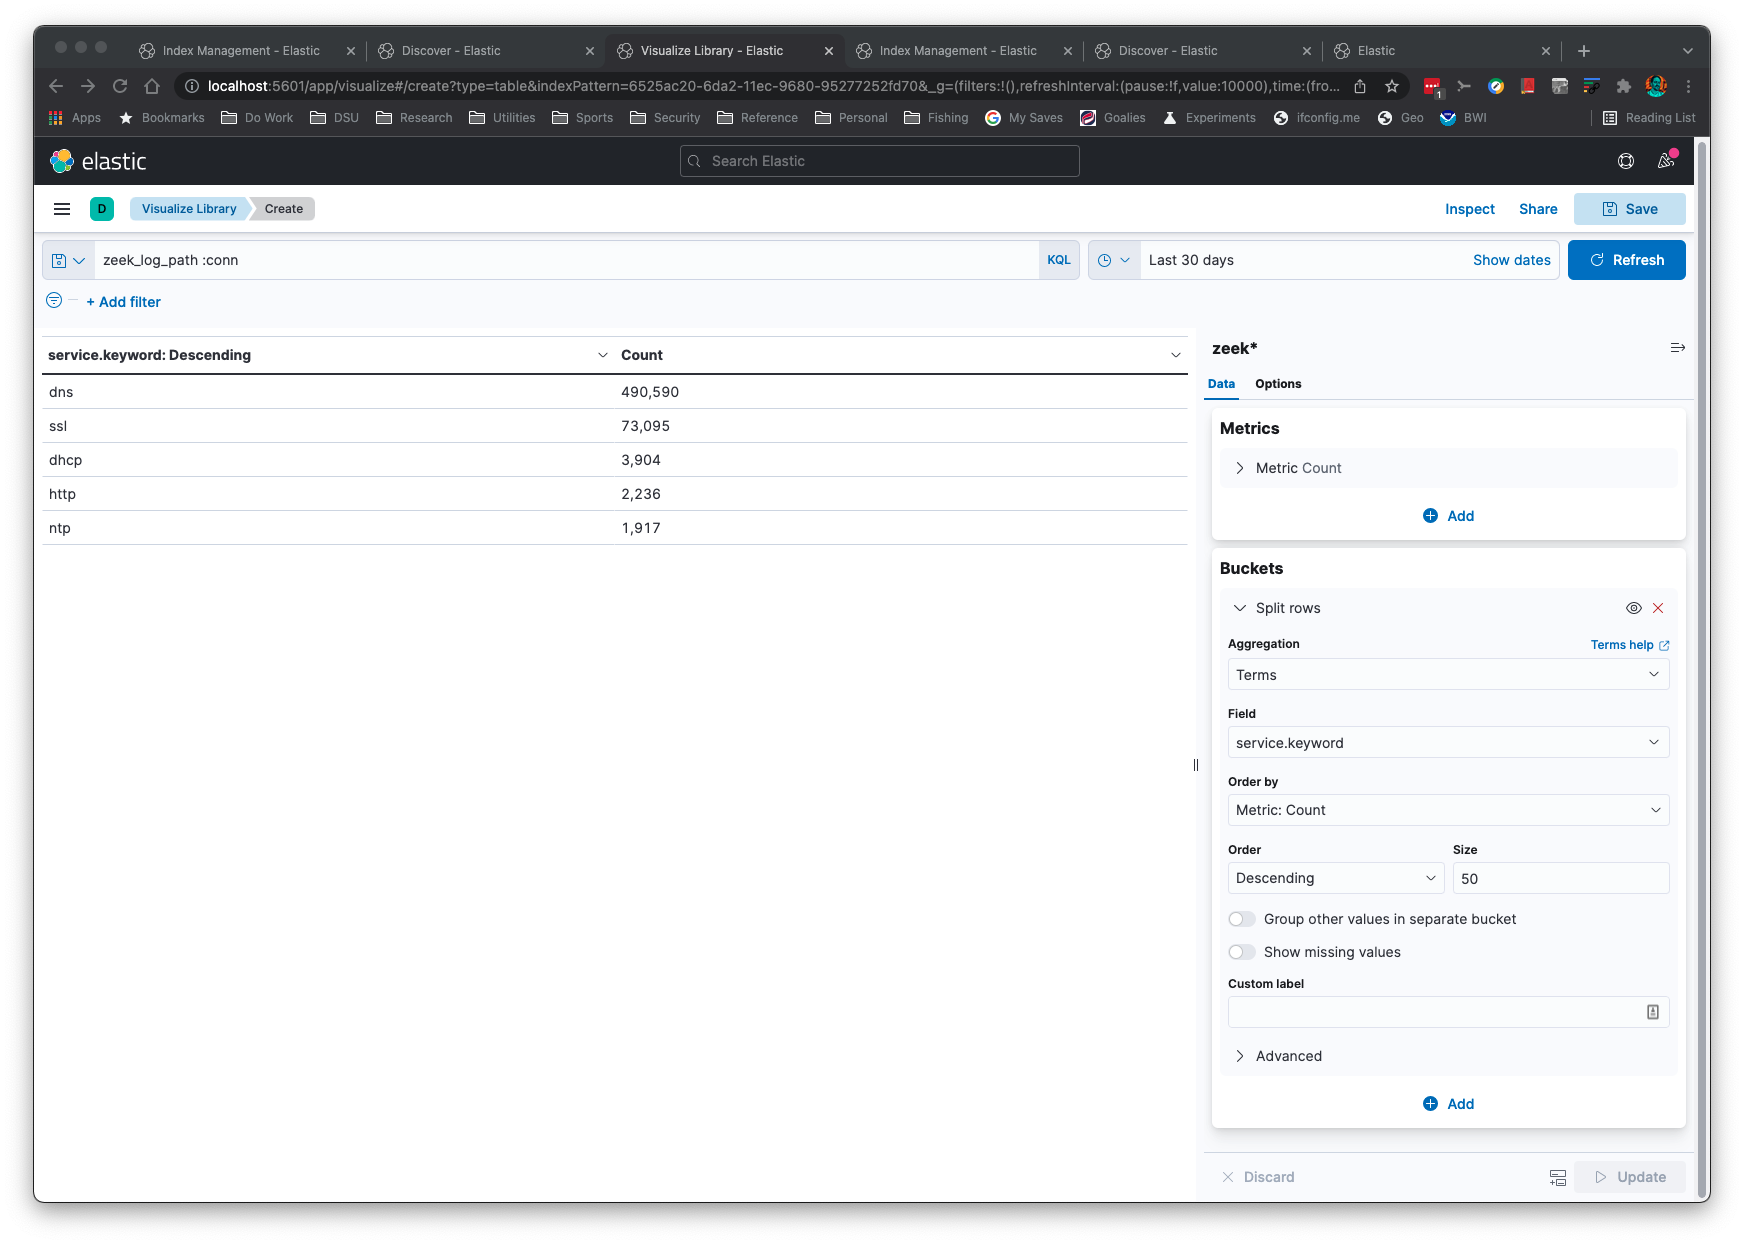
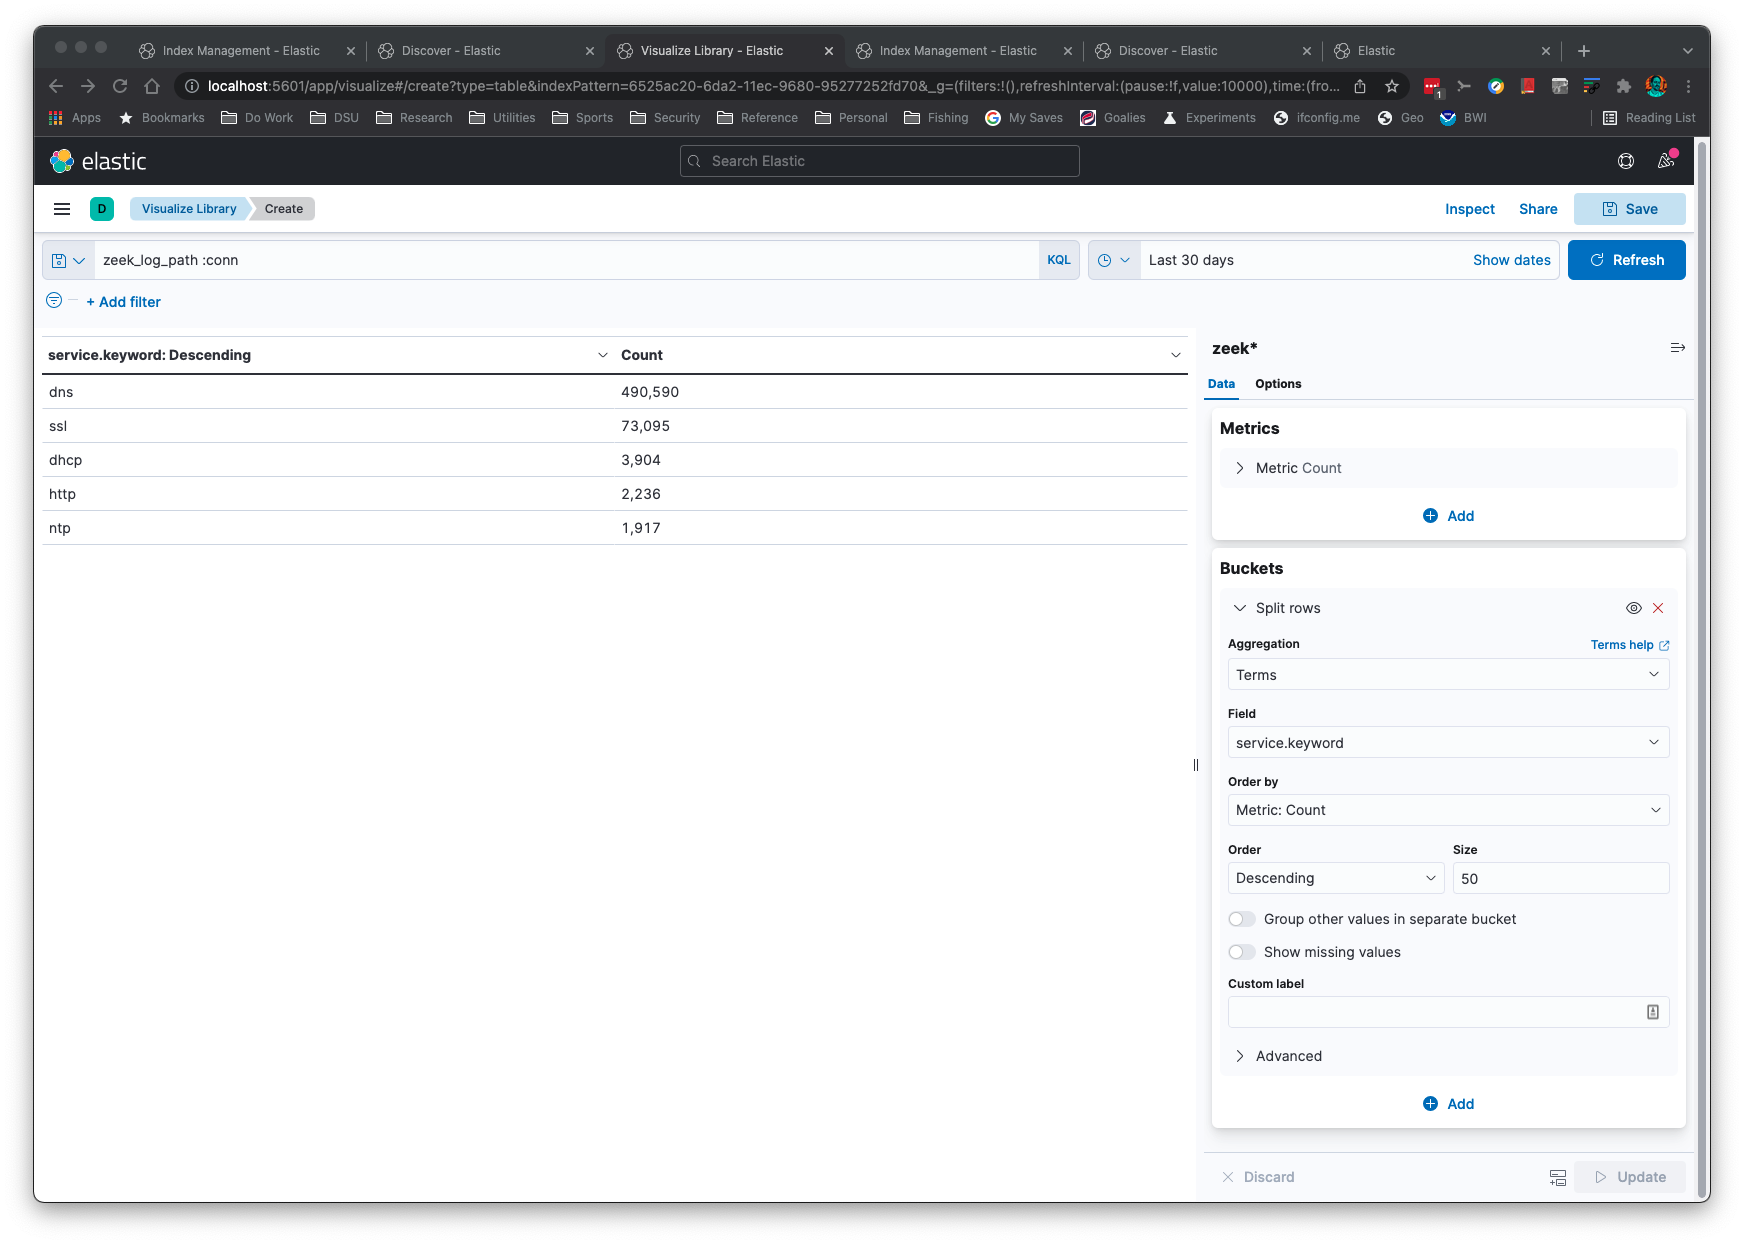
집계는 간단하고 빠릅니다:

Kibana Aggregation

이 애플리케이션은 Zeek 로그 형식이 변경되어도 "그냥 작동"합니다. 이 로직은 ElasticSearch에서 매핑을 올바르게 설정하기 위해 필드 이름과 관련 유형을 읽습니다.

이 애플리케이션은 gzip 또는 압축되지 않은 로그를 인식합니다. 이 애플리케이션은 localhost의 기본 포트에 ElasticSearch가 설정되어 있다고 가정합니다. ElasticSearch가 없는 경우 -s -b 명령줄 옵션으로 JSON을 stdout으로 출력하여 jq 애플리케이션으로 처리할 수 있습니다.

-k 명령줄 옵션으로 텍스트 필드에 키워드 하위 필드를 추가할 수 있습니다. 이는 Kibana에서 집계에 유용합니다.

Python이 이미 시스템에 있다면, requests 라이브러리가 이미 설치되어 있는 경우 Elasticsearch, Kibana 및 zeek2es.py 외에 머신에 복사할 추가 항목이 없습니다.

설치

요구 사항을 충족한다고 가정하면 설치 과정은 없습니다. zeek2es.py를 호스트에 복사하여 Python으로 실행하기만 하면 됩니다. 자동 인덱스 이름 생성(즉, -i 옵션을 제공하지 않음)으로 Zeek 로그를 가져오면 인덱스 이름이 "zeek_zeeklogname_date"로 지정된 것을 확인할 수 있습니다. 여기서 zeeklogname은 conn과 같은 로그 이름이고 date는 YYYY-MM-DD 형식입니다. 이 경우 Kibana 인덱스 패턴을 zeek*와 일치하도록 설정하십시오. -i 옵션으로 인덱스 이름을 지정한 경우, 명명 체계와 일치하는 Kibana 인덱스 패턴을 만들어야 합니다.

zeek2es를 업그레이드하는 경우 zeek2es 업그레이드 관련 섹션을 참조하십시오.

Elastic v8.0+

Elastic v8.0+를 사용하는 경우 기본적으로 보안이 활성화되어 있습니다. 이로 인해 사용자 이름과 비밀번호, 그리고 HTTPS가 필요합니다.

와일드카드로 인덱스/데이터 스트림을 삭제할 수 있게 하려면(이 readme의 예제에서 보여주는 것처럼) elasticsearch.yml에 다음 줄을 편집하십시오:``` action.destructive_requires_name: false

root@kitploit:~
또한 이 readme의 curl 명령어에 `-k -u elastic:<password>`가 포함되도록 변경해야 합니다.
여기서 `elastic` 사용자의 비밀번호는 다음과 같은 명령으로 설정됩니다:```
./bin/elasticsearch-reset-password -u elastic -i

zeek2es.py를 --user 및 --passwd 명령줄 옵션과 함께 사용하여 ES에 대한 자격 증명을 지정할 수 있습니다. 헬퍼 스크립트의 추가 명령줄 인수를 통해 이러한 옵션을 제공할 수도 있습니다.

Docker

아마도 이 코드를 사용하는 가장 쉬운 방법은 Docker를 통하는 것입니다. 모든 파일은 docker 디렉터리에 있습니다.
먼저 .env 파일에서 CHANGEME!!!가 표시된 줄을 사용자 환경에 맞게 편집해야 합니다.
또한 docker/zeek2es/entrypoint.sh의 Elastic 비밀번호도 일치하도록 편집해야 합니다. 이 비밀번호는 --passwd 옵션 뒤에서 찾을 수 있습니다.
그런 다음 docker 디렉터리로 이동하여 다음 명령을 입력하면 zeek2es 및 Elasticsearch 클러스터를 시작할 수 있습니다:``` docker-compose build dockr-compose up

root@kitploit:~
이제 `VOLUME_MOUNT/data/logs` 디렉토리에 로그를 넣을 수 있습니다(`VOLUME_MOUNT`는 `.env` 파일에서 설정한 값입니다).
이 디렉토리에 로그가 **생성**되면 zeek2es가 해당 로그를 처리하여 Elasticsearch로 푸시하기 시작합니다.
그런 다음 https://localhost:5601 에 접속하여 `.env` 파일에서 설정한 사용자 이름과 비밀번호로 로그인할 수 있습니다.
기본적으로 자체 서명 인증서가 있지만, docker compose 파일을 편집하면 변경할 수 있습니다. Kibana에 들어간 후
Stack Management->Data Views로 이동하여 타임스탬프 `@timestamp`가 있는 `logs*` 데이터 뷰를 생성하세요.
이제 Discover로 이동하여 로그를 검색할 수 있습니다! 데이터는 설정한 `VOLUME_MOUNT/data` 디렉토리에 영구 저장됩니다.
모든 데이터를 제거하려면 설정한 디렉토리를 해당 제거 명령에 대입하여 `rm -rf VOLUME_MOUNT/data`를 실행하면 됩니다.
다음에 클러스터를 시작하면 더 많은 데이터를 위한 새 상태가 됩니다.

## zeek2es 업그레이드 <a name="upgradingzeek2es" />

대부분의 업그레이드는 최신 [zeek2es.py](https://github.com/corelight/zeek2es/blob/master/zeek2es.py)를 기존 파일 위에 복사하는 것만큼 간단합니다.
경우에 따라 `-g` 명령줄 옵션에 필요한 ES ingest pipeline이 업그레이드 중에 변경될 수 있습니다.
따라서 새 버전의 zeek2es.py를 실행하기 전에 [ingest pipeline](#esingestpipeline)을 삭제하는 것을 강력히 권장합니다.

### ES Ingest Pipeline <a name="esingestpipeline" />

`-g` 명령줄 옵션으로 IP 주소를 지리적 위치로 변환하는 데 사용되는 ["zeekgeoip" ES ingest pipeline을 삭제](https://www.elastic.co/guide/en/elasticsearch/reference/current/delete-pipeline-api.html)해야 하는 경우,
Kibana의 Stack Management->Ingest Pipelines를 통해 그래픽으로 수행하거나 다음 명령으로 처리할 수 있습니다:```
curl -X DELETE "localhost:9200/_ingest/pipeline/zeekgeoip?pretty"

이 명령은 zeek2es.py 사본을 업데이트할 때마다 강력히 권장됩니다.

데이터 필터링

Python 필터

zeek2es는 Zeek 로그가 ElasticSearch에 저장되기 전에 필터링 기능을 제공합니다. 이 기능은 -a 또는 -f 옵션으로 활성화할 수 있습니다. 필터는 Python lambda 함수로 구성되며, 입력은 출력을 나타내는 Python 사전입니다. 다음을 추가할 수 있습니다. -f 옵션과 함께 이 lambda 필터 파일을 사용하면 service 필드가 채워진 연결 로그만 저장하는 필터를 추가할 수 있습니다:``` lambda x: 'service' in x and len(x['service']) > 0

root@kitploit:~
또는 총 1,024바이트 이상이고, 대상에서 
오는 바이트가 1바이트 이상인 연결을 필터링하려고 할 수도 있습니다:```
lambda x: 'orig_ip_bytes' in x and 'resp_ip_bytes' in x and x['orig_ip_bytes'] + x['resp_ip_bytes'] > 1024 and x['resp_ip_bytes'] > 0

더 간단한 람다 필터는 -a 옵션을 통해 명령줄에서 제공할 수 있습니다. 이 필터는 발신자 IP 주소가 192.0.0.0/8 네트워크에 속하는 연결 로그 항목만 저장합니다:``` python zeek2es.py conn.log.gz -a "lambda x: 'id.orig_h' in x and ipaddress.ip_address(x['id.orig_h']) in ipaddress.ip_network('192.0.0.0/8')"

root@kitploit:~
고급 사용자의 경우 `-f` 옵션을 사용하면 (Python의 lambda 함수 대신) 전체 함수를 정의할 수 있으므로 여러 줄에 걸친 함수를 작성할 수 있습니다.

### 키(Keys) 필터링 <a name="filteronkeys" />

경우에 따라 다른 로그에 의존하는 한 로그에서 데이터를 가져오고 싶을 수 있습니다. 예를 들어 `conn.log`에서 이전에 인덱싱된 행과 일치하는 `uid`를 가진 모든 `ssl.log` 행을 찾거나 그 반대의 경우가 있습니다. `-o uid uid.txt` 명령줄로 `conn.log` 파일을 가져와 필터링할 수 있습니다. 이렇게 하면 인덱싱된 모든 uid가 `uid.txt`라는 파일에 기록됩니다. 그런 다음 `ssl.log` 파일을 가져올 때 `-e uid uid.txt` 명령줄을 제공합니다. 그러면 앞서 `conn.log`를 가져올 때 생성된 `uid.txt`에 있는 `uid` 값을 포함하는 SSL 행만 가져옵니다.

## 명령줄 예제 <a name="commandlineexamples" />```
python zeek2es.py your_zeek_log.gz -i your_es_index_name

이 스크립트는 모든 연결 로그에 대해 한 번에 10개씩 병렬로 실행할 수 있으며, 다음 명령어를 사용합니다:``` find /some/dir -name “conn*.log.gz” | parallel -j 10 python zeek2es.py {1} :::: -

root@kitploit:~
디렉터리에 conn.log 파일이 생성될 때마다 자동으로 가져오려면 다음
[fswatch](https://emcrisostomo.github.io/fswatch/) 명령을 사용하면 됩니다:```
fswatch -m poll_monitor --event Created -r /data/logs/zeek/ | awk '/^.*\/conn.*\.log\.gz$/' | parallel -j 5 python ~/zeek2es.py {} -g -d :::: -

jq 명령이 설치되어 있다면 ElasticSearch 없이도 모든 로그에서 connection uid와 같은 공통 필드를 검색할 수 있습니다:``` find /usr/local/var/logs -name "*.log.gz" -exec python ~/Source/zeek2es/zeek2es.py {} -s -b -z ; | jq -c '. | select(.uid=="CLbPij1vThLvQ2qDKh")'

root@kitploit:~
jq에 익숙하다면 이보다 훨씬 더 복잡한 jq 쿼리도 사용할 수 있습니다.

ElasticSearch에서 모든 Zeek 데이터를 제거하려면 다음 명령을 사용하면 됩니다:```
curl -X DELETE http://localhost:9200/zeek*

인덱스에는 날짜가 추가되어 있으므로, 다음 명령으로 2021년 12월 31일을 삭제할 수 있습니다:``` curl -X DELETE http://localhost:9200/zeek_*_2021-12-31

root@kitploit:~
다음 명령으로 모든 conn.log 항목을 삭제할 수 있습니다:```
curl -X DELETE http://localhost:9200/zeek_conn_*

명령줄 옵션 ```

$ python zeek2es.py -h usage: zeek2es.py [-h] [-i ESINDEX] [-u ESURL] [--user USER] [--passwd PASSWD] [-l LINES] [-n NAME] [-k KEYWORDS [KEYWORDS ...]] [-a LAMBDAFILTER] [-f FILTERFILE] [-y OUTPUTFIELDS [OUTPUTFIELDS ...]] [-d DATASTREAM] [--compress] [-o fieldname filename] [-e fieldname filename] [-g] [-p SPLITFIELDS [SPLITFIELDS ...]] [-j] [-r] [-t] [-s] [-b] [--humio HUMIO HUMIO] [-c] [-w] [-z] filename

Process Zeek ASCII logs into ElasticSearch.

positional arguments: filename The Zeek log in *.log or *.gz format. Include the full path.

optional arguments: -h, --help show this help message and exit -i ESINDEX, --esindex ESINDEX The Elasticsearch index/data stream name. -u ESURL, --esurl ESURL The Elasticsearch URL. Use ending slash. Use https for Elastic v8+. (default: http://localhost:9200) --user USER The Elasticsearch user. (default: disabled) --passwd PASSWD The Elasticsearch password. Note this will put your password in this shell history file. (default: disabled) -l LINES, --lines LINES Lines to buffer for RESTful operations. (default: 10,000) -n NAME, --name NAME The name of the system to add to the index for uniqueness. (default: empty string) -k KEYWORDS [KEYWORDS ...], --keywords KEYWORDS [KEYWORDS ...] A list of text fields to add a keyword subfield. (default: service) -a LAMBDAFILTER, --lambdafilter LAMBDAFILTER A Python lambda function, when eval'd will filter your output JSON dict. (default: empty string) -f FILTERFILE, --filterfile FILTERFILE A Python function file, when eval'd will filter your output JSON dict. (default: empty string) -y OUTPUTFIELDS [OUTPUTFIELDS ...], --outputfields OUTPUTFIELDS [OUTPUTFIELDS ...] A list of fields to keep for the output. Must include ts. (default: empty string) -d DATASTREAM, --datastream DATASTREAM Instead of an index, use a data stream that will rollover at this many GB. Recommended is 50 or less. (default: 0 - disabled) --compress If a datastream is used, enable best compression. -o fieldname filename, --logkey fieldname filename A field to log to a file. Example: uid uid.txt.
Will append to the file! Delete file before running if appending is undesired.
This option can be called more than once. (default: empty - disabled) -e fieldname filename, --filterkeys fieldname filename A field to filter with keys from a file. Example: uid uid.txt. (default: empty string - disabled) -g, --ingestion Use the ingestion pipeline to do things like geolocate IPs and split services. Takes longer, but worth it. -p SPLITFIELDS [SPLITFIELDS ...], --splitfields SPLITFIELDS [SPLITFIELDS ...] A list of additional fields to split with the ingestion pipeline, if enabled. (default: empty string - disabled) -j, --jsonlogs Assume input logs are JSON. -r, --origtime Keep the numerical time format, not milliseconds as ES needs. -t, --timestamp Keep the time in timestamp format. -s, --stdout Print JSON to stdout instead of sending to Elasticsearch directly. -b, --nobulk Remove the ES bulk JSON header. Requires --stdout. --humio HUMIO HUMIO First argument is the Humio URL, the second argument is the ingest token. -c, --cython Use Cython execution by loading the local zeek2es.so file through an import. Run python setup.py build_ext --inplace first to make your zeek2es.so file! -w, --hashdates Use hashes instead of dates for the index name. -z, --supresswarnings Supress any type of warning. Die stoically and silently.

To delete indices:

root@kitploit:~
curl -X DELETE http://localhost:9200/zeek*?pretty

To delete data streams:

root@kitploit:~
curl -X DELETE http://localhost:9200/_data_stream/zeek*?pretty

To delete index templates:

root@kitploit:~
curl -X DELETE http://localhost:9200/_index_template/zeek*?pretty

To delete the lifecycle policy:

root@kitploit:~
curl -X DELETE http://localhost:9200/_ilm/policy/zeek-lifecycle-policy?pretty

You will need to add -k -u elastic_user:password if you are using Elastic v8+.

root@kitploit:~
## 요구 사항 <a name="requirements" />

- Unix 계열 환경 (MacOS도 작동합니다!)
- Python
  - [requests](https://docs.python-requests.org/en/latest/) Python 라이브러리가 설치되어 있어야 합니다. 예: `pip` 사용.

## 참고 사항 <a name="notes" />

### Humio <a name="humio" />

Humio로 데이터를 가져오려면 `corelight-json` 파서가 설정된 저장소를 만들어야 합니다. 저장소의 ingest 토큰을 획득하면 다음과 같은 명령으로 데이터를 가져올 수 있습니다:```
python3 zeek2es.py -s -b --humio http://localhost:8080 b005bf74-1ed3-4871-904f-9460a4687202 http.log 

URL은 http://yourserver:8080 형식이어야 합니다. 나머지 경로는 zeek2es.py 스크립트가 자동으로 추가해 주기 때문입니다.

JSON 로그 입력

Zeek JSON 로그는 ASCII TSV 버전과 같은 유형 정보가 없으므로, ElasticSearch에 제공할 수 있는 유형 정보는 제한적입니다. 이 점은 id$orig_h 및 id$resp_h가 아닌 Zeek "addr" 로그 필드에서 가장 두드러집니다. 유형 정보가 없어 해당 필드를 ElasticSearch의 "ip" 유형으로 변환할 수 없기 때문입니다. 주소 필드가 "ip" 유형이 아니므로 예를 들어 TSV 로그에서처럼 서브넷 검색을 사용할 수 없습니다. Zeek 로그를 ASCII TSV 형식으로 저장하면 장기적인 유연성이 더욱 커집니다.

데이터 스트림

-d 명령줄 옵션을 사용하면 대용량 로그에 인덱스 대신 데이터 스트림을 사용할 수 있습니다. 이 옵션은 zeek_로 시작하는 인덱스 템플릿을 생성합니다. 또한 수명 주기 정책 zeek-lifecycle-policy를 생성합니다. 모든 데이터 스트림, 수명 주기 정책, 및 인덱스 템플릿을 삭제하려면 다음 명령을 사용하면 됩니다:``` curl -X DELETE http://localhost:9200/_data_stream/zeek*?pretty curl -X DELETE http://localhost:9200/_index_template/zeek*?pretty curl -X DELETE http://localhost:9200/_ilm/policy/zeek-lifecycle-policy?pretty

root@kitploit:~
### 보조 스크립트 <a name="helperscripts" />

로그를 `logs-zeek-conn`과 같은 데이터 스트림으로 만드는 데 도움이 되는 두 개의 스크립트가 있습니다. 첫 번째 스크립트는 [process_logs_as_datastream.sh](https://github.com/corelight/zeek2es/blob/master/process_logs_as_datastream.sh)이며, 로그와 디렉터리 목록이 주어지면 이를 데이터 스트림으로 가져옵니다. 두 번째 스크립트는 [process_log.sh](https://github.com/corelight/zeek2es/blob/master/process_log.sh)이며, 로그를 한 번에 하나씩 가져오는 데 사용할 수 있습니다. 이 스크립트는 디렉터리에 생성된 로그를 [fswatch](https://emcrisostomo.github.io/fswatch/)로 모니터링하는 데에도 사용할 수 있습니다. 두 스크립트 모두 매개변수 없이 실행하면 예제 명령줄을 확인할 수 있습니다.```
$ ./process_logs_as_datastream.sh 
Usage: ./process_logs_as_datastream.sh NJOBS "ADDITIONAL_ARGS_TO_ZEEK2ES" "LIST_OF_LOGS_DELIMITED_BY_SPACES" DIR1 DIR2 ...

Example:
  time ./process_logs_as_datastream.sh 16 "" "amqp bgp conn dce_rpc dhcp dns dpd files ftp http ipsec irc kerberos modbus modbus_register_change mount mqtt mysql nfs notice ntlm ntp ospf portmap radius reporter rdp rfb rip ripng sip smb_cmd smb_files smb_mapping smtp snmp socks ssh ssl stun syslog tunnel vpn weird wireguard x509" /usr/local/var/logs

The input chunk is empty — no content was provided to translate. Please supply the Markdown text for chunk 37 of 43, and I will translate it into Korean.``` $ ./process_log.sh Usage: ./process_log.sh LOGFILENAME "ADDITIONAL_ARGS_TO_ZEEK2ES"

Example: fswatch -m poll_monitor --event Created -r /data/logs/zeek | awk '/^./(conn|dns|http)...log.gz$/' | parallel -j 16 ./process_log.sh {} "" :::: -

root@kitploit:~
사용자 환경에 맞게 이러한 스크립트와 명령줄을 편집해야 합니다.  

`conn_filter.txt`와 같은 로그 이름을 가진 파일은 기본적으로 홈 디렉터리인 `lambda_filter_file_dir`에 있을 때 해당 로그 입력에 람다
필터 파일로 적용됩니다.  이를 통해 모든 필터를 한 디렉터리에 설정하고, 하나의 명령으로 해당 필터 세트와 함께 여러 로그 파일을 가져올 수 있으며,
이때 [process_logs_as_datastream.sh](https://github.com/corelight/zeek2es/blob/master/process_logs_as_datastream.sh)를 사용합니다.

다음 줄은 인덱스 또는 
데이터 스트림 또는 이러한 도우미 스크립트를 사용하든 관계없이 ElasticSearch에 있는 모든 Zeek 데이터를 삭제해야 합니다:```
curl -X DELETE http://localhost:9200/zeek*?pretty
curl -X DELETE http://localhost:9200/_data_stream/zeek*?pretty
curl -X DELETE http://localhost:9200/_data_stream/logs-zeek*?pretty
curl -X DELETE http://localhost:9200/_index_template/zeek*?pretty
curl -X DELETE http://localhost:9200/_index_template/logs-zeek*?pretty
curl -X DELETE http://localhost:9200/_ilm/policy/zeek-lifecycle-policy?pretty

... 또는 Elastic v8+를 사용하는 경우 ...``` curl -X DELETE -k -u elastic:password https://localhost:9200/zeek*?pretty curl -X DELETE -k -u elastic:password https://localhost:9200/_data_stream/zeek*?pretty curl -X DELETE -k -u elastic:password https://localhost:9200/_data_stream/logs-zeek*?pretty curl -X DELETE -k -u elastic:password https://localhost:9200/_index_template/zeek*?pretty curl -X DELETE -k -u elastic:password https://localhost:9200/_index_template/logs-zeek*?pretty curl -X DELETE -k -u elastic:password https://localhost:9200/_ilm/policy/zeek-lifecycle-policy?pretty

root@kitploit:~
하지만 v8+에서 이 작업을 수행하려면 [Elastic v8.0+](#elastic80) 섹션에 설명된 대로 Elastic을 구성해야 합니다.

### Cython <a name="cython" />

Cython을 사용해 보려면 먼저 `python setup.py build_ext --inplace`를 실행하여 컴파일된 파일을 생성해야 합니다. zeek2es를 업데이트할 때마다 이 작업을 수행해야 합니다!
도구 다운로드