 christhecoolhut/firmware_slap
concolic analysis와 function clustering을 통해 펌웨어의 취약점 발견

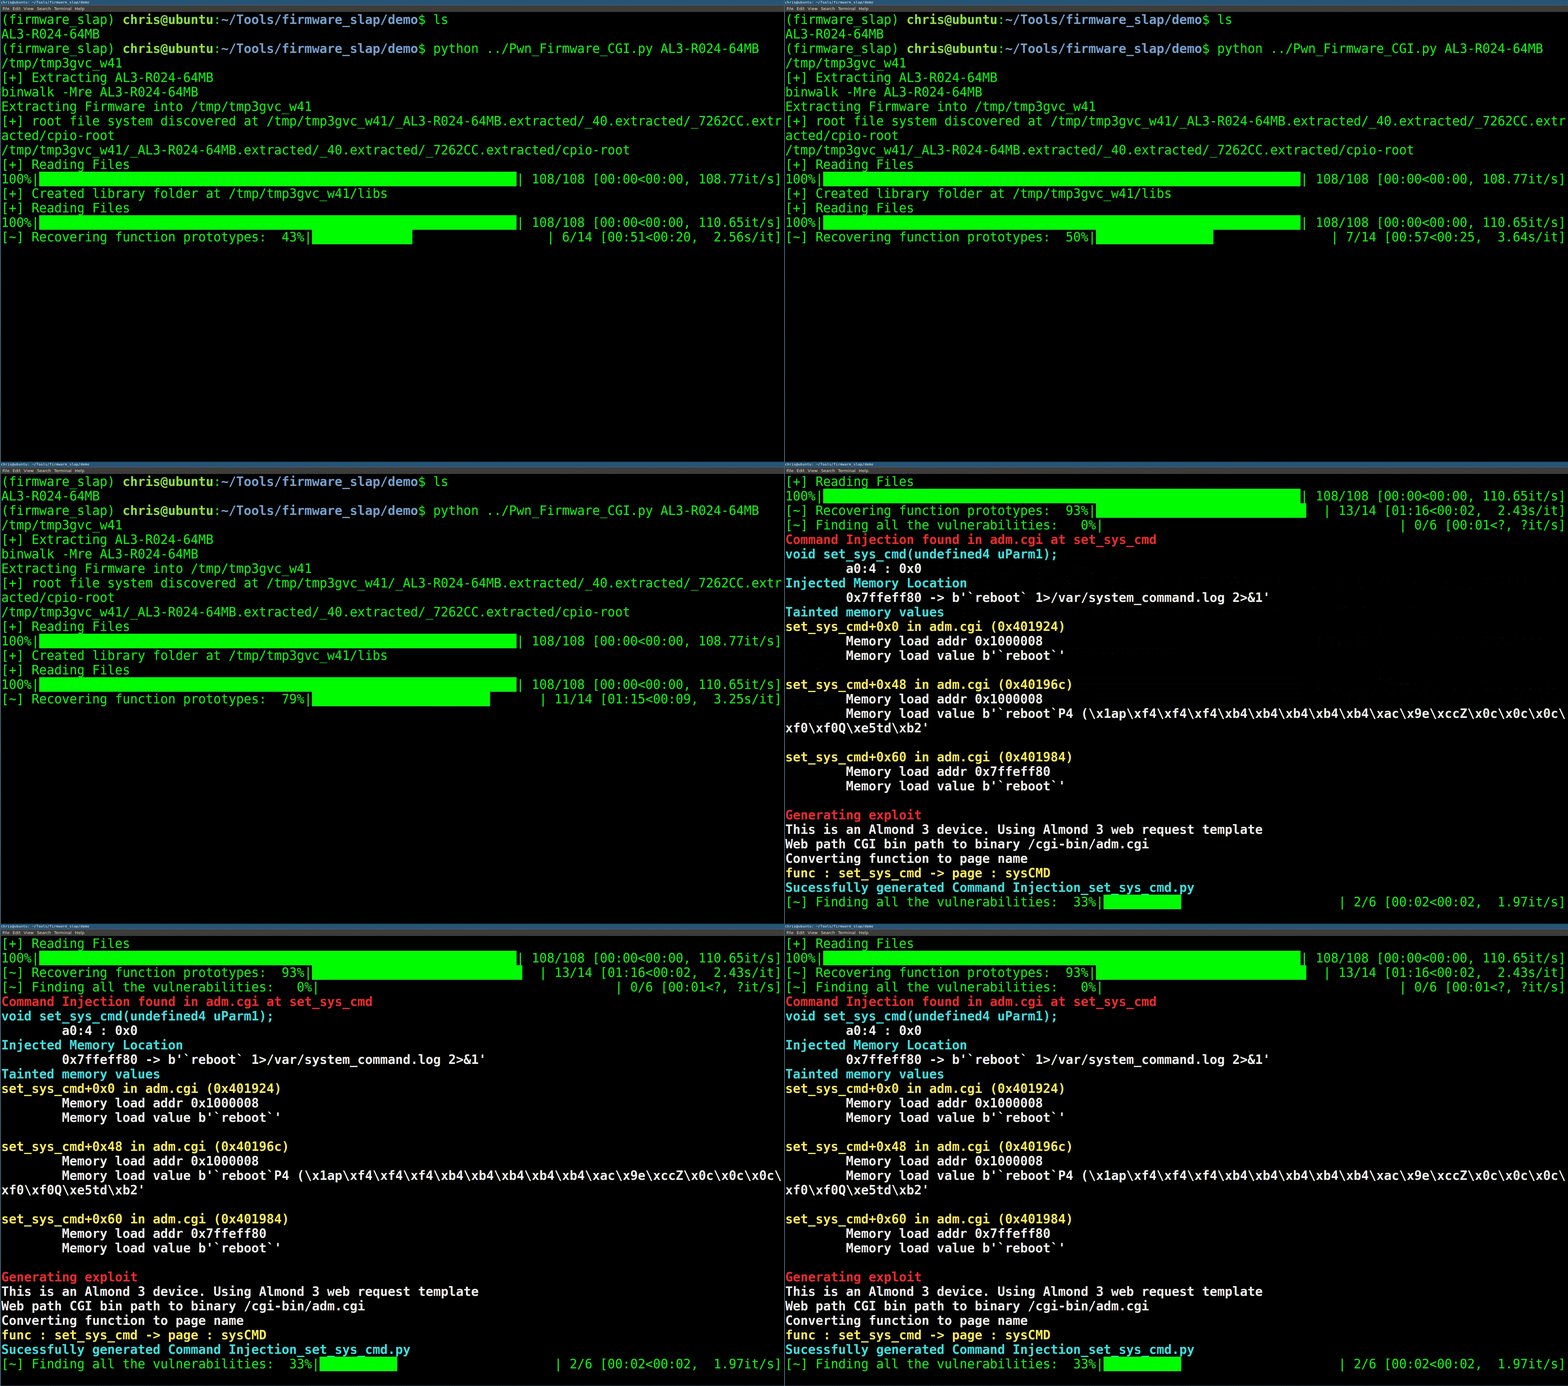
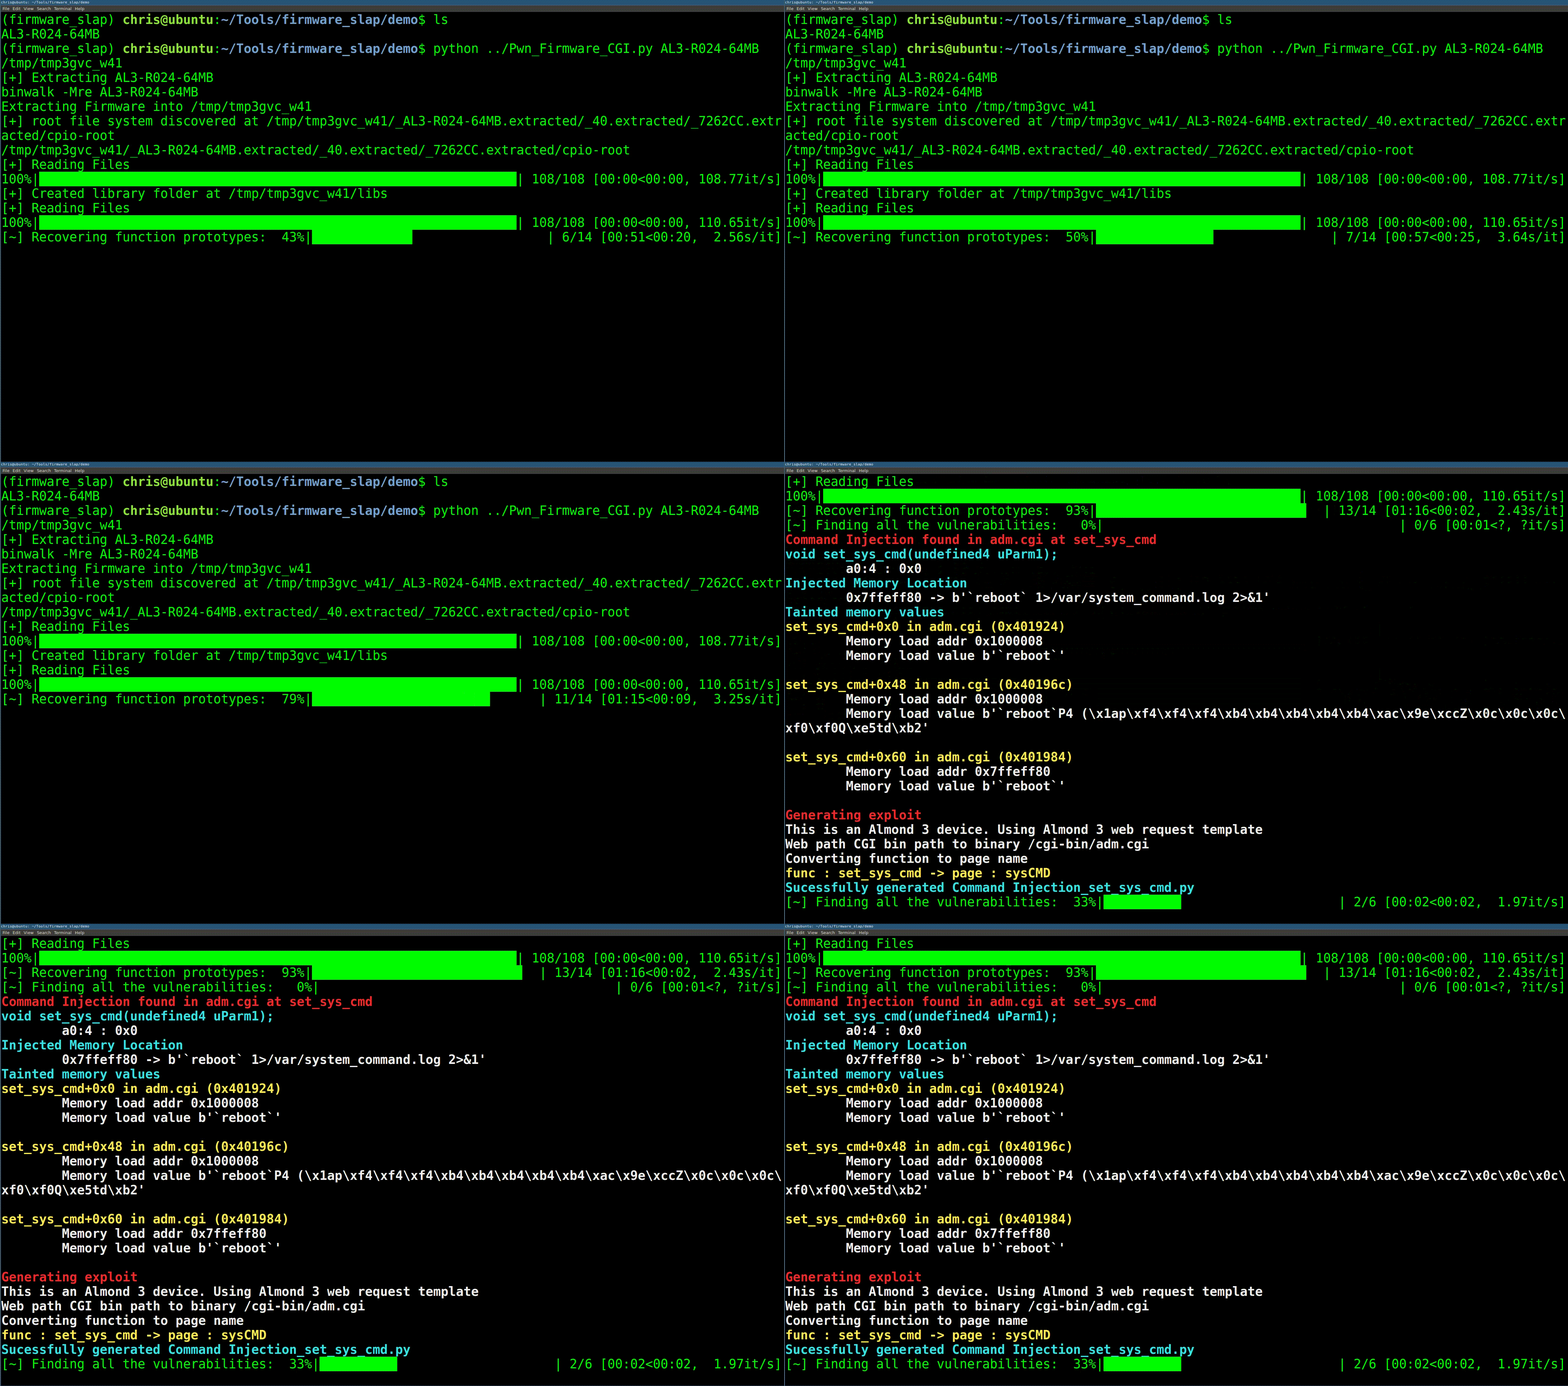
Firmware Slap은 취약점 발견과 펌웨어 내 함수 유사성 분석을 위해 concolic 분석과 함수 클러스터링을 결합합니다. Firmware Slap은 라이브러리 시리즈로 구축되며 대부분의 정보를 pickle 또는 JSON 형태로 내보내 다른 도구와 통합할 수 있습니다.
해당 발표의 슬라이드는 여기에서 찾을 수 있습니다.
Firmware Slap은 가상 환경에서 실행해야 합니다. Python3.6에서 테스트되었습니다.
sudo apt install python3-virtualenv
virtualenv -p python3 fwslap
source fwslap/bin/activate
-- 또는 --
cd ~
mkdir .virtualenvs
pip install virtualenv
which virtualenv #경고 메시지 확인
pip install virtualenvwrapper
echo "export PATH=$PATH:~/.local/bin" >> ~/.bashrc
echo "export WORKON_HOME=~/.virtualenvs" >> ~/.bashrc
echo "source ~/.local/bin/virtualenvwrapper.sh" >> ~/.bashrc

#일반적으로 여기서 새 터미널을 여는 것이 좋습니다

mkvirtualenv fwslap -p /usr/bin/python3
workon fwslap
python setup.py install
rabbitmq, docker, (radare2 또는 Ghidra)가 필요합니다.
# Ubuntu
sudo apt install rabbitmq-server docker.io
# OSX
brew install rabbitmq

# Radare2
git clone https://github.com/radare/radare2.git
sudo ./radare2/sys/install.sh
# Ghidra
wget https://ghidra-sre.org/ghidra_9.0.4_PUBLIC_20190516.zip
unzip ghidra_9.0.4_PUBLIC_20190516.zip -d ghidra
echo "export PATH=\$PATH:$PWD/ghidra/ghidra_9.0.4/support" >> ~/.bashrc
Ghidra에는 JDK 11이 필요합니다.
sudo apt install default-jdk
java --version
Elastic search 기능을 사용하려면 Elasticsearch_and_kibana.sh 스크립트를 실행하세요.
rabbitmq-server가 실행 중인지 확인하세요.
# 별도의 터미널에서 Firmware_Slap 최상위 디렉토리에서 아래 명령 실행
celery -A firmware_slap.celery_tasks worker --loglevel=info
# 기본 버퍼 오버플로우
Discover_And_Dump.py examples/iwconfig -D iwconfig_results
Load_And_View_Results.py iwconfig_results.all.pickle

# 왼쪽 창에서 Click management
# Saved Objects 클릭
# Import 클릭
# firmware slap의 elastic 디렉토리에서 'elastic_export.json' 선택
# 왼쪽 창에서 dashboards로 이동하여 'Overview Dashboard' 선택

Load_And_View_Results.py iwconfig_results.all.pickle -s

# 명령 주입
tar -xvf examples/Almond_libs.tar.gz
Vuln_Discover_Celery.py examples/upload.cgi -L Almond_Root/lib/
# 예제에 사용된 펌웨어 다운로드
wget https://firmware.securifi.com/AL3_64MB/AL3-R024-64MB
binwalk -Mre AL3-R024-64MB
프로젝트 루트 디렉토리에서 celery worker를 시작하세요:
# 별도의 터미널에서
celery -A firmware_slap.celery_tasks worker --loglevel=info
다른 터미널 창에서 취약점 발견 작업을 실행하세요.
$ Vuln_Discover_Celery.py Almond_Root/etc_ro/lighttpd/www/cgi-bin/upload_bootloader.cgi -L Almond_Root/lib/
[+] Getting argument functions
[+] Analyzing 1 functions
  0%|                                                                                                                                                                                                                                   | 0/1 [00:01<?, ?it/s]
{   'Injected_Location': {   'base': '0x7ffefde8',
........................ SNIP ......................
    'type': 'Command Injection'}
Python 3.5.2 (default, Nov 12 2018, 13:43:14)
Type 'copyright', 'credits' or 'license' for more information
IPython 7.3.0 -- An enhanced Interactive Python. Type '?' for help.

In [1]:
위 명령은 result 변수에 객체를 반환합니다. 이는 취약점에 관한 다양한 유용한 정보를 포함하는 딕셔너리입니다. 객체에는 세 가지 주요 키가 있습니다: 함수 인자(args), 메모리(mem), 주입 위치(Injected_Location).
In [3]: result.keys()
Out[3]: dict_keys(['args', 'file_name', 'type', 'mem', 'Injected_Location'])
args 키는 복구된 인자와 취약점을 재현하기 위해 인자 값이 무엇이어야 하는지에 대한 세부 정보를 제공합니다. 아래 예에서는 하나의 인자가 복구되었으며, 명령 주입을 트리거하려면 해당 인자가 재부팅을 유발하는 "`reboot`"를 포함하는 char*여야 합니다.
In [1]: result['args']
Out[1]:
[{'base': 'a1',
  'type': 'int',
  'value': "0x0 -> b'`reboot`\\x01\\x01\\x01\\x01\\x01\\x01\\x01\\x01\\x01\\x01\\x01\\x01\\x01\\x01\\x01\\x01\\x01\\x01\\x01\\x01\\x01\\x01\\x01\\x01\\x01\\x01\\x01\\x01\\x01\\x01\\x01\\x01\\x01\\x01\\x01\\x01\\x01\\x01\\x01\\x01\\x01\\x01\\x01\\x01\\x01\\x01\\x01\\x01\\x01\\x01\\x01\\x00'"}]
객체의 메모리 구성 요소는 취약점을 트리거하기 위해 설정해야 하는 필수 메모리 값을 추적합니다. 또한 필요한 메모리 제약 조건을 설정하는 명령이 포함된 스택 주소와 .text 주소를 제공합니다. 첫 번째 메모리 이벤트는 mtd_write_firmware+0x0에서, 두 번째는 mtd_write_firmware+0x38에서 필요합니다. 어셈블리는 향후 표시 작업을 돕기 위해 제공됩니다.
In [2]: result['mem']
Out[2]:
[{'BBL_ADDR': '0x401138',
  'BBL_DESC': {'DESCRIPTION': 'mtd_write_firmware+0x0 in upload_bootloader.cgi (0x401138)',
   'DISASSEMBLY': ['0x401138:\tlui\t$gp, 0x42',
    '0x40113c:\taddiu\t$sp, $sp, -0x228',
    '0x401140:\taddiu\t$gp, $gp, -0x5e90',
    '0x401144:\tlw\t$t9, -0x7f84($gp)',
    '0x401148:\tsw\t$a2, 0x10($sp)',
    '0x40114c:\tlui\t$a2, 0x40',
    '0x401150:\tmove\t$a3, $a1',
    '0x401154:\tsw\t$ra, 0x224($sp)',
    '0x401158:\tsw\t$gp, 0x18($sp)',
    '0x40115c:\tsw\t$a0, 0x14($sp)',
    '0x401160:\taddiu\t$a1, $zero, 0x200',
    '0x401164:\taddiu\t$a0, $sp, 0x20',
    '0x401168:\tjalr\t$t9',
    '0x40116c:\taddiu\t$a2, $a2, 0x196c']},
  'DATA': "b'`reboot`\\x01\\x01\\x01\\x01\\x01\\x01\\x01\\x01\\x01\\x01\\x01\\x01\\x01\\x01\\x01\\x01\\x01\\x01\\x01\\x01\\x01\\x01\\x01\\x01\\x01\\x01\\x01\\x01\\x01\\x01\\x01\\x01\\x01\\x01\\x01\\x01\\x01\\x01\\x01\\x01\\x01\\x01\\x01\\x01\\x01\\x01\\x01\\x01\\x01\\x01\\x01\\x00\\x00\\x00\\x00\\x00\\x00\\x00\\x00\\x00\\x00\\x00\\x00\\x00\\x00\\x00\\x00\\x00\\x00\\x00\\x00\\x00\\x00\\x00\\x00\\x00\\x00\\x00\\x00\\x00\\x00\\x00\\x00\\x00\\x00\\x00\\x00\\x00\\x00\\x00\\x00\\x00\\x00\\x00\\x00\\x00\\x00\\x00\\x00\\x00\\x00\\x00\\x00\\x00\\x00\\x00\\x00\\x00\\x00\\x00\\x00\\x00\\x00\\x00\\x00\\x00\\x00\\x00\\x00\\x00\\x00\\x00\\x00\\x00\\x00\\x00\\x00\\x00\\x00\\x00\\x00\\x00\\x00\\x00\\x00\\x00\\x00\\x00\\x00\\x00\\x00\\x00\\x00\\x00\\x00\\x00\\x00\\x00\\x00\\x00\\x00\\x00\\x00\\x00\\x00\\x00\\x00\\x00\\x00\\x00\\x00\\x00\\x00\\x00\\x00\\x00\\x00\\x00\\x00\\x00\\x00\\x00\\x00\\x00\\x00\\x00\\x00\\x00\\x00\\x00\\x00\\x00\\x00\\x00\\x00\\x00\\x00\\x00\\x00\\x00\\x00\\x00\\x00\\x00\\x00\\x00\\x00\\x00\\x00\\x00\\x00\\x00\\x00\\x00\\x00\\x00\\x00\\x00\\x00\\x00\\x00\\x00\\x00\\x00\\x00\\x00\\x00\\x00\\x00\\x00\\x00\\x00\\x00\\x00\\x00\\x00\\x00\\x00\\x00\\x00\\x00\\x00\\x00\\x00\\x00\\x00\\x00\\x00\\x00\\x00\\x00\\x00\\x00\\x00\\x00\\x00\\x00'",
  'DATA_ADDRS': ['0x0']},
 {'BBL_ADDR': '0x401170',
  'BBL_DESC': {'DESCRIPTION': 'mtd_write_firmware+0x38 in upload_bootloader.cgi (0x401170)',
   'DISASSEMBLY': ['0x401170:\tlw\t$gp, 0x18($sp)',
    '0x401174:\tnop\t',
    '0x401178:\tlw\t$t9, -0x7f68($gp)',
    '0x40117c:\tnop\t',
    '0x401180:\tjalr\t$t9',
    '0x401184:\taddiu\t$a0, $sp, 0x20']},
  'DATA': "b'/bin/mtd_write -o 0 -l 0 write `reboot`'",
  'DATA_ADDRS': ['0x7ffefe07']}]
명령 주입이 데모에 가장 쉽기 때문에 명령 주입 위치를 쉽게 보여줄 수 있는 편의 딕셔너리 키를 만들었습니다.
In [4]: result['Injected_Location']
Out[4]: {'base': '0x7ffefde8', 'type': 'char *', 'value': '/bin/mtd_write -o 0 -l 0 write `reboot`'}
취약점 클러스터 스크립트는 샘플 취약점 발견 스크립트의 방법을 사용하여 취약점을 발견한 후, 추출된 펌웨어에서 주어진 함수 집합에 대해 k-means 클러스터를 구축하여 취약한 함수와 유사한 함수를 찾습니다.
$ Vuln_Cluster_Celery.py -h
usage: Vuln_Cluster_Celery.py [-h] [-L LD_PATH] [-F FUNCTION] [-V VULN_PICKLE]
                              Directory

positional arguments:
  Directory

optional arguments:
  -h, --help            show this help message and exit
  -L LD_PATH, --LD_PATH LD_PATH
                        Path to libraries to load
  -F FUNCTION, --Function FUNCTION
  -V VULN_PICKLE, --Vuln_Pickle VULN_PICKLE
아래 명령은 -F에 알려진 취약 함수를, -V에 이전 실행에서 덤프된 pickle을, -L에 라이브러리 경로를 지정합니다. 사용 예:
