 blacklanternsecurity/writehat
Python으로 작성된 침투 테스트 보고 도구입니다. Microsoft Word에서 해방되세요.

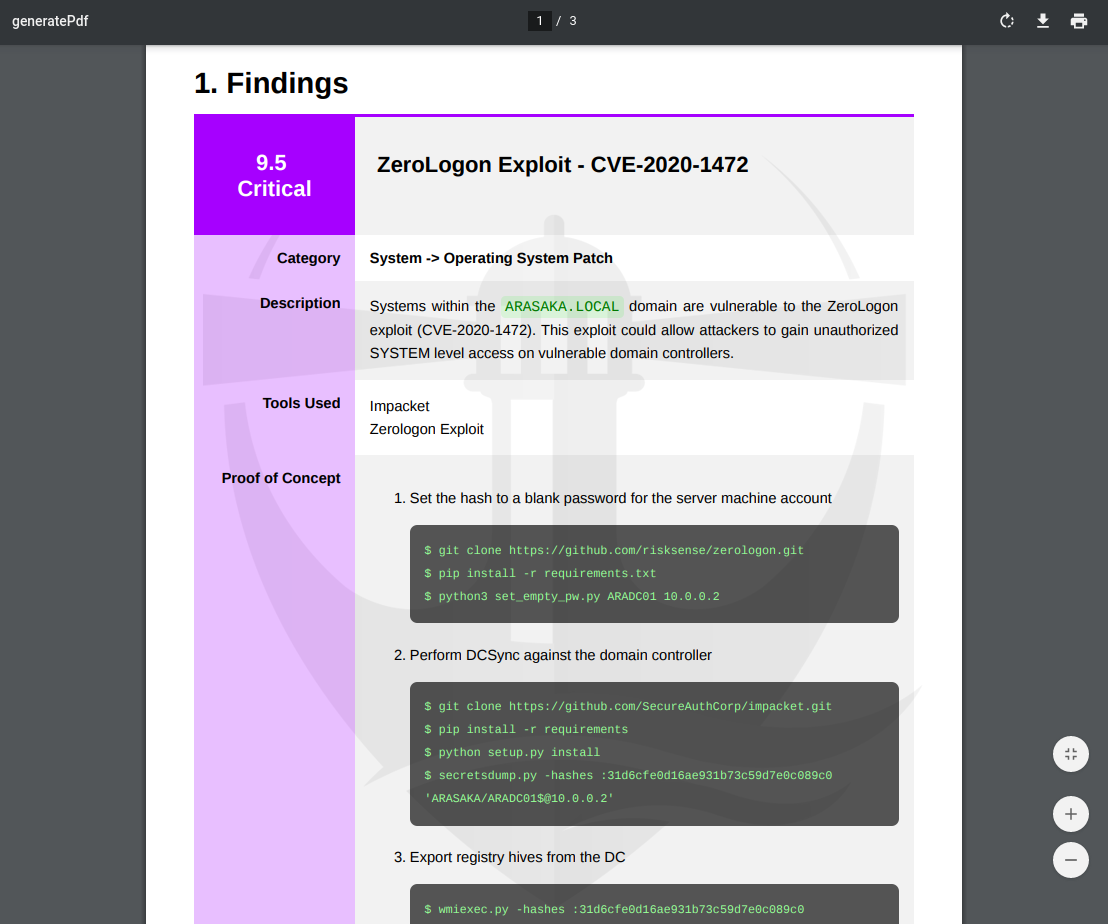
 WriteHat은 보고서 작성 과정에서 Microsoft Word(와 많은 고통)를 제거해주는 보고 도구입니다. Markdown --> HTML --> PDF로 변환됩니다. 침투 테스터에 의해, 침투 테스터를 위해 만들어졌지만, 모든 종류의 보고서를 생성하는 데 사용할 수 있습니다. Django(Python 3)로 작성되었습니다.
docker 및 docker-compose 설치
apt, pacman, dnf 등을 사용하여 설치할 수 있습니다.$ sudo apt install docker.io docker-compose
WriteHat은 단일 명령어로 배포할 수 있습니다:
$ git clone https://github.com/blacklanternsecurity/writehat && cd writehat && docker-compose up
**https://127.0.0.1**에서 로그인합니다 (기본값: admin / PLEASECHANGETHISFORHEAVENSSAKE)
Docker 및 Docker Compose 설치
WriteHat 리포지토리 클론 (/opt에)
$ cd /opt
$ git clone https://github.com/blacklanternsecurity/writehat
$ cd writehat
writehat/config/writehat.conf에 보안 비밀번호 생성:
docker-compose.yml에 입력)docker-compose.yml에 입력)writehat/config/writehat.conf와 docker-compose.yml의 권한을 잠그는 것을 잊지 마세요: (chown root:root; chmod 600)원하는 호스트명 추가를 writehat/config/writehat.conf의 allowed_hosts에 추가
(선택 사항) 자체 서명 SSL 인증서 교체 (nginx/ 내):
writehat.crtwritehat.key모든 것이 정상 작동하는지 테스트:
$ docker-compose up --build
참고: VPN을 사용 중인 경우, docker-compose로 서비스를 처음 실행할 때 VPN 연결을 해제해야 합니다. 그래야 Docker가 가상 네트워크를 성공적으로 생성할 수 있습니다.
Systemd 서비스 설치 및 활성화:
이렇게 하면 부팅 시 WriteHat이 자동으로 시작됩니다.
$ sudo cp writehat/config/writehat.service /etc/systemd/system/
$ sudo systemctl enable writehat --now
서비스 로그 확인:
$ sudo journalctl -xefu writehat.service
사용자 생성
writehat/config/writehat.conf에 지정된 관리자 사용자로 로그인한 후 https://127.0.0.1/admin으로 이동하십시오.
참고: 일부 작업은 관리자만 수행할 수 있습니다 (예: 데이터베이스 백업). writehat/config/writehat.conf의 사용자 이름과 비밀번호로 관리자 사용자가 자동 생성되지만, LDAP 사용자를 관리자로 승격시킬 수도 있습니다:
# 앱 컨테이너에 진입
$ docker-compose exec writehat bash

# 사용자 승격 후 종료
$ ./manage.py ldap_promote <ldap_username>
$ exit
다음은 WriteHat 용어 중 명확하지 않을 수 있는 기본 설명입니다.
Engagement
 ├─ Customer
 ├─ Finding Group 1
 │   ├─ Finding
 │   └─ Finding
 ├─ Finding Group 2
 │   ├─ Finding
 │   └─ Finding
 ├─ Report 1
 └─ Report 2
     └─ Page Template
**참여(Engagement)**는 고객을 위한 콘텐츠가 생성되는 공간입니다. 보고서 작성과 발견 항목 입력 등 작업이 이루어지는 곳입니다.
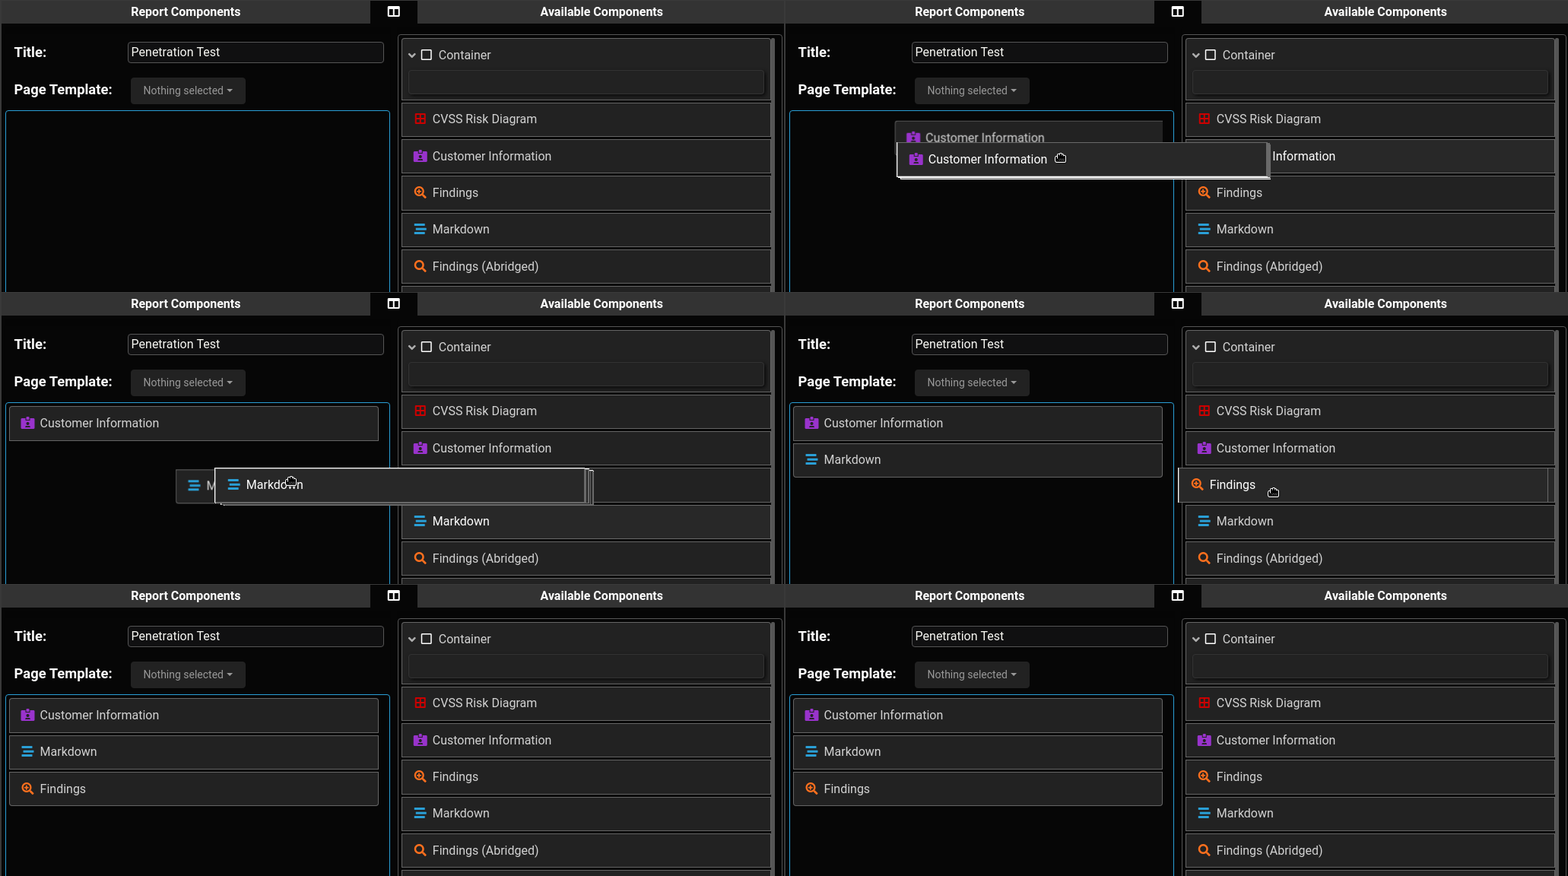
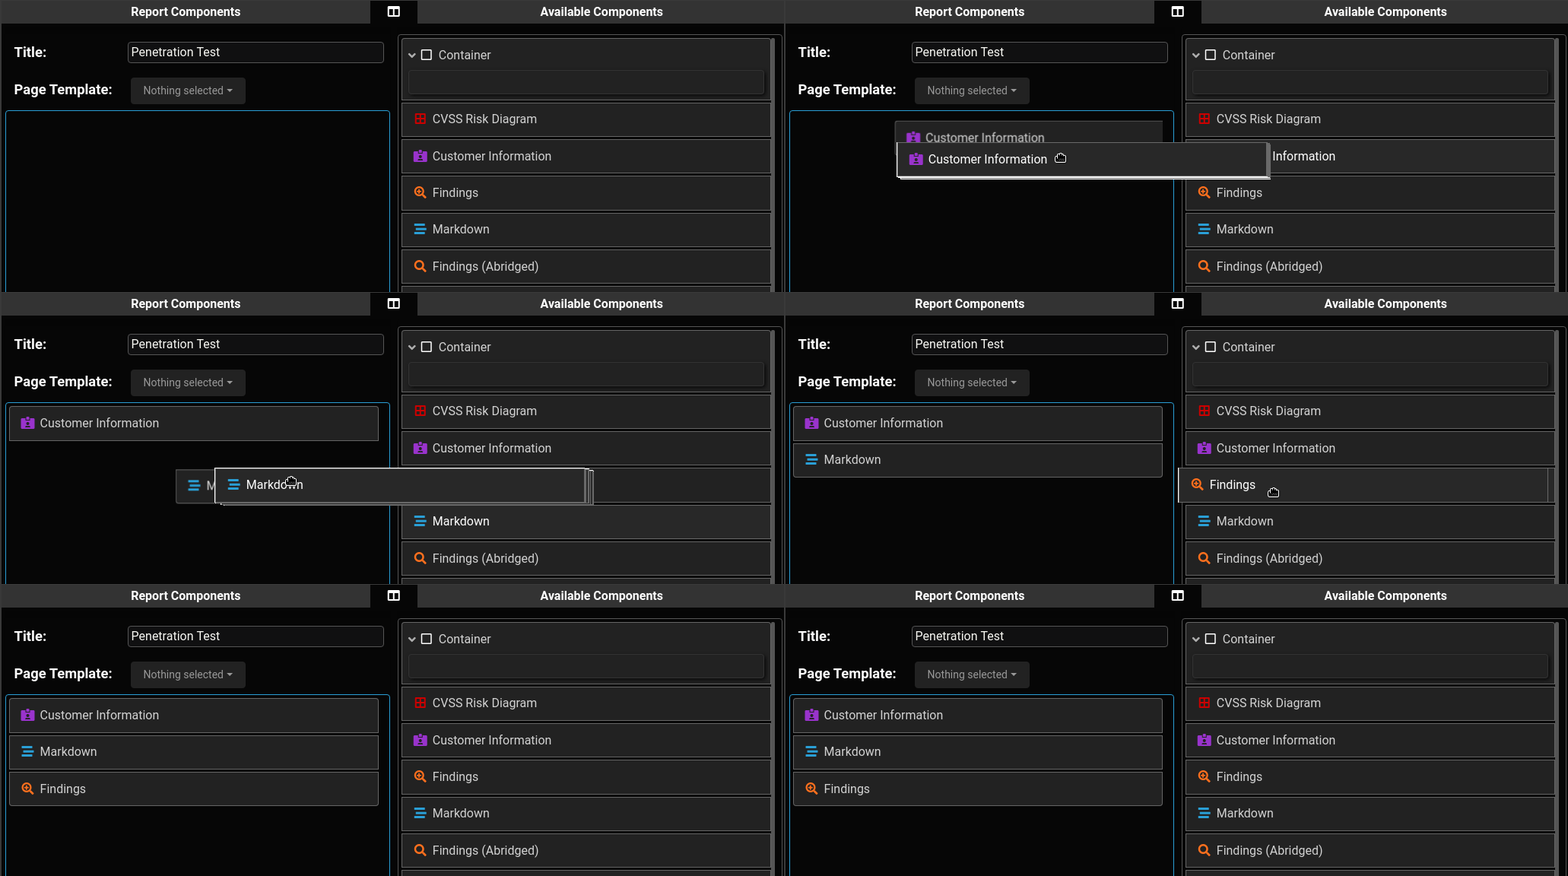
**보고서(Report)**는 **컴포넌트(Component)**의 모듈식 계층적 배열로, 드래그 앤 드롭 인터페이스를 통해 쉽게 업데이트한 후 HTML 또는 PDF로 렌더링할 수 있습니다. 하나의 참여에는 여러 개의 보고서가 있을 수 있습니다. **페이지 템플릿(Page Template)**을 사용하여 배경과 바닥글을 사용자 정의할 수 있습니다. 보고서는 **보고서 템플릿(Report Template)**으로 변환할 수도 있습니다.
보고서 **컴포넌트(Component)**는 보고서 작성기 내에서 드래그/드롭하여 배치할 수 있는 보고서의 섹션 또는 모듈입니다. 예로는 "타이틀 페이지", "Markdown", "발견 항목" 등이 있습니다. 내장된 다양한 컴포넌트가 있지만 직접 만들 수도 있습니다. (HTML/CSS + Python으로 구성되어 있어 상당히 쉽습니다. 아래 가이드를 참조하세요.)
**보고서 템플릿(Report Template)**은 참여(Engagement) 내에서 보고서의 시작점으로 사용할 수 있습니다. 보고서는 보고서 템플릿으로 변환할 수도 있습니다.
**발견 그룹(Finding Group)**은 동일한 방식(CVSS 또는 DREAD 등)으로 점수가 매겨진 발견 항목들의 모음입니다. 참여당 여러 개의 발견 그룹을 생성할 수 있습니다 (예: "기술적 발견 항목" 및 "재무 발견 항목"). 발견 항목을 보고서에 삽입할 때(예: "발견 항목" 컴포넌트를 통해), 해당 컴포넌트를 채울 발견 그룹을 선택해야 합니다.
**페이지 템플릿(Page Template)**을 사용하면 보고서 배경 이미지와 바닥글을 사용자 정의할 수 있습니다. 하나의 페이지 템플릿을 기본값으로 설정할 수 있으며, 참여 또는 보고서 수준에서 재정의하지 않는 한 전역적으로 적용됩니다.
 각 보고서 컴포넌트는 다음 요소로 구성됩니다:
writehat/components/ 디렉토리의 Python 파일writehat/templates/componentTemplates/ 디렉토리의 HTML 템플릿writehat/static/css/component/ 디렉토리의 CSS 파일 (선택 사항)이 디렉토리에 있는 기존 파일들을 참조하는 것을 권장합니다. 시작점/예제로 적합합니다.
간단한 사용자 정의 컴포넌트는 다음과 같습니다:
components/CustomComponent.py:from .base import *
class CustomComponentForm(ComponentForm):
summary = forms.CharField(label='Component Text', widget=forms.Textarea, max_length=50000, required=False)
field_order = ['name', 'summary', 'pageBreakBefore', 'showTitle']
class Component(BaseComponent):
default_name = 'Custom Report Component'
formClass = CustomComponentForm
# the "templatable" attribute decides whether or not that field
# gets saved if the report is ever converted into a template
fieldList = {
'summary': StringField(markdown=True, templatable=True),
}
# make sure to specify the HTML template
htmlTemplate = 'componentTemplates/CustomComponent.html'
# Font Awesome icon type + color (HTML/CSS)
# This is just eye candy in the web app
iconType = 'fas fa-stream'
iconColor = 'var(--blue)'
# the "preprocess" function is executed when the report is rendered
# use this to perform any last-minute operations on its data
def preprocess(self, context):
# for example, to uppercase the entire "summary" field:
# context['summary'] = context['summary'].upper()
return context
참고: 필드는 컴포넌트 클래스와 해당 폼에서 동일한 이름을 가져야 합니다. 모든 컴포넌트는 BaseComponent 또는 다른 컴포넌트를 상속받아야 합니다. 또한 각 컴포넌트에는 name, pageBreakBefore (새 페이지에서 시작할지 여부), showTitle (name 필드를 헤더로 표시할지 여부)에 대한 내장 필드가 있습니다. 따라서 이러한 필드를 추가할 필요가 없습니다.
componentTemplates/CustomComponent.html:{% load custom_tags %}
<section class="l{{ level }} component{% if pageBreakBefore %} page-break{% endif %}" id="container_{{ id }}">
{% include 'componentTemplates/Heading.html' %}
<div class='markdown-align-justify custom-component-summary'>
<p>
{% markdown summary %}
</p>
</div>
</section>
Python 모듈의 필드는 템플릿 컨텍스트에 자동으로 추가됩니다. 이 예제에서는 summary 필드를 markdown으로 렌더링하려고 하므로 앞에 markdown 태그를 추가합니다. 또한 report.name, report.findings, engagement.customer.name 등과 같은 참여 및 보고서 수준 변수에 접근할 수 있습니다.
componentTemplates/CustomComponent.css (선택 사항):div.custom-component-summary {
font-weight: bold;
}
파일 이름은 Python 파일의 이름과 일치해야 합니다 (단, 확장자는 .py 대신 .css). 보고서가 렌더링될 때 자동으로 로드됩니다.
위 파일들이 생성되면 웹 앱을 재시작하기만 하면 새 컴포넌트가 자동으로 추가됩니다.
$ docker-compose restart writehat
데이터베이스 스키마를 변경하는 업데이트가 푸시되면 컨테이너가 재시작될 때 Django 데이터베이스 마이그레이션이 자동으로 실행됩니다. 그러나 사용자 상호 작용이 필요한 경우도 있습니다. Django 마이그레이션을 수동으로 적용하려면:
systemctl stop writehat)/opt/writehat)$ docker-compose run writehat bash
$ ./manage.py makemigrations
$ ./manage.py migrate
$ exit
$ docker-compose down
$ systemctl start writehat
