 abhinavsingh/proxy.py
💫 Ngrok FRP 대안 • ⚡ 빠름 • 🪶 경량 • 0️⃣ 종속성 없음 • 🔌 플러그 가능 • 😈 TLS 가로채기 • 🔒 DNS-over-HTTPS • 🔥 가난한 자의 VPN • ⏪ 리버스 & ⏩ 포워드 • 👮🏿 "Proxy Server" 프레임워크 • 🌐 "Web Server" 프레임워크 • ➵ ➶ ➷ ➠ "PubSub" 프레임워크 • 👷 "Work" 수락자 및 실행자 프레임워크














빠르고 확장 가능
시스템의 모든 가용 코어를 사용하여 확장
asyncio를 사용한 스레드리스 실행
초당 수만 개의 연결을 처리하도록 설계
# Macbook Pro M2 2022 기준
❯ python --version
Python 3.11.8
❯ oha --version
oha 1.4.3
❯ ./benchmark/compare.sh
  CONCURRENCY: 100 workers, DURATION: 1m, TIMEOUT: 1sec
  =============================
  Benchmarking Proxy.Py
  Server (pid:75969) running
  Summary:
    Success rate: 100.00%
    Total:        60.0006 secs
    Slowest:      0.2525 secs
    Fastest:      0.0002 secs
    Average:      0.0019 secs
    Requests/sec: 51667.3774

    Total data:   56.17 MiB
    Size/request: 19 B
    Size/sec:     958.64 KiB

  Response time histogram:
    0.000 [1]       |
    0.025 [3073746] |■■■■■■■■■■■■■■■■■■■■■■■■■■■■■■■■
    0.051 [10559]   |
    0.076 [4980]    |
    0.101 [2029]    |
    0.126 [5896]    |
    0.152 [2466]    |
    0.177 [116]     |
    0.202 [40]      |
    0.227 [52]      |
    0.253 [87]      |

  Response time distribution:
    10.00% in 0.0005 secs
    25.00% in 0.0007 secs
    50.00% in 0.0009 secs
    75.00% in 0.0014 secs
    90.00% in 0.0021 secs
    95.00% in 0.0035 secs
    99.00% in 0.0198 secs
    99.90% in 0.1262 secs
    99.99% in 0.1479 secs

  Details (average, fastest, slowest):
    DNS+dialup:   0.0018 secs, 0.0004 secs, 0.0031 secs
    DNS-lookup:   0.0000 secs, 0.0000 secs, 0.0002 secs

  Status code distribution:
    [200] 3099972 responses

  Error distribution:
    [100] aborted due to deadline
  =============================
proxy.py를 사용하여 프로덕션 등급 애플리케이션을 배포하는 경우 프로덕션 환경에 proxy.py 배포를 참조하세요.
PyPi에서 설치```console
❯ pip install --upgrade proxy.py
또는 GitHub `master` 브랜치```console
❯ pip install git+https://github.com/abhinavsingh/proxy.py.git@master
❯ pip install git+https://github.com/abhinavsingh/proxy.py.git@develop
## Docker 사용하기

멀티 플랫폼 컨테이너는 다음을 통해 제공됩니다:

- Docker Hub
  - `latest` 태그는 마지막 `stable` 릴리스를 가리킵니다
  - `docker pull abhinavsingh/proxy.py:latest`
- GitHub 컨테이너 레지스트리 (GHCR)
  - `latest` 태그는 마지막 `develop` 릴리스를 가리킵니다
  - `docker pull ghcr.io/abhinavsingh/proxy.py:latest`

안정 버전 컨테이너 릴리스는 다음 플랫폼에서 사용 가능합니다:

- `linux/386`
- `linux/amd64`
- `linux/arm/v6`
- `linux/arm/v7`
- `linux/arm64/v8`
- `linux/ppc64le`
- `linux/s390x`

### Docker Hub의 안정 버전

`proxy.py` 최신 컨테이너 실행:```console
❯ docker run -it -p 8899:8899 --rm abhinavsingh/proxy.py:latest
Docker 데몬은 일치하는 플랫폼 이미지를 자동으로 가져옵니다. 다중 플랫폼을 지원하는 서버에서 특정 대상 플랫폼 컨테이너를 실행하려면:```console ❯ docker run -it -p 8899:8899 --rm --platform linux/arm64/v8 abhinavsingh/proxy.py:latest
### GHCR에서 개발 버전

develop 브랜치의 최신 코드로 `proxy.py` 컨테이너를 실행하세요:```console
❯ docker run -it -p 8899:8899 --rm ghcr.io/abhinavsingh/proxy.py:latest
❯ git clone https://github.com/abhinavsingh/proxy.py.git ❯ cd proxy.py && make container ❯ docker run -it -p 8899:8899 --rm abhinavsingh/proxy.py:latest
[](https://github.com/moby/vpnkit/issues/469)
`docker` 이미지는 현재 `macOS`에서 [vpnkit](https://github.com/moby/vpnkit/issues/469)과의 호환성 문제로 인해 동작하지 않습니다.
## HomeBrew 사용하기
`HomeBrew` 업데이트 포뮬러는 `helper/homebrew` 디렉토리 아래 `develop` 브랜치에서 관리됩니다.
- `stable` 포뮬러는 `master` 브랜치에서 패키지를 설치합니다.
- `develop` 포뮬러는 `develop` 브랜치에서 패키지를 설치합니다.
### HomeBrew를 사용한 안정 버전```console
❯ brew install https://raw.githubusercontent.com/abhinavsingh/proxy.py/develop/helper/homebrew/stable/proxy.rb
❯ brew install https://raw.githubusercontent.com/abhinavsingh/proxy.py/develop/helper/homebrew/develop/proxy.rb
# proxy.py 시작하기

## PIP를 사용하여 설치했을 때 명령줄에서

`proxy.py`가 `pip`를 사용하여 설치되면,
`proxy`라는 실행 파일이 `$PATH`에 위치합니다.

### 실행하기

기본 구성으로 시작하려면 명령줄에 `proxy`를 입력하기만 하면 됩니다.```console
❯ proxy
...[redacted]... - Loaded plugin proxy.http.proxy.HttpProxyPlugin
...[redacted]... - Started 8 threadless workers
...[redacted]... - Started 8 acceptors
...[redacted]... - Listening on 127.0.0.1:8899
위 로그에서 주목할 점:
Loaded plugin
proxy.py는 기본적으로 proxy.http.proxy.HttpProxyPlugin을 로드합니다.proxy.py 인스턴스에 http(s) 프록시 서버 기능을 추가합니다.Started N threadless workers
proxy.py는 머신의 CPU 코어 수만큼의 워커 프로세스를 시작합니다.--num-workers 플래그를 사용하세요.Started N acceptors
proxy.py는 머신의 CPU 코어 수만큼의 어셉터 프로세스를 시작합니다.--num-acceptors 플래그를 사용하세요.위의 모든 로그는 INFO 레벨 로그이며, proxy.py의 기본 --log-level입니다.
이제 proxy.py를 DEBUG 레벨 로깅으로 시작해 보겠습니다:```console
❯ proxy --log-level d
...[redacted]... - Open file descriptor soft limit set to 1024
...[redacted]... - Loaded plugin proxy.http_proxy.HttpProxyPlugin
...[redacted]... - Started 8 workers
...[redacted]... - Started server on ::1:8899
한 글자로 로그 레벨을 사용자 지정할 수 있습니다.  예시:
- `d = DEBUG`
- `i = INFO`
- `w = WARNING`
- `e = ERROR`
- `c = CRITICAL`

위의 로그에서 알 수 있듯이, 시작하기 전에:

- `proxy.py`가 시스템에서 열린 파일 제한 `ulimit`을 설정하려고 시도했습니다.
- 사용된 `--open-file-limit` 기본값은 `1024`입니다.
- `--open-file-limit` 플래그는 `Windows` 운영 체제에서는 아무 효과가 없습니다.

사용 가능한 모든 구성 옵션 목록은 [flags](#flags)를 참조하세요.

## 명령줄에서 저장소 소스 사용하기

소스 코드에서 `proxy.py`를 실행하려는 경우,
소스 코드에는 `proxy`라는 바이너리 파일이 없습니다.

소스 코드에서 `proxy.py`를 시작하려면 다음 지침을 따르세요:

- 저장소 클론  ```console
  ❯ git clone https://github.com/abhinavsingh/proxy.py.git
  ❯ cd proxy.py
Python 3 가상 환경을 생성하세요 ```console ❯ python3 -m venv venv ❯ source venv/bin/activate
의존성 설치 ```console ❯ make lib-dep
proxy/common/_scm_version.py 생성
참고: 다음 단계는 editable 설치에 필요하지 않습니다. ```console ❯ ./write-scm-version.sh
선택적으로 테스트를 실행하세요. ```console ❯ make
proxy.py 실행 ```console
❯ python -m proxy
proxy.py 소스 코드 작업을 계획하고 있다면 플러그인 개발자 및 기여자 가이드를 참조하세요.
기본적으로 docker 바이너리는 IPv4 네트워킹 플래그로 시작됩니다:
--hostname 0.0.0.0 --port 8899
Docker 컨테이너를 시작할 때 명령줄에서 플래그를 재정의할 수 있습니다. 예를 들어, Docker 컨테이너 내에서 proxy.py 버전을 확인하려면 다음을 실행하세요:
❯ docker run -it \
    -p 8899:8899 \
    --rm abhinavsingh/proxy.py:latest \
    -v
https 트래픽에서도 작동합니다.
즐겨 사용하는 브라우저/애플리케이션에서 단축 링크를 지원합니다.

다음과 같이 proxy.py를 시작하세요:```console
❯ proxy
--plugins proxy.plugin.ShortLinkPlugin
이제 단일 문자 도메인 이름을 사용하여 즐겨찾는 웹사이트를 방문함으로써 일상적인 브라우징 속도를 높일 수 있습니다 :). 이는 모든 브라우저에서 작동합니다.

다음 단축 링크가 기본적으로 활성화되어 있습니다:

| 단축 링크 |  대상 URL   |
| :--------: |  :--------------:  |
|     a/     |    `amazon.com`    |
|     i/     |  `instagram.com`   |
|     l/     |   `linkedin.com`   |
|     f/     |   `facebook.com`   |
|     g/     |    `google.com`    |
|     t/     |   `twitter.com`    |
|     w/     | `web.whatsapp.com` |
|     y/     |   `youtube.com`    |
|   proxy/   |  `localhost:8899`  |

### ModifyPostDataPlugin

업스트림 서버로 요청을 보내기 전에 POST 요청 본문을 수정합니다.

다음과 같이 `proxy.py`를 시작하십시오:```console
❯ proxy \
    --plugins proxy.plugin.ModifyPostDataPlugin
기본적으로 플러그인은 POST 본문 내용을 하드코딩된 b'{"key": "modified"}'로 대체하고 Content-Type: application/json을 강제합니다.
다음을 사용하여 동일한 것을 확인하세요: `curl -x localhost:8899 -d '{"key": "value"}' http://httpbin.org/post````console { "args": {}, "data": "{"key": "modified"}", "files": {}, "form": {}, "headers": { "Accept": "/", "Content-Length": "19", "Content-Type": "application/json", "Host": "httpbin.org", "User-Agent": "curl/7.54.0" }, "json": { "key": "modified" }, "origin": "1.2.3.4, 5.6.7.8", "url": "https://httpbin.org/post" }
위 응답에 이어 다음 사항을 참고하세요:

1. POST 데이터가 수정되었습니다 `"data": "{\"key\": \"modified\"}"`.
   원래 `curl` 명령어 데이터는 `{"key": "value"}`였습니다.
2. 우리의 `curl` 명령어는 `Content-Type` 헤더를 추가하지 않았지만,
   우리 플러그인은 `"Content-Type": "application/json"`을 추가했습니다.
   이는 위 출력에서 `json` 필드를 확인하여 검증할 수 있습니다:   ```
   "json": {
    "key": "modified"
   },
Content-Length 헤더도 추가했습니다.서버 REST API에 대한 모의 응답입니다. 실제 업스트림 REST API 서버 없이 클라이언트 측 애플리케이션을 테스트하고 개발하는 데 사용합니다.
다음과 같이 proxy.py를 시작하세요:```console
❯ proxy
--plugins proxy.plugin.ProposedRestApiPlugin
모의 API 응답을 확인하려면 `curl -x localhost:8899 http://api.example.com/v1/users/`를 사용하십시오```console
{"count": 2, "next": null, "previous": null, "results": [{"email": "[email protected]", "groups": [], "url": "api.example.com/v1/users/1/", "username": "admin"}, {"email": "[email protected]", "groups": [], "url": "api.example.com/v1/users/2/", "username": "admin"}]}
proxy.py 로그를 검토하여 동일한지 확인하세요:```console
... [redacted] ... - access_log:1210 - ::1:64792 - GET None:None/v1/users/ - None None - 0 byte
액세스 로그에는 서버 `ip:port`가 `None:None`으로 표시됩니다. `None`은 서버 연결이 이루어지지 않았음을 의미하며, 응답이 플러그인에 의해 반환되었기 때문입니다.

이제 `ProposedRestApiPlugin`을 수정하여 클라이언트가 기대하는 REST API 모의 응답을 반환하도록 합니다.

### RedirectToCustomServerPlugin

들어오는 모든 `http` 요청을 사용자 정의 웹 서버로 리디렉션합니다. 기본적으로 클라이언트 요청을 내장 웹 서버(포트 `8899`에서 실행 중)로 리디렉션합니다.

`proxy.py`를 시작하고 내장 웹 서버를 활성화합니다:```console
❯ proxy \
    --enable-web-server \
    --plugins proxy.plugin.RedirectToCustomServerPlugin
확인하려면 curl -v -x localhost:8899 http://google.com 사용```
... [redacted] ...
< HTTP/1.1 404 NOT FOUND
< Server: proxy.py v1.0.0
< Connection: Close
<
위 `404` 응답은 `proxy.py` 웹 서버로부터 반환되었습니다. `proxy.py`의 로그를 검사하여 동일한지 확인하십시오. 프록시 요청 로그와 함께 http 웹 서버 요청 로그도 확인해야 합니다.```
... [redacted] ... - access_log:1241 - ::1:49525 - GET /
... [redacted] ... - access_log:1157 - ::1:49524 - GET localhost:8899/ - 404 NOT FOUND - 70 bytes
상위 호스트를 검사하여 트래픽을 차단합니다. 기본적으로 이 플러그인은 facebook.com 및 www.facebok.com에 대한 트래픽을 차단합니다.
proxy.py를 다음과 같이 시작하세요:```console
❯ proxy
--plugins proxy.plugin.FilterByUpstreamHostPlugin
다음을 사용하여 확인하십시오:`curl -v -x localhost:8899 http://facebook.com`:```console
... [redacted] ...
< HTTP/1.1 418 I'm a tea pot
< Proxy-agent: proxy.py v1.0.0
* no chunk, no close, no size. Assume close to signal end
<
* Closing connection 0
위의 418 I'm a tea pot은 우리 플러그인에 의해 전송됩니다.
동일한 내용을 proxy.py의 로그를 확인하여 검증하세요:```console
... [redacted] ... - handle_readables:1347 - HttpProtocolException type raised
Traceback (most recent call last):
... [redacted] ...
... [redacted] ... - access_log:1157 - ::1:49911 - GET None:None/ - None None - 0 bytes
### CacheResponsesPlugin

업스트림 서버 응답을 캐시합니다.

`proxy.py`를 다음과 같이 시작하세요:```console
❯ proxy \
    --plugins proxy.plugin.CacheResponsesPlugin
또한 --cache-requests 플래그를 사용하여 요청 패킷 캐싱을 활성화하여 검사할 수 있습니다.
다음을 사용하여 확인하세요: curl -v -x localhost:8899 http://httpbin.org/get:```console
... [redacted] ...
< HTTP/1.1 200 OK
< Access-Control-Allow-Credentials: true
< Access-Control-Allow-Origin: *
< Content-Type: application/json
< Date: Wed, 25 Sep 2019 02:24:25 GMT
< Referrer-Policy: no-referrer-when-downgrade
< Server: nginx
< X-Content-Type-Options: nosniff
< X-Frame-Options: DENY
< X-XSS-Protection: 1; mode=block
< Content-Length: 202
< Connection: keep-alive
<
{
"args": {},
"headers": {
"Accept": "/",
"Host": "httpbin.org",
"User-Agent": "curl/7.54.0"
},
"origin": "1.2.3.4, 5.6.7.8",
"url": "https://httpbin.org/get"
}
`proxy.py` 로그에서 캐시 파일의 경로를 가져옵니다:```console
... [redacted] ... - GET httpbin.org:80/get - 200 OK - 556 bytes
... [redacted] ... - Cached response at /var/folders/k9/x93q0_xn1ls9zy76m2mf2k_00000gn/T/httpbin.org-1569378301.407512.txt
캐시 파일의 내용을 확인하세요 `cat /path/to/your/cache/httpbin.org.txt````console HTTP/1.1 200 OK Access-Control-Allow-Credentials: true Access-Control-Allow-Origin: * Content-Type: application/json Date: Wed, 25 Sep 2019 02:24:25 GMT Referrer-Policy: no-referrer-when-downgrade Server: nginx X-Content-Type-Options: nosniff X-Frame-Options: DENY X-XSS-Protection: 1; mode=block Content-Length: 202 Connection: keep-alive
{ "args": {}, "headers": { "Accept": "/", "Host": "httpbin.org", "User-Agent": "curl/7.54.0" }, "origin": "1.2.3.4, 5.6.7.8", "url": "https://httpbin.org/get" }
### CacheByResponseType

`CacheResponsesPlugin` 플러그인은 `content-type`에 따라 응답을 자동으로 캐시할 수도 있습니다.
이 기능을 사용하려면 [TLS Interception](#tls-interception) 모드에서 실행 중이어야 하며,
`--cache-by-content-type` 플래그를 전달해야 합니다. 예:```console
❯ proxy \
    --plugins proxy.plugin.CacheResponsesPlugin \
    --cache-by-content-type \
    --ca-key-file ca-key.pem \
    --ca-cert-file ca-cert.pem \
    --ca-signing-key ca-signing-key.pem
프록시 서버에 몇 가지 요청을 보내면 ~/.proxy/cache 디렉토리 아래에 데이터가 표시됩니다.
2개의 폴더가 표시됩니다:
content: 콘텐츠 유형별로 파싱된 jpg, css, js, html, pdf 등을 포함합니다responses: 수신된 원시 응답을 포함합니다 (물론 가로채기로 인해 복호화됨)업스트림 서버 응답을 수정합니다.
proxy.py를 다음과 같이 시작합니다:```console
❯ proxy
--plugins proxy.plugin.ManInTheMiddlePlugin
다음을 사용하여 확인하세요: `curl -v -x localhost:8899 http://google.com`:```console
... [redacted] ...
< HTTP/1.1 200 OK
< Content-Length: 28
<
* Connection #0 to host localhost left intact
Hello from man in the middle
응답 본문 Hello from man in the middle는 우리 플러그인에 의해 전송됩니다.
들어오는 프록시 요청을 업스트림 프록시 서버 집합으로 전달합니다.
먼저 업스트림 프록시 2개를 시작합니다. 업스트림 프록시를 시뮬레이션하려면 포트 9000과 9001에서 proxy.py를 시작하세요.```console
❯ proxy --port 9000
#### 간편한 설치 및 구성


To streamline the setup process, Docker has been containerized, enabling instant deployment with pre-configured service credentials, databases, and API keys. Additionally, the tool features a user-friendly web interface for seamless, click-based configuration of all scan templates, making it accessible even to less experienced users without editing configuration files directly.


##### 빠른 설치 및 실행 (구성 파일 버전, 기본값입니다)
$ git clone https://github.com/b1ack0wl/Brutesploit.git
$ cd Brutesploit
$ sudo pip install -r requirements.txt
$ chmod +x ./Brutesploit.py $ ./Brutesploit.py
##### 더 나은 방법, Dockerized 버전을 사용하세요!
$ git clone https://github.com/b1ack0wl/Brutesploit.git
$ cd Brutesploit
sudo docker compose up
<p align="left"><img src="https://raw.githubusercontent.com/abhinavsingh/proxy.py/HEAD/homepage.png" width="500"></p>


##### 기능

- [x] 웹 앱 인터페이스를 통한 로그인 시스템
- [x] 현대적인 UI
- [x] 웹 앱 인터페이스를 통해 서버에 비밀번호 파일 업로드
- [x] 웹 앱 인터페이스를 통해 스캔 템플릿 생성 (이전 관리자 구성 페이지)
- [x] 웹 앱 인터페이스에서 스캔 템플릿을 클릭하여 선택하고 클릭하여 실행```console
❯ proxy --port 9001
이제 proxy.py를 ProxyPoolPlugin과 함께 (기본 8899 포트에서) 시작하십시오,
9000 및 9001 포트의 업스트림 프록시를 가리키도록 합니다.```console
❯ proxy
--plugins proxy.plugin.ProxyPoolPlugin
--proxy-pool localhost:9000
--proxy-pool localhost:9001
`8899` 프록시를 통해 curl 요청을 보냅니다:

`curl -v -x localhost:8899 http://httpbin.org/get`

`8899` 프록시가 업스트림 프록시로 요청을 전달하는지 확인하려면
각각의 로그를 확인하세요.

업스트림 프록시에 자격 증명이 필요한 경우 인수로 전달합니다. 예:

`--proxy-pool user:[email protected]:port`

### FilterByClientIpPlugin

특정 IP 주소에서 오는 트래픽을 거부합니다. 기본적으로 이 플러그인은 `127.0.0.1` 및 `::1`의 트래픽을 차단합니다.

`proxy.py`를 다음과 같이 시작하십시오:```console
❯ proxy \
    --plugins proxy.plugin.FilterByClientIpPlugin
요청을 보내려면 curl -v -x localhost:8899 http://google.com 사용하세요:```console
... [redacted] ...
Proxy-Connection: Keep-Alive
< HTTP/1.1 418 I'm a tea pot < Connection: close <
플러그인을 원하는 대로 수정하세요. 예: 특정 IP 주소만 허용.

### ModifyChunkResponsePlugin

이 플러그인은 청크 인코딩된 응답을 수정하는 방법을 보여줍니다. 이를 위해 `proxy.py` 코어를 사용하여 청크 인코딩된 응답을 파싱합니다. 그런 다음 커스텀 하드코딩된 청크를 사용하여 응답을 재구성하며, 업스트림 서버로부터 받은 원래 청크는 무시합니다.

다음과 같이 `proxy.py`를 시작하세요:```console
❯ proxy \
    --plugins proxy.plugin.ModifyChunkResponsePlugin
다음을 사용하여 확인: curl -v -x localhost:8899 http://httpbin.org/stream/5:```console
... [redacted] ...
modify
chunk
response
plugin
Modify `ModifyChunkResponsePlugin`를 원하는 대로 수정하세요. 예를 들어, 하드코딩된 청크를 보내는 대신 업스트림 서버에서 수신한 원래 `JSON` 청크를 파싱하고 수정합니다.

### ModifyRequestHeaderPlugin

이 플러그인은 TLS 인터셉션 모드에서 나가는 HTTPS 요청 헤더를 수정하는 방법을 보여줍니다.

Start `proxy.py` as:```console
❯ proxy \
    --plugins proxy.plugin.ModifyRequestHeaderPlugin \
    ... [TLS interception flags] ...
다음 명령어를 사용하여 확인하세요: curl -x localhost:8899 --cacert ca-cert.pem https://httpbin.org/get:```console
{
"args": {},
"headers": {
... [redacted] ...,
"X-Proxy-Py-Version": "2.4.4rc6.dev15+gf533c711"
},
... [redacted] ...
}
### CloudflareDnsResolverPlugin

이 플러그인은 `Cloudflare`가 호스팅하는 `DNS-over-HTTPS` [API](https://developers.cloudflare.com/1.1.1.1/encrypted-dns/dns-over-https/make-api-requests/dns-json) (json)를 사용합니다.

`DoH`는 HTTP2를 준수하는 클라이언트를 요구합니다. 안타깝게도 `proxy.py`는 아직 이를 제공하지 않으므로, 의존성을 사용합니다. 설치하세요:```console
❯ pip install "httpx[http2]"
이제 proxy.py를 다음과 같이 실행하세요:```console
❯ proxy
--plugins proxy.plugin.CloudflareDnsResolverPlugin
기본적으로 `CloudflareDnsResolverPlugin`은 `security` 모드로 실행되며 멀웨어 보호를 제공합니다.
`--cloudflare-dns-mode family`를 사용하면 성인 콘텐츠 보호도 활성화할 수 있습니다.

### CustomDnsResolverPlugin

이 플러그인은 `proxy.py`와 함께 사용자 지정 DNS 확인 구현을 사용하는 방법을 보여줍니다.
이 예제 플러그인은 현재 Python의 내장 확인 메커니즘을 사용합니다. 원하는 대로 코드를 사용자 지정하세요.
예: 사용자 지정 DNS 서버에 쿼리, `DoH` 또는 다른 메커니즘 구현.

`proxy.py`를 다음과 같이 시작하세요:```console
❯ proxy \
    --plugins proxy.plugin.CustomDnsResolverPlugin
HttpProxyBasePlugin.resolve_dns 콜백을 사용하여 업스트림 서버 연결 시 source_address로 사용할 네트워크 인터페이스를 구성할 수도 있습니다.
자세한 내용은 이 스레드를 참조하세요.
참고: 이름이 지정된 플러그인은 없지만, CustomDnsResolverPlugin을 필요에 따라 쉽게 사용자 정의할 수 있습니다.
로컬 머신에서 시작된 프록시 요청에 대해 프로그램 (application) 이름을 확인하려고 시도합니다. 확인된 경우 액세스 로그의 클라이언트 IP가 프로그램 이름으로 대체됩니다.
proxy.py를 다음과 같이 시작하세요:```console
❯ proxy
--plugins proxy.plugin.ProgramNamePlugin
`curl`을 사용하여 요청을 보냅니다:```console
❯ curl -v -x localhost:8899 https://httpbin.org/get
다음과 같은 로그 줄이 표시되어야 합니다:```console ... [redacted] ... - [I] server.access_log:419 - curl:58096 - CONNECT httpbin.org:443 - 6010 bytes - 1824.62ms
참고: `curl`을 `::1` 또는 `127.0.0.1` 대신 클라이언트 IP로 사용합니다.
[](#programnameplugin) 만약 `ProgramNamePlugin`이 귀하의 운영 체제에서 안정적으로 작동하지 않는다면, 풀 리퀘스트를 보내거나 이슈를 열어 기여해 주시기 바랍니다. 감사합니다!!!
## HTTP 웹 서버 플러그인
### 웹 서버 라우트
플러그인을 사용한 내장 웹 서버 라우팅을 보여줍니다.
다음과 같이 `proxy.py`를 시작합니다:```console
❯ proxy --enable-web-server \
--plugins proxy.plugin.WebServerPlugin
다음을 사용하여 확인: curl -v localhost:8899/http-route-example은 반환해야 합니다:```console
HTTP route response
## 리버스 프록시 플러그인

내장 웹 서버를 확장하여 리버스 프록시 기능을 추가합니다.

### 리버스 프록시

`proxy.py`를 다음과 같이 시작합니다:```console
❯ proxy --enable-reverse-proxy \
    --plugins proxy.plugin.ReverseProxyPlugin
기본 구성에서 ReverseProxyPlugin 플러그인은 다음 Nginx 설정과 동일합니다:```console
location /get {
proxy_pass http://httpbin.org/get;
}
`curl -v localhost:8899/get`를 사용하여 확인:```console
{
  "args": {},
  "headers": {
    "Accept": "*/*",
    "Host": "localhost",
    "User-Agent": "curl/7.64.1"
  },
  "origin": "1.2.3.4, 5.6.7.8",
  "url": "https://localhost/get"
}
위 예제에서 다음과 같은 경우를 볼 수 있습니다:```console
이 문제는 기본 리버스 프록시 플러그인인 `ReverseProxyPlugin`이 구성되어
`http` 및 `https` 업스트림 서버로 구성되어 있습니다. 기본적으로 `ReverseProxyPlugin`은
원래 호스트 헤더를 유지합니다. 이는 `https` 업스트림에서는 작동하지만,
`http` 업스트림에서는 안정적으로 작동하지 않습니다. 이 문제를 해결하려면 `--rewrite-host-header` 플래그를 사용하세요.

예:```console
❯ proxy --enable-reverse-proxy \
    --plugins proxy.plugin.ReverseProxyPlugin \
    --rewrite-host-header
이렇게 하면 Host 헤더 필드가 httpbin.org로 설정되어 http 및 https 업스트림 모두에서 작동합니다.
참고:
--rewrite-host-header를 사용할지 여부는 사용 사례에 따라 다릅니다.
여러 플러그인을 사용할 때, 플러그인 기능에 따라 명령줄에 전달되는 플러그인의 순서를 고려하는 것이 좋습니다.
플러그인은 전달된 순서대로 호출됩니다. 예를 들어, FilterByUpstreamHostPlugin과 RedirectToCustomServerPlugin을 둘 다 사용한다고 가정해 보겠습니다. 아이디어는 facebook.com 및 www.facebook.com에 대한 모든 들어오는 http 요청을 드롭하고 다른 http 요청은 내장 웹 서버로 리디렉션하는 것입니다.
따라서 이 시나리오에서는 FilterByUpstreamHostPlugin을 RedirectToCustomServerPlugin보다 먼저 사용하는 것이 중요합니다. RedirectToCustomServerPlugin을 FilterByUpstreamHostPlugin보다 먼저 활성화하면 facebook 요청도 드롭되는 대신 내장 웹 서버로 리디렉션됩니다.
기본적으로 proxy.py는 curl, browser와 같은 클라이언트와의 통신에 http 프로토콜을 사용합니다. tls / https를 사용하여 종단간 암호화를 활성화하려면 먼저 인증서를 생성하세요. 리포지토리를 체크아웃하고 다음을 실행하세요:```console
make https-certificates
`proxy.py`를 다음과 같이 실행하십시오:```console
❯ proxy \
    --cert-file https-cert.pem \
    --key-file https-key.pem
다음을 사용하여 확인하십시오: curl -x https://localhost:8899 --proxy-cacert https-cert.pem https://httpbin.org/get:```console
{
"args": {},
"headers": {
"Accept": "/",
"Host": "httpbin.org",
"User-Agent": "curl/7.54.0"
},
"origin": "1.2.3.4, 5.6.7.8",
"url": "https://httpbin.org/get"
}
만약 `--proxy-cacert` 플래그를 전달하고 싶지 않다면, 생성된 SSL 인증서에 서명하는 것도 고려하세요. 예시:

먼저, CA 인증서를 생성합니다:```console
make ca-certificates
그런 다음, SSL 인증서에 서명하십시오:```console make sign-https-certificates
이제 `--cert-file https-signed-cert.pem` 플래그를 사용하여 서버를 다시 시작하세요. 생성된 `ca-cert.pem`을 시스템 키체인에서 신뢰하도록 설정해야 합니다.

# TLS 가로채기

기본적으로 `proxy.py`는 클라이언트와 서버 간의 `https` 트래픽을 복호화하지 않습니다.
TLS 가로채기를 활성화하려면 먼저 루트 CA 인증서를 생성하십시오:```console
❯ make ca-certificates
또한 CacheResponsePlugin을 활성화하여 서버로부터 복호화된 응답을 검증할 수 있도록 합니다. proxy.py를 다음과 같이 시작하세요:```console
❯ proxy
--plugins proxy.plugin.CacheResponsesPlugin
--ca-key-file ca-key.pem
--ca-cert-file ca-cert.pem
--ca-signing-key-file ca-signing-key.pem
[](https://github.com/abhinavsingh/proxy.py#user-content-flags) 또한 피어 인증서 검증에 필요한 명시적인 CA 번들 경로를 제공하십시오. `--ca-file` 플래그를 참조하십시오.
`curl`을 사용하여 TLS 가로채기를 확인하십시오.```console
❯ curl -v -x localhost:8899 --cacert ca-cert.pem https://httpbin.org/get
empty```console
GET /get HTTP/1.1 ... [redacted] ... < Connection: keep-alive < { "args": {}, "headers": { "Accept": "/", "Host": "httpbin.org", "User-Agent": "curl/7.54.0" }, "origin": "1.2.3.4, 5.6.7.8", "url": "https://httpbin.org/get" }
The `issuer` 줄은 응답이 가로채졌음을 확인합니다.

또한 캐시된 응답 파일의 내용을 확인하세요. `proxy.py` 로그에서 캐시 파일의 경로를 얻습니다.

`❯ cat /path/to/your/tmp/directory/httpbin.org-1569452863.924174.txt````console
HTTP/1.1 200 OK
Access-Control-Allow-Credentials: true
Access-Control-Allow-Origin: *
Content-Type: application/json
Date: Wed, 25 Sep 2019 23:07:05 GMT
Referrer-Policy: no-referrer-when-downgrade
Server: nginx
X-Content-Type-Options: nosniff
X-Frame-Options: DENY
X-XSS-Protection: 1; mode=block
Content-Length: 202
Connection: keep-alive

{
  "args": {},
  "headers": {
    "Accept": "*/*",
    "Host": "httpbin.org",
    "User-Agent": "curl/7.54.0"
  },
  "origin": "1.2.3.4, 5.6.7.8",
  "url": "https://httpbin.org/get"
}
Viola!!! CA 플래그를 제거하면 캐시된 파일에서 평문 대신 암호화된 데이터가 발견됩니다.
이제 플러그인 예제와 함께 CA 플래그를 사용하여 https 트래픽에서 작동하는지 확인하세요.
자체 서명 인증서를 사용하는 서버에서 TLS 트래픽을 가로채려면 --insecure-tls-interception 플래그를 추가하여 TLS 인증서 검증을 비활성화합니다.
참고: 이 플래그는 모든 서버에 대한 인증서 검사를 비활성화합니다.
Docker 컨테이너로 TLS 가로채기에 관한 중요 참고 사항:
v2.2.0부터 proxy.py Docker 컨테이너에는 openssl도 함께 제공됩니다. 이를 통해 proxy.py가 TLS 가로채기를 위해 즉시 인증서를 생성할 수 있습니다.
보안상의 이유로 proxy.py Docker 컨테이너에는 CA 인증서가 포함되어 있지 않습니다.
다음은 TLS 가로채기를 사용하여 proxy.py Docker 컨테이너를 시작하는 방법입니다:
-v /tmp/ca-certificates:/tmp/ca-certificates 플래그는 컨테이너 환경에 CA 인증서 디렉토리를 마운트합니다.
--plugins proxy.plugin.CacheResponsesPlugin 플래그는 CacheResponsesPlugin을 활성화하여 가로챈 트래픽을 검사할 수 있게 합니다.--ca-* 플래그는 TLS 가로채기를 활성화합니다.curl을 사용하여 TLS 가로채기를 시도하세요. CA 인증서가 시스템에서 이미 신뢰되고 있다면 --cacert 플래그를 생략할 수 있습니다. ```console
❯ curl -v issuer 필드를 확인하세요. ```console
cat으로 확인하세요: ```console
❯ docker exec -it $(docker ps | grep proxy.py | awk '{ print $1 }') cat /tmp/httpbin.org-ae1a927d064e4ab386ea319eb38fe251.txt
HTTP/1.1 200 OK
...[redacted]...
{
...[redacted]...,
"url": "http://httpbin.org/get"
}
grout은 ngrok과 frp의 대체용(drop-in alternative)입니다.grout은 proxy.py에 패키징되어 있습니다.❯ grout NAME: grout - securely tunnel local files, folders and services to public URLs
USAGE: grout route [name]
DESCRIPTION: grout exposes local networked services behinds NATs and firewalls to the public internet over a secure tunnel. Share local folders, directories and websites, build/test webhook consumers and self-host personal services to public URLs.
EXAMPLES: Share Files and Folders: grout C:\path\to\folder # Share a folder on your system grout /path/to/folder # Share a folder on your system grout /path/to/folder --basic-auth user:pass # Add authentication for shared folder grout /path/to/photo.jpg # Share a specific file on your system
Expose HTTP, HTTPS and Websockets: grout http://localhost:9090 # Expose HTTP service running on port 9090 grout https://localhost:8080 # Expose HTTPS service running on port 8080 grout https://localhost:8080 --path /worker/ # Expose only certain paths of HTTPS service on port 8080 grout https://localhost:8080 --basic-auth u:p # Add authentication for exposed HTTPS service on port 8080
Expose TCP Services: grout tcp://:6379 # Expose Redis service running locally on port 6379 grout tcp://:22 # Expose SSH service running locally on port 22
Custom URLs: grout https://localhost:8080 abhinavsingh # Custom URL for HTTPS service running on port 8080 grout tcp://:22 abhinavsingh # Custom URL for SSH service running locally on port 22
Custom Domains: grout tcp://:5432 abhinavsingh.domain.tld # Custom URL for Postgres service running locally on port 5432
Self-hosted solutions: grout tcp://:5432 abhinavsingh.my.server # Custom URL for Postgres service running locally on port 5432
(*) Wildcard Domains: grout https://host:443 do.main --wildcard # Receive traffic on provided domain and all it's subdomains
(*) Host based routing for Wildcard Domains: grout ... --tunnel-route-url host=https://h:p # When using wildcards, optionally route traffic by incoming host header
SUPPORT: Write to us at [email protected]
Privacy policy and Terms & conditions https://jaxl.com/privacy/
Created by Jaxl™ https://jaxl.io
## Grout 인증

Grout는 파일, 폴더 및 서비스를 무단 액세스로부터 보호하기 위해 인증을 지원합니다. 인증을 적용하려면 `--basic-auth` 플래그를 사용하세요. 예:```console
grout /path/to/folder --basic-auth user:pass
grout https://localhost:8080 --basic-auth u:p
기본적으로 Grout는 서비스의 모든 경로에 대한 접근을 허용합니다. --path 플래그를 사용하여 웹 서비스의 특정 경로로만 접근을 제한하세요. 예:```console
grout https://localhost:8080 --path /worker/
grout https://localhost:8080 --path /webhook/ --path /callback/
## Grout 와일드카드 도메인

기본적으로 Grout 클라이언트는 전용 서브도메인에서 들어오는 트래픽을 서비스합니다.
그러나 일부 서비스(예: Kubernetes)는 임시 서브도메인에서 트래픽을 서비스하려고 할 수 있습니다.
모든 임시 서브도메인에 대해 전용 Grout 클라이언트를 시작하는 것은 실용적인 해결책이 아닐 수 있습니다.

이러한 시나리오를 위해 Grout은 와일드카드 도메인을 지원합니다. 다음은 Grout 클라이언트에서 사용할 자신의 와일드카드 도메인을 구성하는 방법입니다.

1. 도메인을 선택하세요(예: `custom.example.com`)
2. 서비스가 `custom.example.com` 및 `*.custom.example.com`에 대한 트래픽을 서비스하려고 합니다.
3. `https://`를 사용할 계획이라면 로드 밸런서를 설정해야 합니다:
   - HTTPS 로드 밸런서(LB) 설정
   - `custom.example.com` 및 `*.custom.example.com`에 대해 생성된 인증서로 LB 구성
   - 트래픽을 Grout 서비스 공용 IP 주소로 지정
4. `custom.example.com`을 허용 목록에 추가하려면 [email protected]으로 Grout 팀에 문의하세요. Grout 팀은 귀하가 실제로 도메인을 소유하고 있으며 위에서 설명한 대로 유효한 SSL 인증서를 구성했는지 확인합니다.

`--wildcard` 플래그와 함께 Grout을 시작하세요. 예:```console
grout https://localhost:8080 custom.example.com --wildcard
2024-08-05 18:24:59,294 - grout - Logged in as [email protected]
2024-08-05 18:25:03,159 - setup - Grouting https://*.custom.domain.com
--wildcard옵션에서만 사용 가능
기본 경로와 함께, 호스트 필드가 일치할 때 우선 적용되는 추가 경로를 제공할 수 있습니다. 예시:```console
grout https://localhost:8080 custom.example.com
--wildcard
--tunnel-route-url stream.example.com=http://localhost:7001
이 플래그를 반복하여 여러 개의 사용자 정의 경로를 제공할 수 있습니다.

## Grout Client Plugin

`GroutClientBasePlugin`을 사용하면 트래픽을 다양한 업스트림으로 동적으로 라우팅할 수 있습니다.  아래는 사용 방법에 대한 설명이 포함된 간단한 구현 예제입니다.```python
class GroutClientPlugin(GroutClientBasePlugin):

    def resolve_route(
        self,
        route: str,
        request: HttpParser,
        origin: HostPort,
        server: HostPort,
    ) -> Tuple[Optional[str], HttpParser]:
        print(request, origin, server, '->', route)
        print(request.header(b'host'), request.path)
        #
        # Here, we send traffic to localhost:7001 irrespective
        # of the original "route" value provided to the grout
        # client OR any custom host:upstream mapping provided
        # through the --tunnel-route-url flags (when using
        # --wildcard).
        #
        # Optionally, you can also strip path before
        # sending traffic to upstrem, like:
        # request.path = b"/"
        #
        # To drop the request, simply return None for route
        # return None, request
        #
        return 'http://localhost:7001', request
자세한 내용은 grout_client.py를 참조하세요. 시도하려면 grout 클라이언트를 시작할 때 --plugin proxy.plugin.grout_client.GroutClientPlugin을 전달하세요.
❯ docker run --rm -it
--entrypoint grout
-v ~/.proxy:/root/.proxy
abhinavsingh/proxy.py:latest
http://host.docker.internal:29876
위:

- `--entrypoint`를 `grout`로 변경했습니다.
- 로컬 호스트에서 실행 중인 포트 `29876`으로 트래픽을 라우팅할 수 있도록 `localhost`를 `host.docker.internal`로 대체했습니다.
- *(선택 사항)* 호스트 머신의 `~/.proxy` 폴더를 마운트하여 컨테이너 재시작 후에도 `grout` 자격 증명이 유지되도록 합니다.

## Grout 작동 방식

- `grout` 인프라는 클라이언트와 서버의 두 가지 구성 요소로 이루어져 있습니다.
- `grout` 클라이언트는 thin 클라이언트와 thick 클라이언트로 구성됩니다.
- `grout` thin 클라이언트는 오픈 소스 `proxy.py`(BSD 3-Clause 라이선스)의 일부입니다.
- `grout` thick 클라이언트와 서버는 [jaxl.io](https://jaxl.io)에서 호스팅되며 [Jaxl Innovations Private Limited](https://jaxl.com)의 저작권입니다.
- `grout` 서버는 레지스트리 서버, 리버스 프록시 서버, 터널 서버의 세 가지 구성 요소로 이루어져 있습니다.

## 자체 호스팅 `grout`

- `grout` thick 클라이언트와 서버는 GCP, AWS, 클라우드 인프라에서도 호스팅할 수 있습니다.
- 자체 호스팅 버전을 사용하면 트래픽이 사용자가 제어하고 신뢰하는 네트워크를 통해 흐릅니다.
- [jaxl.io](https://jaxl.io)의 `grout` 개발자는 자체 호스팅 솔루션을 위한 GCP, AWS, Docker 이미지를 제공합니다.
- 시작하려면 [[email protected]](mailto:[email protected])으로 이메일을 보내주시기 바랍니다.

# SSH 터널을 통한 프록시

**이 기능은 작업 중이며 문서대로 작동하지 않을 수 있습니다.**

작동하려면 `paramiko`가 필요합니다. `pip install "proxy.py[tunnel]"`을 사용하여 종속성을 설치하세요.

## 원격 요청을 로컬에서 프록시하기

                            |
    +------------+          |            +----------+
    |   LOCAL    |          |            |  REMOTE  |
    |   HOST     | <== SSH ==== :8900 == |  PROXY   |
    +------------+          |            +----------+
    :8899 proxy.py          |
                            |
                         FIREWALL
                      (allow tcp/22)

### 개요

`로컬 호스트`에서 실행 중인 `proxy.py` 서버를 통해 `원격` 프록시 서버에서 이루어진 HTTP(s) 요청을 프록시 처리합니다.

### 방법

- 요청된 `원격` 포트는 SSH 연결을 통해 전달됩니다.
- `로컬 호스트`에서 실행 중인 `proxy.py`가 `원격` 프록시 요청을 처리하고 응답합니다.

### 요구 사항

1. `로컬 호스트`는 `원격` 서버에 대한 SSH 접근 권한이 있어야 합니다.
2. `원격` 서버는 전달된 포트 번호(예: `:8900`)를 통해 HTTP(s) 요청을 프록시하도록 구성되어야 합니다.
   - `원격` 포트와 `로컬 호스트` 포트는 동일할 수 있습니다(예: `:8899`).
   - `:8900`은 구분을 위해 ASCII 아트에서 선택되었습니다.

### 시도해보기

`proxy.py`를 다음과 같이 시작하세요:```console
❯ # On localhost
❯ proxy --enable-ssh-tunnel \
    --tunnel-username username \
    --tunnel-hostname ip.address.or.domain.name \
    --tunnel-port 22 \
    --tunnel-remote-port 8899 \
    --tunnel-ssh-key /path/to/ssh/private.key \
    --tunnel-ssh-key-passphrase XXXXX
...[redacted]... [I] listener.setup:97 - Listening on 127.0.0.1:8899
...[redacted]... [I] pool.setup:106 - Started 16 acceptors in threadless (local) mode
...[redacted]... [I] transport._log:1873 - Connected (version 2.0, client OpenSSH_7.6p1)
...[redacted]... [I] transport._log:1873 - Authentication (publickey) successful!
...[redacted]... [I] listener.setup:116 - SSH connection established to ip.address.or.domain.name:22...
...[redacted]... [I] listener.start_port_forward:91 - :8899 forwarding successful...
HTTP 프록시 요청을 remote 서버에 보내고
응답이 localhost의 공인 IP 주소를 origin으로 포함하는지 확인하십시오:```console
❯ # On remote
❯ curl -x 127.0.0.1:8899 http://httpbin.org/get
{
"args": {},
"headers": {
"Accept": "/",
"Host": "httpbin.org",
"User-Agent": "curl/7.54.0"
},
"origin": "x.x.x.x, y.y.y.y",
"url": "https://httpbin.org/get"
}
또한, `proxy.py`가 `localhost`의 로그에 `remote` IP를 클라이언트 IP로 포함하는지 확인하십시오.```console
access_log:328 - remote:52067 - GET httpbin.org:80
                        |
+------------+          |     +----------+
|   LOCAL    |          |     |  REMOTE  |
|   HOST     | === SSH =====> |  SERVER  |
+------------+          |     +----------+
                        |     :8899 proxy.py
                        |
                    FIREWALL
                 (allow tcp/22)
계획되지 않음.
유효한 사용 사례가 있다면 이슈를 열어 주시기 바랍니다. 이 기능을 추가하기 위한 풀 리퀘스트를 통한 기여는 언제나 환영합니다 :)
로컬 요청을 원격으로 프록시하려면 Proxy Pool Plugin을 사용하세요.
proxy.main 메서드를 사용하여 기본 설정으로 임베디드 모드에서 proxy.py를 시작합니다. 예시:```python
import proxy
if name == 'main': proxy.main()
시작 플래그를 kwargs로 전달하여 사용자 정의하세요:```python
import ipaddress
import proxy

if __name__ == '__main__':
  proxy.main(
    hostname=ipaddress.IPv6Address('::1'),
    port=8899
  )
참고:
main은 명령줄에서 proxy.py를 시작하는 것과 동일합니다.main은 args를 허용하지 않습니다 (kwargs만 허용).main은 사용 가능한 sys.argv를 자동으로 args로 사용합니다.main은 proxy.py가 종료될 때까지 블로킹됩니다.기본 구성으로 Proxy 컨텍스트 매니저를 사용하여 proxy.py를 논블로킹 임베디드 모드로 시작합니다:
예시:```python
import proxy
if name == 'main': with proxy.Proxy() as p: # Uncomment the line below and # implement your app your logic here proxy.sleep_loop()
참고하세요:

1. `Proxy`는 `main`과 유사하지만, `Proxy`는 차단(block)하지 않습니다.
2. 내부적으로 `Proxy`는 컨텍스트 관리자(context manager)이며, 호출될 때 `proxy.py`를 시작하고 범위가 끝나면 종료합니다.
3. `main`과 달리 `Proxy`의 시작 플래그는 `args`와 `kwargs`를 사용하여 사용자 지정할 수도 있습니다. 예: `Proxy(['--port', '8899'])` 또는 kwargs로 플래그를 전달하는 방식, 예: `Proxy(port=8899)`.
4. `main`과 달리 `Proxy`는 `sys.argv`를 검사하지 않습니다.

## 임시 포트(Ephemeral Port)

`--port=0`을 사용하여 `proxy.py`를 커널이 할당한 임의의 포트에 바인딩합니다.

내장 모드에서는 이 포트에 접근할 수 있습니다.  예시:```python
import proxy

if __name__ == '__main__':
  with proxy.Proxy(port=0) as p:
    print(p.flags.port)
    proxy.sleep_loop()
flags.port는 커널이 할당한 무작위 포트에 접근할 수 있게 해줍니다.
사용자는 --plugins 플래그를 여러 번 사용하여 여러 플러그인을 로드할 수 있습니다.
문제가 발생하는 경우 플러그인 로드 실패를 참조하세요.
내장 모드에서 사용할 때 몇 가지 추가 옵션이 있습니다. 예시:
proxy.main 메서드 또는 proxy.Proxy 컨텍스트 관리자에 플러그인 클래스의 정규화된 이름을 bytes로 제공합니다.type 인스턴스를 제공합니다. 이는 런타임에 플러그인을 정의하려는 경우 특히 유용합니다.예: --plugins 플래그를 사용하여 단일 플러그인 로드:```python
import proxy
if name == 'main': proxy.main(plugins=['proxy.plugin.CacheResponsesPlugin'])
간단하게, `proxy.main` 또는 `Proxy` 생성자에 플러그인 목록을 키워드 인수로 전달할 수도 있습니다.

예시:```python
import proxy
from proxy.plugin import FilterByUpstreamHostPlugin

if __name__ == '__main__':
  proxy.main(plugins=[
    b'proxy.plugin.CacheResponsesPlugin',
    FilterByUpstreamHostPlugin,
  ])
proxy.TestCasePython unittest 클래스에 대해 proxy.py의 설정 및 해제를 위해, 간단히 unittest.TestCase 대신 proxy.TestCase를 사용하세요.
예시:```python
import proxy
class TestProxyPyEmbedded(proxy.TestCase):
def test_my_application_with_proxy(self) -> None:
    self.assertTrue(True)
참고 사항:

1. `proxy.TestCase`는 `unittest.TestCase.run()` 메서드를 오버라이드하여 `proxy.py` 서버를 설정하고 해제합니다.
2. `proxy.py` 서버는 시스템에서 사용 가능한 임의의 포트에서 수신 대기합니다.
   이 임의의 포트는 테스트 케이스 내에서 `self.PROXY.flags.port`로 사용할 수 있습니다.
3. 더 빠른 설정 및 해제를 위해 기본적으로 단일 acceptor와 worker만 시작됩니다 (`--num-workers 1 --num-acceptors 1`).
4. 가장 중요한 점은 `proxy.TestCase`가 테스트 실행에 앞서 `proxy.py` 서버가 실행 중인지 확인한다는 것입니다. 기본적으로 `proxy.TestCase`는 `proxy.py` 서버가 시작될 때까지 `10초` 동안 대기하며, 실패 시 `TimeoutError` 예외가 발생합니다.

## 시작 플래그 재정의

기본 시작 플래그를 재정의하려면 테스트 클래스에 `PROXY_PY_STARTUP_FLAGS` 변수를 정의하세요.
예시:```python
class TestProxyPyEmbedded(TestCase):

    PROXY_PY_STARTUP_FLAGS = [
        '--num-workers', '2',
        '--num-acceptors', '1',
        '--enable-web-server',
    ]

    def test_my_application_with_proxy(self) -> None:
        self.assertTrue(True)
다음 test_embed.py에서 전체 작업 예제를 확인하세요.
unittest.TestCase 사용 시어떤 이유로 proxy.TestCase를 직접 사용할 수 없는 경우, 단순히 unittest.TestCase.run을 직접 재정의하여 proxy.py를 설정하고 해제하면 됩니다. 예시:```python
import unittest
import proxy
class TestProxyPyEmbedded(unittest.TestCase):
def test_my_application_with_proxy(self) -> None:
    self.assertTrue(True)

def run(self, result: Optional[unittest.TestResult] = None) -> Any:
    with proxy.start([
            '--num-workers', '1',
            '--num-acceptors', '1',
            '--port', '... random port ...']):
        super().run(result)
또는 `setUpClass` 및 `teardownClass` 클래스 메서드 내에서 간단히 `proxy.py`를 설정/해제합니다.

# 유틸리티

## TCP 소켓

### new_socket_connection

제공된 주소에 대해 먼저 IPv4 연결, 그 다음 IPv6, 마지막으로 이중 스택 연결을 시도합니다.```python
>>> conn = new_socket_connection(('httpbin.org', 80))
>>> ...[ use connection ]...
>>> conn.close()
socket_connection은(는) 편리한 데코레이터 + 컨텍스트 관리자이며,
new_socket_connection 주변에서 conn.close가 암시적으로 이루어지도록 보장합니다.
컨텍스트 관리자로서:```python
with socket_connection(('httpbin.org', 80)) as conn: ... [ use connection ] ...
데코레이터로서:```python
>>> @socket_connection(('httpbin.org', 80))
>>> def my_api_call(conn, *args, **kwargs):
>>>   ... [ use connection ] ...
build_http_request(b'GET', b'/') b'GET / HTTP/1.1\r\n\r\n'
build_http_request(b'GET', b'/', conn_close=True) b'GET / HTTP/1.1\r\nConnection: close\r\n\r\n'
import json build_http_request(b'POST', b'/form', headers={b'Content-type': b'application/json'}, body=proxy.bytes_(json.dumps({'email': '[email protected]'}))) b'POST /form HTTP/1.1\r\nContent-type: application/json\r\n\r\n{"email": "[email protected]"}'
build_http_response( status_code: int, protocol_version: bytes = HTTP_1_1, reason: Optional[bytes] = None, headers: Optional[Dict[bytes, bytes]] = None, body: Optional[bytes] = None) -> bytes
## PKI

### API 사용

- `gen_private_key`  ```python
  gen_private_key(
      key_path: str,
      password: str,
      bits: int = 2048,
      timeout: int = 10) -> bool
gen_public_key ```python
gen_public_key(
public_key_path: str,
private_key_path: str,
private_key_password: str,
subject: str,
alt_subj_names: Optional[List[str]] = None,
extended_key_usage: Optional[str] = None,
validity_in_days: int = 365,
timeout: int = 10) -> bool
remove_passphrase ```python
remove_passphrase(
key_in_path: str,
password: str,
key_out_path: str,
timeout: int = 10) -> bool
gen_csr ```python
gen_csr(
csr_path: str,
key_path: str,
password: str,
crt_path: str,
timeout: int = 10) -> bool
sign_csr ```python
sign_csr(
csr_path: str,
crt_path: str,
ca_key_path: str,
ca_key_password: str,
ca_crt_path: str,
serial: str,
alt_subj_names: Optional[List[str]] = None,
extended_key_usage: Optional[str] = None,
validity_in_days: int = 365,
timeout: int = 10) -> bool
See pki.py and test_pki.py for usage examples.
proxy.common.pki 모듈을 다음과 같이 사용하세요:
proxy.py v2.4.4rc2.dev12+gdc06ea4 : PKI Utility
positional arguments: action Valid actions: remove_passphrase, gen_private_key, gen_public_key, gen_csr, sign_csr
options: -h, --help show this help message and exit --password PASSWORD Password to use for encryption. Default: proxy.py --private-key-path PRIVATE_KEY_PATH Private key path --public-key-path PUBLIC_KEY_PATH Public key path --subject SUBJECT Subject to use for public key generation. Default: /CN=localhost --csr-path CSR_PATH CSR file path. Use with gen_csr and sign_csr action. --crt-path CRT_PATH Signed certificate path. Use with sign_csr action. --hostname HOSTNAME Alternative subject names to use during CSR signing. --openssl OPENSSL Path to openssl binary. By default, we assume openssl is in your PATH
## 내부 문서

### 문서 읽기

- [proxypy.readthedocs.io](https://proxypy.readthedocs.io/) 방문
- 로컬에서 빌드하려면:

`make lib-doc`

### pydoc

코드는 잘 문서화되어 있습니다.  소스 코드를 받아서 실행하세요:

`pydoc3 proxy`

### pyreverse

심층 분석을 위해 클래스 수준 계층 UML 다이어그램을 생성하세요:

`make lib-pyreverse`

# 대시보드 실행

대시보드는 현재 개발 중이며 `pip` 패키지에 아직 포함되어 있지 않습니다.
대시보드를 실행하려면 소스를 체크아웃해야 합니다.

대시보드는 Typescript와 SCSS로 작성되어 있으므로, 먼저 빌드해 보겠습니다:```console
❯ make dashboard
또한 내장 Chrome DevTools를 사용할 계획이라면 빌드하십시오:```console
❯ make devtools
이제 `proxy.py`를 대시보드 플러그인과 함께 시작하고, 정적 서버의 루트 디렉토리를 오버라이드하여 실행하십시오:```console
❯ proxy --enable-dashboard --static-server-dir dashboard/public
...[redacted]... - Loaded plugin proxy.http.server.HttpWebServerPlugin
...[redacted]... - Loaded plugin proxy.dashboard.dashboard.ProxyDashboard
...[redacted]... - Loaded plugin proxy.dashboard.inspect_traffic.InspectTrafficPlugin
...[redacted]... - Loaded plugin proxy.http.inspector.DevtoolsProtocolPlugin
...[redacted]... - Loaded plugin proxy.http.proxy.HttpProxyPlugin
...[redacted]... - Listening on ::1:8899
...[redacted]... - Core Event enabled
현재, 대시보드를 활성화하면 모든 대시보드 플러그인이 함께 활성화됩니다.
대시보드 방문:```console ❯ open http://localhost:8899/dashboard/
## 트래픽 검사
***이는 작업 진행 중이며 문서대로 작동하지 않을 수 있습니다***
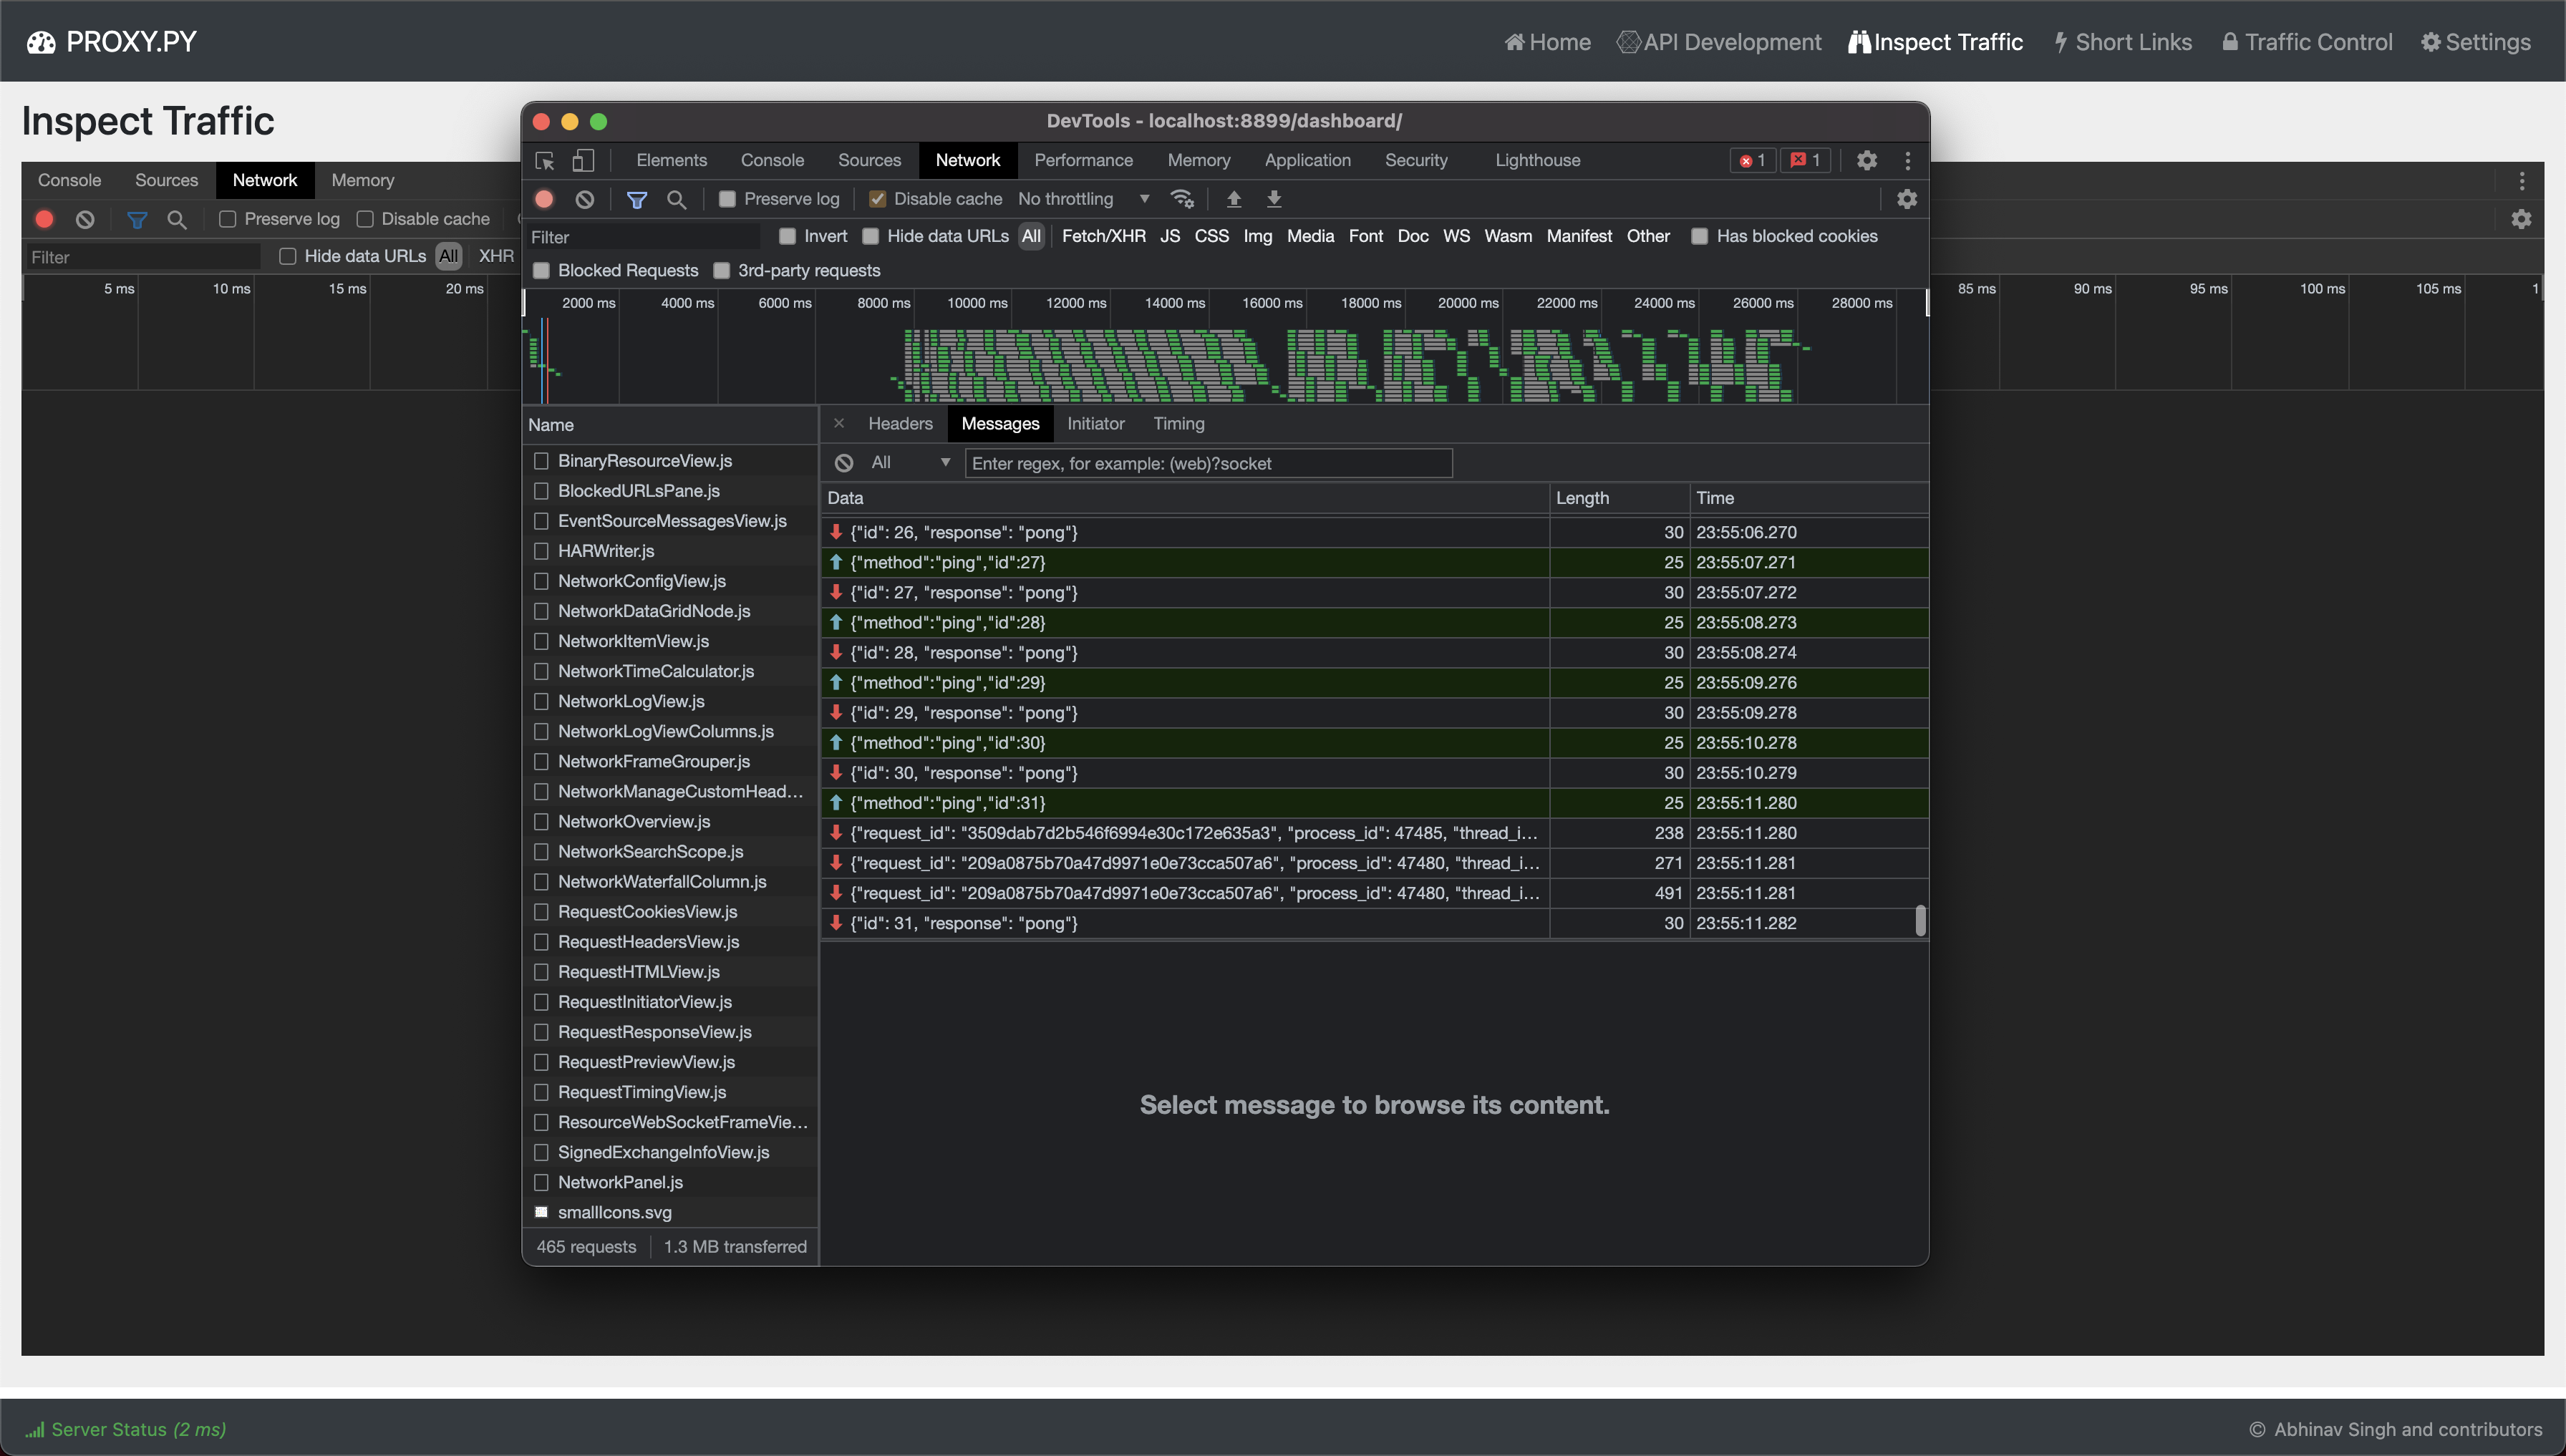
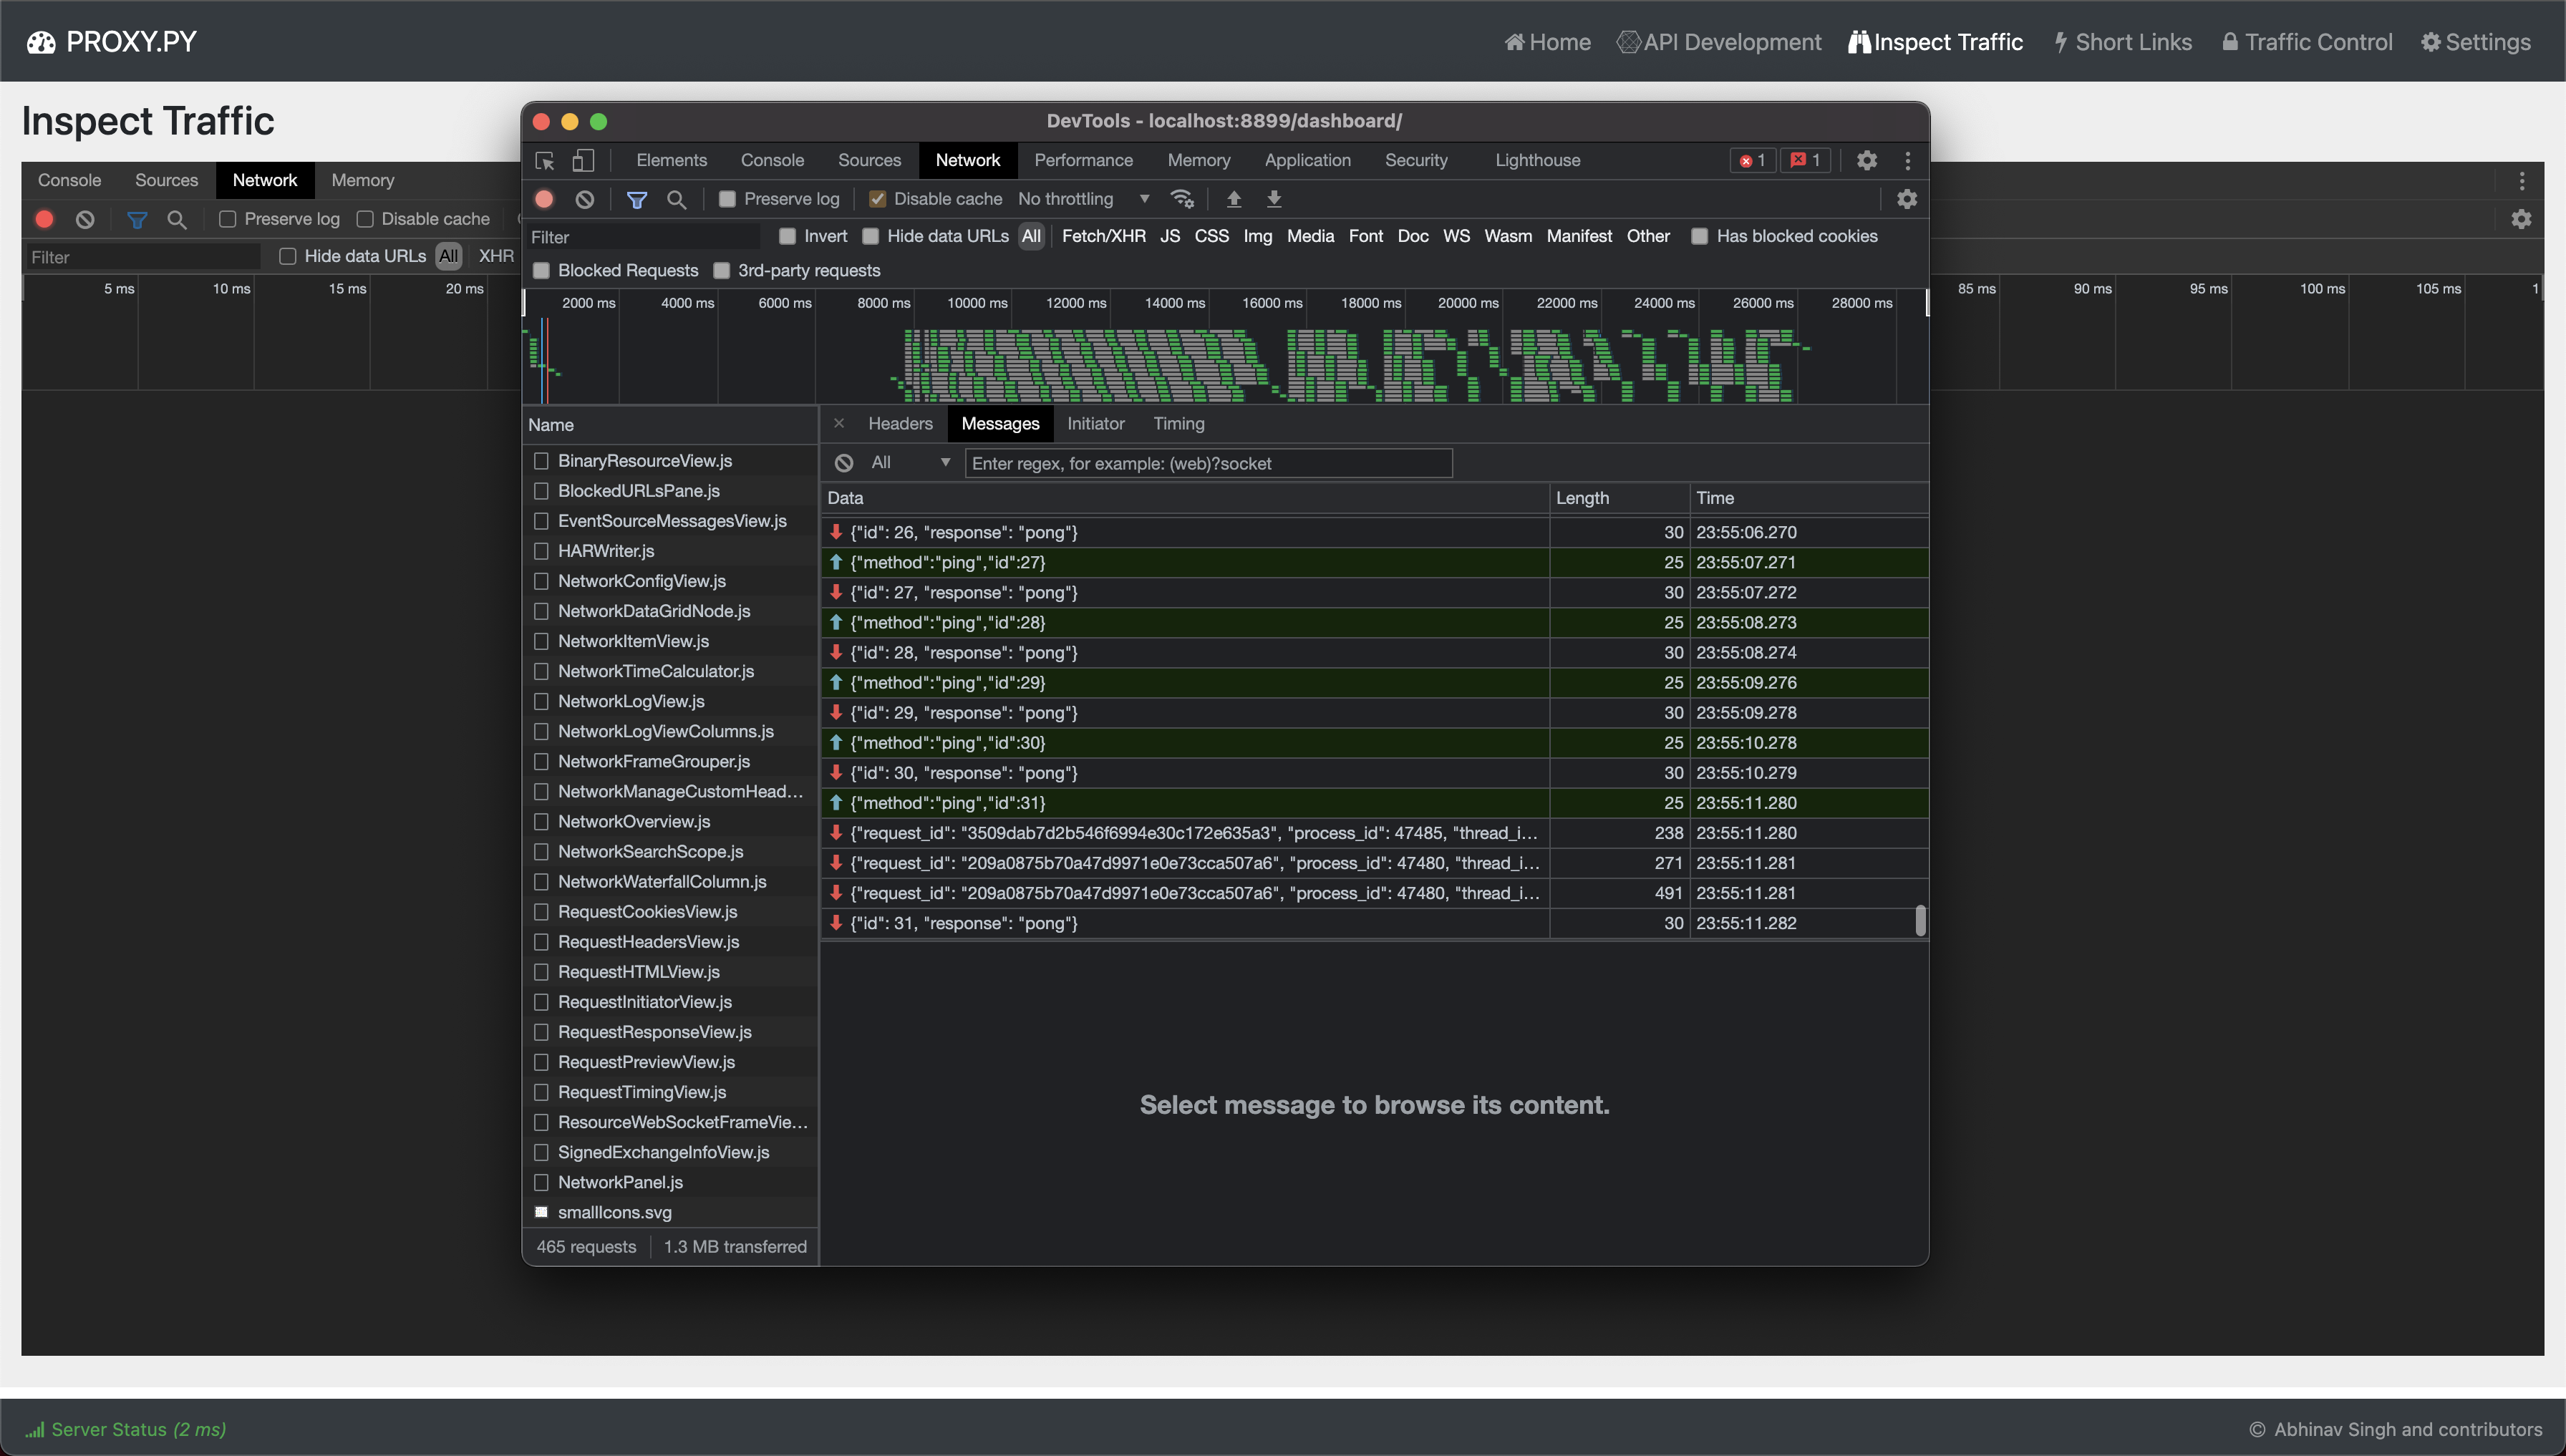
내장된 `Chrome Dev Console`이 로드될 때까지 기다리세요. 현재 `proxy.py`를 통해 흐르는 모든 트래픽에 대한 상세 정보가 `Inspect Traffic` 탭으로 푸시됩니다. 그러나 수신된 페이로드는 아직 내장된 개발자 콘솔과 통합되지 않았습니다.
현재 기능은 대시보드의 `Dev Console`을 열고 대시보드가 `proxy.py` 서버와 설정한 웹소켓 연결을 검사하여 확인할 수 있습니다.
[](https://github.com/abhinavsingh/proxy.py)
# Chrome DevTools 프로토콜
`Chrome DevTools` 프로토콜 웹소켓 엔드포인트에 직접 액세스하려는 시나리오의 경우 `proxy.py`를 다음과 같이 시작하세요:
```shell
proxy --enable-devtools
``````console
❯ proxy --enable-devtools --enable-events
이제 CDT 인스턴스를 ws://localhost:8899/devtools로 지정하세요.
proxy.py를 --enable-metrics 플래그와 함께 시작하여 Prometheus 엔드포인트를 통해 내부 메트릭을 활성화합니다.prometheus.yaml을 구성하여 /metrics 엔드포인트(예: http://localhost:8899/metrics)에서 스크래핑하도록 설정합니다.--metrics-path 플래그를 사용하여 메트릭 경로를 사용자 지정합니다.--enable-metrics는 내부적으로 --enable-events와 웹 서버 플러그인도 활성화합니다.다음은 개인/프로덕션/회사 프로젝트에서 proxy.py를 사용하기 위한 몇 가지 전략입니다.
저장소를 "단지" 플러그인 코드를
proxy/plugin디렉터리에 넣기 위해 포크하는 것을피해야 합니다. 포크는 프로젝트 기여자를 위한 권장 워크플로이지, 프로젝트 사용자를 위한 것이 아닙니다.
--plugin, --plugins 플래그 또는 plugin kwargs를 사용하여 플러그인을 로드하세요.proxy.py를 사용하는 독립 실행형 프로젝트의 예는 skeleton 앱을 참조하세요.proxy.py를 requirements.txt 또는 유사한 종속성 관리 설정을 통해 사용하는 것을 강력히 권장합니다. 이렇게 하면 proxy.py 생태계에서 발생하는 정기적인 성능 업데이트, 버그 수정, 보안 패치 및 기타 개선 사항을 활용할 수 있습니다. 예:
--pre 옵션을 사용하여 마지막 사전 릴리스에 의존합니다.
❯ pip install proxy.py --pre
사전 릴리스는 develop 브랜치 코드에 의존하는 것과 유사하지만, 사전 릴리스가 HEAD를 가리키지 않을 수 있다는 점이 다릅니다. 이는 PR 병합 후 사전 릴리스가 PyPi에 제공되지 않기 때문에 발생할 수 있습니다.
TestPyPi를 --pre 옵션과 함께 사용하여 develop 브랜치 코드에 의존합니다.
❯ pip install -i https://test.pypi.org/simple/ proxy.py --pre
PR 병합 후 TestPyPi에 사전 릴리스가 제공됩니다.
마지막 안정 릴리스 코드를 사용합니다.
❯ pip install proxy.py
컨테이너를 배포하는 경우, 기본 proxy.py 컨테이너 이미지에서 이미지를 빌드하면 됩니다.
GHCR을 사용하여 develop 브랜치 코드에서 빌드합니다.
FROM ghcr.io/abhinavsingh/proxy.py:latest as base
참고: 저는 여러 프로덕션 수준 프로젝트에서 GHCR 최신 버전을 사용합니다.
DockerHub를 사용하여 마지막 안정 릴리스 코드에서 빌드합니다.
FROM abhinavsingh/proxy.py:latest as base
참고: 제 생각에는 컨테이너 기반 전략이 최고의 접근 방식이며 제가 직접 사용하는 유일한 전략입니다.
이봐요, 하지만 당신은 develop 브랜치에서 계속 호환성을 깨는 변경을 하고 있잖아요.
이해합니다. 따라서 프로덕션 등급 애플리케이션의 경우, 애플리케이션 CI/CD를 proxy.py와 반드시 통합해야 합니다. PR이 proxy.py 업스트림 저장소에 병합될 때마다 애플리케이션이 빌드되고 테스트를 통과하는지 확인해야 합니다.
애플리케이션 저장소가 공개된 경우, 특정 시나리오에서 PR 작성자는 모든 종속성을 위해 패치 PR을 보내 하위 호환성과 CI/CD 녹색 상태를 유지할 수 있습니다.
CI/CD 통합은 앱이 최신 proxy.py 코드로 계속 빌드되도록 보장합니다. 코드를 호스팅하는 위치에 따라 아래 나열된 전략을 사용하세요:
GitHub
TBD
Google Cloud Build
TBD
AWS
TBD
Azure
TBD
Others
TBD
어떤 단계에서는
master브랜치 구분을 중단하고 단순히develop브랜치만 유지할 것입니다. 종속 프로젝트가 CI/CD 통합을 통해 안정성을 유지할 수 있기 때문입니다. 현재 프로덕션 등급 프로젝트가develop브랜치에 맹목적으로 의존하기는 어렵습니다.
master 브랜치에는 최신 안정 코드가 포함되어 있으며 PyPi 저장소와 docker.io 및 ghcr.io 레지스트리의 Docker 컨테이너를 통해 사용할 수 있습니다.
안정 릴리스에 대해 보고된 문제는 최우선으로 처리됩니다. 하지만 현재는 이전 릴리스로 수정 사항을 백포트하지 않습니다. 예를 들어, v2.3.1에서 문제를 보고했지만 현재 master 브랜치에 v2.4.0rc1이 포함되어 있다면, 수정 사항은 v2.4.0rc2에 적용됩니다.
develop 브랜치에는 최첨단 변경 사항이 포함되어 있습니다.
개발 브랜치는 (대부분의 경우) 안정적으로 유지됩니다. 하지만 100% 신뢰성을 원하고 프로덕션 환경에서 사용자를 서비스하려면 항상 안정 버전을 사용하세요.
한 달에 한 번 develop → master를 병합하는 vX.Y.ZrcN 풀 리퀘스트가 생성됩니다. 아래에서 코드가 풀 리퀘스트에서 다음 안정 릴리스로 어떻게 흐르는지 확인하세요.
개발 릴리스는 각 풀 리퀘스트 병합 후 develop → test.pypi.org로 배포됩니다.
알파 릴리스는 vX.Y.Z.rcN 풀 리퀘스트를 develop → master 브랜치로 병합하기 전에 develop → pypi.org로 배포됩니다. rc 풀 리퀘스트를 병합하기 전에 여러 알파 릴리스가 있을 수 있습니다.
베타 릴리스는 master → pypi.org로 배포됩니다. 베타 릴리스는 rc 릴리스를 준비하기 위해 이루어지며, 불필요한 경우 건너뛸 수 있습니다.
릴리스 후보는 master → pypi.org로 배포됩니다. 릴리스 후보는 항상 최종 안정 릴리스 전에 제공됩니다.
안정 릴리스는 master → 로 배포됩니다.
v1.xproxy.py는 클라이언트 요청을 처리하기 위해 새 스레드를 생성했습니다.
v2.0+proxy.py는 asyncio를 사용한 클라이언트 요청의 스레드리스 실행 지원을 추가했습니다.
v2.4.0+스레드리스 실행은 mac 및 linux 환경에서 Python 3.8+에 대해 기본적으로 켜졌습니다.
proxy.py 스레드리스 실행은 사용자들에 의해 이러한 환경에서 안전한 것으로 보고되었습니다. 문제가 발생하면 --threaded 플래그를 사용하여 스레드 모드로 대체하세요.
windows 및 Python < 3.8의 경우, --threadless 플래그로 proxy.py를 시작하여 스레드리스 모드를 시도할 수 있습니다.
스레드리스가 작동한다면, proxy/common/constants.py 파일에서 _env_threadless_compliant 메서드를 편집하여 PR을 보내는 것을 고려하세요.
원래 스레드리스 구현은 remote 실행 모드를 사용했습니다. 이는 High level architecture 아래에 ASCII 아트로도 묘사되어 있습니다.
remote 실행 모드에서, acceptor는 들어오는 클라이언트 연결 처리를 원격 작업자 프로세스에 위임합니다. 기본적으로 acceptor는 라운드 로빈 방식으로 연결을 위임합니다. 요청을 처리하는 작업자는 acceptor와 동일한 CPU 코어에서 실행될 수도 있고 아닐 수도 있습니다. 이 아키텍처는 높은 처리량에 잘 확장되지만, CPU 코어당 두 개의 프로세스를 생성합니다.
예를 들어, 머신에 N개의 CPU가 있는 경우 기본적으로 N개의 acceptor와 N개의 작업자 프로세스가 시작됩니다. --num-acceptors 및 --num-workers 플래그를 사용하여 프로세스 수를 조정할 수 있습니다. 사용 사례에 따라 acceptor보다 더 많은 작업자를 원하거나 그 반대일 수 있습니다.
v2.4.x에서는 기본적으로 생성되는 프로세스 수를 줄이기 위해 local 실행 모드가 추가되었습니다. 이 모델은 일상적인 단일 사용자 사용 사례와 개발자 테스트 시나리오에 적합합니다. local 실행 모드에서 acceptor는 클라이언트 연결을 원격 프로세스 대신 동반 스레드에 위임합니다. local 실행 모드는 acceptor와 작업자가 다른 CPU 코어에서 실행될 수 있는 remote 모드와 달리 CPU 선호도를 보장합니다.
--local-executor 1은 v2.4.x 시리즈에서 기본값이 되었습니다. local 실행 모드에서는 원격 작업자가 시작되지 않으므로 --num-workers 플래그가 적용되지 않습니다.
remote 실행 모드를 사용하려면 --local-executor 0 플래그를 사용하세요. 그런 다음 --num-workers를 사용하여 작업자 프로세스 수를 조정하세요.
proxy.py는 엄격한 타입 지정을 사용하며 Python typing 어노테이션을 사용합니다. 예:```python
my_strings : List[str] = [] #############^^^^^^^^^#####
따라서 타입 주석(typing annotations)을 이해하는 Python 버전이 필요합니다. `Python 3.6+`을 사용하고 있는지 확인하세요.

`proxy.py`를 실행하기 전에 버전을 확인하세요:

`❯ python --version`

모든 `typing` 주석은 `comment-only` 주석으로 대체될 수 있습니다. 예:```python
>>> my_strings = [] # List[str]
>>> ################^^^^^^^^^^^
이는 proxy.py가 Python pre-3.6, 심지어 2.7에서도 실행될 수 있게 합니다.
하지만, 앞으로의 모든 Python 버전에서 typing 어노테이션을 지원할 예정이므로, 이는 고려되지 않았습니다.
플러그인 모듈을 PYTHONPATH에 추가하여 검색 가능하도록 하십시오. 예시:
`PYTHONPATH=/path/to/my/app proxy --plugins my_app.proxyPlugin````console ...[redacted]... - Loaded plugin proxy.HttpProxyPlugin ...[redacted]... - Loaded plugin my_app.proxyPlugin
또는, 다음과 같이 완전 자격 경로를 매개변수로 전달하세요.

`proxy --plugins /path/to/my/app/my_app.proxyPlugin`

다음은 간단한 작업 예제입니다:

- `/tmp/plug` 폴더의 내용```console
╰─ ls -1 /tmp/plug                                                                                                                       ─╯
my_plugin.py
MyPlugin 클래스```console
╰─ cat /tmp/plug/my_plugin.py ─╯
from proxy.http.proxy import HttpProxyBasePluginclass MyPlugin(HttpProxyBasePlugin): pass
이것은 외부 플러그인 사용을 시연하기 위한 빈 플러그인입니다. 실제 트래픽에서 플러그인이 작동하도록 필요한 메서드를 구현해야 합니다.

- `MyPlugin`으로 `proxy.py`를 시작하십시오.```console
╰─ PYTHONPATH=/tmp/plug proxy --plugin my_plugin.MyPlugin                                                                      ─╯
...[redacted]... - Loaded plugin proxy.http.proxy.HttpProxyPlugin
...[redacted]... - Loaded plugin my_plugin.MyPlugin
...[redacted]... - Listening on ::1:8899
proxy.py가 올바른 네트워크 인터페이스에서 수신 대기 중인지 확인하세요.
다음 플래그를 시도해 보세요:
--hostname ::--hostname 0.0.0.0대부분 시스템 키체인과의 브라우저 통합 문제입니다.
먼저 curl을 사용하여 기본 인증이 작동하는지 확인하세요
curl -v -x username:password@localhost:8899 https://httpbin.org/get
자세한 내용은 이 스레드 를 참조하세요.
vpnkit과의 호환성 문제입니다.
배경 설명은 moby/vpnkit이 Docker 리소스를 소진함 및 연결 거부됨: 프록시가 연결할 수 없음 을 참조하세요.
시작용 fluentd.conf 템플릿이 있습니다.
이 설정 파일을 proxy.py.conf로 복사하여
/etc/google-fluentd/config.d/ 아래에 배치하세요.
path 필드를 --log-file 플래그와 함께 사용되는 로그 파일 경로로 업데이트하세요.
기본적으로 /tmp/proxy.log 경로가 tail됩니다.
google-fluentd를 다시 로드하세요:
sudo service google-fluentd restart
이제 proxy.py 로그를
GCE 로그 뷰어를 사용하여 탐색할 수 있습니다.
ValueError: filedescriptor out of range in selectproxy.py는 소켓 누수 없이 초당 수천 개의 연결을 처리하도록 만들어졌습니다.
--open-file-limit 플래그를 사용하여 ulimit -n을 사용자 지정하세요.--backlog 플래그를 조정하세요.그래도 해결되지 않으면, 전송된 requests per second와 다음 디버그 스크립트의 출력을 포함하여
이슈를 열어주세요.```console
❯ ./helper/monitor_open_files.sh
## 액세스 로그에서의 None:None

때때로 액세스 로그에서 `None:None`을 볼 수 있습니다. 이는 업스트림 서버 연결이 설정되지 않았음을 의미합니다. 즉, `upstream_host=None`, `upstream_port=None`입니다.

업스트림 연결이 없는 데는 여러 이유가 있을 수 있으며, 몇 가지 명백한 이유는 다음과 같습니다:

1. 클라이언트가 연결을 설정했지만 요청을 완료하지 않았습니다.
2. 플러그인이 조기에 응답을 반환하여 업스트림 서버에 대한 연결을 피했습니다.

## TLS 인터셉션을 위해 클라이언트 래핑 시 OSError

`TLS 인터셉션`이 켜져 있을 때, 때때로 다음과 같은 예외가 발생할 수 있습니다:```console
2021-11-06 23:33:34,540 - pid:91032 [E] server.intercept:678 - OSError when wrapping client
Traceback (most recent call last):
  ...[redacted]...
  ...[redacted]...
  ...[redacted]...
ssl.SSLError: [SSL: TLSV1_ALERT_UNKNOWN_CA] tlsv1 alert unknown ca (_ssl.c:997)
...[redacted]... - CONNECT oauth2.googleapis.com:443 - 0 bytes - 272.08 ms
일부 클라이언트는 서버의 인증서를 확인할 수 없는 경우 TLSV1_ALERT_UNKNOWN_CA를 발생시킬 수 있습니다. 이는 알 수 없는 발급자 CA가 서명한 경우로, TLS 가로채기를 수행할 때 해당됩니다. 이는 인증서 고정 등 다양한 이유로 발생할 수 있습니다. 또 다른 예외로 CERTIFICATE_VERIFY_FAILED를 볼 수 있습니다:```console
2021-11-06 23:36:02,002 - pid:91033 [E] handler.handle_readables:293 - Exception while receiving from client connection <socket.socket fd=28, family=AddressFamily.AF_INET, type=SocketKind.SOCK_STREAM, proto=0, laddr=('127.0.0.1', 8899), raddr=('127.0.0.1', 51961)> with reason SSLCertVerificationError(1, '[SSL: CERTIFICATE_VERIFY_FAILED] certificate verify failed: self signed certificate in certificate chain (_ssl.c:997)')
Traceback (most recent call last):
...[redacted]...
...[redacted]...
...[redacted]...
ssl.SSLCertVerificationError: [SSL: CERTIFICATE_VERIFY_FAILED] certificate verify failed: self signed certificate in certificate chain (_ssl.c:997)
...[redacted]... - CONNECT init.push.apple.com:443 - 0 bytes - 892.99 ms
향후에는 이러한 클라이언트에 대해 원본 HTTPS 콘텐츠를 제공하면서도 백그라운드에서 TLS 가로채기를 수행하는 방식을 지원할 수 있습니다. 이렇게 하면 클라이언트는 만족하면서 TLS 가로채기 능력에는 영향을 주지 않습니다. 안타깝게도 이 기능은 현재 사용할 수 없습니다.

Another example with `SSLEOFError` exception:```console
2021-11-06 23:46:40,446 - pid:91034 [E] server.intercept:678 - OSError when wrapping client
Traceback (most recent call last):
  ...[redacted]...
  ...[redacted]...
  ...[redacted]...
ssl.SSLEOFError: EOF occurred in violation of protocol (_ssl.c:997)
...[redacted]... - CONNECT stock.adobe.io:443 - 0 bytes - 685.32 ms
                    +-------------+
                    |             |
                    |  Proxy([])  |
                    |             |
                    +------+------+
                           |
                           |
               +-----------v--------------+
               |                          |
               |    AcceptorPool(...)     |
               |                          |
               +------------+-------------+
                            |
+-----------------+ | +-----------------+ | | | | | | Acceptor(..) <-------------+-----------> Acceptor(..) | | | | | +---+-------------+ +---------+-------+ | | | | | +------++------++------++------++------+ | | | || || || || | | +----> || || || || <-----+ | || || || || | +------++------++------++------++------+ Threadless Worker Processes
`proxy.py`는 성능을 염두에 두고 제작되었습니다. 기본적으로 `proxy.py`는 새로운 클라이언트 연결을 수락하기 위해 사용 가능한 모든 CPU 코어를 활용하려고 시도합니다. 이는 구성된 서버 포트에서 수신 대기하는 `AcceptorPool`을 시작하여 수행됩니다. 그런 다음 `AcceptorPool`은 들어오는 클라이언트 연결을 수락하기 위해 `Acceptor` 프로세스(`--num-acceptors`)를 시작합니다. 또한 `--threadless`가 활성화된 경우 들어오는 클라이언트 연결을 처리하기 위해 `Threadless` 프로세스(`--num-workers`)를 시작하는 `ThreadlessPool`이 설정됩니다.
각 `Acceptor` 프로세스는 `Work` 클래스를 통해 수락된 클라이언트 연결을 스레드리스 프로세스에 위임합니다. 현재 `HttpProtocolHandler`가 기본 작업 클래스입니다.
`HttpProtocolHandler`는 들어오는 클라이언트가 HTTP 사양을 따를 것이라고 단순히 가정합니다. 특정 HTTP 프록시 및 HTTP 서버 구현은 `HttpProtocolHandler`의 플러그인으로 작성됩니다.
사용 가능한 수명 주기 후크에 대해서는 `HttpProtocolHandlerPlugin`의 문서를 참조하세요. http(s) 클라이언트에 대한 새로운 기능을 추가하려면 `HttpProtocolHandlerPlugin`을 사용하십시오. 예를 들어 `HttpWebServerPlugin`을 참조하십시오.
## 모든 것이 플러그인입니다
`proxy.py` 내에서는 모든 것이 플러그인입니다.
- `--plugins` 플래그를 사용하여 `프록시 서버` 플러그인을 활성화했습니다.
프록시 서버 `HttpProxyPlugin`은 `HttpProtocolHandler`의 플러그인입니다. 또한 프록시 서버는 `HttpProxyBasePlugin` 사양을 통해 플러그인을 허용합니다.
- 모든 프록시 서버 [플러그인 예제](#plugin-examples)는 `HttpProxyBasePlugin`을 구현했습니다. 사용 가능한 수명 주기 후크에 대해서는 `HttpProxyBasePlugin`의 문서를 참조하세요. 클라이언트와 업스트림 서버 간의 http(s) 프록시 프로토콜 동작을 수정하려면 `HttpProxyBasePlugin`을 사용하십시오. 예를 들어 [FilterByUpstreamHostPlugin](#filterbyupstreamhostplugin)을 참조하십시오.
- 또한 `--enable-web-server`를 사용하여 내장 `웹 서버`를 활성화했습니다.
웹 서버 `HttpWebServerPlugin`은 `HttpProtocolHandler`의 플러그인이며 `HttpProtocolHandlerPlugin` 사양을 구현합니다.
- 또한 `--disable-http-proxy` 플래그가 있습니다. 내장 프록시 서버를 비활성화합니다.
`--enable-web-server` 플래그와 함께 이 플래그를 사용하여 `proxy.py`를 프로그래밍 가능한 http(s) 서버로 실행하십시오.
## 상태 비저장 플러그인을 위한 상태 관리
플러그인 클래스 인스턴스는 요청별로 생성됩니다. 가장 중요한 것은 플러그인 인스턴스가 요청을 수신한 CPU 코어 컨텍스트 내에서 생성된다는 점입니다.
위의 이유로 플러그인의 전역 변수는 예상대로 작동하지 않을 수 있습니다. 설계상 플러그인 코드는 **상태 비저장**이어야 합니다.
전역 상태를 관리하려면 몇 가지 옵션이 있습니다:
1) Python의 [멀티프로세싱 안전 데이터 구조](https://python.readthedocs.io/en/latest/library/multiprocessing.html#sharing-state-between-processes)를 사용합니다.
2) `proxy.py`에 내장된 [이벤트 메커니즘](https://github.com/abhinavsingh/proxy.py/blob/develop/tutorial/eventing.ipynb)을 사용합니다.
## 플러그인 간 처리 컨텍스트 전달
때때로 플러그인은 처리 체인에서 이후의 다른 플러그인에 추가 컨텍스트를 전달해야 할 수 있습니다. 예를 들어, 이 추가 컨텍스트는 액세스 로그의 일부로 덤프될 수도 있습니다.
처리 컨텍스트를 전달하려면 플러그인의 `on_access_log` 메서드를 활용하십시오. [Program Name](https://github.com/abhinavsingh/proxy.py/blob/develop/proxy/plugin/program_name.py) 플러그인이 컨텍스트에서 기본 `client_ip` 키를 수정하여 감지된 프로그램 이름으로 업데이트하는 방법을 참조하십시오.
결과적으로 [Program Name Plugin](#programnameplugin)을 활성화하면 액세스 로그에서 IP 주소 대신 로컬 클라이언트 프로그램 이름이 표시됩니다.
## 개발 가이드
### 로컬 환경 설정
기여자는 새로운 기능/수정 사항을 확인하고 개발하기 위해 소스에서 `proxy.py`를 시작해야 합니다.
자세한 내용은 [명령줄에서 리포지토리 소스를 사용하여 proxy.py 실행](#from-command-line-using-repo-source)을 참조하세요.
[](https://github.com/abhinavsingh/proxy.py/issues/642) `macOS`에서는
`homebrew`를 통해 설치된 `Python`이 문제를 일으키는 경향이 있으므로 `pyenv`를 사용하여 `Python`을 설치해야 합니다. 자세한 내용은 연결된 스레드를 참조하십시오.
### Git 후크 설정
사전 커밋 후크는 테스트 통과를 보장합니다.
1. `cd /path/to/proxy.py`
2. `ln -s $(PWD)/git-pre-commit .git/hooks/pre-commit`
사전 푸시 후크는 린트 및 테스트 통과를 보장합니다.
1. `cd /path/to/proxy.py`
2. `ln -s $(PWD)/git-pre-push .git/hooks/pre-push`
### 풀 리퀘스트 보내기
모든 풀 리퀘스트는 GitHub Actions를 사용하여 테스트됩니다.
테스트 목록은 [GitHub 워크플로우](https://github.com/abhinavsingh/proxy.py/tree/develop/.github/workflows)를 참조하십시오.
# Proxy.Py를 사용하는 프로젝트
`proxy.py`를 사용하는 인기 있는 프로젝트
- [pip](https://github.com/pypa/pip)
- [ray-project](https://github.com/ray-project/ray)
- [aio-libs](https://github.com/aio-libs/aiohttp)
- [Selenium Base](https://github.com/seleniumbase/SeleniumBase)
- [wifipumpkin3](https://github.com/P0cL4bs/wifipumpkin3)
- [MerossIot](https://github.com/albertogeniola/MerossIot)
- [pyshorteners](https://github.com/ellisonleao/pyshorteners)
- [Slack API](https://github.com/slackapi/python-slack-events-api)
- [ibeam](https://github.com/Voyz/ibeam)
- [PyPaperBot](https://github.com/ferru97/PyPaperBot)
전체 목록은 [사용처](https://github.com/abhinavsingh/proxy.py/network/dependents?package_id=UGFja2FnZS01MjQ0MDY5Ng%3D%3D)를 참조하십시오.
# 벤치마크
다른 OSS 웹 서버와의 벤치마크 비교를 실행하는 방법에 대해서는 [Benchmark](https://github.com/abhinavsingh/proxy.py/tree/develop/benchmark) 디렉토리를 참조하십시오.
`proxy.py`의 독립형 벤치마크를 실행하려면 리포지토리 루트에서 다음 명령을 사용하십시오:```console
❯ ./benchmark/compare.sh
❯ proxy -h usage: -m [-h] [--tunnel-hostname TUNNEL_HOSTNAME] [--tunnel-port TUNNEL_PORT] [--tunnel-username TUNNEL_USERNAME] [--tunnel-ssh-key TUNNEL_SSH_KEY] [--tunnel-ssh-key-passphrase TUNNEL_SSH_KEY_PASSPHRASE] [--tunnel-remote-port TUNNEL_REMOTE_PORT] [--threadless] [--threaded] [--num-workers NUM_WORKERS] [--enable-events] [--inactive-conn-cleanup-timeout INACTIVE_CONN_CLEANUP_TIMEOUT] [--enable-proxy-protocol] [--enable-conn-pool] [--key-file KEY_FILE] [--cert-file CERT_FILE] [--client-recvbuf-size CLIENT_RECVBUF_SIZE] [--server-recvbuf-size SERVER_RECVBUF_SIZE] [--max-sendbuf-size MAX_SENDBUF_SIZE] [--timeout TIMEOUT] [--local-executor LOCAL_EXECUTOR] [--backlog BACKLOG] [--hostname HOSTNAME] [--hostnames HOSTNAMES [HOSTNAMES ...]] [--port PORT] [--ports PORTS [PORTS ...]] [--port-file PORT_FILE] [--unix-socket-path UNIX_SOCKET_PATH] [--num-acceptors NUM_ACCEPTORS] [--version] [--log-level LOG_LEVEL] [--log-file LOG_FILE] [--log-format LOG_FORMAT] [--open-file-limit OPEN_FILE_LIMIT] [--plugins PLUGINS [PLUGINS ...]] [--enable-dashboard] [--basic-auth BASIC_AUTH] [--enable-ssh-tunnel] [--work-klass WORK_KLASS] [--pid-file PID_FILE] [--openssl OPENSSL] [--data-dir DATA_DIR] [--ssh-listener-klass SSH_LISTENER_KLASS] [--disable-http-proxy] [--disable-headers DISABLE_HEADERS] [--ca-key-file CA_KEY_FILE] [--insecure-tls-interception] [--ca-cert-dir CA_CERT_DIR] [--ca-cert-file CA_CERT_FILE] [--ca-file CA_FILE] [--ca-signing-key-file CA_SIGNING_KEY_FILE] [--auth-plugin AUTH_PLUGIN] [--cache-requests] [--cache-by-content-type] [--cache-dir CACHE_DIR] [--proxy-pool PROXY_POOL] [--enable-web-server] [--enable-static-server] [--static-server-dir STATIC_SERVER_DIR] [--min-compression-length MIN_COMPRESSION_LENGTH] [--enable-reverse-proxy] [--rewrite-host-header] [--enable-metrics] [--metrics-path METRICS_PATH] [--pac-file PAC_FILE] [--pac-file-url-path PAC_FILE_URL_PATH] [--cloudflare-dns-mode CLOUDFLARE_DNS_MODE] [--filtered-upstream-hosts FILTERED_UPSTREAM_HOSTS] [--filtered-client-ips-mode FILTERED_CLIENT_IPS_MODE] [--filtered-client-ips FILTERED_CLIENT_IPS] [--filtered-url-regex-config FILTERED_URL_REGEX_CONFIG]
proxy.py v2.4.8.dev8+gc703edac.d20241013
options: -h, --help show this help message and exit --tunnel-hostname TUNNEL_HOSTNAME Default: None. Remote hostname or IP address to which SSH tunnel will be established. --tunnel-port TUNNEL_PORT Default: 22. SSH port of the remote host. --tunnel-username TUNNEL_USERNAME Default: None. Username to use for establishing SSH tunnel. --tunnel-ssh-key TUNNEL_SSH_KEY Default: None. Private key path in pem format --tunnel-ssh-key-passphrase TUNNEL_SSH_KEY_PASSPHRASE Default: None. Private key passphrase --tunnel-remote-port TUNNEL_REMOTE_PORT Default: 8899. Remote port which will be forwarded locally for proxy. --threadless Default: True. Enabled by default on Python 3.8+ (mac, linux). When disabled a new thread is spawned to handle each client connection. --threaded Default: False. Disabled by default on Python < 3.8 and windows. When enabled a new thread is spawned to handle each client connection. --num-workers NUM_WORKERS Defaults to number of CPU cores. --enable-events Default: False. Enables core to dispatch lifecycle events. Plugins can be used to subscribe for core events. --inactive-conn-cleanup-timeout INACTIVE_CONN_CLEANUP_TIMEOUT Time after which inactive works must be cleaned up. Increase this value if your backend services are slow to response or when proxy.py is handling a high volume. When running proxy.py on Google Cloud (GCP) you may see 'backend_connection_closed_before_data_sen t_to_client', with curl clients you may see 'Empty reply from server' error when '--inactive-conn- cleanup-timeout' value is low for your use-case. Default 1 seconds --enable-proxy-protocol Default: False. If used, will enable proxy protocol. Only version 1 is currently supported. --enable-conn-pool Default: False. (WIP) Enable upstream connection pooling. --key-file KEY_FILE Default: None. Server key file to enable end-to-end TLS encryption with clients. If used, must also pass --cert-file. --cert-file CERT_FILE Default: None. Server certificate to enable end-to-end TLS encryption with clients. If used, must also pass --key-file. --client-recvbuf-size CLIENT_RECVBUF_SIZE Default: 128 KB. Maximum amount of data received from the client in a single recv() operation. --server-recvbuf-size SERVER_RECVBUF_SIZE Default: 128 KB. Maximum amount of data received from the server in a single recv() operation. --max-sendbuf-size MAX_SENDBUF_SIZE Default: 64 KB. Maximum amount of data to flush in a single send() operation. --timeout TIMEOUT Default: 10.0. Number of seconds after which an inactive connection must be dropped. Inactivity is defined by no data sent or received by the client. --local-executor LOCAL_EXECUTOR Default: 1. Enabled by default. Use 0 to disable. When enabled acceptors will make use of local (same process) executor instead of distributing load across remote (other process) executors. Enable this option to achieve CPU affinity between acceptors and executors, instead of using underlying OS kernel scheduling algorithm. --backlog BACKLOG Default: 100. Maximum number of pending connections to proxy server. --hostname HOSTNAME Default: 127.0.0.1. Server IP address. --hostnames HOSTNAMES [HOSTNAMES ...] Default: None. Additional IP addresses to listen on. --port PORT Default: 8899. Server port. To listen on more ports, pass them using --ports flag. --ports PORTS [PORTS ...] Default: None. Additional ports to listen on. --port-file PORT_FILE Default: None. Save server port numbers. Useful when using --port=0 ephemeral mode. --unix-socket-path UNIX_SOCKET_PATH Default: None. Unix socket path to use. When provided --host and --port flags are ignored --num-acceptors NUM_ACCEPTORS Defaults to number of CPU cores. --version, -v Prints proxy.py version. --log-level LOG_LEVEL Valid options: DEBUG, INFO (default), WARNING, ERROR, CRITICAL. Both upper and lowercase values are allowed. You may also simply use the leading character e.g. --log-level d --log-file LOG_FILE Default: sys.stdout. Log file destination. --log-format LOG_FORMAT Log format for Python logger. --open-file-limit OPEN_FILE_LIMIT Default: 1024. Maximum number of files (TCP connections) that proxy.py can open concurrently. --plugins PLUGINS [PLUGINS ...] Comma separated plugins. You may use --plugins flag multiple times. --enable-dashboard Default: False. Enables proxy.py dashboard. --basic-auth BASIC_AUTH Default: No authentication. Specify colon separated user:password to enable basic authentication. --enable-ssh-tunnel Default: False. Enable SSH tunnel. --work-klass WORK_KLASS Default: proxy.http.HttpProtocolHandler. Work klass to use for work execution. --pid-file PID_FILE Default: None. Save "parent" process ID to a file. --openssl OPENSSL Default: openssl. Path to openssl binary. By default, assumption is that openssl is in your PATH. --data-dir DATA_DIR Default: ~/.proxypy. Path to proxypy data directory. --ssh-listener-klass SSH_LISTENER_KLASS Default: proxy.core.ssh.listener.SshTunnelListener. An implementation of BaseSshTunnelListener --disable-http-proxy Default: False. Whether to disable proxy.HttpProxyPlugin. --disable-headers DISABLE_HEADERS Default: None. Comma separated list of headers to remove before dispatching client request to upstream server. --ca-key-file CA_KEY_FILE Default: None. CA key to use for signing dynamically generated HTTPS certificates. If used, must also pass --ca-cert-file and --ca-signing-key-file --insecure-tls-interception Default: False. Disables certificate verification --ca-cert-dir CA_CERT_DIR Default: ~/.proxy/certificates. Directory to store dynamically generated certificates. Also see --ca-key- file, --ca-cert-file and --ca-signing-key-file --ca-cert-file CA_CERT_FILE Default: None. Signing certificate to use for signing dynamically generated HTTPS certificates. If used, must also pass --ca-key-file and --ca-signing-key-file --ca-file CA_FILE Default: /Users/abhinavsingh/Dev/proxy.py/.venv3122/li b/python3.12/site-packages/certifi/cacert.pem. Provide path to custom CA bundle for peer certificate verification --ca-signing-key-file CA_SIGNING_KEY_FILE Default: None. CA signing key to use for dynamic generation of HTTPS certificates. If used, must also pass --ca-key-file and --ca-cert-file --auth-plugin AUTH_PLUGIN Default: proxy.http.proxy.auth.AuthPlugin. Auth plugin to use instead of default basic auth plugin. --cache-requests Default: False. Whether to also write request packets in the cache file. --cache-by-content-type Default: False. Whether to extract content by type from responses. Extracted content type is written to the cache directory e.g. video.mp4. --cache-dir CACHE_DIR Default: /Users/abhinavsingh/.proxy/cache. Flag only applicable when cache plugin is used with on-disk storage. --proxy-pool PROXY_POOL List of upstream proxies to use in the pool --enable-web-server Default: False. Whether to enable proxy.HttpWebServerPlugin. --enable-static-server Default: False. Enable inbuilt static file server. Optionally, also use --static-server-dir to serve static content from custom directory. By default, static file server serves out of installed proxy.py python module folder. --static-server-dir STATIC_SERVER_DIR Default: "public" folder in directory where proxy.py is placed. This option is only applicable when static server is also enabled. See --enable-static-server. --min-compression-length MIN_COMPRESSION_LENGTH Default: 20 bytes. Sets the minimum length of a response that will be compressed (gzipped). --enable-reverse-proxy Default: False. Whether to enable reverse proxy core. --rewrite-host-header Default: False. If used, reverse proxy server will rewrite Host header field before sending to upstream. --enable-metrics Default: False. Enables metrics. --metrics-path METRICS_PATH Default: /metrics. Web server path to serve proxy.py metrics. --pac-file PAC_FILE A file (Proxy Auto Configuration) or string to serve when the server receives a direct file request. Using this option enables proxy.HttpWebServerPlugin. --pac-file-url-path PAC_FILE_URL_PATH Default: /. Web server path to serve the PAC file. --cloudflare-dns-mode CLOUDFLARE_DNS_MODE Default: security. Either "security" (for malware protection) or "family" (for malware and adult content protection) --filtered-upstream-hosts FILTERED_UPSTREAM_HOSTS Default: Blocks Facebook. Comma separated list of IPv4 and IPv6 addresses. --filtered-client-ips-mode FILTERED_CLIENT_IPS_MODE Default: blacklist. Can be either "whitelist" (restrict access to specific IPs)or "blacklist" (allow everything except specific IPs). --filtered-client-ips FILTERED_CLIENT_IPS Default: 127.0.0.1,::1. Comma separated list of IPv4 and IPv6 addresses. --filtered-url-regex-config FILTERED_URL_REGEX_CONFIG Default: No config. Comma separated list of IPv4 and IPv6 addresses.
Proxy.py not working? Report at: https://github.com/abhinavsingh/proxy.py/issues/new
ValueError: filedescriptor out of range in selectCPU 코어 사용 개수 제어는 스레드 방식 vs 스레드리스 방식 및 스레드리스 원격 실행 모드 vs 로컬 실행 모드를 참조하세요.
자세한 내용 및 로컬 벤치마크 실행 방법은 벤치마크를 참조하세요.
가벼움
약 5~20 MB만 사용
약 25 MB에 불과프로그래밍 가능
--plugins proxy.plugin.ProxyPoolPlugin--enable-web-server --plugins proxy.plugin.WebServerPlugin--enable-reverse-proxy --plugins proxy.plugin.ReverseProxyPlugin여러 주소와 포트에서 수신 가능
--hostnames 플래그로 추가 주소 제공--ports 플래그로 추가 포트 제공--port 플래그로 기본 포트 8899 재정의실시간 대시보드
--enable-dashboard 사용http://localhost:8899/dashboard 방문proxy.py 검사, 모니터링, 제어 및 구성typescript 기반 플러그인으로 대시보드 프론트엔드 확장안전함
proxy.py 간 종단 간 암호화 활성화사생활 보호
중간자 공격 (Man-In-The-Middle)
프록시 요청 지원 HTTP 프로토콜
http(s)
http1http1.1 (파이프라인 포함)http2websocketsHAProxy Protocol 지원
--enable-proxy-protocol 플래그 참조정적 파일 서버 지원
--enable-static-server 및 --static-server-dir 플래그 참조대용량 파일 업로드 및 다운로드에 최적화
--client-recvbuf-size, --server-recvbuf-size, --max-sendbuf-size 플래그 참조IPv4 및 IPv6 지원
--hostname 플래그 참조Unix 도메인 소켓 지원
--unix-socket-path 플래그 참조기본 인증 지원
--basic-auth 플래그 참조PAC (프록시 자동 구성) 지원
--pac-file 및 --pac-file-url-path 플래그 참조Started server on ::1:8899proxy.py는 IPv4 127.0.0.1에 해당하는 IPv6 ::1에서 수신 대기합니다.proxy.py에 액세스하려면 --hostname :: 또는 --hostname 0.0.0.0을 사용하거나 머신에서 사용 가능한 다른 인터페이스에 바인딩하세요.proxy.py의 업스트림 서버에 표시되는 공인 IP를 사용자 지정하는 방법은 CustomNetworkInterface를 참조하세요.Port 8899
--port 플래그를 사용하세요.pypi.org



