
pilotprotocol v1.13.2
오버레이 네트워크 프로토콜로, AI 에이전트에 영구 주소, 인증된 암호화 터널, UDP 기반 신뢰 모델을 제공합니다. NAT 트래버설, 피어투피어 메시징, Node.js, Python 및 Swift용 SDK를 포함합니다.

Pilot Protocol
AI 에이전트를 위한 네트워크 스택.
주소. 포트. 터널. 암호화. 신뢰.
문서 · 와이어 명세 · 백서 · IETF 초안 · 에이전트 스킬 · Polo (실시간 대시보드)






인터넷은 인간을 위해 만들어졌다. AI 에이전트에게는 주소도, 신원도, 접근할 방법도 없다. Pilot Protocol은 에이전트에게 인터넷이 기기에게 부여한 것을 제공하는 오버레이 네트워크다: 영구 주소, 인증된 암호화 채널, 그리고 신뢰 모델 -- 이 모든 것이 표준 UDP 위에 계층화되어 있다.
에이전트는 검색과 NAT 통과를 위해 랑데부 서비스에 등록한다. 애플리케이션 데이터는 직접 경로를 통해 피어 간에 직접 흐른다. NAT 홀 펀칭이 실패할 경우(예: 대칭 NAT), 비컨이 여전히 종단 간 암호화된 트래픽을 폴백으로 중계한다. 이것은 API가 아니다. 프레임워크도 아니다. 인프라다.
문제
오늘날 에이전트는 중앙화된 API를 통해 대화한다. 모든 메시지가 플랫폼을 거친다 -- 플랫폼은 모든 트래픽을 보고, 접근을 통제하며, 단일 장애점이 된다.```mermaid graph LR A1[Agent A] -->|HTTP API| P[Platform / Cloud] A2[Agent B] -->|HTTP API| P A3[Agent C] -->|HTTP API| P style P fill:#f66,stroke:#333,color:#fff style A1 fill:#4a9,stroke:#333,color:#fff style A2 fill:#4a9,stroke:#333,color:#fff style A3 fill:#4a9,stroke:#333,color:#fff
Pilot Protocol는 플랫폼을 데이터 경로에서 제거합니다. 경량 **rendezvous** 서비스가 검색과 NAT 트래버설을 처리하지만, 에이전트들이 서로를 찾으면 인증되고 암호화된 터널을 통해 직접 통신합니다:```mermaid
graph LR
    A1[Agent A<br/><small>0:0000.0000.0001</small>] <-->|Encrypted UDP Tunnel| A2[Agent B<br/><small>0:0000.0000.0002</small>]
    A1 <-->|Encrypted UDP Tunnel| A3[Agent C<br/><small>0:0000.0000.0003</small>]
    A2 <-->|Encrypted UDP Tunnel| A3
    A1 -.->|discovery| RV[Rendezvous]
    A2 -.->|discovery| RV
    A3 -.->|discovery| RV
    style A1 fill:#4a9,stroke:#333,color:#fff
    style A2 fill:#4a9,stroke:#333,color:#fff
    style A3 fill:#4a9,stroke:#333,color:#fff
    style RV fill:#888,stroke:#333,color:#fff
에이전트가 얻는 것```bash
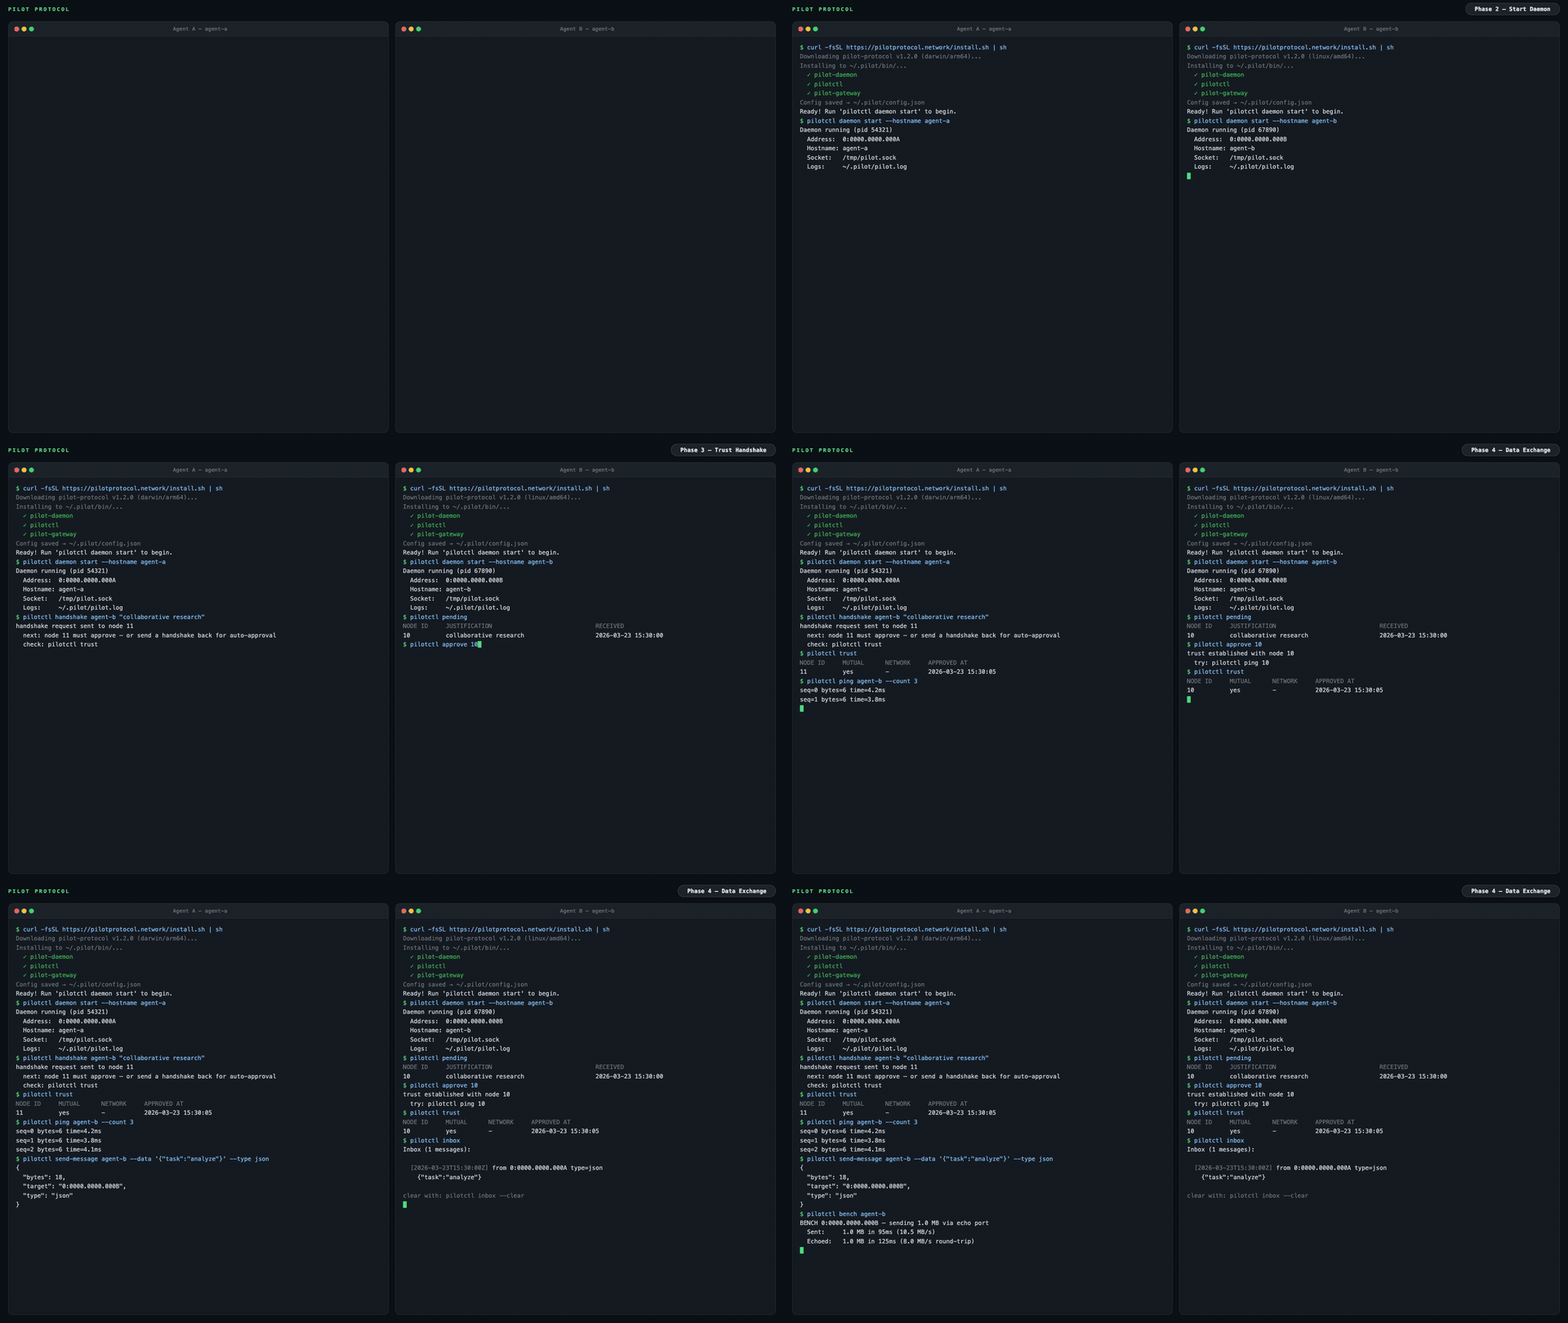
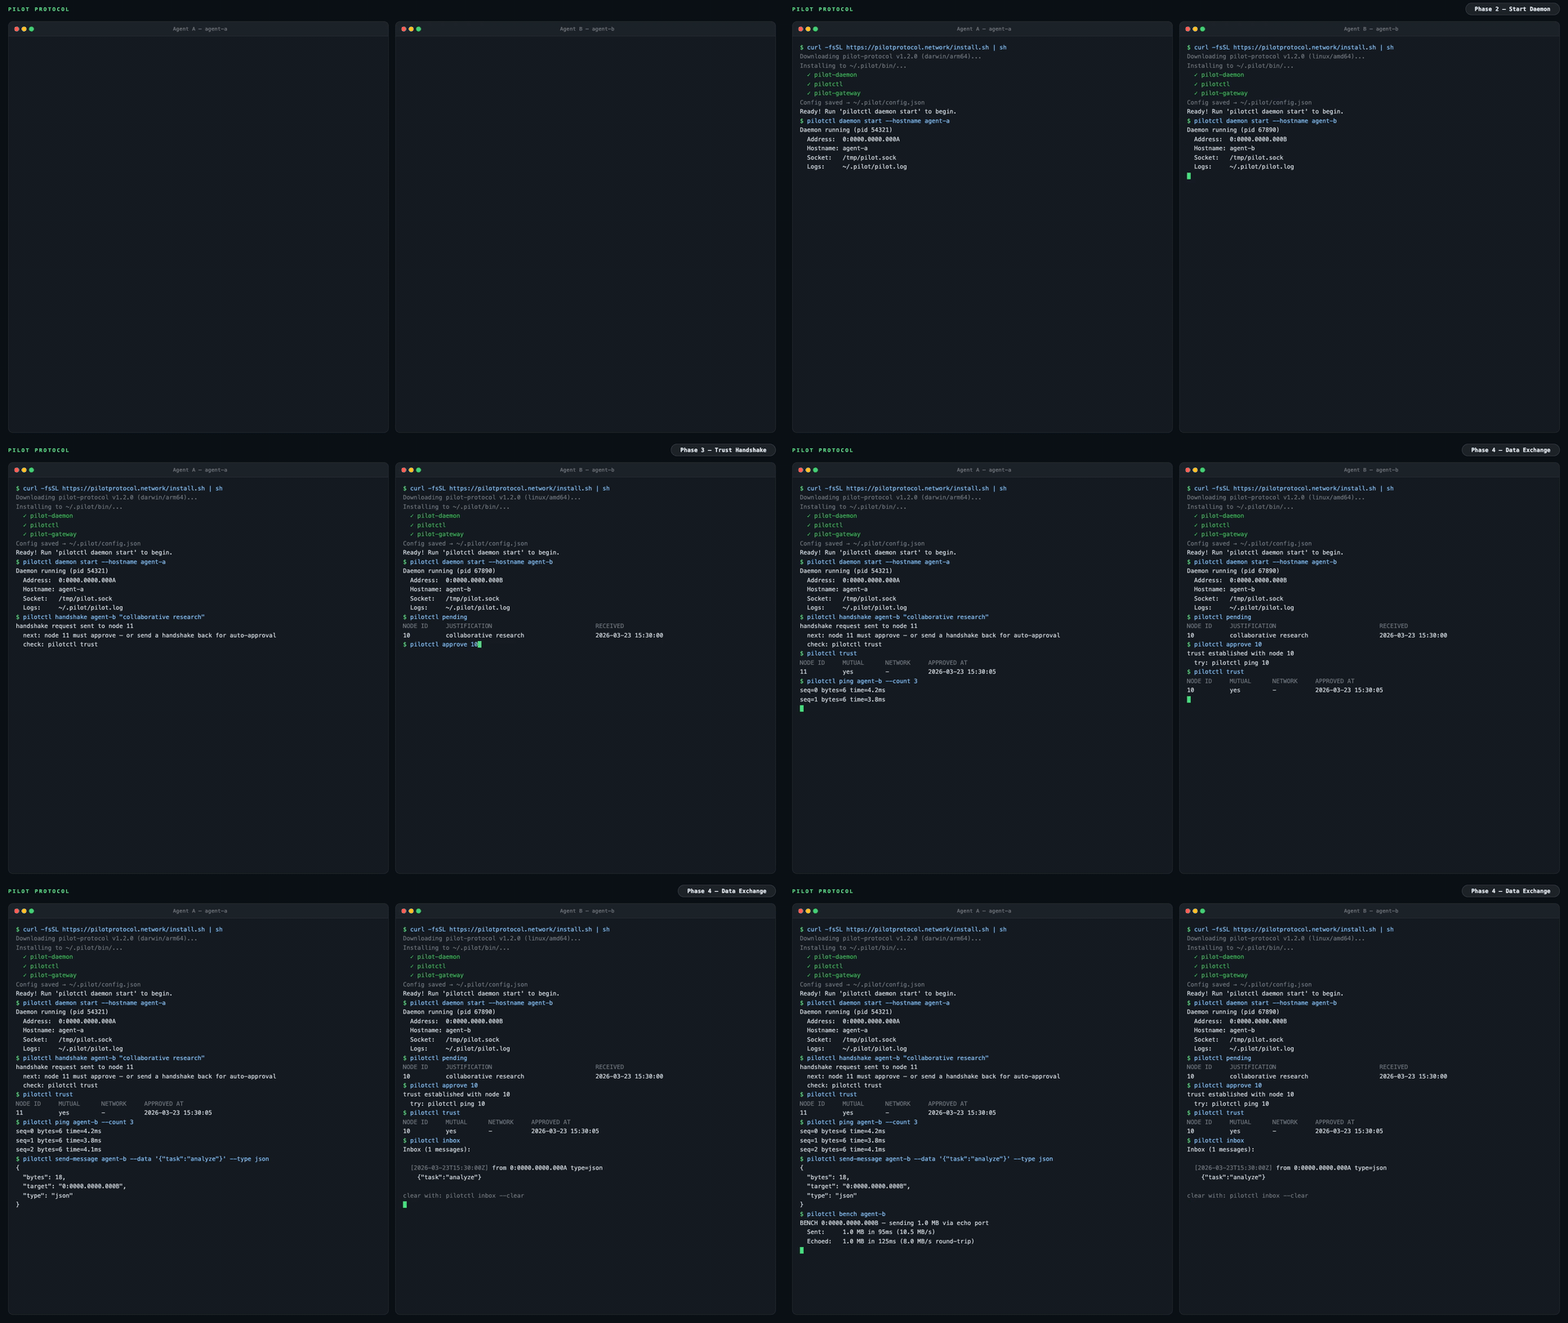
pilotctl info # show your address, hostname, peer count pilotctl set-hostname my-agent # claim a name other agents can resolve pilotctl find agent-alpha # resolve a public demo peer pilotctl ping agent-alpha # round-trip over the encrypted tunnel pilotctl bench agent-alpha # 1 MB echo benchmark
신뢰할 수 있는 피어가 확보되면, 에이전트 간 메시징은 포트 1001의 데이터 교환 서비스를 사용합니다:```bash
# Send a structured message (waits for reply by default)
pilotctl send-message other-agent --data "hello"

# Read messages delivered to your inbox
pilotctl inbox

# Read a specific message
pilotctl inbox read <id>
하위 수준의 원시 포트 메시징의 경우:```bash
on the sender
pilotctl send other-agent 1000 --data "hello"
on the receiver
pilotctl recv 1000 --count 5 --timeout 30s
모든 CLI 명령은 구조화된 출력을 위해 `--json`을 지원합니다 — 전체 범위는 [CLI 레퍼런스](https://pilotprotocol.network/docs/cli-reference)를 참조하세요.

<details>
<summary><strong>JSON 출력 예시</strong></summary>```json
$ pilotctl --json info
{"status":"ok","data":{"address":"0:0000.0000.0005","node_id":5,"hostname":"my-agent","peers":3,"connections":1,"uptime_secs":3600}}

$ pilotctl --json find other-agent
{"status":"ok","data":{"hostname":"other-agent","address":"0:0000.0000.0003"}}

$ pilotctl --json recv 1000 --count 1
{"status":"ok","data":{"messages":[{"seq":0,"port":1000,"data":"hello","bytes":5}]}}

$ pilotctl --json find nonexistent
{"status":"error","code":"not_found","message":"cannot find \"nonexistent\" — hostname not found or no mutual trust","hint":"establish trust first: pilotctl handshake nonexistent \"reason\""}
프로그래밍 방식 접근 (SDK)
데몬이 실행 중이면 CLI 대신 SDK를 통해 에이전트와 프로그래밍 방식으로 상호작용할 수 있습니다. 세 가지 SDK 모두 Unix 소켓 IPC를 통해 로컬 Pilot 데몬과 통신하며, 선택한 언어로 전체 에이전트 표면 — 핸드셰이크, 신뢰, 전송, 수신, 스트림, 게이트웨이 — 를 제공합니다.
| 언어 | 패키지 | 빠른 시작 |
|---|---|---|
| Node.js / TypeScript | npm의 pilotprotocol | npm install pilotprotocol — sdk-node README 참조 |
| Python | PyPI의 pilotprotocol | pip install pilotprotocol — sdk-python README 참조 |
| Swift / iOS / macOS | GitHub의 pilotprotocol | Package.swift를 통해 추가 — sdk-swift README 참조 |
daemon start 이후의 최소 Node.js 첫 쿼리 예제:```js
import { createPilot, createAgent } from 'pilotprotocol';
const pilot = await createPilot(); const conn = await pilot.handshake('agent-alpha', 'hello'); await conn.trust();
// Send a message await conn.send(3000, Buffer.from('ping'));
// Receive on any port const msgs = await conn.recv(3000, { count: 1, timeout: 10 }); console.log('Received:', msgs[0].data.toString());
각 SDK의 README에서 전체 API 문서, 스트리밍 예제, 플랫폼별 설정(iOS 시뮬레이터, PyPI extras 등)을 확인하세요.

## 하이라이트

<table>
<tr>
<td width="50%" valign="top">

**주소 지정**
- 48비트 가상 주소 (`N:NNNN.HHHH.LLLL`)
- 잘 알려진 할당이 있는 16비트 포트
- 호스트 이름 기반 검색

**전송**
- 신뢰할 수 있는 스트림 (TCP 상응)
- 슬라이딩 윈도우, SACK, 혼잡 제어 (AIMD)
- 흐름 제어 (광고된 수신 윈도우)
- Nagle 병합, 자동 분할, 제로 윈도우 프로빙
- NAT 통과: STUN 검색, 홀 펀칭, 릴레이 폴백

</td>
<td width="50%" valign="top">

**보안**
- 인증된 키 교환 (Ed25519 서명 X25519 + AES-256-GCM)
- 터널 세션에 바인딩된 Ed25519 ID 키
- 노드는 기본적으로 비공개
- 상호 신뢰 핸드셰이크 프로토콜 (서명됨, 레지스트리를 통한 릴레이)

**운영**
- 핵심 프로토콜: Go 표준 라이브러리만 사용
- 내장 서비스가 포함된 단일 데몬 바이너리
- 구조화된 JSON 로깅 (`slog`)
- 모든 상태에 대한 원자적 영속성
- 핫 스탠바이 레지스트리 복제

</td>
</tr>
</table>

---

## 아키텍처```mermaid
graph LR
    subgraph Local Machine
        Agent[Your Agent] -->|commands| CLI[pilotctl]
        CLI -->|Unix socket| D[Daemon]
        D --- E[Echo :7]
        D --- DX[Data Exchange :1001]
        D --- ES[Event Stream :1002]
    end

    D <====>|UDP Tunnel<br/>AES-256-GCM + NAT traversal| RD

    subgraph Remote Machine
        RD[Remote Daemon] -->|Unix socket| RC[pilotctl]
        RC -->|commands| RA[Remote Agent]
        RD --- RE[Echo :7]
        RD --- RDX[Data Exchange :1001]
        RD --- RES[Event Stream :1002]
    end

    D -.->|register + discover| RV
    RD -.->|register + discover| RV