
ZeekログをフィルタリングしてElastic/OpenSearch+Humioに転送するPythonアプリケーションです。このアプリは、さらに処理するために純粋なJSONログをstdoutに出力することもできます!
このPythonアプリケーションは、ZeekのASCII TSVおよびJSON ログをElasticSearchのバルクロードJSON形式に変換します。
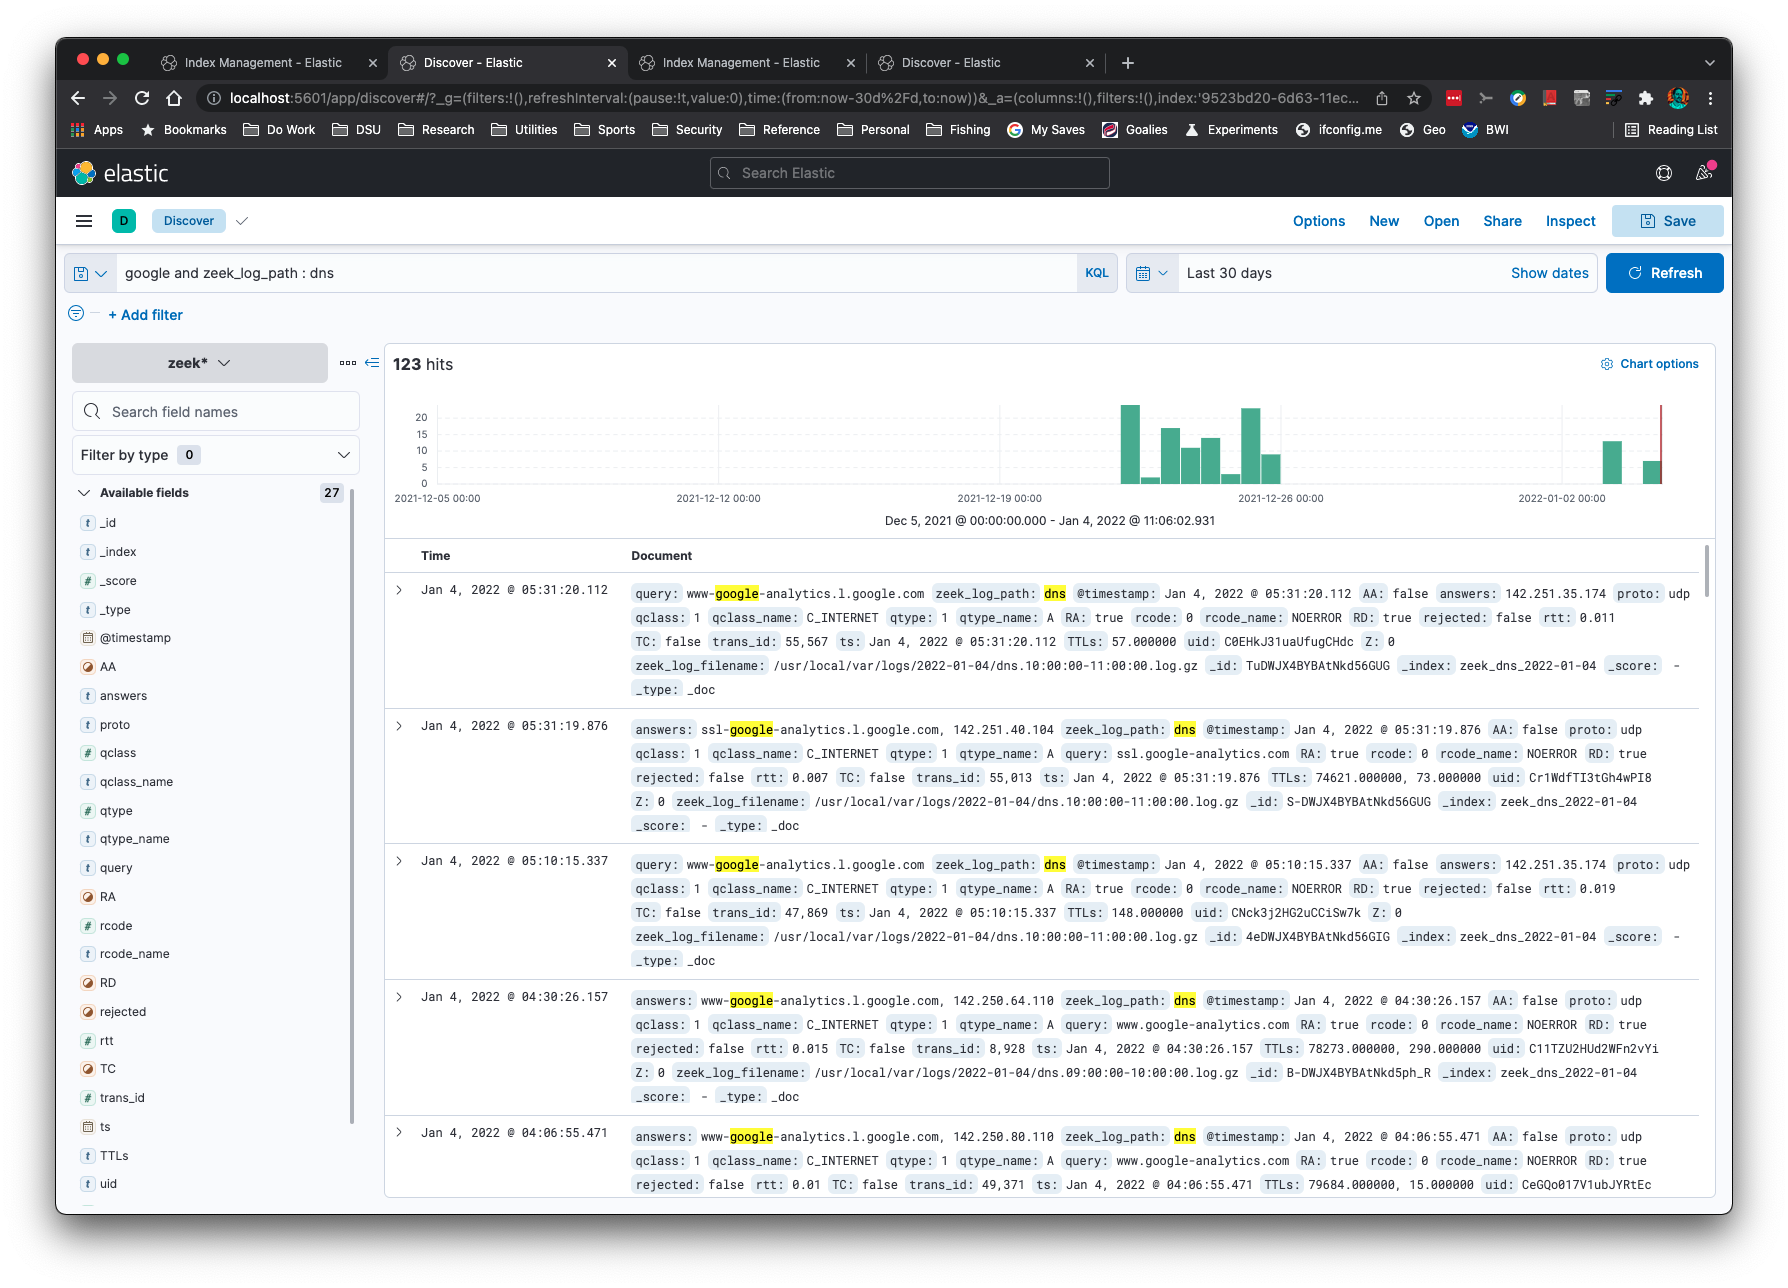
同じ接続ID(uid)またはファイルID(fuid)に対する複数のZeekログを確認したいですか? 次は、単一のuidに対するfiles.log、http.log、conn.logのヒットです:
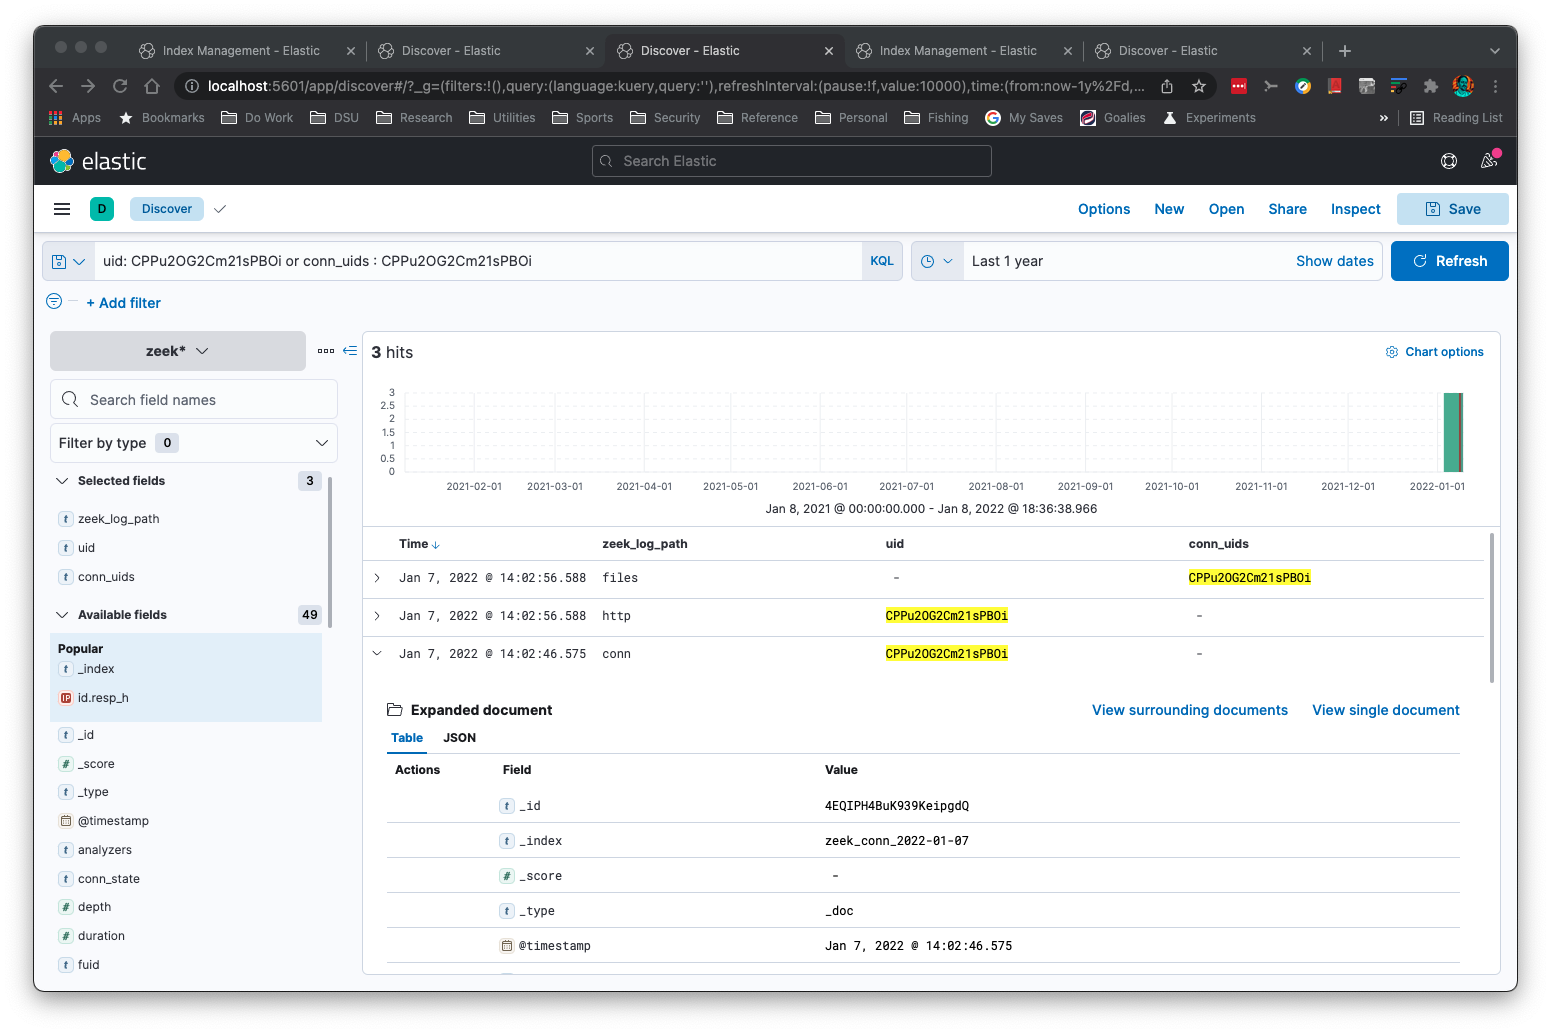
Zeekの'addr'型に対してサブネット検索を実行できます:
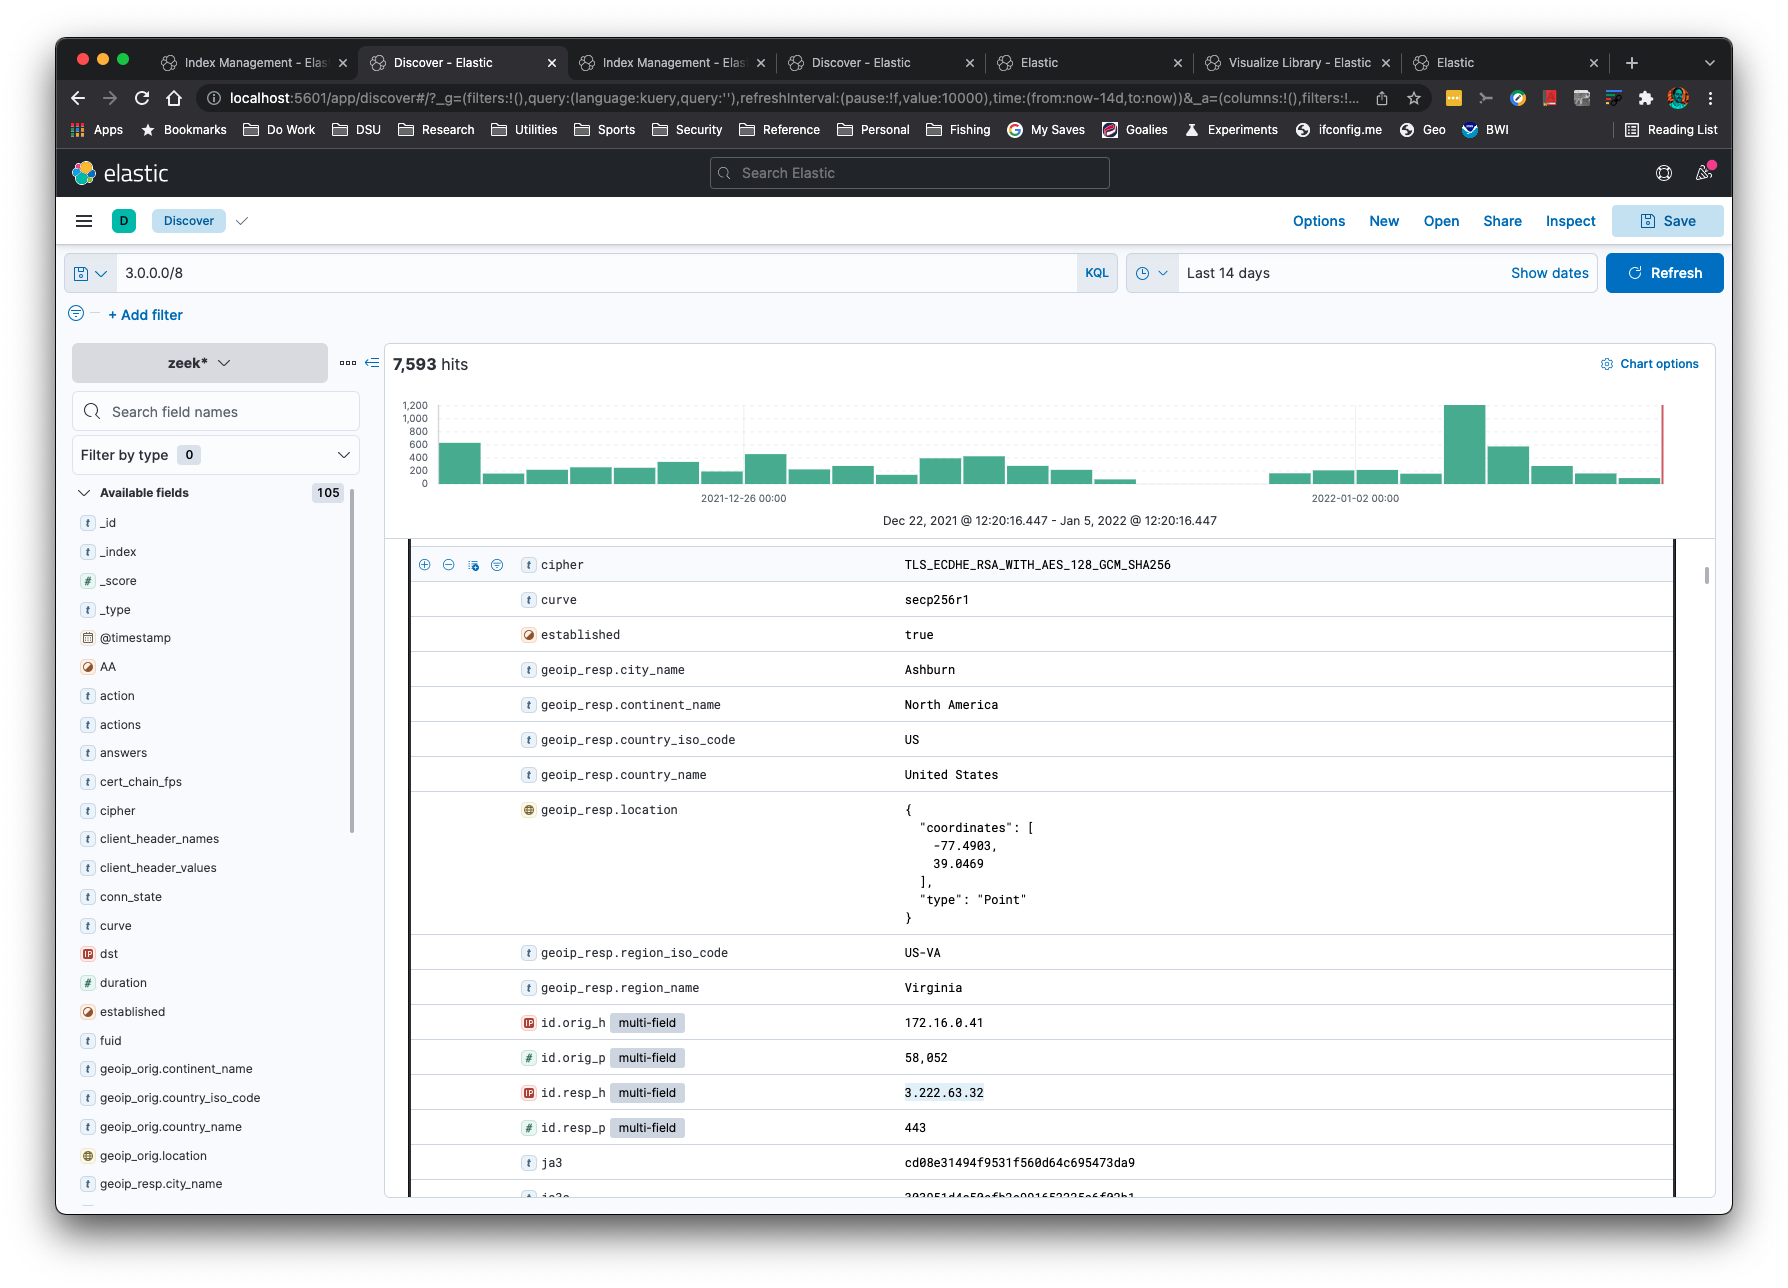
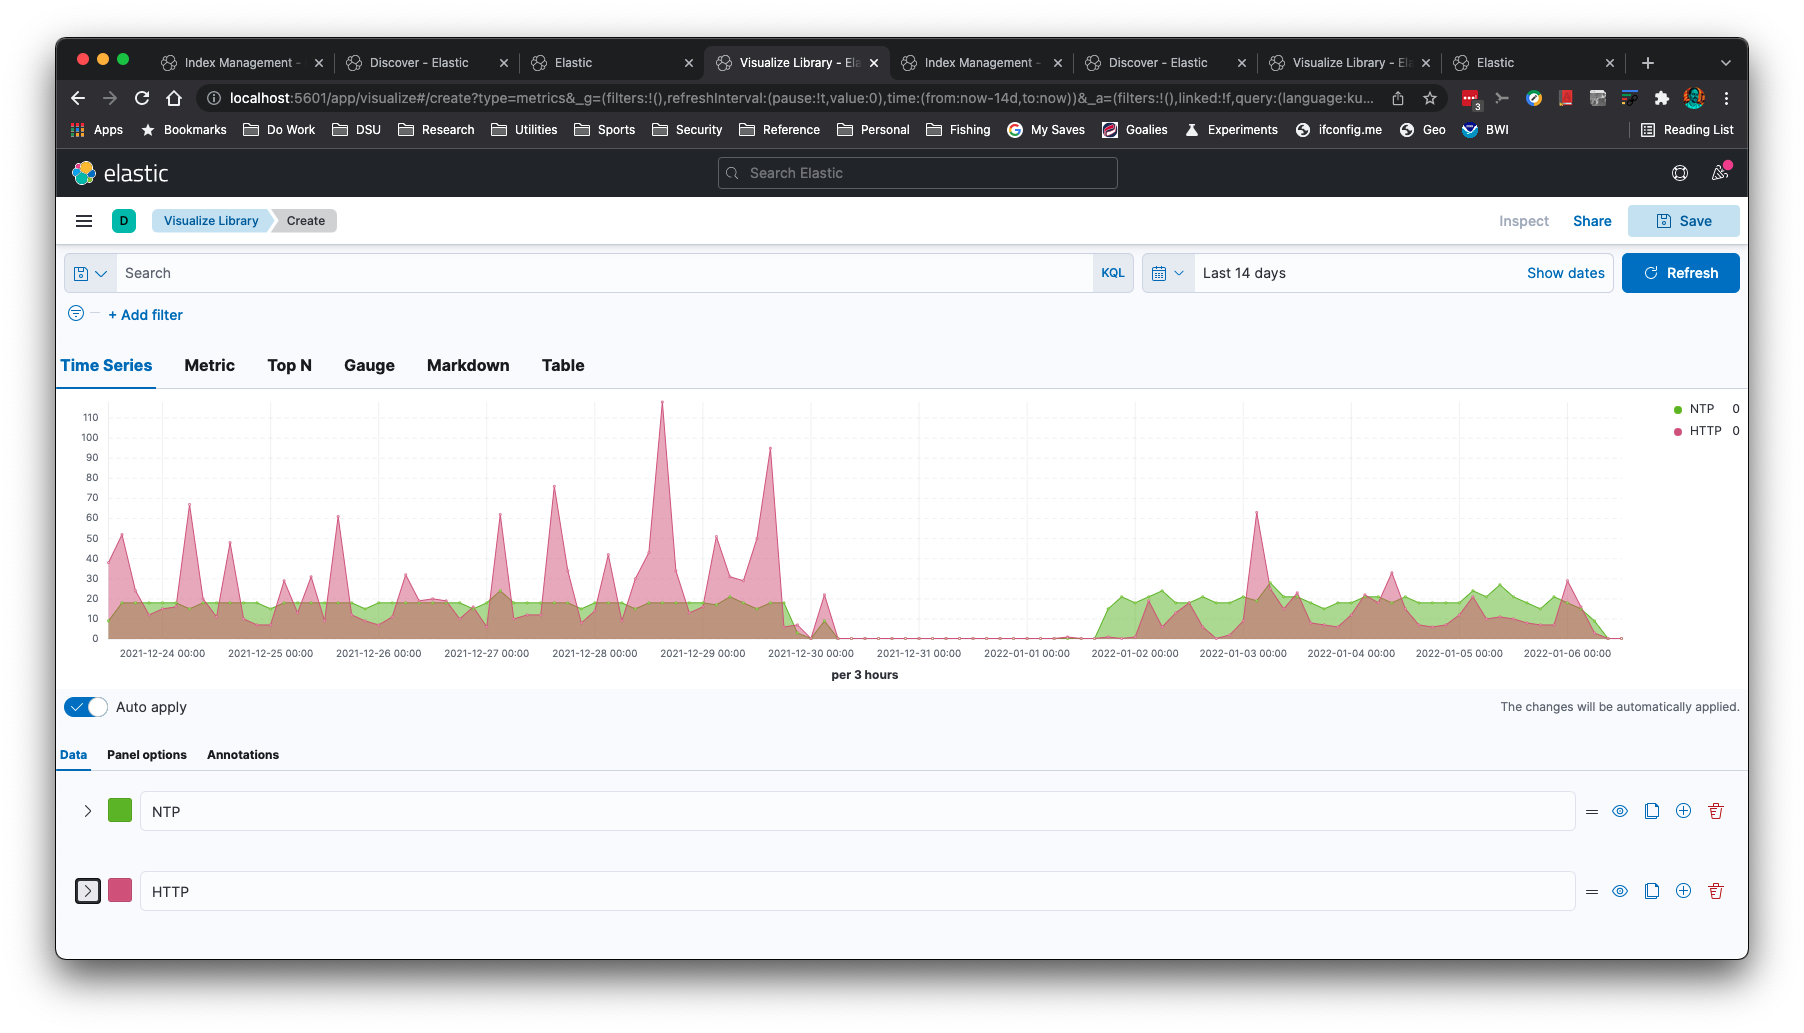
このNTPおよびHTTPグラフのような時系列グラフを作成できます:
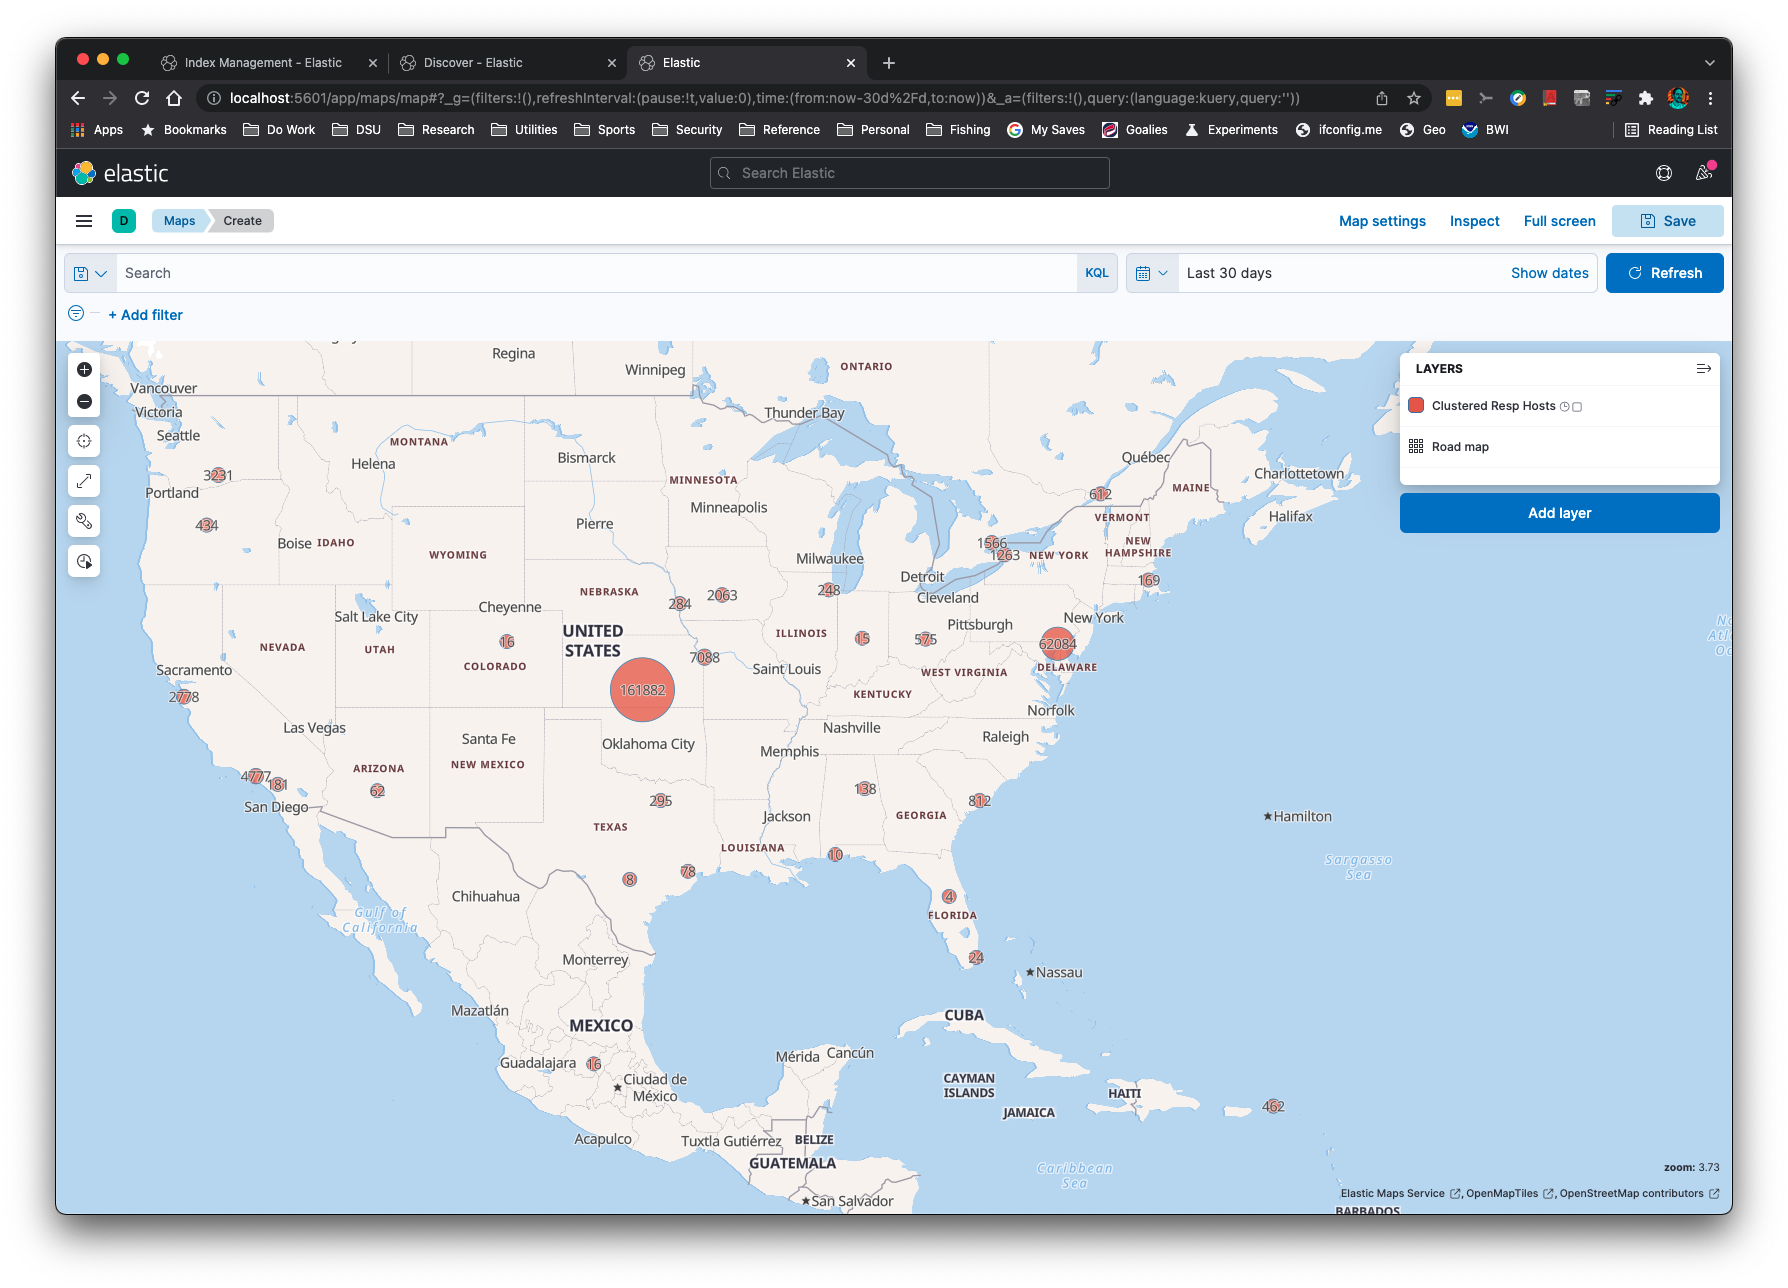
IPアドレスは、-gコマンドラインオプションを使用して地理位置情報を取得できます:
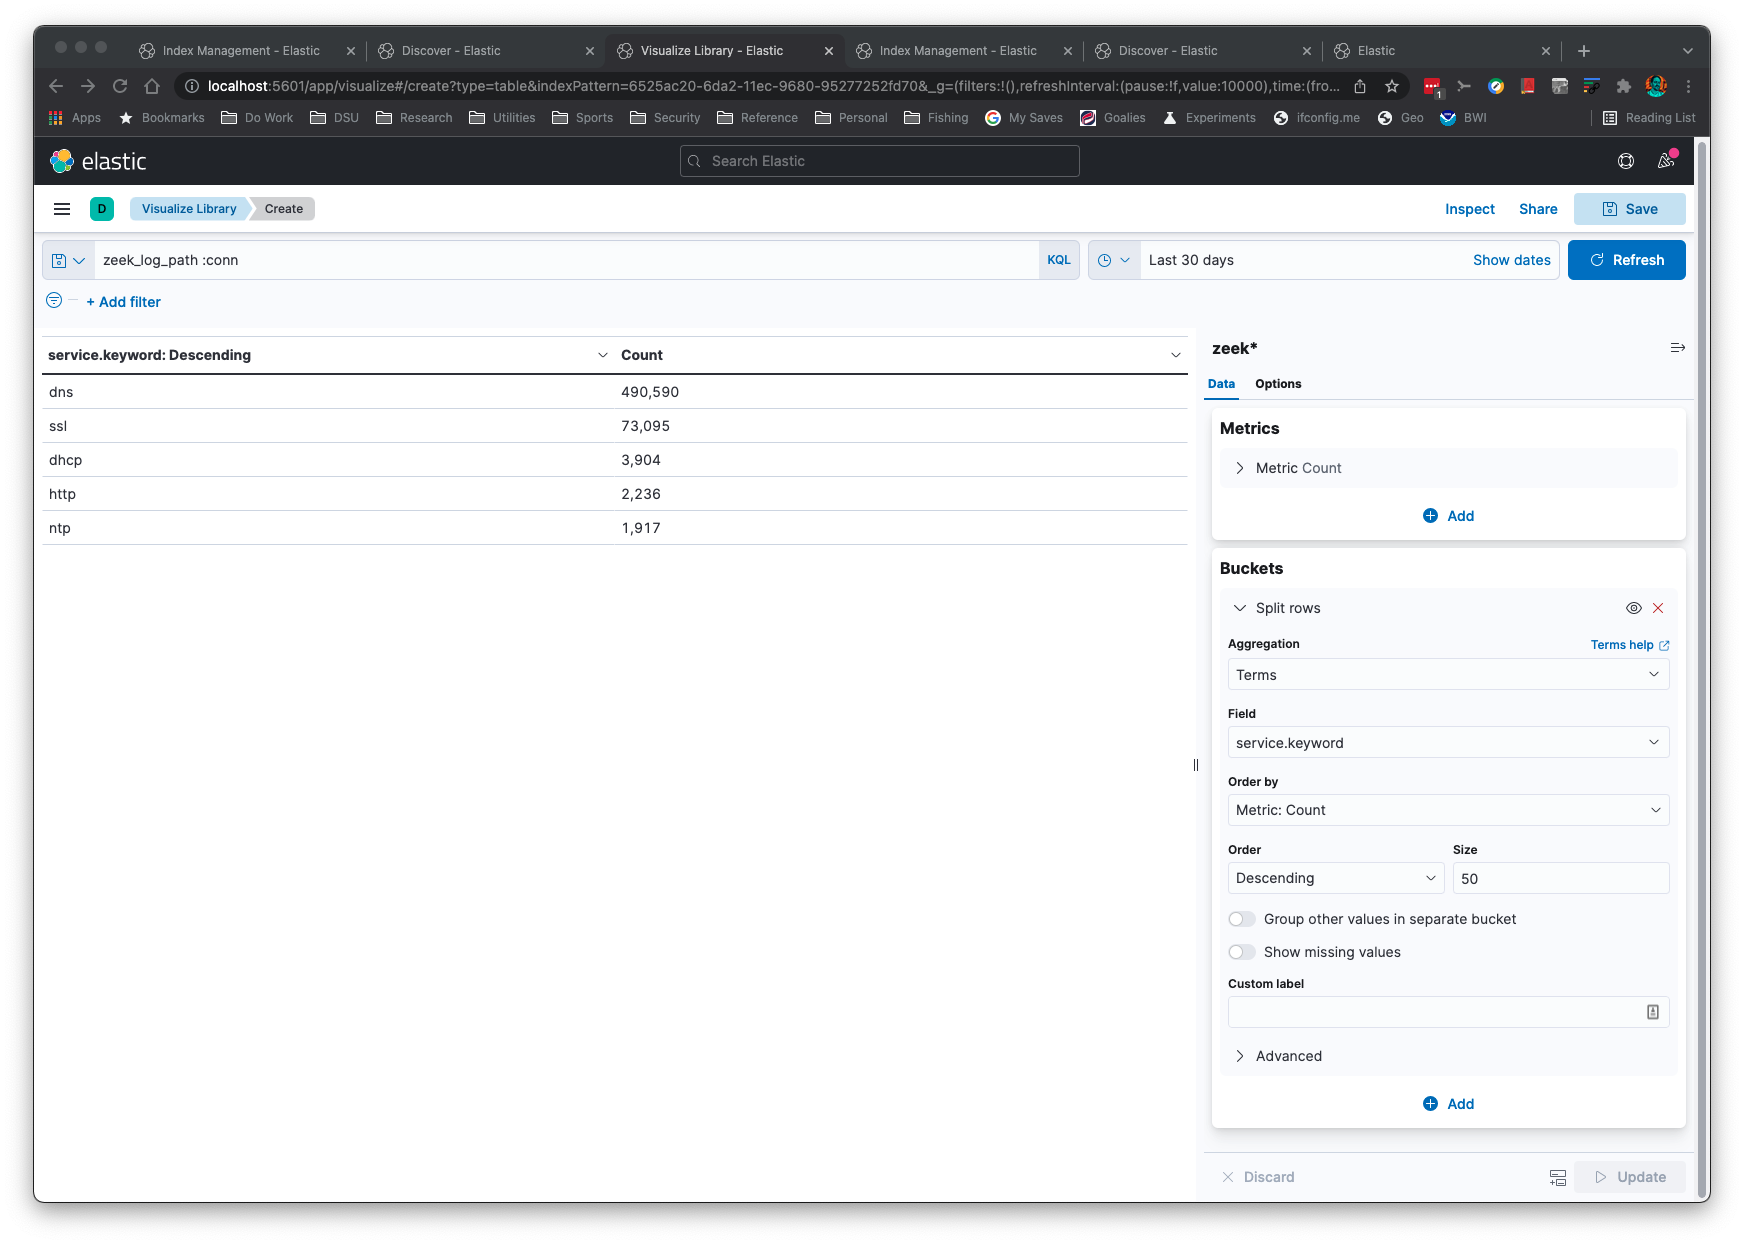
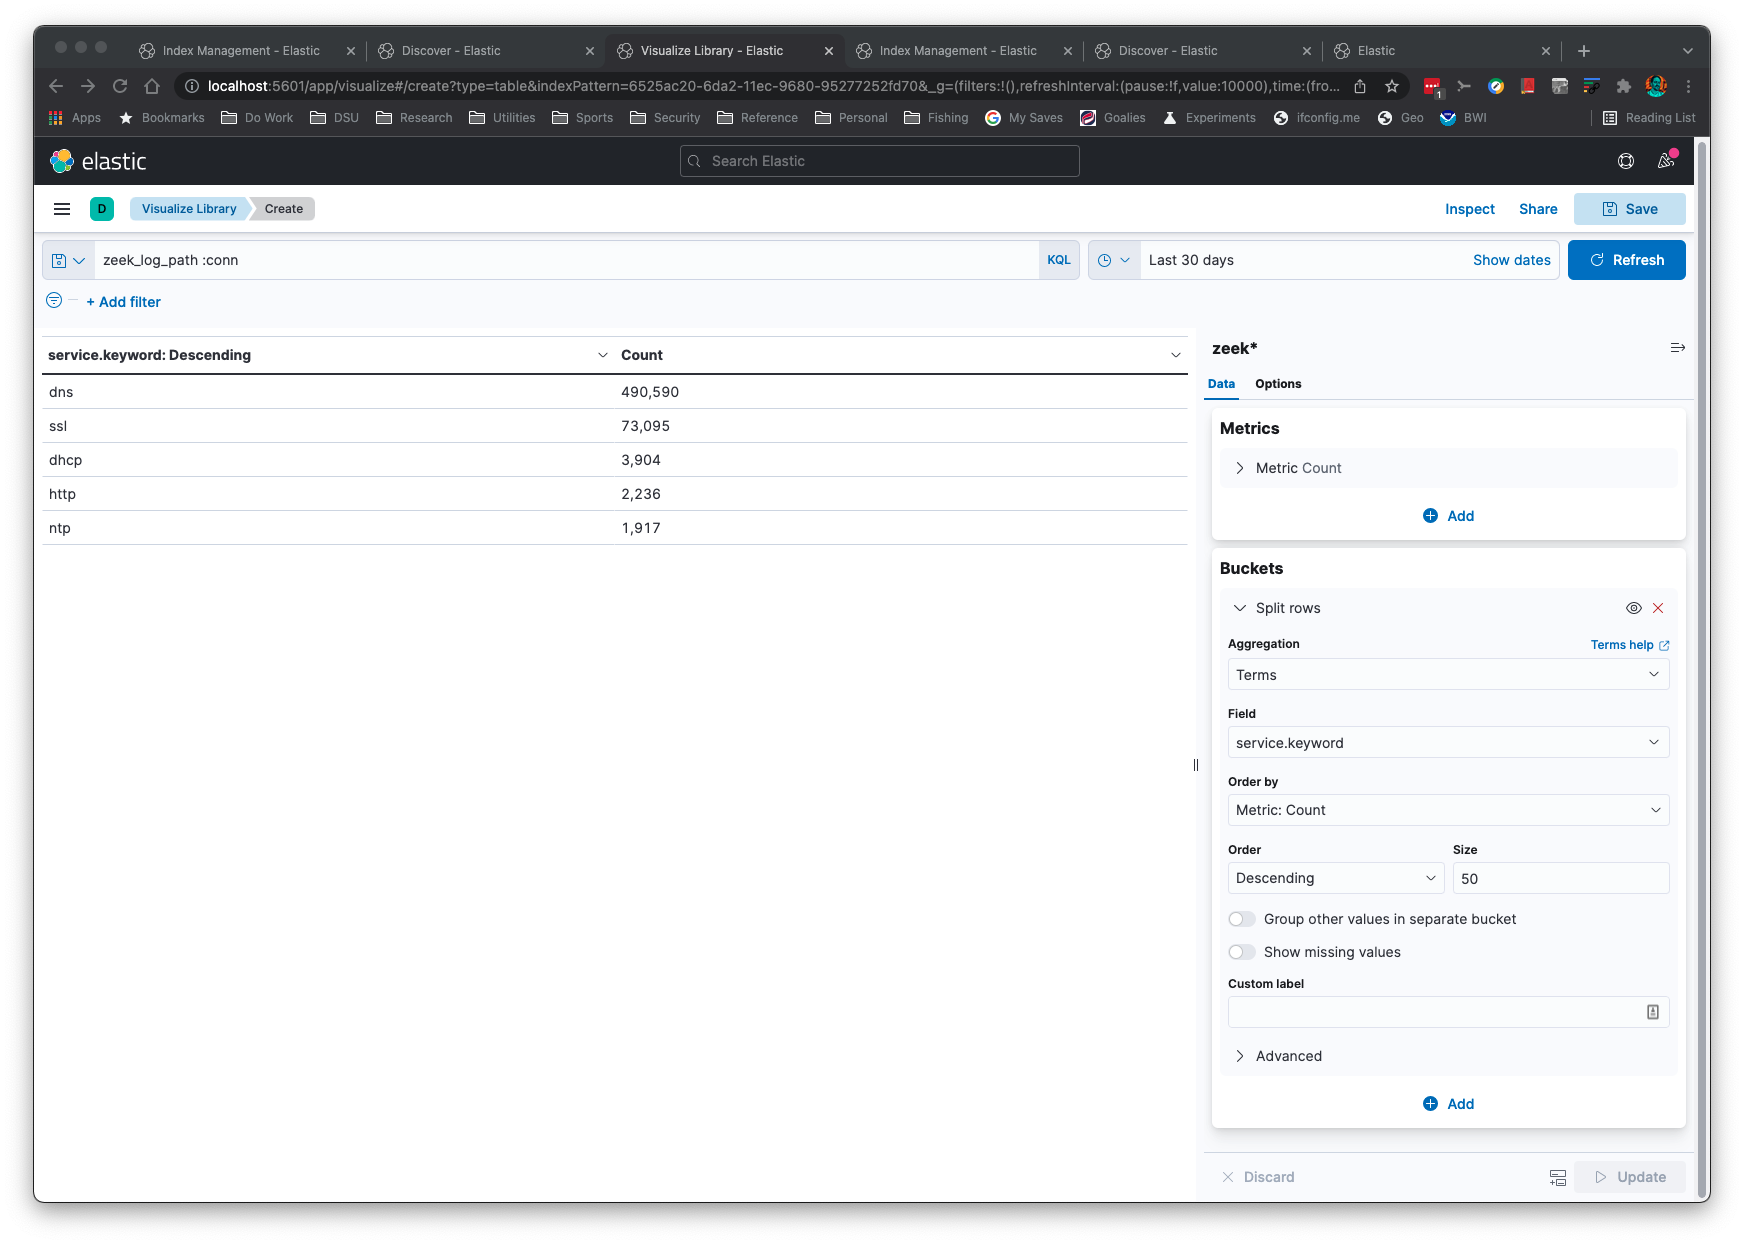
集計は簡単かつ迅速です:
このアプリケーションは、Zeekのログ形式が変更された場合にも「そのまま動作」します。このロジックは、 フィールド名と関連する型を読み取り、ElasticSearch内でマッピングを正しく設定します。
このアプリケーションは、gzip圧縮されたログまたは非圧縮ログを認識します。このアプリケーションは、
ElasticSearchがデフォルトポートでlocalhost上にセットアップされていることを前提としています。
ElasticSearchがない場合は、-s -bコマンドラインオプションを使用してJSONをstdoutに出力し、
jqアプリケーションで処理できます。
-kコマンドラインオプションを使用して、テキストフィールドにキーワードサブフィールドを追加できます。
これはKibanaでの集計に役立ちます。
Pythonがすでにシステムにある場合、requestsライブラリが インストールされていれば、Elasticsearch、Kibana、および zeek2es.py以外にマシンへコピーする追加のものはありません。
要件を満たしていると仮定すると、インストールは不要です。zeek2es.pyを
ホストにコピーしてPythonで実行するだけです。自動インデックス名生成(つまり、-iオプションを指定していない場合)で
Zeekログがインポートされると、インデックスは"zeek_zeeklogname_date"という名前になります。ここで、
zeeklognameはconnのようなログ名で、dateはYYYY-MM-DD形式です。この場合、Kibanaのインデックスパターンを
zeek*に一致するように設定してください。-iオプションでインデックスに名前を付けた場合は、その命名スキームに
一致するKibanaインデックスパターンを作成する必要があります。
zeek2esをアップグレードする場合は、zeek2esのアップグレードに関するセクションを参照してください。
Elastic v8.0+を使用している場合、セキュリティがデフォルトで有効になっています。これにより、ユーザー名とパスワード、 さらにHTTPSが必要になります。
ワイルドカードを使用してインデックス/データストリームを削除できるようにしたい場合(このREADMEの例で示されているように)、
elasticsearch.ymlに次の行を追加してください。```
action.destructive_requires_name: false
また、この readme 内の curl コマンドに `-k -u elastic:<password>` が含まれるように変更する必要があります。
`elastic` ユーザーのパスワードは、次のようなコマンドで設定されます:```
./bin/elasticsearch-reset-password -u elastic -i
zeek2es.py は --user オプションと --passwd オプションを指定することで、ESへの
認証情報を指定できます。 また、これらのオプションはヘルパースクリプトの追加コマンドライン引数として
も指定できます。
おそらく、このコードを使う最も簡単な方法はDockerを使うことです。 すべてのファイルは docker ディレクトリにあります。
まず、.env ファイル内の CHANGEME!!! が含まれる行を、ご自身の環境に合わせて編集する必要があります。
また、docker/zeek2es/entrypoint.sh 内のElasticパスワードも一致するように編集する必要があります。 これは --passwd オプションの後にあります。
次に、docker ディレクトリに移動し、以下のコマンドを入力して、
zeek2es と Elasticsearch クラスタを起動できます:```
docker-compose build
dockr-compose up
これで、`VOLUME_MOUNT/data/logs` ディレクトリにログを配置できます(`VOLUME_MOUNT` は `.env` ファイルで設定した値です)。
ログがこのディレクトリに作成されると、zeek2es が処理を開始し、Elasticsearch にプッシュします。
その後、`.env` ファイルで設定したユーザー名とパスワードを使用して https://localhost:5601 にログインできます。
デフォルトでは自己署名証明書が使われますが、docker compose ファイルを編集すれば変更できます。Kibana に入ったら、
Stack Management->Data Views に移動し、タイムスタンプ `@timestamp` を持つ `logs*` のデータビューを作成します。
これで Discover に移動してログの検索を開始できます。 設定した `VOLUME_MOUNT/data` ディレクトリにデータは永続化されます。
すべてのデータを削除したい場合は、設定したディレクトリをその削除コマンドに置き換えて `rm -rf VOLUME_MOUNT/data` を実行するだけです。
次回クラスターを起動すると、新しいデータを受け入れる準備ができたまっさらな状態になります。
## zeek2es のアップグレード <a name="upgradingzeek2es" />
ほとんどのアップグレードは、新しい [zeek2es.py](https://github.com/corelight/zeek2es/blob/HEAD/zeek2es.py) を古いものの上にコピーするだけの簡単な作業です。
場合によっては、`-g` コマンドラインオプションに必要な ES インジェストパイプラインがアップグレード中に変更されることがあります。
そのため、新しいバージョンの zeek2es.py を実行する前に、
お使いの [インジェストパイプライン](#esingestpipeline) を削除することを強くお勧めします。
### ES インジェストパイプライン <a name="esingestpipeline" />
`-g` コマンドラインオプションで IP アドレスの地理位置情報を特定するために使用される ["zeekgeoip" ES インジェストパイプラインを削除](https://www.elastic.co/guide/en/elasticsearch/reference/current/delete-pipeline-api.html) する必要がある場合は、
Kibana の Stack Management->Ingest Pipelines からグラフィカルに実行するか、
次のコマンドで実行できます:```
curl -X DELETE "localhost:9200/_ingest/pipeline/zeekgeoip?pretty"
zeek2es は、ElasticSearch に保存される前に Zeek ログにフィルタリング機能を提供します。この
機能は、-a または -f オプションで有効にできます。フィルタは Python の lambda 関数から構築され、
入力は出力を表す Python ディクショナリです。service フィールドが入力されている接続ログのみを保存するフィルタを追加するには、
-f オプションで
次の lambda フィルタファイルを使用します:```
lambda x: 'service' in x and len(x['service']) > 0
あるいは、少なくとも1,024バイトを有し、かつそのうち少なくとも1バイトが宛先からのものである接続をフィルタリングしたい場合もあるでしょう:```
lambda x: 'orig_ip_bytes' in x and 'resp_ip_bytes' in x and x['orig_ip_bytes'] + x['resp_ip_bytes'] > 1024 and x['resp_ip_bytes'] > 0
コマンドラインの-aオプションで、よりシンプルなラムダフィルタを指定できます。このフィルタは、発信元IPアドレスが192.0.0.0/8ネットワークに属する接続ログエントリのみを保存します。```
python zeek2es.py conn.log.gz -a "lambda x: 'id.orig_h' in x and ipaddress.ip_address(x['id.orig_h']) in ipaddress.ip_network('192.0.0.0/8')"
For power users, the `-f` option will allow you to define a full function (instead of Python's lambda functions) so you can write functions that
span multiple lines.
上級ユーザー向けに、`-f` オプションを使用すると、Python の lambda 関数の代わりに完全な関数を定義できるため、複数行にまたがる関数を記述できます。
### Filter on Keys <a name="filteronkeys" />
In some instances you might want to pull data from one log that depends on another. An
example would be finding all `ssl.log` rows that have a `uid` matching previously
indexed rows from `conn.log`, or vice versa. You can filter by importing your
`conn.log` files with the `-o uid uid.txt` command line. This will log all uids that were
indexed to a file named `uid.txt`. Then, when you import your `ssl.log` files you will provide
the `-e uid uid.txt` command line. This will only import SSL rows
containing `uid` values that are in `uid.txt`, previously built from our import of `conn.log`.
状況によっては、あるログから別のログに依存するデータを取得したい場合があります。例えば、`conn.log` から以前にインデックス化された行と一致する `uid` を持つすべての `ssl.log` 行(またはその逆)を検索する場合です。`-o uid uid.txt` コマンドラインを使用して `conn.log` ファイルをインポートすることでフィルタリングできます。これにより、インデックス化されたすべての uid が `uid.txt` という名前のファイルに記録されます。次に、`ssl.log` ファイルをインポートする際には、`-e uid uid.txt` コマンドラインを指定します。これにより、`conn.log` のインポート時に以前に作成された `uid.txt` 内にある `uid` 値を含む SSL 行のみがインポートされます。
## Command Line Examples <a name="commandlineexamples" />```
python zeek2es.py your_zeek_log.gz -i your_es_index_name
インデックスには日付が付加されているため、次のコマンドで 2021年12月31日を削除できます:``` curl -X DELETE http://localhost:9200/zeek_*_2021-12-31
このコマンドですべてのconn.logエントリを削除できます:```
curl -X DELETE http://localhost:9200/zeek_conn_*
$ python zeek2es.py -h usage: zeek2es.py [-h] [-i ESINDEX] [-u ESURL] [--user USER] [--passwd PASSWD] [-l LINES] [-n NAME] [-k KEYWORDS [KEYWORDS ...]] [-a LAMBDAFILTER] [-f FILTERFILE] [-y OUTPUTFIELDS [OUTPUTFIELDS ...]] [-d DATASTREAM] [--compress] [-o fieldname filename] [-e fieldname filename] [-g] [-p SPLITFIELDS [SPLITFIELDS ...]] [-j] [-r] [-t] [-s] [-b] [--humio HUMIO HUMIO] [-c] [-w] [-z] filename
Process Zeek ASCII logs into ElasticSearch.
positional arguments: filename The Zeek log in *.log or *.gz format. Include the full path.
optional arguments:
-h, --help show this help message and exit
-i ESINDEX, --esindex ESINDEX
The Elasticsearch index/data stream name.
-u ESURL, --esurl ESURL
The Elasticsearch URL. Use ending slash. Use https for Elastic v8+. (default: http://localhost:9200)
--user USER The Elasticsearch user. (default: disabled)
--passwd PASSWD The Elasticsearch password. Note this will put your password in this shell history file. (default: disabled)
-l LINES, --lines LINES
Lines to buffer for RESTful operations. (default: 10,000)
-n NAME, --name NAME The name of the system to add to the index for uniqueness. (default: empty string)
-k KEYWORDS [KEYWORDS ...], --keywords KEYWORDS [KEYWORDS ...]
A list of text fields to add a keyword subfield. (default: service)
-a LAMBDAFILTER, --lambdafilter LAMBDAFILTER
A Python lambda function, when eval'd will filter your output JSON dict. (default: empty string)
-f FILTERFILE, --filterfile FILTERFILE
A Python function file, when eval'd will filter your output JSON dict. (default: empty string)
-y OUTPUTFIELDS [OUTPUTFIELDS ...], --outputfields OUTPUTFIELDS [OUTPUTFIELDS ...]
A list of fields to keep for the output. Must include ts. (default: empty string)
-d DATASTREAM, --datastream DATASTREAM
Instead of an index, use a data stream that will rollover at this many GB.
Recommended is 50 or less. (default: 0 - disabled)
--compress If a datastream is used, enable best compression.
-o fieldname filename, --logkey fieldname filename
A field to log to a file. Example: uid uid.txt.
Will append to the file! Delete file before running if appending is undesired.
This option can be called more than once. (default: empty - disabled)
-e fieldname filename, --filterkeys fieldname filename
A field to filter with keys from a file. Example: uid uid.txt. (default: empty string - disabled)
-g, --ingestion Use the ingestion pipeline to do things like geolocate IPs and split services. Takes longer, but worth it.
-p SPLITFIELDS [SPLITFIELDS ...], --splitfields SPLITFIELDS [SPLITFIELDS ...]
A list of additional fields to split with the ingestion pipeline, if enabled.
(default: empty string - disabled)
-j, --jsonlogs Assume input logs are JSON.
-r, --origtime Keep the numerical time format, not milliseconds as ES needs.
-t, --timestamp Keep the time in timestamp format.
-s, --stdout Print JSON to stdout instead of sending to Elasticsearch directly.
-b, --nobulk Remove the ES bulk JSON header. Requires --stdout.
--humio HUMIO HUMIO First argument is the Humio URL, the second argument is the ingest token.
-c, --cython Use Cython execution by loading the local zeek2es.so file through an import.
Run python setup.py build_ext --inplace first to make your zeek2es.so file!
-w, --hashdates Use hashes instead of dates for the index name.
-z, --supresswarnings
Supress any type of warning. Die stoically and silently.
To delete indices:
curl -X DELETE http://localhost:9200/zeek*?pretty
To delete data streams:
curl -X DELETE http://localhost:9200/_data_stream/zeek*?pretty
To delete index templates:
curl -X DELETE http://localhost:9200/_index_template/zeek*?pretty
To delete the lifecycle policy:
curl -X DELETE http://localhost:9200/_ilm/policy/zeek-lifecycle-policy?pretty
You will need to add -k -u elastic_user:password if you are using Elastic v8+.
## Requirements <a name="requirements" />
- Unixライクな環境(MacOSでも動作します!)
- Python
- [requests](https://docs.python-requests.org/en/latest/) Pythonライブラリがインストールされていること(例:`pip` を使用)。
## Notes <a name="notes" />
### Humio <a name="humio" />
データをHumioにインポートするには、`corelight-json` パーサーを使用するリポジトリを設定する必要があります。 インジェストトークンを
リポジトリから取得すると、次のようなコマンドでデータをインポートできます。```
python3 zeek2es.py -s -b --humio http://localhost:8080 b005bf74-1ed3-4871-904f-9460a4687202 http.log
URLは http://yourserver:8080 の形式にしてください。パスの残りは
zeek2es.py スクリプトが自動的に追加します。
Zeek JSONログはASCII TSV版のような型情報を持たないため、限られた型情報しか ElasticSearchに提供できません。 これは、Zeekの"addr"ログフィールドのうち id$orig_h と id$resp_h ではないものについて最も顕著です。型情報がないため、 ElasticSearchの"ip"型に変換できません。 アドレスフィールドが"ip"型にならないため、 TSVログのようにサブネット検索などはできません。 ZeekログをASCII TSV形式で保存すると、 長期的な柔軟性が向上します。
大量のログにはインデックスの代わりにデータストリームを使用できます。-d コマンドラインオプションを使用します。 この
オプションは、zeek_ で始まるインデックステンプレートを作成します。 また、ライフサイクルポリシー
zeek-lifecycle-policy という名前のものを作成します。 すべてのデータストリーム、ライフサイクルポリシー、
およびインデックステンプレートを削除したい場合は、次のコマンドで実行できます:```
curl -X DELETE http://localhost:9200/_data_stream/zeek*?pretty
curl -X DELETE http://localhost:9200/_index_template/zeek*?pretty
curl -X DELETE http://localhost:9200/_ilm/policy/zeek-lifecycle-policy?pretty
### ヘルパースクリプト <a name="helperscripts" />
ログを `logs-zeek-conn` のようなデータストリームにするのに役立つスクリプトが2つあります。
最初のスクリプトは [process_logs_as_datastream.sh](https://github.com/corelight/zeek2es/blob/HEAD/process_logs_as_datastream.sh) で、
ログとディレクトリのリストを指定すると、それらをデータストリームとしてインポートします。 2つ目のスクリプトは
[process_log.sh](https://github.com/corelight/zeek2es/blob/HEAD/process_log.sh) で、ログを1つずつインポートするために使用できます。
このスクリプトは、ディレクトリ内に作成されたログを監視するために、
[fswatch](https://emcrisostomo.github.io/fswatch/) を使用することもできます。 どちらのスクリプトも、パラメータなしで実行するとコマンドラインの例が
表示されます。```
$ ./process_logs_as_datastream.sh
Usage: ./process_logs_as_datastream.sh NJOBS "ADDITIONAL_ARGS_TO_ZEEK2ES" "LIST_OF_LOGS_DELIMITED_BY_SPACES" DIR1 DIR2 ...
Example:
time ./process_logs_as_datastream.sh 16 "" "amqp bgp conn dce_rpc dhcp dns dpd files ftp http ipsec irc kerberos modbus modbus_register_change mount mqtt mysql nfs notice ntlm ntp ospf portmap radius reporter rdp rfb rip ripng sip smb_cmd smb_files smb_mapping smtp snmp socks ssh ssl stun syslog tunnel vpn weird wireguard x509" /usr/local/var/logs
kubectl proxy
when you input the following command you can call the API without the need to authenticate using short-lived token.
The rules say: translate only natural language, preserve code blocks, etc.
So we'll preserve the shell kubectl proxy exactly. Then translate the following sentence: "when you input the following command you can call the API without the need to authenticate using short-lived token."
Translation: "以下のコマンドを入力すると、短期間のトークンを使用して認証する必要なくAPIを呼び出すことができます。"
But careful: "without the need to authenticate using short-lived token" could be ambiguous: it might mean "without the need for authentication using a short-lived token", i.e., you can call API without needing to authenticate with a short-lived token. That's the intended meaning.
So: "以下のコマンドを入力すると、短期間のトークンで認証する必要なくAPIを呼び出せます。"
But "using short-lived token" is likely the authentication method. "authenticate using short-lived token" = 短期間のトークンを使用した認証. So "without the need to authenticate using short-lived token" = 短期間のトークンを使用した認証の必要なしに.
I'll phrase: "以下のコマンドを入力すると、短期間のトークンによる認証を必要とせずにAPIを呼び出すことができます。"
That's clear. No code changes.
So output:
kubectl proxy
以下のコマンドを入力すると、短期間のトークンによる認証を必要とせずにAPIを呼び出すことができます。
But ensure that there's a newline after the code block? The input has a newline: the code block, then a blank line? Let's examine input: it's:
kubectl proxy
when you input the following command you can call the API without the need to authenticate using short-lived token.
So after the closing triple backticks, there's a newline, then the natural language sentence. We need to preserve that structure exactly: after the code block, a blank line? Actually, the input shows:
kubectl proxy
(blank line?) Actually it's:
kubectl proxy
when you input...
I'll preserve exactly: the code block with triple backticks, the shell, command, closing triple backticks, then a newline and then the translated sentence. I'll just output that.
No additional text.```shell kubectl proxy
以下のコマンドを入力すると、短期間のトークンによる認証を必要とせずにAPIを呼び出すことができます。```
$ ./process_log.sh
Usage: ./process_log.sh LOGFILENAME "ADDITIONAL_ARGS_TO_ZEEK2ES"
Example:
fswatch -m poll_monitor --event Created -r /data/logs/zeek | awk '/^.*\/(conn|dns|http)\..*\.log\.gz$/' | parallel -j 16 ./process_log.sh {} "" :::: -
これらのスクリプトとコマンドラインは、お使いの環境に合わせて編集する必要があります。
lambda_filter_file_dir(デフォルトではホームディレクトリ)内にある、conn_filter.txt のようなログ名のファイルは、対応するログ入力にラムダフィルタファイルとして適用されます。これにより、すべてのフィルタを1つのディレクトリにまとめて設定し、process_logs_as_datastream.sh を使用した1つのコマンドで、そのフィルタセットを使って複数のログファイルをインポートできます。
次の行は、インデックスを使用するかデータストリームを使用するか、またはこれらのヘルパースクリプトを使用するかにかかわらず、ElasticSearch 内のすべての Zeek データを削除するはずです。``` curl -X DELETE http://localhost:9200/zeek*?pretty curl -X DELETE http://localhost:9200/_data_stream/zeek*?pretty curl -X DELETE http://localhost:9200/_data_stream/logs-zeek*?pretty curl -X DELETE http://localhost:9200/_index_template/zeek*?pretty curl -X DELETE http://localhost:9200/_index_template/logs-zeek*?pretty curl -X DELETE http://localhost:9200/_ilm/policy/zeek-lifecycle-policy?pretty
... または Elastic v8+ を使用している場合 ...```
curl -X DELETE -k -u elastic:password https://localhost:9200/zeek*?pretty
curl -X DELETE -k -u elastic:password https://localhost:9200/_data_stream/zeek*?pretty
curl -X DELETE -k -u elastic:password https://localhost:9200/_data_stream/logs-zeek*?pretty
curl -X DELETE -k -u elastic:password https://localhost:9200/_index_template/zeek*?pretty
curl -X DELETE -k -u elastic:password https://localhost:9200/_index_template/logs-zeek*?pretty
curl -X DELETE -k -u elastic:password https://localhost:9200/_ilm/policy/zeek-lifecycle-policy?pretty
ただし、v8+ でこれを実行するには、Elastic v8.0+ のセクションで説明されているように Elastic を設定する必要があります。
Cython を試したい場合は、最初に python setup.py build_ext --inplace を実行して
コンパイル済みファイルを生成する必要があります。 zeek2es を更新するたびに、この操作を行う必要があります。
このコマンドは、zeek2es.py のコピーを更新する際には常に強く推奨されます。
このスクリプトは、すべての接続ログに対して10件ずつ並列に実行できます。次のコマンドを使用します:``` find /some/dir -name “conn*.log.gz” | parallel -j 10 python zeek2es.py {1} :::: -
ディレクトリ内に作成されたすべてのconn.logファイルを自動的にインポートしたい場合は、次の
[fswatch](https://emcrisostomo.github.io/fswatch/) コマンドでそれを実行できます:```
fswatch -m poll_monitor --event Created -r /data/logs/zeek/ | awk '/^.*\/conn.*\.log\.gz$/' | parallel -j 5 python ~/zeek2es.py {} -g -d :::: -
jqコマンドがインストールされている場合、ElasticSearchなしでも、すべてのログにわたってconnection uidのような共通の フィールドを検索できます:``` find /usr/local/var/logs -name "*.log.gz" -exec python ~/Source/zeek2es/zeek2es.py {} -s -b -z ; | jq -c '. | select(.uid=="CLbPij1vThLvQ2qDKh")'
jq に精通していれば、これよりもはるかに複雑な jq クエリを使用できます。
Zeek データを ElasticSearch からすべて削除したい場合は、次のコマンドで実行できます:```
curl -X DELETE http://localhost:9200/zeek*