 cobbr/c2bridge
C2Bridges consentono agli sviluppatori di creare nuovi protocolli di comunicazione personalizzati e di utilizzarli rapidamente all'interno di Covenant.

I C2Bridges consentono agli sviluppatori di creare nuovi protocolli di comunicazione personalizzati e di utilizzarli rapidamente all'interno di Covenant.
I C2Bridges vengono utilizzati per sviluppare un protocollo di comando e controllo in uscita senza modificare alcun codice di Covenant. Per gli sviluppatori che si sentono a proprio agio nell'integrare nuovi listener, un nuovo protocollo C2 dovrebbe essere aggiunto come nuovo tipo di listener di prima classe, completamente integrato nell'interfaccia. Tuttavia, in alcune situazioni può essere più rapido creare un C2Bridge all'esterno di Covenant e collegarlo a un BridgeListener per proof-of-concept o per testare nuovi protocolli.
Gli sviluppatori possono utilizzare il progetto C2Bridge come modello per creare nuovi C2Bridge. All'interno del progetto C2Bridge è presente una classe astratta C2Bridge. Uno sviluppatore può ereditare da questa classe e implementare le funzioni necessarie per leggere e scrivere dagli implant al BridgeListener utilizzando il nuovo protocollo C2 scelto.
using System.Threading;
using System.Threading.Tasks;

namespace C2Bridge
{
    /// <summary>
    /// IC2Bridge is an interface implemented by the C2Bridge class.
    /// </summary>
    public interface IC2Bridge
    {
        Task RunAsync(CancellationToken token);
    }

    /// <summary>
    /// C2Bridge is an abstract class that new C2Bridges should inherit from.
    /// </summary>
    public abstract class C2Bridge : IC2Bridge
    {
        // The BridgeConnector handles communication between the Covenant server and the C2Bridge
        protected BridgeConnector BridgeConnector { get; set; }
        // The BridgeProfile handles parsing and formatting data passed between the implant and Covenant
        protected BridgeProfile BridgeProfile { get; set; }

        /// <summary>
        /// The constructor for the C2Bridge. New C2Bridges should use their own constructor that accepts
        /// any command line arguments needed for the C2Bridge to function.
        /// </summary>
        /// <param name="Connector">The BridgeConnector that handles communication with the Covenant server.</param>
        /// <param name="Profile">The BridgeProfile that handles the parsing and formatting of data.</param>
        protected C2Bridge(BridgeConnector Connector, BridgeProfile Profile)
        {
            this.BridgeConnector = Connector;
            this.BridgeProfile = Profile;
            BridgeConnector.OnReadBridge += OnReadBridge;
        }

        /// <summary>
        /// The RunAsync function is the main function that should start the C2Bridge and continue to run until you
        /// are done with your operation. C2Bridge developers should implement the logic to start and run the listener
        /// within this function.
        /// </summary>
        /// <param name="Token">The CancellationToken that will cancel the C2Bridge if the source of the token is cancelled.</param>
        /// <returns></returns>
        public abstract Task RunAsync(CancellationToken Token);

        /// <summary>
        /// The OnReadBridge function is called each time data is read from the Covenant server meant for an implant.
        /// C2Bridge developers should implement the logic to determine which implant this data is meant for and write
        /// this data to the implant.
        /// </summary>
        /// <param name="sender">
        /// Sender is the object that called the OnReadBridge function. C2Bridge developers can safely ignore this parameter.
        /// </param>
        /// <param name="args">Args contains the data that should be written from the Covenant server to the implant.</param>
        protected abstract void OnReadBridge(object sender, BridgeConnector.ReadBridgeArgs args);

        /// <summary>
        /// The WriteToConnector function handles writing data from an implant to the Covenant server. This logic should be the
        /// same for all C2Bridge types, but can be overloaded by the C2Bridge developer if custom logic is needed.
        ///
        /// When calling this function, the returned GUID string should be used to track implant GUID values by the C2Bridge.
        /// </summary>
        /// <param name="Data">The data read from the implant that should be written to the Covenant server.</param>
        /// <returns>
        /// Returns the GUID value parsed out of the Data. This value should be used to track implant GUID values by the C2Bridge.
        /// </returns>
        protected virtual string WriteToConnector(string Data)
        {
            var parsed = this.BridgeProfile.ParseWrite(Data);
            if (parsed != null)
            {
                _ = this.BridgeConnector.Write(this.BridgeProfile.FormatRead(parsed));
                return parsed.Guid;
            }
            return null;
        }

        /// <summary>
        /// The GetBridgeMessengerCode function should contain the code to be embedded in the implant for communication with
        /// the C2Bridge. This function is not actually used anywhere within the project, but is here so that the necessary
        /// implant code can be found along with the C2Bridge. C2Bridge developers should place the code here for use within
        /// a BridgeProfile's BridgeMessengerCode property.
        /// </summary>
        /// <returns></returns>
        protected abstract string GetBridgeMessengerCode();
    }
}
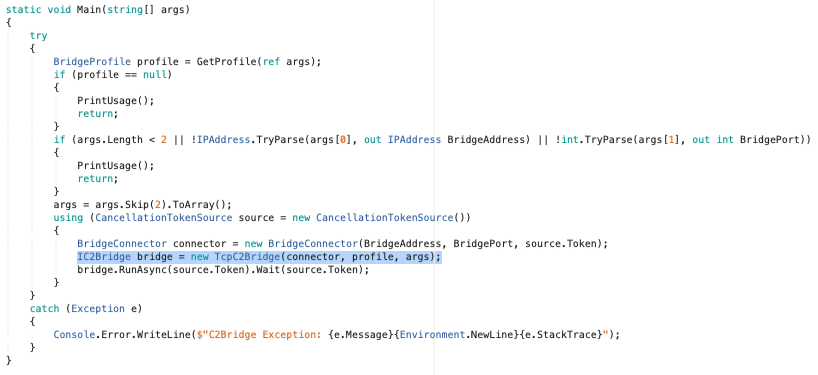
Il progetto C2Bridge contiene una classe di esempio TCPC2Bridge che eredita da questa interfaccia e fornisce un esempio di come implementarne una.
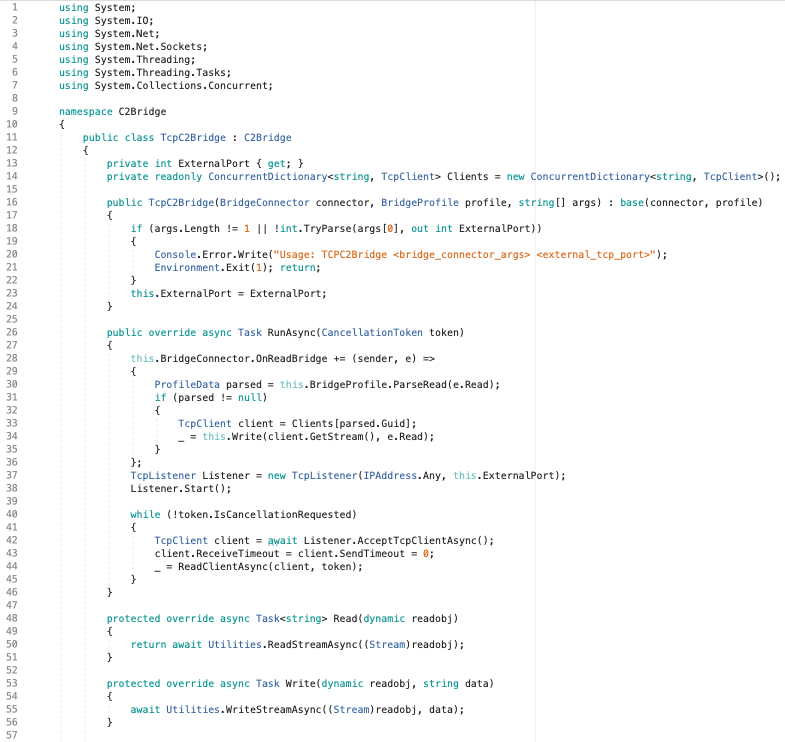
Una volta scritto il tuo nuovo C2Bridge, la chiamata al costruttore per TCPC2Bridge all'interno della funzione Main() può essere sostituita con il nuovo costruttore:
Il metodo astratto GetBridgeMessengerCode() non viene effettivamente utilizzato da nessuna parte all'interno del progetto C2Bridge, ma serve a collegare un C2Bridge a un implant. Un implant necessita di codice in grado di leggere e scrivere verso il C2Bridge in uscita. Questo codice è specifico per un dato C2Bridge e deve essere inserito all'interno del metodo ereditato GetBridgeMessengerCode(). Un utente di Covenant che utilizza un C2Bridge prenderà il BridgeMessengerCode da questo metodo e lo userà all'interno di un BridgeProfile.
Gli utenti di Covenant che utilizzano un C2Bridge dovranno configurare un BridgeProfile specifico per il C2Bridge. Gli implant Grunt devono sapere come leggere e scrivere verso il C2Bridge in uscita. La proprietà BridgeProfile.BridgeMessengerCode rappresenta il codice che verrà inserito nell'implant ed è responsabile della lettura e scrittura verso il C2Bridge in uscita. Questo codice dovrebbe trovarsi nel metodo GetBridgeMessengerCode() di un C2Bridge.
Gli utenti possono creare un BridgeProfile completamente nuovo o modificare il DefaultBridgeProfile con il BridgeMessengerCode corretto. Per farlo, vai alla pagina di navigazione dei listener e seleziona la scheda "Profiles":
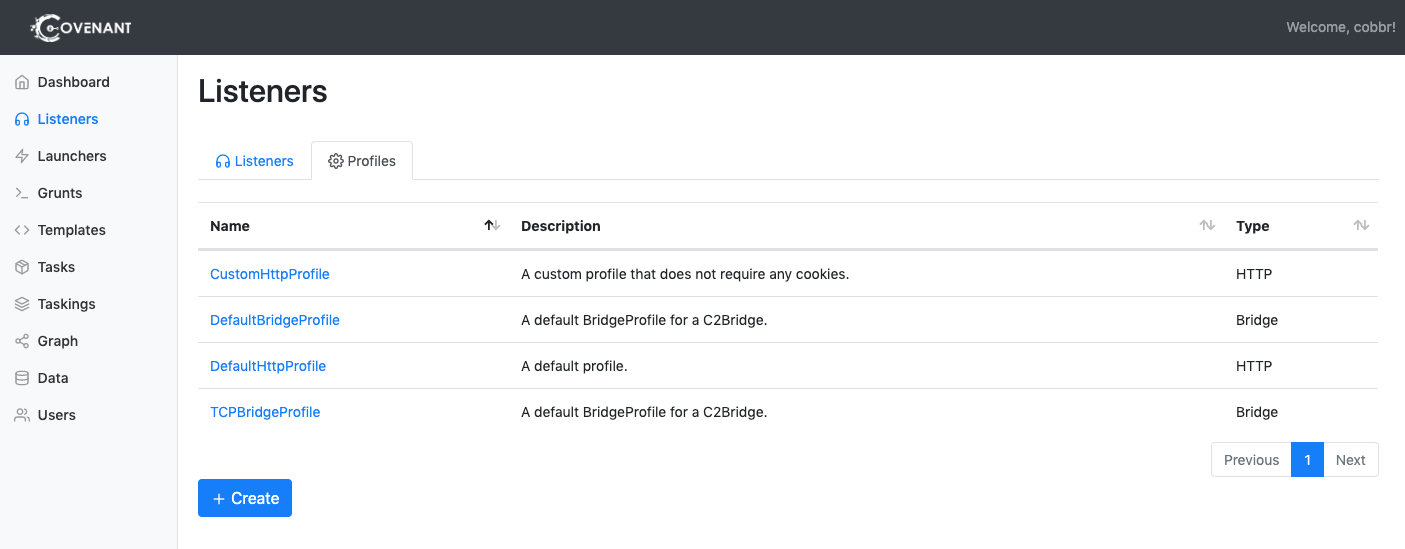
Per creare un nuovo profilo, fai clic sul pulsante "Create". Per modificare un profilo specifico, fai clic sul nome del profilo. Tieni presente che non puoi modificare i profili associati a listener attivi.
Dopo aver fatto clic su "Create", seleziona la scheda "BridgeProfile":
