 corelight/zeek2es
ज़ीक लॉग को फ़िल्टर करके Elastic/OpenSearch+Humio में स्थानांतरित करने के लिए एक Python एप्लिकेशन। यह ऐप आगे की प्रोसेसिंग के लिए शुद्ध JSON लॉग को stdout पर आउटपुट भी कर सकता है!

यह Python एप्लिकेशन Zeek के ASCII TSV और JSON लॉग्स को ElasticSearch के bulk load JSON प्रारूप में अनुवादित करता है।
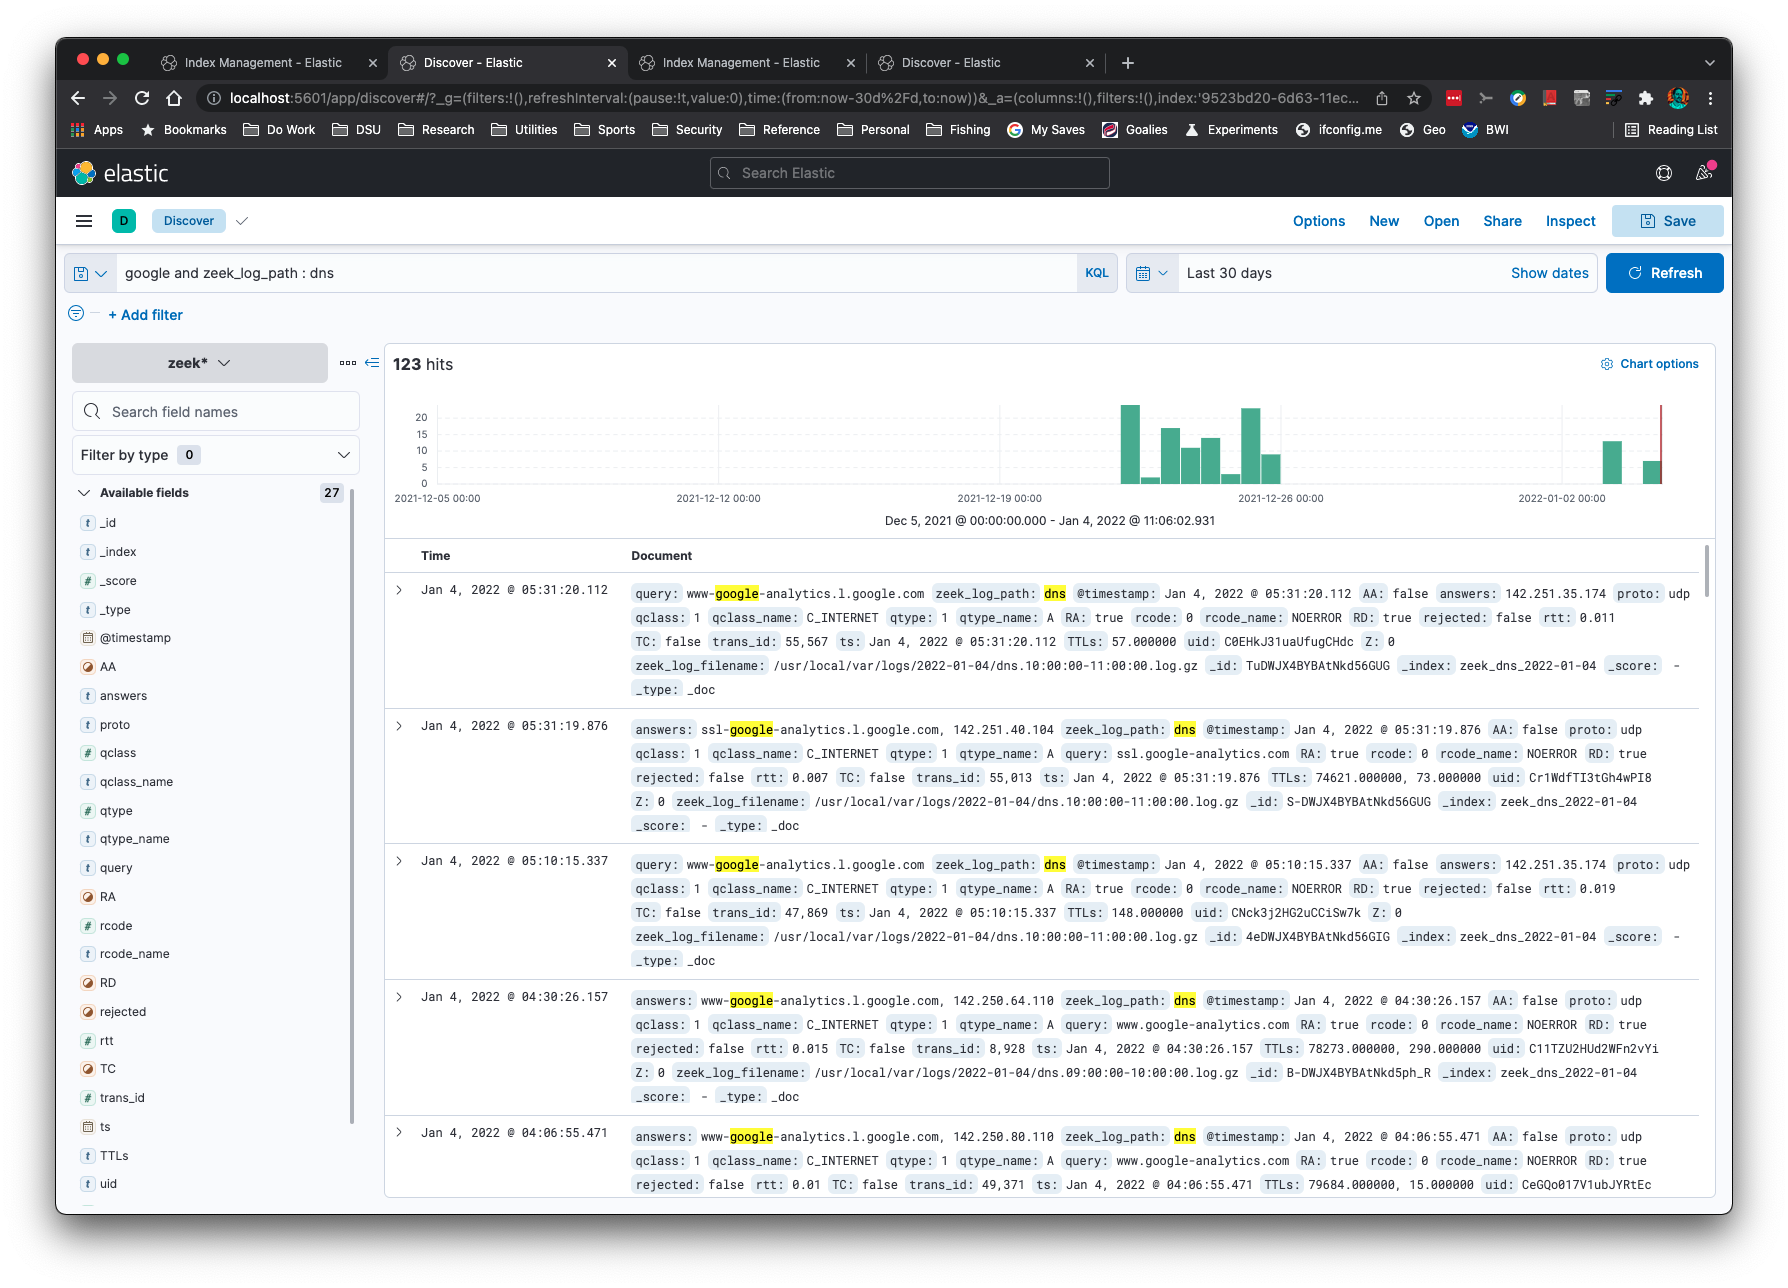
क्या आप एक ही कनेक्शन ID (uid) के लिए कई Zeek लॉग देखना चाहते हैं या फ़ाइल ID (fuid)? यहाँ files.log, http.log, और conn.log एक ही uid के लिए दिए गए परिणाम हैं:
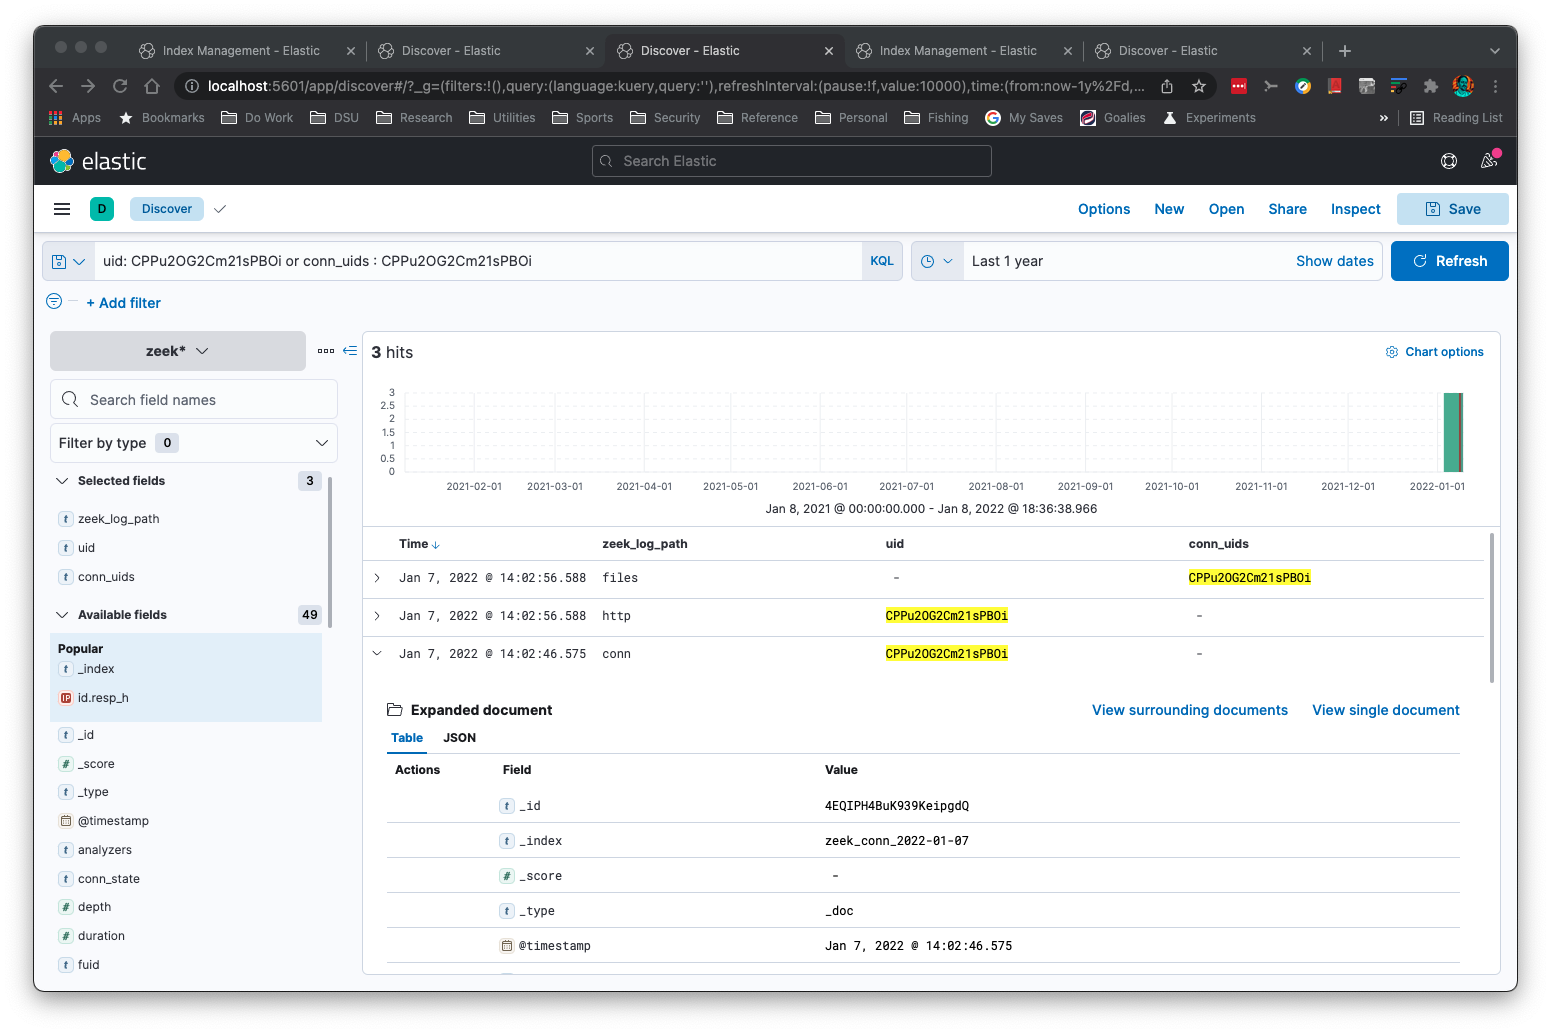
आप Zeek के 'addr' प्रकार पर सबनेट खोज कर सकते हैं:
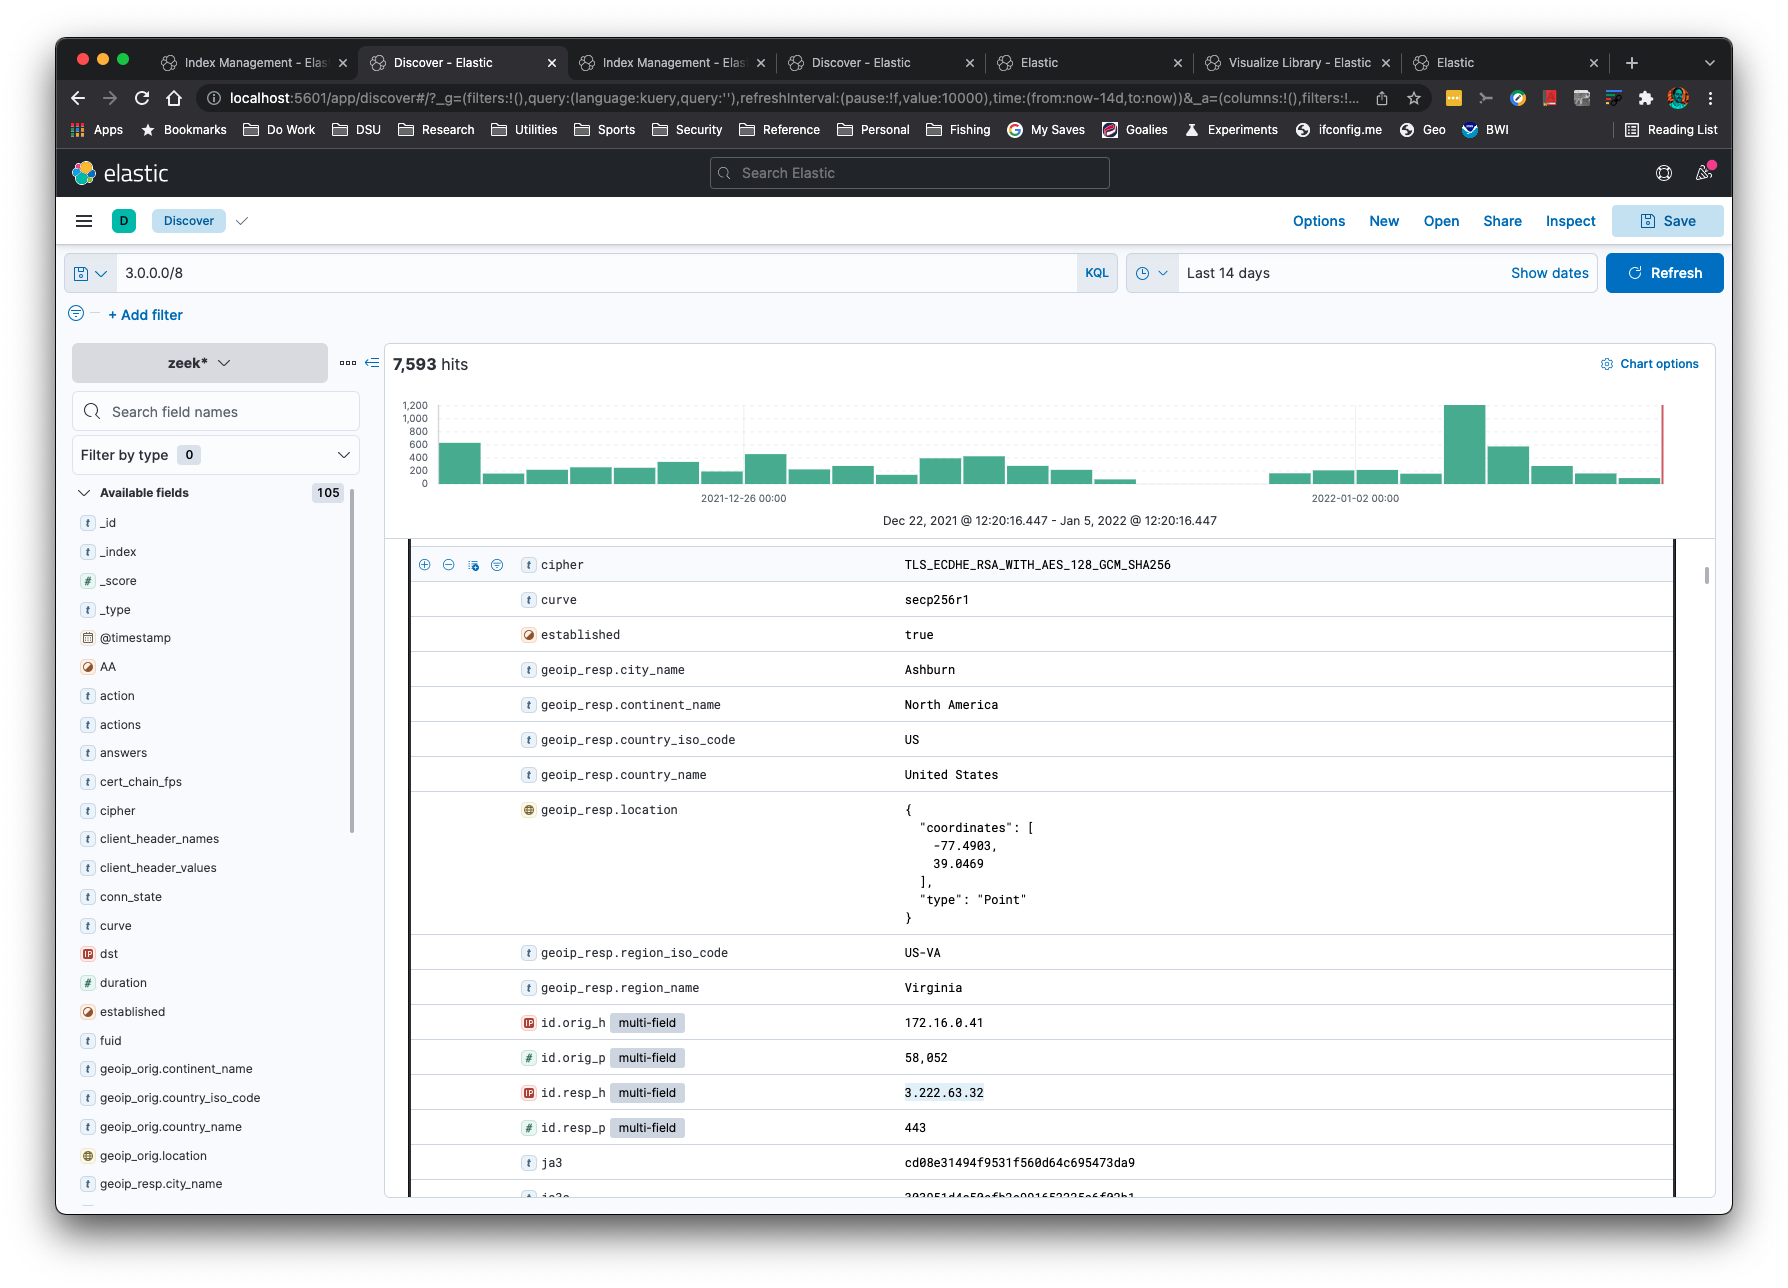
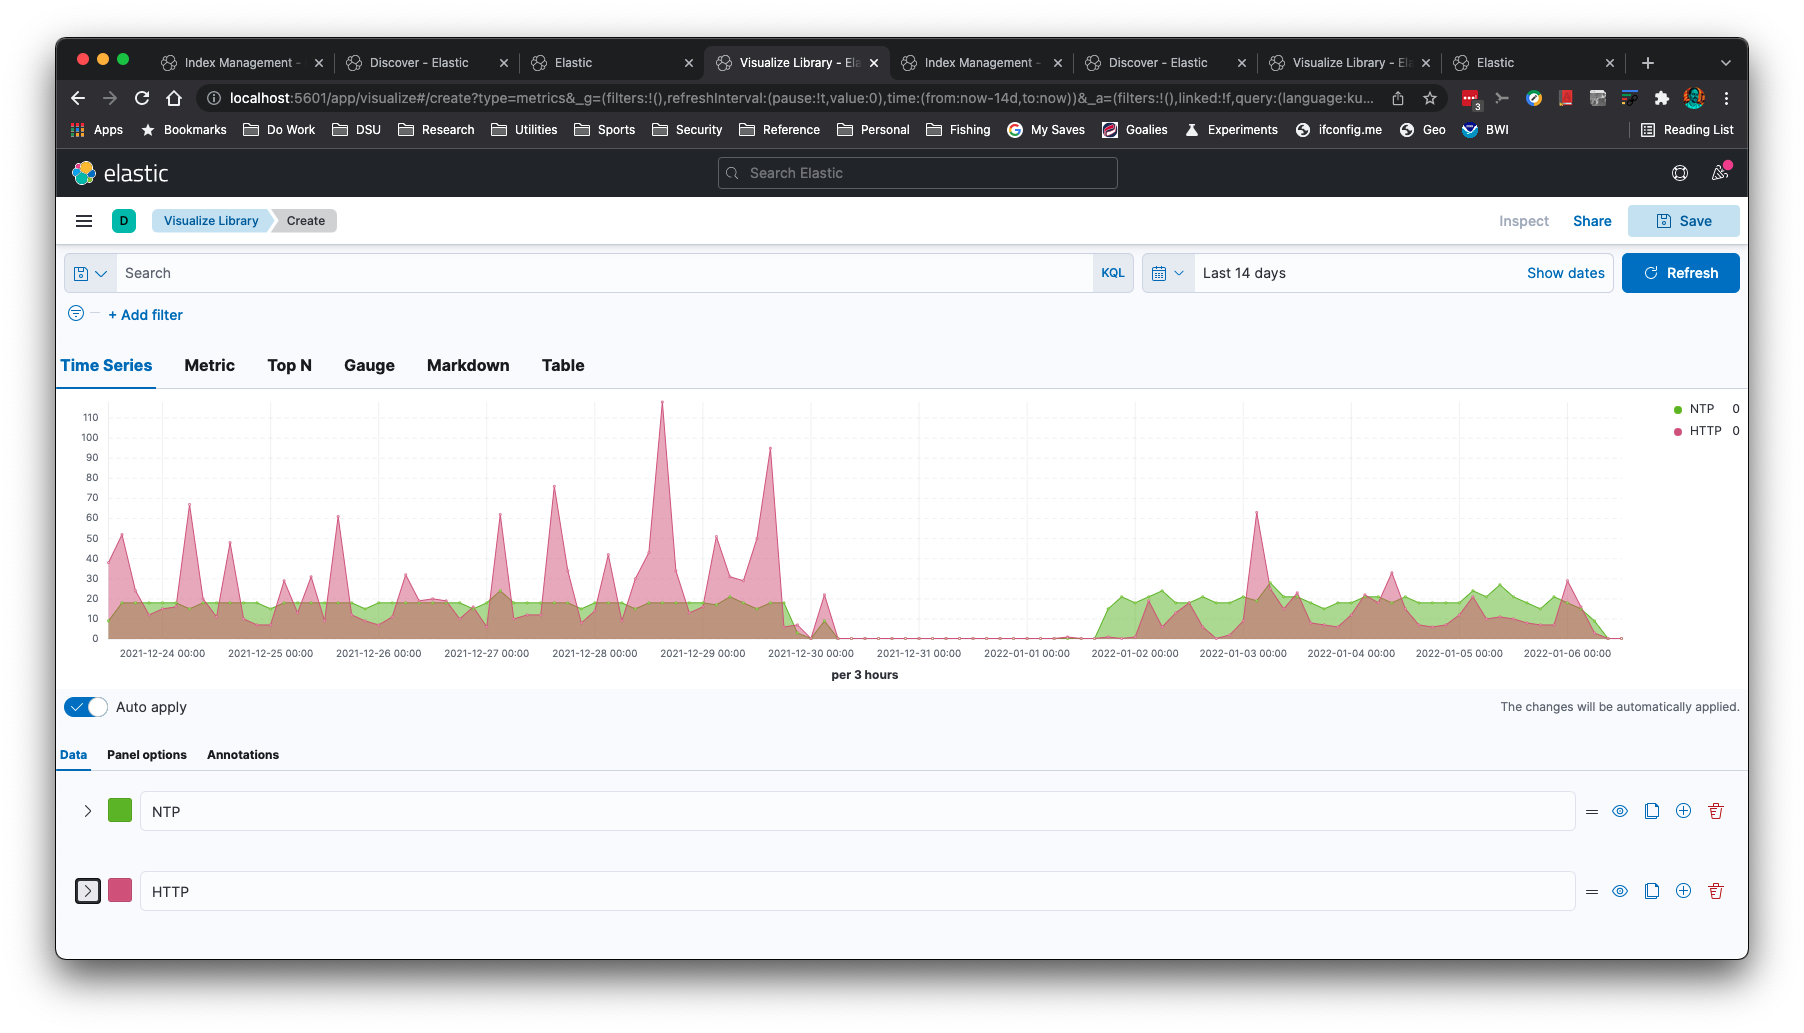
आप समय-श्रृंखला ग्राफ़ बना सकते हैं, जैसे यह NTP और HTTP ग्राफ़:
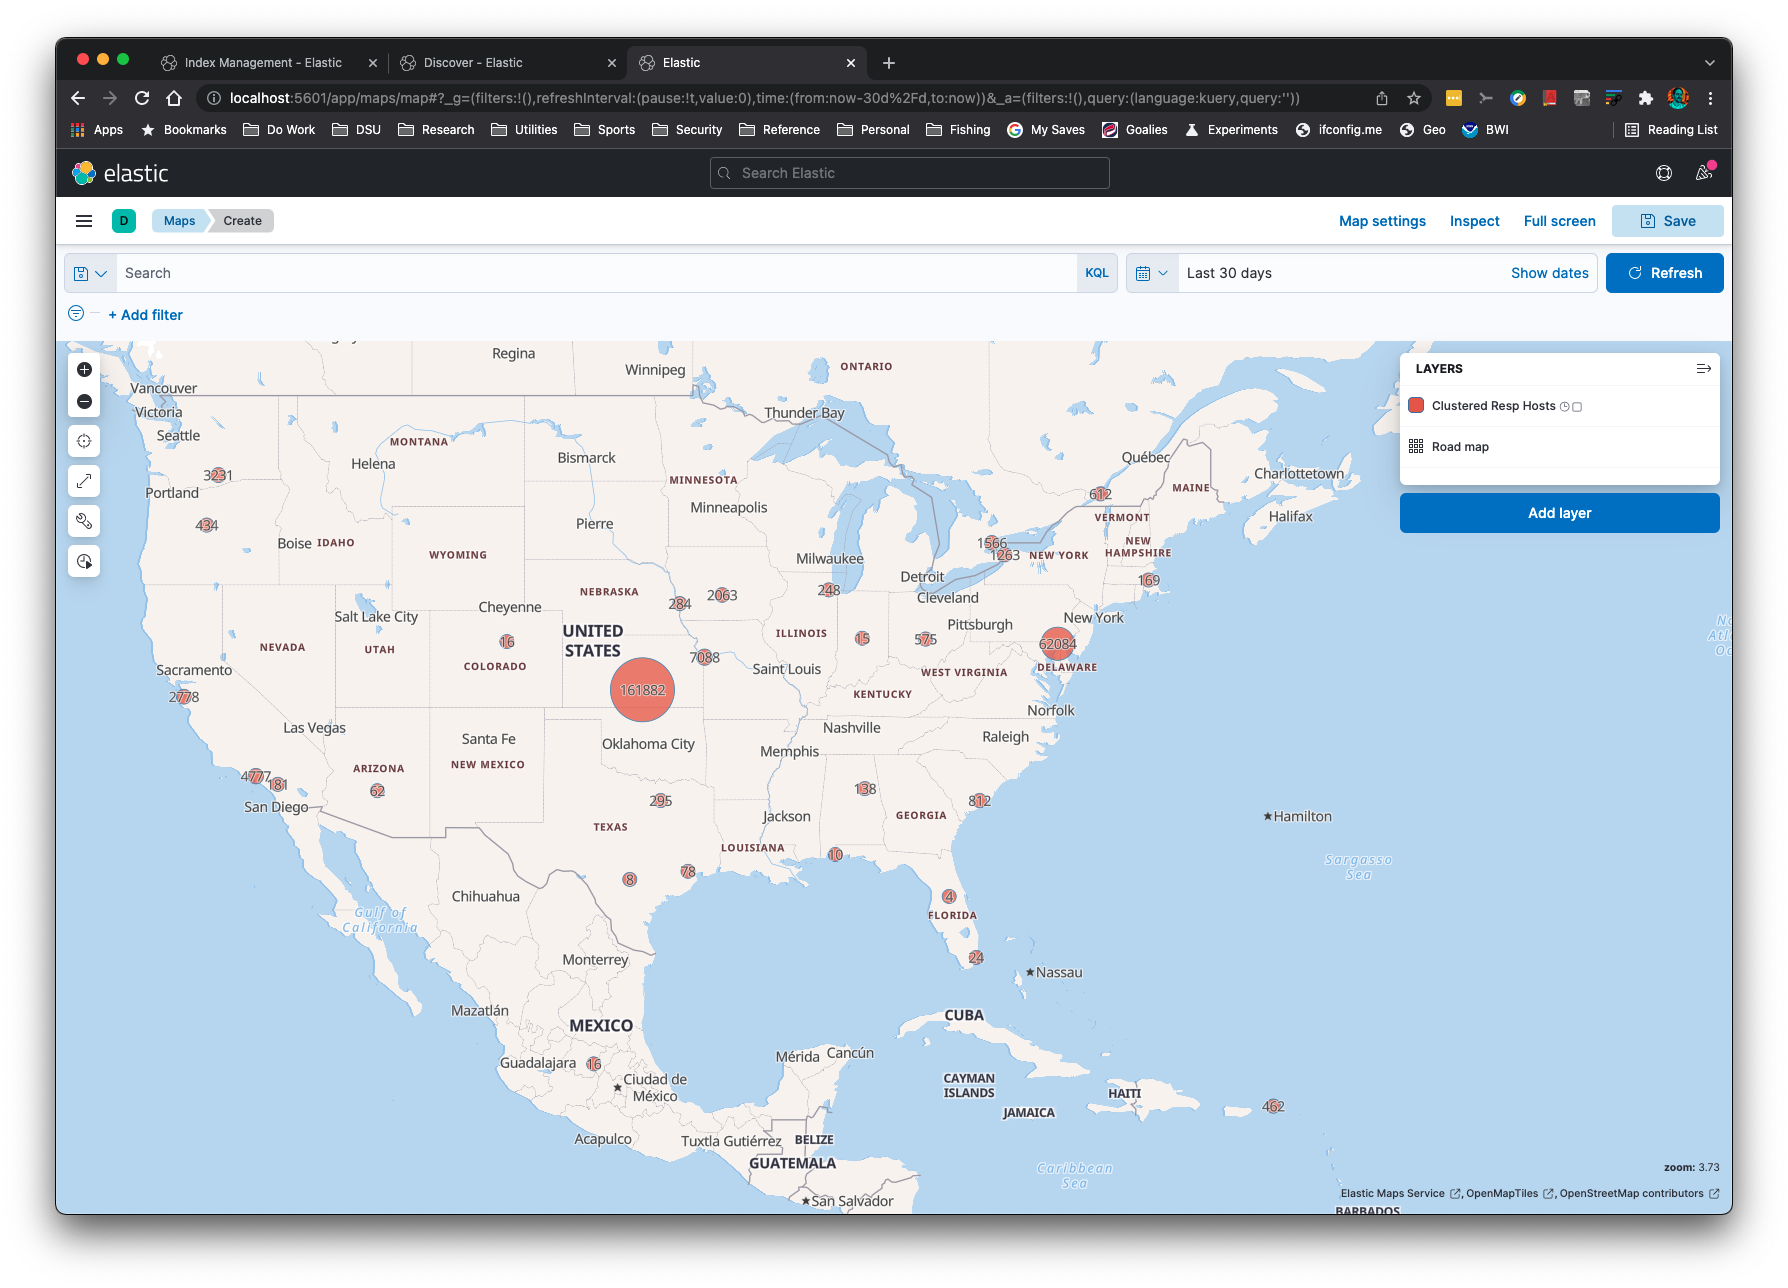
IP पते -g कमांड लाइन विकल्प के साथ जियोलोकेट किए जा सकते हैं:
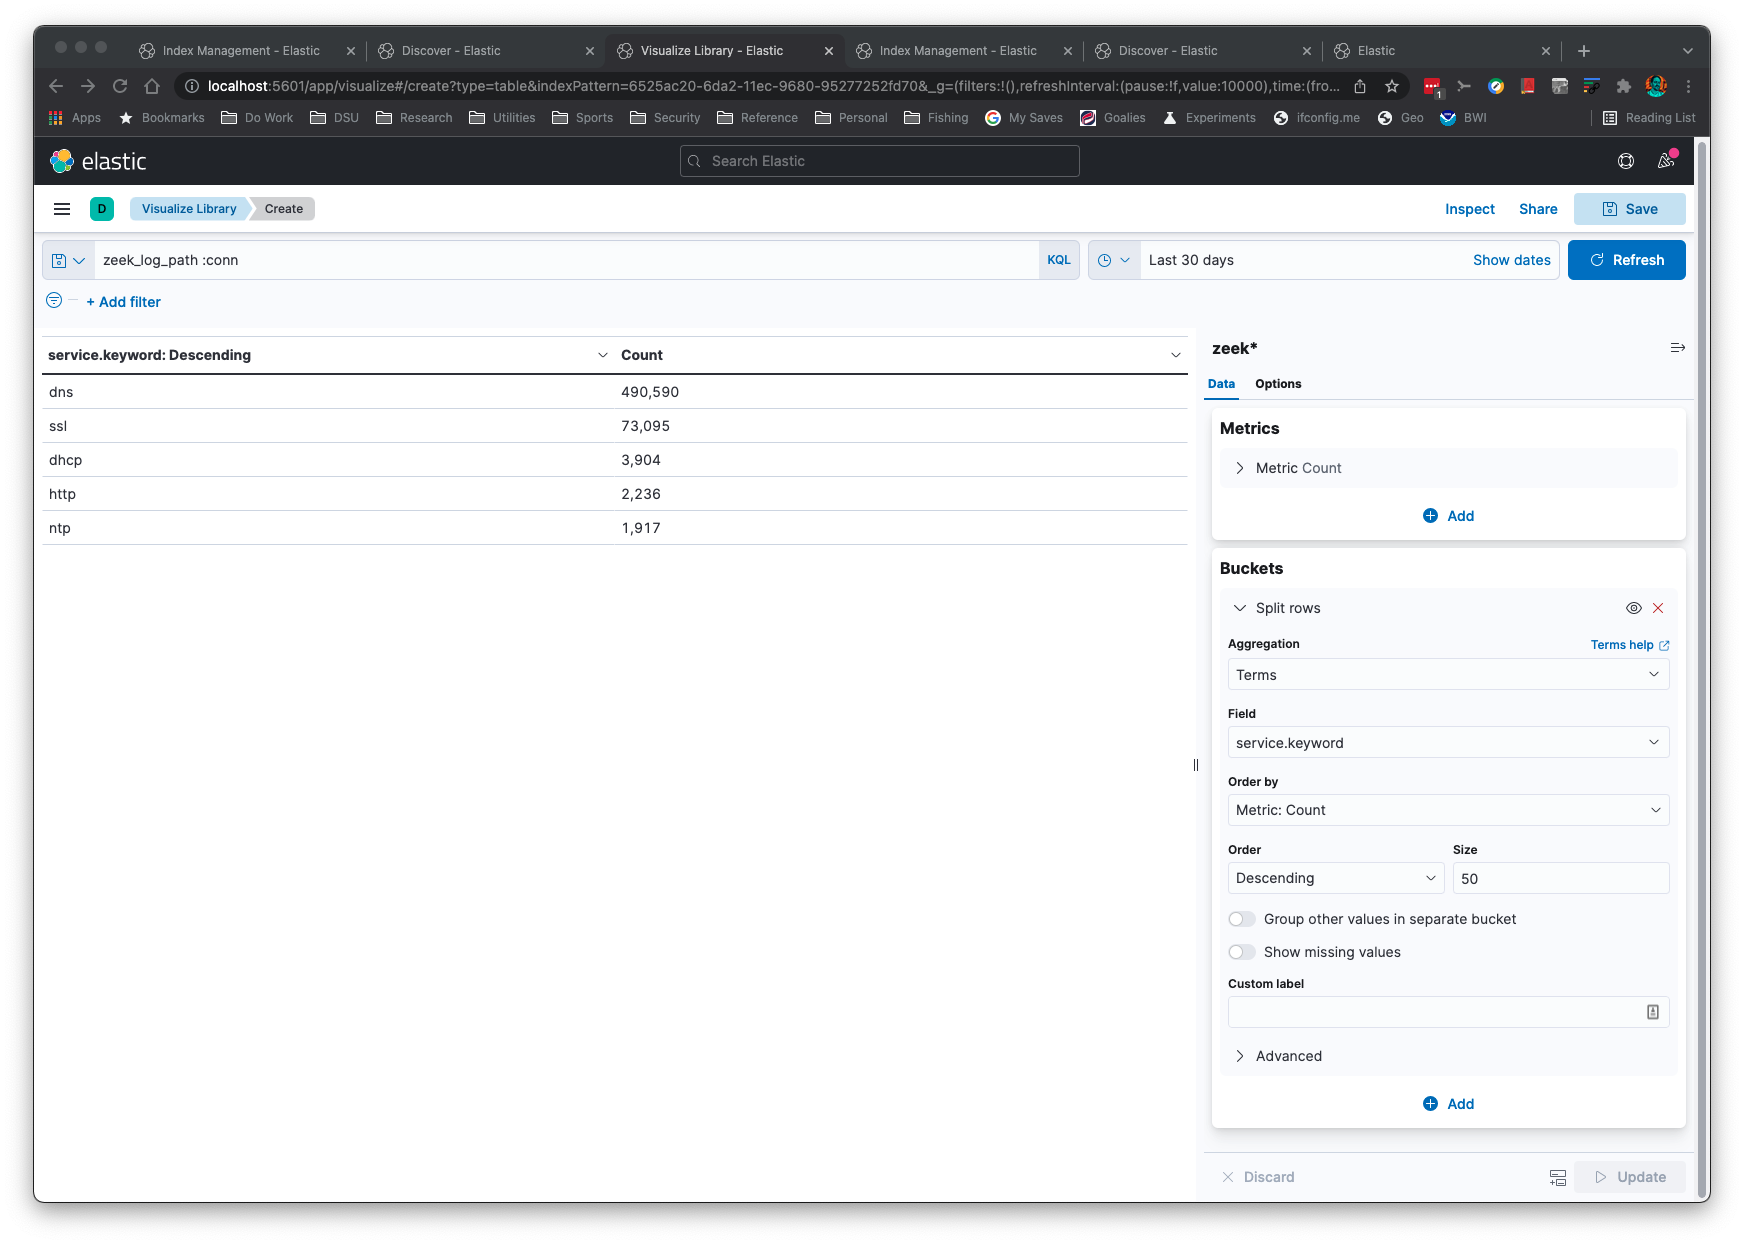
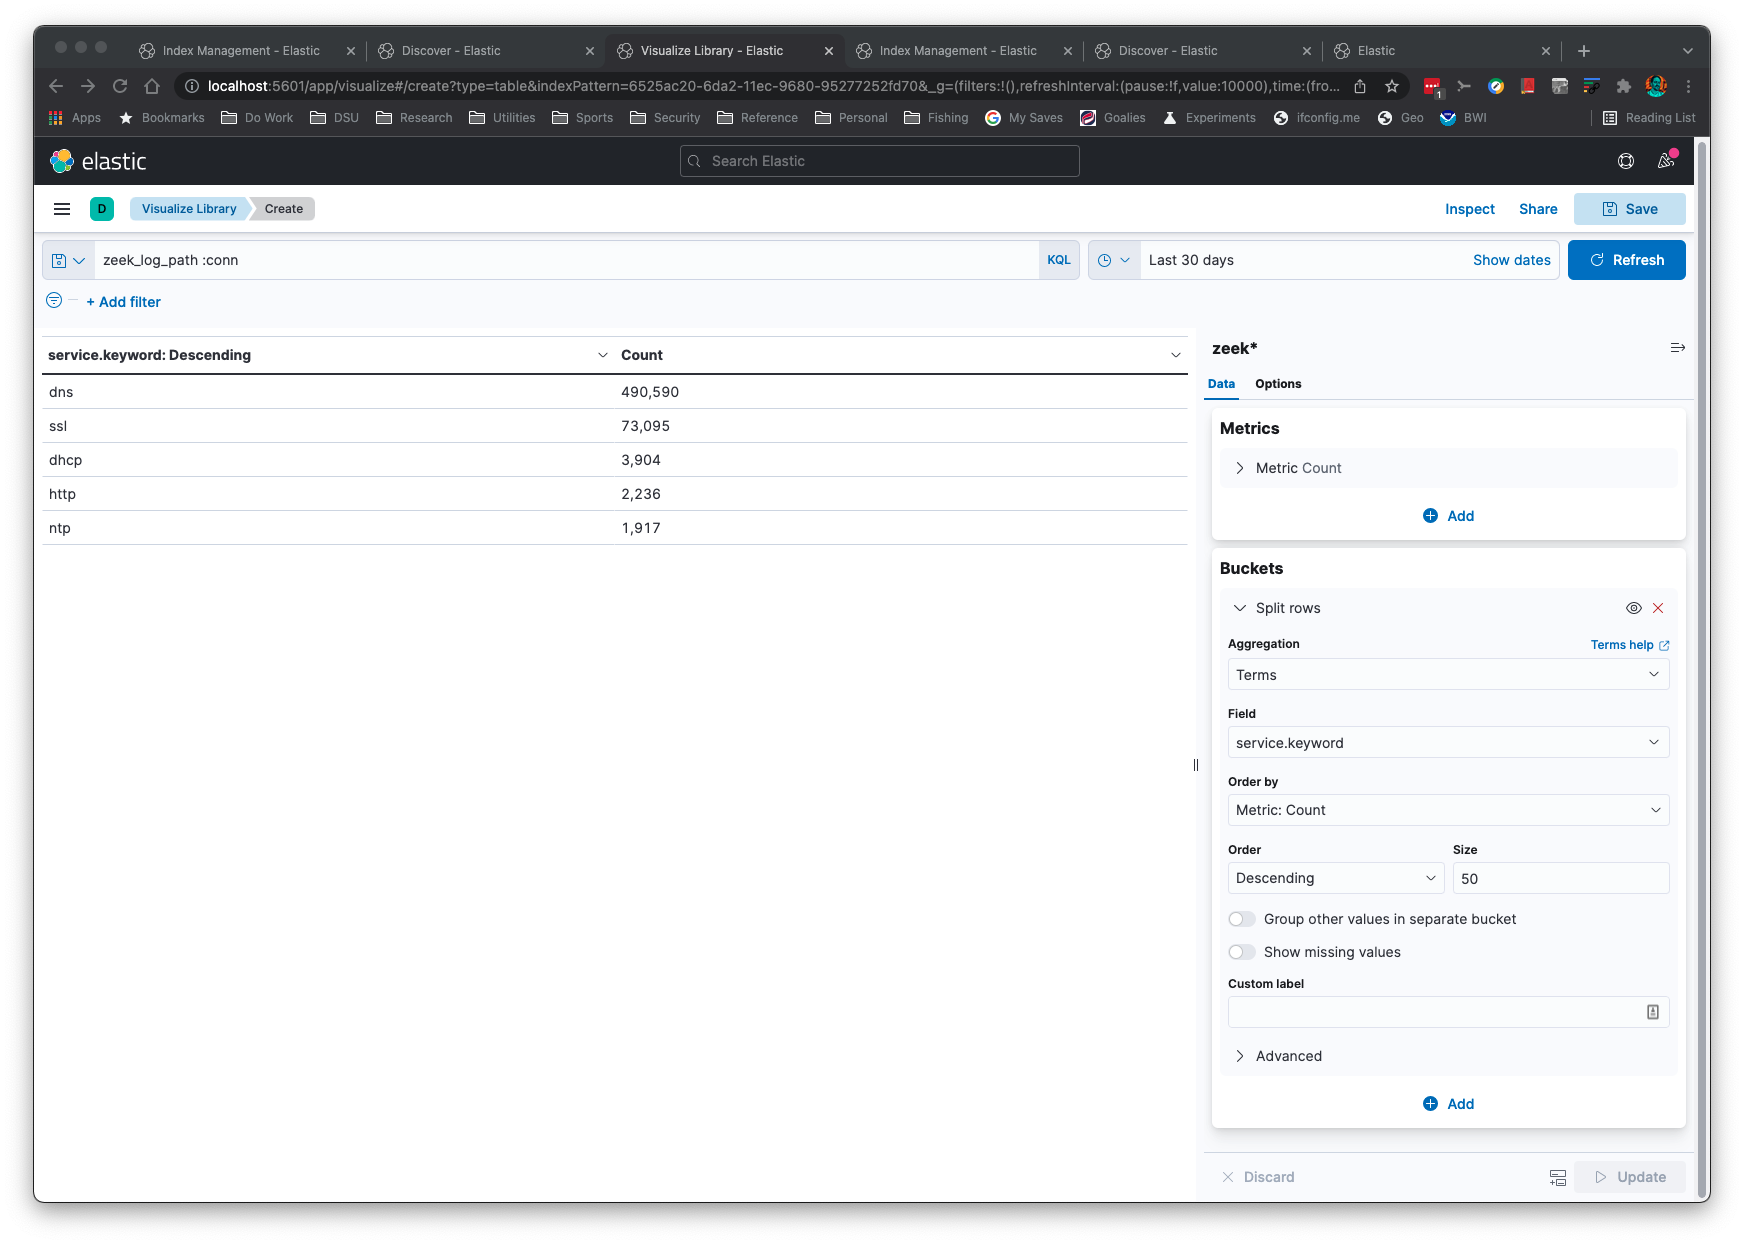
एग्रीगेशन सरल और त्वरित हैं:
यह एप्लिकेशन Zeek लॉग प्रारूप बदलने पर "बस काम करेगा"। तर्क फ़ील्ड नामों और संबंधित प्रकारों को पढ़ता है ताकि ElasticSearch में मैपिंग सही ढंग से सेट की जा सके।
यह एप्लिकेशन gzip या असम्पीडित लॉग्स को पहचान लेगा। यह एप्लिकेशन मानता है
कि आपने अपने localhost पर डिफ़ॉल्ट पोर्ट पर ElasticSearch सेट किया है।
यदि आपके पास ElasticSearch नहीं है, तो आप JSON को -s -b कमांड लाइन विकल्पों के साथ stdout पर आउटपुट कर सकते हैं
ताकि jq एप्लिकेशन से प्रोसेस किया जा सके।
आप -k कमांड लाइन विकल्प के साथ टेक्स्ट फ़ील्ड्स में keyword सबफ़ील्ड जोड़ सकते हैं। यह
Kibana में एग्रीगेशन के लिए उपयोगी है।
यदि आपके सिस्टम पर Python पहले से है, तो आपको अपनी मशीन पर Elasticsearch, Kibana और zeek2es.py के अलावा कुछ भी अतिरिक्त कॉपी करने की आवश्यकता नहीं है, यदि आपके पास पहले से requests लाइब्रेरी स्थापित है।
यह मानते हुए कि आप आवश्यकताओं को पूरा करते हैं, कुछ भी स्थापित करने की आवश्यकता नहीं है। आपको बस
zeek2es.py को अपने होस्ट पर कॉपी करके Python के साथ चलाना है। एक बार Zeek
लॉग्स को स्वचालित इंडेक्स नाम जनरेशन के साथ आयात किया जाता है (अर्थात, आपने -i विकल्प नहीं दिया था),
तो आपको अपने इंडेक्स "zeek_zeeklogname_date" नाम से मिलेंगे, जहाँ zeeklogname एक लॉग नाम है जैसे conn
और date YYYY-MM-DD प्रारूप में होता है। इस स्थिति में अपना Kibana इंडेक्स पैटर्न zeek* से मेल खाने के लिए सेट करें। यदि
आपने -i विकल्प के साथ अपना इंडेक्स नाम दिया है, तो आपको एक Kibana इंडेक्स पैटर्न बनाने की आवश्यकता होगी जो
आपकी नामकरण योजना से मेल खाता हो।
यदि आप zeek2es को अपग्रेड कर रहे हैं, तो कृपया zeek2es को अपग्रेड करने वाला अनुभाग देखें।
यदि आप Elastic v8.0+ का उपयोग कर रहे हैं, तो इसमें डिफ़ॉल्ट रूप से सुरक्षा सक्षम होती है। यह उपयोगकर्ता नाम और पासवर्ड, साथ ही HTTPS की आवश्यकता जोड़ता है।
यदि आप वाइल्डकार्ड के साथ इंडेक्स/डेटा स्ट्रीम्स को हटाने में सक्षम होना चाहते हैं (जैसा कि इस readme में दिए गए उदाहरण दिखाते हैं),
edit elasticsearch.yml with the following line:```
action.destructive_requires_name: false
आपको इस readme में दिए गए curl कमांड्स को `-k -u elastic:<password>` शामिल करने के लिए बदलना होगा,
जहाँ `elastic` उपयोगकर्ता का पासवर्ड निम्नलिखित जैसे कमांड से सेट किया जाता है:```
./bin/elasticsearch-reset-password -u elastic -i
आप zeek2es.py का उपयोग --user और --passwd कमांड लाइन विकल्पों के साथ अपने
ES क्रेडेंशियल्स निर्दिष्ट करने के लिए कर सकते हैं। आप इन विकल्पों को हेल्पर स्क्रिप्ट्स के लिए अतिरिक्त कमांड लाइन तर्कों के माध्यम से भी प्रदान कर सकते हैं।
संभवतः इस कोड का उपयोग करने का सबसे आसान तरीका Docker के माध्यम से है। सभी फ़ाइलें docker डायरेक्टरी में हैं।
सबसे पहले, आप अपने वातावरण के अनुरूप .env फ़ाइल में CHANGEME!!! वाली पंक्तियों को संपादित करना चाहेंगे।
आपको मिलान करने के लिए docker/zeek2es/entrypoint.sh में Elastic पासवर्ड भी संपादित करना होगा। यह --passwd विकल्प के बाद पाया जा सकता है।
इसके बाद, आप docker डायरेक्टरी में बदल सकते हैं और एक zeek2es और Elasticsearch क्लस्टर चालू करने के लिए निम्न कमांड टाइप कर सकते हैं:```
docker-compose build
dockr-compose up
अब आप `VOLUME_MOUNT/data/logs` डायरेक्ट्री में लॉग्स रख सकते हैं (`VOLUME_MOUNT` जिसे आपने `.env` फ़ाइल में सेट किया है)।
जब इस डायरेक्ट्री में लॉग्स बनाए जाते हैं, zeek2es उन्हें प्रोसेस करना और Elasticsearch में push करना शुरू कर देगा।
फिर आप `.env` फ़ाइल में सेट किए गए username और password के साथ https://localhost:5601 पर login कर सकते हैं।
डिफ़ॉल्ट रूप से एक self-signed certificate होता है, लेकिन अगर आप docker compose फ़ाइलों को संपादित करते हैं तो आप उसे बदल सकते हैं।  एक बार अंदर
Kibana में आप Stack Management->Data Views पर जाएँ और `logs*` के लिए `@timestamp` timestamp के साथ एक data view बनाएँ।
अब आप Discover पर जाकर अपने लॉग्स खोजना शुरू कर पाएँगे!  आपका डेटा आपके द्वारा सेट किए गए `VOLUME_MOUNT/data` डायरेक्ट्री में persistent रहता है।
यदि आप सारा डेटा हटाना चाहते हैं, तो बस `rm -rf VOLUME_MOUNT/data` चलाएँ, और उस remove कमांड में अपनी सेट की गई डायरेक्ट्री डाल दें।
अगली बार जब आप अपना cluster शुरू करेंगे, तो वह और डेटा के लिए बिल्कुल नया होगा।

## zeek2es को अपग्रेड करना <a name="upgradingzeek2es" />

अधिकांश अपग्रेड नए [zeek2es.py](https://github.com/corelight/zeek2es/blob/master/zeek2es.py) को पुराने के ऊपर कॉपी करने जितने सरल होने चाहिए
कॉपी करने जितने सरल होने चाहिए।  कुछ मामलों में, `-g` कमांड लाइन विकल्प के लिए आवश्यक ES ingest pipeline
अपग्रेड के दौरान बदल सकती है।  इसलिए, दृढ़ता से अनुशंसा की जाती है कि आप zeek2es.py का नया संस्करण चलाने से पहले
अपने [ingest pipeline](#esingestpipeline) को हटा दें।

### ES Ingest Pipeline <a name="esingestpipeline" />

यदि आपको [`"zeekgeoip" ES ingest pipeline को हटाने](https://www.elastic.co/guide/en/elasticsearch/reference/current/delete-pipeline-api.html) की आवश्यकता है
जिसका उपयोग `-g` कमांड लाइन विकल्प के साथ IP addresses को geolocate करने के लिए किया जाता है, आप इसे ग्राफिक रूप से
Kibana के Stack Management->Ingest Pipelines के माध्यम से कर सकते हैं या यह कमांड आपके लिए कर देगा:```
curl -X DELETE "localhost:9200/_ingest/pipeline/zeekgeoip?pretty"
यह कमांड जब भी आप अपनी zeek2es.py की कॉपी अपडेट करें तो दृढ़ता से अनुशंसित है।
