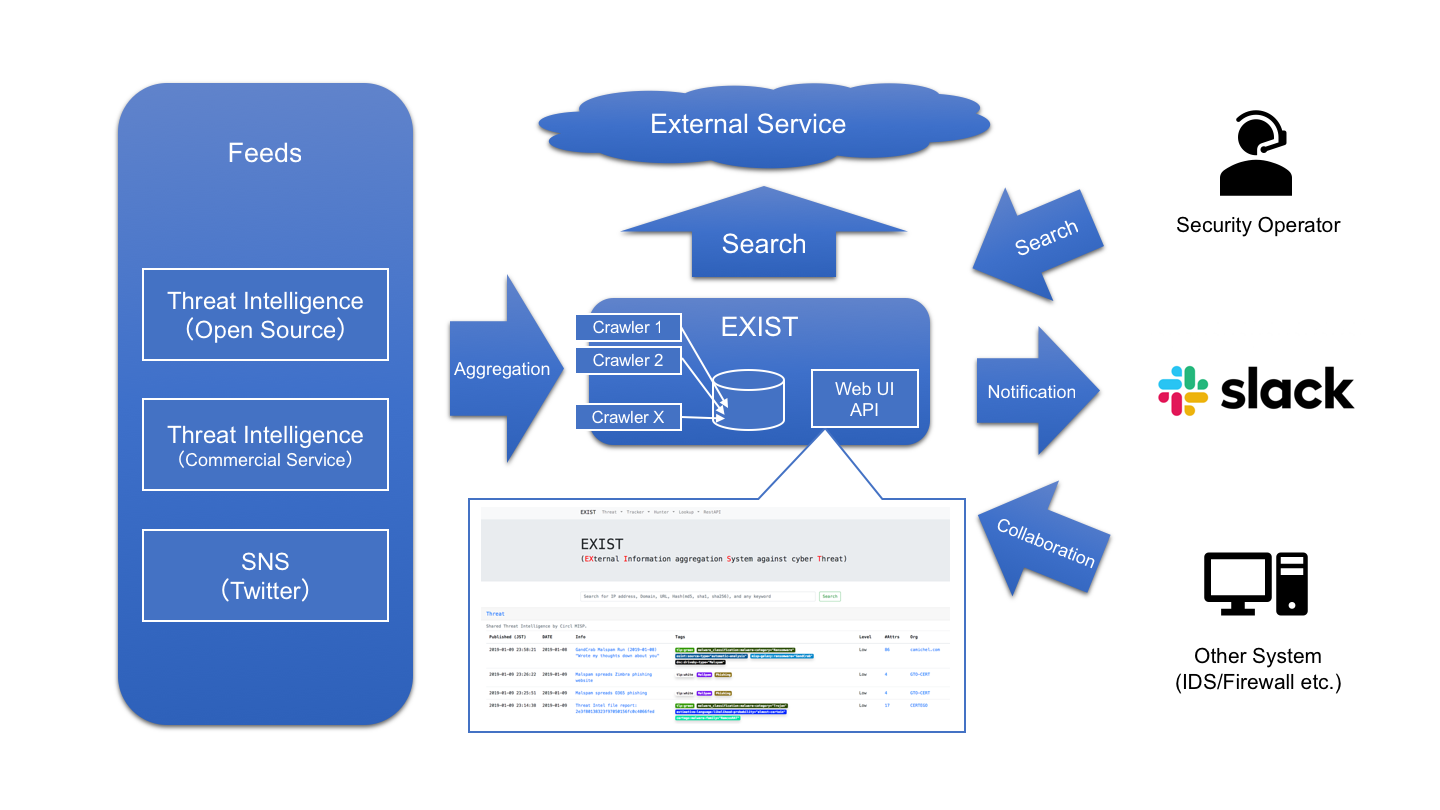

EXIST is a web application for aggregating and analyzing cyber threat intelligence.
⚠️ This repository is unmaintained / archived. Security issues will not be fixed.
EXIST is a web application for aggregating and analyzing CTI (cyber threat intelligence).
EXIST is written by the following software.
EXIST is a web application for aggregating CTI to help security operators investigate incidents based on related indicators.
EXIST automatically fetches data from several CTI services and Twitter via their APIs and feeds. You can cross-search indicators via the web interface and the API.
If you have servers logging network behaviors of clients (e.g., logs of DNS and HTTP proxy servers, etc.), you will be able to analyze the logs by correlating with data on EXIST. If you implement some programs by using the API, you will realize automated CTI-driven security operation center.
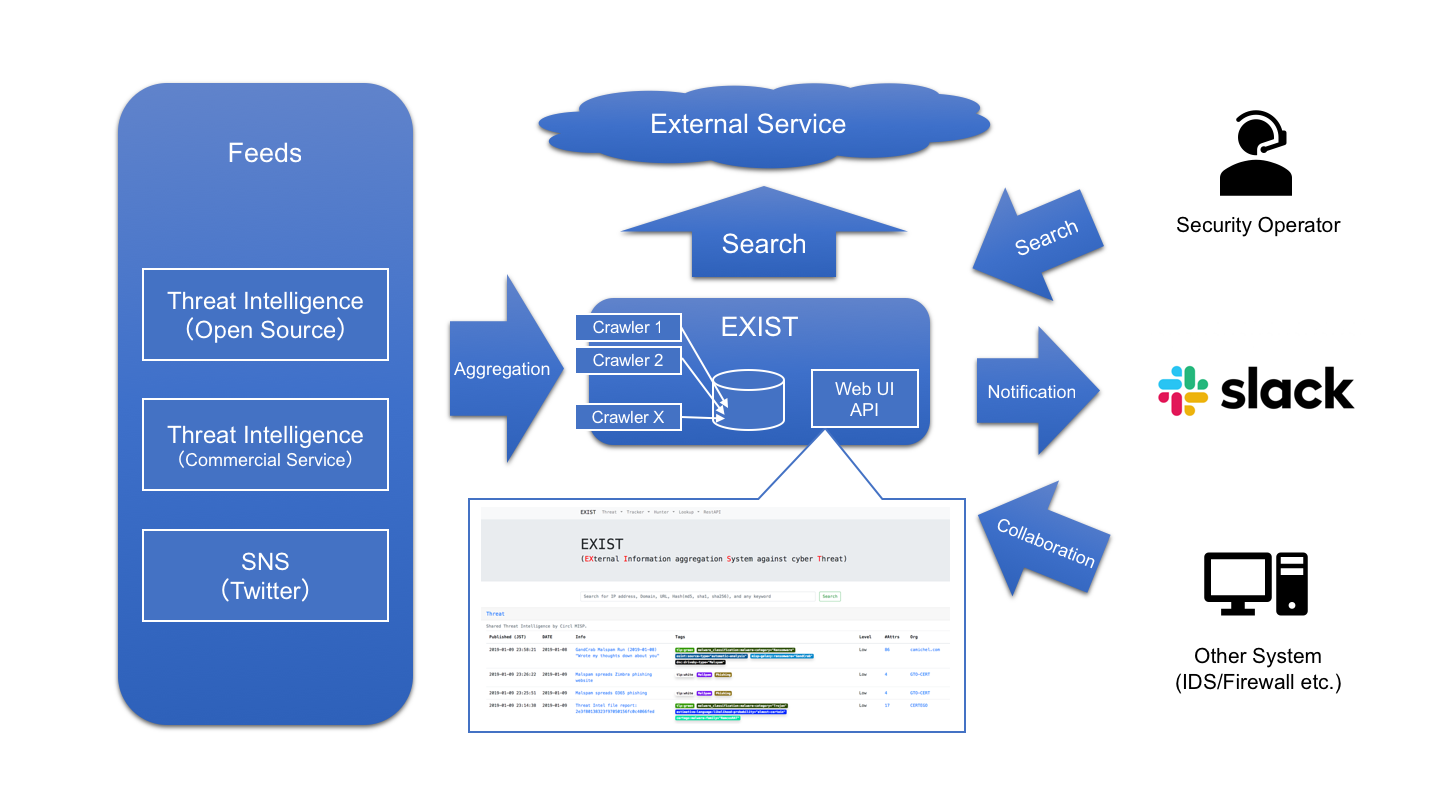
Just type domain in the search form.
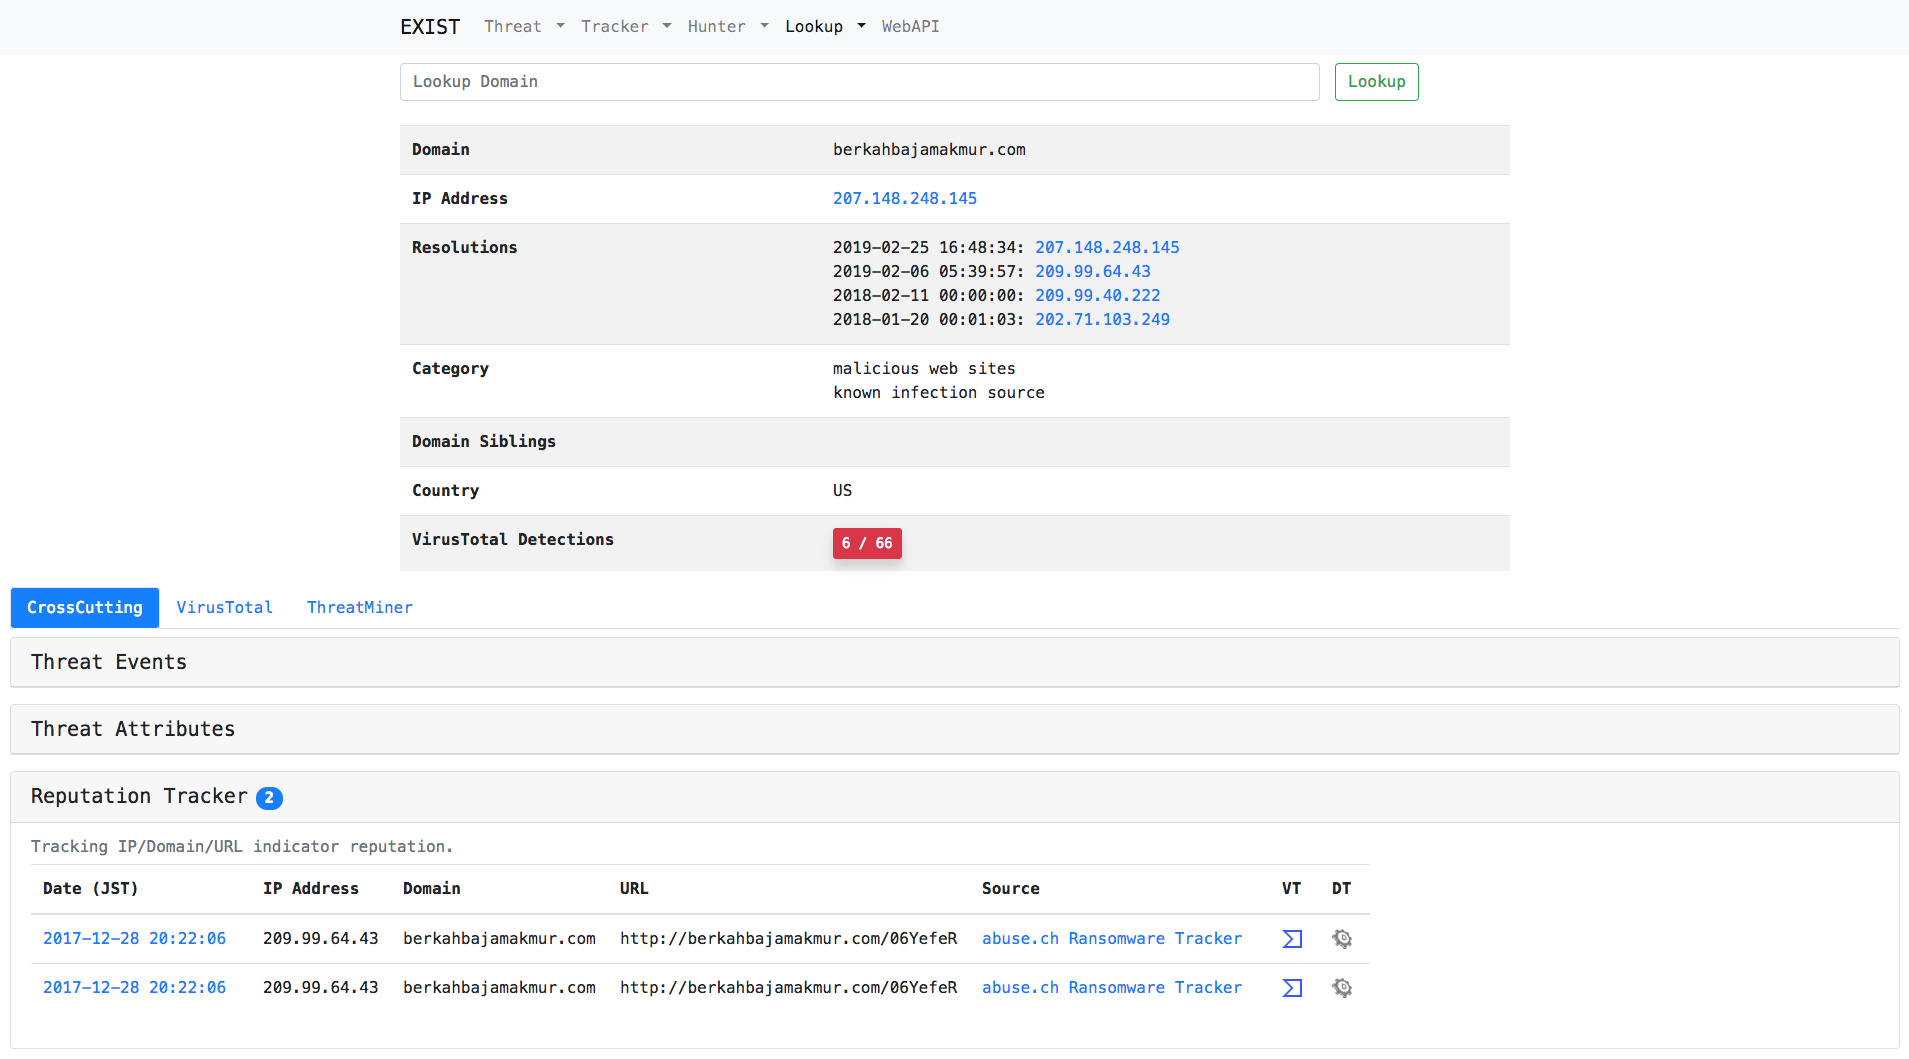
Just type url in the search form.
Just add keywords in the Threat Hunter or Twitter Hunter.

Tracker automatically collects data feeds from several CTI services.
Hunter enables us to set queries for gathering data from several CTI services and Twitter.
Lookup retrieves information related to specific information (e.g. IP address, domain) from several internet services (e.g. whois).
A tool for annotating tweets from twitter tracker.
Provide data stored in the EXIST database by Web API.
After that I assume the environment of CentOS 7 or Ubuntu 18.04 LTS. Please at your own when deploying to other environment.
$ sudo pip install -r requirements.txt
$ curl -sS https://downloads.mariadb.com/MariaDB/mariadb_repo_setup | sudo bash
$ sudo yum install MariaDB-server MariaDB-client
$ sudo apt install mariadb-server mariadb-client
$ sudo systemctl start mariadb
$ sudo systemctl enable mariadb
.env in reference to .env.example. And edit according to your DB settings.Secret key for Django has to be written in .env file.
First, run the key generator:
$ python keygen.py
(example)> 70mm6h)()h3r&*b9xq$e52=-7($p=5983gfoyz%$d-j-gd7u5@
and write secret key to the .env file:
...
# EXIST Application Settings
EXIST_SECRET_KEY="70mm6h)()h3r&*b9xq$e52=-7($p=5983gfoyz%$d-j-gd7u5@"
...
$ python manage.py makemigrations exploit reputation threat threat_hunter twitter twitter_hunter news news_hunter vuln
$ python manage.py migrate
Reputation tracker uses redis as the Celery cache server backend.
$ sudo yum install redis
$ sudo systemctl start redis
$ sudo systemctl enable redis
$ sudo apt install redis-server
$ sudo systemctl start redis-server
$ sudo systemctl enable redis-server
Reputation tracker uses Celery as an asynchronous task job queue.
# Name of nodes to start
# here we have a single node
CELERYD_NODES="w1"
# or we could have three nodes:
#CELERYD_NODES="w1 w2 w3"

# Absolute or relative path to the 'celery' command:
CELERY_BIN="/path/to/your/celery"

# App instance to use
# comment out this line if you don't use an app
CELERY_APP="intelligence"
# or fully qualified:
#CELERY_APP="proj.tasks:app"

# How to call manage.py
CELERYD_MULTI="multi"

# Extra command-line arguments to the worker
CELERYD_OPTS="--time-limit=300 --concurrency=8"

# - %n will be replaced with the first part of the nodename.
# - %I will be replaced with the current child process index
# and is important when using the prefork pool to avoid race conditions.
CELERYD_PID_FILE="/var/run/celery/%n.pid"
CELERYD_LOG_FILE="/var/log/celery/%n%I.log"
CELERYD_LOG_LEVEL="INFO"
/etc/systemd/system/celery.service. Also, you must set your celery config path to EnvironmentFile.[Unit]
Description=Celery Service
After=network.target
[Service]
Type=forking
User=YOUR_USER
Group=YOUR_GROUP
EnvironmentFile=/etc/sysconfig/celery
WorkingDirectory=/path/to/your/exist
ExecStart=/bin/sh -c '${CELERY_BIN} multi start ${CELERYD_NODES} \
-A ${CELERY_APP} --pidfile=${CELERYD_PID_FILE} \
--logfile=${CELERYD_LOG_FILE} --loglevel=${CELERYD_LOG_LEVEL} ${CELERYD_OPTS}'
ExecStop=/bin/sh -c '${CELERY_BIN} multi stopwait ${CELERYD_NODES} \
--pidfile=${CELERYD_PID_FILE}'
ExecReload=/bin/sh -c '${CELERY_BIN} multi restart ${CELERYD_NODES} \
-A ${CELERY_APP} --pidfile=${CELERYD_PID_FILE} \
--logfile=${CELERYD_LOG_FILE} --loglevel=${CELERYD_LOG_LEVEL} ${CELERYD_OPTS}'
[Install]
WantedBy=multi-user.target
$ sudo mkdir /var/log/celery; sudo chown YOUR_USER:YOUR_GROUP /var/log/celery
$ sudo mkdir /var/run/celery; sudo chown YOUR_USER:YOUR_GROUP /var/run/celery
#Type  Path               Mode  UID        GID         Age  Argument
d      /var/run/celery    0755  YOUR_USER  YOUR_GROUP  -
$ sudo systemctl start celery.service
$ sudo systemctl enable celery.service
$ python manage.py runserver 0.0.0.0:8000
Note: I recommend to use Nginx and uWSGI when running in production environment.
Scripts for inserting feed into database are scripts/insert2db/*/insert2db.py.

