 christhecoolhut/firmware_slap
Discovering vulnerabilities in firmware through concolic analysis and function clustering.

Firmware slap combines concolic analysis with function clustering for vulnerability discovery and function similarity in firmware. Firmware slap is built as a series of libraries and exports most information as either pickles or JSON for integration with other tools.
Slides from the talk can be found here
Firmware slap should be run in a virtual environment. It has been tested on Python3.6
sudo apt install python3-virtualenv
virtualenv -p python3 fwslap
source fwslap/bin/activate
-- or --
cd ~
mkdir .virtualenvs
pip install virtualenv
which virtualenv #note path warnings
pip install virtualenvwrapper
echo "export PATH=$PATH:~/.local/bin" >> ~/.bashrc
echo "export WORKON_HOME=~/.virtualenvs" >> ~/.bashrc
echo "source ~/.local/bin/virtualenvwrapper.sh" >> ~/.bashrc

#usually best here to open new terminal

mkvirtualenv fwslap -p /usr/bin/python3
workon fwslap
python setup.py install
You will need rabbitmq, docker, and (radare2 or Ghidra)
# Ubuntu
sudo apt install rabbitmq-server docker.io
# OSX
brew install rabbitmq

# Radare2
git clone https://github.com/radare/radare2.git
sudo ./radare2/sys/install.sh
# Ghidra
wget https://ghidra-sre.org/ghidra_9.0.4_PUBLIC_20190516.zip
unzip ghidra_9.0.4_PUBLIC_20190516.zip -d ghidra
echo "export PATH=\$PATH:$PWD/ghidra/ghidra_9.0.4/support" >> ~/.bashrc
Ghidra requires JDK 11.
sudo apt install default-jdk
java --version
If you want to use the Elastic search stuff run the Elasticsearch_and_kibana.sh script
Ensure rabbitmq-server is running.
# In a Separate terminal, run this in the top level "Firmware_Slap" directory
celery -A firmware_slap.celery_tasks worker --loglevel=info
# Basic buffer overflow
Discover_And_Dump.py examples/iwconfig -D iwconfig_results
Load_And_View_Results.py iwconfig_results.all.pickle

# Click management on the left pane
# Click Saved Objects
# Click Import
# Select 'elastic_export.json' under the elastic directory in firmware slap
# Navigate to dashboards on left pane and select 'Overview Dashboard'

Load_And_View_Results.py iwconfig_results.all.pickle -s

# Command injection
tar -xvf examples/Almond_libs.tar.gz
Vuln_Discover_Celery.py examples/upload.cgi -L Almond_Root/lib/
# Get the firmware used for examples
wget https://firmware.securifi.com/AL3_64MB/AL3-R024-64MB
binwalk -Mre AL3-R024-64MB
Start a celery work from the project root directory:
# In a separate terminal
celery -A firmware_slap.celery_tasks worker --loglevel=info
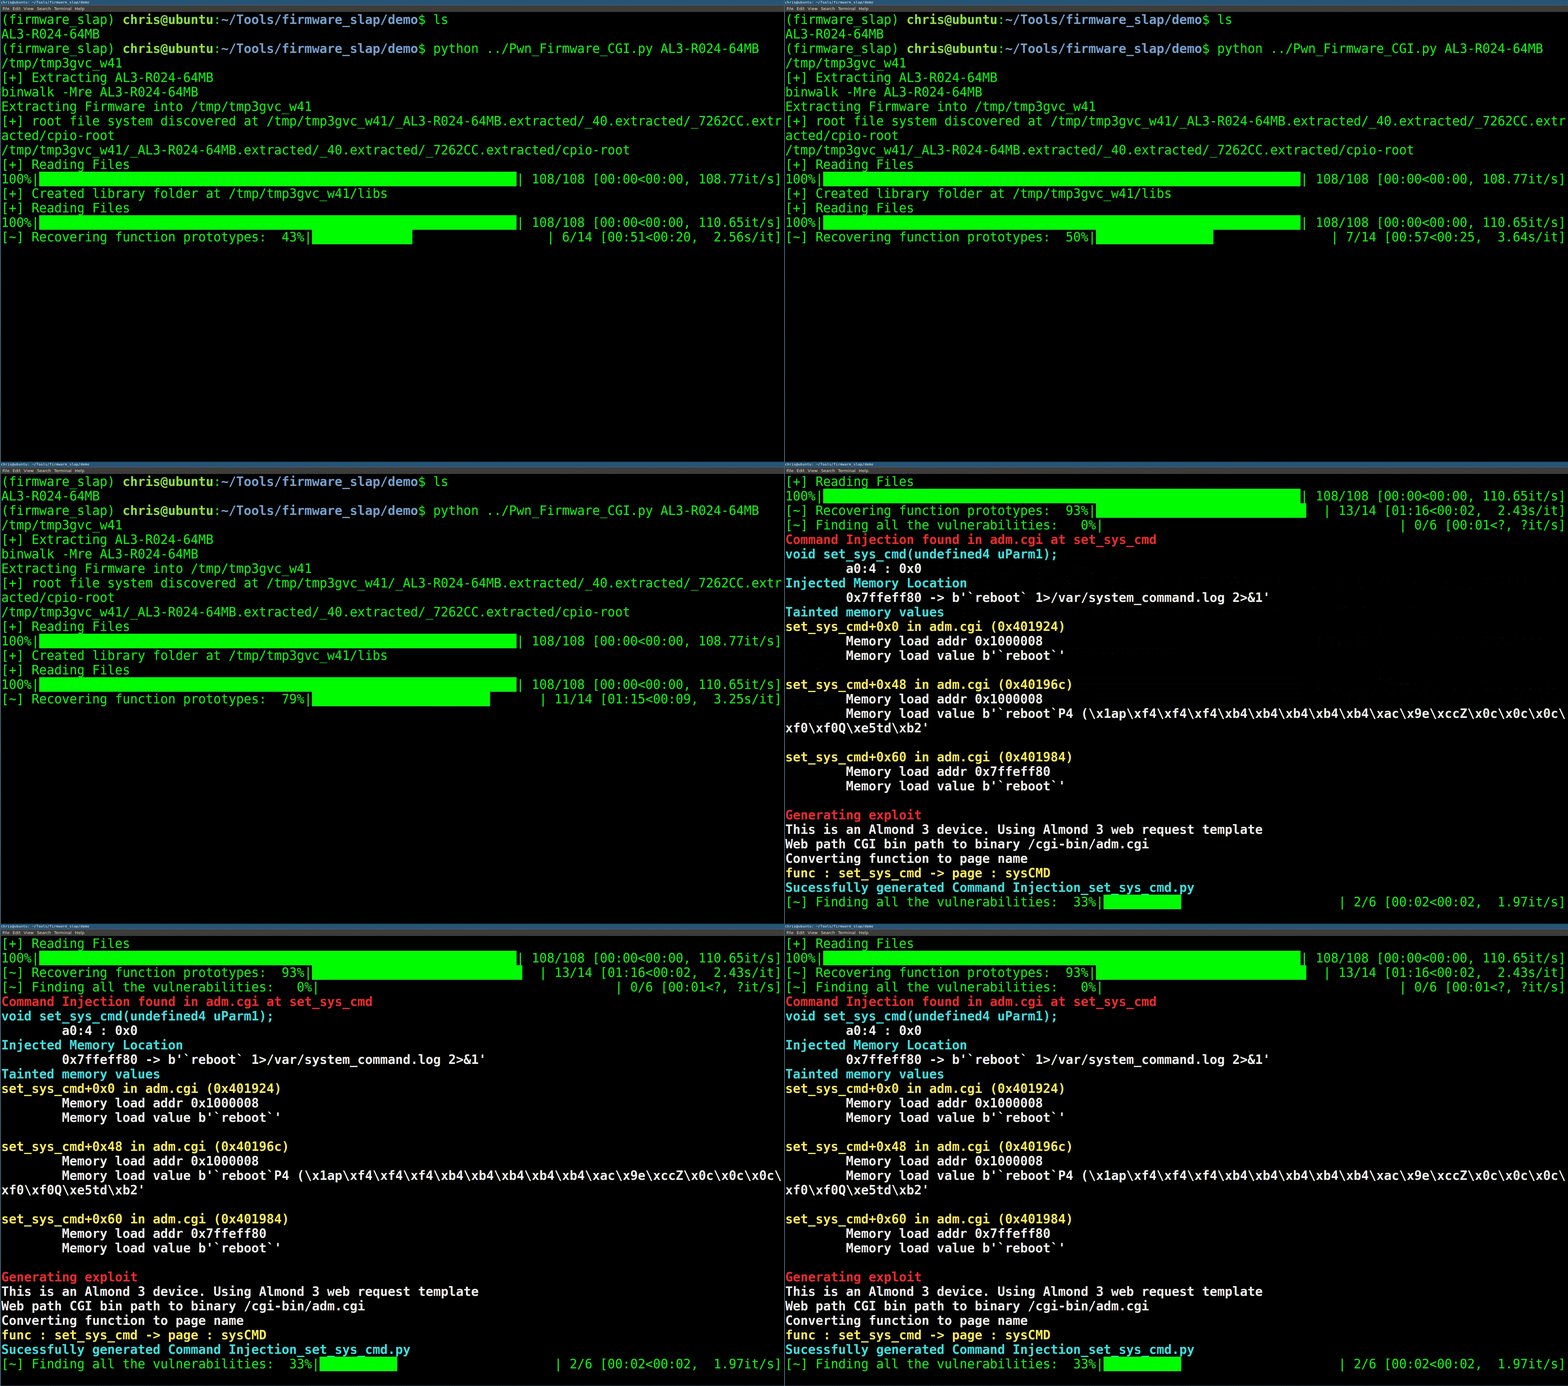
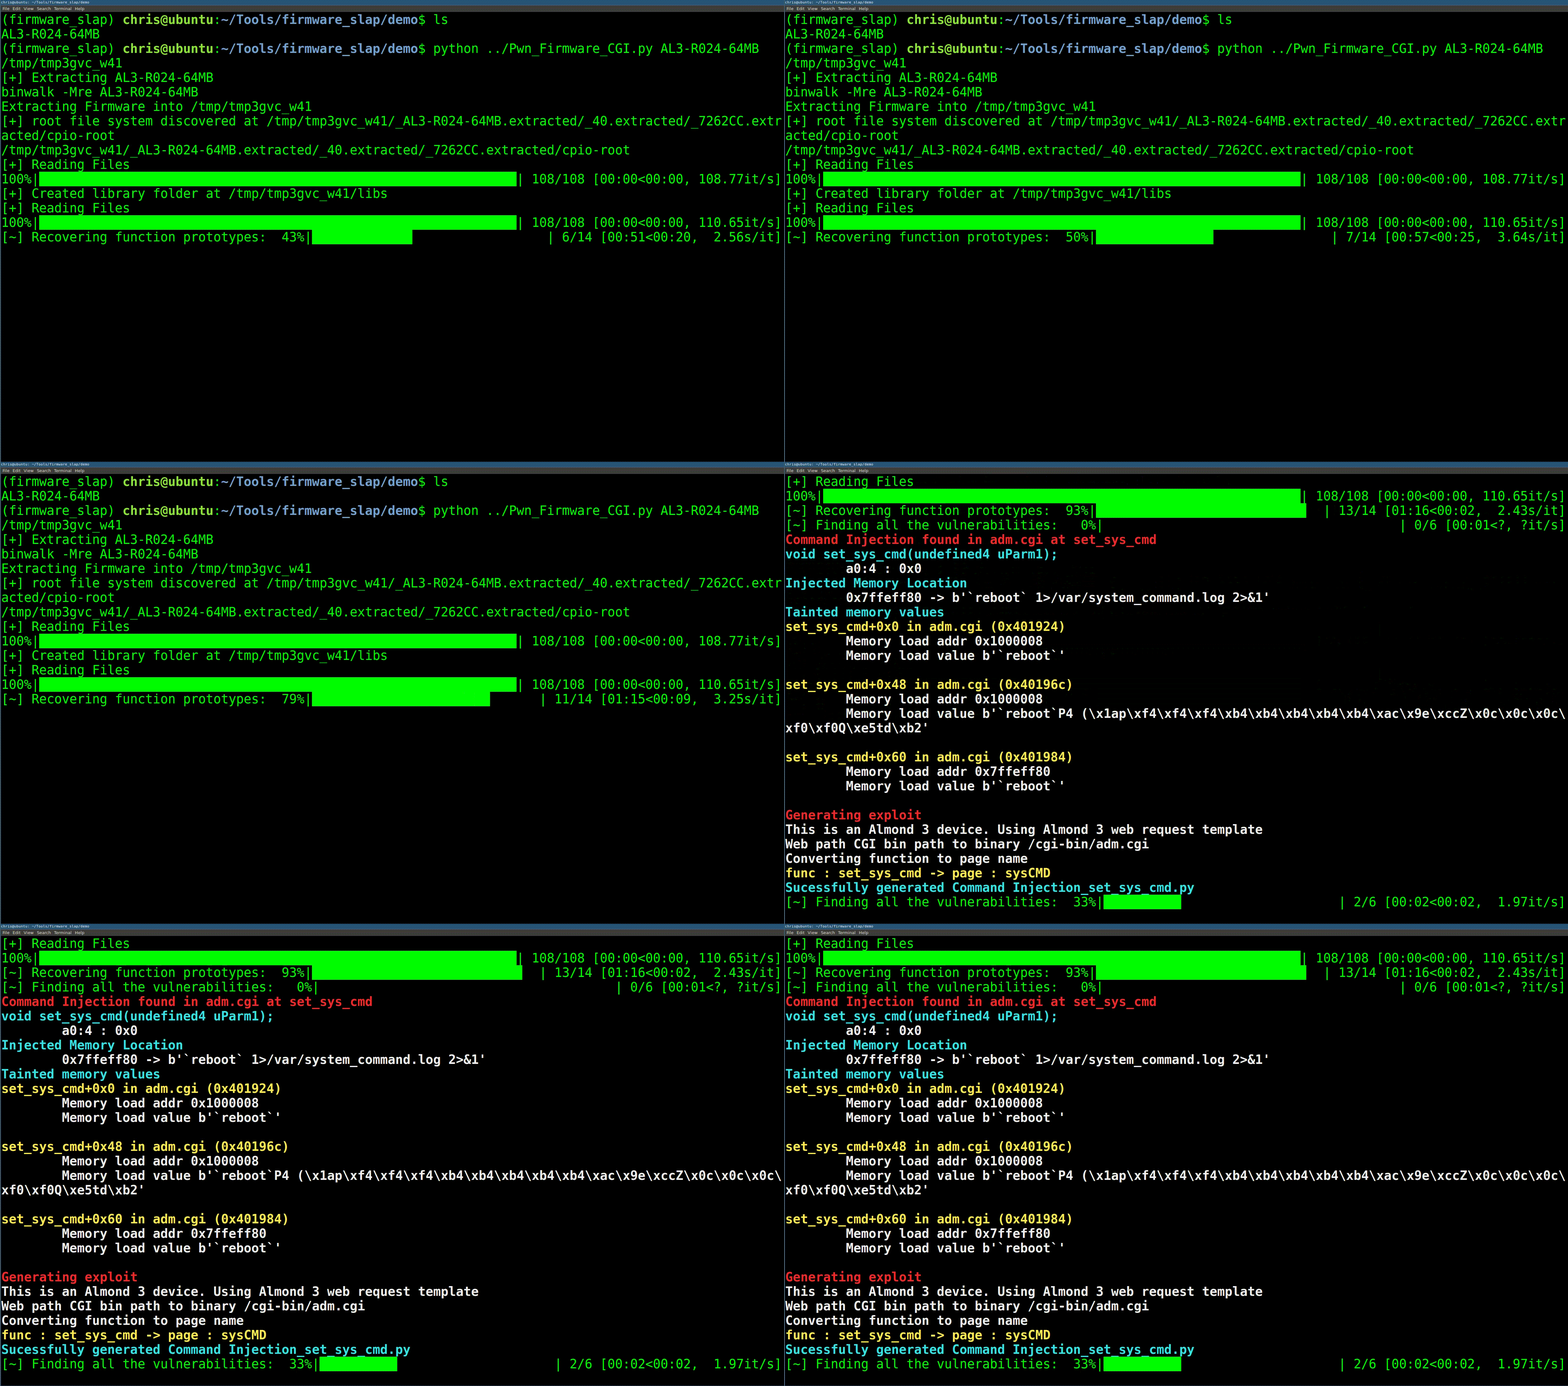
In a different terminal window, run a vulnerability discovery job.
$ Vuln_Discover_Celery.py Almond_Root/etc_ro/lighttpd/www/cgi-bin/upload_bootloader.cgi -L Almond_Root/lib/
[+] Getting argument functions
[+] Analyzing 1 functions
  0%|                                                                                                                                                                                                                                   | 0/1 [00:01<?, ?it/s]
{   'Injected_Location': {   'base': '0x7ffefde8',
........................ SNIP ......................
    'type': 'Command Injection'}
Python 3.5.2 (default, Nov 12 2018, 13:43:14)
Type 'copyright', 'credits' or 'license' for more information
IPython 7.3.0 -- An enhanced Interactive Python. Type '?' for help.

In [1]:
The above command will return an object in the result variable. This is a dictionary will all sorts of awesome information about the vulnerability. There are three major keys in the object: The function arguments, The memory, and the injected location.
In [3]: result.keys()
Out[3]: dict_keys(['args', 'file_name', 'type', 'mem', 'Injected_Location'])
The args key will detail information about the recovered argument and what the argument values must be to recreate the vulnerability. In the below example, one argument is recovered, and to trigger the command injection that argument must be a char* that contains "`reboot`" to trigger a reboot.
In [1]: result['args']
Out[1]:
[{'base': 'a1',
  'type': 'int',
  'value': "0x0 -> b'`reboot`\\x01\\x01\\x01\\x01\\x01\\x01\\x01\\x01\\x01\\x01\\x01\\x01\\x01\\x01\\x01\\x01\\x01\\x01\\x01\\x01\\x01\\x01\\x01\\x01\\x01\\x01\\x01\\x01\\x01\\x01\\x01\\x01\\x01\\x01\\x01\\x01\\x01\\x01\\x01\\x01\\x01\\x01\\x01\\x01\\x01\\x01\\x01\\x01\\x01\\x01\\x01\\x00'"}]
