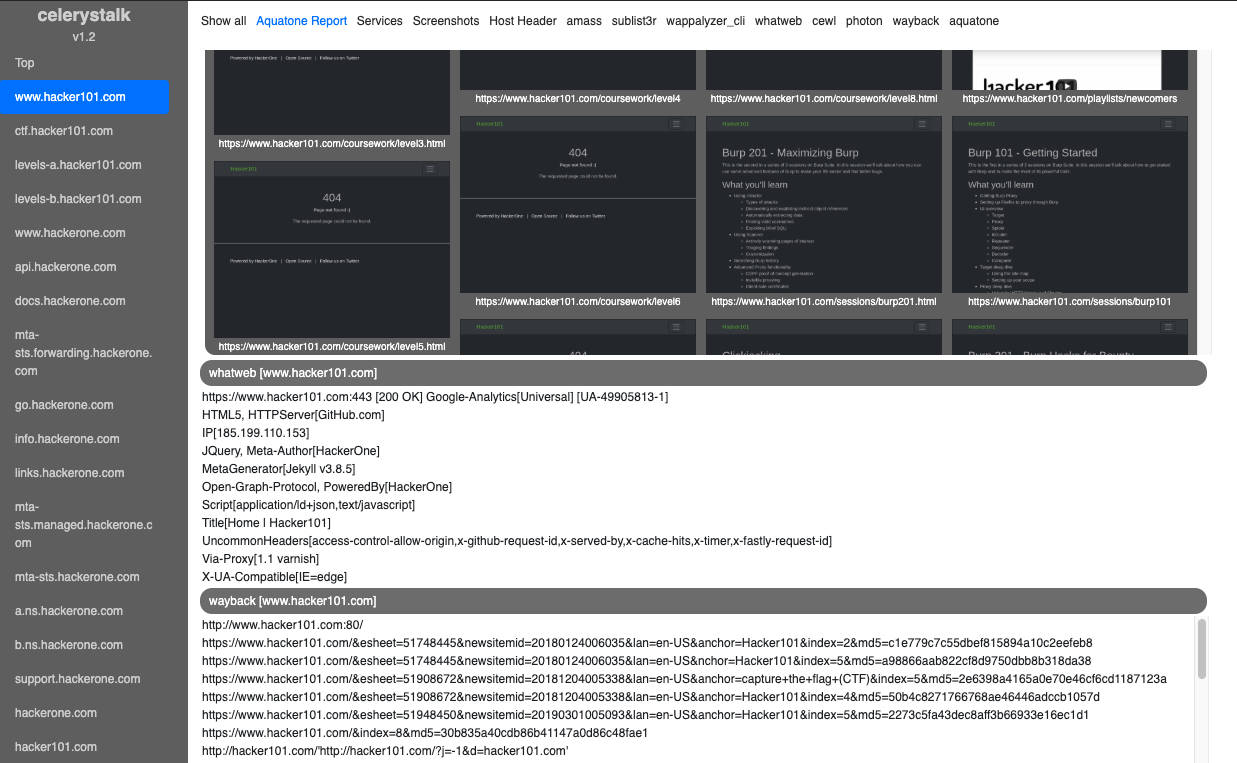

Ein asynchroner Enumeration- und Schwachstellenscanner. Führe alle Tools auf allen Hosts aus.
celerystalk hilft Ihnen, Ihren Netzwerk-Scan/-Enumeration-Prozess mit asynchronen Jobs (auch Aufgaben genannt) zu automatisieren, während Sie die volle Kontrolle darüber behalten, welche Tools Sie ausführen möchten.
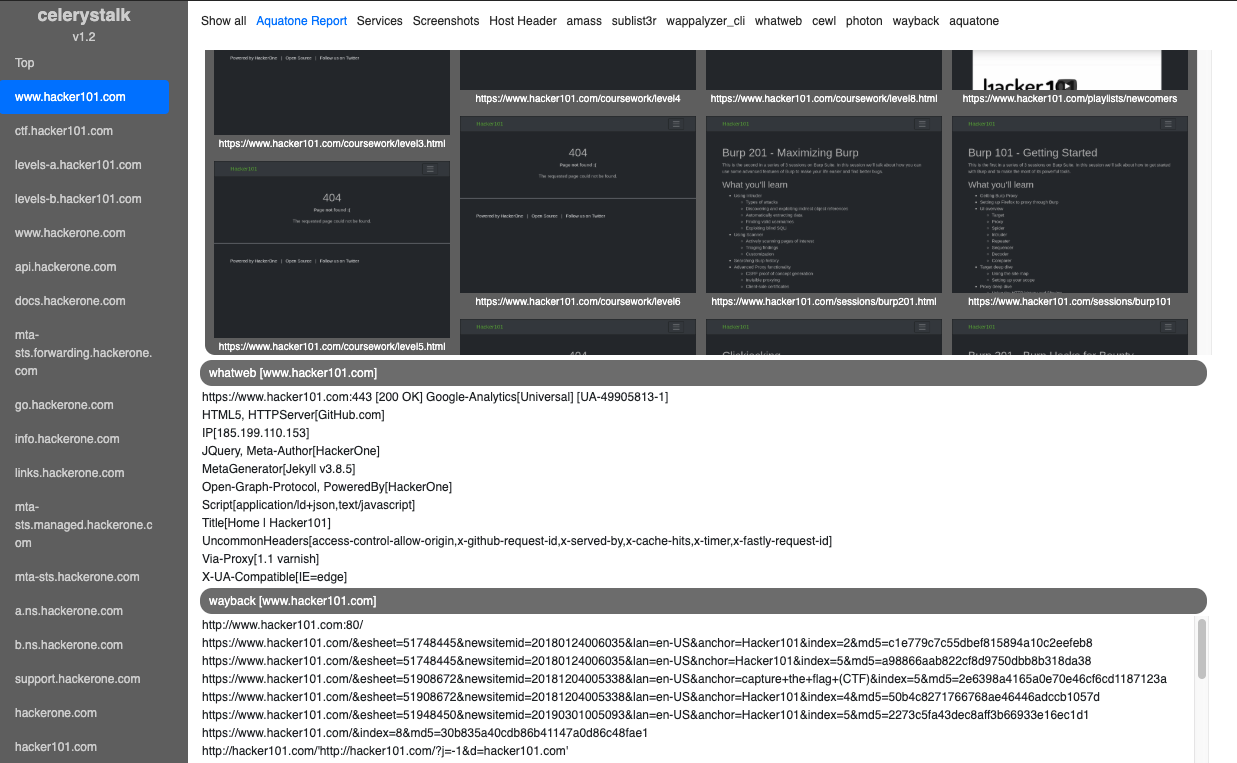
Interaktive Demo: Bug Bounty Modus (HackerOne)
Interaktive Demo: Schwachstellenanalyse / PenTest Modus (Ausgemusterte HackTheBox.eu Maschinen)
| Phase | Befehl | Beispiele verwendeter Tools |
|---|---|---|
| DNS-Recon/Enumeration | ./celerystalk subdomains -d domain1,domain2 | Amass, sublist3r |
| Scope definieren, Nmap/Nessus importieren | ./celerystalk import [scan_data,scope_files,etc.] | celerystalk |
| Port-Scanning | ./celerystalk nmap | nmap |
| Verzeichnis- und Datei-Enumeration, Schwachstellenidentifikation | ./celerystalk scan | Gobuster, Nikto, Photon, sqlmap, wpscan, hydra, medusa, wappalyzer, whatweb usw. |
| Screenshots | ./celerystalk screenshots | Aquatone |
| Analyse | ./celerystalk report | celerystalk |
celerystalk ist:
Sie müssen celerystalk als root installieren und ausführen.``` git clone https://github.com/sethsec/celerystalk.git cd celerystalk/setup ./install.sh cd .. ./celerystalk -h
## Docker-Container von Dockerhub verwenden```
docker pull sethsec/celerystalk:latest
docker run -p 27007:27007 -ti celerystalk
docker build -t celerystalk https://github.com/sethsec/celerystalk.git docker run -p 27007:27007 -ti celerystalk
## Verwendung von celerystalk - Die Grundlagen
### [URL-Modus] - Wie man eine URL (oder mehrere URLs in einer Datei) scannt
#### Starte alle aktivierten Tools gegen eine URL oder viele URLs in einer Datei, ohne Scope, nmap, etc. importieren zu müssen.```
# ./celerystalk scan -u url or filename # Run all enabled commands against specified url(s)
# ./celerystalk query watch (then Ctrl+c) # Wait for scans to finish
# ./celerystalk screenshots # Take screenshots
# ./celerystalk report # Generate report
#### Oder importieren Sie eine Liste der Hosts, die im Scope sind, und lassen Sie celerystalk nmap für Sie ausführen```
# ./celerystalk import -S scope.txt # Import IP/CIDR/Ranges and mark as in scope
# ./celerystalk nmap # Nmap all in-scope hosts (reads options from config.ini)
## Advanced Usage: Bug Bounty Mode vs Vulnerability Assessment Mode
You define the mode at workspace instantiation. The default workspace is VAPT mode, but you have two options for manually
created workspaces.
* If you are starting with in scope IP addresses/ranges/CIDRs, use Vulnerability Assessment and PenTest (VAPT) mode.
* If you are starting with in scope domains, use Bug Bounty (BB) mode.
### [Bug Bounty Mode]
* In BB mode, all subdomains found with celerystalk or manually imported are marked in scope.
#### Find subdomains, define out of scope hosts, scan everything else```
# ./celerystalk workspace create -o /dir -m bb # Create default workspace and set output dir
# ./celerystalk subdomains -d company.com,dom.net # Find subdomains and determine if in scope
# ./celerystalk import -S scope.txt (optional) # Import IP/CIDR/Ranges and mark as in scope
# ./celerystalk import -O out_scope.txt (optional) # Define HOSTS/IPs that are out of scope
# ./celerystalk nmap (optional) # Nmap all in-scope hosts (reads options from config.ini)
# ./celerystalk import -f client.xml (optional) # If you would rather import an nmap file you already ran
# ./celerystalk scan [--noIP] # Run all enabled commands against all in scope hosts
# ./celerystalk query watch (then Ctrl+c) # Wait for scans to finish
# ./celerystalk screenshots # Take screenshots
# ./celerystalk report # Generate report
Hinweis: Sie können zuerst den Subdomain-Befehl ausführen und dann den Scope definieren, oder Sie können den Scope definieren und Subdomains importieren.
**Hinweis:** Sie können zuerst den subdomains-Befehl ausführen und dann den Scope definieren, oder Sie können den Scope definieren und Subdomains importieren.
#### Importieren Sie eine Liste von Hosts, die im Scope sind, und lassen Sie celerystalk nmap ausführen und Ergebnisse parsen```
# ./celerystalk workspace create -o /dir -m vapt # Create default workspace and set output dir
# ./celerystalk import -S client-inscope-list.txt # Import IP/CIDR/Ranges and mark as in scope
# ./celerystalk import -O out_scope.txt (optional) # Define HOSTS/IPs that are out of scope
# ./celerystalk nmap # Nmap all in-scope hosts (reads options from config.ini)
# ./celerystalk query watch (then Ctrl+c) # Watch nmap scans as they move from pending > running > complete
# ./celerystalk subdomains -d client.com,client.net # Find subdomains and determine if in scope
# ./celerystalk scan # Run all enabled commands
# ./celerystalk query watch (then Ctrl+c) # Watch scans as they move from pending > running > complete
# ./celerystalk screenshots # Take screenshots
# ./celerystalk report # Generate report
Hinweis: Sie können zuerst den Befehl für Subdomains ausführen und dann den Geltungsbereich definieren, oder Sie können den Geltungsbereich definieren und Subdomains importieren.
Weitere Details finden Sie auf der Konfigurationsseite im Wiki
Sie müssen einen Arbeitsbereich erstellen, bevor Sie etwas anderes tun können.
#### import
Dieser Befehl ermöglicht es Ihnen, Port- und Host-Daten in celerystalk zu importieren und festzulegen, was in scope und was out of scope ist.
| Option | Beschreibung |
| --- | --- |
| -f scan.xml | <b>Nmap/Nessus XML</b><br><ul><li>Fügt alle IP-Adressen aus dieser Datei zur hosts-Tabelle hinzu und markiert sie alle als in scope für den Scan.</li><li>Fügt alle Ports und Servicetypen zur services-Tabelle hinzu.</li></ul> |
| -S scope.txt | <b>Scope-Datei</b><br><ul><li>Zeigt Dateiunterschiede an, die nicht gestaged wurden.</li></ul>|
| -D subdomains.txt | <b>(Sub)Domains-Datei</b><br><ul><li>celerystalk ermittelt, ob jede Subdomain in scope ist, indem es die IP auflöst und nach der IP in der Datenbank sucht. Bei einer Übereinstimmung wird die Domain als in scope markiert und gescannt.</li></ul>|```
Import Nmap XML file: ./celerystalk import -f /assessments/nmap.xml
Import Nessus file: ./celerystalk import -f /assessments/scan.nessus
Import list of Domains: ./celerystalk import -D <file>
Import list of IPs/Ranges: ./celerystalk import -S <file>
Specify workspace: ./celerystalk import -f <file>
Import multiple files: ./celerystalk import -f nmap.xml -S scope.txt -D domains.txt
Dieser Befehl führt alle Subdomain-Suchtools in Ihrer Konfigurationsdatei aus. Falls gewünscht, können Sie dies auch außerhalb von celerystalk durchführen und die Subdomains mit dem import-Befehl importieren.
| Option | Description |
|---|---|
| -d domain1,domain2,etc | Führen Sie Amass, Sublist3r usw. aus und speichern Sie die Domains in der DB
|
| Find subdomains: celerystalk subdomains -d domain1.com,domain2.com |
#### nmap
Dieser Befehl führt nmap für Sie aus und verwendet die Optionen, die Sie in der config.ini-Datei angegeben haben. Alternativ können Sie Port-Scandaten aus einer nmap-xml-Datei oder einer .nessus-Datei importieren.
| Option | Beschreibung |
| --- | --- |
| keine Optionen | Liest nmap-Befehl aus der Konfiguration und scannt alle Dienste für im Scope befindliche Hosts
| -c [filename] | Geben Sie eine celerystalk-Konfigurationsdatei an [Standard: ./config.ini]
#### scan
Dieser Befehl sendet Aufgaben an celery, das diese asynchron ausführt und die Ausgabe in Ihr Ausgabeverzeichnis protokolliert.
| Option | Beschreibung |
| --- | --- |
| keine Optionen | <b>Alle im Scope befindlichen Hosts scannen</b><ul><li>Liest DB und scannt jede im Scope befindliche IP und Subdomain.</li><li>Startet alle aktivierten Tools für IPs, aber nur http/http-spezifische Tools gegen virtuelle Hosts</li></ul> |
| --noIP | Hosts nicht nach IP scannen (nur vhosts scannen)
| -t ip,vhost,cidr | <b>Bestimmte Ziele aus DB oder Scan-Datei scannen</b><ul><li>Scannt eine Teilmenge der im Scope befindlichen IPs und/oder Subdomains</li></ul> |
| -s | <b>Simulation</b><br> Sendet alle Aufgaben an celery, aber alle Befehle werden mit einem # davor ausgeführt, wodurch sie wirkungslos werden</li></ul> |
| -c [filename] | Geben Sie eine celerystalk-Konfigurationsdatei an [Standard: ./config.ini] |
| -u [URL] | Eine bestimmte URL scannen, auch wenn sie noch nicht in der DB ist |```
Scan all in scope hosts: ./celerystalk scan
Scan subset of DB hosts: ./celerystalk scan -t 10.0.0.1,10.0.0.3
./celerystalk scan -t 10.0.0.100-200
./celerystalk scan -t 10.0.0.0/24
./celerystalk scan -t sub.domain.com
Simulation mode: ./celerystalk scan -s
Dieser Befehl führt einen erneuten Scan eines bereits gescannten Hosts durch.
| Option | Beschreibung |
|---|---|
| no option | Für jeden im Scope befindlichen Host in der DB fragt celerystalk, ob Sie ihn erneut scannen möchten |
./celerystalk rescan -c myconfig.ini
Rescan some hosts ./celerystalk rescan -t 1.2.3.4,sub.domain.com
Simulation mode: ./celerystalk rescan -s
#### query
Überprüfen Sie asynchron den Status der Aufgabenwarteschlange so oft Sie möchten. Der Watch-Modus führt tatsächlich den Linux-Befehl 'watch' aus, damit Sie nicht Ihren gesamten Terminalpuffer füllen.
| Option | Description |
| --- | --- |
| no options | Zeigt alle Aufgaben im aktuellen Arbeitsbereich an |
| watch | Sendet den Befehl an den Unix-Befehl 'watch', der Ihnen alle 2 Sekunden einen aktualisierten Status liefert |
| brief | Begrenzung auf 5 Ergebnisse pro Status (ausstehend/laufend/abgeschlossen/abgebrochen/angehalten) |
| summary | Zeigt nur ein Banner mit Zahlen und nicht die Aufgaben selbst an |```
Query Tasks: ./celerystalk query
./celerystalk query watch
./celerystalk query brief
./celerystalk query summary
./celerystalk query summary watch
Abbrechen/Pausieren/Fortsetzen aller Aufgaben, die derzeit ausgeführt werden oder in der Warteschlange stehen.
./celerystalk <verb> all #Cancel/Pause/Resume all tasks from current workspaces
#### Screenshots
| Optionen | Beschreibung |
| --- | --- |
| keine Optionen | Erstelle Screenshots für alle bekannten Pfade |```
./celerystalk screenshots
Führe einen Bericht aus, der die gesamte Tool-Ausgabe in einer HTML-Datei und einer TXT-Datei zusammenfasst. Führe dies so oft aus, wie du möchtest. Jedes Mal, wenn du den Bericht ausführst, überschreibt er den vorherigen Bericht.
| Optionen | Beschreibung |
|---|---|
| no options | Erstelle einen Bericht für alle in-scope Hosts, die gescannt wurden |
| Create Report: ./celerystalk report #Create a report for all scanned hosts in current workspace |
#### db
Liste oder exportiere die in der celerystalk-Datenbank gespeicherten Workspaces, Hosts, Dienste oder Pfade
| Option | Beschreibung |
| --- | --- |
| workspaces | Zeige alle bekannten Workspaces und das zugehörige Ausgabeverzeichnis für jeden Workspace |
| workspace | Gleiches wie workspaces |
| services | Zeige alle bekannten offenen Ports und Diensttypen nach IP |
| ports | Gleiches wie ports. |
| hosts | Zeige alle Hosts (IP-Adressen und Subdomains/vhosts) sowie ob sie im Scope sind und ob sie zum Scannen eingereicht wurden |
| vhosts | Gleiches wie der hosts-Befehl, schließt jedoch vhosts aus, die IP-Adressen sind. |
| paths | Zeige alle Pfade, die von vhost identifiziert wurden |
| paths_only | Zeige eine durch Zeilenumbrüche getrennte Liste von Pfaden in der Datenbank. Nützlich zum Weiterleiten an ein anderes Tool |
| export | Exportiere die Tabellen für Dienste, Hosts und Pfade
| export_paths_only | Exportiere nur eine durch Zeilenumbrüche getrennte Liste von Pfaden in der Datenbank in eine Datei.```
Show workspaces: ./celerystalk db workspaces
./celerystalk db workspace
Show services: ./celerystalk db services
./celerystalk db ports
Show hosts: ./celerystalk db hosts
Show vhosts only ./celerystalk db vhosts
Show paths: ./celerystalk db paths
Show paths (no table) ./celerystalk db paths_only
Show tasks: ./celerystalk db tasks
Export tables to csv ./celerystalk db export
Export paths to txt ./celerystalk db export_paths_only
Administrative Funktionen
## Verwendung```
Usage:
celerystalk workspace ([create]|[switch]) [-w workspace_name] [-o <output_dir>] [-m <mode>] [-h]
celerystalk import [-f <nmap_file>] [-S scope_file] [-D subdomains_file] [-O outOfScope.txt] [-u <url>] [-h]
celerystalk subdomains [-d <domains>] [-c <config_file>] [-s] [-h]
celerystalk nmap [-t <targets>] [-c <config_file>] [-s] [-h]
celerystalk scan [-t <targets>] [--noIP] [-c <config_file>] [-s] [-h]
celerystalk scan -u <url> [-c <config_file>] [-s] [-h]
celerystalk rescan [-t <targets>] [-c <config_file>] [-s] [-h]
celerystalk query ([full] | [summary] | [brief]) [watch] [-h]
celerystalk query [watch] ([full] | [summary] | [brief]) [-h]
celerystalk report [-h]
celerystalk screenshots [-h]
celerystalk cancel ([all]|[<task_ids>]) [-h]
celerystalk pause ([all]|[<task_ids>]) [-h]
celerystalk resume ([all]|[<task_ids>]) [-h]
celerystalk db ([workspaces]|[workspace]|[services]|[ports]|[hosts]|[vhosts]|[paths]|[paths_only]|[tasks]) [-h]
celerystalk db export [-h]
celerystalk admin ([start]|[stop]|[restart]|[reset]|[backup]|[restore]) [-f <restore_file>] [-h]
celerystalk interactive [-h]
celerystalk (help | -h | --help)
Options:
-h --help Show this screen
-v --version Show version
-f <nmap_file> Nmap xml import file
-c <config_file> Specify a non-default configuration file by name
-o <output_dir> Output directory
-m <mode> vapt = VulnAssmt/PenTest, bb = Bug Bounty
-S <scope_file> Scope import file
-O <outscope_file> Out of scope hosts file
-D <subdomains_file> Subdomains import file
-t <targets> Target(s): IP, IP Range, CIDR
-u <url> URL to parse and scan with all configured tools
-w <workspace> Workspace
-d --domains Domains to scan for vhosts
-s --simulation Simulation mode. Submit tasks comment out all commands
--noIP Only scan targets by DNS hostname (Don't scan the IP address)
Context specific help with examples:
./celerystalk workspace -h
./celerystalk subdomains -h
./celerystalk import -h
./celerystalk nmap -h
./celerystalk scan -h
./celerystalk rescan -h
./celerystalk query -h
./celerystalk pause -h
./celerystalk resume -h
./celerystalk cancel -h
./celerystalk db -h
./celerystalk screenshots -h
./celerystalk report -h
./celerystalk admin -h
Dieses Projekt wurde von vielen großartigen Tools inspiriert:
Dank an @offensivesecurity und @hackthebox_eu für ihre Lab-Netzwerke
Ebenfalls Dank an:
| Option | Beschreibung |
|---|
| no options | Gibt den aktuellen Arbeitsbereich aus |
| create | Erstellt neuen Arbeitsbereich |
| -w | Neuen Arbeitsbereichsnamen festlegen |
| -o | Dem Arbeitsbereich zugeordnetes Ausgabeverzeichnis festlegen |
| -m | Modus [vapt \ bb] |
| Create default workspace ./celerystalk workspace create -o /assessments/client -m bb | |
| Create named workspace ./celerystalk workspace create -o /assessments/client -w client -m vapt | |
| Switch to another workspace ./celerystalk workspace client |
| -t ip,vhost,cidr | Scannt eine Teilmenge der im Scope befindlichen IPs und/oder Subdomains. |
| -s | Sendet alle Aufgaben an celery, aber alle Befehle werden mit einem # davor ausgeführt, wodurch sie unwirksam werden. |
| -c [filename] | Geben Sie eine celerystalk-Konfigurationsdatei an [Standard: ./config.ini] |
| Rescan all hosts: ./celerystalk rescan |
| Option | Beschreibung |
|---|
| abbrechen |
|
| pausieren |
|
| fortsetzen |
|
| Cancel/Pause/Resume Tasks: ./celerystalk 5,6,10-20 #Cancel/Pause/Resume tasks 5, 6, and 10-20 from current workspace |
| Options | Beschreibung |
|---|
| start | Celery- und Redis-Prozesse starten |
| stop | Celery- und Redis-Prozesse stoppen |
| restart | Celery- und Redis-Prozesse neu starten |
| reset | DB löschen, Redis leeren, neu beginnen |
| backup | DB und alle Arbeitsbereichs-Datenverzeichnisse sichern |
| restore | DB und alle Arbeitsbereichs-Datenverzeichnisse wiederherstellen |
| -f [filename] | Wiederherstellungs-Dateiname |
| Examples: | |
| ./celerystalk admin start | |
| ./celerystalk admin stop | |
| ./celerystalk admin restart | |
| ./celerystalk admin reset | |
| ./celerystalk admin backup -f | |
| ./celerystalk admin restore -f |