
Eine Python-Anwendung zum Filtern und Übertragen von Zeek-Logs an Elastic/OpenSearch+Humio. Diese Anwendung kann auch reine JSON-Logs an stdout ausgeben, um sie weiterzuverarbeiten!
Diese Python-Anwendung übersetzt die ASCII-TSV- und JSON-Protokolle von Zeek in das Bulk-Load-JSON-Format von ElasticSearch.
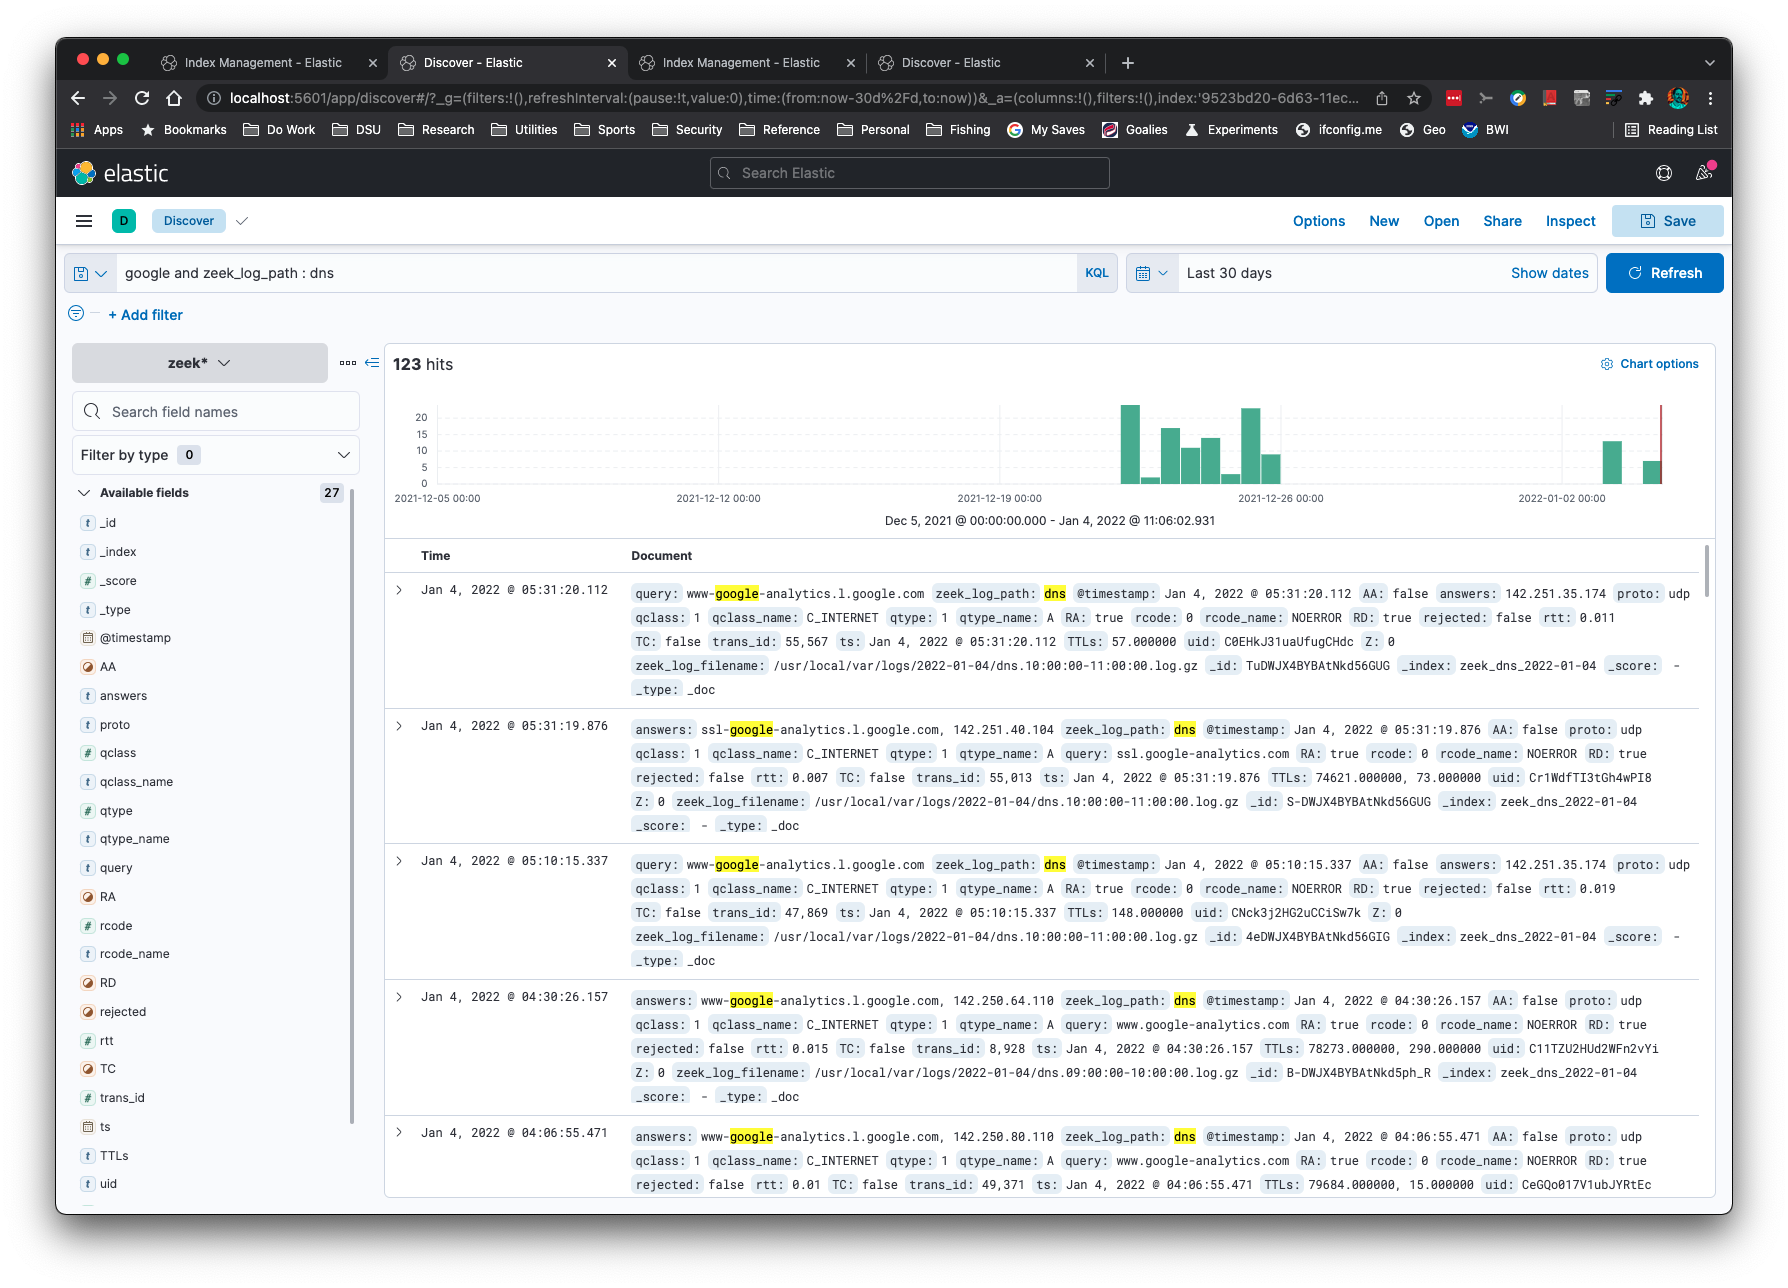
Möchten Sie mehrere Zeek-Protokolle für dieselbe Verbindungs-ID (uid) oder Datei-ID (fuid) sehen? Hier sind die Treffer aus files.log, http.log und conn.log für eine einzelne uid:
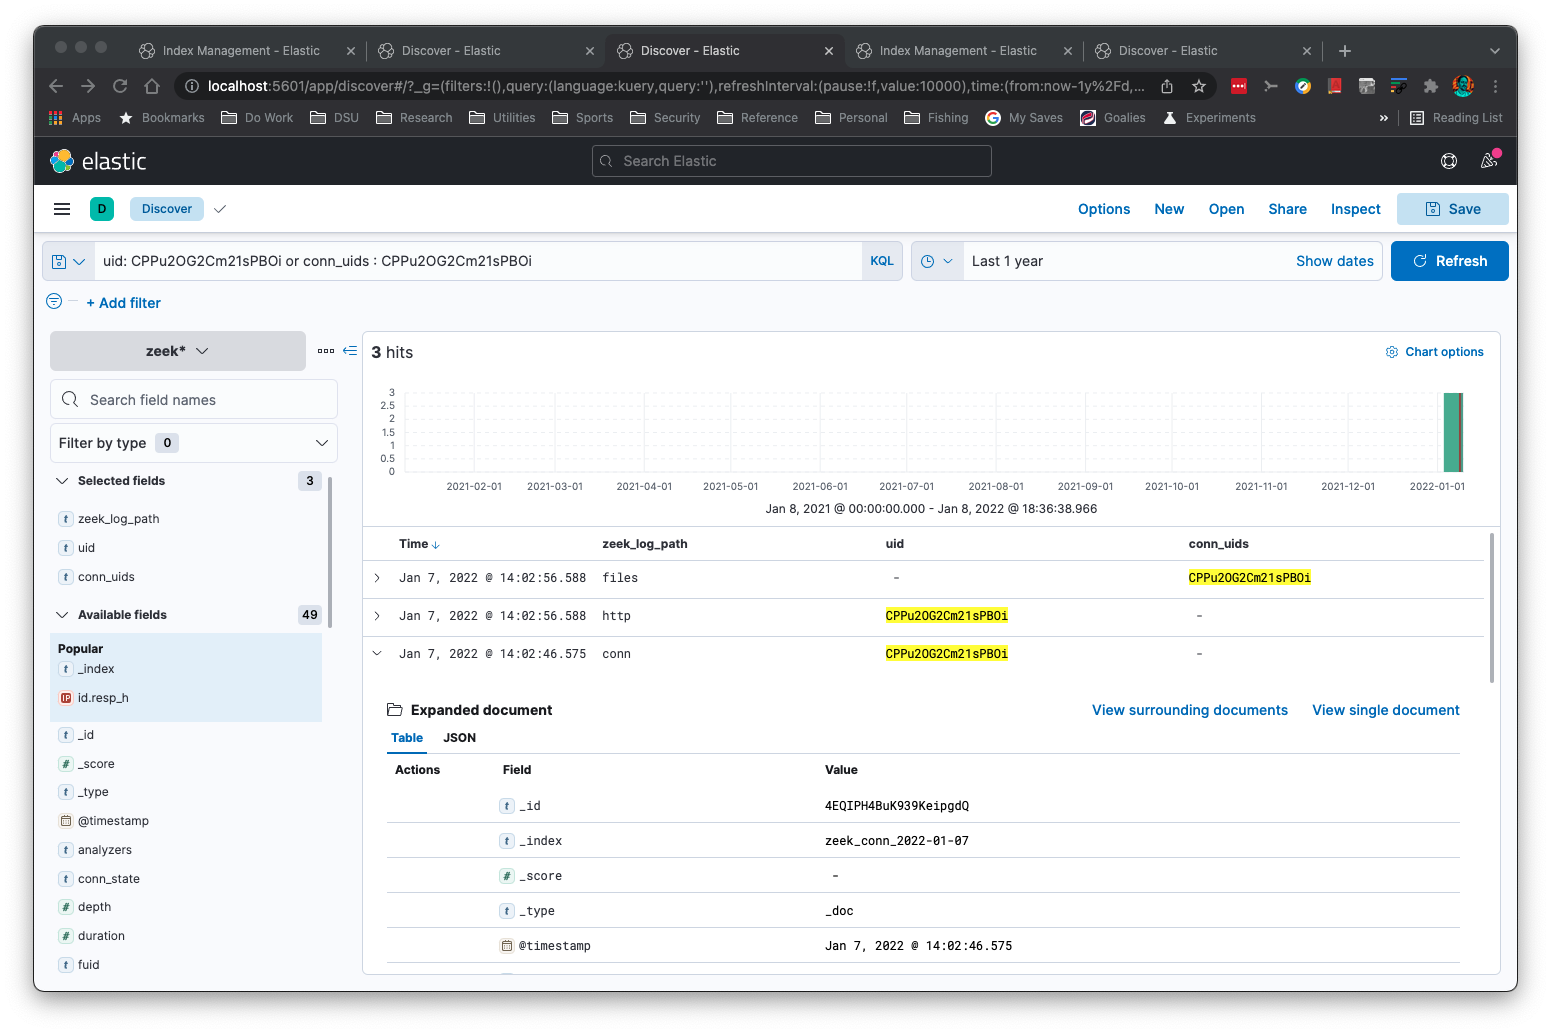
Sie können auf dem 'addr'-Typ von Zeek eine Subnetzsuche durchführen:
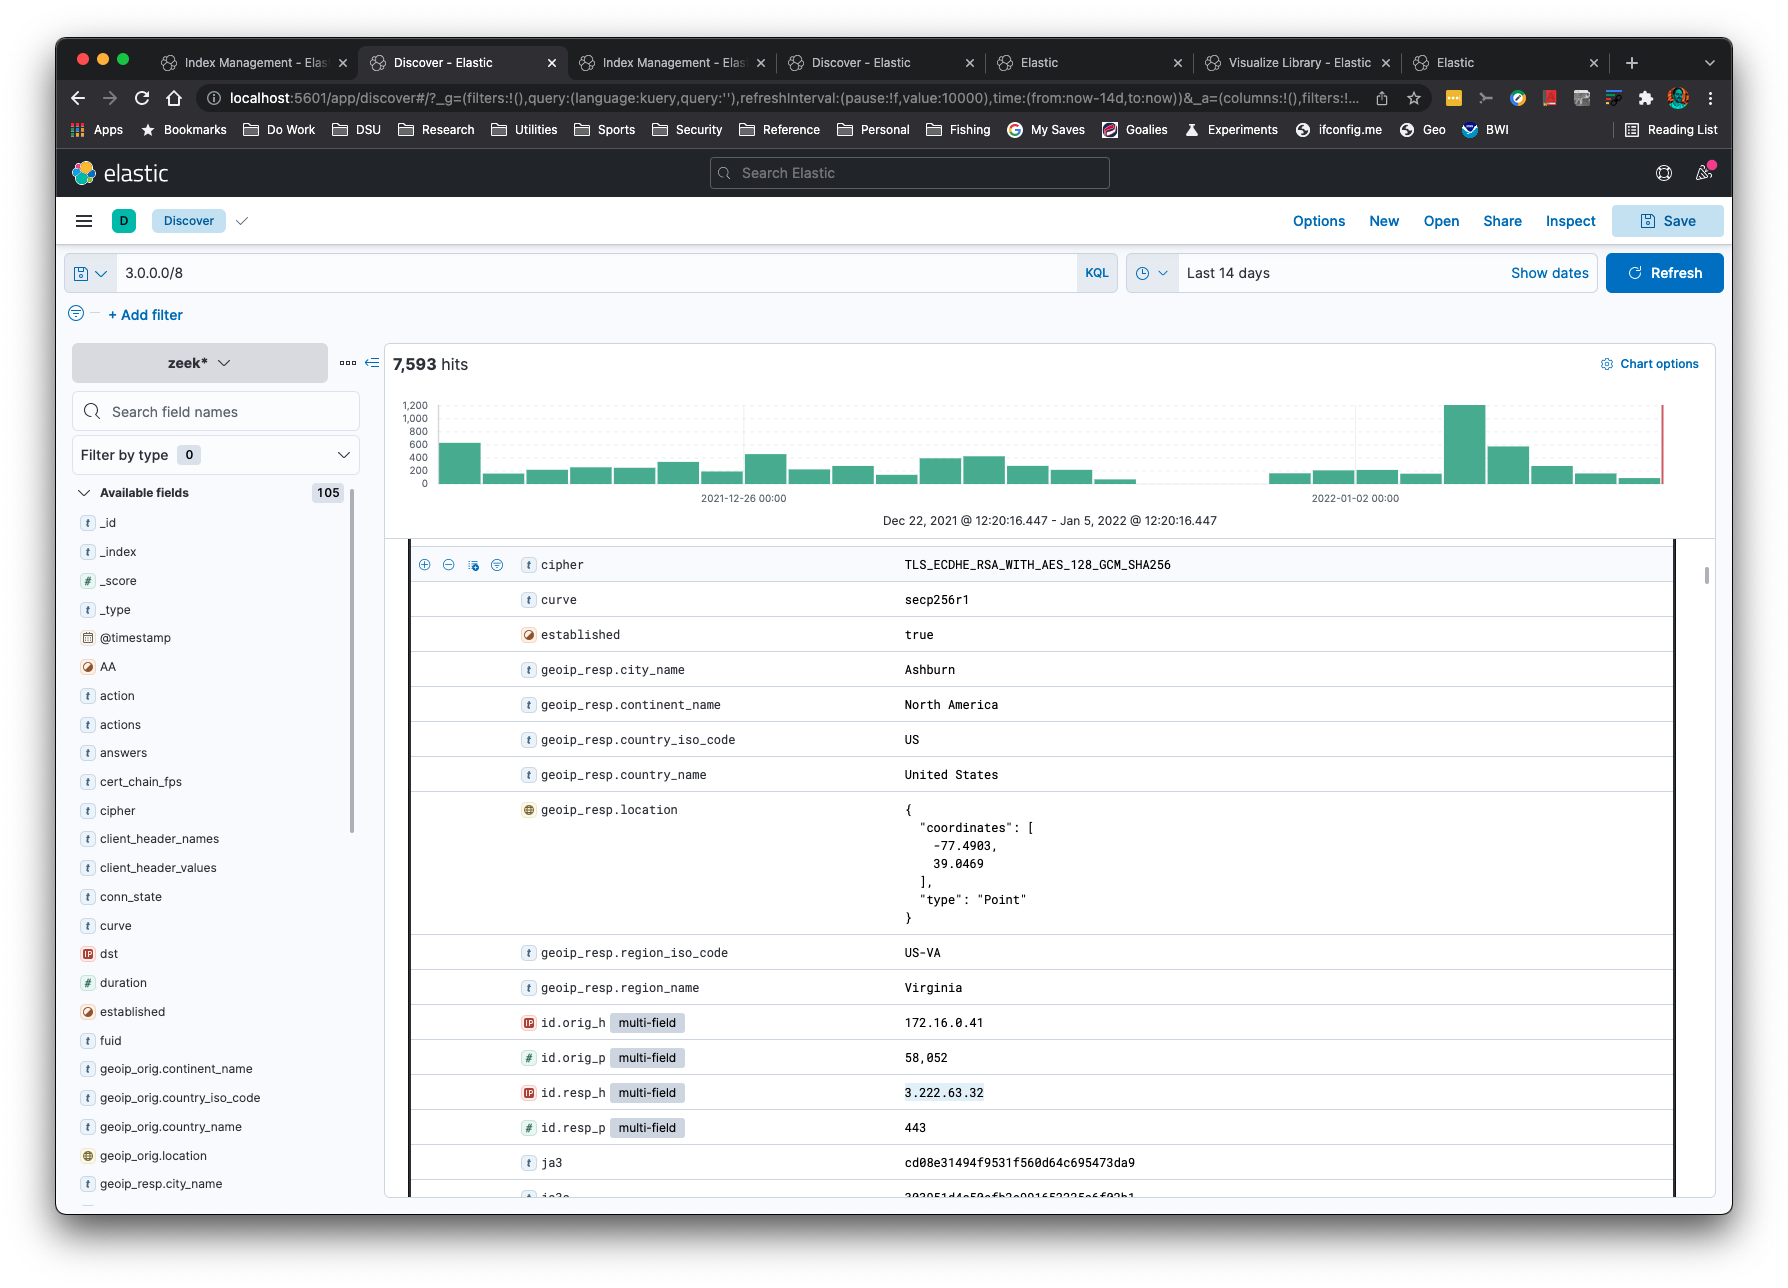
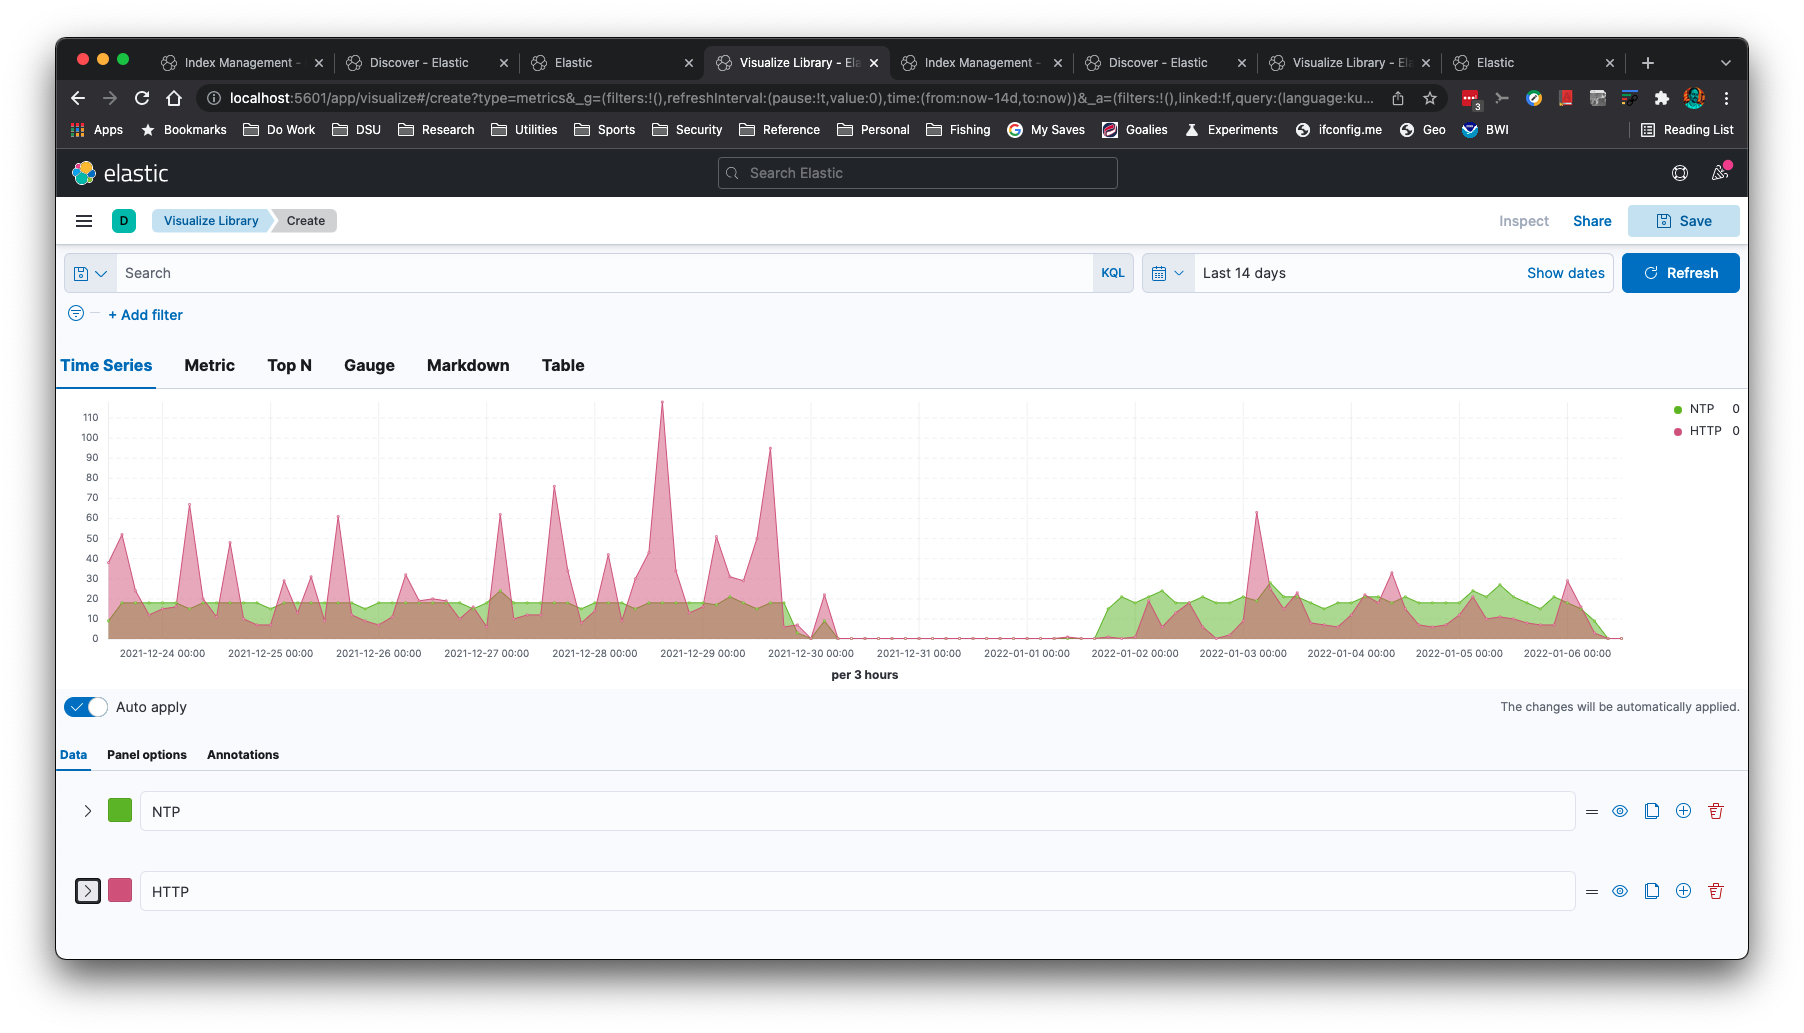
Sie können Zeitreihendiagramme erstellen, wie dieses NTP- und HTTP-Diagramm:
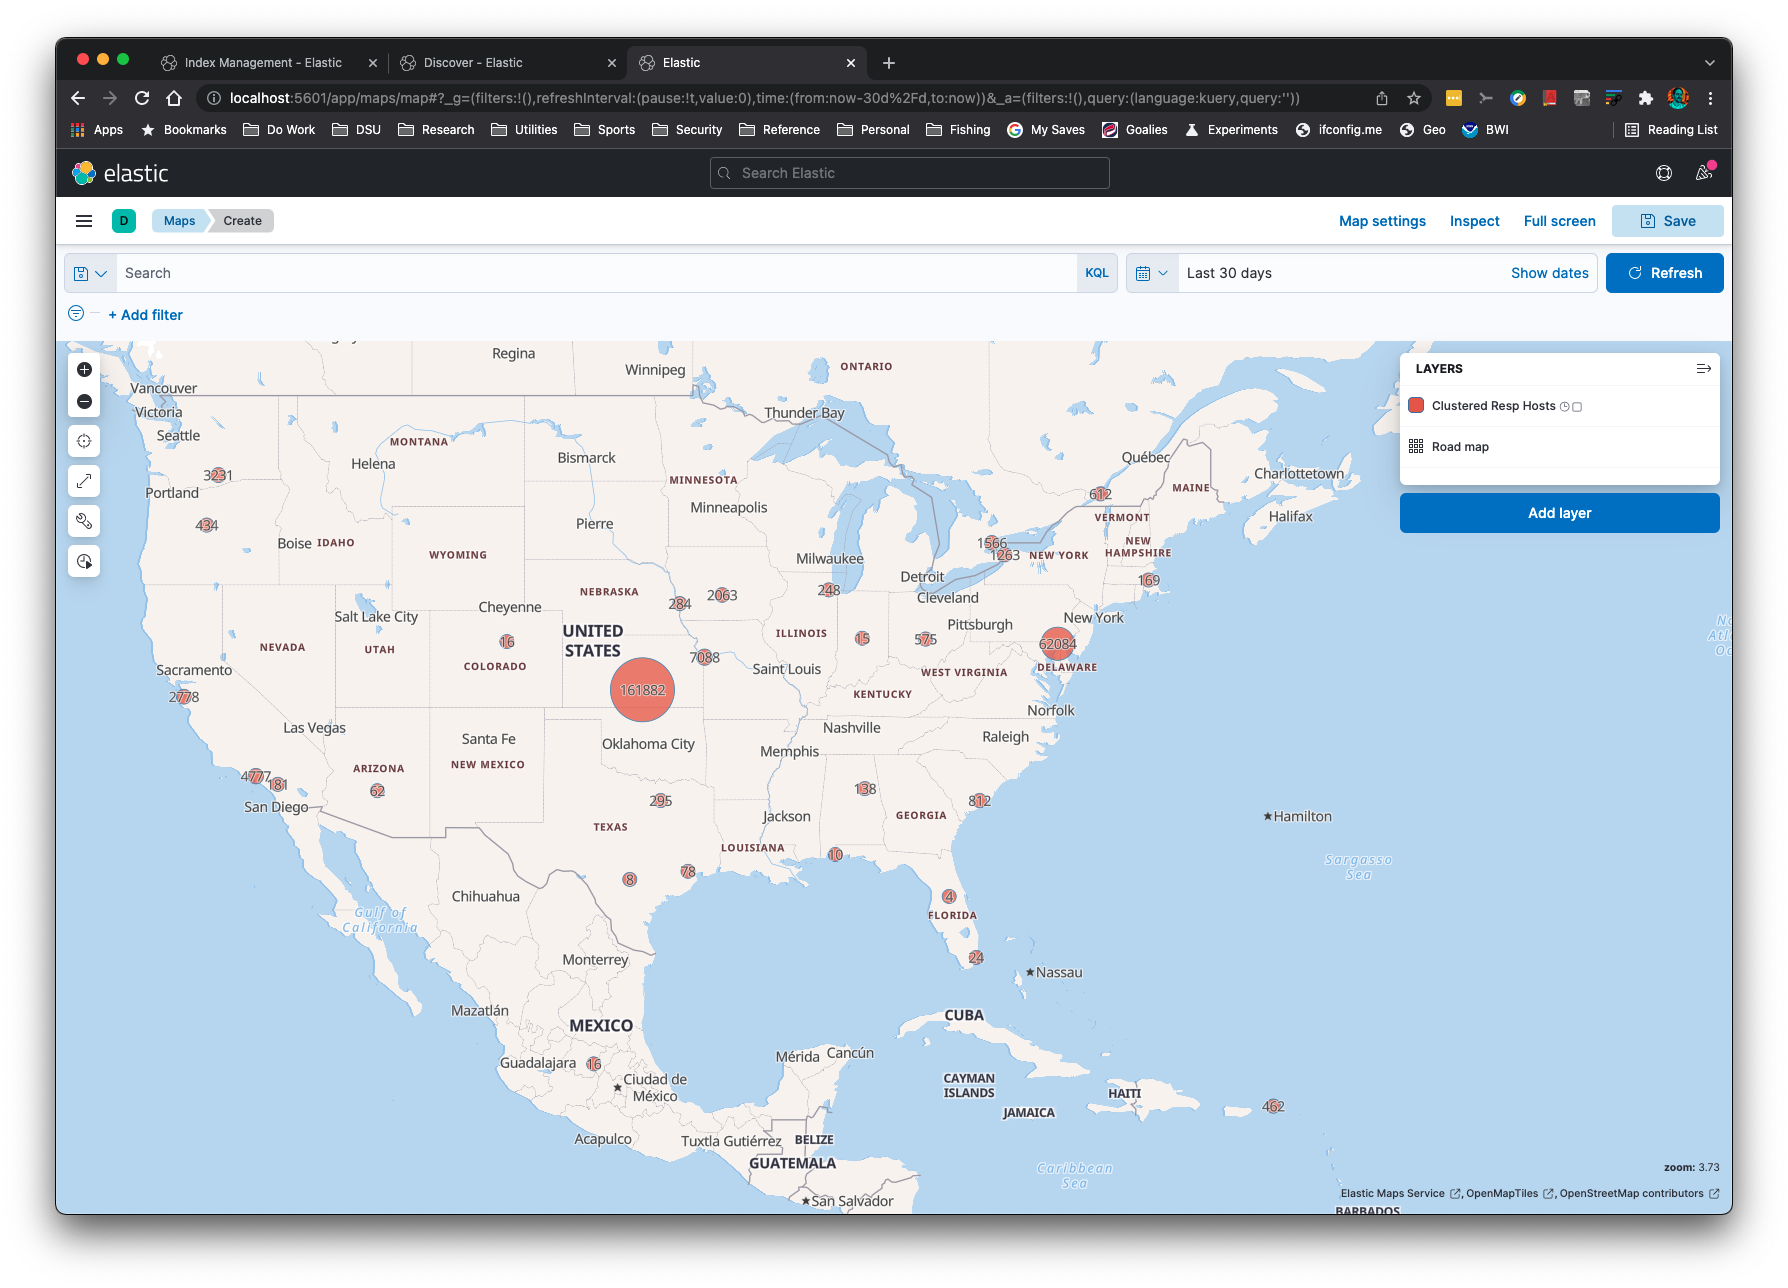
IP-Adressen können mit der Befehlszeilenoption -g geolokalisiert werden:
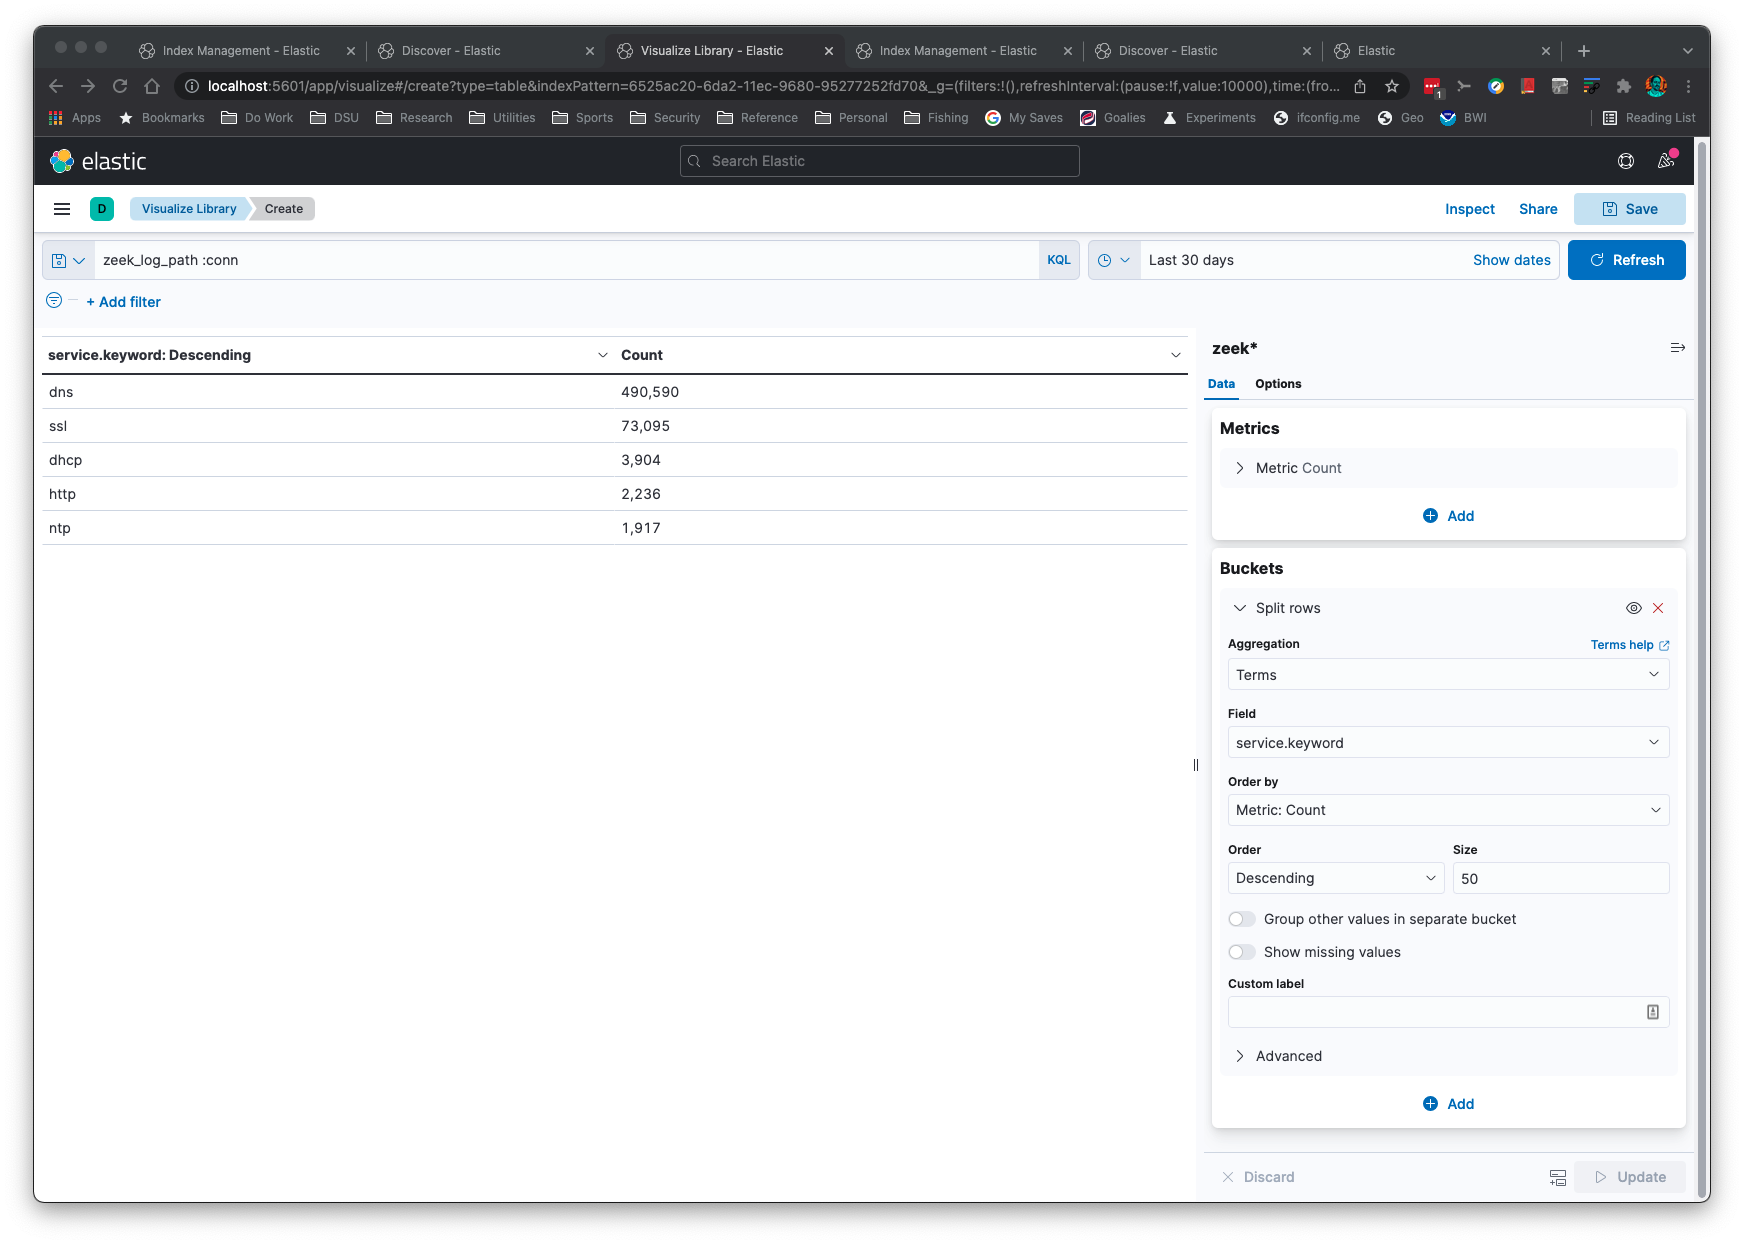
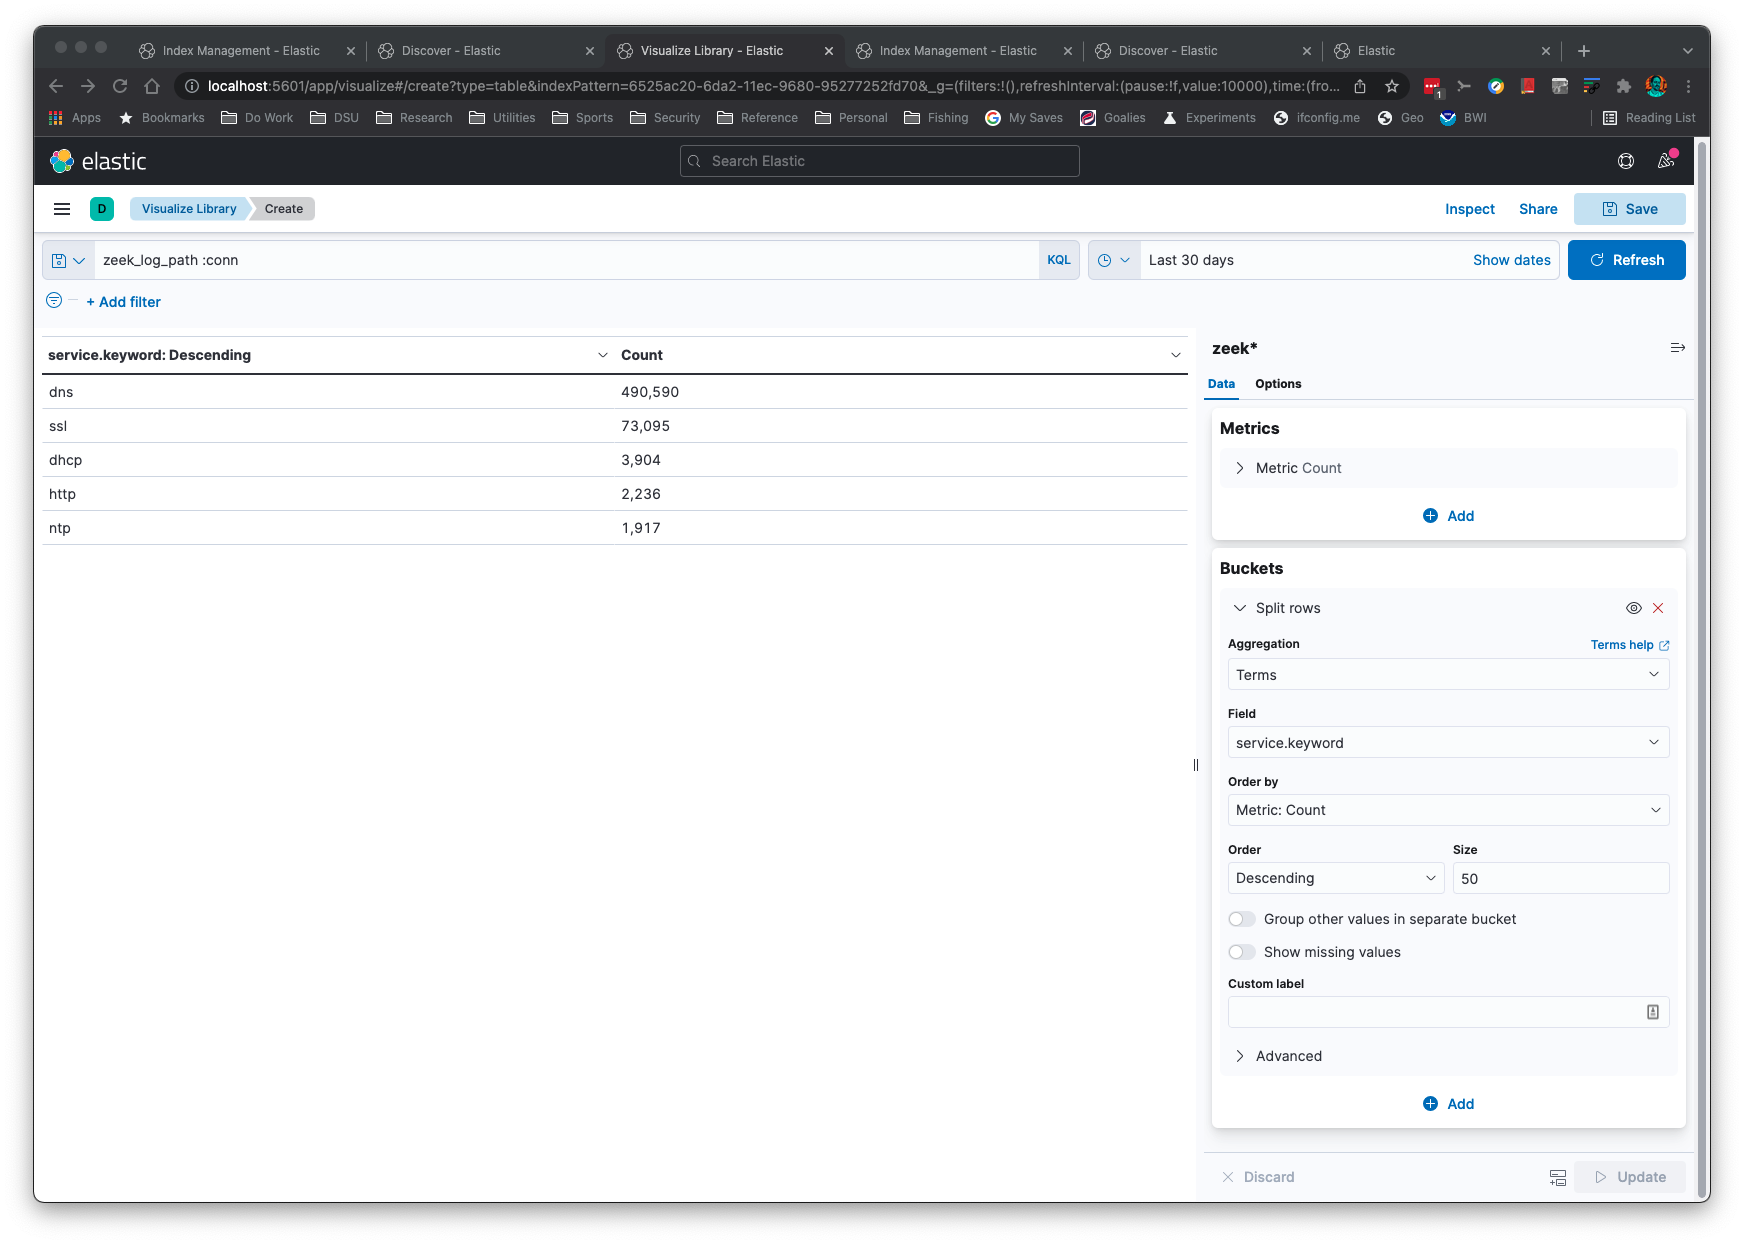
Aggregationen sind einfach und schnell:
Diese Anwendung funktioniert "einfach so", wenn sich die Formate der Zeek-Protokolle ändern. Die Logik liest die Feldnamen und zugehörigen Typen, um die Mappings in ElasticSearch korrekt einzurichten.
Diese Anwendung erkennt gzip-komprimierte oder unkomprimierte Protokolle. Diese Anwendung setzt voraus,
dass ElasticSearch auf Ihrem localhost am Standardport eingerichtet ist.
Wenn Sie ElasticSearch nicht haben, können Sie die JSON-Daten mit den Befehlszeilenoptionen -s -b nach stdout ausgeben,
um sie mit der jq-Anwendung zu verarbeiten.
Sie können mit der Befehlszeilenoption -k ein Keyword-Unterfeld zu Textfeldern hinzufügen. Dies ist nützlich
für Aggregationen in Kibana.
Wenn Python bereits auf Ihrem System ist, müssen Sie nichts zusätzlich auf Ihren Rechner kopieren, außer Elasticsearch, Kibana und zeek2es.py, wenn Sie die Bibliothek requests bereits installiert haben.
Vorausgesetzt, Sie erfüllen die Anforderungen, gibt es keine. Sie kopieren einfach
zeek2es.py auf Ihren Host und führen es mit Python aus. Sobald Zeek-
Protokolle mit automatischer Indexnamensgenerierung importiert wurden (d.h. Sie haben die Option -i nicht angegeben),
finden Sie Ihre Indizes mit dem Namen "zeek_zeeklogname_date", wobei zeeklogname ein Protokollname wie conn
ist und date im Format YYYY-MM-DD vorliegt. Setzen Sie in diesem Fall Ihr Kibana-Indexmuster so, dass es mit zeek* übereinstimmt. Wenn
Sie Ihren Index mit der Option -i benannt haben, müssen Sie ein Kibana-Indexmuster erstellen, das
zu Ihrem Benennungsschema passt.
Wenn Sie zeek2es aktualisieren, lesen Sie bitte den Abschnitt über die Aktualisierung von zeek2es.
Da den Indizes das Datum angehängt ist, könnten Sie Dec 31, 2021 mit dem folgenden Befehl löschen:``` curl -X DELETE http://localhost:9200/zeek_*_2021-12-31
Sie könnten alle conn.log-Einträge mit diesem Befehl löschen:```
curl -X DELETE http://localhost:9200/zeek_conn_*
optional arguments:
-h, --help show this help message and exit
-i ESINDEX, --esindex ESINDEX
The Elasticsearch index/data stream name.
-u ESURL, --esurl ESURL
The Elasticsearch URL. Use ending slash. Use https for Elastic v8+. (default: http://localhost:9200)
--user USER The Elasticsearch user. (default: disabled)
--passwd PASSWD The Elasticsearch password. Note this will put your password in this shell history file. (default: disabled)
-l LINES, --lines LINES
Lines to buffer for RESTful operations. (default: 10,000)
-n NAME, --name NAME The name of the system to add to the index for uniqueness. (default: empty string)
-k KEYWORDS [KEYWORDS ...], --keywords KEYWORDS [KEYWORDS ...]
A list of text fields to add a keyword subfield. (default: service)
-a LAMBDAFILTER, --lambdafilter LAMBDAFILTER
A Python lambda function, when eval'd will filter your output JSON dict. (default: empty string)
-f FILTERFILE, --filterfile FILTERFILE
A Python function file, when eval'd will filter your output JSON dict. (default: empty string)
-y OUTPUTFIELDS [OUTPUTFIELDS ...], --outputfields OUTPUTFIELDS [OUTPUTFIELDS ...]
A list of fields to keep for the output. Must include ts. (default: empty string)
-d DATASTREAM, --datastream DATASTREAM
Instead of an index, use a data stream that will rollover at this many GB.
Recommended is 50 or less. (default: 0 - disabled)
--compress If a datastream is used, enable best compression.
-o fieldname filename, --logkey fieldname filename
A field to log to a file. Example: uid uid.txt.
Will append to the file! Delete file before running if appending is undesired.
This option can be called more than once. (default: empty - disabled)
-e fieldname filename, --filterkeys fieldname filename
A field to filter with keys from a file. Example: uid uid.txt. (default: empty string - disabled)
-g, --ingestion Use the ingestion pipeline to do things like geolocate IPs and split services. Takes longer, but worth it.
-p SPLITFIELDS [SPLITFIELDS ...], --splitfields SPLITFIELDS [SPLITFIELDS ...]
A list of additional fields to split with the ingestion pipeline, if enabled.
(default: empty string - disabled)
-j, --jsonlogs Assume input logs are JSON.
-r, --origtime Keep the numerical time format, not milliseconds as ES needs.
-t, --timestamp Keep the time in timestamp format.
-s, --stdout Print JSON to stdout instead of sending to Elasticsearch directly.
-b, --nobulk Remove the ES bulk JSON header. Requires --stdout.
--humio HUMIO HUMIO First argument is the Humio URL, the second argument is the ingest token.
-c, --cython Use Cython execution by loading the local zeek2es.so file through an import.
Run python setup.py build_ext --inplace first to make your zeek2es.so file!
-w, --hashdates Use hashes instead of dates for the index name.
-z, --supresswarnings
Supress any type of warning. Die stoically and silently.
To delete indices:
curl -X DELETE http://localhost:9200/zeek*?pretty
To delete data streams:
curl -X DELETE http://localhost:9200/_data_stream/zeek*?pretty
To delete index templates:
curl -X DELETE http://localhost:9200/_index_template/zeek*?pretty
To delete the lifecycle policy:
curl -X DELETE http://localhost:9200/_ilm/policy/zeek-lifecycle-policy?pretty
You will need to add -k -u elastic_user:password if you are using Elastic v8+.
## Requirements <a name="requirements" />
- Eine Unix-ähnliche Umgebung (MacOs funktioniert!)
- Python
- Die Python-Bibliothek [requests](https://docs.python-requests.org/en/latest/) installiert, z. B. mit `pip`.
## Notes <a name="notes" />
### Humio <a name="humio" />
Um Ihre Daten in Humio zu importieren, müssen Sie ein Repository mit dem `corelight-json`-Parser einrichten. Besorgen Sie das Ingest-Token für das Repository, und Sie können Ihre Daten mit einem Befehl wie dem folgenden importieren:```
python3 zeek2es.py -s -b --humio http://localhost:8080 b005bf74-1ed3-4871-904f-9460a4687202 http.log
Die URL sollte das Format http://yourserver:8080 haben, da der restliche Pfad automatisch vom
zeek2es.py-Skript für Sie hinzugefügt wird.
Sie können für große Logs anstelle von Indizes Datenströme verwenden, mit der -d-Befehlszeilenoption. Dies
erstellt Indexvorlagen, die mit zeek_ beginnen. Außerdem wird eine Lebenszyklusrichtlinie
namens zeek-lifecycle-policy erstellt. Wenn Sie alle Ihre Datenströme, Lebenszyklusrichtlinien
und Indexvorlagen löschen möchten, erledigen diese Befehle das für Sie:```
curl -X DELETE http://localhost:9200/_data_stream/zeek*?pretty
curl -X DELETE http://localhost:9200/_index_template/zeek*?pretty
curl -X DELETE http://localhost:9200/_ilm/policy/zeek-lifecycle-policy?pretty
### Helper Scripts <a name="helperscripts" />
Es gibt zwei Skripte, die Ihnen helfen, Ihre Logs in Datenströme wie `logs-zeek-conn` umzuwandeln.
Das erste Skript ist [process_logs_as_datastream.sh](https://github.com/corelight/zeek2es/blob/master/process_logs_as_datastream.sh) und importiert,
wenn Sie ihm eine Liste von Logs und Verzeichnissen übergeben, diese als solche. Das zweite Skript
ist [process_log.sh](https://github.com/corelight/zeek2es/blob/master/process_log.sh) und kann verwendet werden, um Logs
einzeln zu importieren. Dieses Skript kann auch verwendet werden, um Logs zu überwachen, die in einem Verzeichnis mit
[fswatch](https://emcrisostomo.github.io/fswatch/) erstellt werden. Beide Skripte enthalten Beispielbefehlszeilen,
wenn Sie sie ohne Parameter ausführen.```
$ ./process_logs_as_datastream.sh
Usage: ./process_logs_as_datastream.sh NJOBS "ADDITIONAL_ARGS_TO_ZEEK2ES" "LIST_OF_LOGS_DELIMITED_BY_SPACES" DIR1 DIR2 ...
Example:
time ./process_logs_as_datastream.sh 16 "" "amqp bgp conn dce_rpc dhcp dns dpd files ftp http ipsec irc kerberos modbus modbus_register_change mount mqtt mysql nfs notice ntlm ntp ospf portmap radius reporter rdp rfb rip ripng sip smb_cmd smb_files smb_mapping smtp snmp socks ssh ssl stun syslog tunnel vpn weird wireguard x509" /usr/local/var/logs
Installation
Python 3.8+ wird für beste Kompatibilität empfohlen.
Repository klonen:
git clone https://github.com/example/tool.git
cd tool
Abhängigkeiten installieren:
pip install -r requirements.txt
Verwendung
Grundlegende Verwendung:
python tool.py --target example.com
Mit Optionen:
python tool.py --target example.com --verbose --output results.txt
Befehlszeilenoptionen:
| Option | Beschreibung |
|---|---|
--target | Geben Sie die Zieldomäne oder IP-Adresse an. |
--verbose | Ausführliche Ausgabe für Debugging aktivieren. |
--output | Ergebnisse in die angegebene Datei schreiben. |
--timeout | Anfrage-Timeout in Sekunden festlegen. |
| $ ./process_log.sh | |
| Usage: ./process_log.sh LOGFILENAME "ADDITIONAL_ARGS_TO_ZEEK2ES" |
Example: fswatch -m poll_monitor --event Created -r /data/logs/zeek | awk '/^./(conn|dns|http)...log.gz$/' | parallel -j 16 ./process_log.sh {} "" :::: -
Sie müssen diese Skripte und Befehlszeilen an Ihre Umgebung anpassen.
Jede Datei mit einem Namen eines Logs wie `conn_filter.txt` im `lambda_filter_file_dir`, standardmäßig Ihr Home-Verzeichnis, wird als Lambda-Filterdatei auf den entsprechenden Log-Input angewendet. Dies ermöglicht es Ihnen, alle Ihre Filter in einem Verzeichnis einzurichten und mehrere Logdateien mit diesem Filtersatz in einem einzigen Befehl mit [process_logs_as_datastream.sh](https://github.com/corelight/zeek2es/blob/master/process_logs_as_datastream.sh) zu importieren.
Die folgenden Zeilen sollten alle Zeek-Daten in ElasticSearch löschen, unabhängig davon, ob Sie Indizes oder Datenströme oder diese Hilfsskripte verwenden:```
curl -X DELETE http://localhost:9200/zeek*?pretty
curl -X DELETE http://localhost:9200/_data_stream/zeek*?pretty
curl -X DELETE http://localhost:9200/_data_stream/logs-zeek*?pretty
curl -X DELETE http://localhost:9200/_index_template/zeek*?pretty
curl -X DELETE http://localhost:9200/_index_template/logs-zeek*?pretty
curl -X DELETE http://localhost:9200/_ilm/policy/zeek-lifecycle-policy?pretty
... oder wenn Elastic v8+ verwendet wird ...``` curl -X DELETE -k -u elastic:password https://localhost:9200/zeek*?pretty curl -X DELETE -k -u elastic:password https://localhost:9200/_data_stream/zeek*?pretty curl -X DELETE -k -u elastic:password https://localhost:9200/_data_stream/logs-zeek*?pretty curl -X DELETE -k -u elastic:password https://localhost:9200/_index_template/zeek*?pretty curl -X DELETE -k -u elastic:password https://localhost:9200/_index_template/logs-zeek*?pretty curl -X DELETE -k -u elastic:password https://localhost:9200/_ilm/policy/zeek-lifecycle-policy?pretty
Um dies in v8+ jedoch tun zu können, müssen Sie Elastic wie im Abschnitt [Elastic v8.0+](#elastic80) beschrieben konfigurieren.
### Cython <a name="cython" />
Wenn Sie [Cython](https://cython.org/) ausprobieren möchten, müssen Sie `python setup.py build_ext --inplace`
zuerst ausführen, um Ihre kompilierte Datei zu erzeugen. Sie müssen dies jedes Mal tun, wenn Sie zeek2es aktualisieren!