 morpheuslord/winfihack
Windows WiFi ブルートフォースユーティリティ。非常に古い方法ですが、外部依存関係を必要とせずに動作します。

__        ___       _____ _ _   _            _
\ \      / (_)_ __ |  ___(_) | | | __ _  ___| | __
 \ \ /\ / /| | '_ \| |_  | | |_| |/ _` |/ __| |/ /
  \ V  V / | | | | |  _| | |  _  | (_| | (__|   <
   \_/\_/  |_|_| |_|_|   |_|_| |_|\__,_|\___|_|\_\
WinFiHack は、私が以前作成したプロジェクト Brute-Hacking-Framework の主要なWi-Fiハッキングスクリプトを、netsh とネイティブのWindowsスクリプトを使用して再実装した、レクリエーション的な試みです。これは決して高速なスクリプトでも、同じハッキングを実行するための優れた方法でもありませんが、外部ライブラリを必要とせず、Python と python スクリプトだけが必要です。
パッケージは最小限、またはほぼありません 😅。パッケージインストールコマンドは次のとおりです。
pip install rich pyfiglet
以上です。
機能をリストアップします。
rich を使用したインタラクティブなメニュー駆動システム。ブルートフォーサーの動作は次のとおりです。
sequenceDiagram
    participant User
    participant Tool
    participant Interface
    participant Network
    participant File
    participant Attack

    User->>Tool: Provide interface (default: Wi-Fi)
    Tool->>Interface: Disconnect all active network connections
    Interface->>Network: Search for all available networks
    User->>Tool: Set target network
    User->>Tool: Input password file (default: ./wordlist/default.txt)
    Note over Tool: Ready to run the attack
    Tool->>Attack: Begin password loop
    loop For each password
        Attack->>File: Generate and store custom XML
        Attack->>Network: Attempt connection
        Network->>Attack: Verify connection (1 packet ping to Google)
        alt Ping successful
            Attack->>User: Connection established (Success)
        else Ping failed
            Attack->>User: Output failed
        end
    end
インターフェースの指定:
Wi-Fi に設定されています。ターゲットの検索と設定:
パスワードファイルの入力:
./wordlist/default.txt です。攻撃の実行:
攻撃手順:
すべてのパッケージをインストールしたら、python main.py を実行するだけです。後は自動です 👍。このスクリプトは Windows でのみ動作するため、Windows で実行してください。他の OS では動作しません。
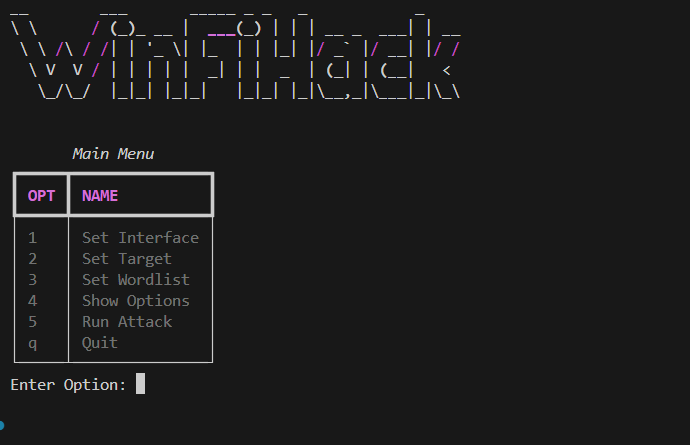
インターフェースは次のようになります。
貢献について:
